Artifact Guide
Genshin Impact Guide
In Genshin Impact, you can equip up to 5 artifacts to your characters. These are the accessories of the game and will add various stat bonuses and effects to the wearer. All artifacts in the game belong to a set that further activates additional effects if pieces are worn together. In this guide, we will discuss how the artifact system works and how you can improve your character’s overall combat power by simply equipping the right artifact sets/effects to your team.
What are Artifacts?
Artifacts are the accessories of the game. There are five artifact slots that you can equip to the character, namely: flower, feather, timepiece, chalice/goblet, and headwear. Each artifact provides different stat boosts, even if they bear the same name. Here are the possible stats/attributes possible on each artifact type:
| Artifact Type | Possible Main Stat |
|---|---|
| Flower of Life | HP |
| Plume of Death (Feather) | ATK |
| Sands of Eon (Time piece) | HP, DEF, ATK%, Elemental Mastery, Energy Recharge |
| Goblet of Eonothem | HP, DEF, ATK%, Elemental Mastery, Elemental DMG bonus, Physical DMG bonus |
| Circlet of Logos | HP, DEF, ATK%, Elemental Mastery, Crit Rate, Crit DMG, Healing Bonus |
You can get artifacts from a lot of sources, like quest rewards, random chests, adventure rank rewards, etc. However, the best artifact sets (and rarities) can only be obtained from specific domains. You can check which domains have the probability to drop specific artifacts from your adventure handbook or by selecting them from the map.

Giving specific characters with the right artifact set(s) can increase their efficiency by a lot.
Preferably, you’d want to equip artifact sets that complement the character’s abilities. For example, equipping an artifact that boosts pyro damage on an anemo character is quite inefficient. Generally, you’ll want to equip sets that boosts ATK and CRIT to your melee DPS, Elemental Mastery for spellcasters, healers or tanks can prioritize sets that boosts healing, HP, and defense, while some characters will benefit immensely from Elemental Recharge boosting artifacts, especially if those characters have so much utility with their Elemental Burst.
Artifact Rarities
There are five artifact rarities in the game, ranging from the colorless 1-star to the gold 5-star artifacts. The starting value will depend on the artifact’s rarity (3-star to 5-star), which will increase as you level up the artifact. Furthermore, artifact rarity will determine its level cap. Artifacts get a random attribute permanently added to them after upgrading them every 4 levels, if the artifact’s default sub-stat/attribute is less than 4.| Artifact Rarity | Max Level |
|---|---|
| 1-star | 4 |
| 2-star | 8 |
| 3-star | 12 |
| 4-star | 16 |
| 5-star | 20 |
Leveling Up Artifacts
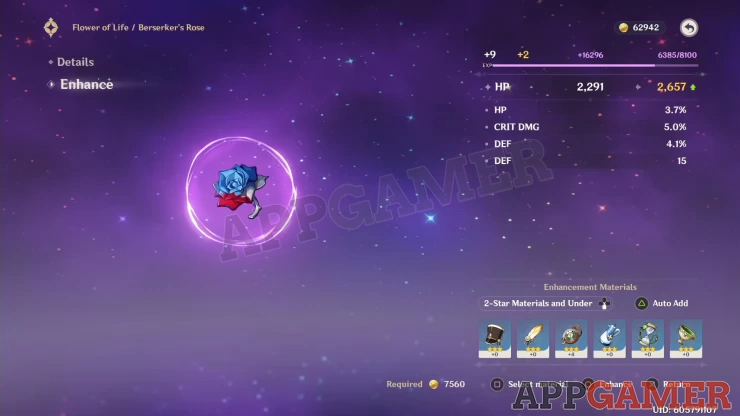
Artifacts get a random attribute permanently added to them after upgrading them every 4 levels, if the artifact’s default sub-stat/attribute is less than 4. As mentioned above, artifacts have a level cap which is determined by their rarity. Upon hitting the level cap, that’s basically the dead-end; there’s no ascension or any way to break that cap. To level up artifacts, you have to use other artifacts as materials and “feed” them to the artifact you want to level up. This will have a corresponding amount of mora too.
Early on, avoid going crazy with leveling up your artifacts. It’s okay to equip the 1-star or 2-star artifacts early on but don’t bother leveling them up. Some 3-star artifacts will stay with you for a while especially while you’re trying to get stronger and tackle harder enemies or domains so it’s okay to level them up, at least around LV8. Once you have 4-star artifacts, you can invest leveling them up to the max since it will take another while before you can start farming 5-star artifacts to replace them.
Artifact Sets
The description of the set effects below are derived from the game’s wiki page. The stats and effects of these artifact sets may or may not change on the subsequent updates of the game.| Artifact Set | 2-set Bonus | 4-set Bonus |
|---|---|---|
| Adventurer | Max HP increased by 1000. | Opening chest regenerates 30% Max HP over 5s. |
| Lucky Dog | DEF increased by 100 | Picking up mora restores 300 HP |
| Lucky Dog | DEF increased by 100 | Picking up mora restores 300 HP |
| Instructor | Elemental Mastery increases by 80. | After using an elemental skill, increases all party members' Elemental Mastery by 120 for 8s |
| Berserker | CRIT Rate +12% | When HP is below 70%, CRIT Rate increases by an additional 24%. |
| The Exile | Energy Recharge +20% | Using an Elemental Burst regenerates 2 Energy for other party members every 2s for 6s. This effect cannot stack. |
| Resolution of Sojourner | ATK +18% | Increases Charged Attack CRIT Rate by 30%. |
| Martial Artist | Normal attack and Charged attack DMG increased by 15% | After using Elemental Skill, increases Normal Attack and Charged Attack DMG by 25% for 8s. |
| Defender's Will | Base DEF +30% | Increases Elemental RES by 30% for each element present in the party. |
| Tiny Miracle | All Elemental RES increased by 20% | Increases incoming elemental DMG corresponding to the Elemental RES by 30% for 10s. Can only occur once every 10s. |
| Heart of Bravery | ATK +18% | Increases DMG by 30% against enemies with more than 50% HP. |
| Gambler | Elemental Skill DMG increased by 20% | Defeating an enemy has 100% chance to remove Elemental Skill CD. Can only occur once every 15s. |
| Scholar | Energy Recharge +20% | Gaining Energy gives 3 Energy to all party members who have a bow or a catalyst equipped. Can only occurs once every 3s. |
| Gladiator's Finale | ATK +18% | If the wielder of this artifact set uses a Sword, Claymore or Polearm, increases their Normal Attack DMG by 35%. |
| Maiden Beloved | Character Healing Effectiveness +15% | Using an Elemental Skill or Burst increases healing received by all party members by 20% for 10s. |
| Noblesse Oblige | Elemental Burst DMG +20% | Using an Elemental Burst increases all party members' ATK by 20% for 12s. This effect cannot stack. |
| Bloodstained Chivalry | Physical DMG +25% | After defeating an opponent, increases Charged Attack DMG by 50%, and reduces its Stamina cost to 0 for 10s. |
| Wanderer's Troupe | Elemental Mastery +80 | Increases Charged Attack DMG by 35% if the character uses a Catalyst or Bow. |
| Viridescent Venerer | Anemo DMG Bonus +15% | Increases Swirl DMG by 60%. Decreases opponent's Elemental RES to the element infused in the Swirl by 40% for 10s. |
| Thundering Fury | Electro DMG Bonus +15% | Increases damage caused by Overloaded, Electro-Charged, and Superconduct DMG by 40%. Triggering such effects decreases Elemental Skill CD by 1s. Can only occur once every 0.8s. |
| Thundersoother | Electro RES increased by 40% | Increases DMG against enemies affected by Electro by 35%. |
| Crimson Witch of Flames | Pyro DMG Bonus +15% | Overloaded and Burning DMG increased by 40%. Vaporize and Melt DMG increased by 15%. When using an Elemental Skill, 2-Piece Set effects are increased by 50% for 10s. Max 3 stacks. |
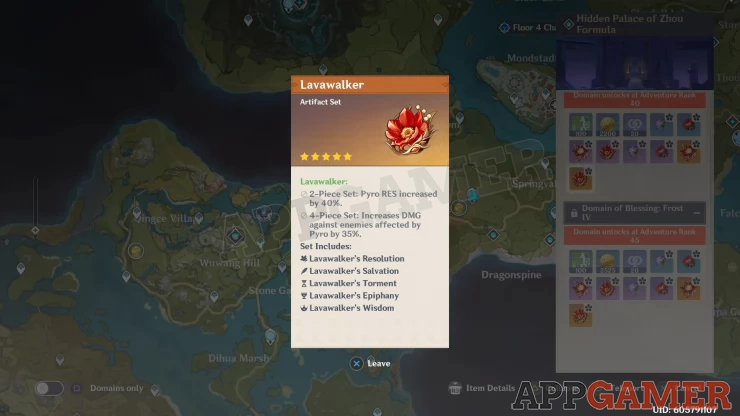
| Lavawalker | Pyro RES increased by 40% | Increases DMG against enemies that are Burning or affected by Pyro by 35%. |
| Archaic Petra | Geo DMG Bonus increases by 15% | Upon obtaining a crystal created through a Geo Elemental Reaction, all party members gain 35% Elemental DMG Bonus to that particular element for 10s. Only one form of Elemental DMG Bonus can be gained in this manner at any one time. |
These are standalone, single-piece artifacts that will provide bonus effects like those in a set.
| Set Name | Artifact | Effect |
|---|---|---|
| Prayers for Wisdom | Tiara of Thunder | Affected by Electro for 40% less time. |
| Prayers to Springtime | Tiara of Frost | Affected by Cryo for 40% less time. |
| Prayers for Illumination | Tiara of Flame | Affected by Pyro for 40% less time. |
| Prayers for Destiny | Tiara of Torrents | Affected by Hydro for 40% less time. |
We have questions and answers related to this topic which may also help you: Show all