The Squire's Tale - Chapter 8 Walkthrough
More Adventure Escape Mysteries
The Squire's Tale is an escape puzzle game from Haiku Games, playable through their Adventure Escape Mysteries app. A quest to find the sword of light and defeat the Monster King.
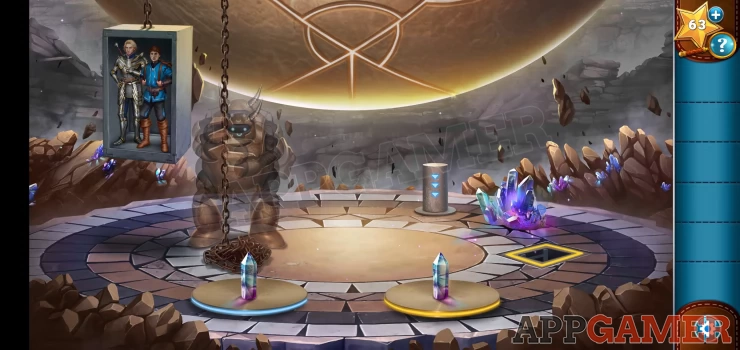
In Chapter 7 you reached the Lair of the Monster King and Nira managed to reforge the Sword of Light, but its seems you have been tricked. The Monster King had not returned and now Nira holds the power of the sword and the doomsday device.

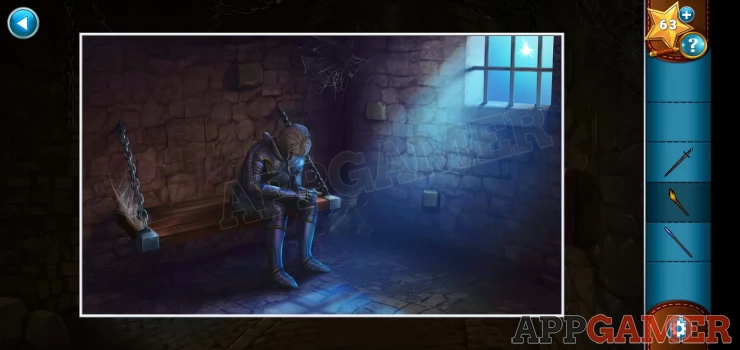
You start locked up in the dungeon after the betrayal. First collect a metal ball from the ground at the back of the cell. You can then use this on the metal floor grate to break it open, collect from inside a shiny coin.
Then tap on the chain hanging from the right side wall. The wall will move a little so tap it a few more times and the wall will collapse. There is a rat in the hole guarding a needle.
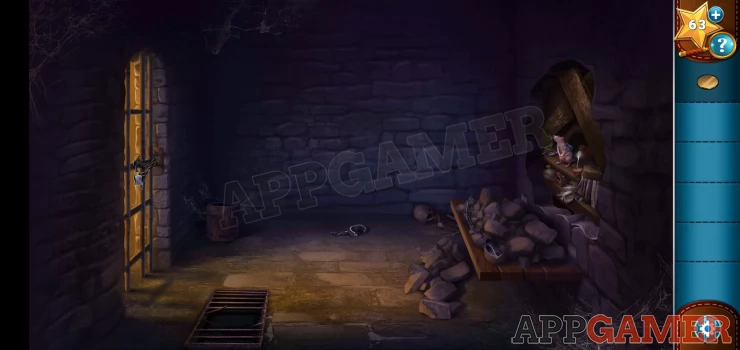
Give the shiny coin to the rat and you will then get the Silver needle. Use the needle on the cell door lock to open it and escape.
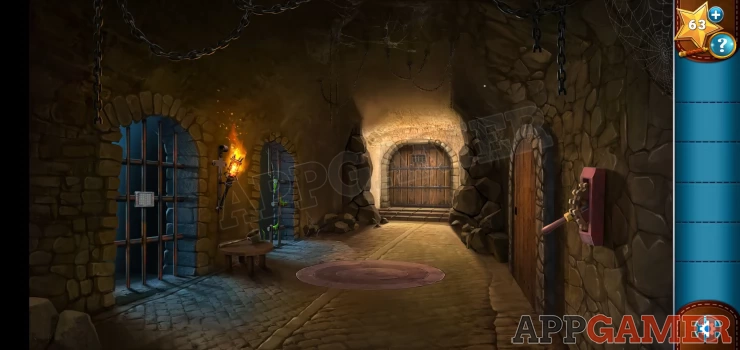
Now you need to rescue Cedrick. Collect the Tin Ladle that is on the small table on the left wall and then tap to enter the open cell door on the left side. You will see a green gelatinous cube.
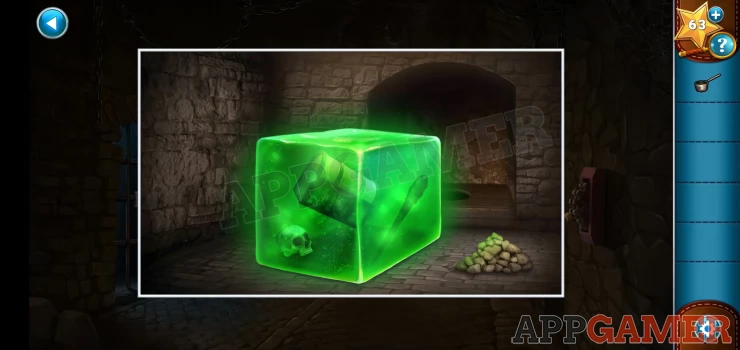
Collect a 'handful of rocks' from the pile on the right and then use these on the cube to throw them in. Repeat this process until there are no more rocks, the cube will explode.
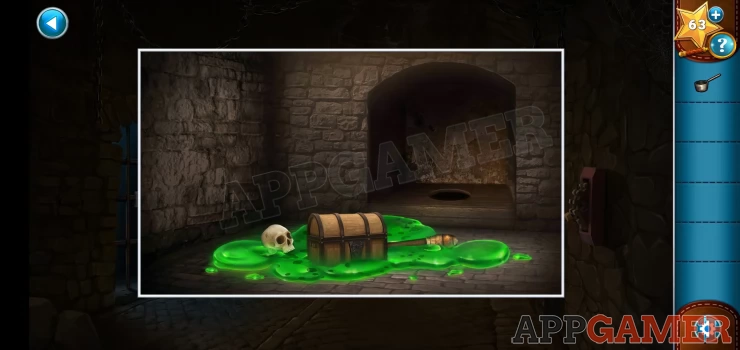
You can now collect a Torch from the debris and open the chest to collect Cedricks Sword. Then use the Tin ladle on the toilet hole in the back of the cell to collect a key.
Exit to the corridor and use the torch on the lit torch on the left wall to light yours. Then use the key to open the door on the right wall. When the door opens the room is dark, use the lit torch to see inside.
Move the light around to find a spear on the right side to collect, and then move the light to the left to see some markings on the wall.
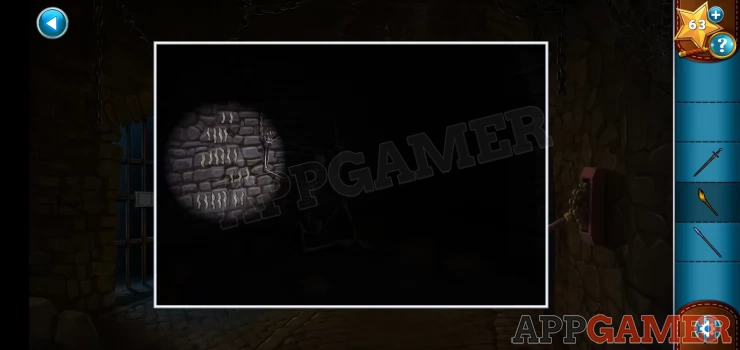
Now exit this room and tap on the locked cell door on the left to see the puzzle lock.
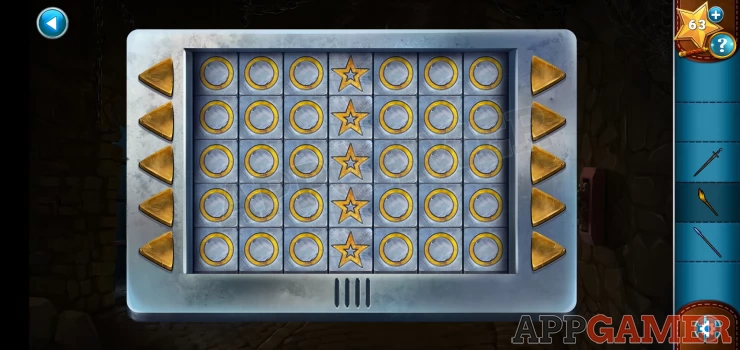
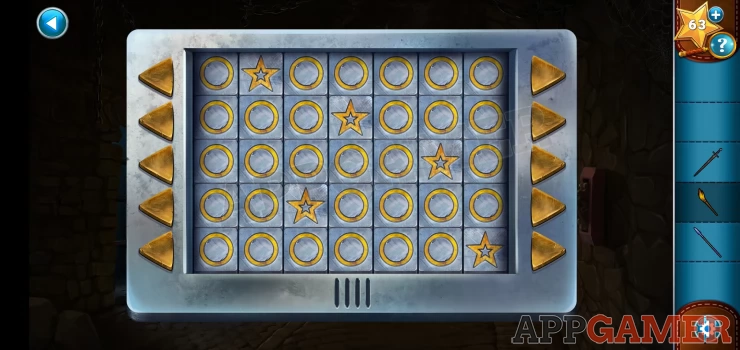
Cedrick's Cell Lock
- This had 5 sliders that you can move left and right.
- Each slider has a star symbol that can be in 7 positions.
- The clue is in the dark cell.
Solution: Count the lines on the wall in the dark cell, this gives you 2 4 6 3 7. Place the star in those options on each row.Show
Now you can enter Cedrick's cell, He is not happy but you can give him the sword to cheer him up and then convince him to join you. Now tap on the 3 stones that stick out of the wall. this will open a small opening and you can collect a gear.
Back out in the corridor you can now tap on the lever on the right wall, this will make a stone circle ride up from the floor. Tap on the side to open a panel and see that there is a missing gear.
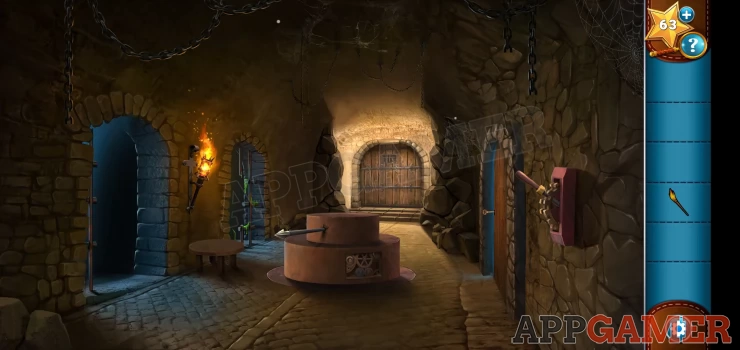
Add the gear that you have to fix it. Then use the spear on the small hole on the top section, Tap to turn it but you will then need Cedricks help so tap on him, this will start a puzzle to make choices to cheer up Cedrick.
Cheer up Cedrick
- You make conversation choices to score points, if you get enough you pass, if not you can start again.
- If you want to see all of the dialog options then you keep retrying to read it all.
- If you want to get through then the best choices to make are listed below.
Solution: These will give the the maximum points:Show
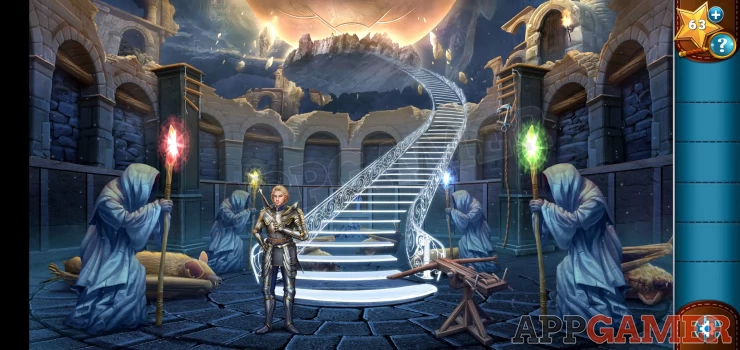
With Cedrick back on form he will now push the spear and open the door. You escape out into some sort of temple below the doomsday device.
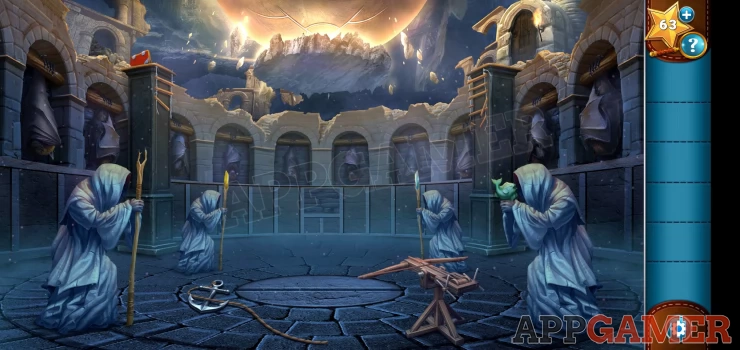
Collect the anchor from the ground, and then also take the small Fish from the statue on the right. Then use the anchor on the pillar on the left with the red book on top, this will then let you collect the book.
Now take the anchor hook again and use it on the pillar on the right side. You can then tap the door on the top right to go through.
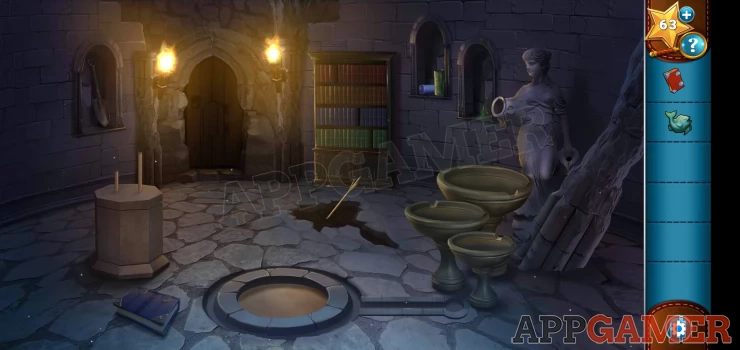
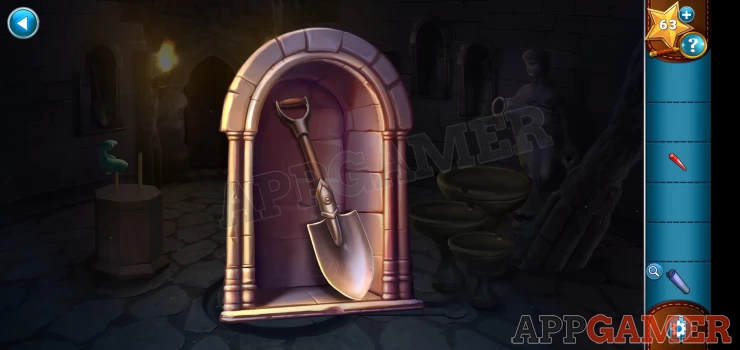
Collect a blue book from the ground on the left and then look in the wall alcove just above it on the left wall, collect a shovel.
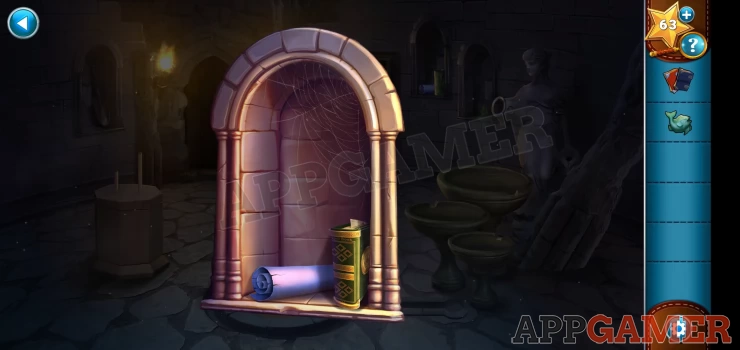
Then look in the left side alcove on the right wall to see a green book and a moon chart to collect.
Now add the 3 books to the bock case and you will be able to collect a red crystal. Place the fish status on the pedestal on the left and then use the shovel on the Ballista bolt that is buried in the middle of the floor. You can then collect it.
Go back through the door to the temple area and you can add the bolt to the Ballista on the right. This will then fire and knock down a suspicious wall, revealing a puzzle.
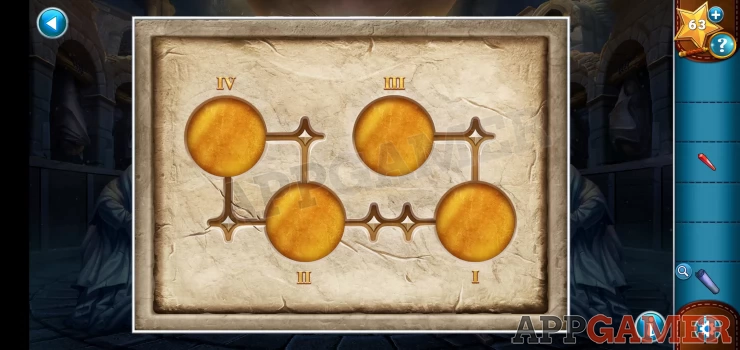
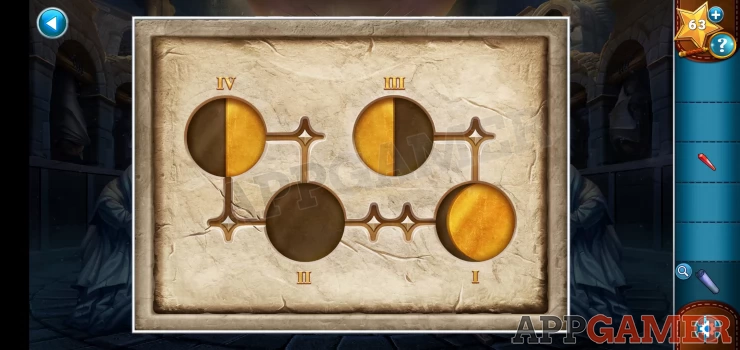
Moon Puzzle
- In this puzzle there are 4 moon shapes. They are marked 1 to 4 in roman numerals.
- You can tap each moon to change the displayed phase.
- They are linked by lines going through star shapes.
- You can look at the moon chart that you have collected to find the clues.

Solution: Look at the moon for number 1 (I) and count the stars linked to it - 3. then look in te chart under the column for I and the row for 3 stars. Set this moon to the same position. Then repeat this for the other 3 moons. You will get the positions shown below.Show
Collect from the opened panel the Shadow Orb and also the second fish statue. Then go back to the room on the top right. Place the second fish status on the pedestal and you will see water running from the statue on the right. It falls into the bowls, but needs to be directed to the pool in the center.
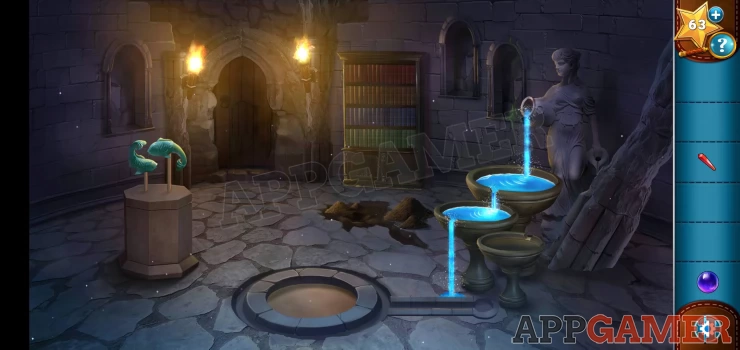
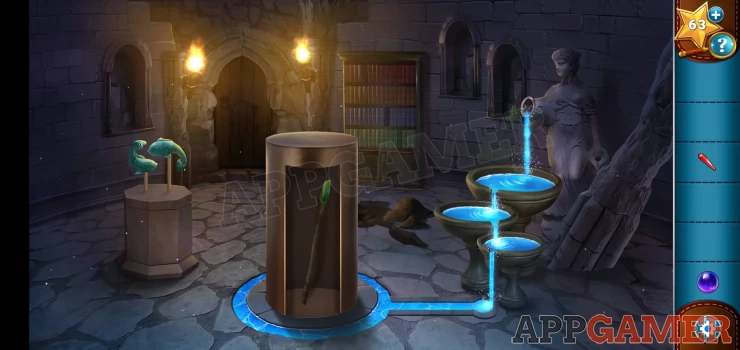
Tap the bowls to turn them so that the water flows from one to the other and finally into the channel to the pool. Once done the center rises up and you can collect a Staff.
Go back to the temple area and place the staff in the empty status on the right. And then add the Red crystal to the staff of the statue on the left.
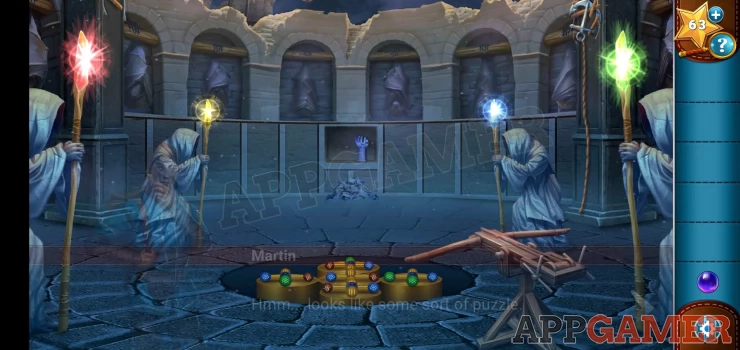
This will reveal another puzzle in the floor but also wake up some creatures that will attack. Cedrick will hold them off and you need to solve the puzzle.
Shadow Orb Puzzle
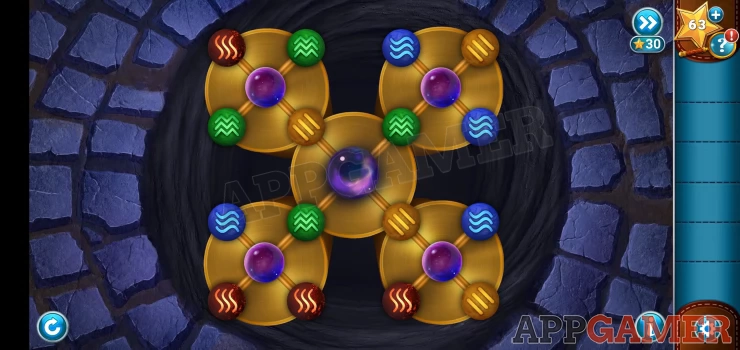
- To begin you need to add the shadow orb to the center of the puzzle.
- There are 5 circles with colored symbols around them.
- Taping the center of a circle will rotate it and move the symbols around.
- You need to arrange them so that each of the 5 circles has 1 of each colored symbol around it.
- Check the video below for a solution.

Once done you will see some magic stairs appear and you can climb up to the doomsday device.
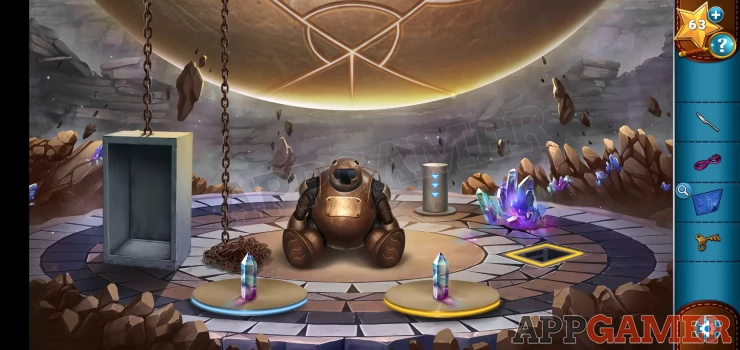
Under the Doomsday Device
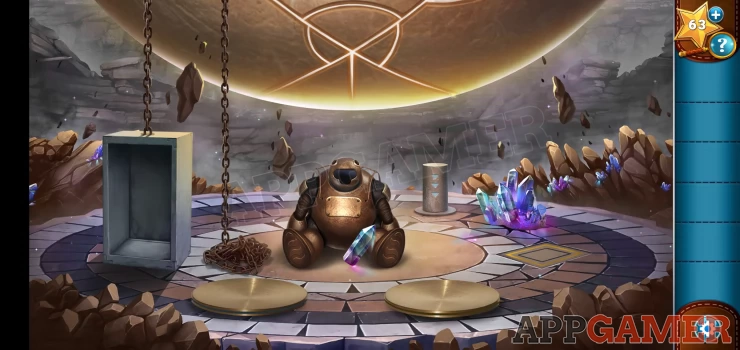
Collect the crystal shard from the robot in the center and then place it onto the round platform on the right, this will open a hatch in the floor that you can climb down through to reach a room.
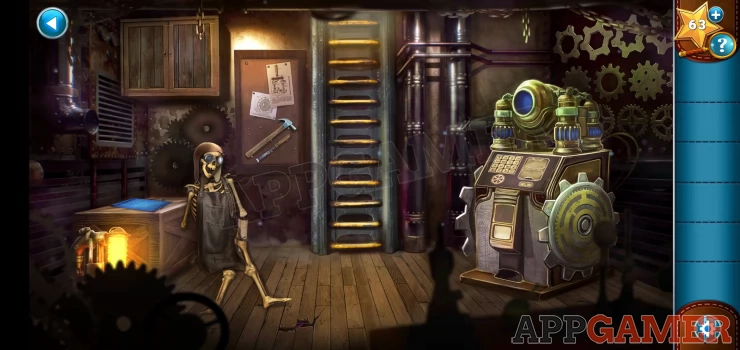
Collect the Hammer and chisel from the wall to the left of the ladder. Then also open the cupboard on the wall on the top left to collect a butter knife.
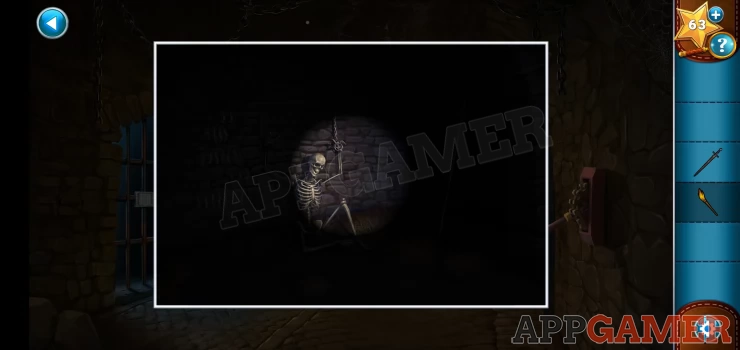
Next collect the horn blue print on the box on the left and then tap on the skeleton and you will be able to collect a scroll that falls from it.
Take the winding key from the scroll and look at the scroll for a clue. Next use the hammer and chisel on the broken floor board below the skeleton and it will lift. You can then collect some filament.
Then go back up the ladder to the top and use the hammer and chisel on the clump of crystals on the right. When you collect a shard you can place it on the platform on the left.
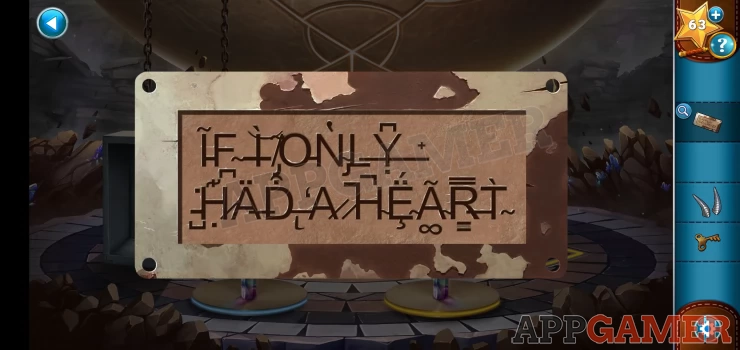
Then use the butter knife on the robot, this will remove the front panel for you to collect. You can view this to read the message.
Go back down to the room and the fabricator machine on the right is now working. View the control panel. First tap the spool on the lower left and then you can add the filament to it.
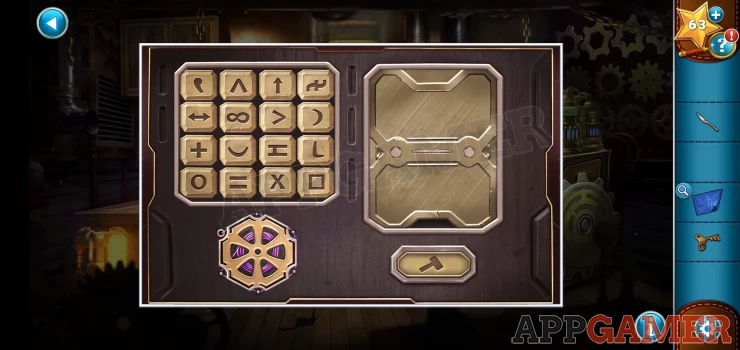
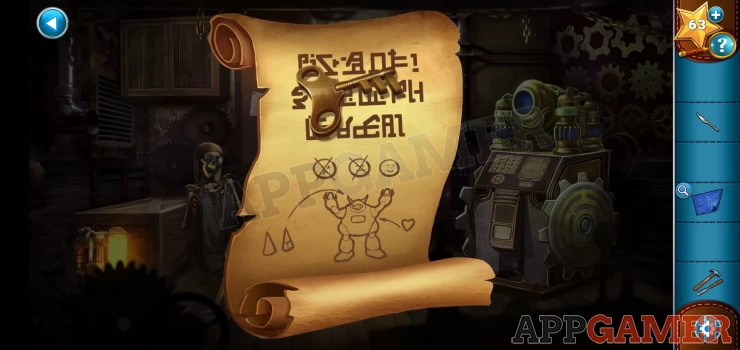
Now to make the horn for the robot you can look at the blue print for a clue. On the blue print you will find 6 symbols that are on the buttons on the left. Tap these 6. Then pres the hammer button
Solution: Show
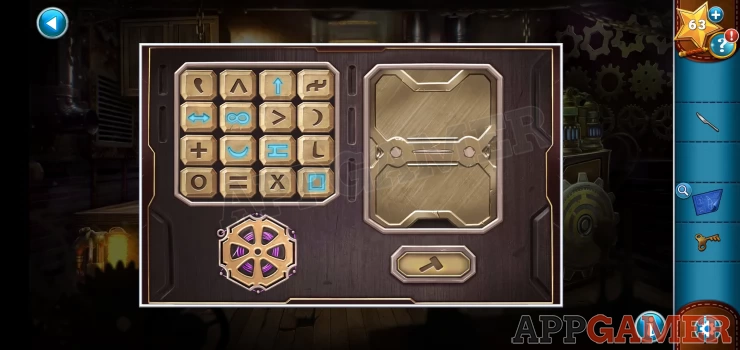
Collect the metal horns. Then we need to repeat this process to make the heart. Look again at the message on the plate that you removed from the robot and you will find another 6 symbols on it.
Solution: Show

Go back to the robot and place the heart in it's chest. Then put the horns on the head. It will stand up for you and turn so that you can wind it.

Use the key to wind up the robot then after it talks to you return the breast plate to cover the heart. It will then help you by pulling the elevator up.
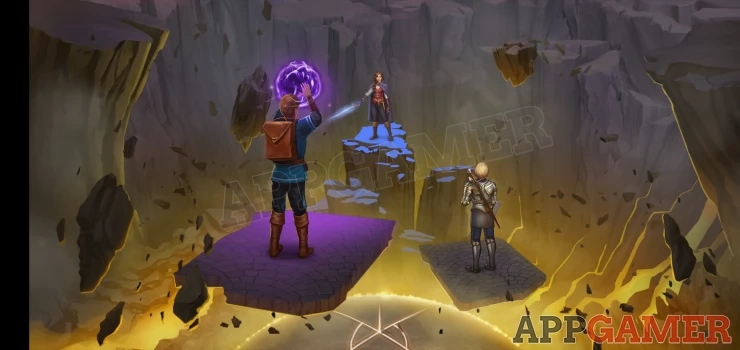
You arrive at the top of the device and there is Nira, she is preparing the doomsday device and you need to stop her. After the conversation you will start a puzzle to charge up the Sphere.
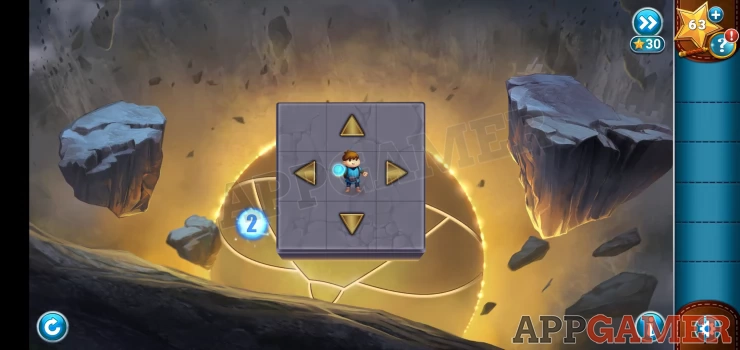
Squares Puzzle
- To complete this you need to move around the squares to step on each one and light it up.
- The squares will alternate light and dark each time you pass over them.
- Light up all squares to clear the level. There are 3 levels to complete.
- There are also white obs that appear on the side or the top. These have count downs on them.
- When the number reaches 0 it will fire a beam on the row or column it is next to, you must avoid these.
Once you complete the 3 levels the orb will be fully charged and you can follow the final scenes. Nira is vanquished and you are rescued from the pit by your Yeti friend.

Congratulations on completing The Square's Tale. If you have any questions about the game please go to the Answers Page to ask there.
We have questions and answers related to this topic which may also help you: Show all