The Squire's Tale - Chapter 3 Walkthrough
More Adventure Escape Mysteries
The Squire's Tale is an escape puzzle game from Haiku Games, playable through their Adventure Escape Mysteries app. A quest to find the sword of light and defeat the Monster King.
In Chapter 2 you have found the first altar in Grim Tops and now you have ventured on to the Ruins of Recursia, an ancient civilization of mathematicians, to look for the second altar.
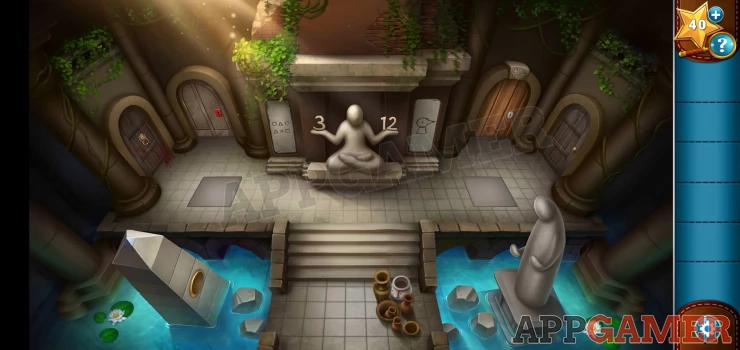
Star Secret: Tap to open the Door on the far right
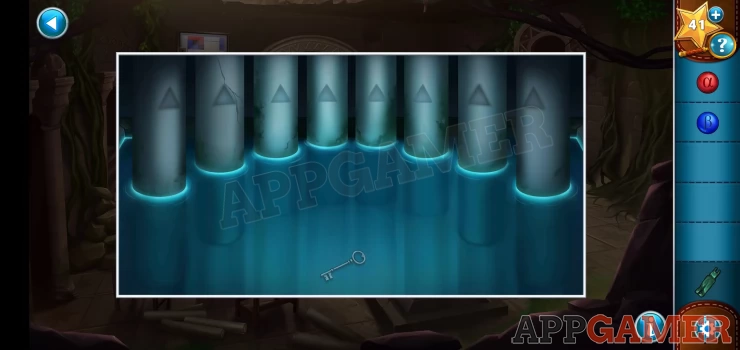
Take note of the numbers and drawings around the figure in the center. Then tap on the pots at the bottom to break them, you can then collect a key.
Open the door on the far left to see a bucket of red paint. Use the key on this to color it red, you can then use it to open the door on the left with the red lock. Another cupboard. Collect the Alpha Orb from inside.

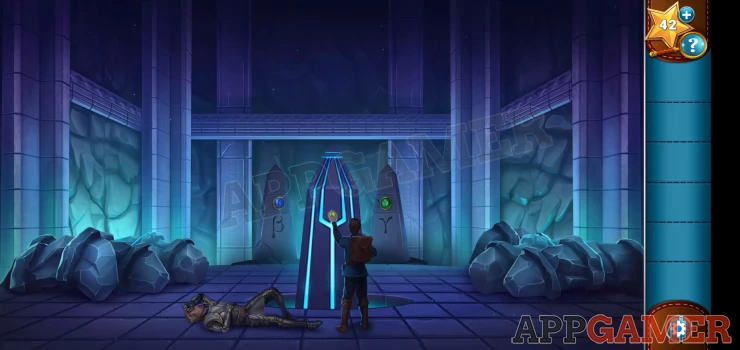
On the left in the water is an obelisk with a round hole in the side. Place the alpha orb into the hole and a platform will rise up, Tap on this to view the puzzle.
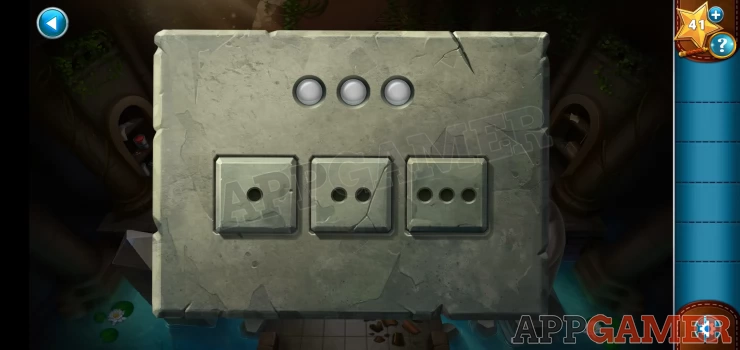
- To solve this you just need to tap the 3 buttons in the right order.
- The clue is the numbers of the statue in the center of the room.
Solution: 3 12 = tap the buttons in the order 3 1 2Show
Before you move on collect the Alpha orb again from the obelisk, then tap on the opened doorway to move through to the main hall.
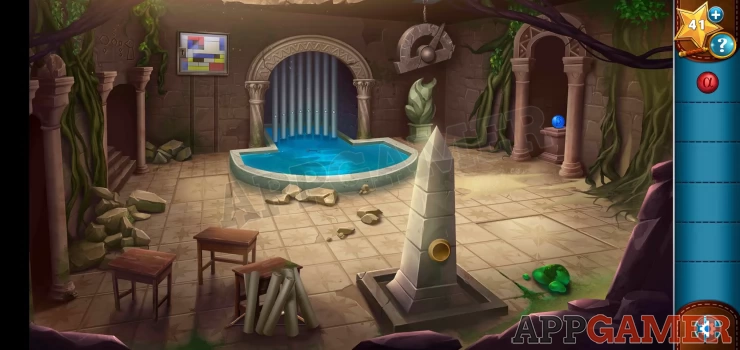
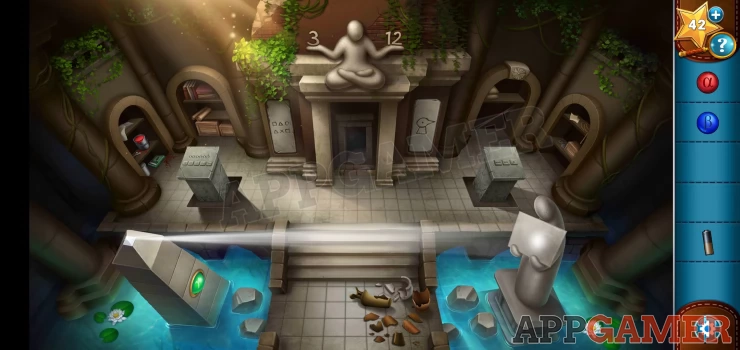
Main Hall
You cannot get the blue orb just yet .First you need to move the scrolls of paper from the desk near the bottom left. then you can collect a bow from behind them. Then open the desk on the left to find an Arrow.
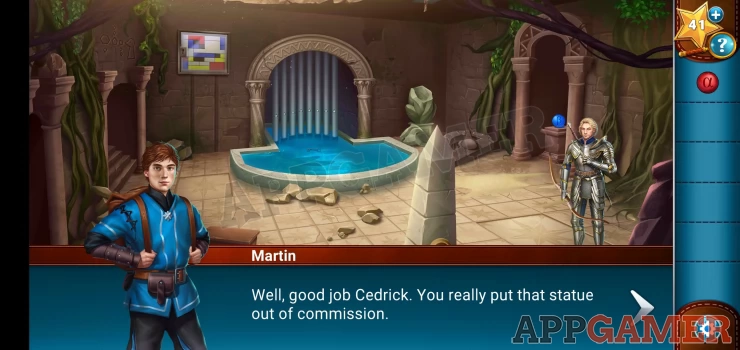
Use the bow and arrow on the stone protractor symbols hanging from the ceiling on the right, this will fall and know down the statue below it.
You can now take the blue Beta Orb. When you have it tap on the steps on the left side to take you back up to the entrance hall. Place the Beta orb into the Obelisk and a panel will open. Collect the Waders from inside. Then collect the blue orb again.
Go back down to the main hall and you can now use the waders on the pool of water, this will let you collect a Painting key. Notice also the pipes at the back.
Now use the red Alpha orb in the obelisk in this main hall, the painting on the left will lower. You can then use the painting key to unlock it and collect it.
Now take out the Alpha Orb and put the Beta Orb into this obelisk. You will see a blue panel on the floor on the left. View this.
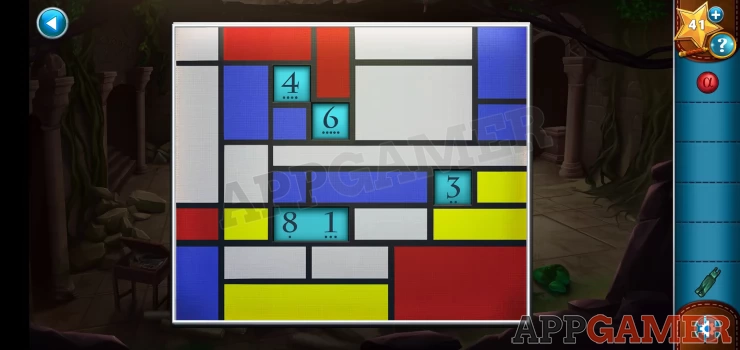
Place the painting on top of the numbers to see a clue.
Now tap in the pool again to see those pipes on the back.
Pipes Puzzle
You can tap each one to light up the triangle.
You need to find the correct order, the clue is the numbers from the painting.
Solution: Check the number of dots under the 5 numbers revealed by the painting. Then in order of 1 to 5 get the associated numbers. This gives you the sequence 8, 3, 1, 4, 6. Now tap the pipes in that order (imagine the pipes are numbered 1 to 8 from left to right.Show
This opens a section of the floor with some steps. Take the blue Beta Orb back and then head down the steps.
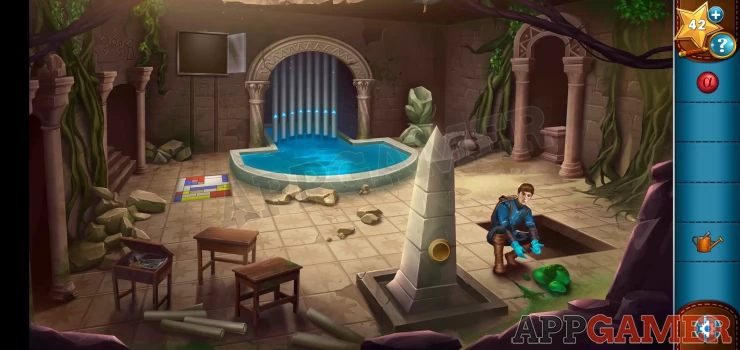
Lecture Room
You arrive at a lecture room. Cedrick is caught in a trap and you need to help him.

Star secret: on a ledge at the top center of the room.
Place the Beta Orb into the obelisk in this room. A stone table will appear and you can view this for a puzzle.
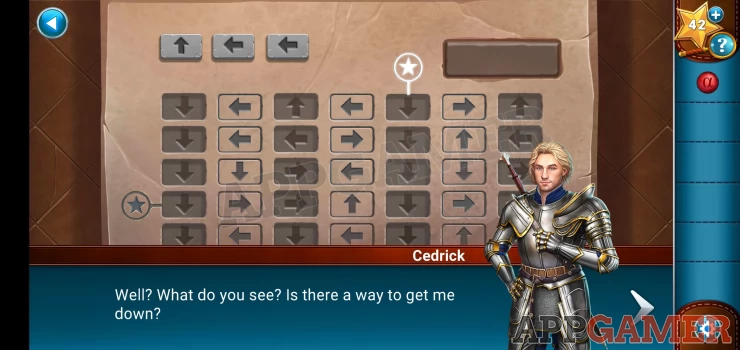
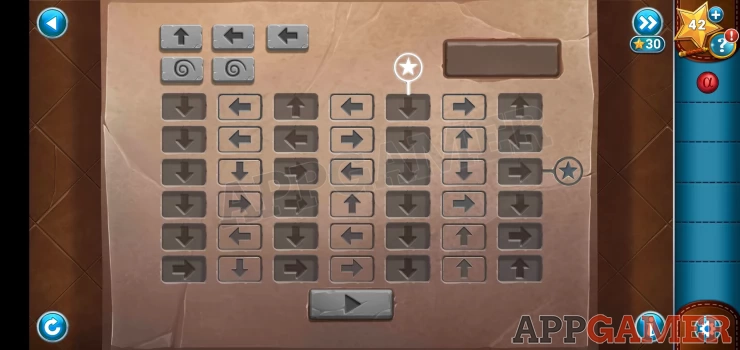
Arrow Puzzle
- To complete this puzzle you need to make a path from the top white star icon to the grey one on the left.
- You can place the 3 arrow tiles on to the grid in the gray space to direct the flow.
- When you have placed the tiles you need to tap the play button at the bottom and see the arrows light up.
- Check the solution below
Solution: Show
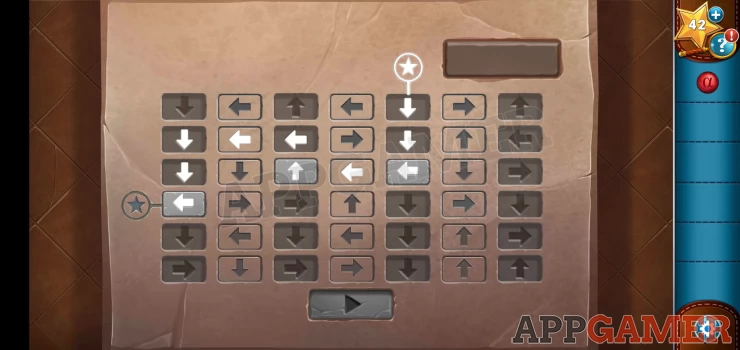
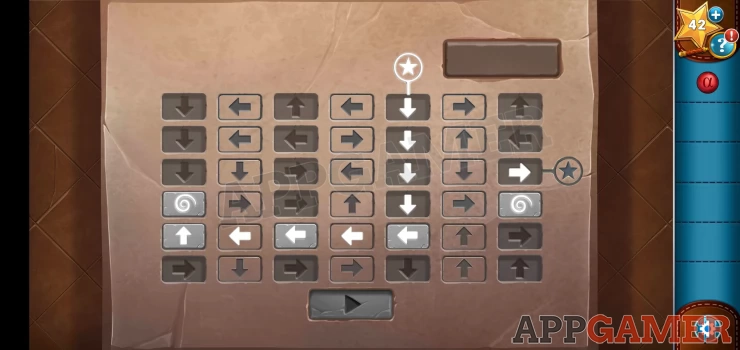
Arrow Puzzle 2
- You now have a second puzzle with the same rules but you now have a pair of teleport tiles.
- You can place these 2 tiles to teleport the flow from one tile to the other around the board.
- You do need to use all of the tiles availalbe
Solution: Show
You can now collect a Flower key. Go back up to the entrance hall and you can use the Flower key to unlock the door on the right. Collect some Rubber Gloves and a watering can.
Go down to the Main hall. First use the watering can on the pool of water to fill it. Then use the Rubber gloves on the glowing green 'Mossbottom Ooze' on the bottom right.
Go back down to the lecture room and swap out the Beta orb out to place the Alpha orb in the obelisk. This uncoverers the round 'Magnet stone' on the right pedestal.
Add the mossbottom ooze to the stone and then use the watering can on it. This will dissolve the stone and Cedrick will be released.

Collect the Alpha orb again and then tap on the broken Stonework on the right wall. Cedrick will move it for you, you can then tap on the green orb that is behind it. After Cedrick kicks it free collect the Gamma Orb from the ground.
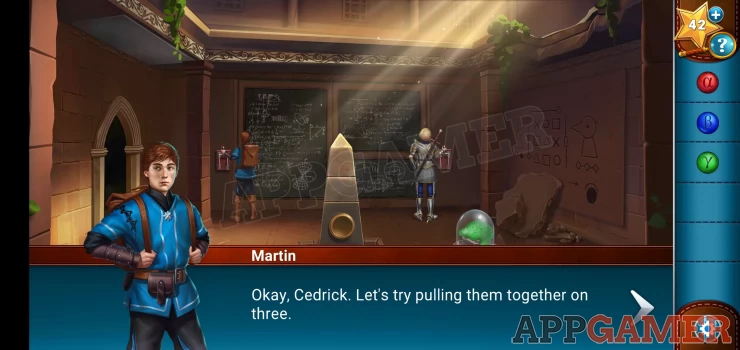
Next on the back wall are 2 red levers on the left and right. Try tapping one of these and then the other. Finally Cedrick will help you pull both at the same time. This will open the wall to reveal a giant abacus.
View the abacus and notice there is a battery panel on the right. open this. Collect the dead battery.
Place the gamma orb into the obelisk and you can then take the stone tablet from the stone figure on the left. Then take back the Gamma Orb and go up again to the entrance hall. Place the stone tablet on the hands of the figure on the right and then place the Gamma orb into the obelisk on the left.
Two pedestals have risen up now, and a beam is projecting onto the tablet.
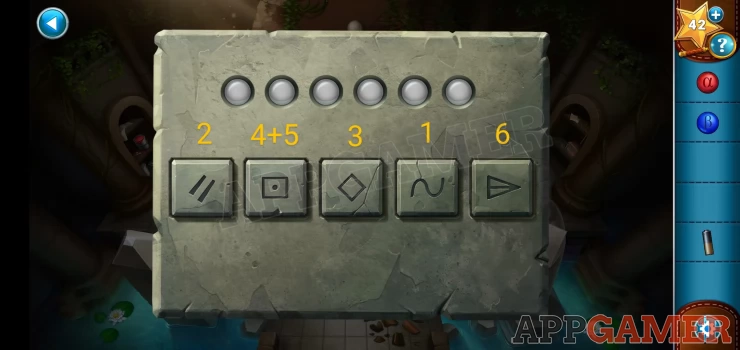
Stone table Puzzle.
- The left pedestal has 5 buttons with symbols and 6 lights that you need to activate.
- You need to find the correct order to tap the symbols
- The right pedestal has 3 buttons with dots.
- You can tap one or more of these buttons to then see a symbol on the tablet on the right.
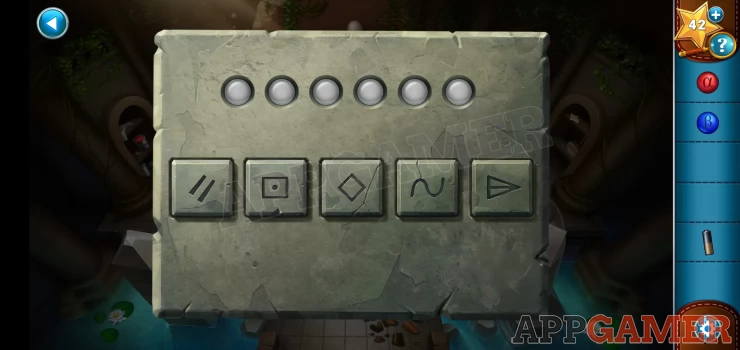
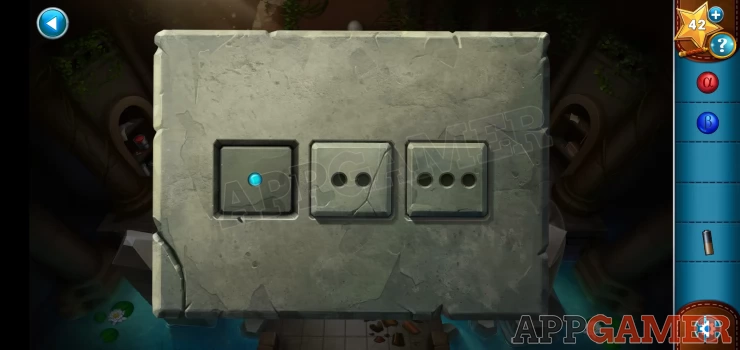
Solution: Tap the button with 1 dot and get the symbol. Then 2 dots and 3 dots. Then tap the 1 and the 3 to get the symbol for the number 4. Then do the same to get the symbols for 5 (2 + 3) and 6 (1 + 2 + 3).Show
Once you have the sequence of six symbols, tap on the left pedestal and enter those symbols in the same order.
Solution: This is the order to pressShow
When the panel on the right opens collect the Abacus Instructions and then place the dead battery into the battery charging device. You will then get a recharged battery.
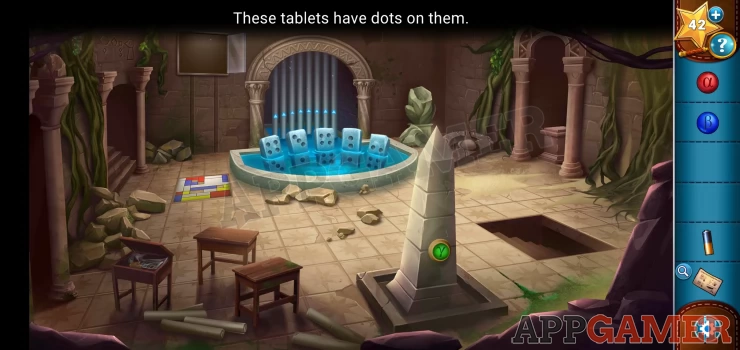
Collect the Gamma Orb and then go back down to the Main hall. Place the Gamma Orb into this obelisk. You will see giant dominoes appear in the pool. Count the dots on these, this is a clue that you will need.
Take the Gamma Org again and head down to the Lecture room. You can now add the battery to the abacus to activate it.
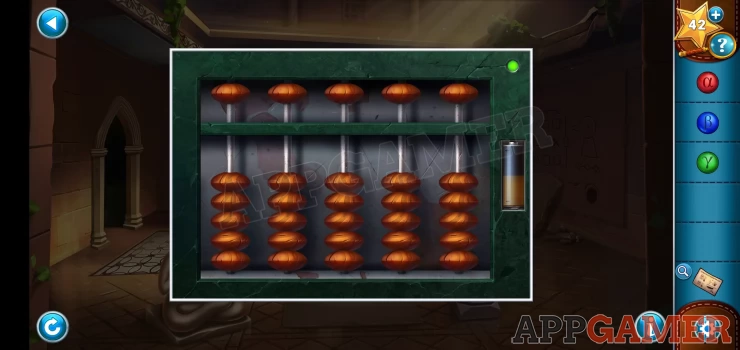
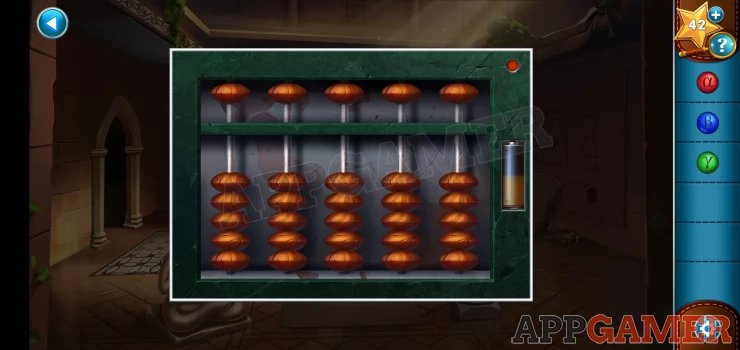
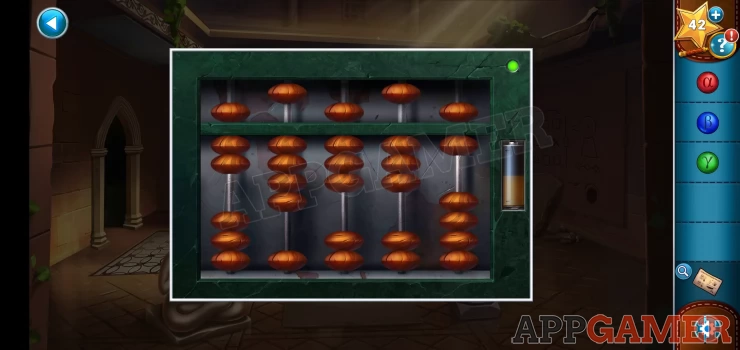
Abacus Puzzle
- You need to set 5 numbers on the abacus.
- The clue is the domino tablets seen in the main hall.
- View the abacus instructions for help.
- Move the disks towards the middle bar to add the numbers.
- The disks at the top are worth 5 and the ones at the bottom are worth 1 each
Solution: The code from the Dominoes is 74836, set the counters on the abacus to display these numbers.Show
A passage opens, make sure you have all 3 orbs and then go though to the Altar Chamber
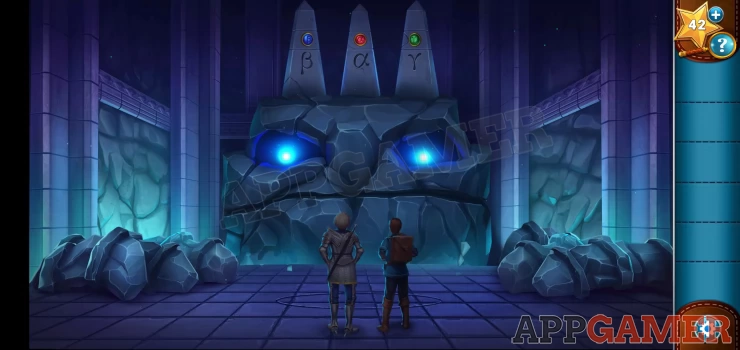
Altar Chamber
Place the 3 orbs into the correct slots on the obelisks at the back. You will then awaken a Golem and asked to take an Exam.
Cedrick chooses the physical exam and you begin the puzzle.

Physical Exam Puzzle
- You need to navigate the grid to reach the exit at the top.
- Pick a direction for Cedrick to run in he will keep going until he hits a block
- A red area will appear on the screen which you must take care to avoid. It will move around the board.
- Make sure that your move does not END in the currently marked red area or you will need to start again.
- There are 2 stages to complete.
- You can watch the videos of the 2 stages below.


Once this is done the Golem will reveal the Altar and you can complete the quest for Chapter 3. Now on to the island of Frost Bell to find the third Altar. The Squire's Tale - Chapter 4
We have questions and answers related to this topic which may also help you: Show all