The Squire's Tale - Chapter 2 Walkthrough
More Adventure Escape Mysteries
The Squire's Tale is an escape puzzle game from Haiku Games, playable through their Adventure Escape Mysteries app. A quest to find the sword of light and defeat the Monster King.
In Chapter 1 you have retrieved the Royal Ruby but now you begin your quest for the Sword of Light. We start by travelling to the Grim Top Mountains to find the first Altar.
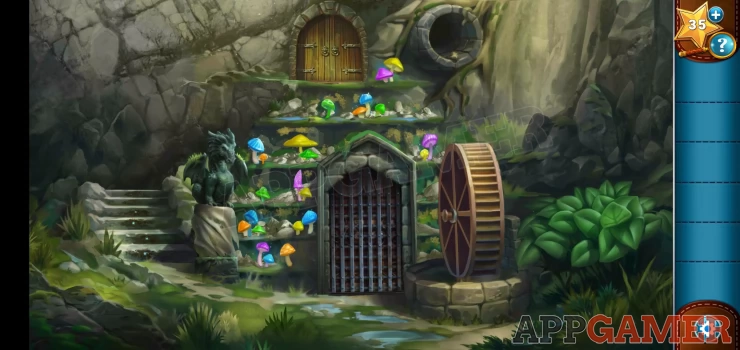
Star Secret: inside the round window in the wall, top right.
Tap on the dragon statue by the steps on the left and you will collect a Old cloth, you will also read the plaque on the statue that says 'Up from the ground we grow'. This is a clue for later.
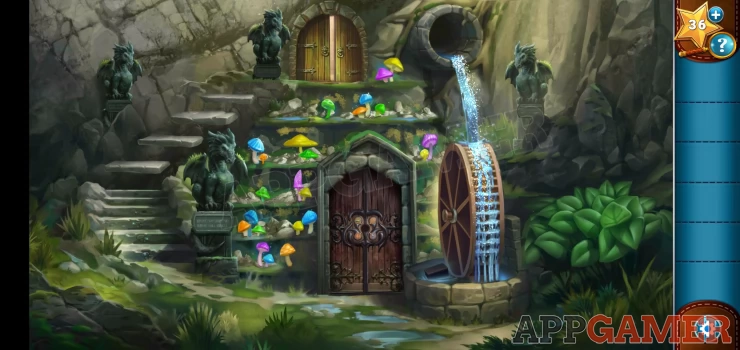
Next tap to view the steps on the left you will then be prompted to clean them, use the cloth to do this. You will then see that each step has an image of mushrooms and a blue dot. This is a puzzle.
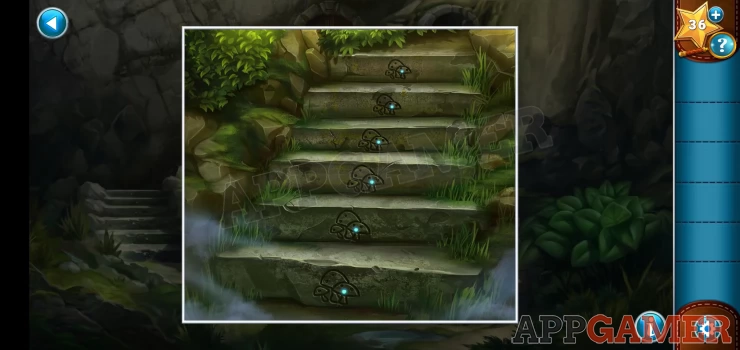
Mushroom Steps Puzzle
Hint: Look back at the shelves of colorful mushrooms growing around the gate. There are 6 shelves / levels.
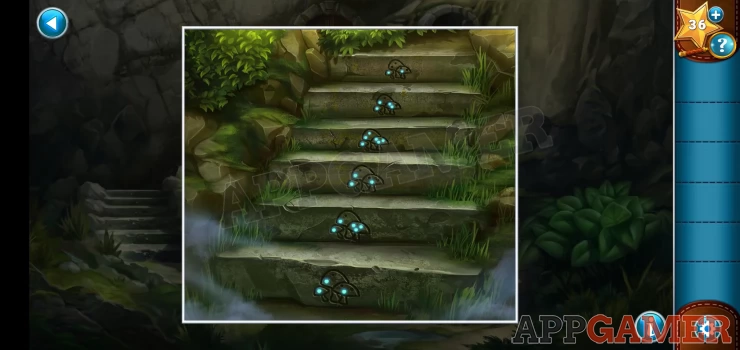
Solution: Count the mushrooms on each of the shelves to get a sequence of numbers, then on the steps tap each one to light up the same number of dots. The numbers from top to bottom are. 2, 4, 6, 3, 5, 3Show
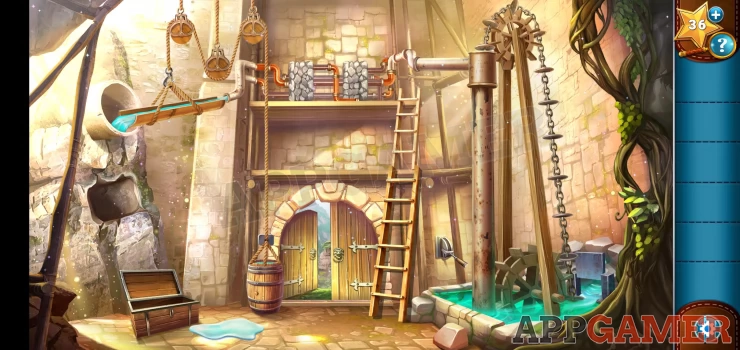
You can now go through the door at the top and enter an old pumping room.
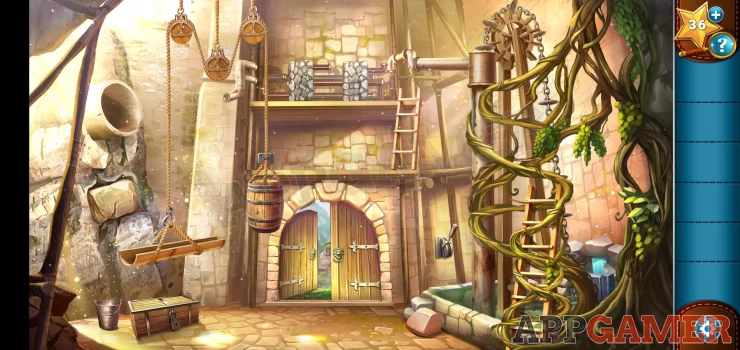
Pump Room
Collect a bucked from the bottom left and then tap on a loose rock just above it to remove it and find a Wooden Gear. Then tap the rock on the ground on the right to move that as well and you will find a chest key.
Now use the chest key on the locked chest on the ground on the left o open it. Collect an Axe from inside. Then use the Axe on the vines on the right. You can collect a Ladder and then hit the vines again. Cedrick will now help.
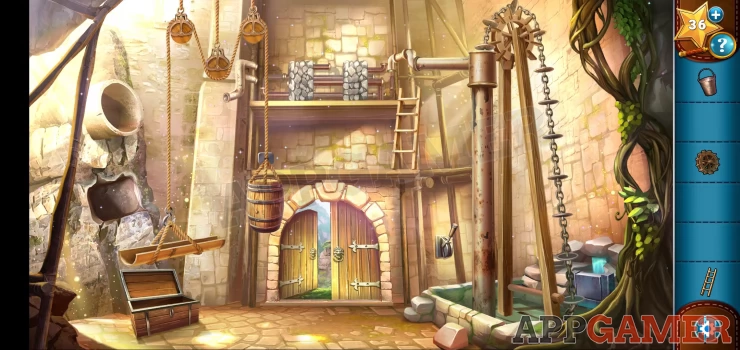
With the vines clues you can now place the Wooden Gear wheel at the bottom of the chain on the right to complete the mechanism. Then add the ladder to the bottom of the one already there so that you can access the top level.
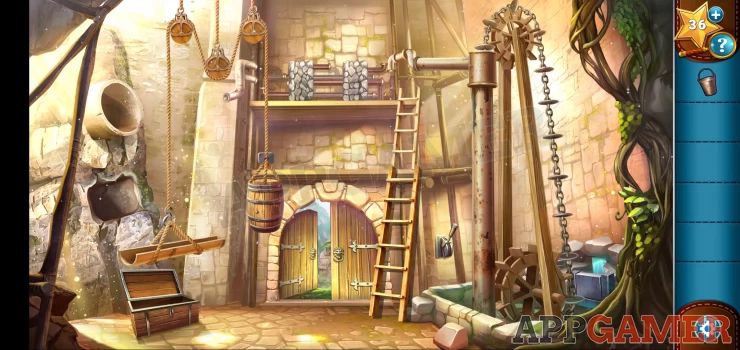
Now tap on the lever on the right of the door to start the water flow to the top, then you can tap at the top to see a water pipe puzzle.
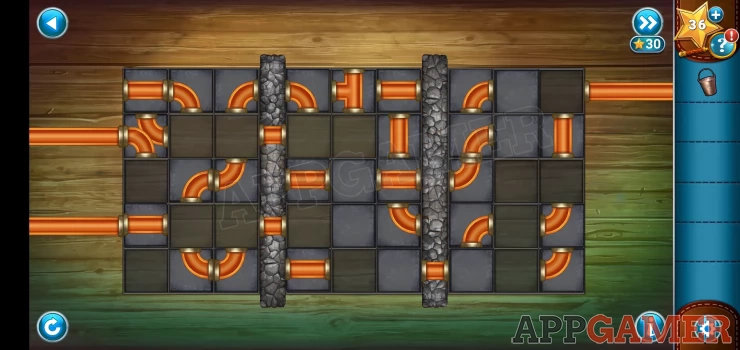
Water Pipe Puzzle
- Slide the blocks around the grid and form a completed pipe system that runs from the single inlet on the right to the 2 outlets on the left.
- The system is split into 3 sections with pass through points that you need to join up.
- The water pipe needs to split in the middle section to pass through the 2 gaps.
- Check the solution below.
Solution: Show
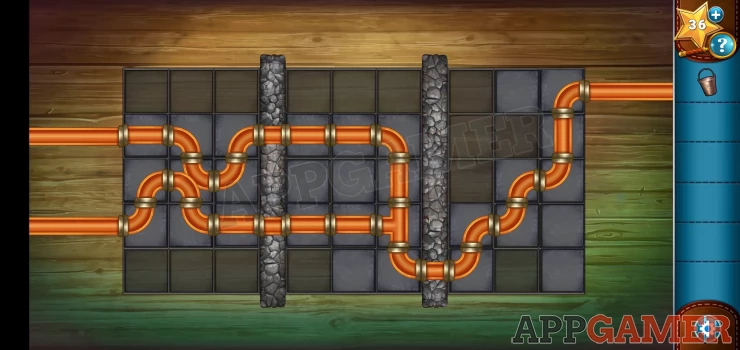
With the water now running to the right, use the bucket on the falling water to collect a bucket of water. Then use this on the barrel that is hanging from the rope. This will raise the channel on the left a little.
Repeat this process 2 more times to lower the barrel and raise the channel until the water runs through the hole on the left side.
Now back outside the water has opened the gate and 3 statues have appeared.
Tap on the 3 new statues to read the plaques on each, you will see the following:
“Westward winds sweep from faraway lands.”
“The liquid of life flows but one way.”
“Eastern fire breathers burn with desire.”
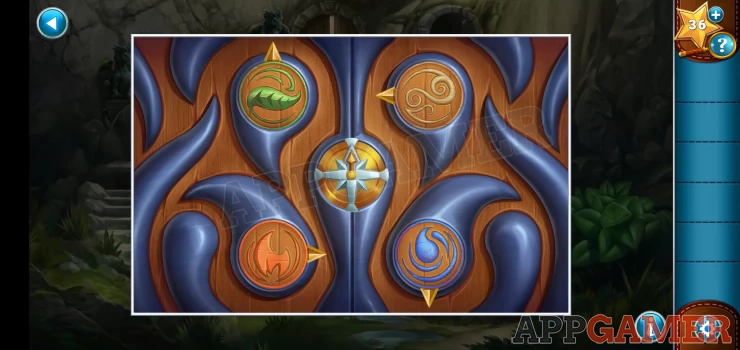
Now tap to open a black box that is in the water by the wheel. Collect from inside a compass. Then view the door that you need to open.
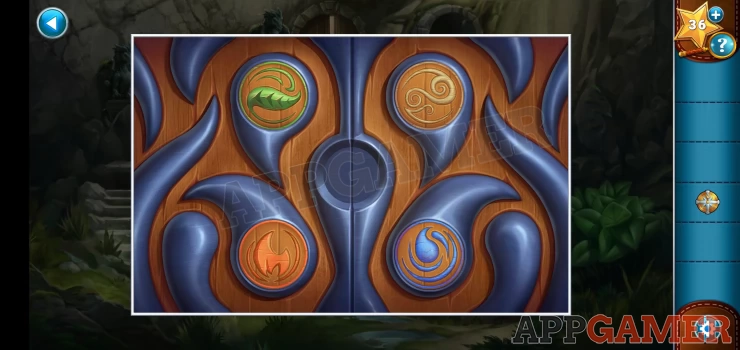
Door Puzzle
Place the compass in the center to start the puzzle,
Now tap the 4 symbols to turn the pointers for each, you need to select the correct directions.
The writings on the 4 statues are the clue.
Check the solution below
Solution:
Green - Leaf (Grows) - Up Yellow - Wind (West) - Left Red - Fire (East) - Right Blue - Water (Down, water flows downhill)Show
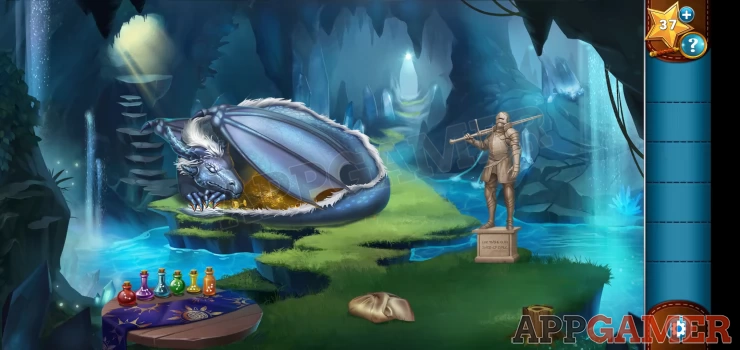
The door opens and you enter the cave. There is a dragon.
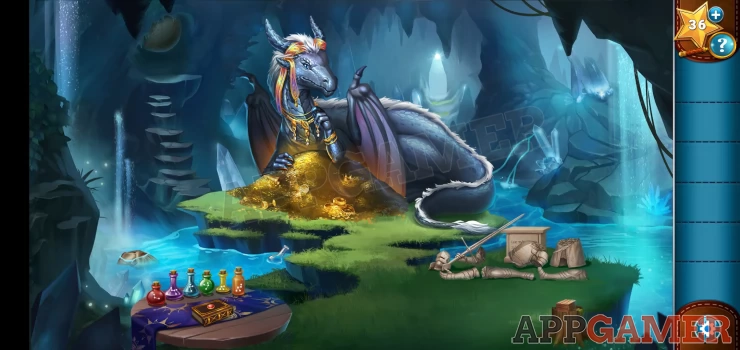
Dragon's Cave
Star secret: on a rock on the top right near the water wall.
Collect an empty glass Flask from the water on the left and then tap on the broken statue to start the statue puzzle.
Statue Puzzle
- Rebuild he broken status by placing the pieces on the plinth.
- Tap and drag the pieces one by one.
- Start with the legs and work up to reach the head.
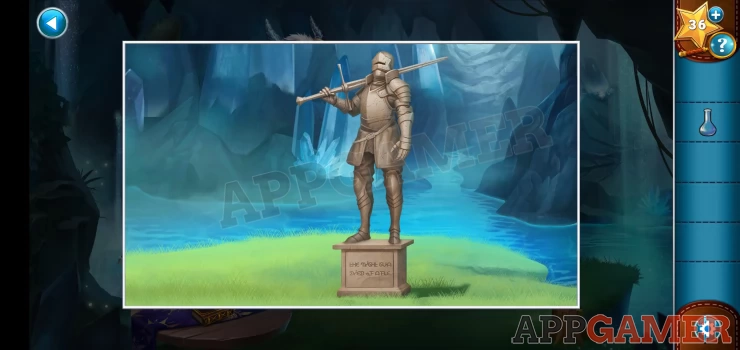
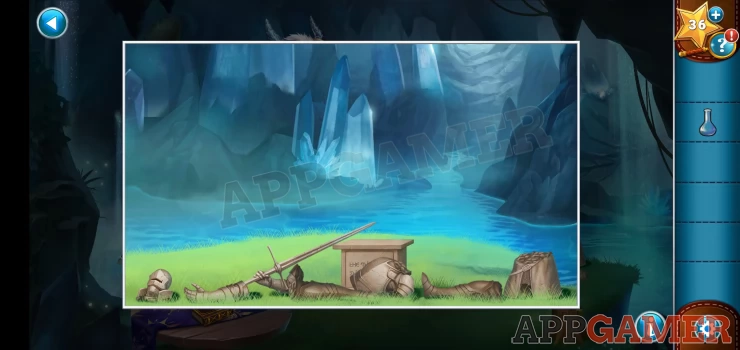
Once done you can collect a Gem from the base of the statue. Then we need to take care of the Griffin. To do this we need to move the boulder that is at the top of the steps on the left side of the cave. Tap this to try but Cedrick cannot move it.
Now tap on the table on the bottom left to see a range of bottles and a book.
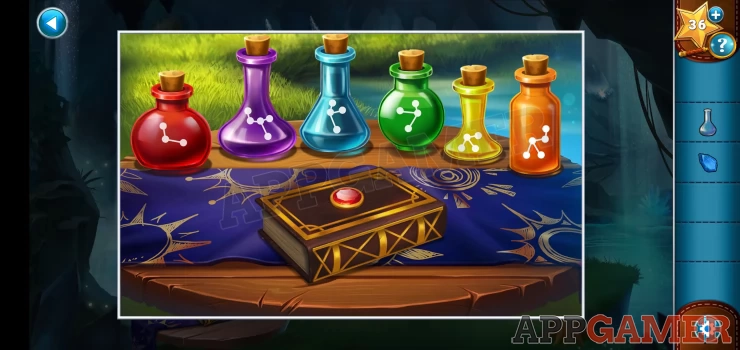
Collect the Potion book and then open it in your inventory to find a recipe of sorts to follow.
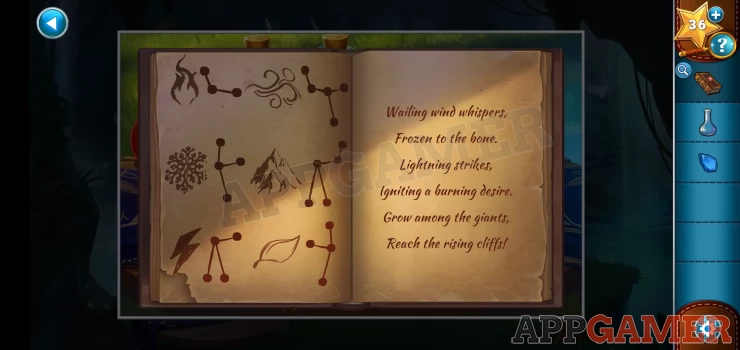
Make the Potion
Place the flask on the table then select the ingredients for the potion in the correct order from the table and add them to the flask.
Hint: Follow the order of the clues on the right of the book, and get the symbol from the images on the left. Then choose the related bottle.
Solution: The order of ingredients is: Wind = Purple Ice = Blue Lightning = Yellow Fire = Red Plant = Green Mountain/Earth = OrangeShow
You have made the Strength potion. After Cedrick drinks it you can tap on the boulder again to move it. Then go through to see the Griffin's nest.
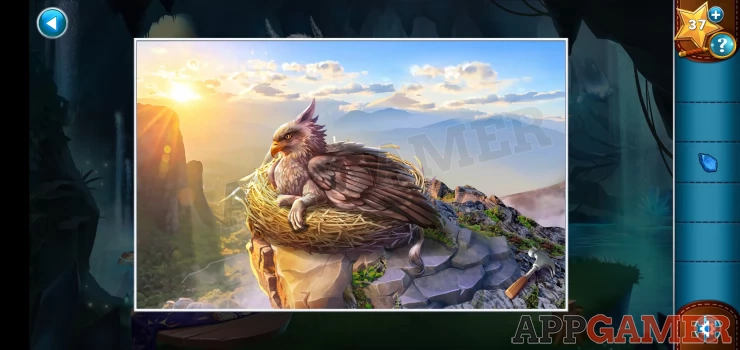
The griffin doesn't want to move, but you can collect a hammer from the side, then go back to the cave. View a small wooden box on a tree stump on the bottom right.
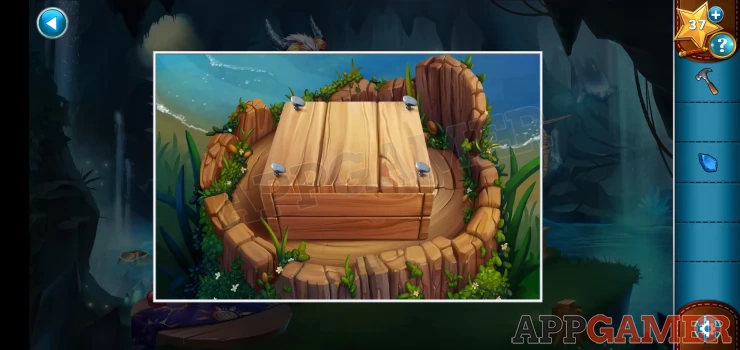
Use the hammer on this to open it an collect the Flint and steel. Then tap to move the box away and collect the Black powder from underneath.
Return to the Griffin nest and place the black powder on the nest, then use the flint and steel to light this to scare the griffin.
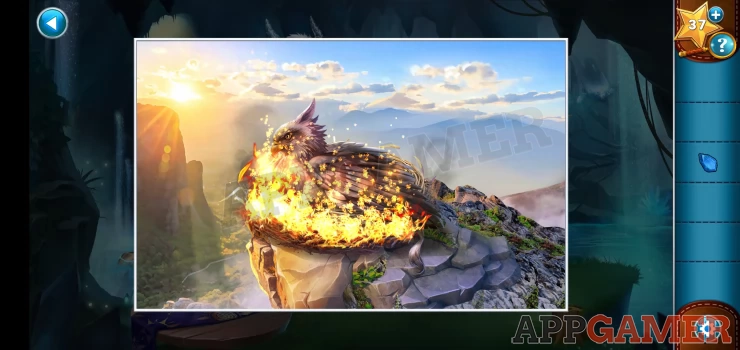
You will now collect a griffin egg, go back to the cave and give the egg to the Dragon. After the conversation the Dragon will go back to sleep and you can continue through the cave to a Terrace.
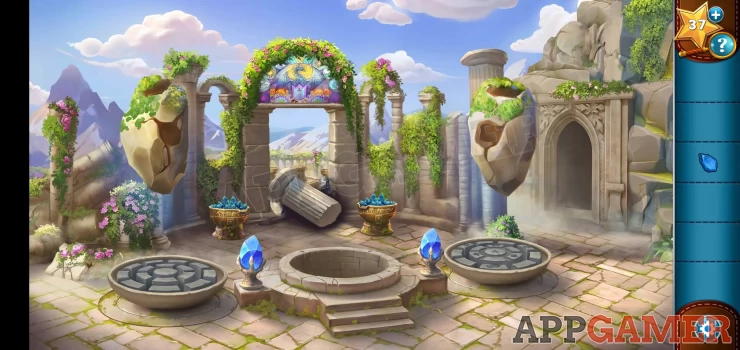
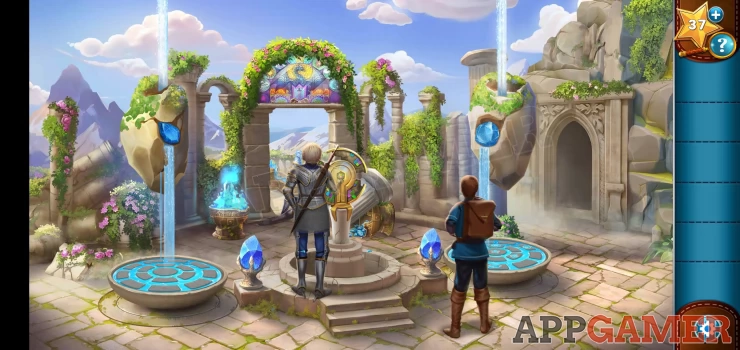
Terrace
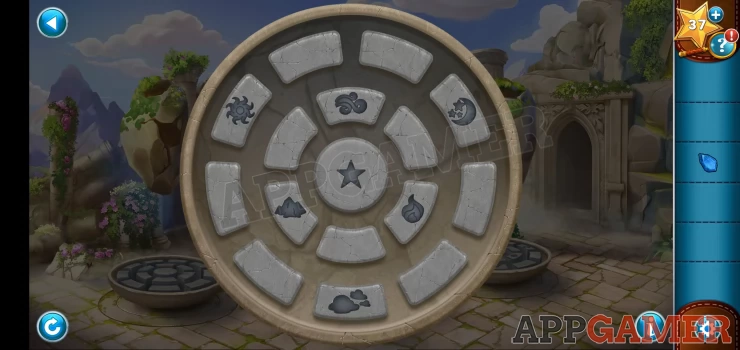
Tap on the stained glass in the arch above the center to view it and see a clue. Notice the symbols around the top. Then view the large bowl on the ground below the right hand floating rock.
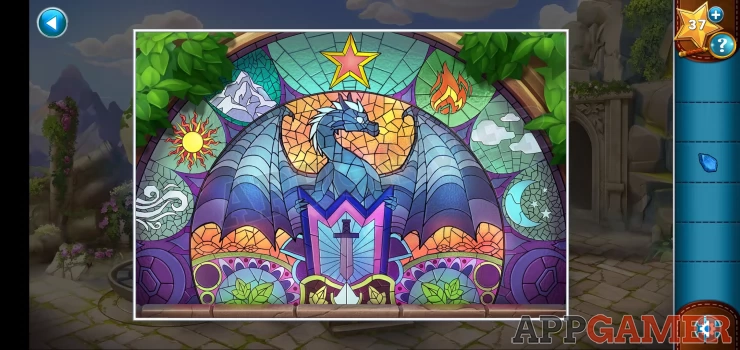
This has the same symbols on it, tap the in the order show in the clue. Wind, Sun, Mountain, Star, Fire, Cloud, Moon.
You can then collect another gem.
Now tap the broken column in the center to move it and you will be able to collect a torch from the boxy that was under it. Then add the 2 gems to the slots in the 2 floating rocks. You need to place the correct one in each rock.
This will ignite a blue flame on the left, use the torch on it to light it as well.

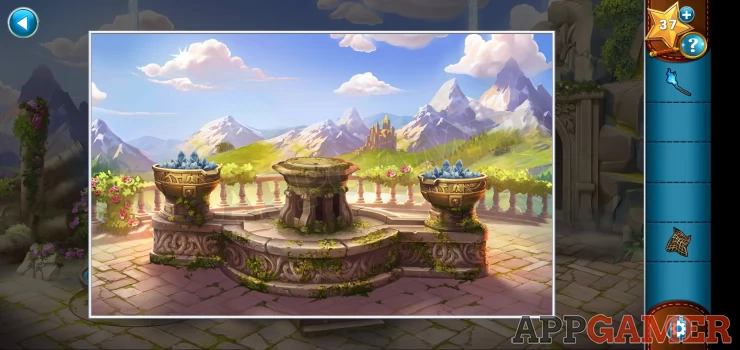
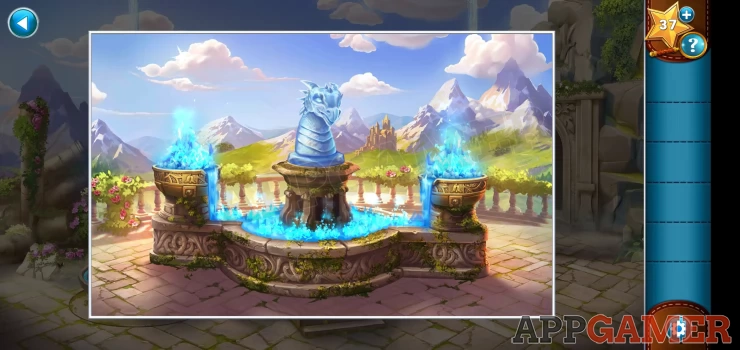
Now tap the center arch to go see a pedestal with 2 braziers on the sides. Collect a net from the right hand side.
Go back to the dragon cave. (through the door on the right of the terrace), in here you can use the net on the water on the left to fish out an object.
Open the net and collect the Dragon Bust.
Go back to the terrace and view the pedestal again. Use the torch to light the 2 braziers and then place the dragon bust in the center.
This will reveal a new puzzle in the center of the terrace.
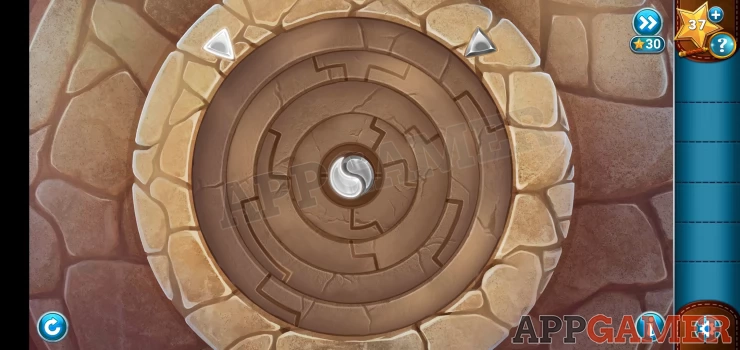
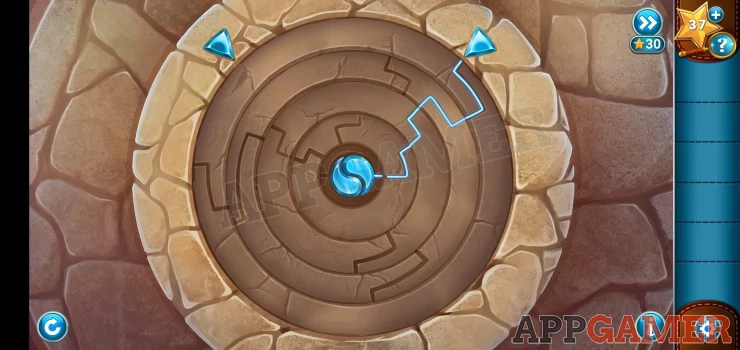
Circle Puzzle
- The aim is to make a line path from the outer arrows to the center symbol.
- You can make a line from the left one to the center first and then make a line from the right one to the center.
- You do not need to have both lines at the same time.
- Check the 2 solutions below for help.
Solutions:
Show
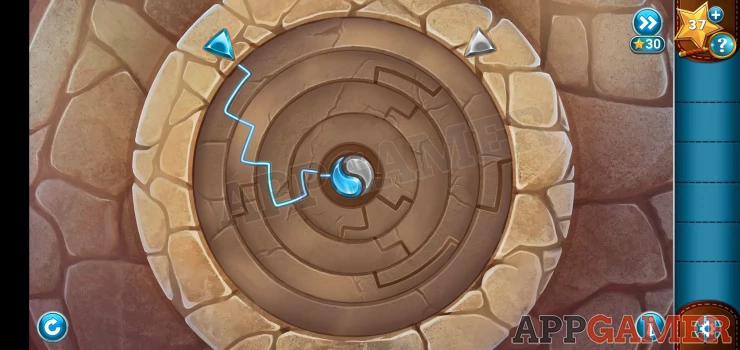
Show
Once done you will reveal the Altar and complete the steps for Chapter 2. Watch the ending scenes and head off for the Ruins of Recursia in The Squire's Tale - Chapter 3.
We have questions and answers related to this topic which may also help you: Show all