Legend of the Sacred Stones - Chapter 2
More Adventure Escape Mysteries
This is our full guide to chapter 2 of Legend of the Sacred Stones, another exciting mystery escape game from Haiku games.
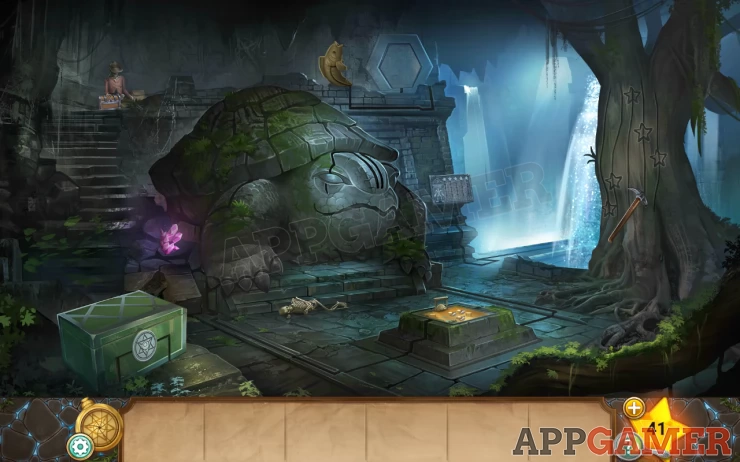
Following chapter 1 we have come to the Sprint Temple, home of the water god.
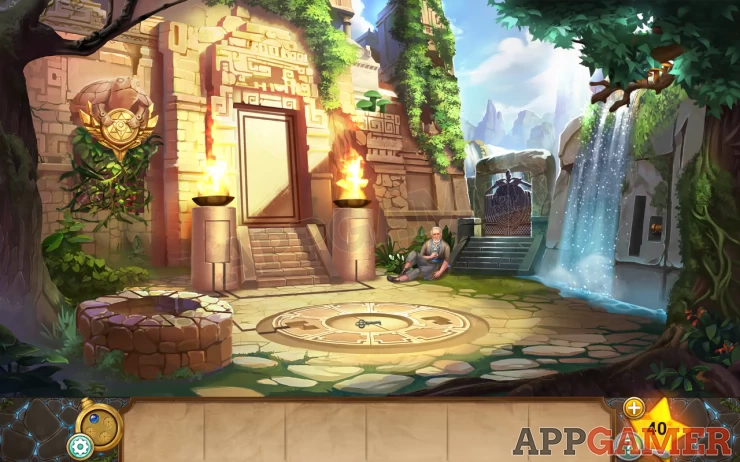
First, pick up the gate key from the center.
Tap the tree branches on the top right to find 4 orange mushrooms.
Note the 3 green mushrooms on the wall.
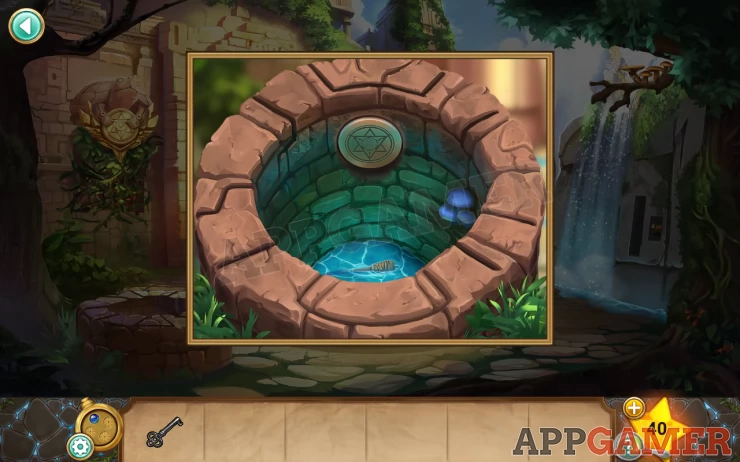
Tap on the well to look inside. There are 4 blue mushrooms here.
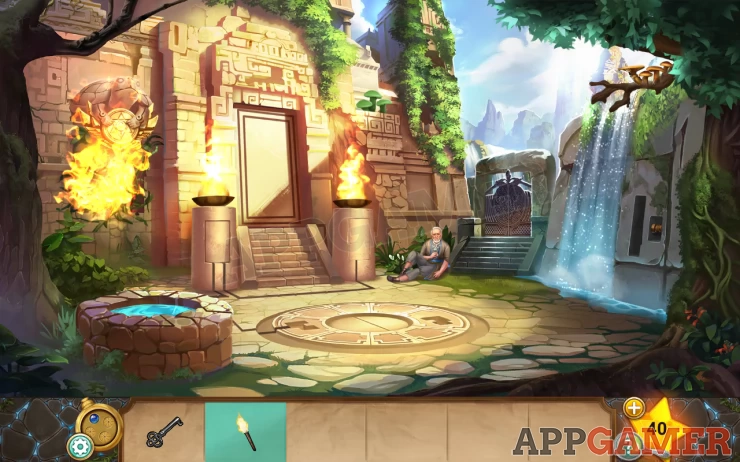
Tap the star symbol at the back and you can then use the locket to make the water rise. Take the torch.
Next light the torch with the flames in front of the temple.
On the left of the doorway is a turtle statue with vines hanging. Use the torch to burn the plants under the statue.
Next tap the symbol the turtle is holding and use the locket to make the turtle spout water.
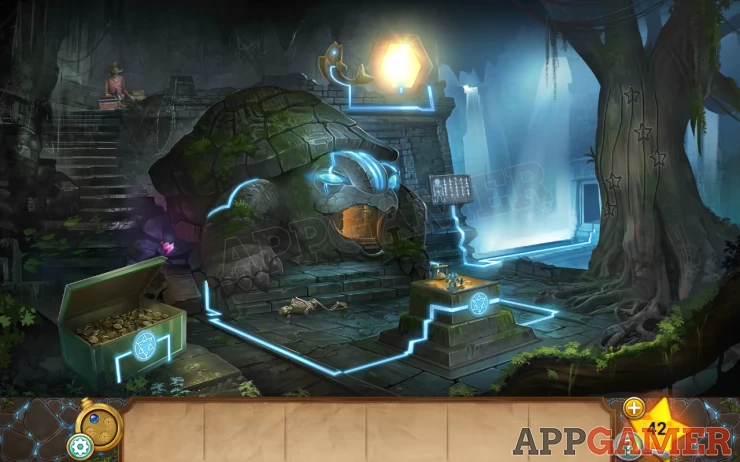
This reveals a hidden area. Take the wheel. Note the two red mushrooms here.
On the far right next to a water fall is a slot for the wheel, Place it and then turn it to reveal a locked chest behind the waterfall. We cannot open this just yet though.
Next use the key to open the gate on the right of your father and tap to go through.

Hidden star: in the vines below the turtle statue.
Note: 5 purple mushroom on the side of the stump.
Use the torch again to burn the dry bush and then tap the symbol on the statue and use the locket to put out the fire. Take the 'stone key'.
Back out to the courtyard area. We now have enough clues to open the hidden chest.
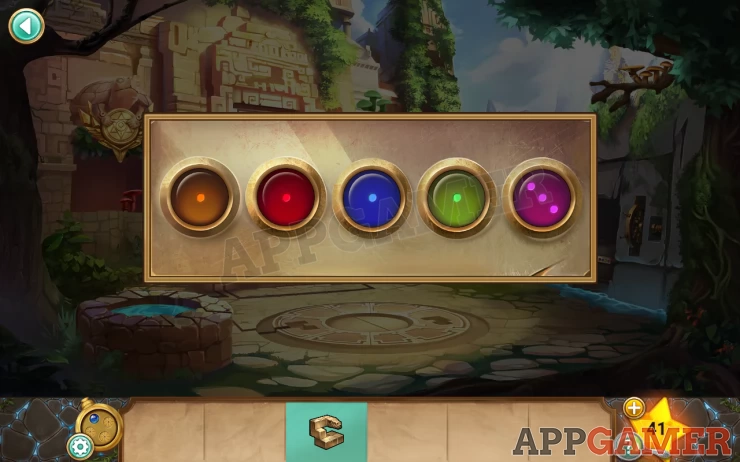
Hint: tap to change the number of dots on the colours to match the mushrooms.Show
Solution: 4 orange 2 red 3 blue 3 green 5 purpleShow
Open the chest and take the other stone key from inside.
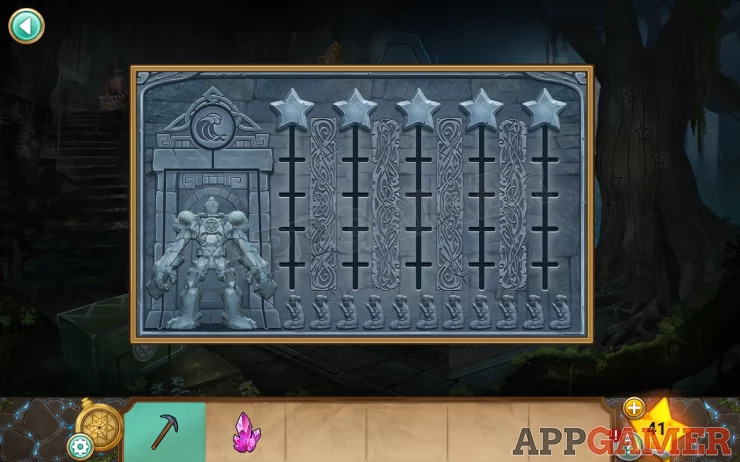
Tap the center area again and place the two stone keys in the slots to the left and right. This reveals another symbol. Tap this to activate the lockets and then start another puzzle in the pillars.

Pillar puzzle 1
You need to get the blue Diamond to the slot on the other side using the segmented paths.Tap to move the sections and make a path.
Hint: You cannot make a single path across. You need to move the diamond to the center section and then change the sections so that you can move it back to section 1. The again arrange to get to the end.

Pillar Puzzle 2
This is a similar puzzle but this time with three gems. Each mist be in the right slot on the far side.
Hint: Move one at a time to get it across. You will again need to move the gems back and forth to get the solution.
You can now go inside the temple.
On the tree to the right is a pickaxe, take this. Take a note of the stars on the tree.
Use the pickaxe on the pink crystal to the left to collect some.
Tap a plaque to the right of the status to see a stars puzzle. Use the stars on the tree to solve this.
Hint: The free has 5 lines with a star on each.Show
Solution: 1 2 5 4 3Show
This opens a door to the right.
Hidden Star: on the rubble to the right of the steps
First use the pickaxe to get the orange crystal from the wall.
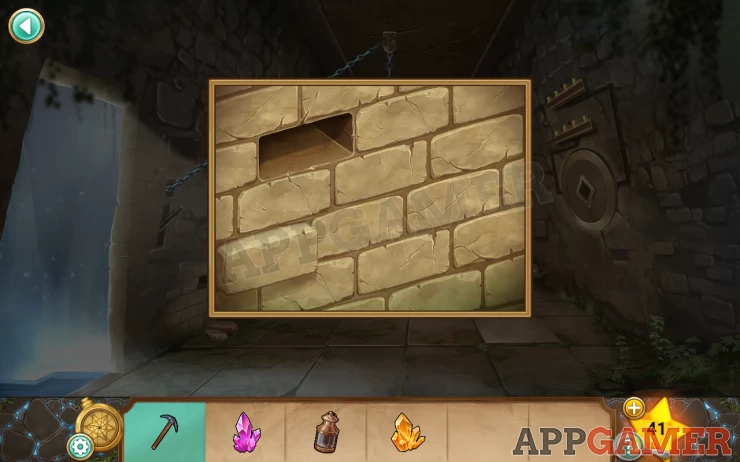
Next, tap on the missing brick on the wall to the left. Tap the bricks that stick out until a pyramid appears to collect.
Go back to the first room and tap on the skeleton at the top of the stairs to the far left.
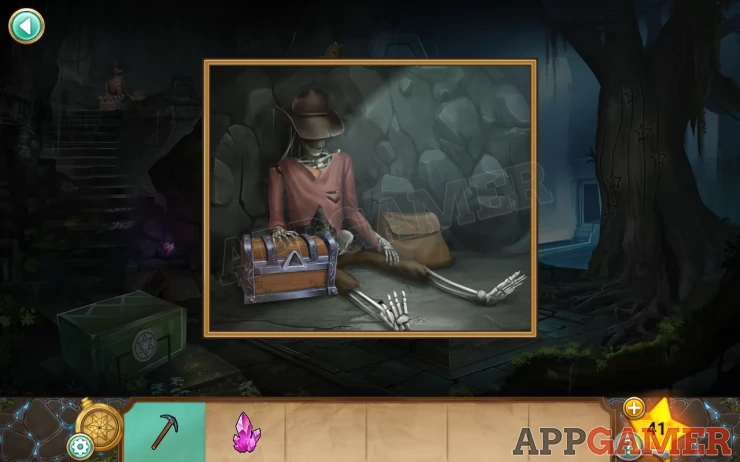
First take the lantern from his bag.
Then use the pyramid to unlock the chest and take the puzzle block and lever handle.
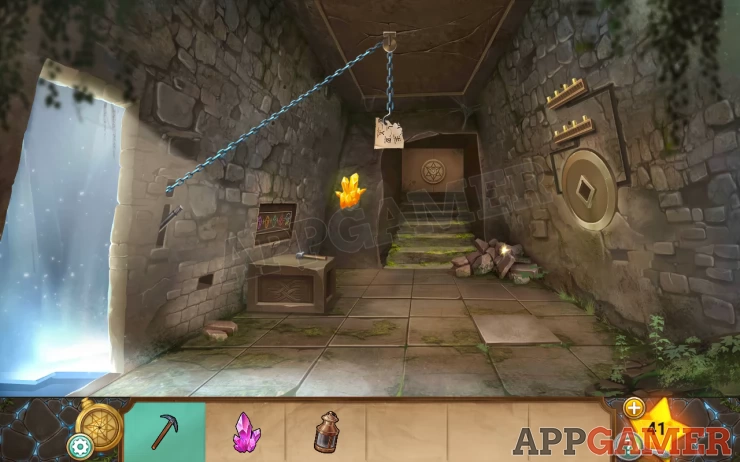
Return to the side room and add the lever handle to the lever on the left. Pull the lever to lower the hook and take the torn page from it.
Next place the puzzle block on the hook. Pull the lever again to raise it up.
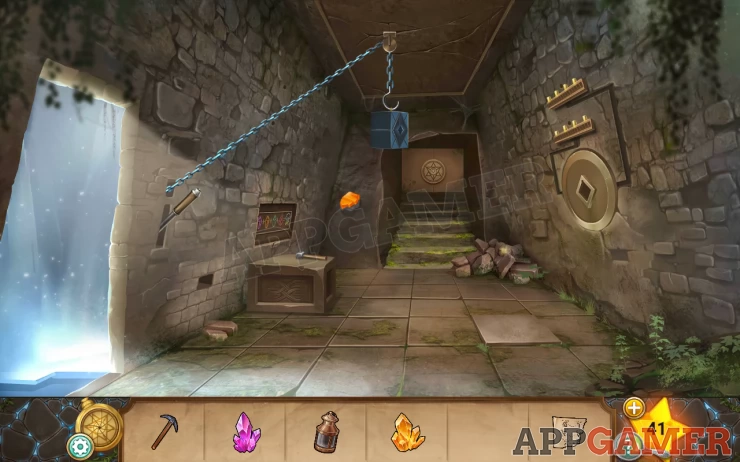
Step on the raised floor tile on the right to shoot an arrow at the puzzle block, the block is now glowing.
Lower it again and take the glowing block.
Place the glowing block in the hole to the right, you can then use the pickaxe to get a green crystal.
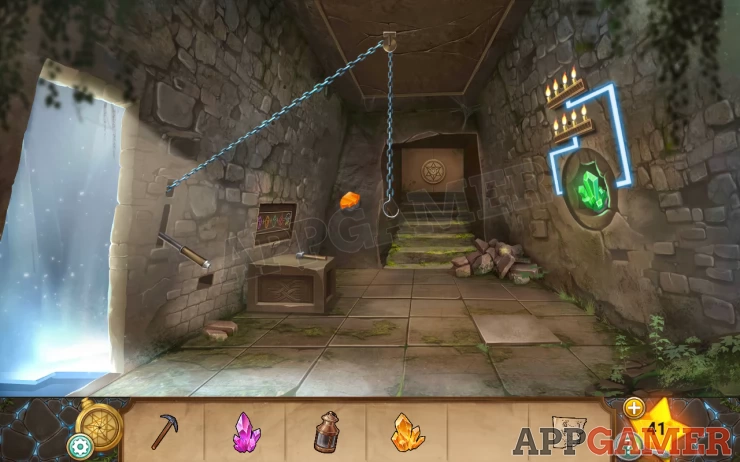
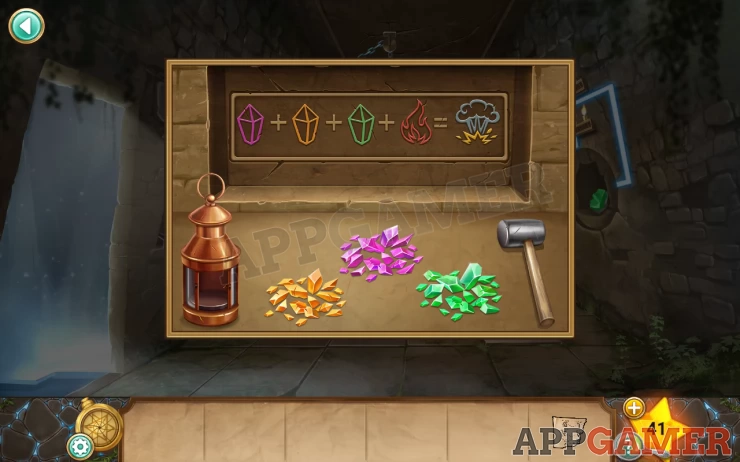
On the left of the scene is a table with a hammer. Tap this to view it,
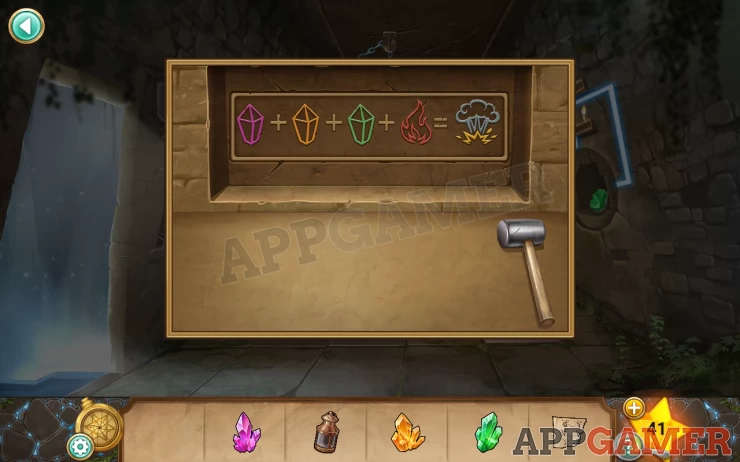
Note the clue shows the three crystals + fire = explosion.
Place the three crystals down on the surface and also the lantern. Drag the hammer to each crystal to crush all three crystals and then drag the shards inside the lantern.
Back up and place the lantern on the hook and then raise it.
Press the floor tile again and the arrows will light on fire from the candles and hit the lantern.
Use the locket with the symbol on the back wall to open the door.
Tap to view the locked cage.
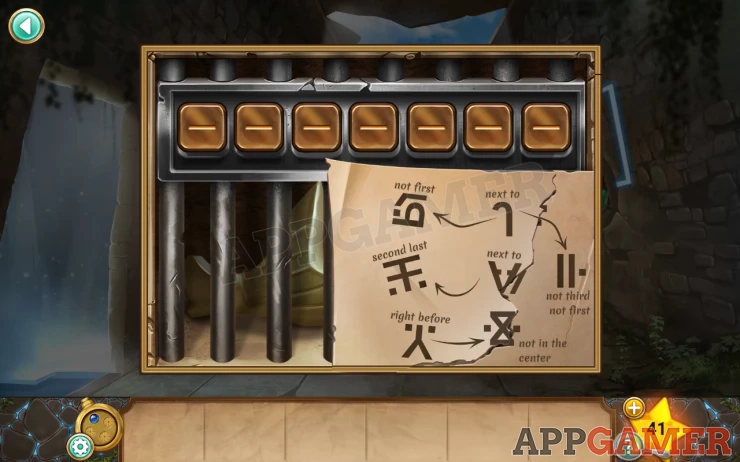
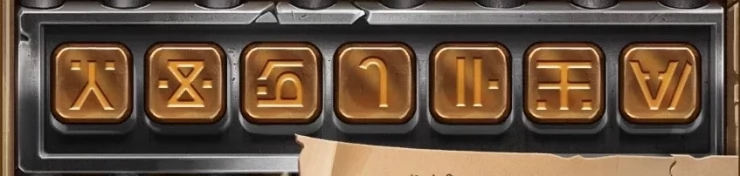
Place the torn page on the right to see the full clue for the combination. You need to use logic to solve this.
Solution: Show
Then take the fish tail and villager figurine.
Return to the first room and place the fish tail on the fish statue that is above the turtle. This opens a window so you can use your locket in this room
Now tap on the symbol on the chest on the lower left of the scene to use the locket again to open it. Collect an Aquarius figurine.
Now tap on the raised platform in front of the turtle statue to view it.
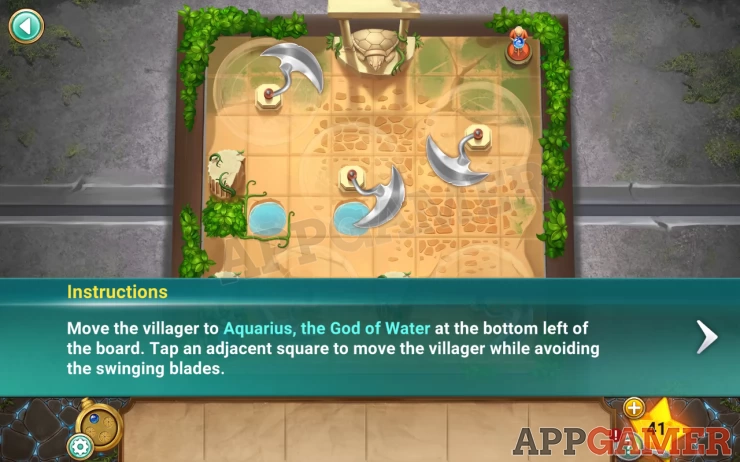
Place both figurines on the board. For this puzzle you need to move the villager from one corner to the other avoiding the blades. Every time you move the blades will rotate 1 quarter turn.
Once solved you can tap on the star emblem that appears to use the locket. A secret door opens in the turtle’s mouth.
You find Milo awakening Aquarius
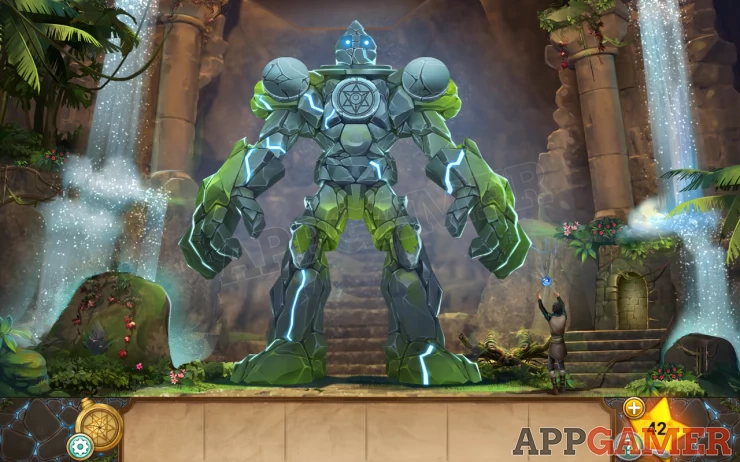
Tap to talk to Milo. Then use your locket on Aquarius.
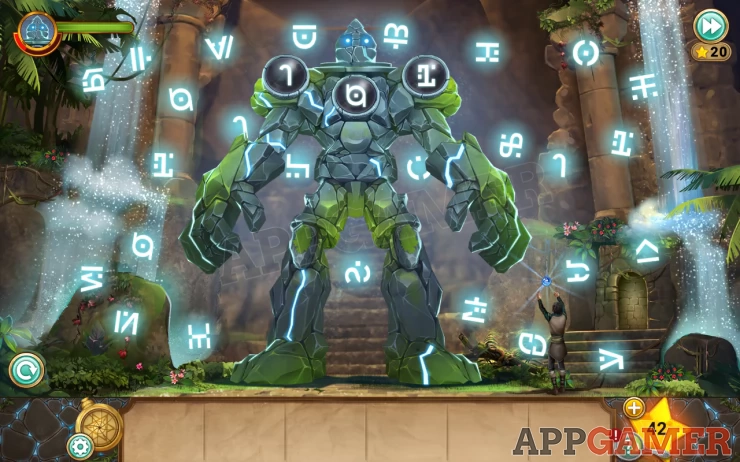
For this puzzle you must find matching symbols for the three runes on his chest and shoulders before the red bar fills up. There are three rounds to pass. If you take too long he attacks and can defeat you. In this case you have to start again.
Once you win you will talk to Aquarius, then you can head through the door to complete chapter 2.
Move on now to Legend of the Sacred Stones - chapter 3
We have questions and answers related to this topic which may also help you: Show all