Team Building Guide
Arknights Guide
What would be the best team to use for Arknights? This will all depend on the types of enemies that you face, therefore you'll need to have different compositions available so that you can adapt to situations. In the end, your main goal is to prevent your enemy from reaching the blue area.
Here, we'll talk about different guidelines when creating your team. Since everyone has different operators based on their recruitment, you will have to adjust yours accordingly.
Key Terms
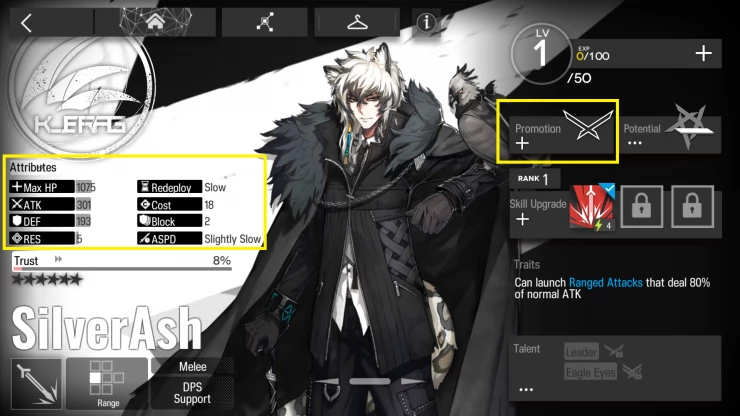
Deployment Points/ DP: When you start the tutorial, you'll be instructed about DP. The amount of DP that you have increases over time, and each Operator has a specific Deployment Cost if you need to bring them to the field.Promotion Level: Your character's strength is increased based on their current promotion level. From your basic promotion, you can promote your character to Elite 1 and then Elite 2 afterward.
Attributes: This refers to your character's stats including their HP, Attack, Defense, Resistance, Redeployment Time, Deployment Cost, Block, and Attack Speed. An important attribute to remember is their Block, since this determines how many opponents they can stop from passing through.
Creating your Squad
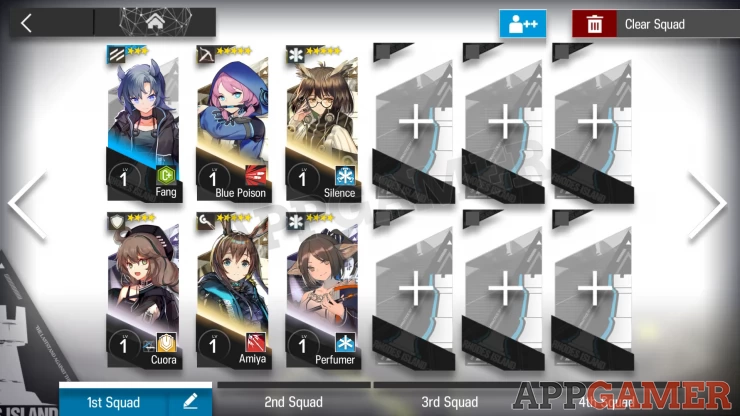
After you have completed the Tutorial section, you should have access to Headhunting. New account receive enough Orundum in order to get 10 pulls from the new player banner. Once you have the 6 Star Operator that you like, you can then start filling in your Squad.A Squad refers to your team composition, you can save up to 4 squads to your liking. Each squad can have a total of 12 Operators combined. You can edit your squad as well before starting a mission since your list of operators will be shown.
Tip: Having a team composed of mostly high star characters can become problematic due to their high deployment costs. When you start a mission with this kind of team, you can end up waiting for too long before you're able to deploy your Operators. This can lead to enemies reaching the Blue Area faster than expected. Having a balance of high and lower star Operators is needed.
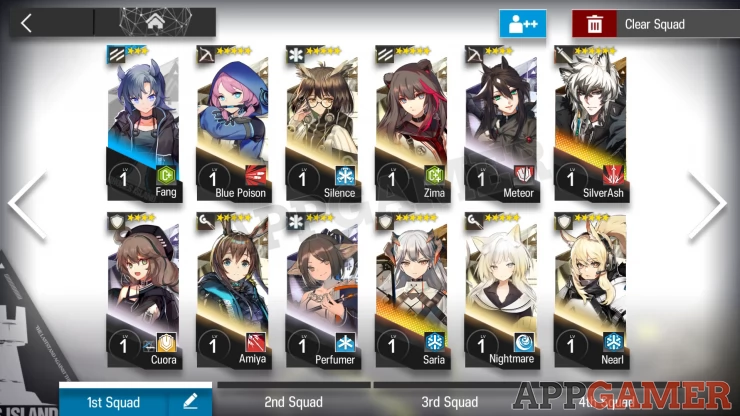
Since there are 12 slots available per squad. You can have specific members that you'll use most of the time. You can have specific Operators assigned to the first 6 slots of your squad, then adjust the rest later on before starting a match. This way, you can use this squad on almost any mission and just fill in the rest of what you need. It's suggested for you to have the following members:
| Role | Function |
|---|---|
| 1 Vanguard | Provides DPS, and secondary Block. Needed in order to help with restoration of your DP. |
| 1 Defender | Block enemy lines and prevent them from reaching the blue area. |
| 1 Sniper | To provide DPS and take out enemies that are in the air. They provide coverage as well. |
| 1 Caster | To provide DPS and take high armored enemies or mobs. |
| 2 Medics | To provide healing primarily to your blockers, and the rest of the team. |
Once your basic team has been created, you can fill it in with other members that you need depending on the situation. This team composition makes it versatile for your use since you have 6 slots left that can be filled with the needed roles.
Starting a Mission
The way you start the mission will determine a lot in terms of the outcome of the match. If you make a wrong move, these can then pile up very quickly which will cause you to lose. When starting, you want to have an Operator deployed as fast as possible in order to slow down enemies.A Vanguard's role is to provide you with deployment points over time. If you have a low star Vanguard, you can bring them out as soon as possible while you build up your team after. Once stronger members arrive, you can eventually withdraw this vanguard and replace them with a stronger one.
Along with your Vanguard, you'll have your Defender to provide block to your enemies. Their role is to slow down opponents while others deal the DPS. Some Defenders can provide buffs, while some can provide healing. It's preferable if you have healing since you'll be supporting your allies as well. Some Defenders get increased block if they get promoted.
Snipers deal damage from afar and they can't get hit by enemies that are engaging with the melee Operators. However, there will be cases where opponents will come from the Air. These cannot be blocked, and they head straight to the blue area. Your Sniper's main role is to provide Anti-Air damage whenever this occurs since their trait is to attack Aerial opponents first.
Casters deal high damage versus armored enemies, they have high def but low res therefore they're weak to a Caster's Magic. There can also be cases where enemies come in swarms so you'll want to use a Caster that has AoE damage (Area of Effect).
Filling in the rest of the squad
The main 6 roles provided can be used in any mission and they can work. The additional operators that you add to the team will then help out with specific situations at hand. You can add any role that you need that will fill for the stage so review the map as well before starting a mission.With the remaining 6 slots, you can add in more Offense or Defense Operators. You can place an extra vanguard for more deployment points, an extra caster for varying spell options (Single target vs AoE), or even an extra sniper for more coverage and anti-air.
Tip: Supporters are a class that's very specific to what they need to do. If you feel that their skills will aid your team for a specific mission, feel free to add them to your team.
Possible Scenarios in Missions
There may be instances where a certain type of enemy might appear more than the others. In this case, you might end up losing a mission but at least you will know what kind of enemies that you have seen. Here are some possible scenarios that you can experience, and the ways that you can adapt:Most enemies have armor: If there are situations like this, you can reduce the number of snipers that you have and exchange them with a caster instead. Enemies with high armor can take a long time to take down with regular melee attacks.
Enemies come in hordes: Part of the TR missions cover this, you'll get to experience enemies coming in hordes which can overcome your defender's block. To adapt to this, you can use Operators with AoE damage like a Caster. There are also Guards who can block multiple opponents and have damaging skills that hit multiple enemies.
A lot of enemies come from the air: Since Aerial opponents cannot be blocked, your main focus now is to take them down as soon as possible. Stationing multiple snipers and having range near the blue area will help in taking them down before they reach it.
Enemies that hit really hard: Some enemies can hit you really hard therefore your Defender might not be able to withstand it. To overcome this, you can have a Defender that has def boosting capabilities, and pair them with multiple medics in order to provide healing support. This way any damage you receive can be healed faster, and the rest of the DPS classes can take down your enemy with their skills or attacks.
Leveling Up
Once you have a team that you wish to use, you may wonder which members you should level up first. Leveling up requires resources, and more is needed as you increase your character's level. After you maximize your operator level for the first time, you can promote them to Elite 1 and then to Elite 2 after.Once you reach Elite 2 and level them up again, it's best that you hold your leveling from 30 to 40. The amount of bonuses you get past 40 get lower so you can focus on allocating these resources by leveling up the rest of your team instead.
Recommended Starter Operators
As stated before, you must have a balanced team composed of high and low rated operators. Starting a match will determine the outcome of your battle, and it's best to avoid being a sitting duck while you wait for your deployment cost to cover your high rated operators.Here is a list of low star operators per class:
| Role | Operator |
|---|---|
| Vanguard | Fang – She has low deployment cost, blocks 2 enemies, and grants DP over time. Great for starting a mission. |
| Defender | Cuora – Can block 3 enemies, has a defense boosting skill, has average Deployment Costs |
| Sniper | Rangers – Has very low deployment cost, has a talent which can be unlocked at level 30 which deals increased damage versus aerial opponents |
| Caster | Amiya – Obtained by default, she has decent DPS versus single target enemies |
| Medic | Perfumer – Moderate deployment cost, she’s able to heal 3 allies at once within her range. |
| Guard | Melantha – Moderate HP and Attack, has decent deployment cost to bring out to the field initially. |
| Supporter | Orchid – Can deal arts damage and slow opponents for a short time, has low deployment cost |
| Rope | Rope – Has low deployment cost, she’s able to pull enemies in and be used on ranged grids. |