Chapter 8
Tiny Room Stories: Town Mystery Guide
This is our full walkthrough of chapter 8 in Tiny Room Stories: Town Mystery. We have every step detailed with images and codes which can be revealed if you need them.
Read below for a full description with hints and solutions, or you can also watch the video walkthrough.

Chapter 8 - NEXT Lab
"Having visited your fathers house for the second time, you found his letter addressed to you. It described the events preceding your arrival as well as the address of the laboratory where, according to your father, you will find the answers and understand what to do next."
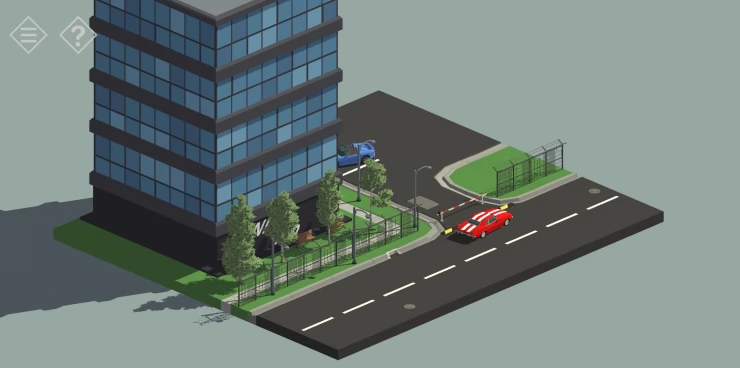
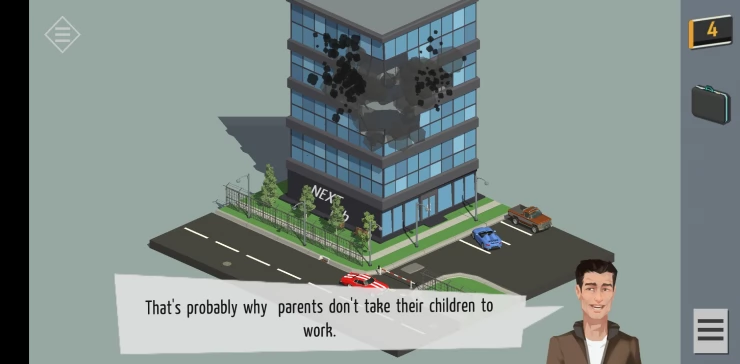
You find yourself outside the NEXT lab building. Rotate the view to see the parking lot and front door of the building. Tap the doors and again to open then and then tap to go inside.
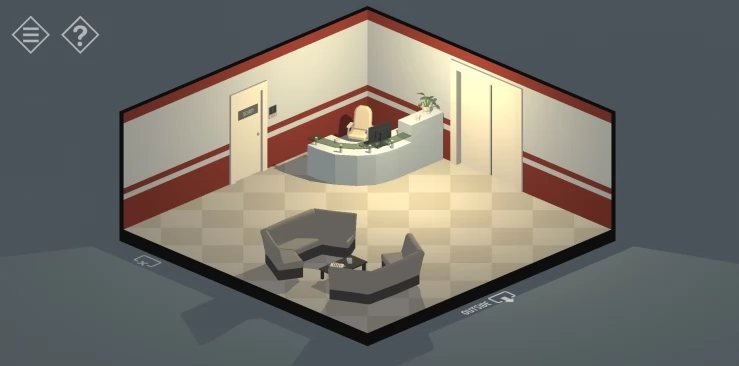
Rotate the view to see the reception desk from the back. Notice the 2 cups on the desk. Tap the draws to the left, open each draw and collect a WC Key and a roll of tape. back up and tap on one of the cups to view it. tap it until it turns round and reveals a fingerprint on it. Use the tape to collect the fingerprint. Do this again with the other cup on the desk.
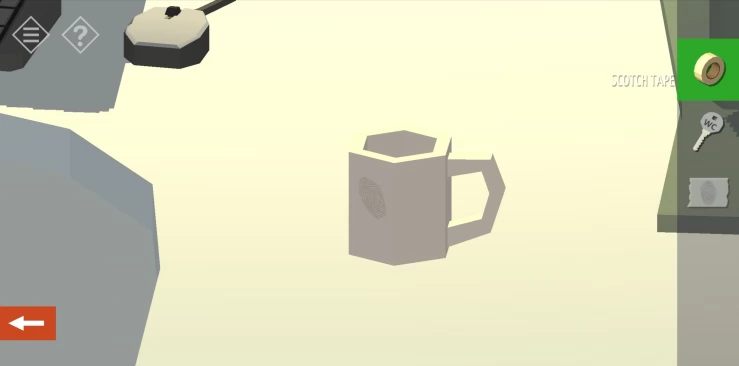
Next back up and tap on the small table in the opposite corner of the room. On the table is a file and another cup. Tap the cup to see a fingerprint on it. Use the tape again to collect this.
Rotate the view the door to the WC. Use the key to open this door and go in.
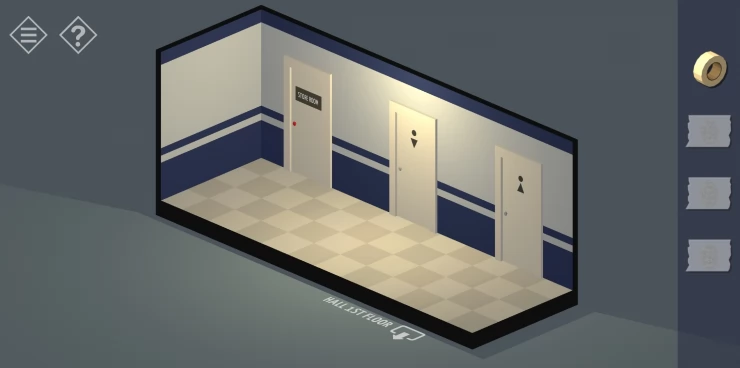
The store room is locked, Go into the middle door and rotate the view to see the mirror on the wall. Use the tap to collect a fingerprint from it.
Go back to the Reception area and view the locked door on the back wall with the finger print scanner. Try each of the fingerprints on the scanner. One of them will unlock the door. Enter the room.
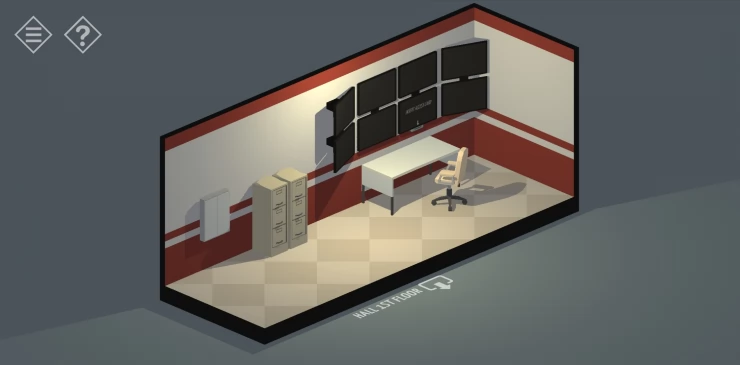
In the room tap on the small white wall cabinet on the left of the back wall. Open it to collect a Red Key. Next tap on the filing cabinets. Check the draws and in the bottom left draw you will find a clue:
Reception password: 37825Show
Go back to the WC corridor and use the red key to unlock the store room. On the shelves at the back collect a screwdriver. Now go back to reception and then exit the building back to the parking area in front. Tap on the blue can to zoom in and view it, then use the screwdriver and tap on the glove compartment to open it. Tap to collect a Level 1 Access Card.
Go back in to the Reception area and rotate the view to see the reception desk computer. Use the code found above to unlock it. Then use the Access Card on the card reader and tap the option to raise the access level to Level 2. Collect the level 2 access card.
Next tap on the elevator doors to the right of the desk. Use the elevator control to move to the third floor.
Third Floor - Biology Lab
Rotate the view to see a door with a card reader. Use your access card to open this door and go inside the lab. Move through the next door into an office area. Rotate the view to see 2 desks.
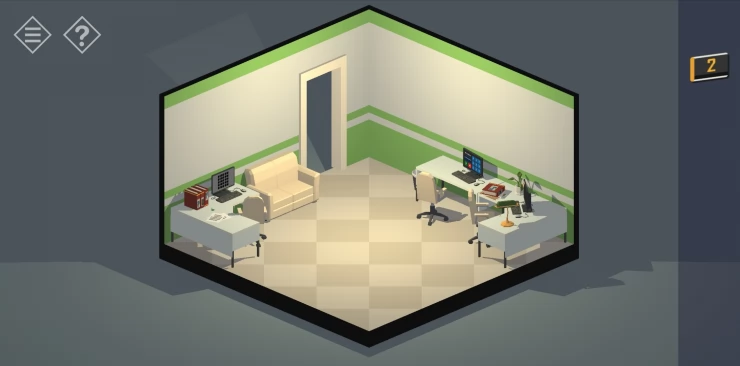
From one collect a green key and you can view some notes on Experiment N: 000013. Notice the folders to the left of the screen that have squared patterns on them. Check the other desk in the room to see a screen with a password required and also another folder with a similar pattern. Tap on the Screen and then on the green question mark to see a clue: Tree + WaterShow
Go back to the first desk and tap the computer screen to see a 5x5 square grid. This is a puzzle. Tap the squares to turn them blue. Notice the outlines that appear as you tap the squares.
Solution: Match the outlines to the arrangements of squares on the folders in the room to figure out the pattern of blue squares required. Show
Hints: Only 3 folder patterns are required, notice one of the folders is upside down.Show
Once solved you will unlock a message on the screen with instructions for Synthesis.
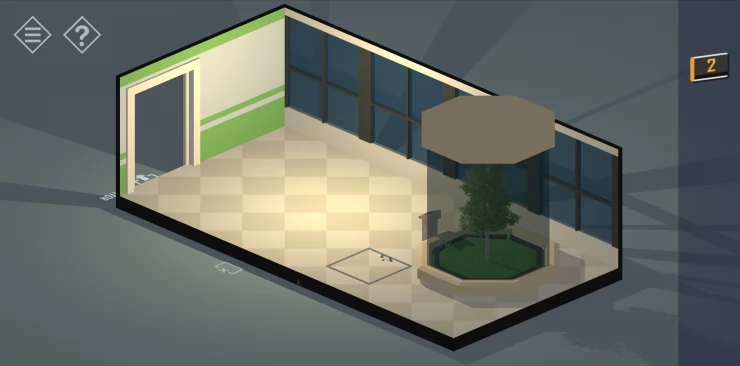
Go back out to the first room on this floor to see a tree in a glass case and a trap door in the floor. Tap on the trap door and use the green key to open it.

There are 3 pipes in the floor with control valves, adjust he valves to turn off (closed) the 2 pipes leading away from the tree position. Leave the remaining vale open.
Tap on the control panel in front of the tree case and use the option to tun on the water. The case will fill up with water. Next use the option to rotate the tree to reveal a code: 193757Show
Solution: The arrows tell you to read the code backwards. > 757391Show
Go back to the office room and use this code to unlock the password computer screen. View the message that is revealed and scroll down through it to see 5 green wave forms that you will need.
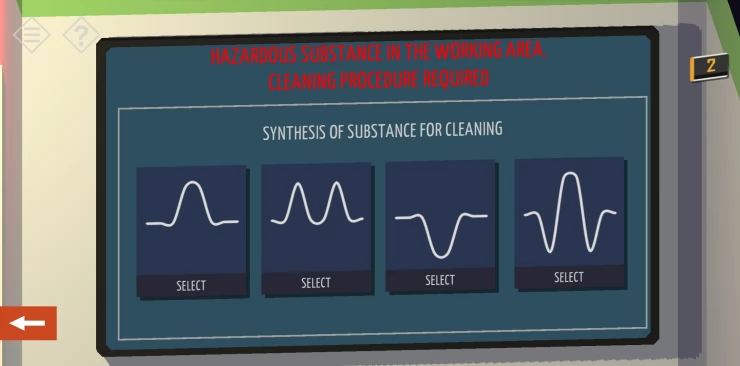
Go back to the lab room and tap on the large screen above the control panel. There is a dangerous substance that needs to be cleaned before you can use it. You will need to tap and select 4 wave forms to make a substance to clean the area.
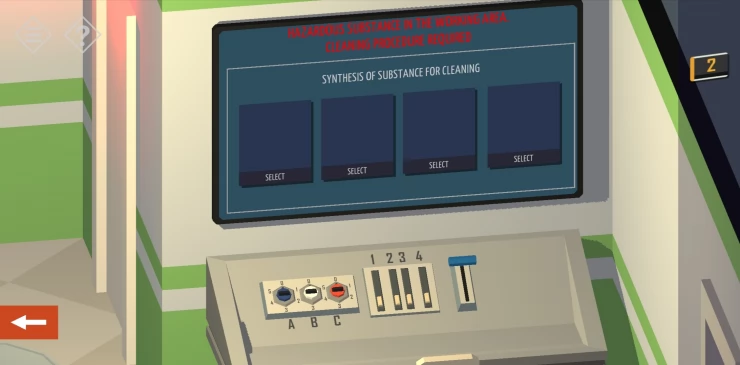
Tap each and use the clue from the wave forms found above to select the correct ones. (Hint: 1 is made up from 2 in the clueShow
Solution: Show
You then need to set the dials on the control desk. The clue for these is the message from the other computer screen. Hint: A is the number of positive peaks on the wave form, B is the number of negative peaks, C do not touch. 1,2,3,4 at maximum.Show
Solution: Set A=4, B=3, C=0, tap each slider 1,2,3 and 4 until they are at the top.Show
Once you have them all correct tap the blue handle to activate it and complete the synthesis.
You should now be able to access the other door in the room with the red light above it. Go through here into an experiment room with plants. Rotate the view to see a desk and on it an Access Card Level 3 and a cage for mice. Tap the cage to see that they have escaped and wonder what they will do tonight. I hope we are not Pinky.. Narf!. Collect the Level 3 Access Card.
Exit the room and go back to the elevator. Go to the fourth floor.
Fourth Floor - Main Laboratory
On the fourth floor use the level 3 card to open the door to the lab. Inside is a room with chairs and a display board.
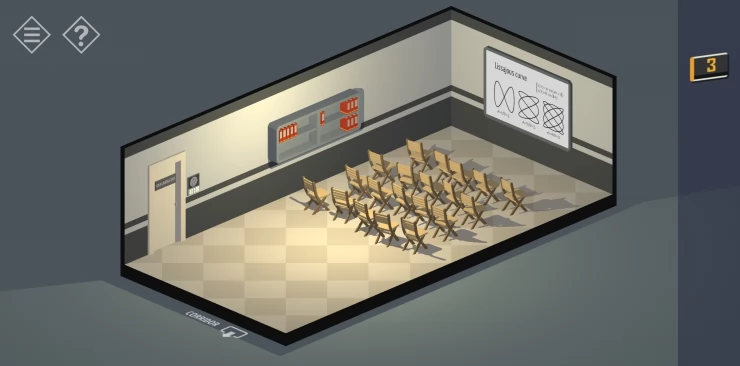
The board shows 3 Lissajous Curves and some calculations. Rotate the view to see the shelf on the wall. Tap the folders until you collect from the shelf some papers. One has details for 'Emergency Object Ejection'. The other has details of 'System Settings'.
Exit the room and go to the fifth floor.
Fifth Floor - Control Room
On the fifth floor use the level 3 access card to open the door to the right 'Peter Stone' (the other one requires a higher level access). In the room is a desk and a white board with a half erased drawing.
Rotate the view and tap the desk to view it. Tap on the briefcase to open it and then collect it. Tap the photo to get a clue. Tap the screen to enter the password
Code: 190185Show
Check the Mail to read a message about the crystal and a hint as to what to do next.
Use the Level 3 access card in the reader and raise the level to 4, collect the Level 4 access card.
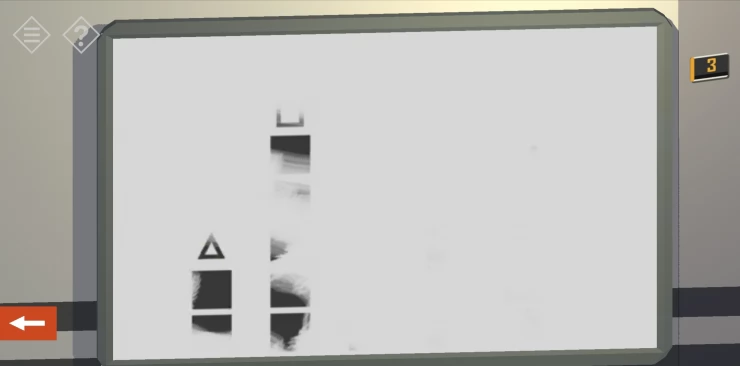
View the Whiteboard to see the drawing showing a triangle above 2 blocks and a square above 5 blocks.
Go back to the elevator and back down to the first floor. Go into the security room behind the desk and use the access card on the screens to activate them. Notice the screen showing the fifth floor office with the white board shows the drawing still complete. Take a note of the other values under the symbols.
Code: Lines: 1 block, Circle: 3 blocks, X: 4 blocks.Show
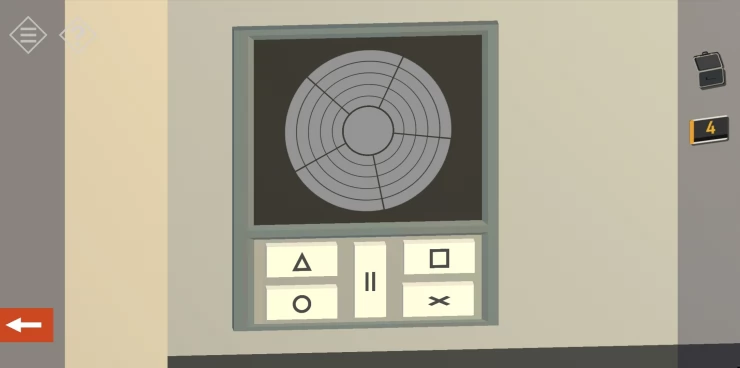
Return to the elevator and go to the fourth floor. Enter the main room and tap the other door to see a puzzle entry. There are 5 buttons with symbols and each press will change the number of orange segments highlighted. Use the symbols from the whiteboard above to unlock the door.
Solution: tap triangle: 2 times, square: 5, lines: 1, Circle: 3, X: 4Show
Enter the room to see a crystal shard in a device. On each side are panels with the option to eject the object. Tap each and select the option. This activates the procedure but does not eject the shard yet.
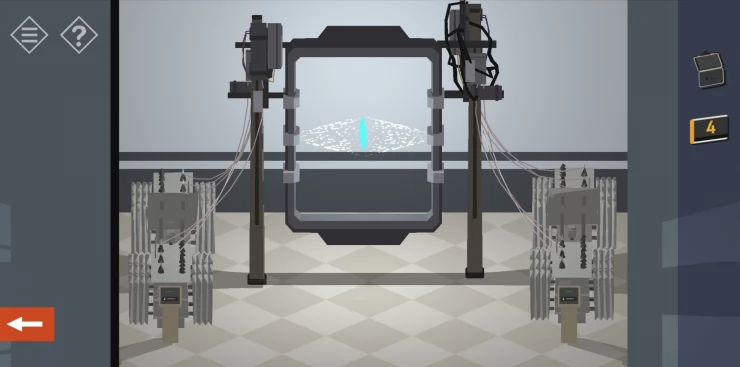
Exit this room and return to the fifth floor. Use the level 4 access card to unlock the other door.
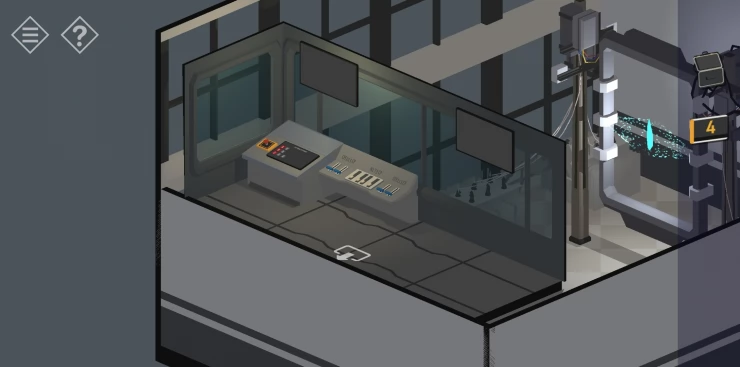
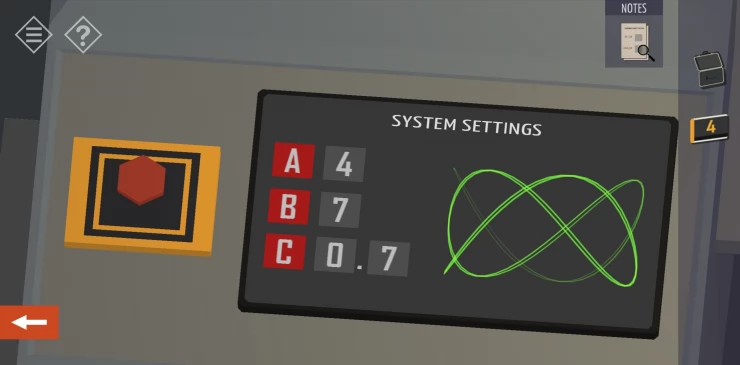
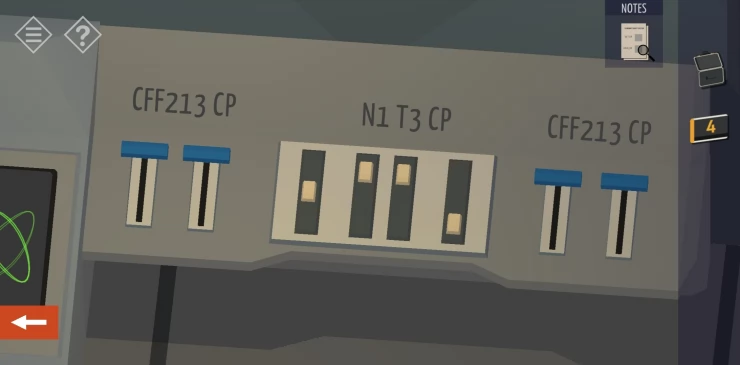
In this room we see a crystal shard in the device and a control panel. There is a red button for ejecting the object, system settings and a control panel. Tap the control panel to the right and use the Emergency Object Ejection paper found above as a clue to set the controls correctly. Then Use the system settings paper to set the values for A, B and C. A and C are given on the paper. B you must alter until the Lissajous curve on the screen matches the diagram on the paper.
Solution: A = 4, B = 7, C = 0.7Show
Once all the settings are correct tap the red button, there will be a countdown and the device will shut down.

Return to the fourth floor and the lab room with the crystal. Use the briefcase to collect the crystal then return to the elevator. Go down to the first floor and exit the building to see the results of your activity. Tap your car to complete the chapter.
You have completed Chapter 8 and can now head on to investigate the warehouse in Chapter 9. If you have any questions for this game please check the Answers Page to ask it there.
We have questions and answers related to this topic which may also help you: Show all