Chapter 13 - Part 1
Tiny Room Stories: Town Mystery Guide
This is our full walkthrough of Chapter 13 - Part 1 in Tiny Room Stories: Town Mystery. We have every step detailed with images and codes which can be revealed if you need them. This part also has some optional actions that will gain you an achievement if completed.
Read below for a full description with hints and solutions, or you can also watch the video walkthrough.

House on the Beach
"The second spot shown by the crystals is in the middle of the bay. While searching for the diving equipment and the boat, you come upon a lonely house on the shore."
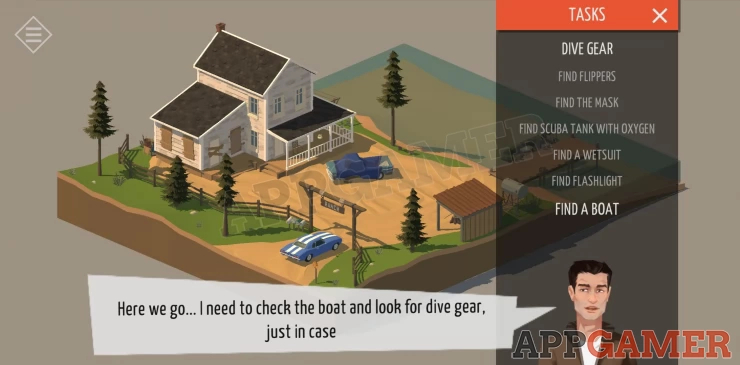
This chapter has a task list for you to complete as you explore the areas. You need items of diving gear and a boat. You can close and open the list as needed.
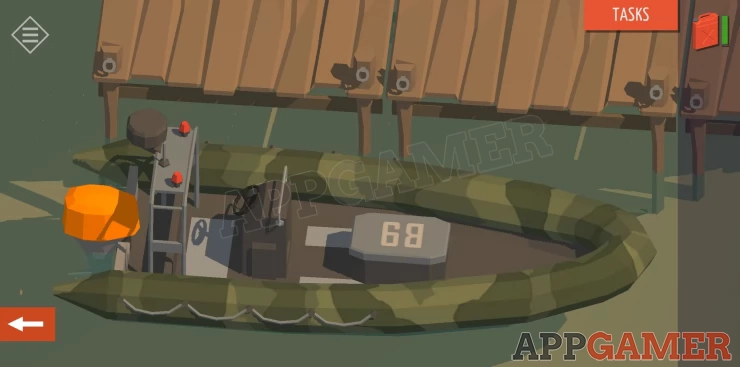
On the dock is a boat. You can tap this and you will be told that the boat is fine but it is missing the keys and the motor. Your list will be updated.

The boat has the characters B9 on it.
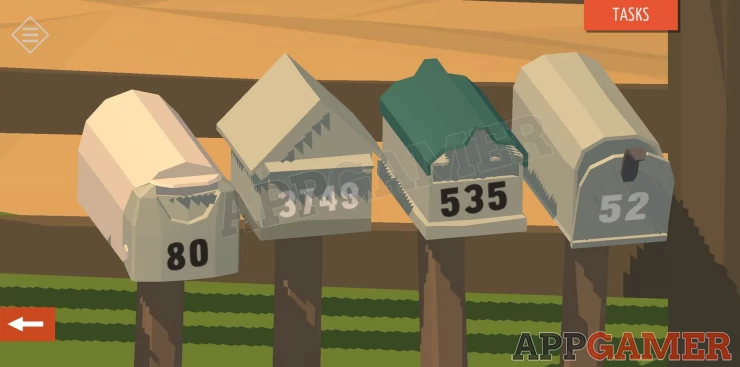
Tap the Entrance where your car is parked and then tap on the mailboxes to the left. These will be a clue for later. Show
Tap on the truck with the blue tarp over it in the drive area. Notice the characters A4.
Tap to view the front of the house then tap on the flower basket to the right to view it. Collect a key.

Rotate the view to see the back of the house.

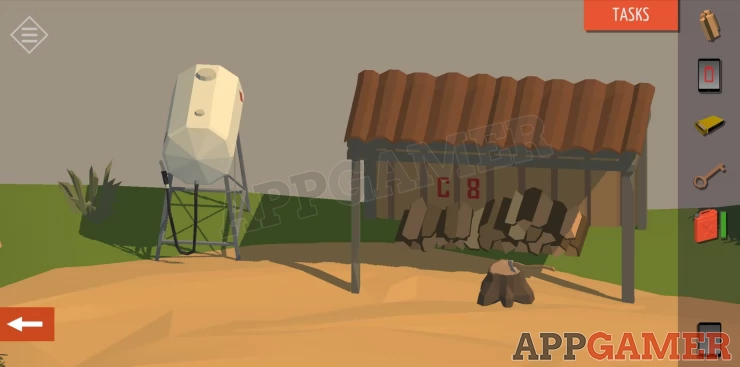
Then tap on the wood shed on the far side (next to the gas tank). You can then tap the Axe and start chopping the wood. Some time later....
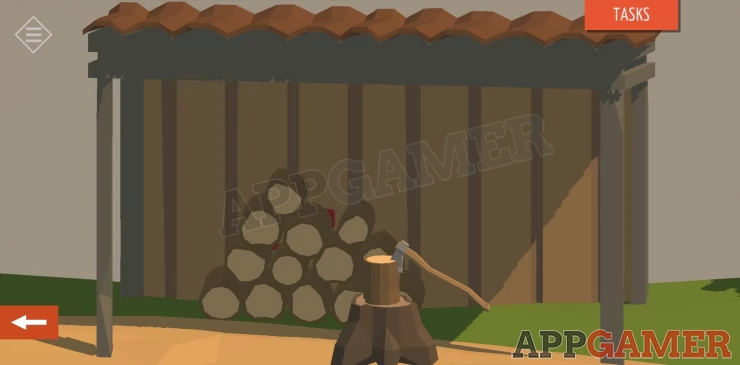
Tap to collect some firewood and notice the characters C8 on the back wall.
Back up and tap on he back of the house to view this area. Notice the characters D3 written and then tap to collect a crowbar.
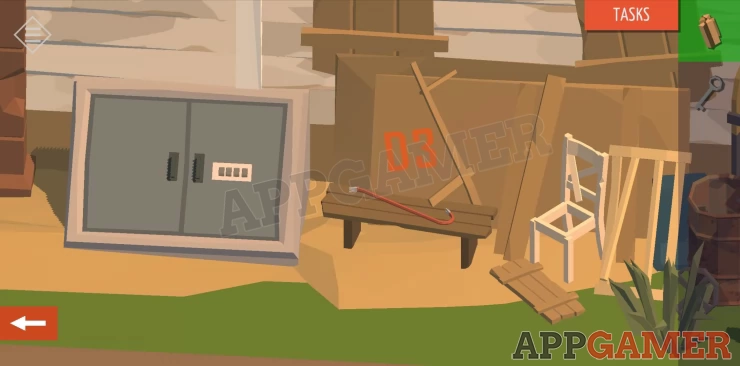
Go back to the front of the house. Tap on the section to the left with a boarded up white door
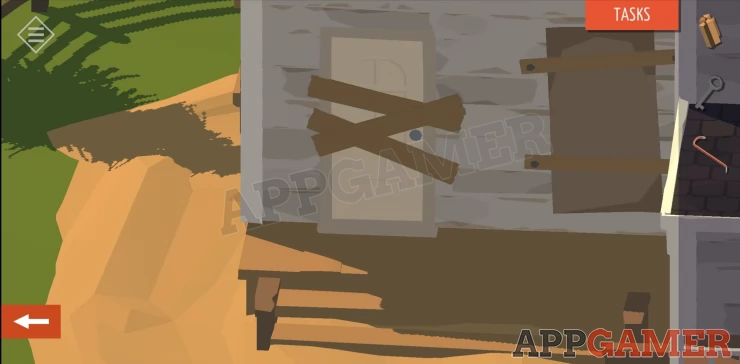
Use the crowbar on this to remove the boards. Then use the key to open it.
Enter the workshop room.
Look to the left and collect a red Canister from the floor. On the table is the motor we need but it has been dismantled. We need a manual.
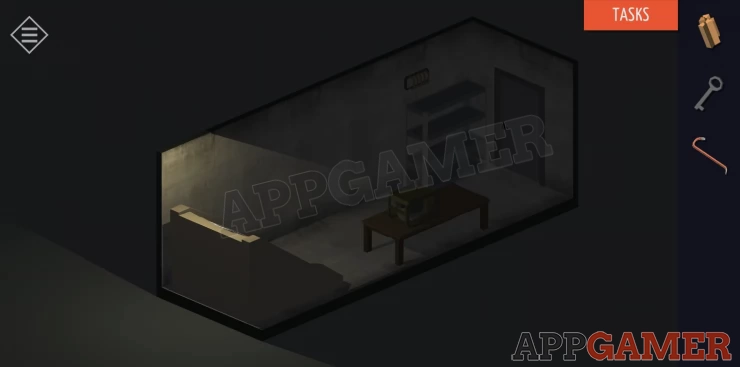
Move through the other door into the Guest room.
Tap on the coffee table and collect the tablet. It is out of charge.
Rotate the view to see a bookshelf. To the left is a Golden button award and above is a trophy made of a fish skeleton. This will be useful to remember later.

Move through the next door into the kitchen.
View the kitchen area and open the top left drawer to collect some matches.
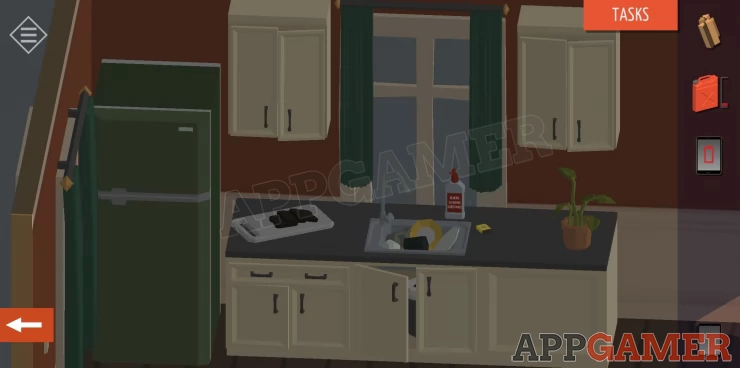
Optional: Tap to view the sink, turn on the water and then tap the generic cleaning substance to add it to the water. Tap to collect the 'Spongebob' sponge. You can now use the sponge to do the dishes.
Optional: Return to the guest room and tap on the fire place to view it. Use the logs that you found and then the matches to light the fire.
In the kitchen area Rotate the view to see the stairs and then Tap to view the photos and unit in front.

Below the photos tap to collect a key.
You can also tap on each photo to view them. Tap again to turn the around and once more to reveal the dates and possibly other clues on the back.
Go up the stairs to the top floor.
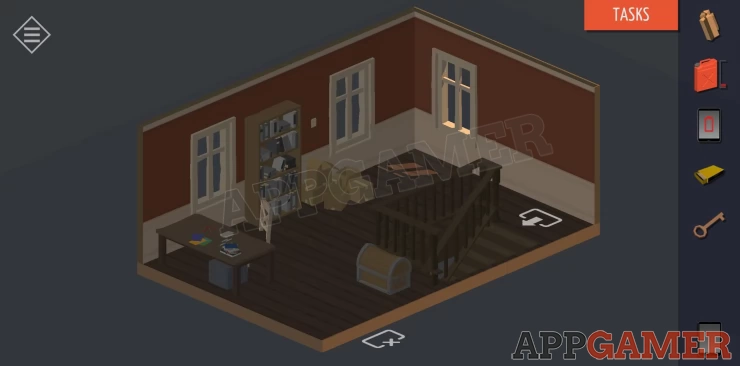
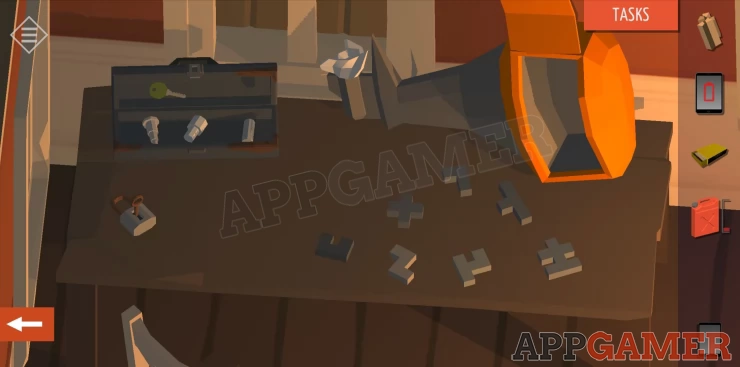
Tap on the desk to view it and then move a chair to reveal a safe.
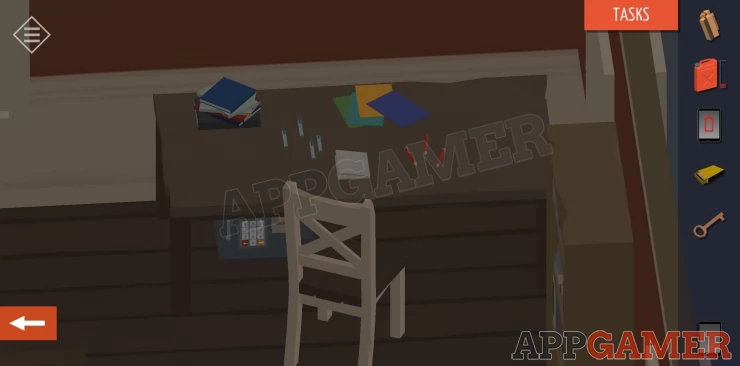
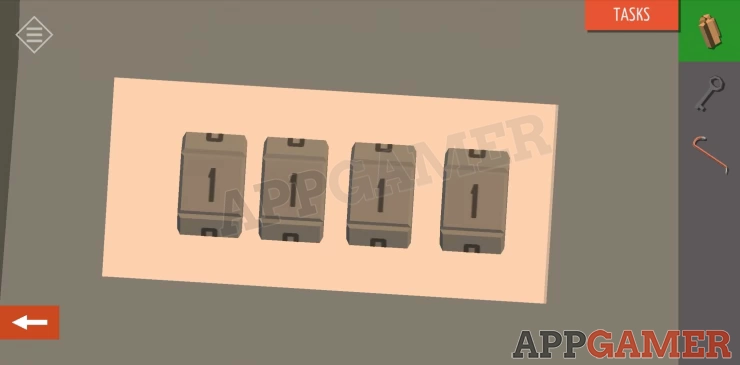
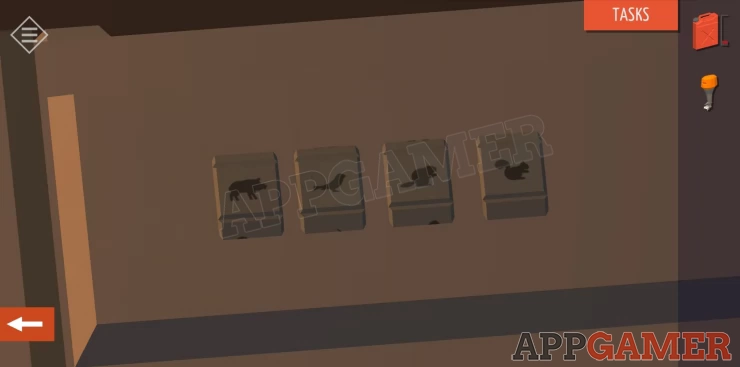
Tap on top of the desk to see several items. You can tap to organise each of these. Tap the folded paper at the front to open it and see the outline of 4 mailboxes.
Tap on the safe to see the keypad and the clue 'Last Digit'

Enter the code to open the safe.
Hint: last digit from the 4 mailboxes
Code: 0952Show
Tap the enter button and the safe will open. Collect the boat keys.
Go back downstairs and exit through the front door in the kitchen. Tap on the gas tank next to the wood shed. Use the canister that you have found on the gas tank to fill the canister.
Now return to the back side of the house and view it. To the left are some cellar doors with a 4 digit code. Tap to view this.
Enter the code from the clues found above.
Code: 4983 (the 4 numbers associated with ABCD above)Show
Tap to enter the basement. It is dark
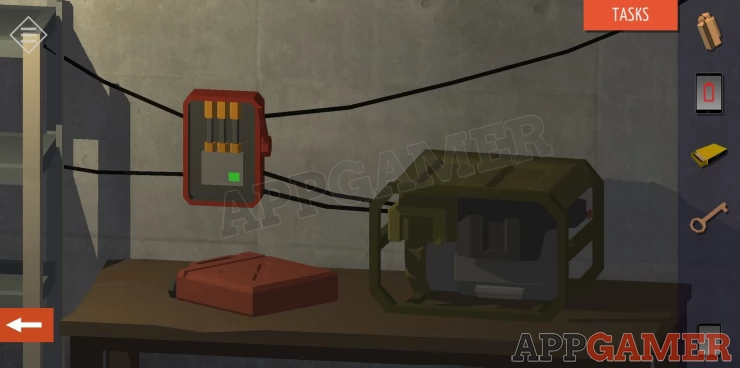
Rotate the view and tap on the generator that is on the table. Use the gas tank on this to fill the generator. The lights are now on. Collect the empty Canister again.
We cannot proceed here so go back out of the basement and enter the house again into the Kitchen.
Enter the kitchen. View the sink area again and open the top left cupboard. Tap the switch inside to release the lower right drawer. Tap to view this.
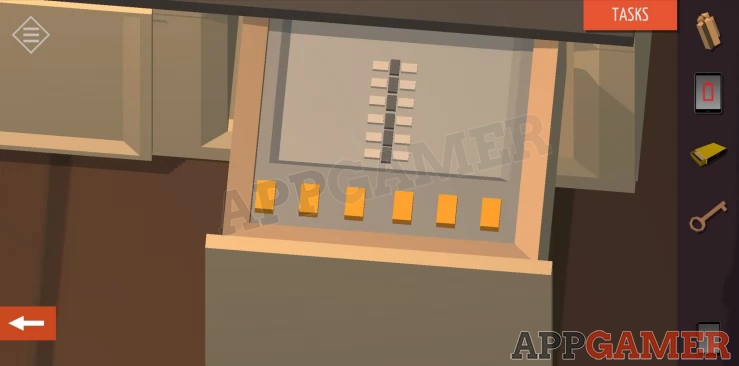
There are 6 buttons to press to move the bars above to different positions. Find the right pattern to complete this puzzle.
Hint: The fish skeleton in the guest room has 6 spines.Show
Solution: Each bar has 4 positions. position 1 is the smallest. From the top: Positions 2, 3, 4, 3, 1, 4Show

You can now collect the mask.
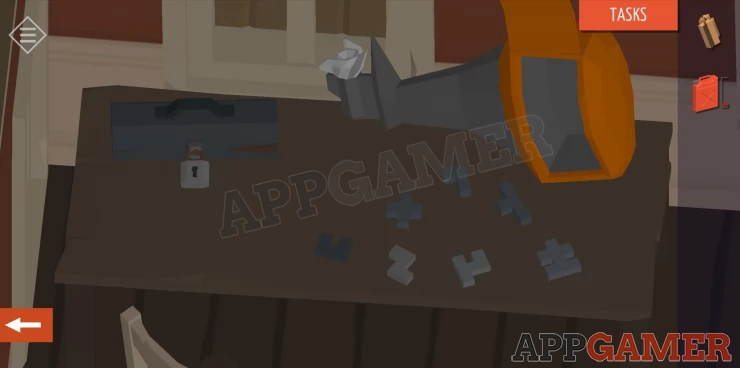
Next move into the workshop. View the table.
Use the key to open the tool box, then collect a green key from it.
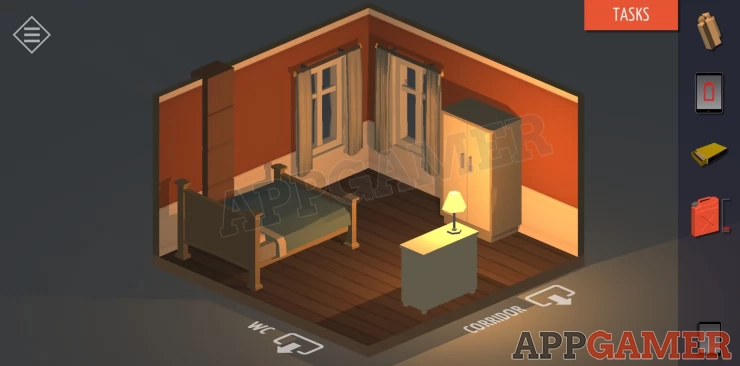
Go up the stairs and use the green key to open the door to the left of the desk. Enter the bedroom.
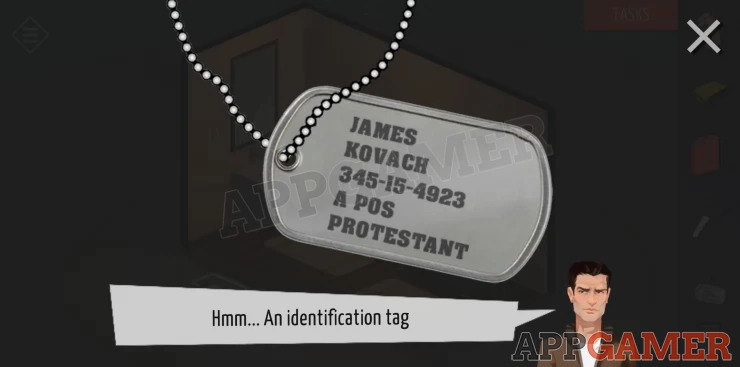
First go to the other door and enter the bathroom. Tap the sink to collect an ID tag with details of the owner. James Kovach.
Rotate the view and open the cupboard to the left of the door. Collect the Flippers. Another item from our list.
Return to the bedroom. Tap to view the bed and then open the drawers in the night stand to collect a black key. Next use the tablet on the charging pad on the night stand.
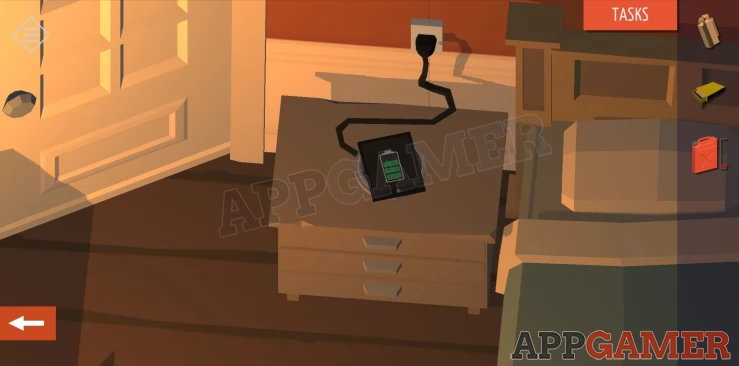
Once charged tap to view it.

A passcode is required to unlock it. We have the clues to find this.
Hint: the background photo is the same as one of the ones seen downstairs and resembles a army buddies photo.Show
Solution: On the back of the photo downstairs is a clue to find numbers from the dog tag from the bathroom. Check these details to get the code:Show
Code: 3593Show
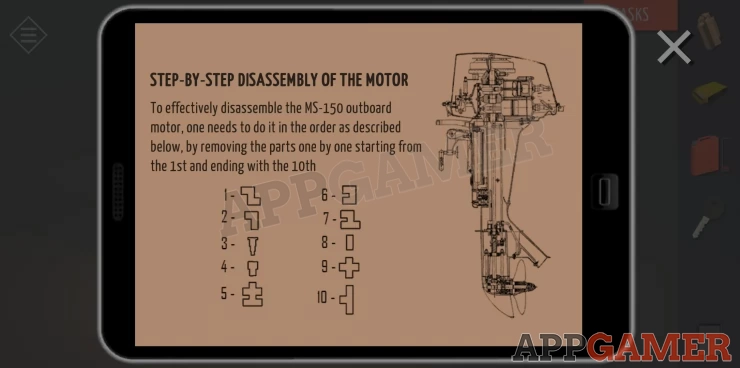
We can now view a manual of how to disassemble the motor.
Next while viewing the bed tap to view a case that is under the end of it. There is a dial lock with 4 pictures on it.
Tap to rotate each dial. To open it consider the likes of the houses owner.
Hint: This guy likes to fishShow
Solution: Rotate each dial to find the image of a fish (sea creature) on each dialShow
Open the case and collect the wetsuit.
Return to the workshop and view the motor on the table. Using the tablet follow the manual to put the motor back together. You need to reverse the steps to do this. Some items are in the toolbox.
You have now collected the motor.
Return to the basement and use the black key to open the door. Move through into the next room.

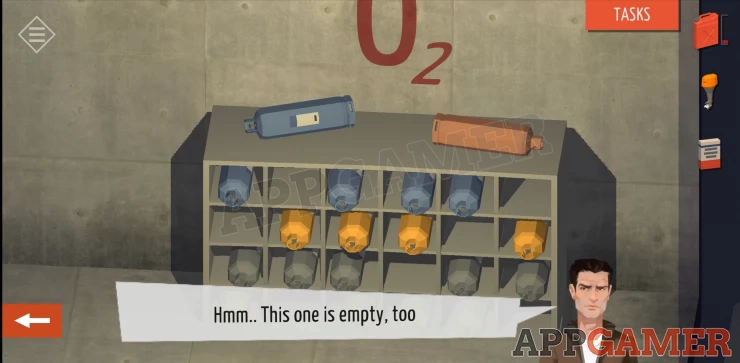
On one side are some O2 tanks, most are empty but one is full. Find it and collect it.
On the other side you will find a washing machine and shelves. Tap the shelves to collect a flashlight.
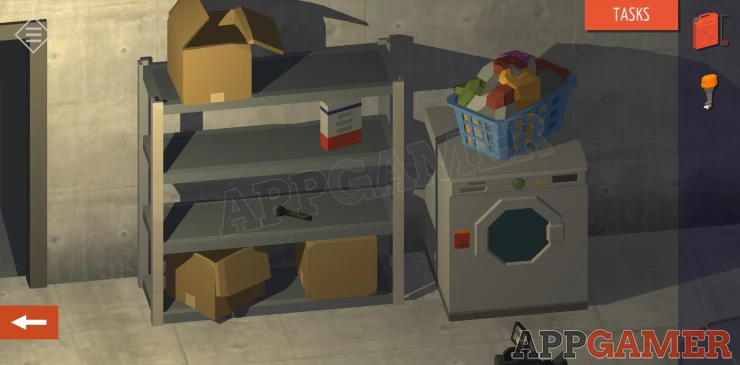
Optional: Collect the washing powder. Tap to collect the laundry from the top of the washing machine and then tap the machine to view it open the door.
Use the laundry to place it inside and then the washing powder in the drawer top left. Close and tap the green button to start it. After 60 seconds it is done. Use the laundry basket to collect the 'wet' washing.
Exit the basement and rotate the view to see the side of the house next to the water. Tap to view the washing line. Use the laundry basket to place it here.
We now have all of the items we need.
Go back outside but before you head to the dock go to the gas tank and refill the canister. Then head to the boat.
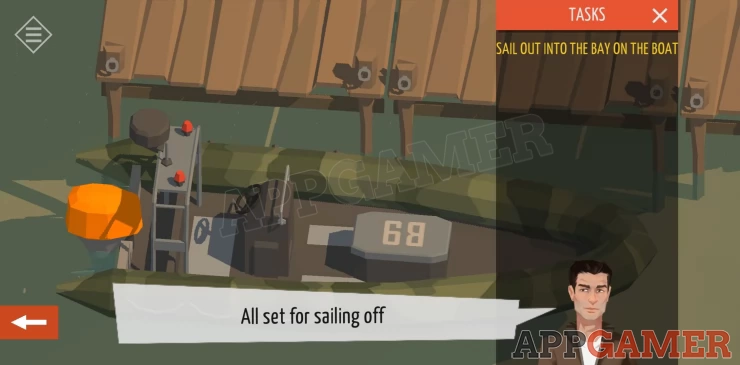
Use the motor on the boat to place it and then use the full canister to fill it up. You can now tap the boat and sail away to end this part of Chapter 13. Next we move on to Chapter 13 - Part 2
If you have any questions for this chapter or any others please head to the Answers Page to ask there.
We have questions and answers related to this topic which may also help you: Show all