Chapter 14
Tiny Room Stories: Town Mystery Guide
This is our full walkthrough of chapter 14 in Tiny Room Stories: Town Mystery. We have every step detailed with images and codes which can be revealed if you need them.
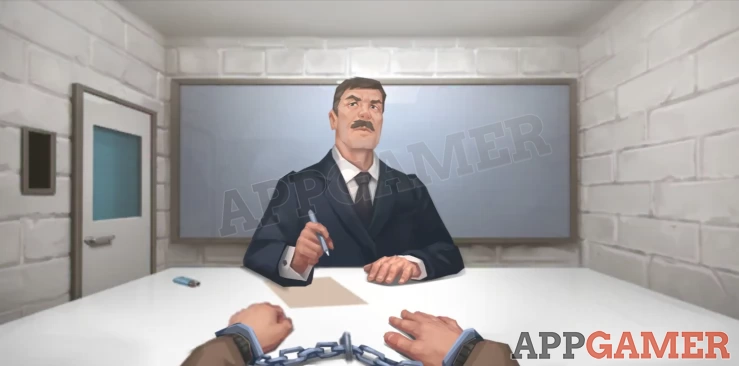
Following the third part of Chapter 13 where you are in a car crash with an unknown driver you have been knocked unconscious.
Read below for a full description with hints and solutions, or you can also watch the video walkthrough.

Escape
"You have come to yourself after the accident. You feel pain all over your body, although there are no severe injuries."
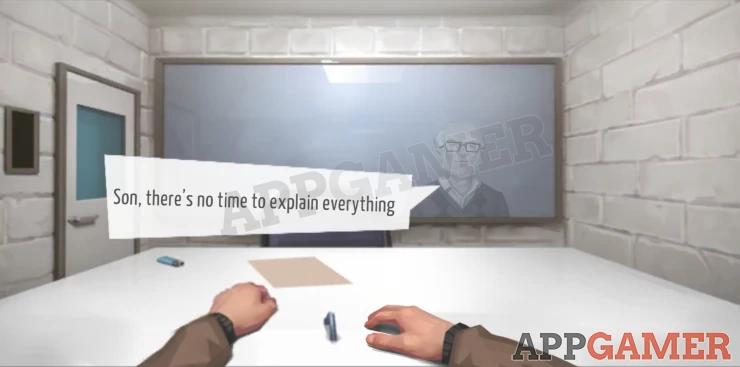
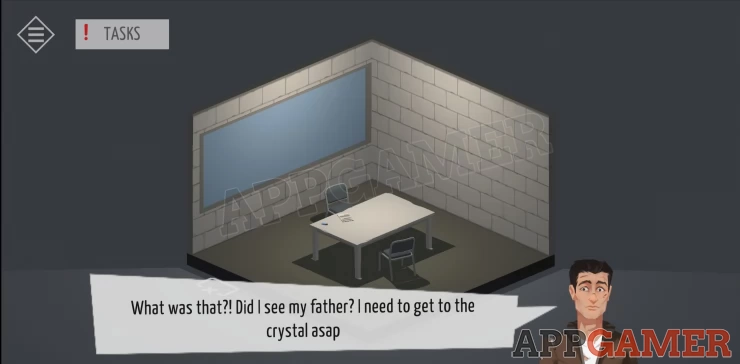
You hear a phone conversation about yourself and then awake in an interrogation room. You get a message from your father. You must escape and reach the crystal.
You can check your tasks list in the top left at any time.
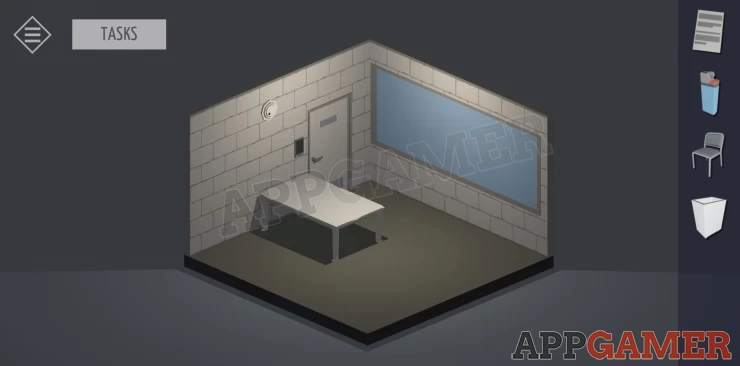
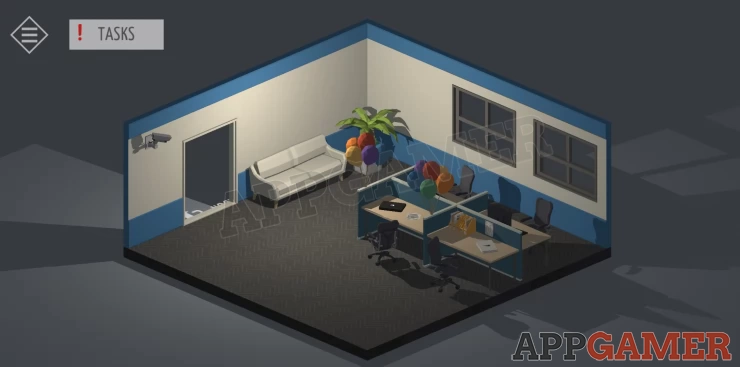
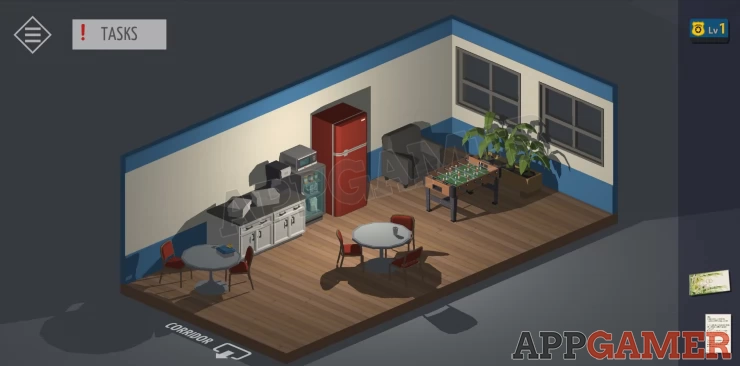
Tap to view the desk and collect a paper and a lighter. Rotate the view to the opposite corner and tap to collect the bin.
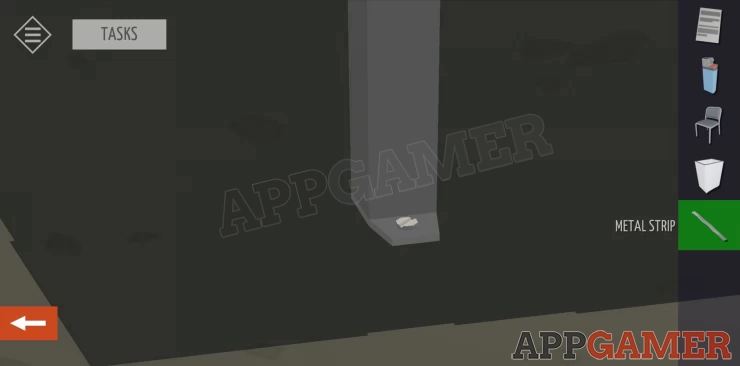
Tap to collect the 2 chairs in the room. One looks a little loose.
Select the chair and then tap on the wall to the left of the door, or the table. This is is a bit tricky but when you tap in the right place it will throw the chair and break it. Then tap it again to collect a metal strip.
Now tap each of the 4 legs of the table. at the bottom of each is a screw. you can use the metal strip to remove these.
Tap the table to move it to the wall under the fire sensor.
Select the other chair and place it on the table. then place the bin on top of the chair. Next place the paper in the bin and finally use the lighter to light it.
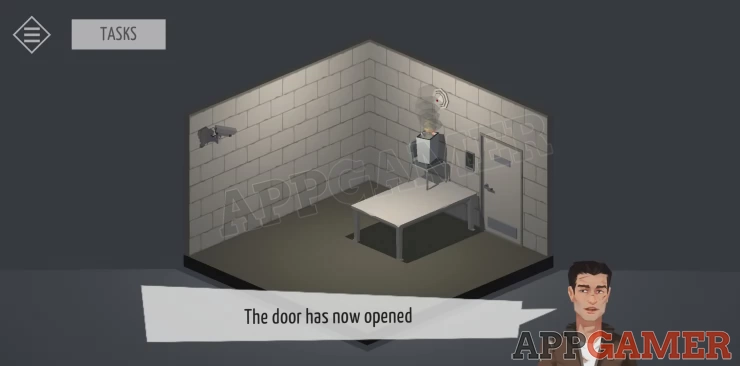
The door will now be open. Exit into the corridor.
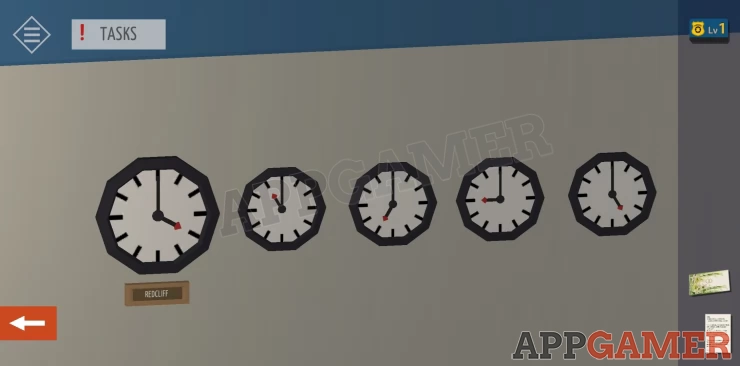
Rotate the view to see 5 clocks on a wall. View these and note the positions of the hour hands.
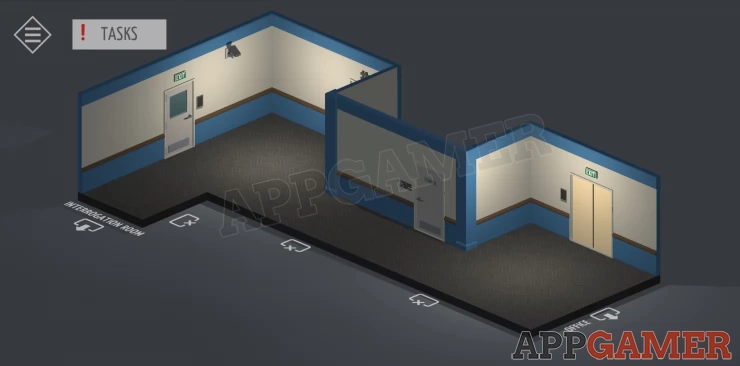
Next, the only open door is to the office at the other end of the corridor. Go there.
Rotate the view to see the tv and notice board. Check the TV to see a lot of detective DVD's. Then tap the printer/photocopier to the left of it. Open the lid and tap to view a Wedding invitation card - for Ross and Rachel, they sound friendly.
Show

Rotate the view and tap to view the desk with the balloons. Tap the papers on the desk to move them to the tray until you reveal and then collect an Access Card.
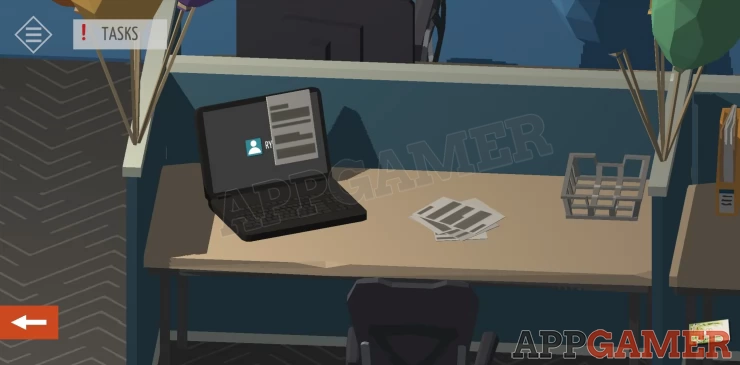
Tap to open the laptop and find a note from the police captain about a 'test'. A clue to the laptops password.
Move to the desks on the other side and find the computer for ROSS. Use a clue to unlock this.
Hint: Save the DateShow
Solution: 04062019Show
Read the mail to find a clue to a locker password.
Move back to the corridor.
At the other end is a door marked 'Exit' that you can now open with the access card. This takes to you the Entrance Hall.
You cannot do much here yet, but check the top drawer on the right desk to find a red key
Back in the corridor to the right of the Exit door is another that you can now open with the card. This takes you to the photo room.

Rotate the view to see a desk by the door and view it.
Open the top right drawer to find a Star Cylinder
On the desk to the left is a stand with 5 holes, you can place the star cylinder in here.
Back in the corridor rotate the view to see a door with a red handle, this is the Lounge room. Use the red key to open the door and go in.
Tap to view the table on the left and collect a Lvl 2 Access Card.
Next tap the counter to the right and open the top right drawer to collect another Star cylinder.
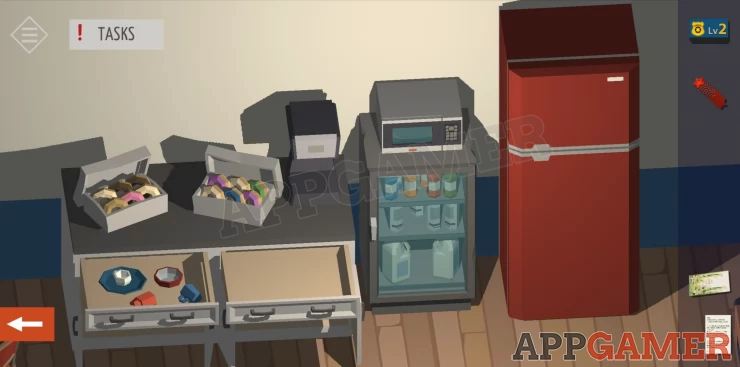
Back up and rotate the view to see the pictures hung on the other side of the room. Make a note of the donuts.
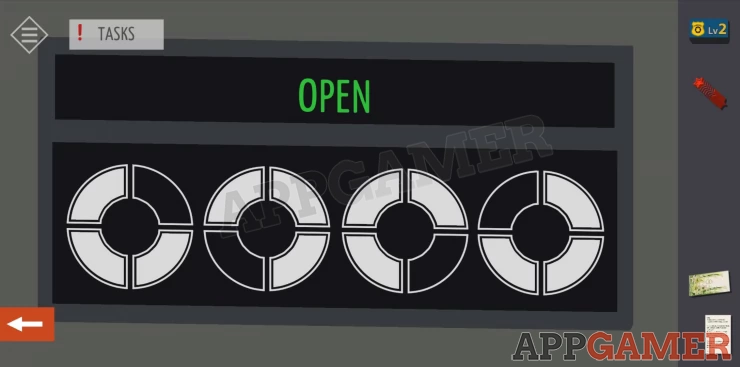
Exit back into the corridor and check the door opposite the lounge room. This is the Gym and it has a code lock.
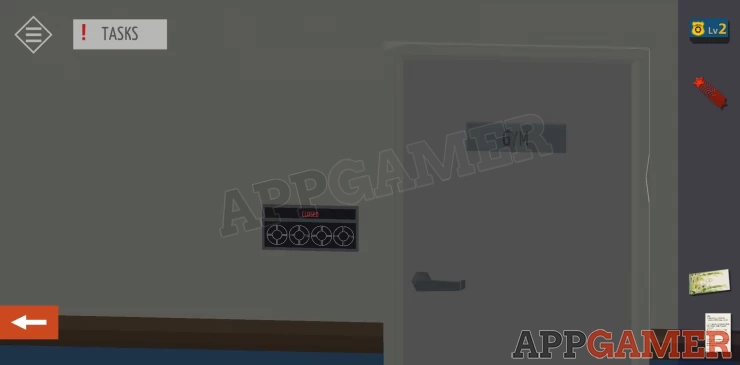
This lock requires 4 colour patterns.
Hint: The patterns are circular. Like donuts.Show
Solution: Copy the donut shapes.Show
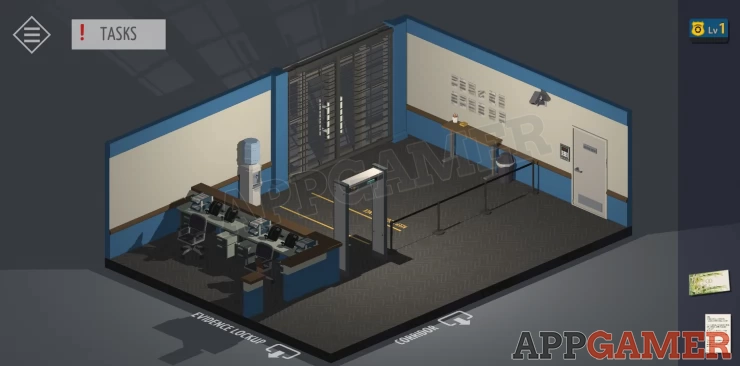
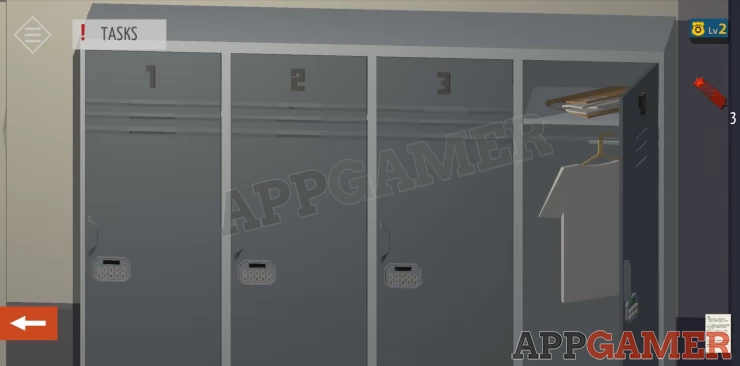
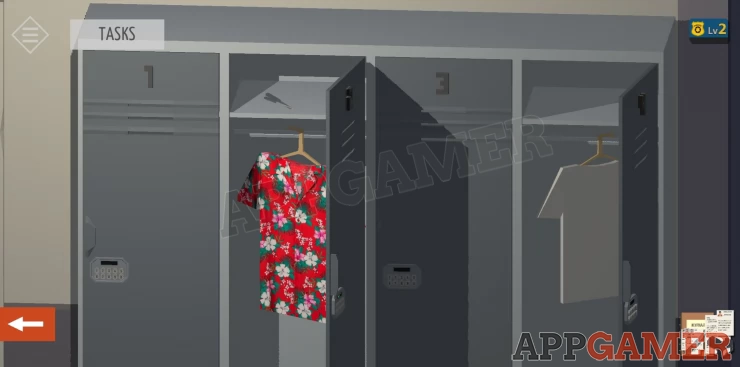
Enter the Locker room. There are 8 lockers and on the wall is a list of the owners.
Find the Locker for Richard (4) and use the code found above to open it.
Code: 08642Show
Tap to view a folder with a memo. Take a note of the details on how to hack the console.
Move through into the gym.
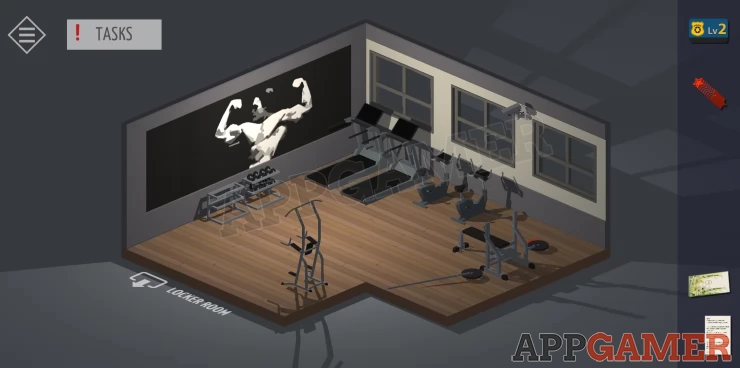
Rotate the view to see a shelf by the door. View this to see an award for Garry.
Back in the locker room find Garry's Locker (5) and enter the code to open it.
Solution: 14325 from the award.Show
Collect another Star Cylinder.
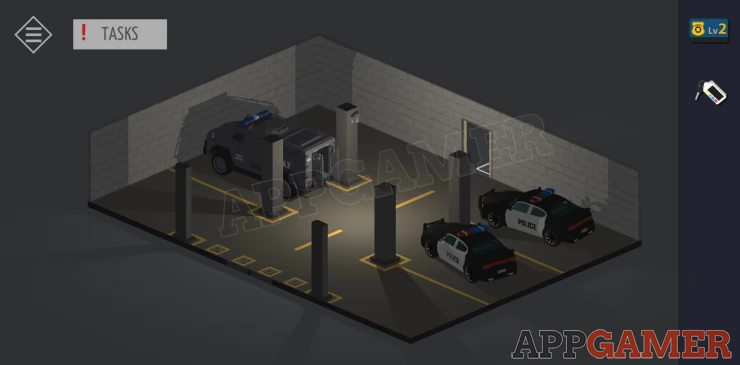
Back in the corridor we can now access the Elevator which is the double doors to the right of the gym. Open this and use it to descend to the Garage.
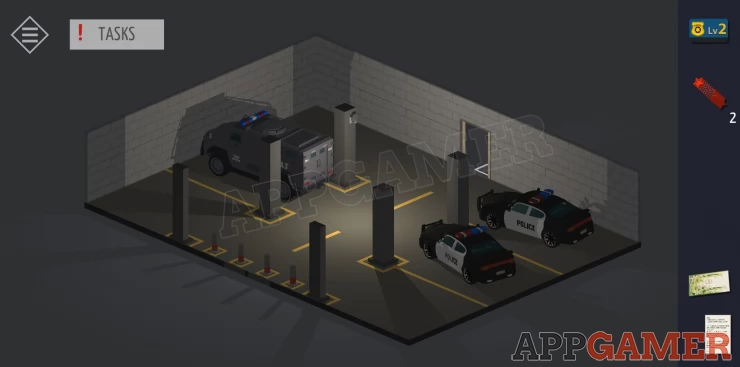
Tap on the back of the SWAT van and then again to open the doors. Then go inside. You can collect another Star Cylinder.
Back in the corridor we an now access the Control Room which is the door to the left of the clocks.

The main terminal does not work but rotate the view to see the 3 server racks.
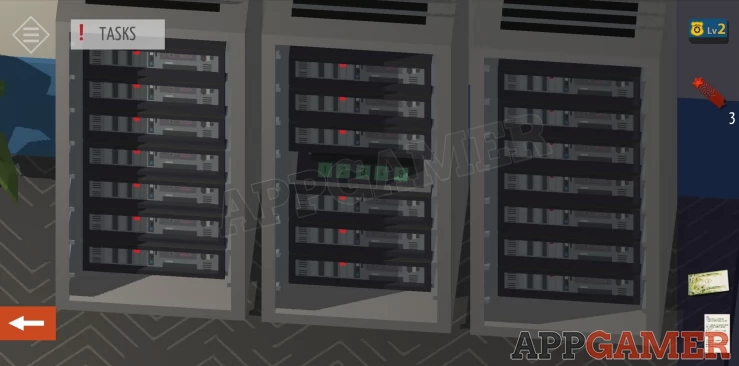
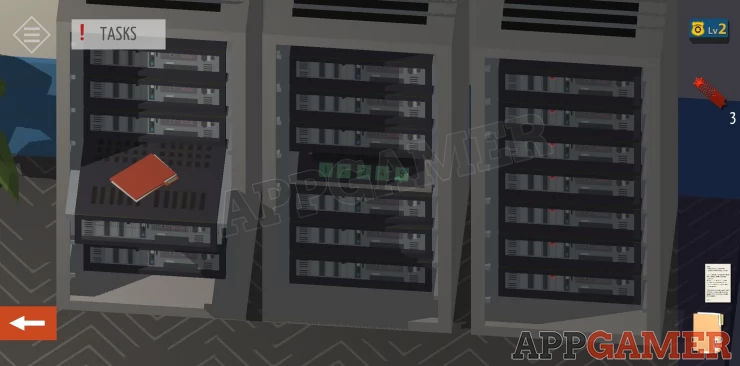
First tap on the center server on the left rack to slide it out and find a folder with instructions inside.
Next tap the control panel in the center rack to view a screen with Server Routing configuration. You need to use the 5 buttons below to make the correct settings to light up the green icons on the right.
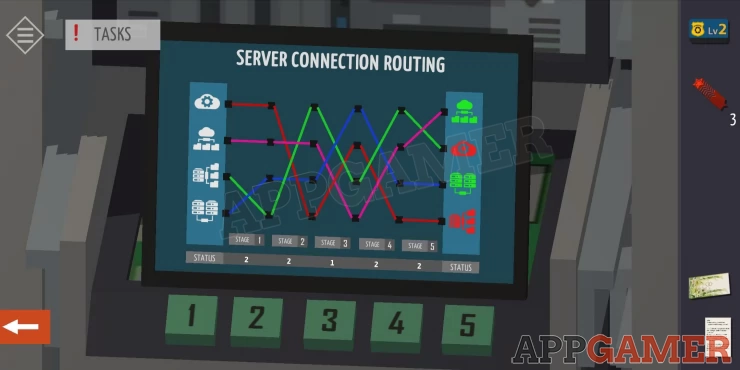
Use the instructions for this.
Hint. Each page as a setting for steps 1 to 5Show
Solution: Set the status line numbers to: 12021Show
Now that the server is connected view the terminal.
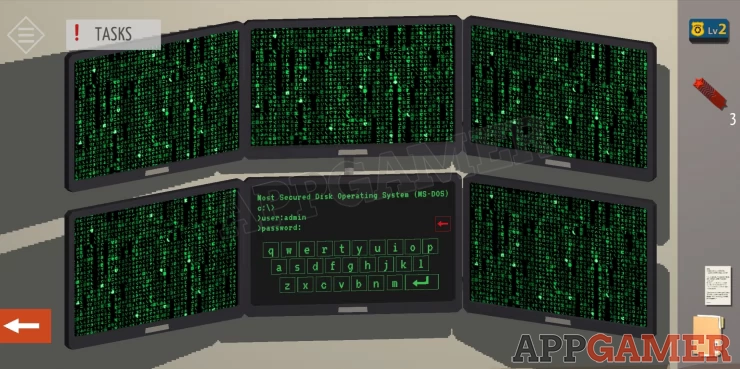
Use the password that you found from the vulnerability above. You will then have a chance to hack in.
user: admin
password: cmdhack
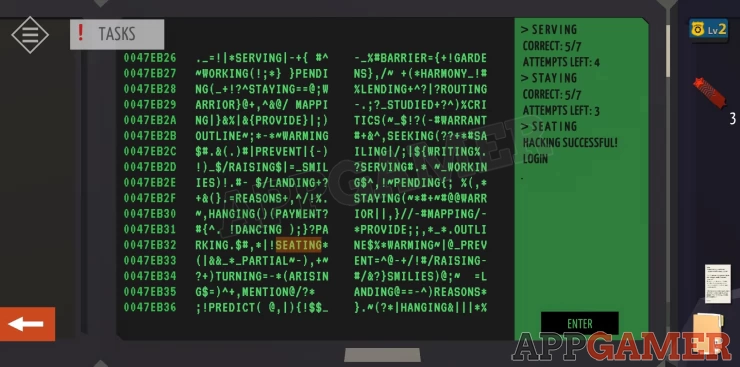
The hacking park is similar to fallout terminals. The password is one of the words hidden in the code on the left of the screen. Tap to pick a word on the left screen, then tap the Enter Button on the right. Assuming you don't get the right one immediately it will tell you how many of the letters are correct for the real password. Use this info to make a better selection for the next guess.
You will have 5 tries to get it right before you have to start again.The code and words are different each time so you will need to keep trying.
Once in, use the lower left screen to view the Photo Room camera feed. Use the OPEN button here to open the cell doors.
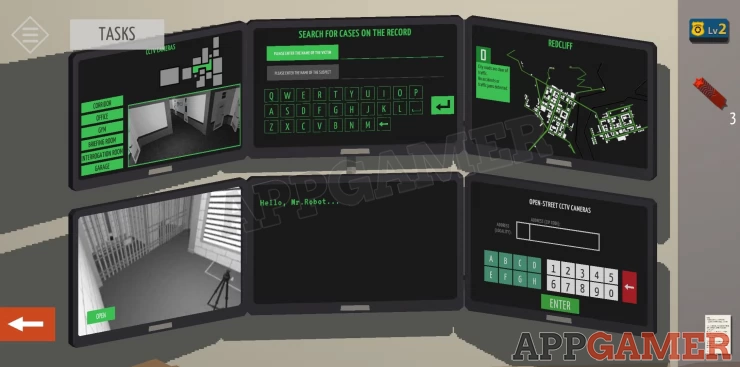
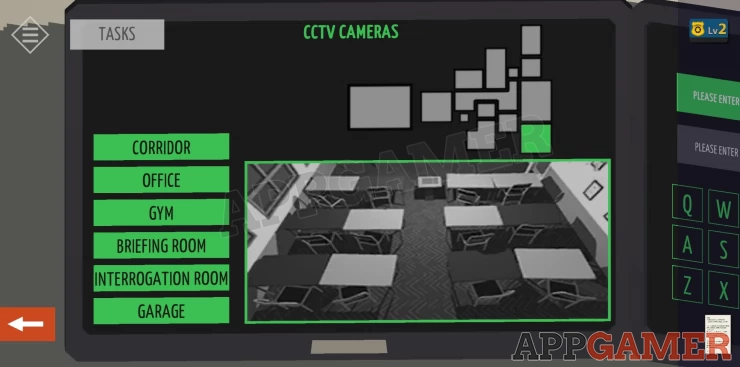
Next you can tap to view the top left screen for the CCTV and select the Garage. Then use the option to OPEN the blockers.
Finally view the camera feed for the briefing room. There is a clue in the pattern of desks.
Clue: Show
Exit this room and return to the Entrance hall. Then tap to view the door to the briefing room on the right.
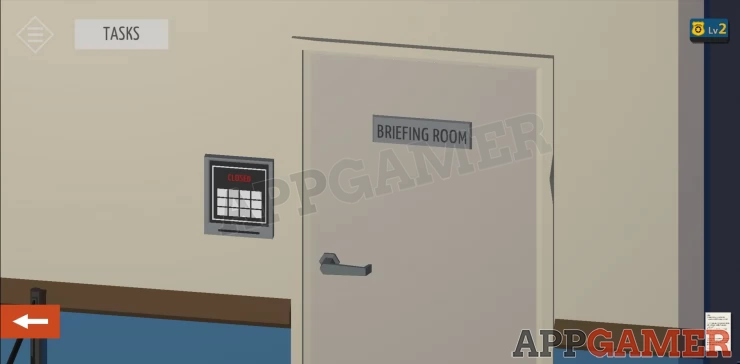
The code entry requires a pattern. Use the clue above to open it.
In the briefing room, rotate the view to see shelves on the wall and a screen that you can tap to pull down.
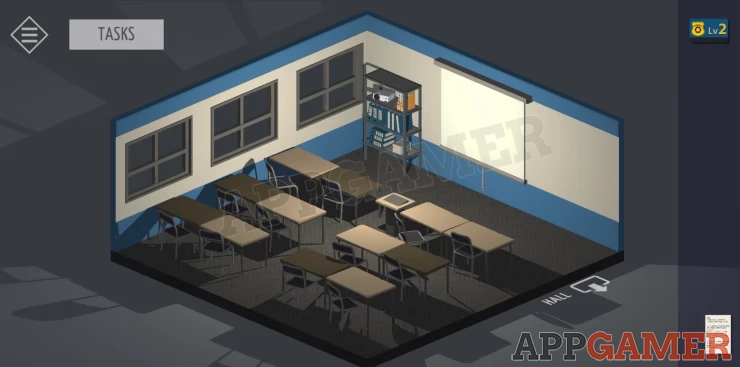
View the shelves and collect a screwdriver and the projector.
Place the projector on the small table in the center of the front row. Then tap the light switch by the door to turn off the lights. Tap the projector to turn it on and view the clue message displayed.
Clue: Show

Return to the Hall and then move to the opposite doorway into the Evidence Lockup.
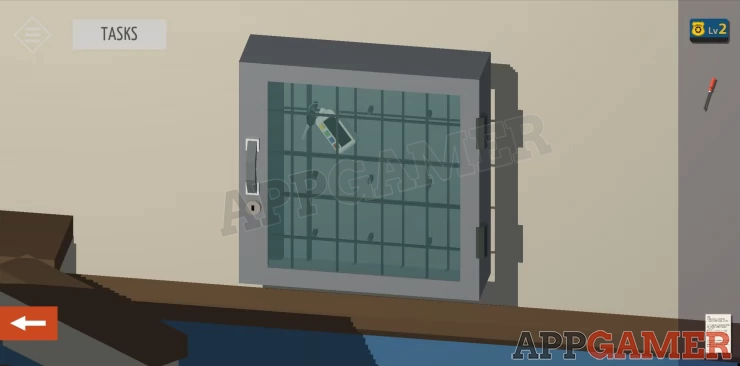
Tap the door to see a keypad entry.
Use the screwdriver to remove the 4 screws on the panel.
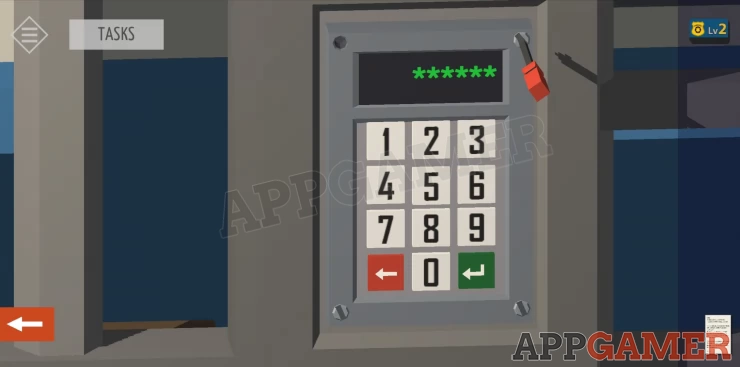
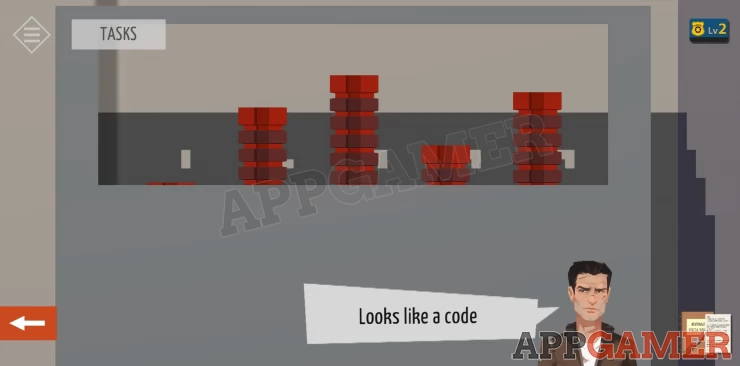
Once opened we can see that we need 5 entries at the top. Use the yellow lines at the top and the blue ones on the key pad locations to work out the code that needs to be entered to connect all the lines together.

Code: 15496Show
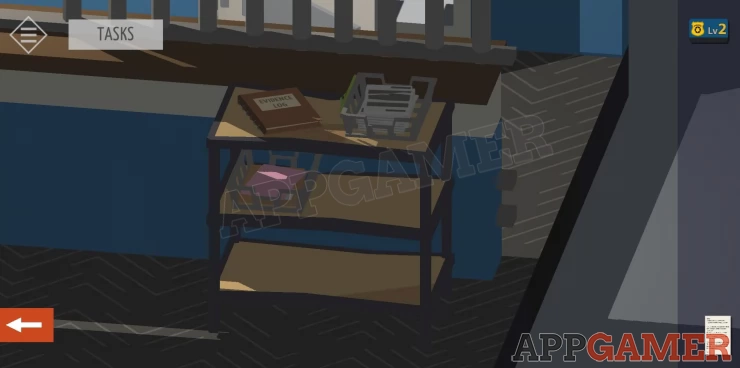
Rotate the view to see some low shelves on the other side of the bars. Tap to collect and view the Evidence Log.
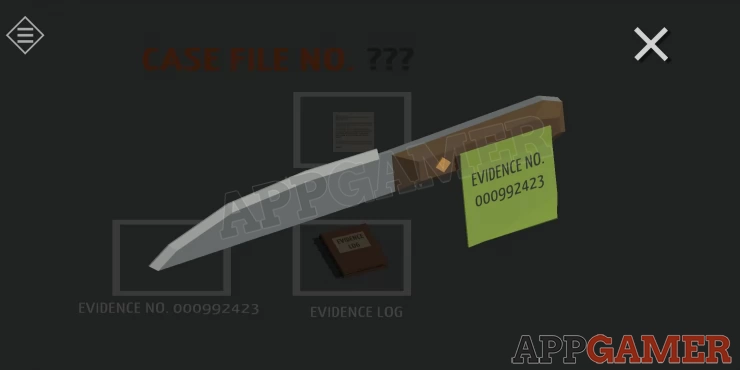
Move through the next door into the evidence store room. Check the shelves to find the item we are interested in Shelf E2 000992423Show
Show
Finally check for shelf C2 to find another Star Cylinder
Return to the Photo Room. Check the cell on the left to find a cake. It's no lie. Then check the other cell.
On the desk view the stand and place the rest of the star cylinders into it. They will now drop into place to reveal a code.
Code: Show
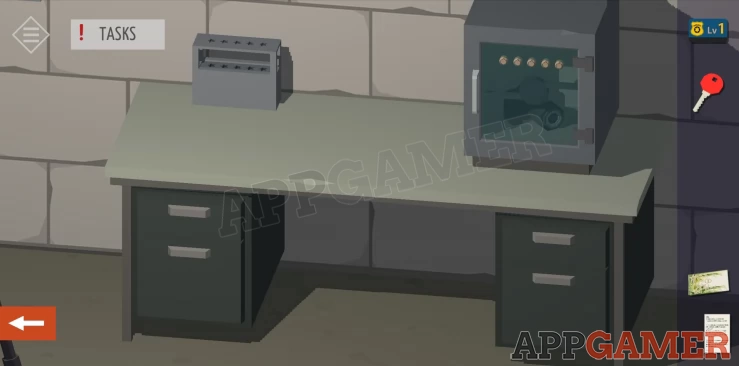
On the right of the desk is a box with 5 dials. You need to set the positions top open the box using the code above.
Solution: Set Position: 0 3 5 1 4Show
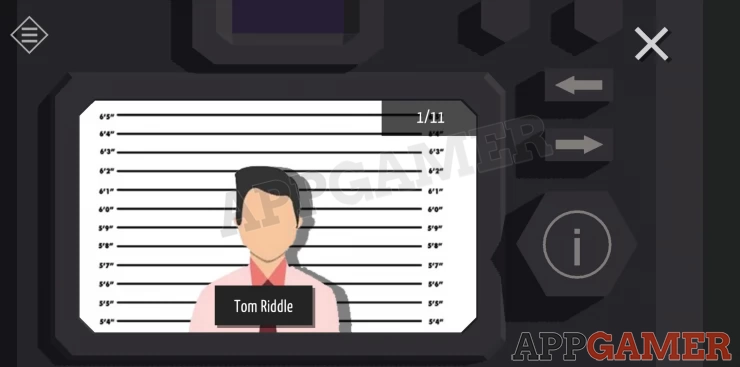
Open the box and collect the camera to view the photo screen. There are 11 photos with information.
Return to the office. Find the computer screen for OTTO and notice that it has a lot of clocks on the screen.
Use a clue to unlock this computer. a 4 digit code is needed.
Hint: The clocks seen in the corridor. There are 4 smaller clocksShow
Solution: find the number of hours each of the 4 smaller clocks are 'ahead' of the Redcliff clock.Show
Code: 7351Show
Once unlocked you can access the Coroners Reports. You need a Date.
Hint: The knife from the evidence room has a number, find this in the Evidence log to get the date it was logged.Show
Solution: 17.05.19Show
This will let you print out 4 Victim reports. Collect these from the printer. These have details but no names.
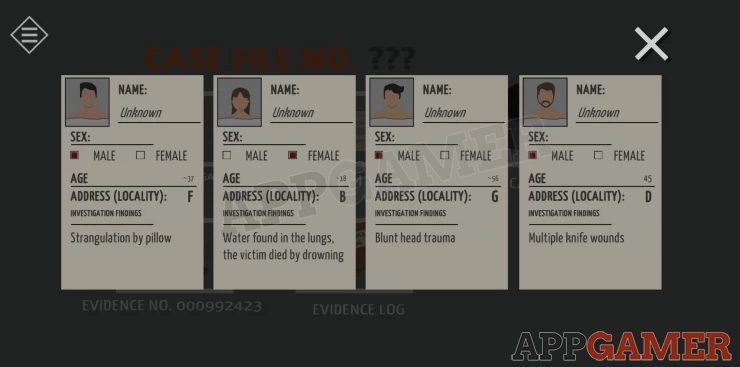
The weapon used for the crime was a knife. This singles out the 4th report as it mentioned knife wounds.
The victim in this case is Male - Age 45 - Address Locality DShow
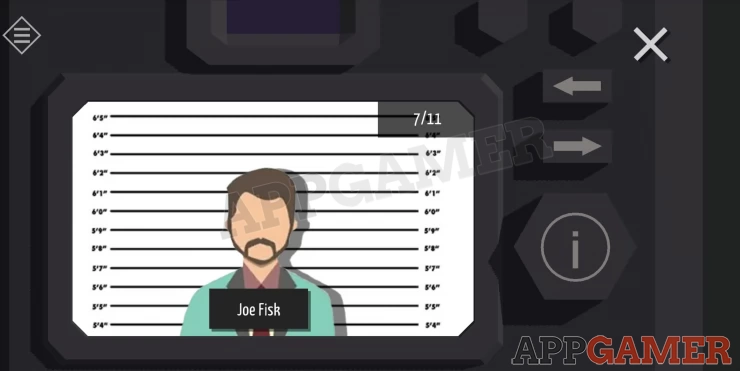
Next check the camera. We are looking for a photo that matches the image on the coroners report. Male, Beard and mustache.
Solution: Joe FiskShow
Tap the Info 'i' button to get the zip code for this person - 378237Show
Go to the control room, and use the terminal. Use the lower right screen to enter the Locality letter and zip code found above.
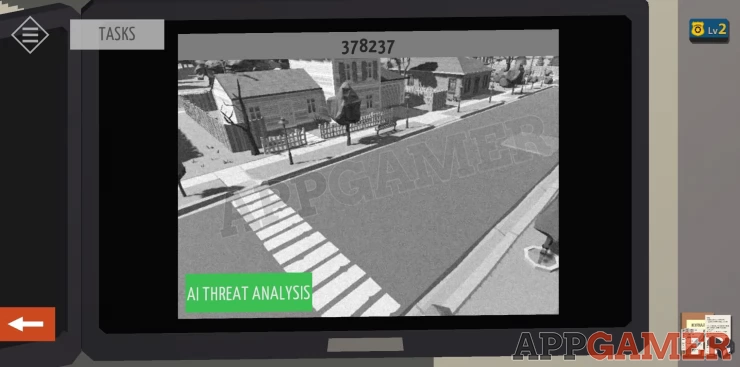
You will see a street view, use the Threat Analysis button to detect a suspicious car, then tap it to view and get the license plate. Print this.
Return to the Office and use the computer of Ross, unlocked earlier. This has a license plate database.
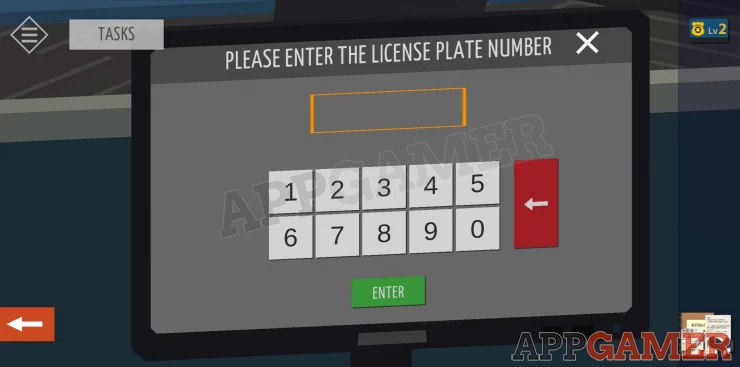
Enter the number found - 5 3 6 7 1 2Show
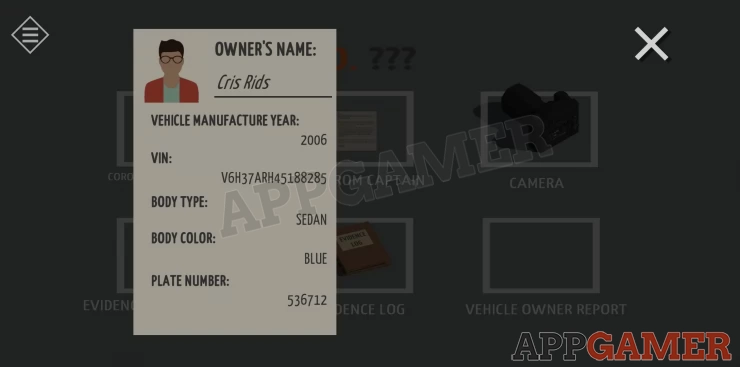
You now have the details of the suspect.
Show
Go back again to the control room. Use the top center screen to find the case details.
Enter the names of the Victim and suspect.
Show
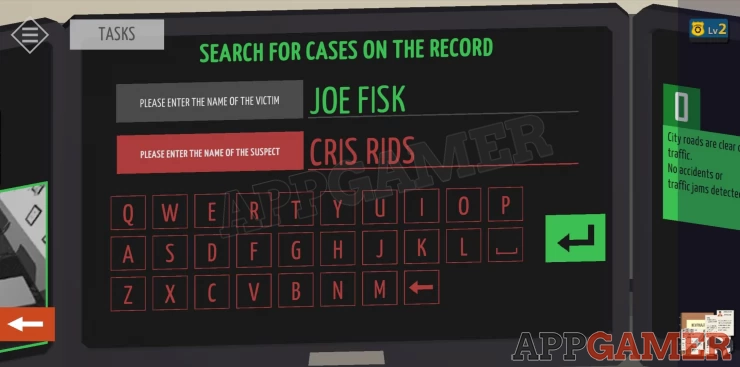
You will be given the Case Number. 5637281Show
Finally back to the office to Ryans laptop and you can use this number to unlock it. Check the notepad icon to view some saved codes and passwords. Find the code for the Locker.

Return to the locker room and find Ryans Locker (2). Use the code 14837Show
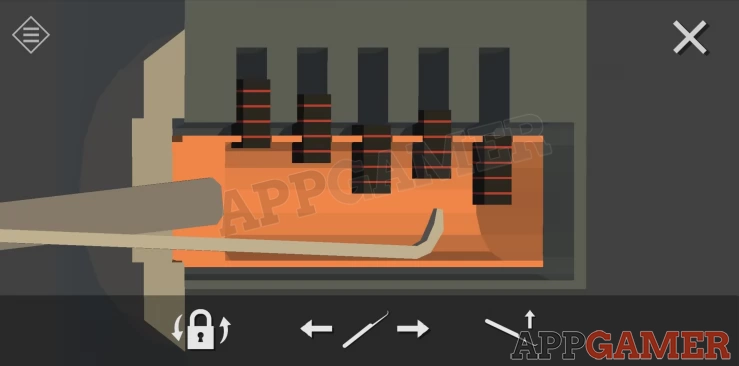
Go to the Entrance Hall and find a key cabinet on the wall behind the desks.
Use the Lock pick on this to open a mini game where you need to pick the lock.
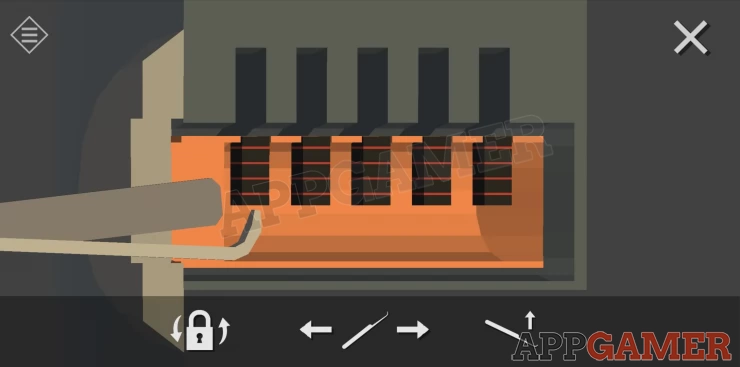
Use the controls at the bottom to move the pick left and right and then one to push the blocks up. When you tap the lock turn icon it will try to open and any blocks that are in the right place will stay while the others will fall back down. Trial and error will find you the right setting.
Solution: Push them up 4 3 1 2 0Show
Collect the car key. Then go back to the elevator and into the garage.
Use the key and tap one of the cars on the right to drive away and end this level.
Now we move on to see if we can complete this mystery in Chapter 15. If you have any questions for this chapter or any others please head to the Answers Page to ask there.
We have questions and answers related to this topic which may also help you: Show all