Chapter 5
Tiny Room Stories: Town Mystery Guide
This is our full walkthrough of chapter 5 in Tiny Room Stories: Town Mystery. We have every step detailed with images and codes which can be revealed if you need them
Read below for a full description with hints and solutions, or you can also watch the video walkthrough.

Olympus Project
"In the secret room under the church you find a painting of Mount Redcliff, as well as various parts of a device"

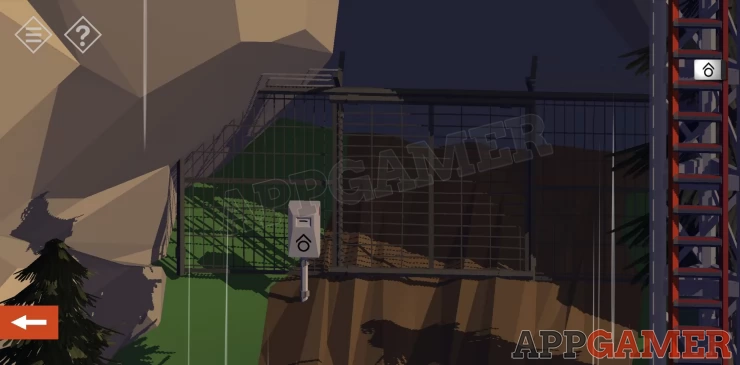
Another blocked road and a gate house. Tap the door to the gate house to open it. Then go inside.
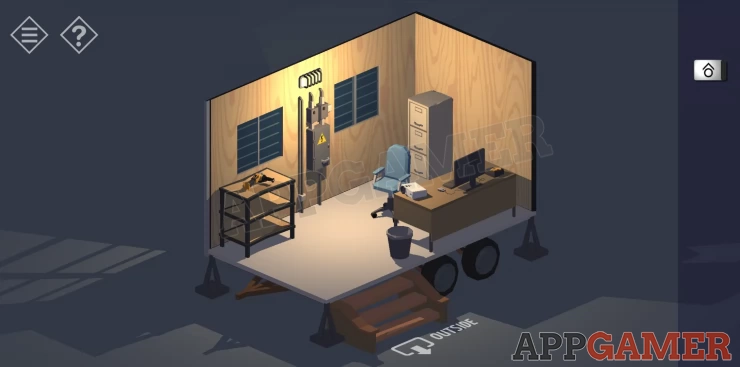
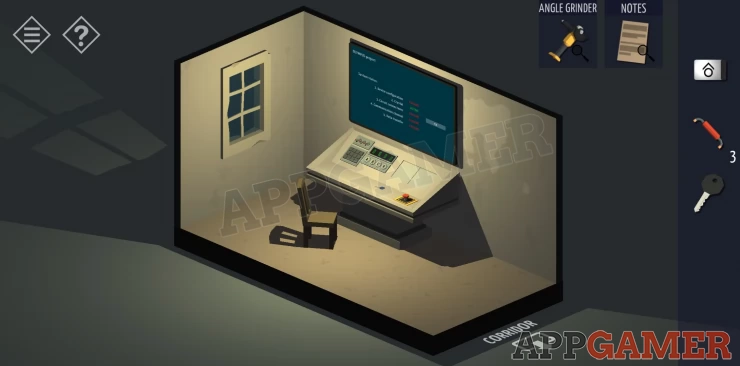
Inside, tap to collect the angle grinder from the shelves, it is missing the disc and battery.
Tap the tall cabinet on the wall to view and open the second drawer to collect some pliers.
Then rotate the view to see the bin next to the desk. Tap this to view it and then collect 2 papers from it. These have clues.
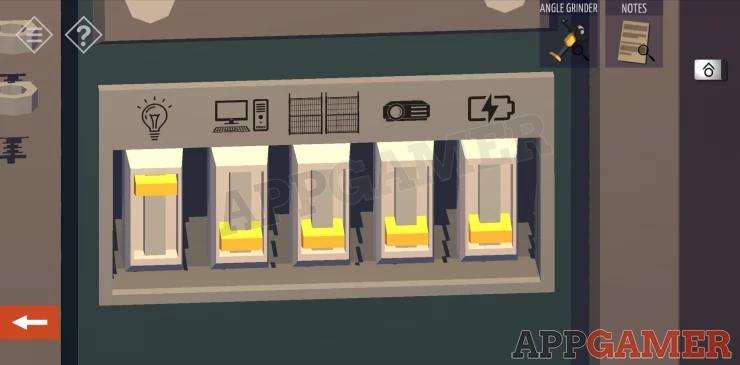
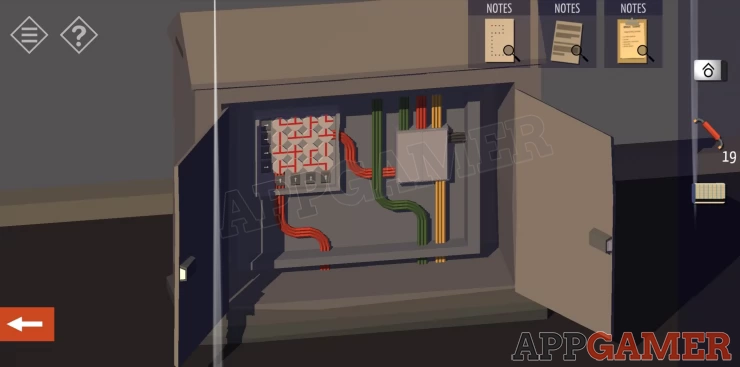
Next view the power box on the back wall. This is locked. Use the pliers on the hinges to remove them and open it. In the box are 5 power switches. You need to turn them all on but turning some on will cause other to trip and close. You must find the right order
Once done view the desk and tap on the projector on the right to turn it on. You can now see an image projected on the white board. Tap to collect the note about passwords. The image is a clue
Show

Use the Image and the paper clues to get the password for the computer.
Hint: The image will show an order of shapes from the largest to the smallest. Use these to get numbers from the papers.Show
Code: 750718Show
Use the Control option on the computer to open the gate then return to your car and tap the game to proceed.
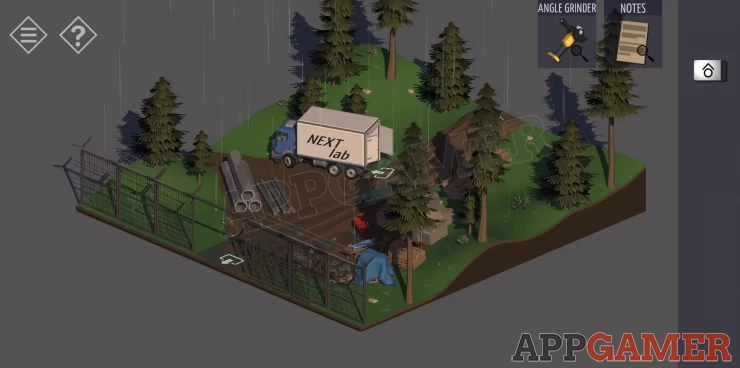
In the next area there is a table to the right next to a blue tarp. View this and then tap to open the tool box on the left. Collect 3 Jumpers.

There is also a truck which is open but you cannot collect anything there yet.
Move on to the next area.
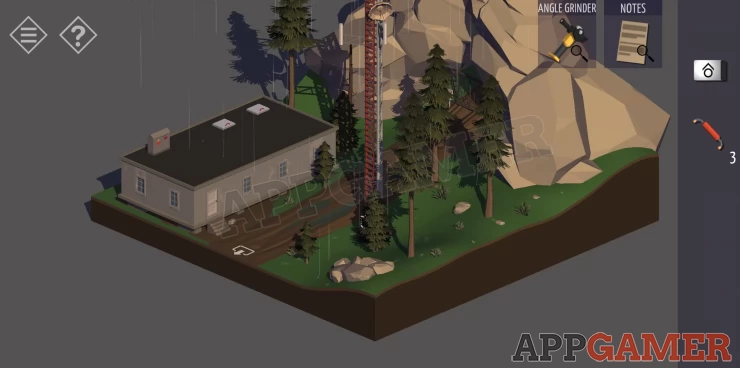
The third area has a building that is locked. Tap the door way to zoom in and then tap the rock on the ground. Tap again to move it and find a key. Use this to unlock the door and go inside. There are 4 more doors.

The notice board at the end has a note to 'Harry' and a Black Key. Collect this. There is also a second note about using strong passwords.
On the wall opposite the doors find some boxes. tap the top one to collect 3 more Jumpers. Also find on the left a clipboard to collect with details on the project.
The second door will open. In the room is a TV screen and console. referencing Project OLYMPUS. On the console is a Blue Key to collect.
Rotate the view to find 2 shelf units on the back wall, on which are boxes. Check all the boxes to find 4 more Jumpers. You should now have 10 jumpers.
Return to the corridor and use the blue key to open the first door. In this room there are book shelves on one wall and cupboards and a desk on the opposite wall.
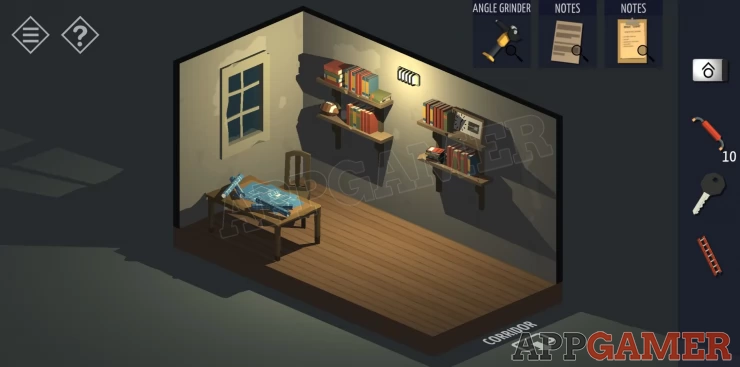
First collect the ladder. Then tap on the grey cupboards to view then and notice that they are locked with a combination.
Rotate to view the shelves and tap to zoom on each. Find 3 more jumpers to collect on the right shelf. You can tap to move the books. This will let you find the combination for the cupboard.
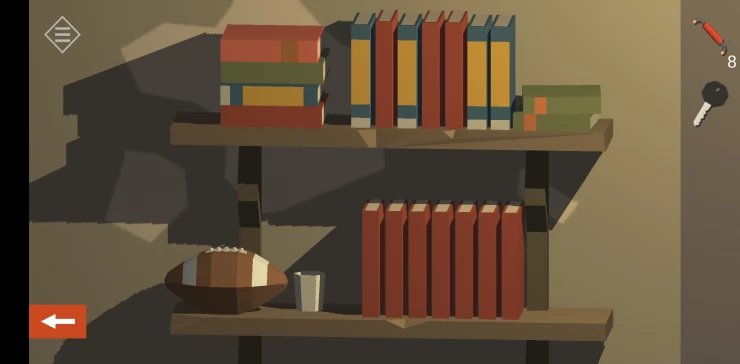
Code:
6 1 3 8Show
Open the cupboard to find a paper with a series of dots on it. Collect this.
Show

Go back outside and return to the second area with the truck. Enter the truck and use the black key to open the case to let you collect a Battery
Next go back to the first are with the gate house. On the desk is a battery charger. Place the battery in it and press the start up button. After a few seconds the battery will be charged. Collect it.
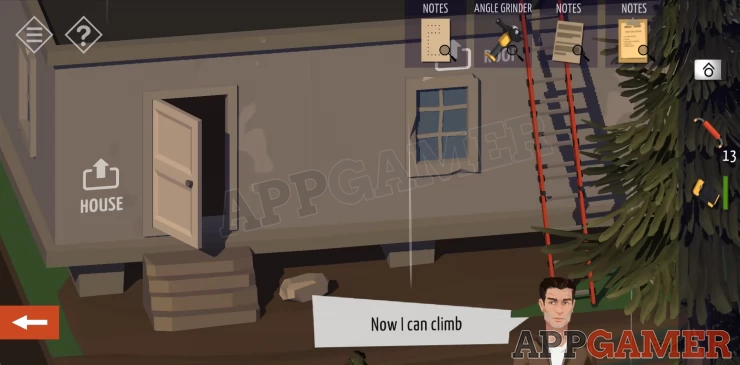
Now return to the third area, tap near the door of the building and then use the ladder to place against the side near the window. You can now access the roof.
Once on the roof tap the back right skylight and go down into the building again. Tap the boxes that you find on the floor to move them and collect a green key. Rotate the view to see shelves and cupboards on the other wall. Check the boxes on the shelves for 4 more jumpers and inside the cupboards for another a cut off wheel to collect.
Exit the room by the door now to go back to the corridor and then you can open the third door with the green handle using the green key. In this room are beds, a desk and a cupboard.

View the desk and collect 2 more Jumpers. Tap the bed and then on the pillow for the lower bunk. Under it find a paper with a clue. Under the bed is a briefcase with a 4 digit lock. Find the code from the clue.
Hint:
Code: 5279Show
Tap to open then and collect an access card.
Now go back to the roof and tap on the electrical cabinet on the corner. open the angle grinder in your inventory and add the charged battery and the cut off wheel. You can now use this to open the cabinet.
Inside find a puzzle similar to chapter 2. In this case though you must tap the arrow indicators to rotate the parts until the lies match up to a continuous circuit.
Next come down from the roof and tap the tower to the right to climb it. Open the control box at the top.
Insert the access card you just received then you will need a passcode. The clues for this is the notes about strong passwords.
Hint: The notes have been ignored.Show
Code: 123456789Show
Return to the corridor and go back into the first room you entered with the console. Notice that you now have ACTIVE items 2, 3 and 5. Tap on the screen to 'FIX' the circuit connections and then tap the panel on the console that opens on the right.
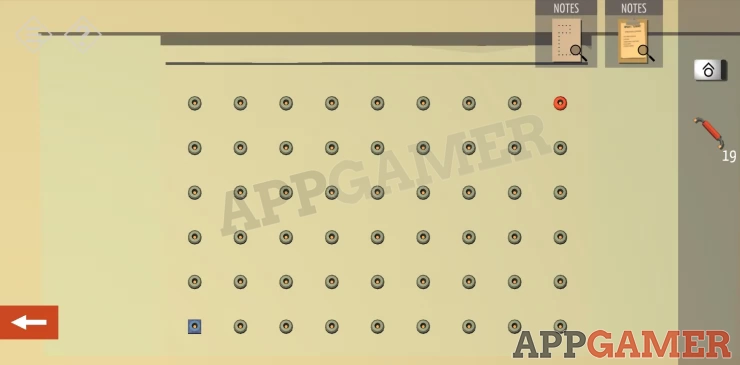
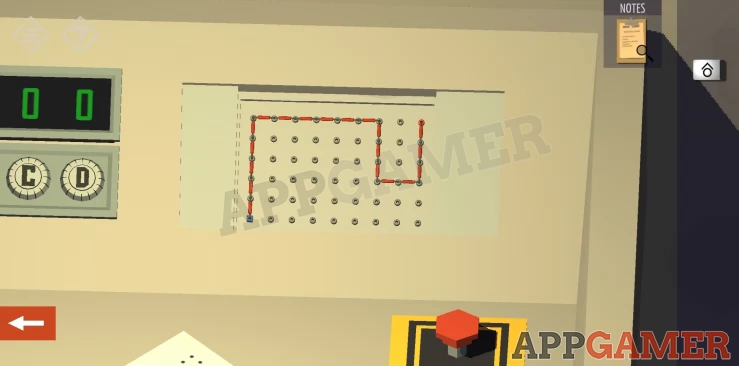
You can now use the jumpers to connect between the blue and red sockets on the board using the diagram on the paper we found earlier.
Hint: Notice that the red and blue sockets on the paper are opposite to those on the paper so you need to reverse the diagram to matchShow
Solution: Show
Finally we need to correct the Device Configuration. Check the clipboard we collected with the list for Check before starting. Tap the paper to view the next page for the settings.
Set Toggle switches Up, Down, Up.
Set the numbers to the right to 6471
Then using the code above and the diagram on the second page of the notes. set the lights on the lower left.
Show
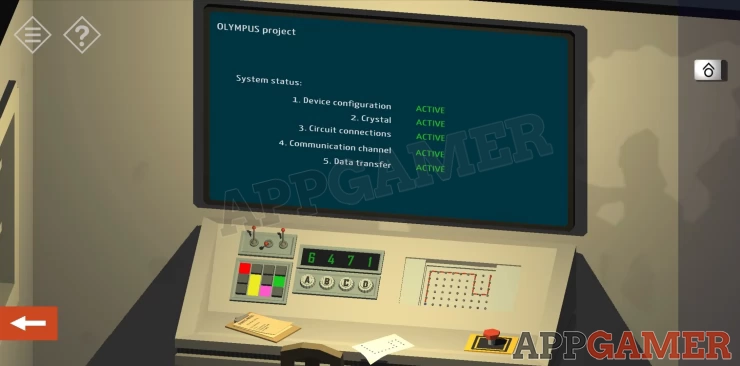
Once complete the screen should show all 5 steps as ACTIVE. Tap the red button on the desk. The device is active.
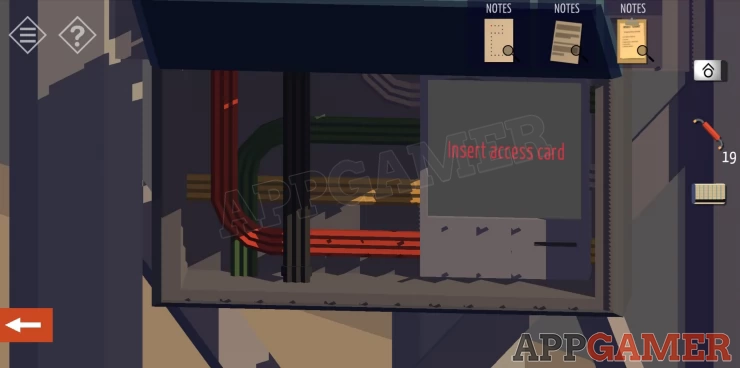
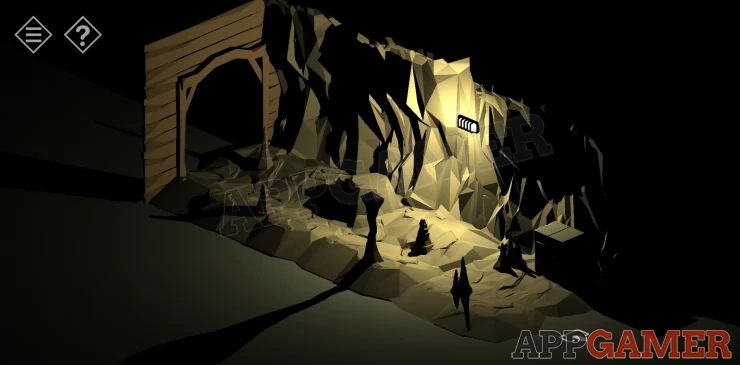
Go back out side and head into the mountain cave entrance. There is a car entry. Use the access card that you have from the previous chapter to open the gate.
It is dark inside but find the switch on the side and turn on the power. Yo can now proceed into the Cave which ends Chapter 5.
Read on to view Chapter 6 to investigate the cave. If you have any questions please check the Answers Page.
We have questions and answers related to this topic which may also help you: Show all