Chapter 9
Tiny Room Stories: Town Mystery Guide
This is our full walkthrough of chapter 9 in Tiny Room Stories: Town Mystery. We have every step detailed with images and codes which can be revealed if you need them.
Read below for a full description with hints and solutions, or you can also watch the video walkthrough.
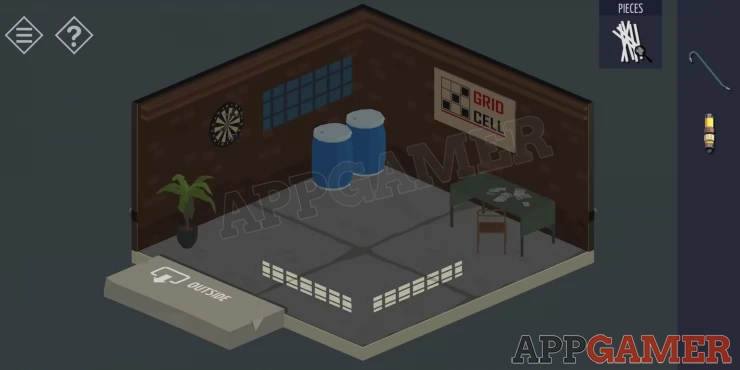
Chapter 9 - Warehouse
"In the laboratory you found out about the experiments on crystal shards. Your father thought that they should be stopped and the shards returned to the cave, otherwise there would be a catastrophe. After finding one shard, you headed to the warehouse for the rest."
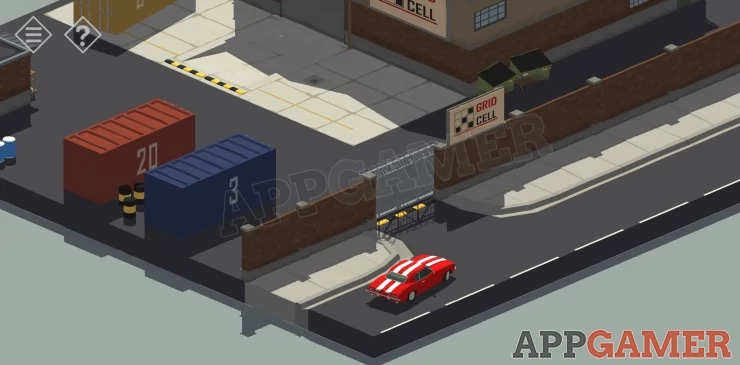
You arrive at the GRID CELL warehouse but the way in is blocked with a gate. Tap the gate to zoom in and then tap your car to drive through the gate and ram it open.
Once inside the gate tap on the green door to the far right with the small red box next to it. Tap the Fire box to open it and collect a crowbar from inside.

Back up and rotate the main scene to view the back of the building with a small flat roofed section.
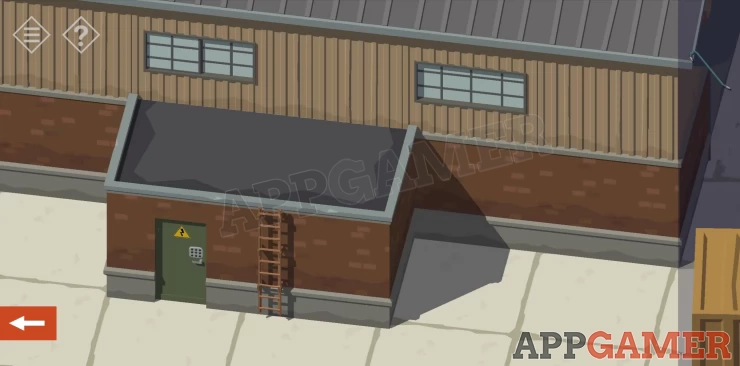
First tap the window that is above the flat roof to view it and use the crowbar on it to open it. You can now go inside.
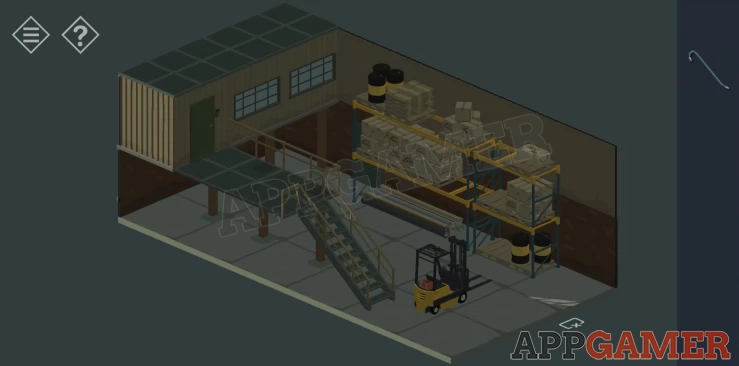
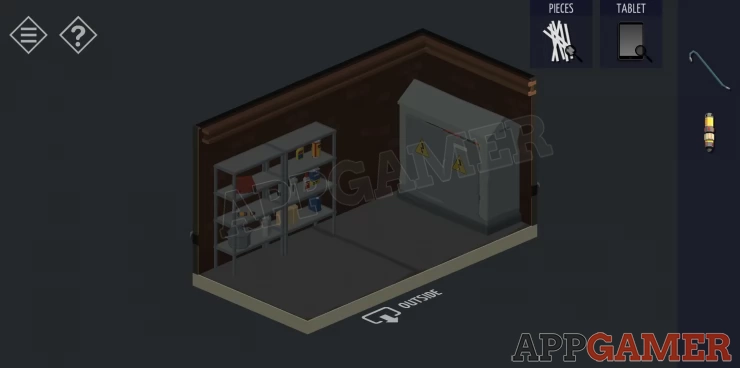
Inside the warehouse tap on the forklift that is on the ground floor and then on the dead battery that is on the back to collect it. Next rotate the view to see another door on the ground floor to the left of the shelves. Tap this to go through to the next room.
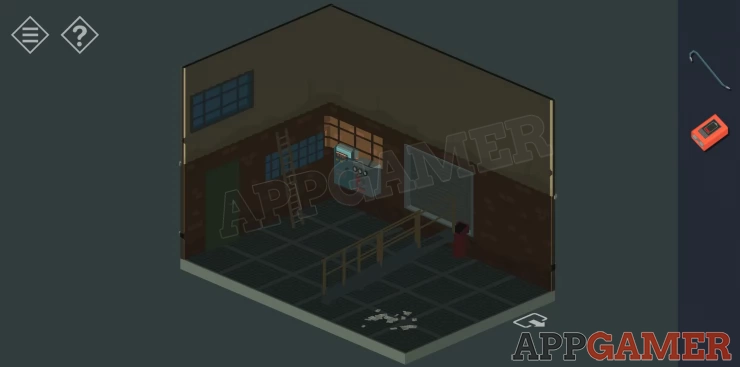
In this room tap the shredded paper on the floor under the stairs. You will be able to view the shreds and notice that you can rearrange them. Arrange the pieces until you get a 5 digit number.
Code: Show
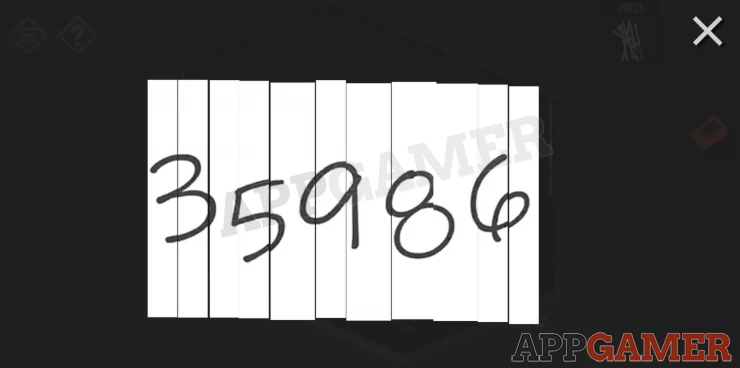
35986
Next rotate the view to see an electrical box on the wall next to a ladder. Tap the box to open it and find inside a fuse to collect. Next use the dead battery in the battery slot on the right to place it and leave it there.
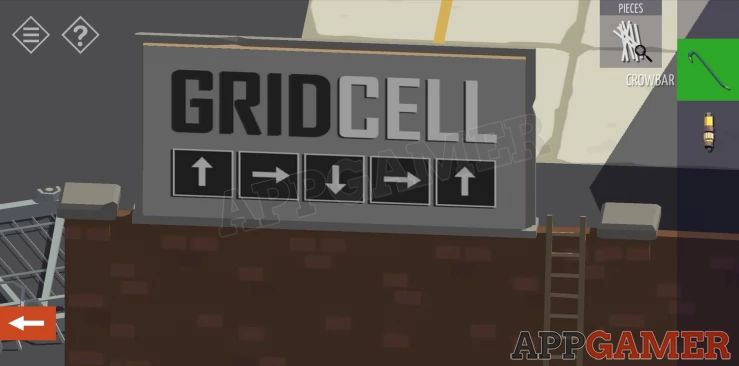
Now back up and tap the ladder to collect it. Then tap the door next to the ladders position and exit the building. Rotate to view the front gate and then use the ladder and tap on the company sign next to the gate to placed the ladder. you can now view the sign closely and then use the crowbar to remove the top sign and find an old one underneath. This old logo has 5 arrows as a clue.
Show
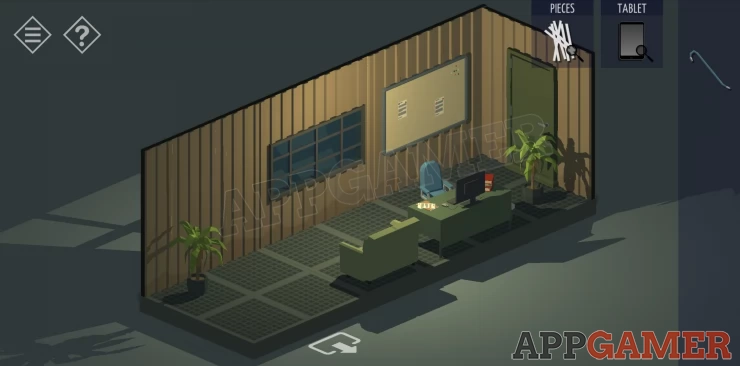
Rotate the scene to view the front of the small building to the back left of the lot. This has a green door that you can open.
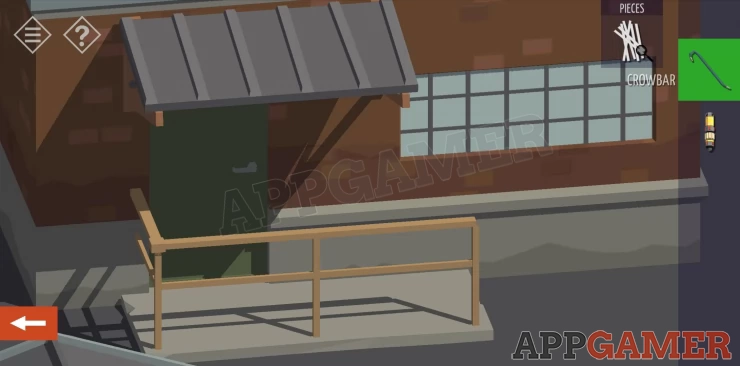
Open the door and then go inside. On the table at the back collect a key to the containers.
Rotate the view to see a dart board on the wall. Tap this to view the knives that are stuck in it. Take a note of the knives and the positions of each one. Notice they have numbers on the handles.
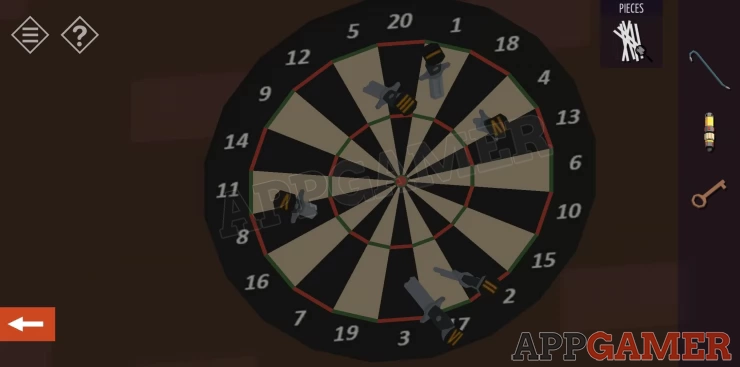
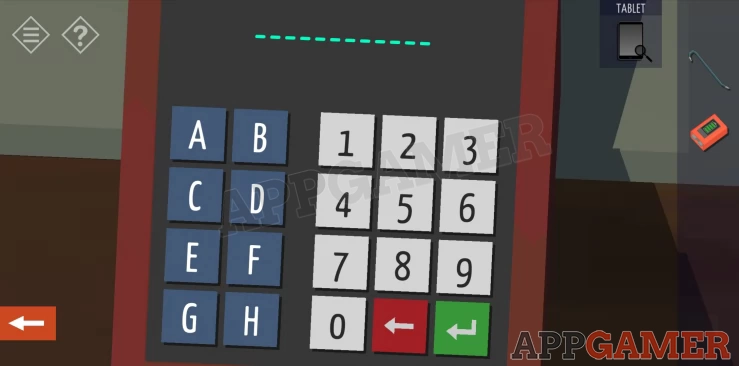
Now back up and rotate the view to see a safe on the other wall, next to some monitors. Tap the safe to view the code entry. You need to use the rotation buttons to set the code to open the safe. each time you change direction the number will be set and you move to the next position. Use the clue above to enter the correct code.
Hint: Use the 6 knives in the dart board in number order and set the score of each in the dart board.Show
Code: 1, 17, 5, 4, 8, 3Show
Once opened collect a tablet from it, this has a puzzle on it to solve.
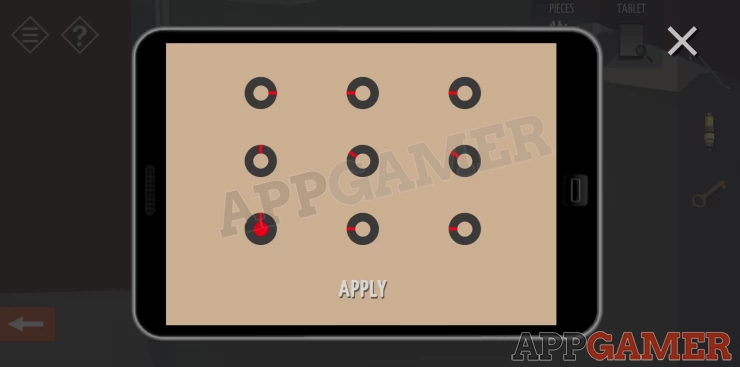
The puzzle requires you to tap the circles to point them in directions that connect them to the others. You can tap the Apply button to start joining the dots in a pattern. You need to work out the correct pattern.
Hint: Use the direction arrows from the sign found above to set the order.Show
Solution: Start from the bottom left, the first one should point up. Right, Down, Right, Up.Show
When you have 5 set correctly use the Apply button. This will unlock the tablet.
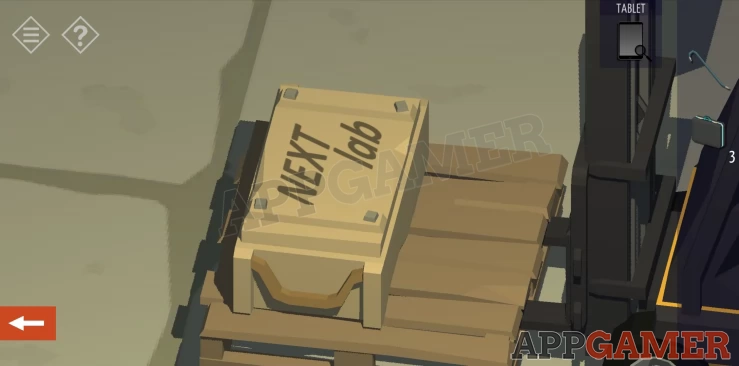
Exit the room back into the parking area. Use the container key you found to open each of the 3 containers. Check inside each one, they are all empty but note that one has NEXT lab printed inside. Remember the container number.
Next return to the back of the warehouse with the small flat roof section. Tap on this to view the door and then again to view the door lock. This has 9 buttons that need to be pressed with the correct pattern.
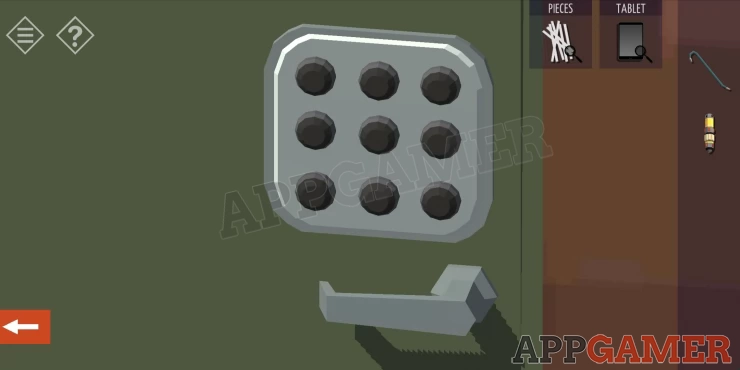
Hint: These is another pattern to be found around the building with 9 sections.Show
Solution: Use the (new) company logo to select 4 buttons to press in.Show
Set the code then tap the handle to open the door and go inside.
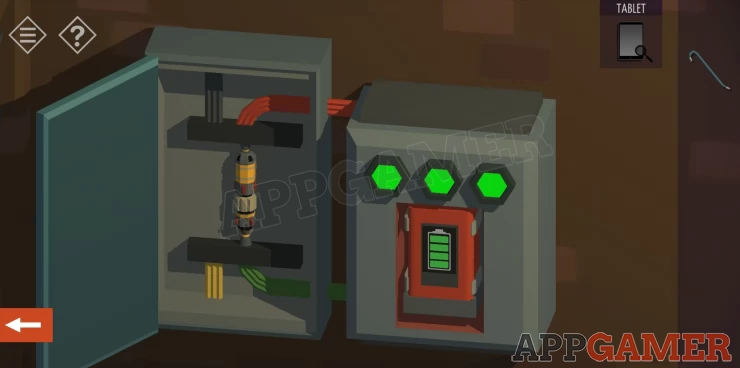
On the shelves at the back collect a second fuse. Now rotate the view to see the large electrical cabinet. Tap to open the doors and find smoke and 2 blown fuses. Tap the fuses to remove the old ones and now use the 2 new ones you collected to replace them.The power is on.
Go back inside the warehouse and to the office door at the top of the stairs in the large room with the forklift in it.
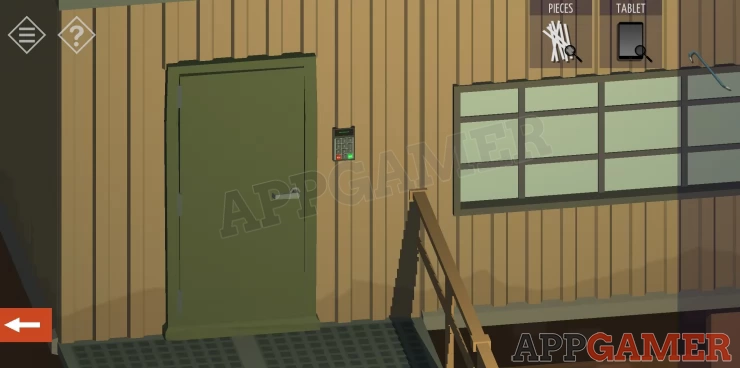
At the door is a keypad entry. Use the Company name GRIDCELL to unlock the door. In the office view the noticeboard and tap to view the 2 documents pinned on it. The first is a list of supplier codes and the second an instruction on the format of database codes. You will need to know these.
Now view the computer screen on the desk. See on the note that the NEXT lab number has been changed to 51 from April 26th. Now use a code number found previously on the shredded paper to unlock the computer. Once unlocked check the mail for information about important shipments from NEXT lab on Apr 24th, Apr 27th and one more in May. Also an address. Then use the option to synchronize the database. This updates the tablet you found.
Finally rotate the view in the room to see an electrical box on the end wall. Open this and take the fuse from it. Now open and go through the door at the other end of the room to take you back to the small room with the battery charging station in it. Use the fuse you just collected to activate the charger again and let the battery charge. Take the battery.
Next to the charger is a control panel that you can now use. This is used to enter the Inventory number of a package to retrieve it.
We need to collect the 3 important shipments from Next lab that have arrived so need to enter the correct inventory numbers. We can use the information found above to work out which of the inventory numbers found in the database will be the packages we want. Tapping the inventory numbers in will retrieve a box from storage, the correct boxes will be marked NEXT lab. When they arrive, use the crowbar to open then and collect the contents.
Hint 1: The first package arrives on April 24th, on this date the code number for next lab was still 24 (from the notice board paper found above). Check the tablet database for a shipment that starts with 20190424 and contains the company code 24Show
Solution 1: GC0000053151Show
Hint 2: The second package arrived April 27th, The Company code for NEXT lab was then 51 .Find the shipment that starts with 20190427 and contains 51.Show
Solution 2: GC0000053156Show
Hint 3: The final package arrived in May, Unfortunately most of Mays data is lost but we can check the tablet arrival of shipments to see that container number 8 (the one from above that had NEXT lab inside it) arrived on the 15th. The database then gives us the inventory number.Show
Solution 3: GC0000053168Show
You should now have 3 briefcases with crystals in them. There is 1 more to find. Return to the forklift and place the battery back into it. Tap the forklift and it will move and collect a box from the top shelf. Use the crowbar to open the box and collect a fourth briefcase from it.
Exit the building and rotate the view to see the back of your car. Tap it to open the trunk and place the briefcases in. Back up and tap the car to end this chapter.
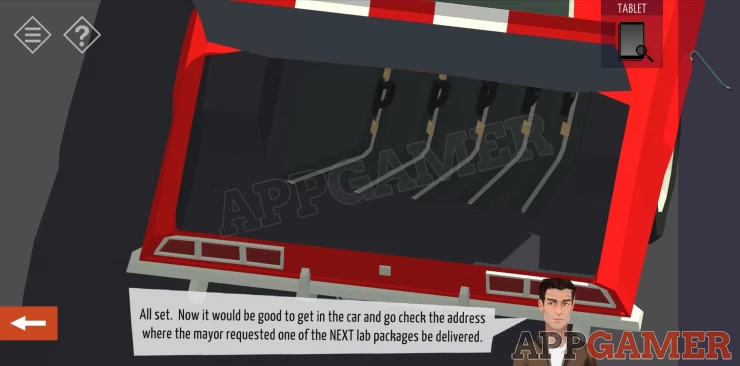
In chapter 10 we will be heading to the address we found earlier to discover more about the crystals. If you have any questions for this game please check the Answers Page to ask it there.
We have questions and answers related to this topic which may also help you: Show all