Lost Lands 8 - Part 16
More Lost Lands 8
This is our walkthrough for Part 16 of Lost Lands 8 Sand Captivity, an mystery puzzle game from Five-BN games. In Part 15 we have solved the puzzles to allow us access into the Temple at the top of the Pyramid. Now we need to explore the temple and find the information that we need.
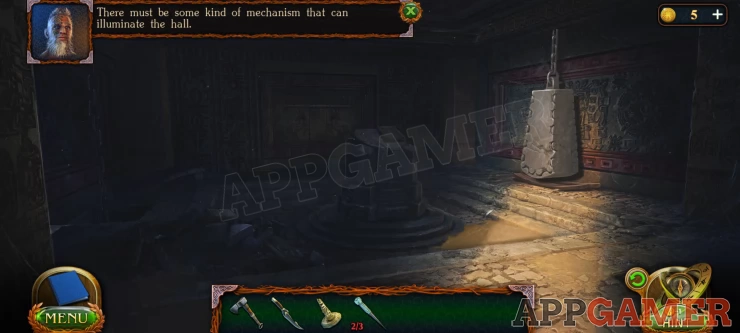
The first task is to illuminate the hall of the temple so we can look around.
View the large stone weight on the right and then use the ax on the wooden planks supporting it.
This will open the roof to let in light.
Collection Item: Turtle figure on the bottom left below the hanging net.
Morphing Object: pile of coins / stones on the lower right.
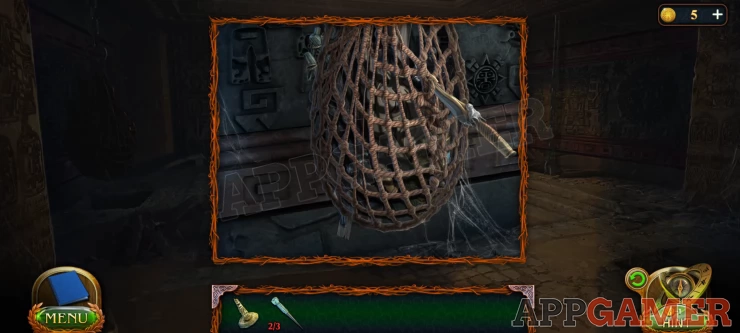
View the net hanging on the left and use the dagger to cut it open.
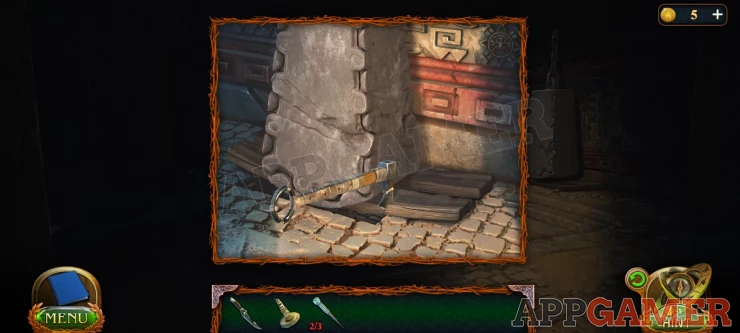
Collect from inside a Horse's Head. Then view the pile of ruble on the ground to the right of the net.
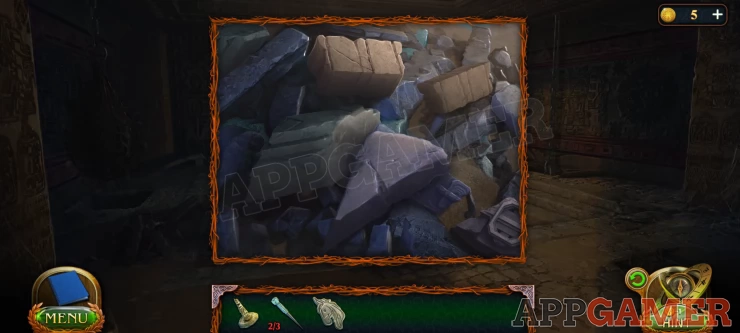
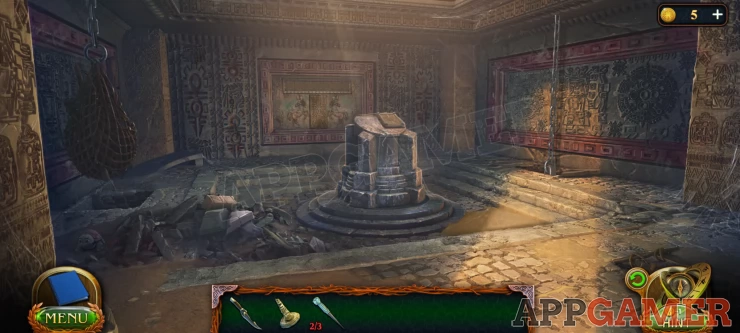
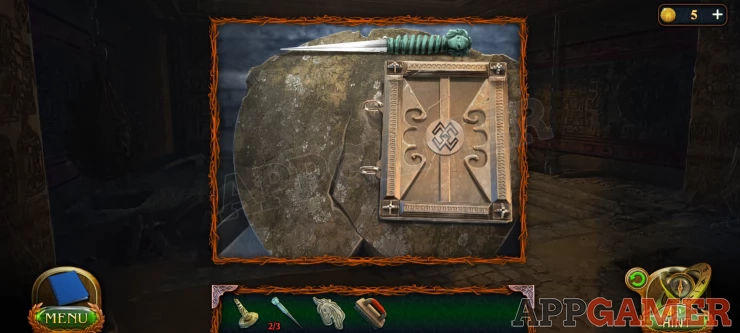
Tap to move the stone away and collect a brush. Next view the stone plinth in the center, Collect the ritual knife (3 of 3)
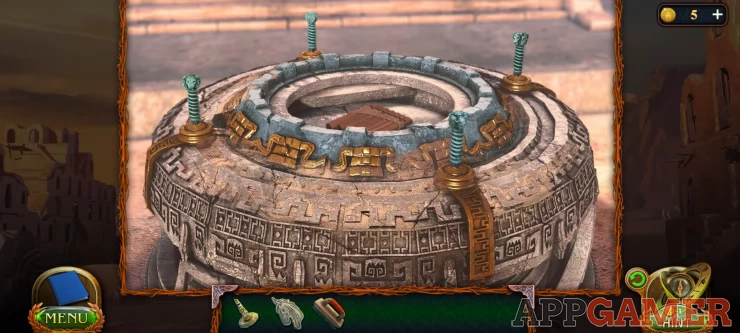
Now exit the temple and tap to view a circular stone at the top of the first set of steps of the pyramid.
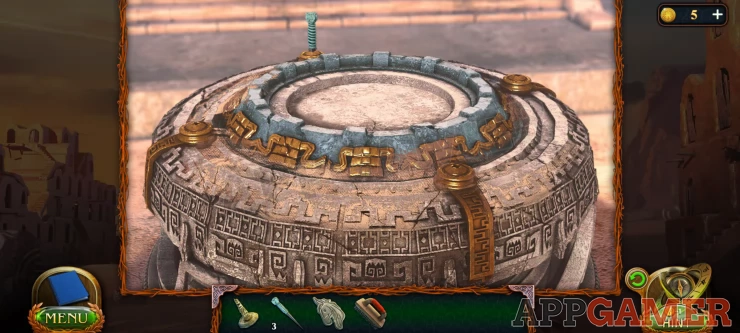
Add the 3 Ritual knives to this to open it. You can then collect a flute.
Go back inside the temple and view the picture on the back wall.
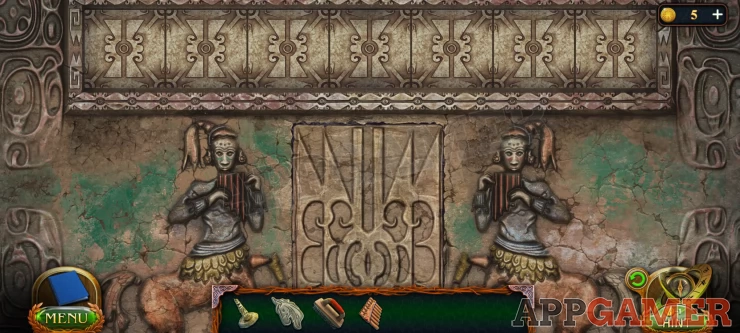
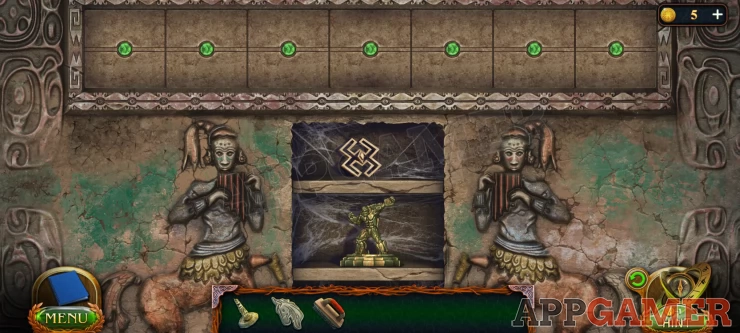
Add the flute to this to start a puzzle. You need to tap the notes of the flute in the correct order to light up the green lights on the wall above, you must light them from left to right.
Use trial and error to find out which flute note lights up each light and find the order.
Solution: If we number the tube of the flute from left to right as 1 to 7 then tap in this order. 5, 7, 2, 3, 6, 4, 1Show
Once done collect the 'Seal' and a 'Tarsas' figure.
Now view the book on the plinth in the center again. Add the Seal to it to open it.
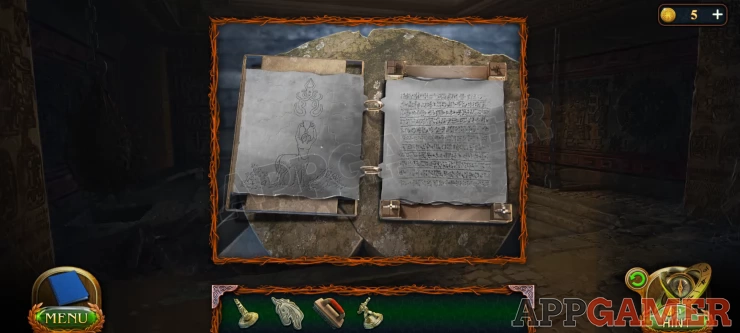
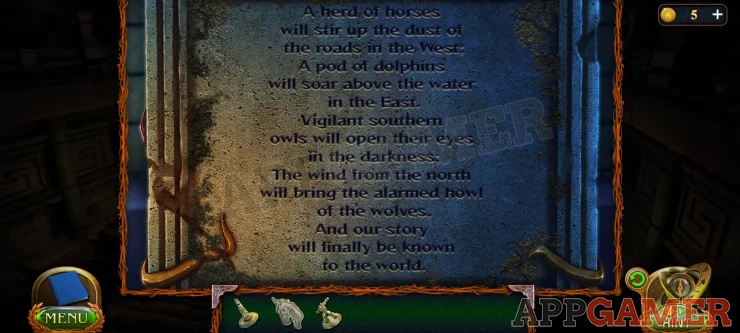
Read the page describing the cave with magical artifacts and the sand curse.
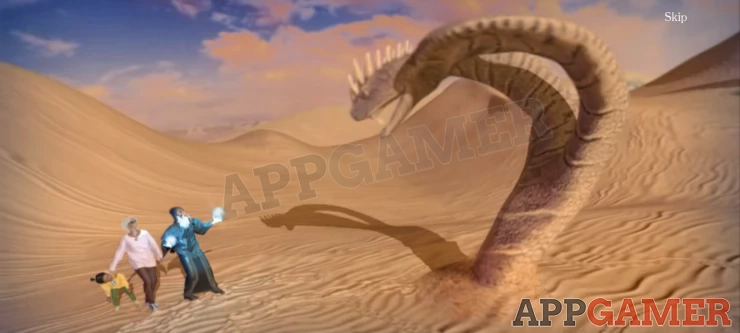
Then back up to see the cut scene with the Sand Ghost.
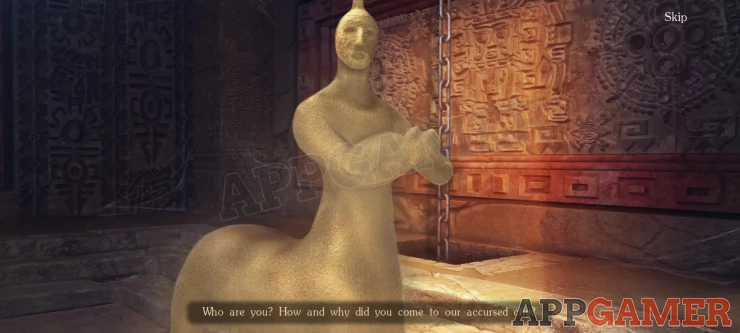
Learn the history of the Curse
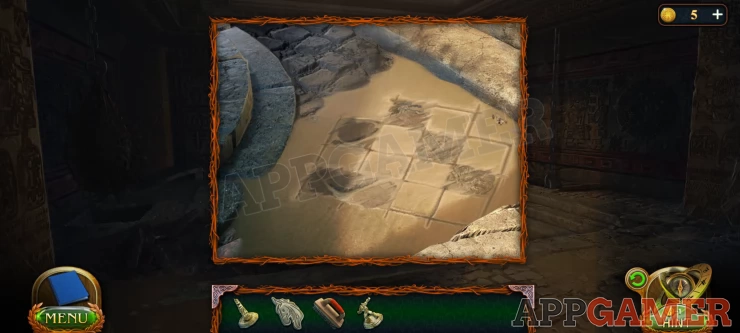
View the sand that remains on the floor where the sand ghost stood. Note the pattern.
Show
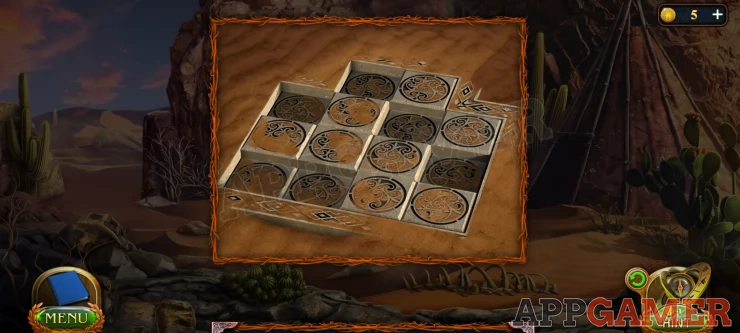
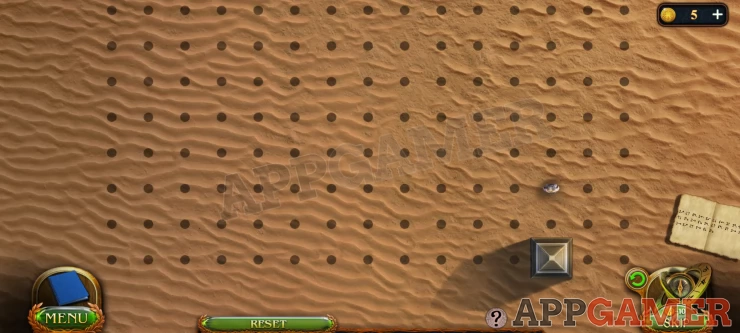
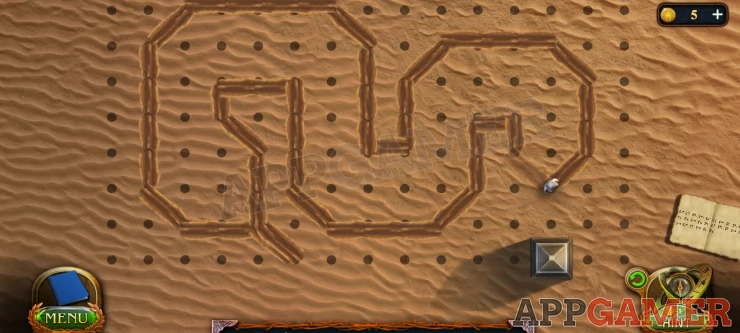
Now exit the temple and move again to the right path to see the desert and the whirlwind in front of the cave entrance. View the ground bottom center to see the tile puzzle we discovered previously. Or clear away the sand to find it if you haven't already done so.

Use the clue above to tap the correct tiles.
Solution: Show
The whirlwind is gone so now you can enter the cave.
In the hall there are 4 smaller stone obelisks and a large stone block on the left.
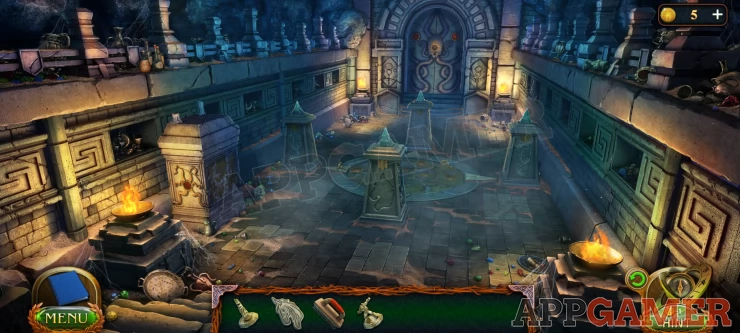
Collection Item: Turtle figure on the floor behind the the large stone block on the left.
Morphing Object: Candles / Jars on the top left of the scene.
View the block on the left to see that is is covered with dirt.
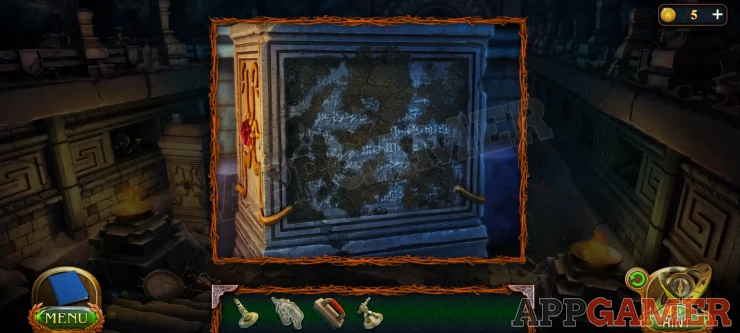
Use the brush on it to clean it and you can read the inscription. This is a clue.
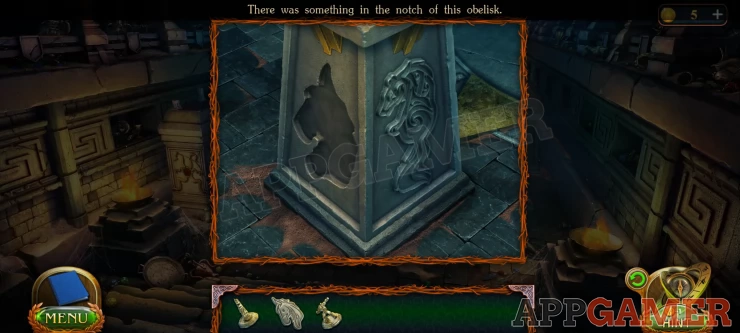
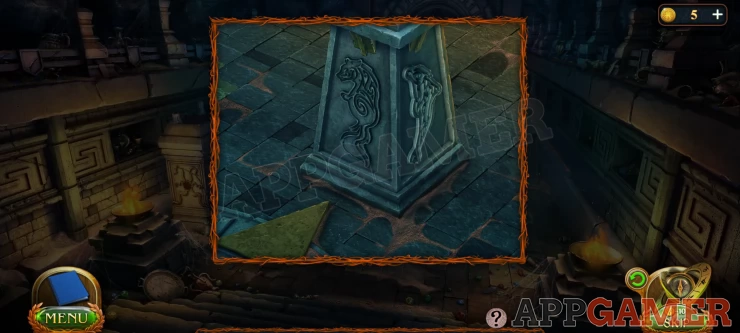
Now view the obelisk closest to you there is a notch with a missing item.
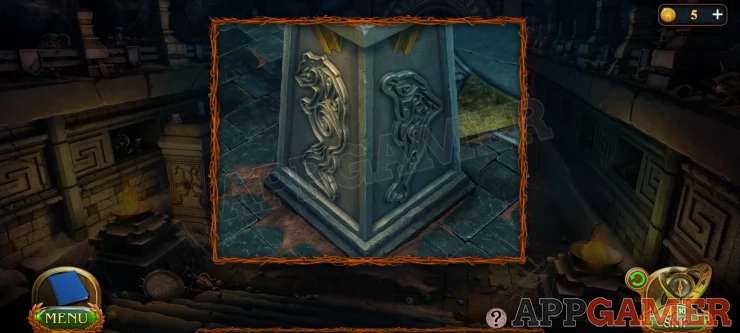
Add the horse head to it.
You can now rotate this obelisk. The 4 of them are arranged around the center at compass points, North, South, West, East. Each obelisk has 4 animal symbols Use the clue found above to turn the obelisks so that the correct symbol is on the inside (towards the center of the compass)
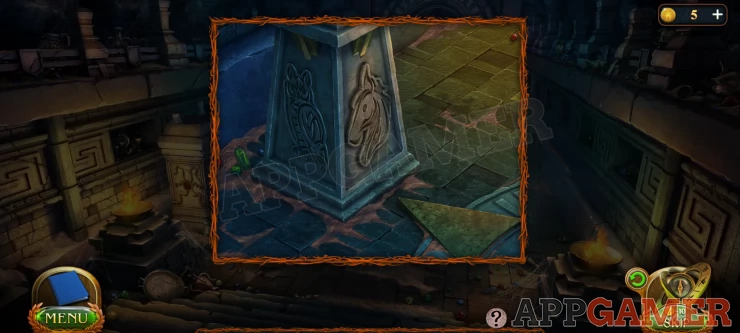
The one you are starting at is South. This needs to be the Owl so turn it so that the own is facing the compass point on the right. It should look like this.
Show
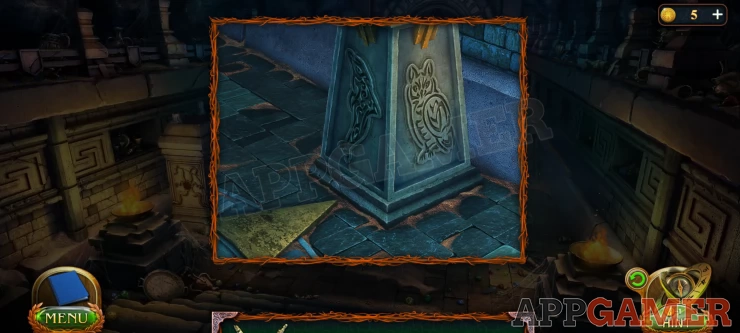
Now repeat this with the other 3 obelisks.
West:
Show
North:
Show
East:
Show
A wall opens and a new stone block appears. View this.

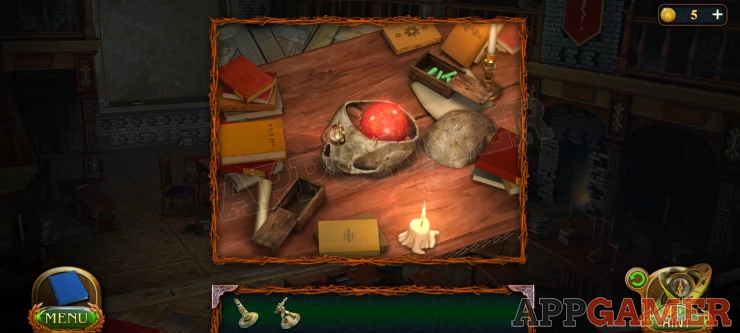
Collect the red 'Orb of memories' from the broken skull on top. Return to the library in the Academy.
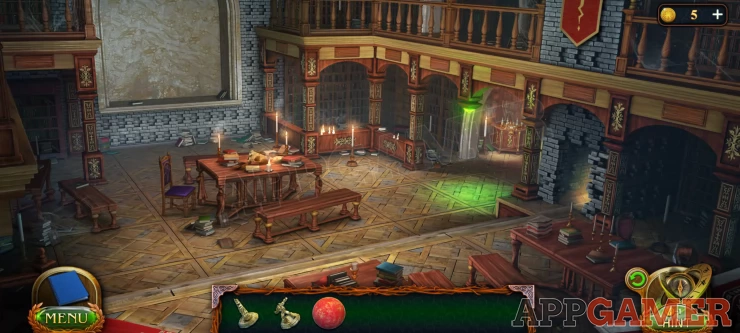
View the table and place the orb into the skull. Then tap it to turn it and start a cut scene about the Myopsis.
You will then get a new Task.
Summon the spirit of the Desert
Enter the hall of the library and move forward to the third set of shelves. As shown.
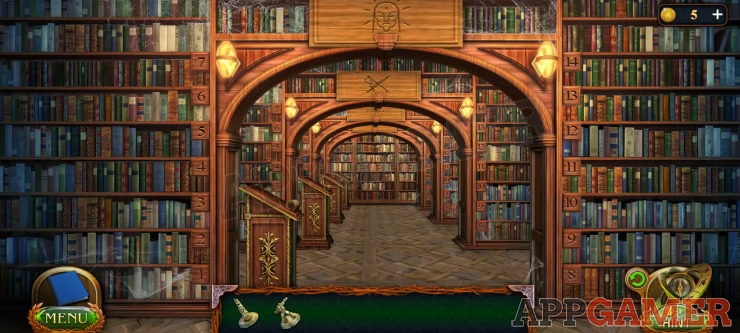
Then view the stand on the left to see the shelf number for Spirits of the Lost Lands. (10)
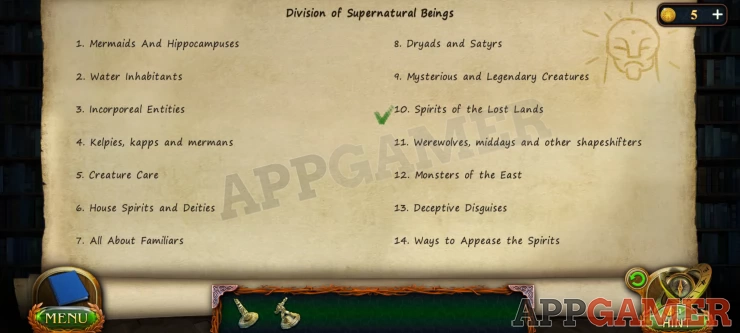
View shelf 10 and tap to see the book with the clue. Collect the clue.
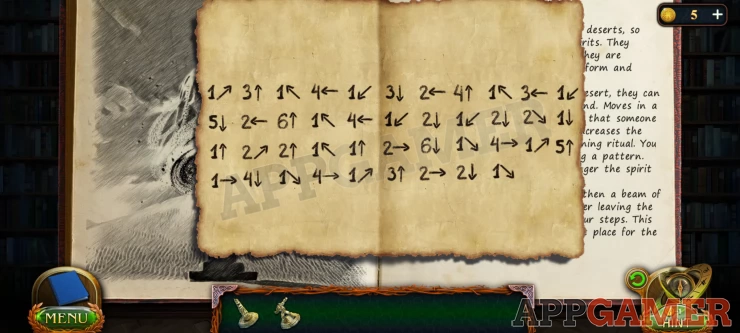
Now return to the desert area of Karemos , outside the cave. Then tap to view the large skeleton in the distance on the left.
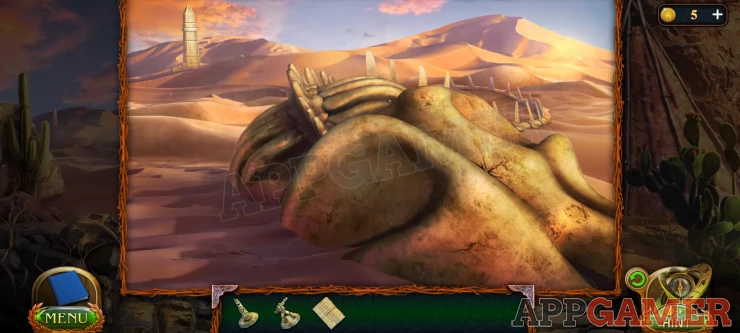
On the top left of this view is a ritual tower, use the clue paper on this to start a puzzle.
There is a stone towards the bottom right. Tap points on the ground to move the stone according to the instruction on the paper. The numbers indicates how many points to move in the shown direction.
Solution: When done the drawing will look like this.
Show
There is now another cut Scene where Maaron will summon the spirit.
You learn of a way to remove the curse and need to retrieve the shackles from the tomb. You will receive a key.
Continue in Part 17
We have questions and answers related to this topic which may also help you: Show all
 With 20 years of experience in creating video game content for the internet and over 30 years as a gamer, Mark is now a passionate mobile App Gamer. Loving a challenge, he is always ready to get stuck in to both survival builders and puzzle solving games. He has been providing content for AppGamer since 2014.