Lost Lands 8 - Part 4
More Lost Lands 8
This is our walkthrough for Part 4 of Lost Lands 8, an mystery puzzle game from Five-BN games. In part 3 we found the rune in the Stronghold ruins which has allowed us to activate the dolmen and travel to the Academy of Magicians.
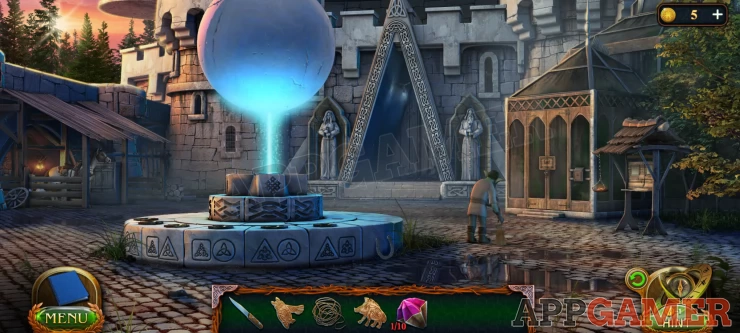
Now we need to find Maaron. You will be told that Maaron is in the building.
Collection Item: Horseshoe resting on the circular platform.
Morphing Object: Window on the stone wall just to the left of the blue beam of light.
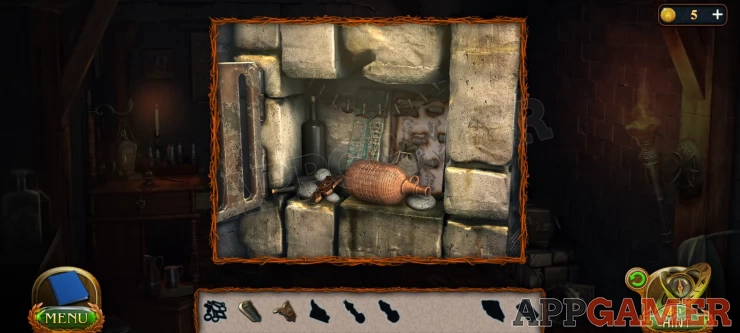
First tap to view the notice board on the right. Collect the Manuscript from it.
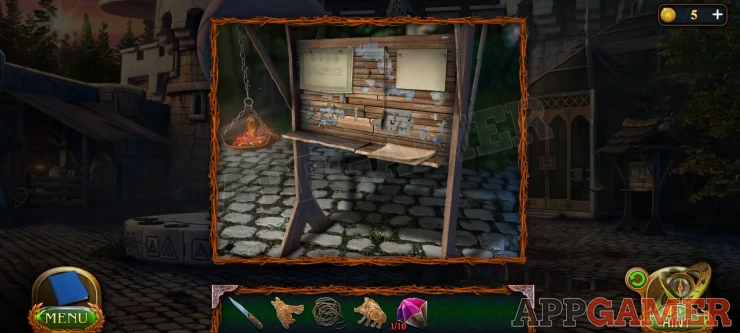
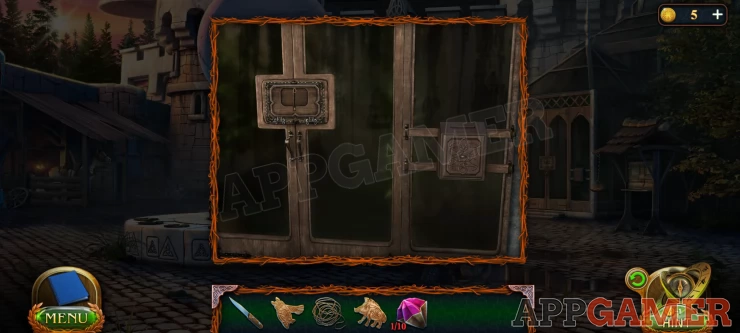
Next view the Wooden doorways to the left of the noticeboard. The main door lock is closed but view the small box on the right.
Open this and read the note inside, then collect the pick gem that is revealed. (2 of 10)
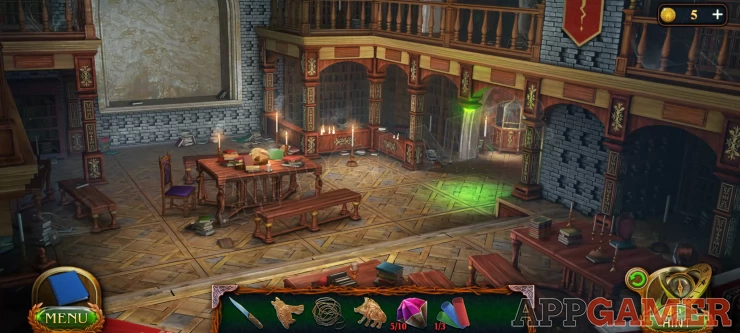
Now tap the large door to the main building and go in.
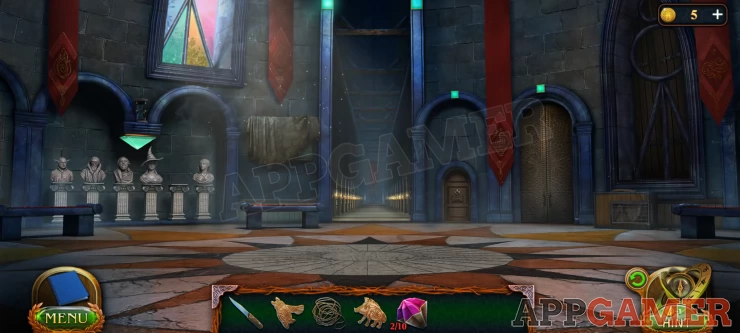
You need to find a list of classrooms. To the left of the central hallway is a board covered by a cloth. View this.

Tap it to try to move the cloth, you can't but you need to do this first.
Now tap the central hallway to move forward and see along line of doors, then tap again at the far end to move and see the suit of armor there.
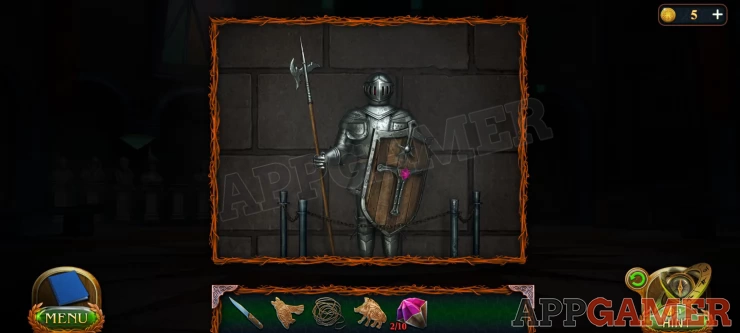
Use the knife to remove and collect the pink gem from the shield. (3 of 10)
Then tap to open the face of the helmet and collect another gem. (4 of 10)
Finally collect the Halberd (long spike weapon) from the suit.
Back to the entrance hall and now you can view the covered board again and use the halberd to remove the cover.
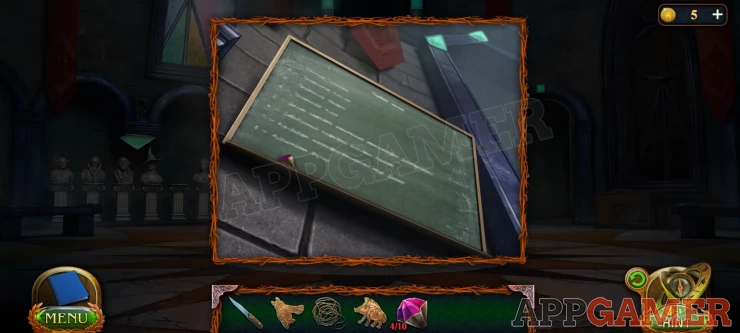
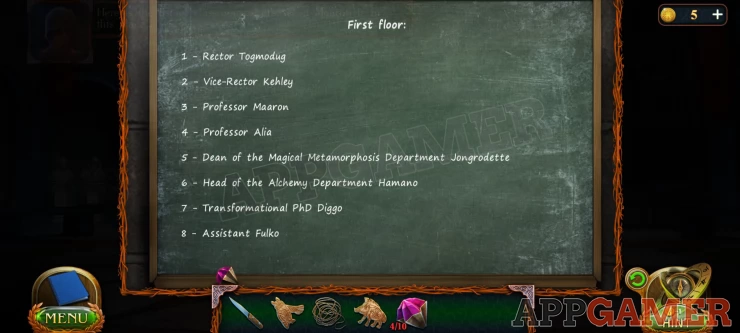
View it for the lit of room, and collect another pink gem.
Professor Maaron is in Room 3.
Move into the hall again and tap on the second door on the left to see it.
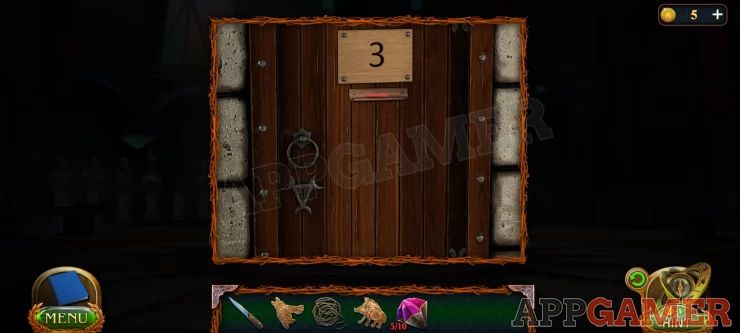
Try the door, it is locked and Maaron is not there, but you can collect the red crayon from the door. (1 of 3)
Back to the entrance hall and tap to open the larger of the 2 doors on the right.
Go through into the Library.
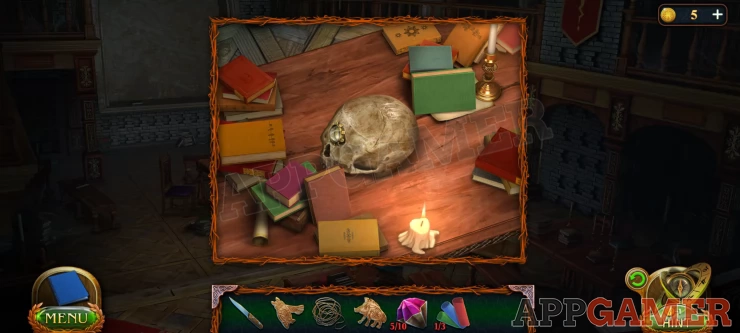
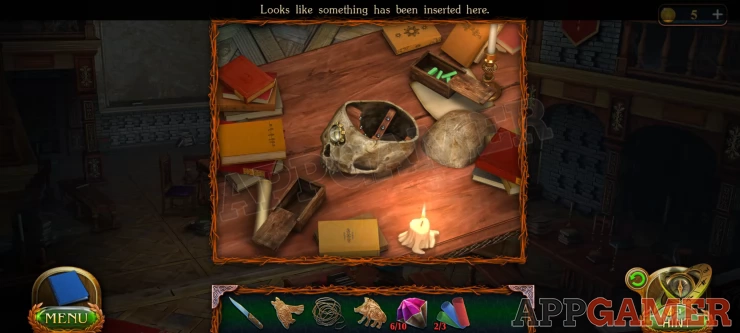
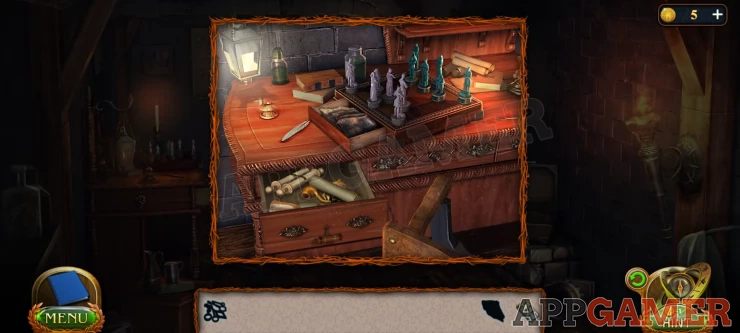
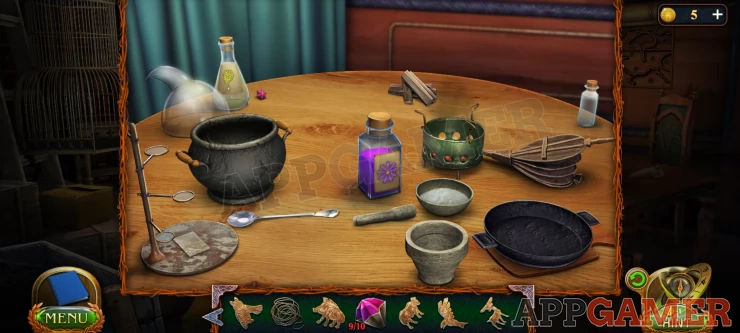
Tap to view the main table
Tap the pile of books top right to move them and find a box, open it and collect a green crayon (2 of 3)
Then move the books on the bottom left to find another box, open it and collect nother pink gem. (6 of 10)
You can also open the skull in the center.
Now back up from here and back out of the building. You want to travel to the Stronghold again. You can back out to the Garden and then go through the dolmen on the right. Or use the fast travel option by tapping the compass symbol above the Hint box in the bottom right.
In the stronghold tap on the stone grinding wheel that is above the quite tent on the right.
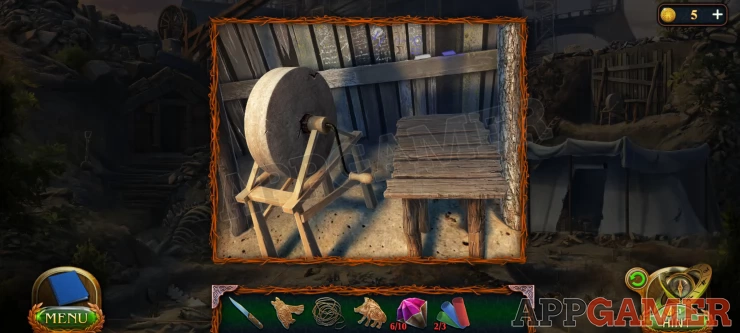
Collect a blue crayon from the fence.
Now travel back to the courtyard of the Academy of Magicians.
Tap to view the horse in the stable on the left.
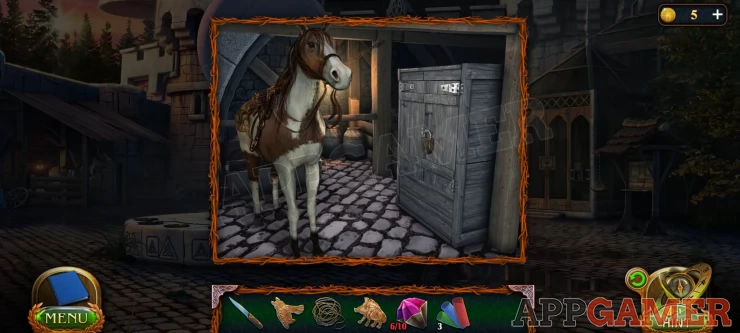
Now view the saddle bag on the left.
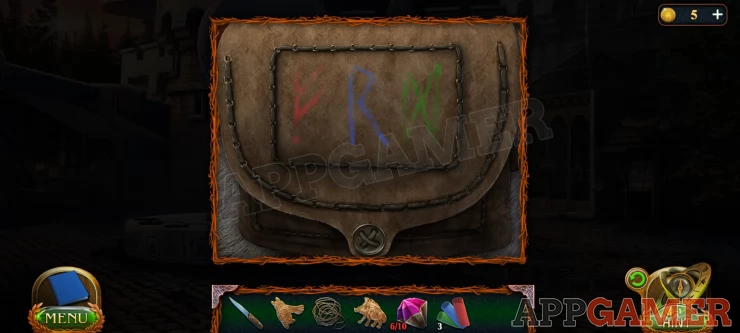
Use the crayons on the bag to draw 3 colored runes. The bag will then open.

Collect the 'Bull' emblem. And another pink gem (7 of 10)
You can also collect a torn drawing of a key.
Now go back into the Academy entrance hall and tap to view the smaller door on the right.
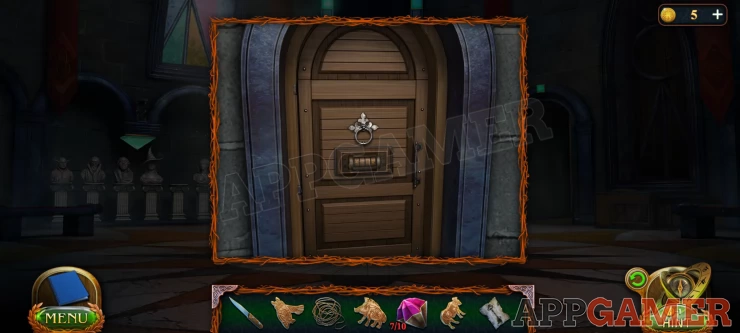
View the lock in the center and add the torn key drawing to it.
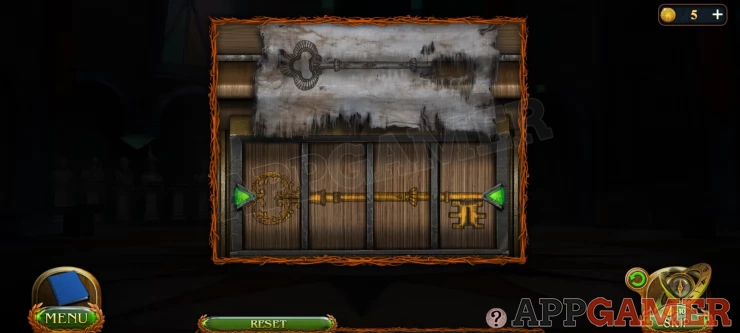
Now you can tap each of the 4 sections of the key lock below to match the drawing. The first 3 you can copy, the final one will unlock when you move it to the correct position.
You can now enter the warehouse (storeroom).
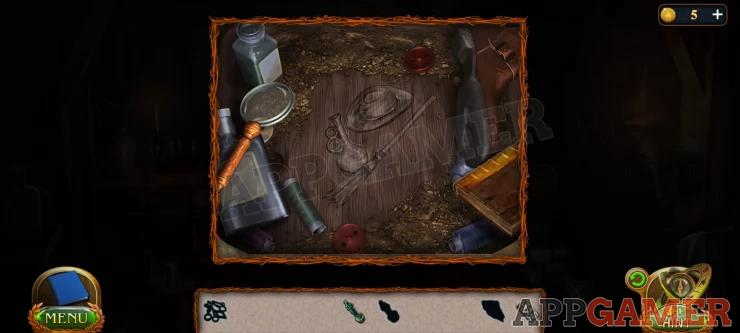
There is a new set of objects to find in this room and you will see the silhouettes at the bottom.
First tap to collect a brush from the back corner on the floor by the broom.
Then tap to view the box on the small stone wall on the lower right.
You cannot open this yet but collect the corkscrew from the bottle on the left.
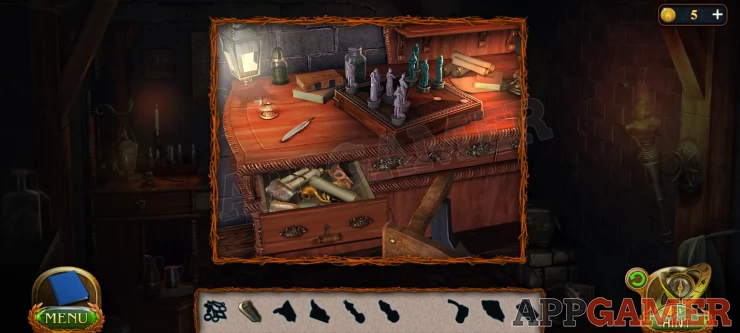
Now tap on the desk
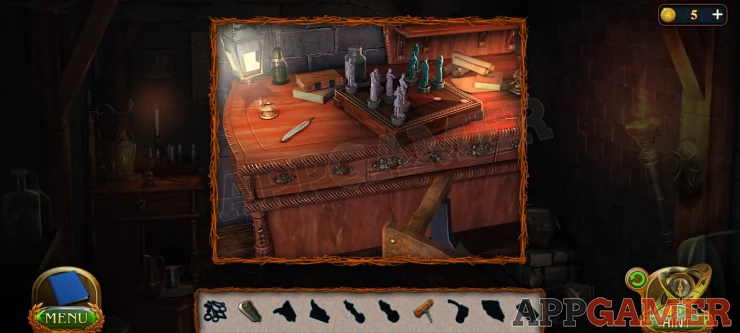
Use the corkscrew on the left drawer and you will open it.
Collect from inside an 'Oiler'. And a 'Part of an owl'
Now view a small vent that is on the wall in the back corner next to the top of the broomstick. (just below a candle).
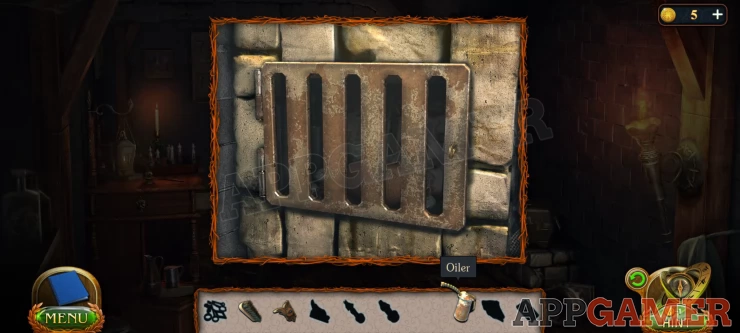
Use the Oiler on this to help you open it.
Collect a second 'Part of an owl). And also a Stencil (with key shapes)
Now view the box on the lower right again. You can add the 2 parts of the Own to it and then it will open.
Look inside and move the items around to collect a Priest Figurine.
At the bottom of the box is it dirty. Use the brush to clean it and reveal a clue. (Hat, broom and bottle)
Now view the key rack on the back wall. Collect a Warrior Figurine.
Now view the desk again.
Add the 2 figurines to the board on the desk and a drawer will open, collect the torn Canvas.
Now view the painting on the right wall. There a piece missing.
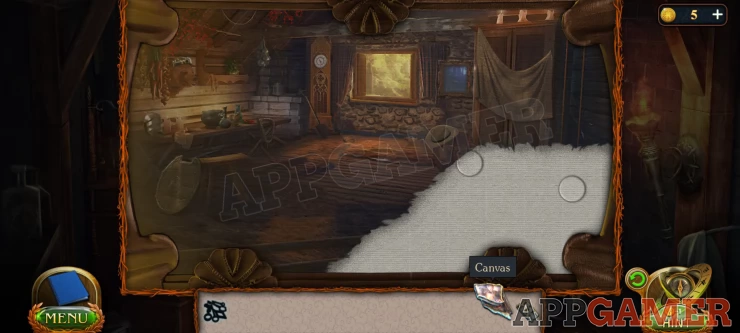
Add the canvas to it and then you need to tap on 3 items. Find the Hat, bottle and broom as in the clue.
Another drawer opens and you can collect all the keys.
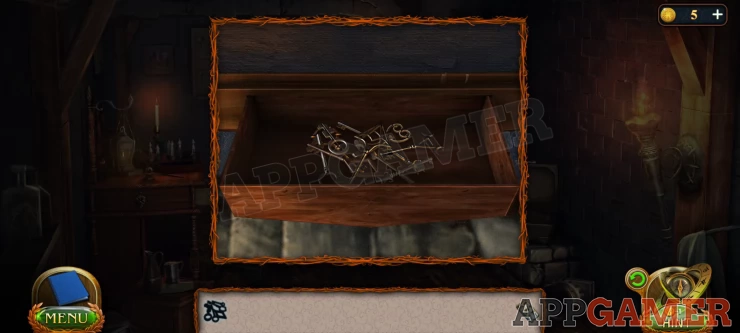
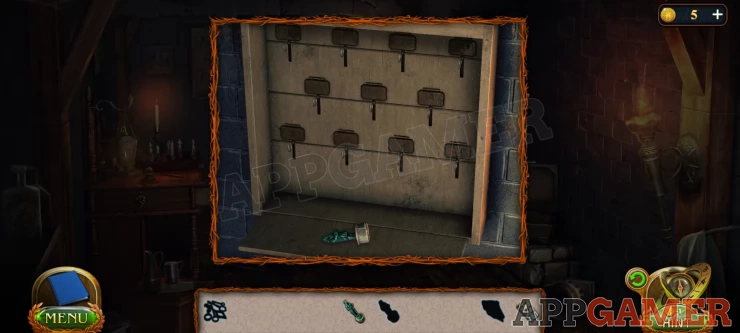
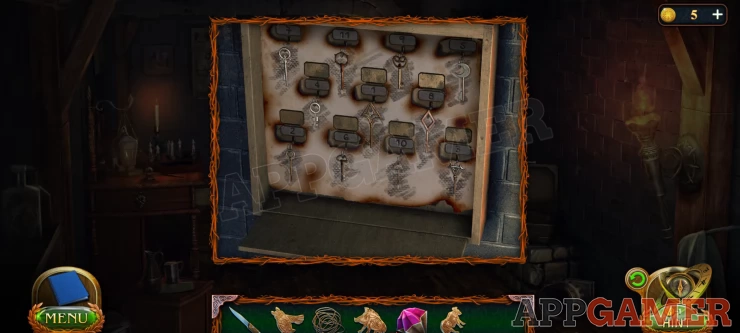
Return to the key rack and add the stencil to it and the pile of keys.

You now need to arrange the keys to place them on the correct hooks. Use the stencil as a guide
Once done the numbers will be revealed above the keys. You want to take the key for room 3.
Show
When you are back out in the entrance hall. Tap to view a box unit on the right.
Now tap the metal bar wedged in the cage and it will break open. Collect the pink gem (8 of 10)
You can now also place the handle from the ground on the right into the spindle on the wheel. You cannot use it yet though.
Return to the door of room 3 in the the hallway and use the key to open it. Then go inside.
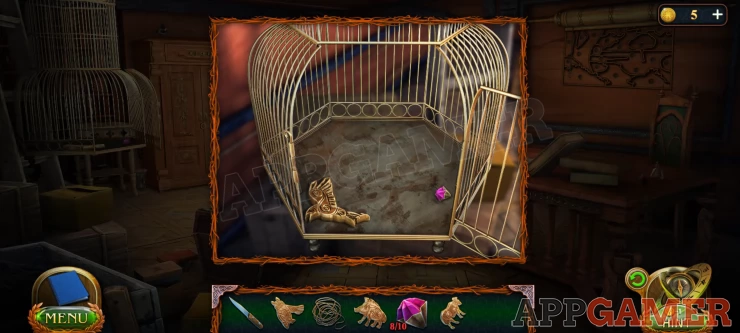
View the large bird cage on the left and collect a pink gem (9 of 10) and also a Raven Emblem.
Then view the Desk top.
Collect the Deer emblem. And then read the note. It refers to an item in the chest, there is a clue on the note.
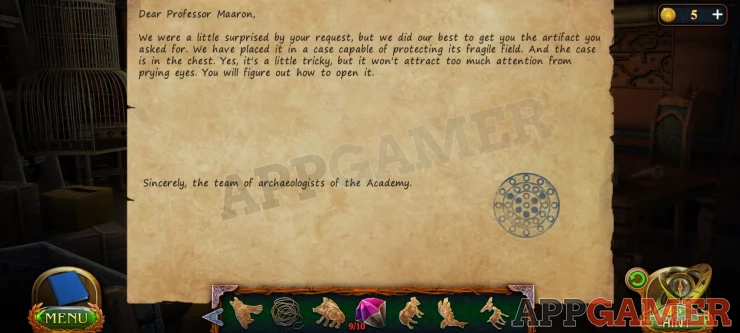
Now tap to view a round table that is is in the back corner of the room in front of a green curtain.
Tap to move the flask of yellow liquid on the back left of the table. Collect a pink gem (10 of 10)
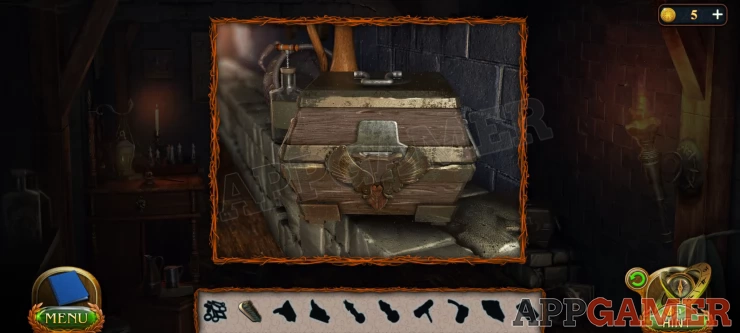
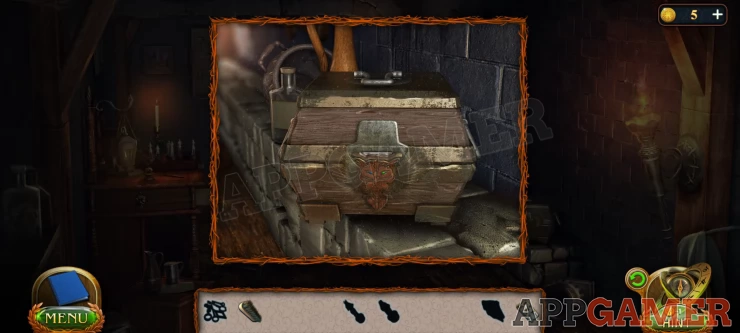
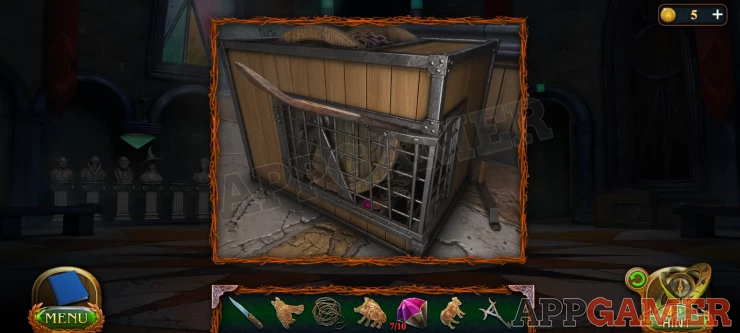
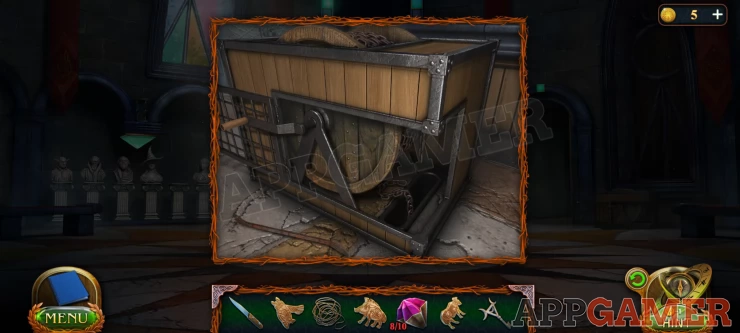
Now tap on the large chest on the floor on the left. There is a puzzle on top.
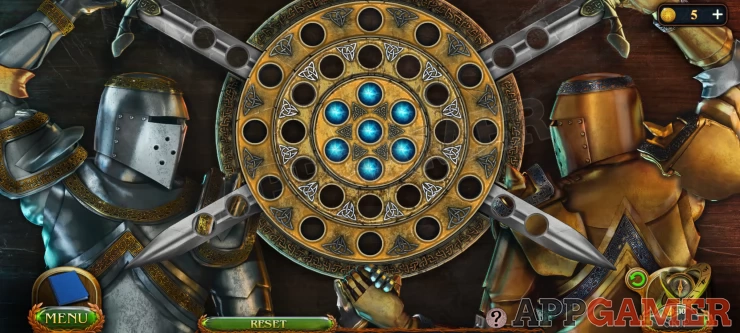
Each of the disk can spin around and the 2 swords can be moved in and out. Use these 2 mechanisms to move the blue gems around and arrange them. The clue for the arrangement is in the note.
Solution: Show
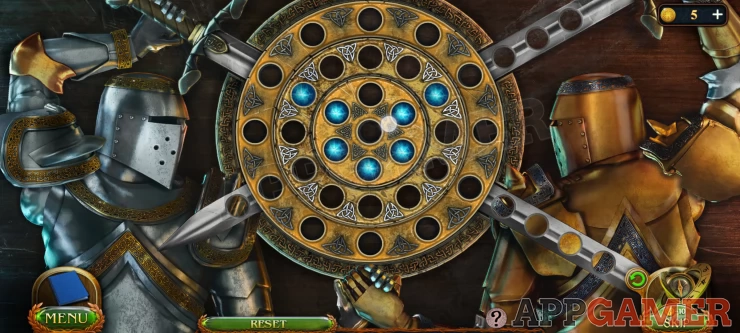
Once done the box will open to find a gold case suspended inside. There is a pink gem on top.
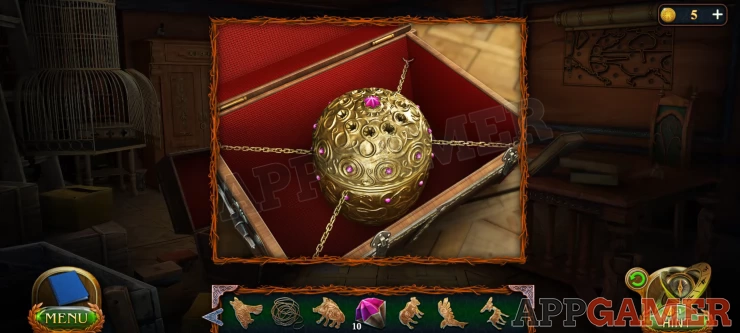
Add the 10 pink gems to it and it will open. You can then collect the green Orb.
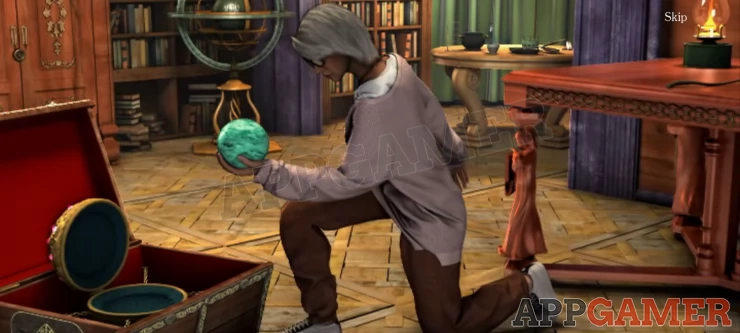
Watch the cut scene to find a path to a secret door in the library.
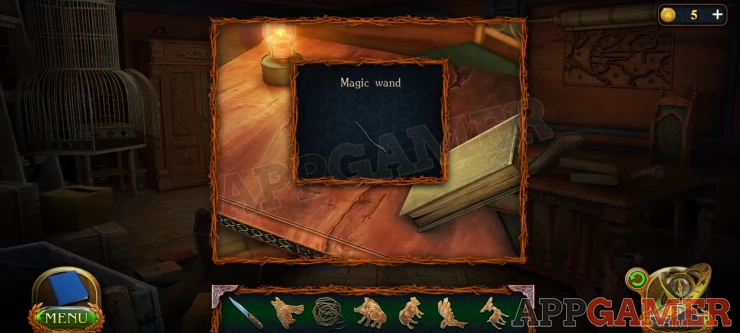
To open the secret door you will need the wand, return to Maaron's room (3) and collect the wand from the desk.
Then go back to the library and view the grey stone wall on the right.
Use the wand on it and you will see green lights appear.
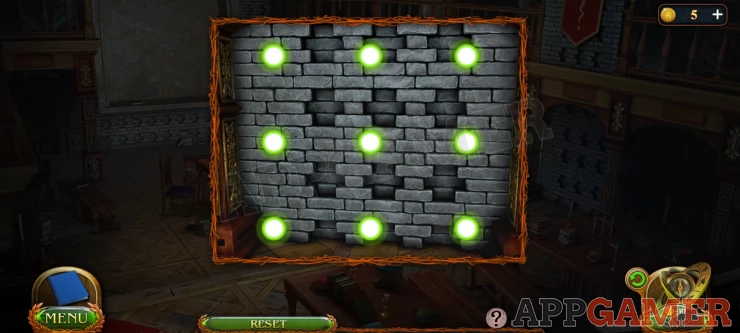
You now need to draw out the magic symbol that you saw in the cut scene. If you do not remember it you can find it in the Notebook that is on the lower left.
If you have any trouble with this follow the video below.

Enter the room to meet with Maaron and watch the next cut scene.
Now move on the Part 5 to Activate the Dolmen to the Darkwoods.
We have questions and answers related to this topic which may also help you: Show all
 With 20 years of experience in creating video game content for the internet and over 30 years as a gamer, Mark is now a passionate mobile App Gamer. Loving a challenge, he is always ready to get stuck in to both survival builders and puzzle solving games. He has been providing content for AppGamer since 2014.