6: Frontier Castle
Castle Defense Guide
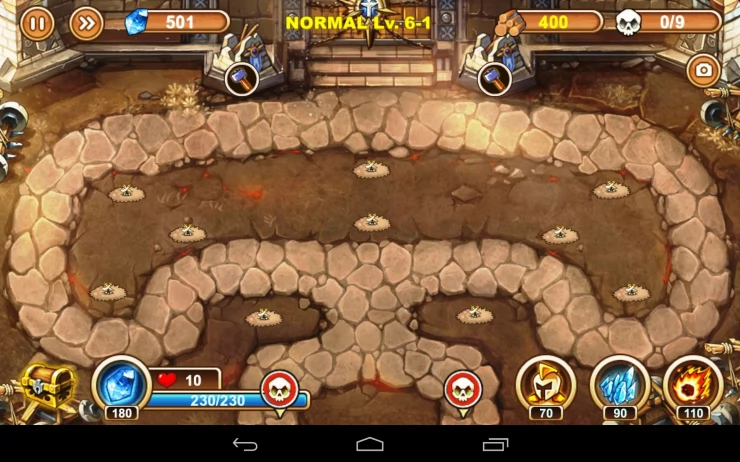
Enemies: Orc Slaves, Boars, Goblins, Orc Warrior, Goblin Medic, Vultures, Orc Shaman, Skeleton Warrior, Devil Observer, Carriers, Skeleton Warriors
Waves: 9
Like the Bridge map, you have two helpful sentry towers outside the entrance of your base. After setting up your basic defensive towers, make sure to repair them as they’ll help in dealing with any enemy that slips past your towers. The map features a large loop which will split the enemy group as soon as they enter it. You have to equally set your defenses on both sides. The bottleneck to the south is a good place to place double cannons and a fort in the middle.
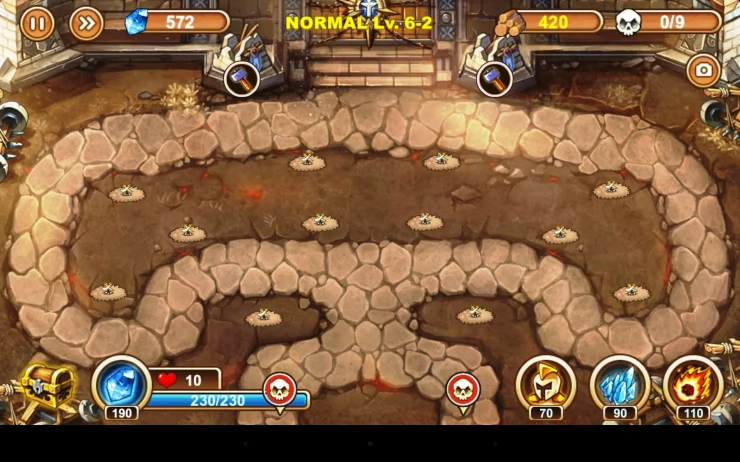
Enemies: Orc Slaves, Boars, Goblins, Orc Warrior, Goblin Medic, Vultures, Orc Shaman, Skeleton Warrior, Devil Observer, Carriers, Skeleton Warriors
Waves: 9
The layout has changed a bit, which still allows you to place two cannons in the bottleneck. This time, you can place two forts and two labs nearby as well. Like the previous map, you can repair the tower sentries later on to help you deal with stragglers.
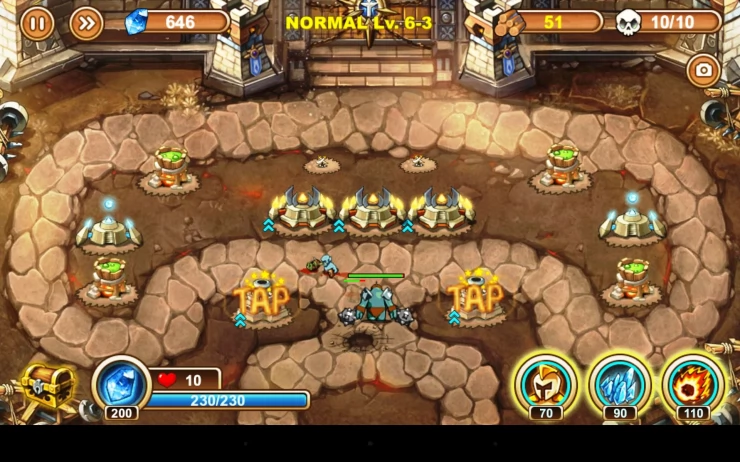
Enemies: Orc Slaves, Boars, Goblins, Orc Warrior, Goblin Medic, Vultures, Orc Shaman, Skeleton Warrior, Devil Observer, Carriers, Skeleton Warriors, Orc General
Waves: 10
The layout where you can place the towers have changed a bit. There’s also a new structure that serves as something like a bank. After repairing it, it will slowly accumulate resources until it reaches its capacity. By then, you can further upgrade it to increase its capacity or sell it to get a huge amount of resources back. The spot it occupies will also be freed, allowing you to install a new tower in its place. Make sure that you fully upgrade most of your towers especially in the frontlines since this map has a boss enemy in the last wave.
The boss, an Orc General will appear in the last wave. It has very high HP, armor and can temporarily disable your towers with its Thunderstrike ability. You have to tap the stunned towers to make them function again. Just be careful since excessive tapping will make you accidentally hit the Sell button. Don’t bother stalling it with your warriors as they’ll just die instantly with its attacks. By the last wave, you should have a lot of fully upgraded towers. Don’t hesitate to use your spells and upgrade towers by the last minute. Using Freeze right before the boss hits the ground with its weapon will cancel the move.
We have questions and answers related to this topic which may also help you: Show all