Grim of Legacy Level 7 Walkthrough
More Escape Room: Grim of Legacy
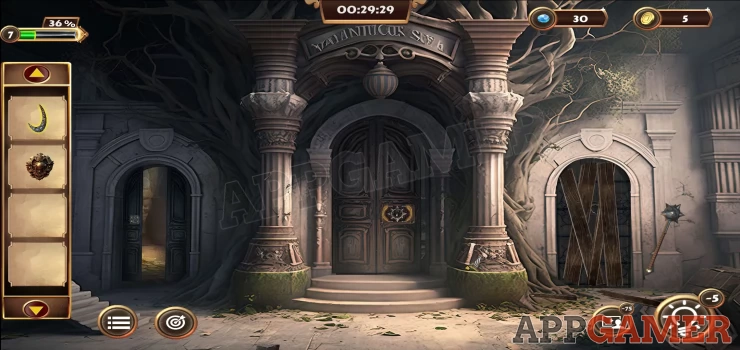
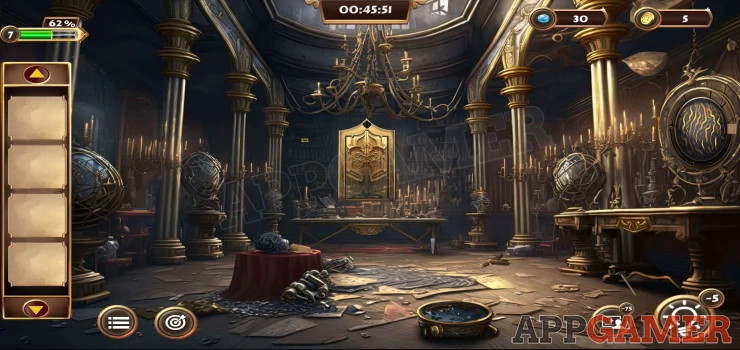
In Level 7 of Escape Room: Grim of Legacy we return to the fantasy Land where Emiley needs to find a way to shrink herself to be like Tinker so she can go to his home. First you need to reach the island using the boat.
Objective - Gather Boat Gems
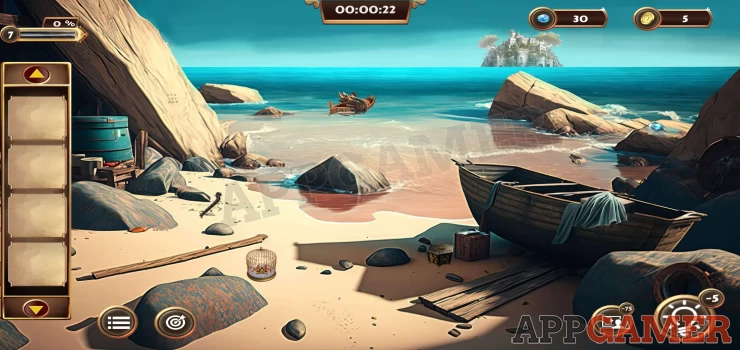
View the small rock near the center and collect from the ground a piece of a Metal Cutter.
Then also collect from the sand on the left second piece of metal cutter, then a small Cage in the middle and a Box by the wooden boat.
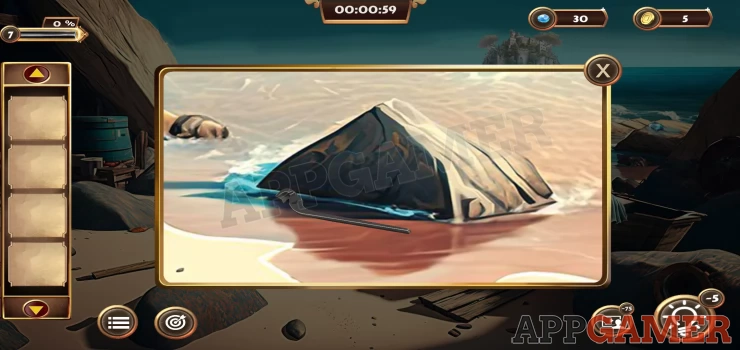
Next tap on the wooden boat to view it and then move the cloth.
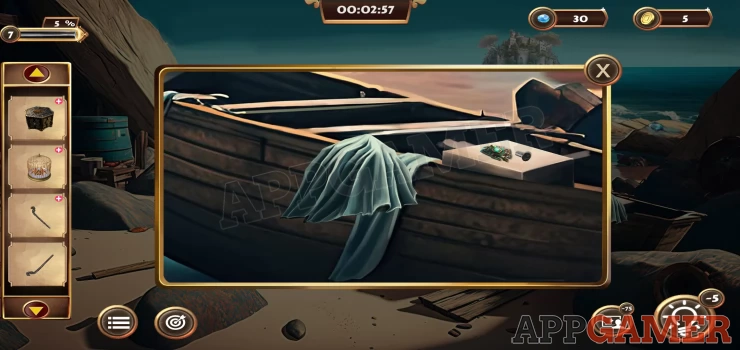
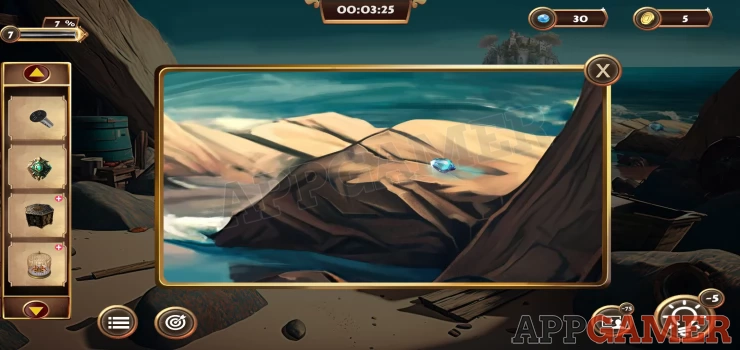
Collect the Pendant and a Screw. Then on the rock on the top right you will see a blue gem to collect.
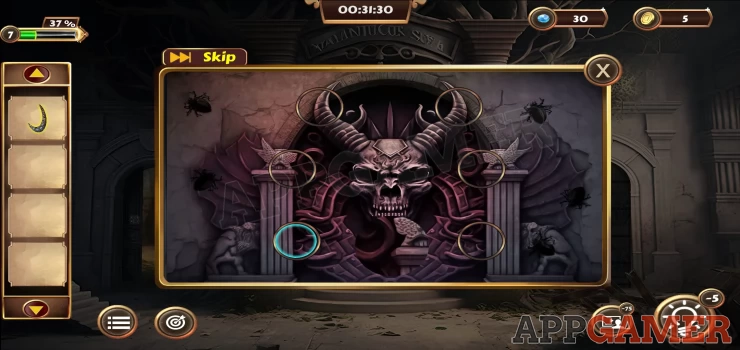
Now tap on the large rock on the left to see a clue of numbers and symbols.
Show
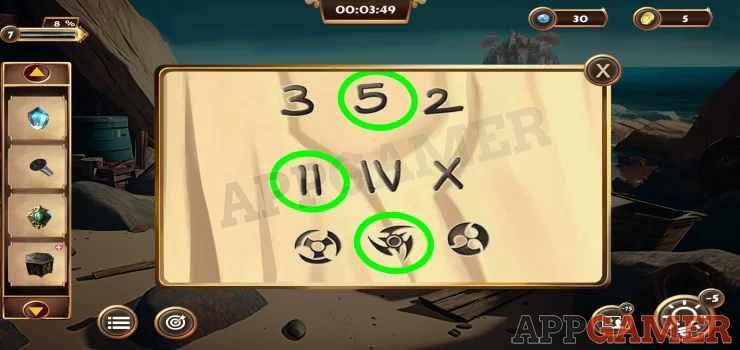
Next view the box in your inventory and tap it to see a puzzle lock.
Use the arrows buttons to spin the 3 dials and set the correct code. The clue is on the rock. Once opened collect from inside a Coin.
Now view one of the pieces of the Metal Cutter in your inventory and add to it the other piece. Then also add the screw. And finally add the Coin to it which will assemble the metal cutter.

Once you have the metal cutter, view the Cage in your inventory and use the metal cutters on it to open the bars.
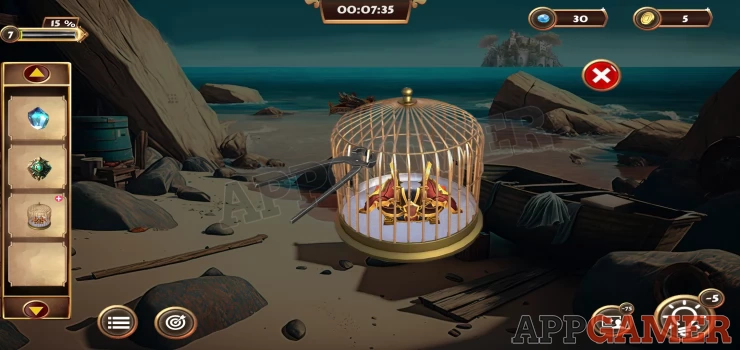
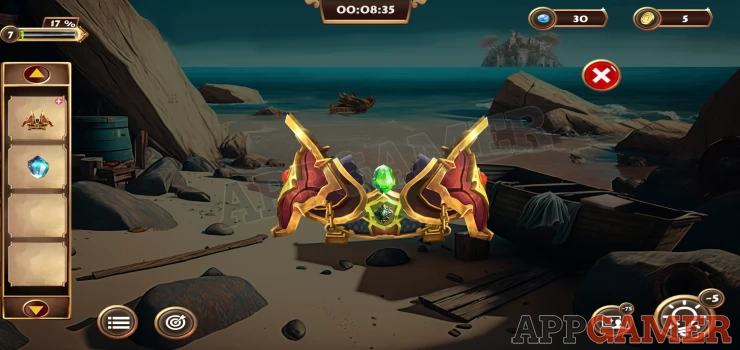
Collect the 'Armer' from inside. Now view the Armer in your inventory and add to it the pendant. It will open and you can collect a second gem.
This completes the Objective.
Objective - Break the Planks
Now tap on the small boat in the water.
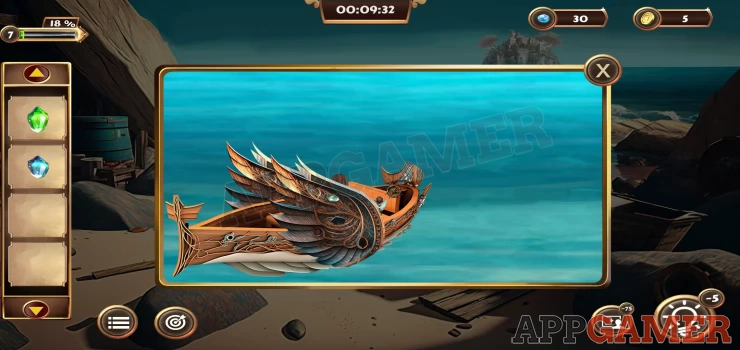
Add the 2 gems to it and it will fly and take you to the island.

From the ground you can collect a Paper (clue) and a blue round Gem. Below the left column you can also tap to move a stone and collect a Pendant from behind it.
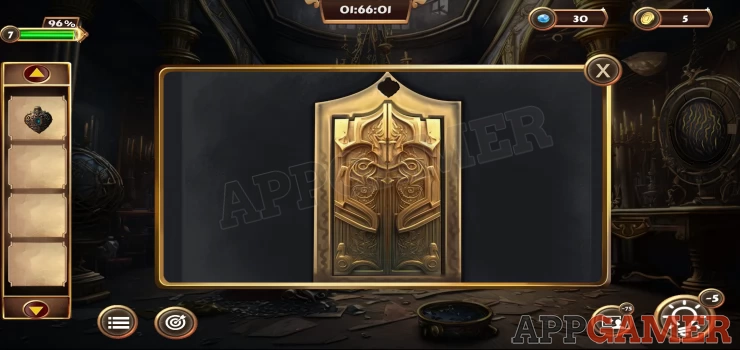
Now view the door on the left. you will see a puzzle lock.
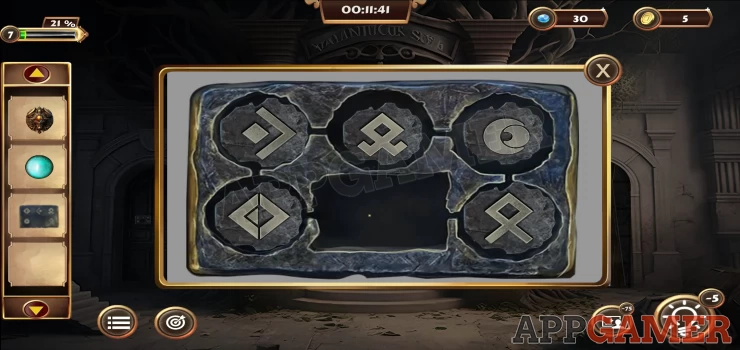
Left Door Lock Puzzle
Add the Paper to the center to begin.
Arrange the 5 symbols to match the layout on the paper.
Tap pairs of symbols next to each other to swap them.
Solution: Show
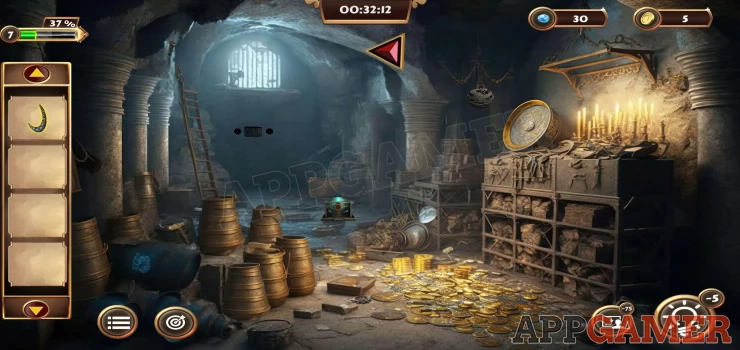
When the door opens go though to a store room.
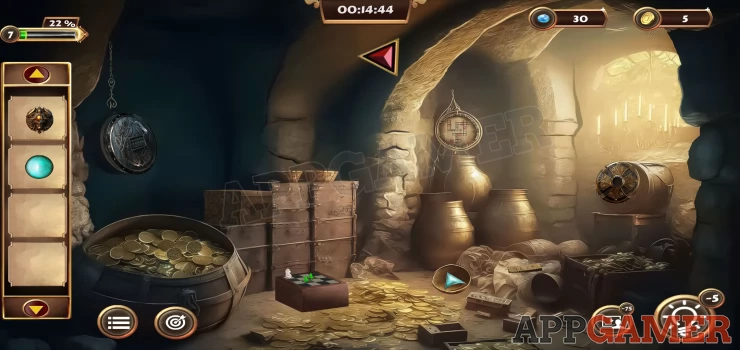
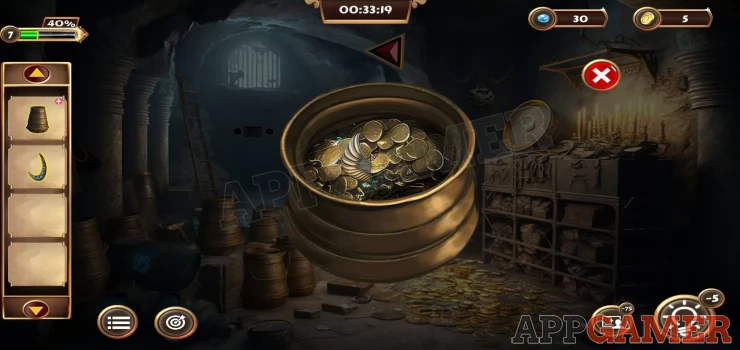
Tap on the large barrel of coins on the left to move some and collect from inside a blue triangular Piece, you can then also collect a second piece from the ground on the right.
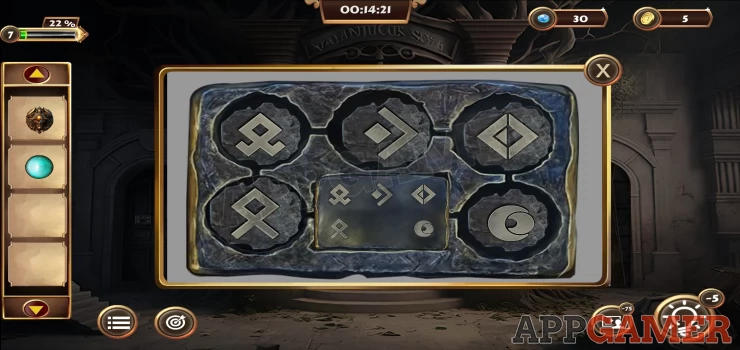
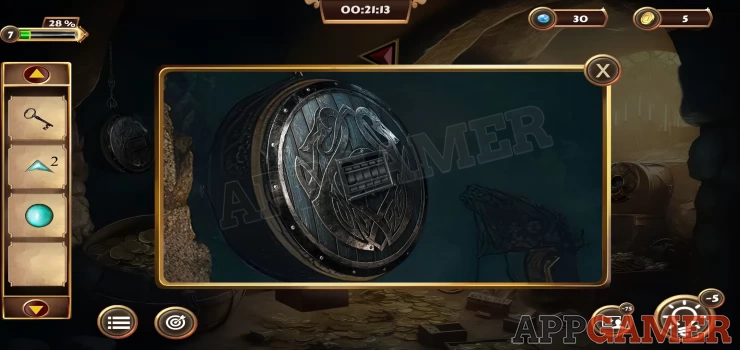
Next tap on the right side below the candles to see a round hatch.
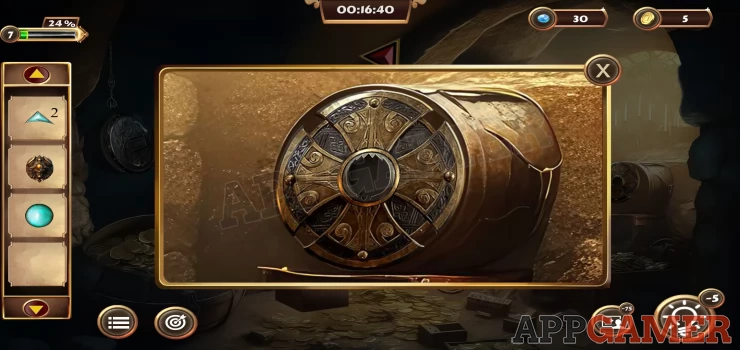
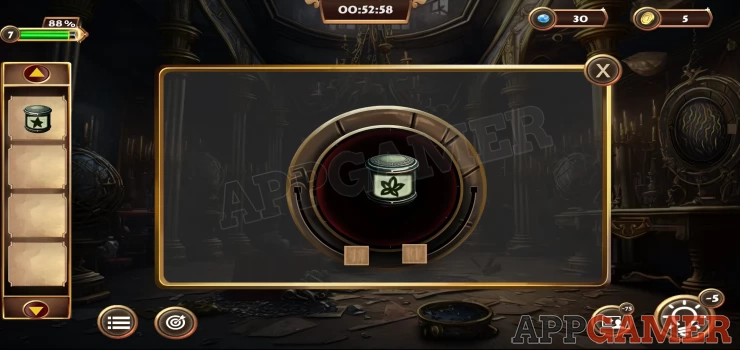
Use the pendant on the center to open it and collect a Key. Next tap on the pile of pots below the hatch to find some 'Manuscripts' with numbers on them , collect these.
Then see another round item hanging from the wall above the large pots.
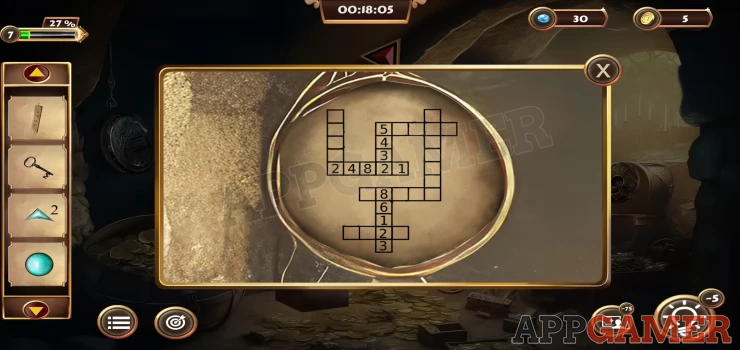
Add the manuscripts to these to start a puzzle.
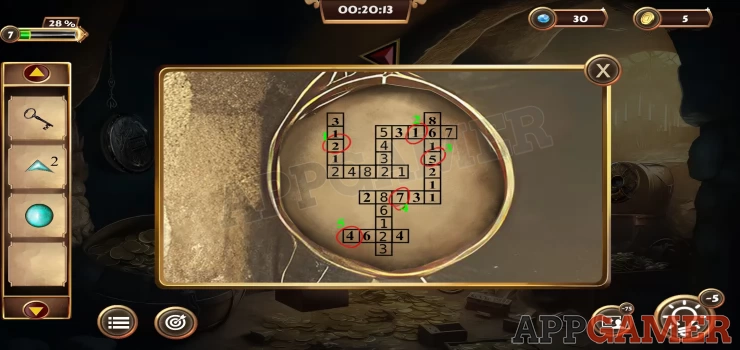
Cross Numbers Puzzle
- Drag the five papers with numbers to the puzzle grid to fit them into the correct positions.
- They must match with the numbers already in place.
- Once done you will see the highlighted numbers with an order
Solution: Show
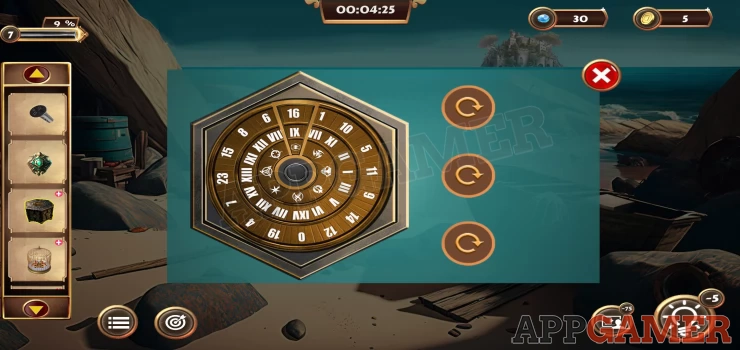
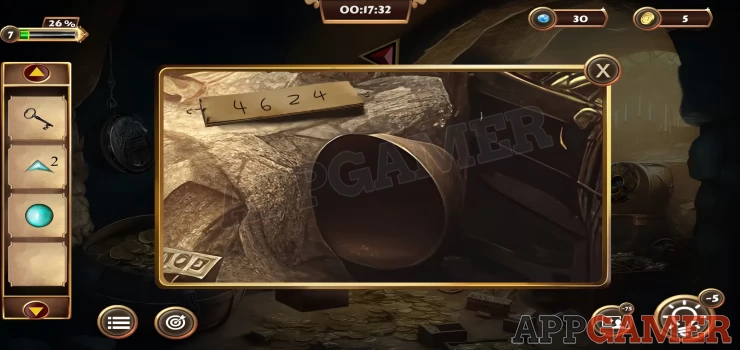
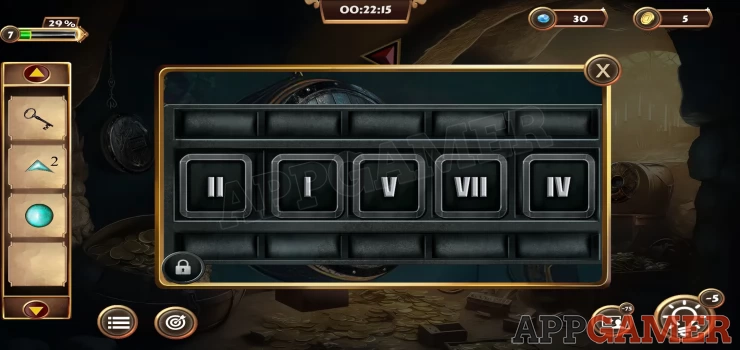
Now view another hatch on the top left of the room.
Tap to see the code lock and use the code found above to open it. You need to set the numbers in Roman Numerals.
After entering the code tap the lock icon on the bottom left to open it.
Solution: Show
Collect another Pendant.
Now collect a box that is to the right of the coins on the left of the room. It has a cat emblem on it. View the box in your inventory and then use the key to open it.
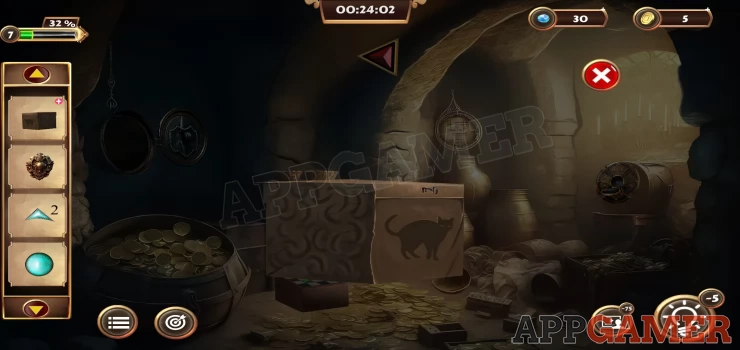
Inside you can collect another box. View this one in your inventory as well.
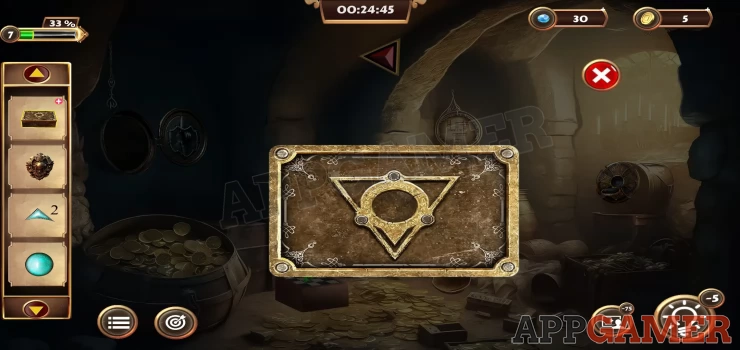
Add to this on the 2 triangular pieces and the round Gem. When it opens collect the Mace.
Finally view a small box on the floor with a small chess board on top. This is a puzzle.
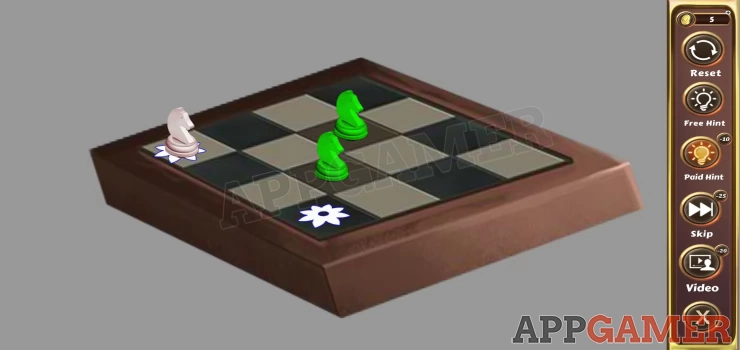
Chess Board Puzzle
- There is a white knight piece that you can move around by tapping any of the green options that show where you can move it to.
- As you move it will leave behind the white flower symbols.
- You cannot move back to a spot with a flower symbol on it.
- You need to move the knight around to cover the board with the symbols.
- If you get stuck tap the Reset button on the top right.
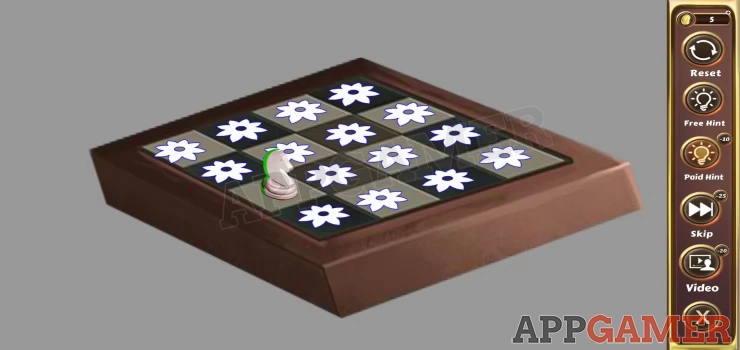
When it is complete you can collect a 'Piece' from the box.
Exit to the front of the building again and now you can use the mace on the boards on the door on the right, this will break them and complete the objective.
Objective - Gather the Steel Disks
View the door on the right now and add the pendant to it to open a panel. You will see a puzzle inside but this is simple to
complete.
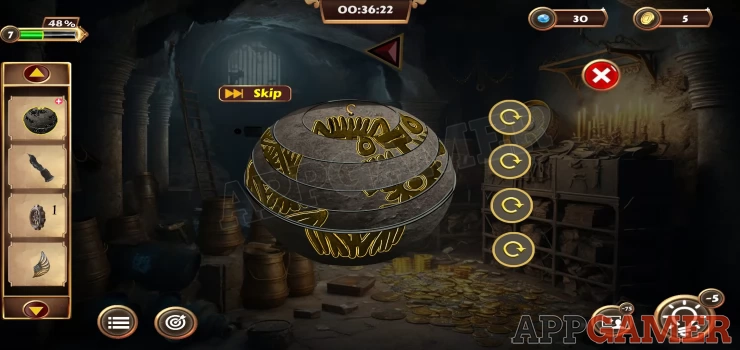
Right Door Puzzle
- There are 6 circles on the image that are rotated.
- Tap each of the circle to turn it and complete the picture.
- You just need to turn each circle twice.
Solution: Show
Enter this second room.
First tap the metal pots on the floor on the left to collect one. Then you can view it in your inventory and look inside to find a wing Piece to collect.
Then also collect from the floor (bottom center) a Steel Disk. And from the pile of items above this you can find a Dagger.
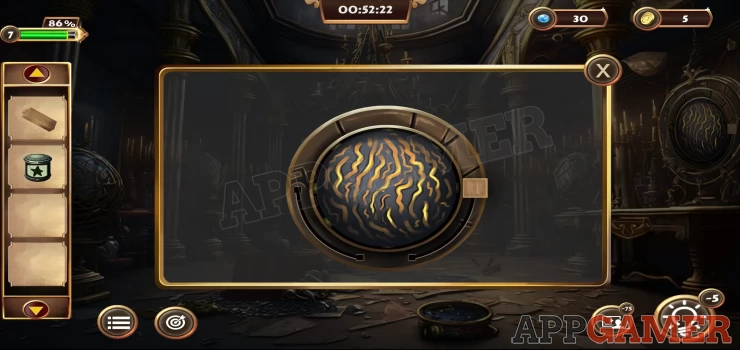
Now tap on the upper right where there are some chains hanging and you will collect a 'Globe'. (to the left of the round gold rimmed drum item). Then view the globe in your inventory.
Globe Puzzle
- Use the arrows on the right to turn part of the globe to complete the image on it.
- This is also simple to complete.
- Tap each arrow twice to line them up.

Once done the globe will open and you can collect another 'Piece'. (sun piece)
Now you can view the blue globe item in a frame that is on the floor in the center of the room.
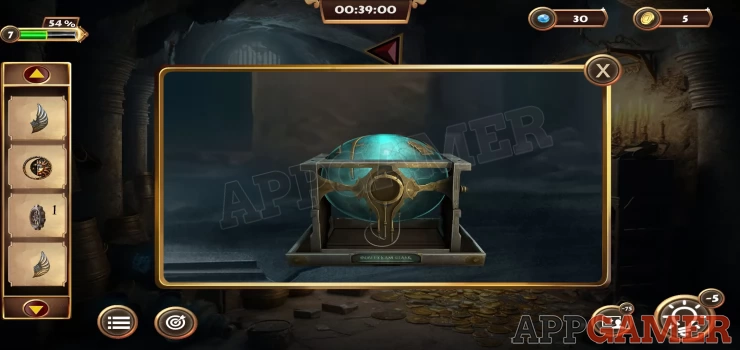
Add to it the round 'sun' piece that you have to it and also the moon shaped piece. The globe opens and you can collect another Steel Disk. This complete the objective.
Objective - Fix the Chisel
Now tap on the wall on the back under the window.

Add the 2 steel disks to the slots and the brick opens for you to collect a 'Swans' (swan head piece)

Now back out to the front of the building again and view the base of the column on the right.
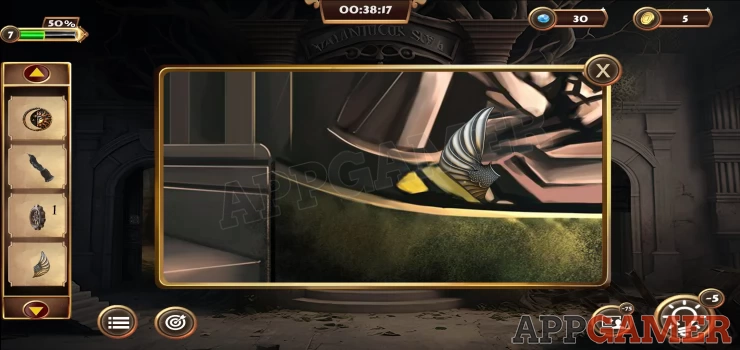
Use the dagger here to collect a second Wing Piece. You can now view the lock on the main door.
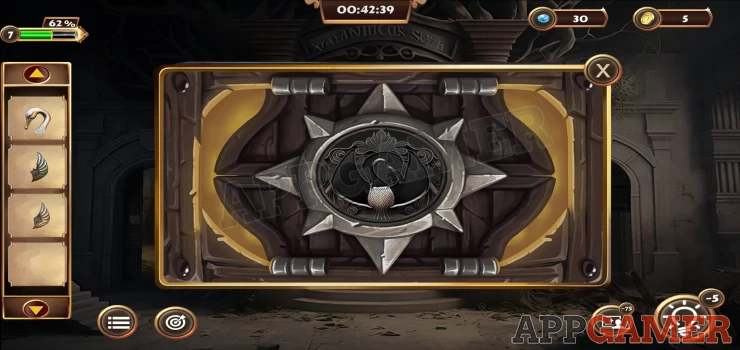
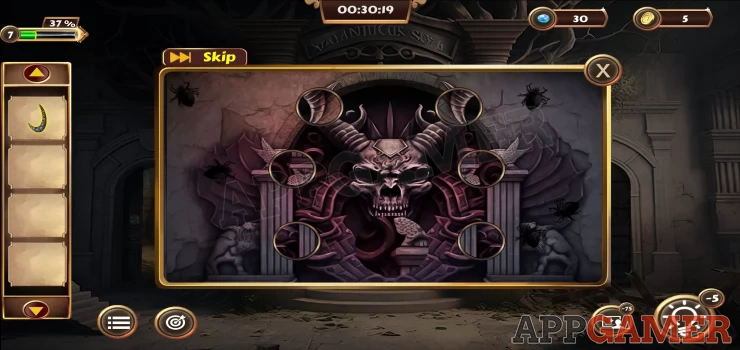
Add the swan head and the 2 wings to it to open it. You will then see a puzzle to complete.
Main Door Puzzle
- Tap the colored pieces to move them around the board using the empty slot.
- You need to arrange them to match the colors on the left.
- All the reds should be on the top row, then yellow and then blue on the bottom.
Enter the hall.
First collect a Chisel part from the right leg of the table in the center of the room. Then tap to view a pile of sticks on the floor just to the right of the table. Move the sticks and you will be able to collect a 'Patch'.
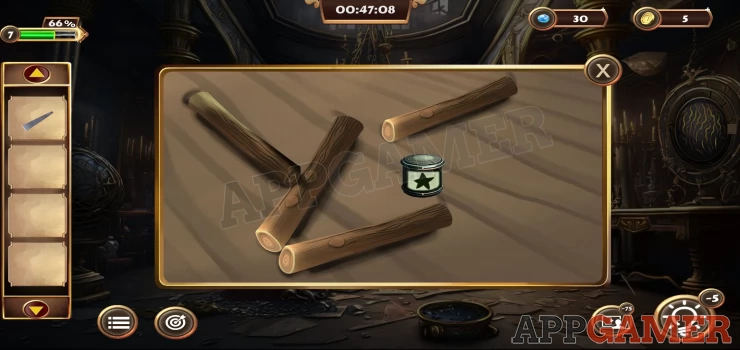
Next tap on a small round red table to the left side and you will collect a a block of Wood.
Now tap on the bottom of the table on the far right of the room and collect a hammer. Then tap on the front of the table on the right to see a small drawer.
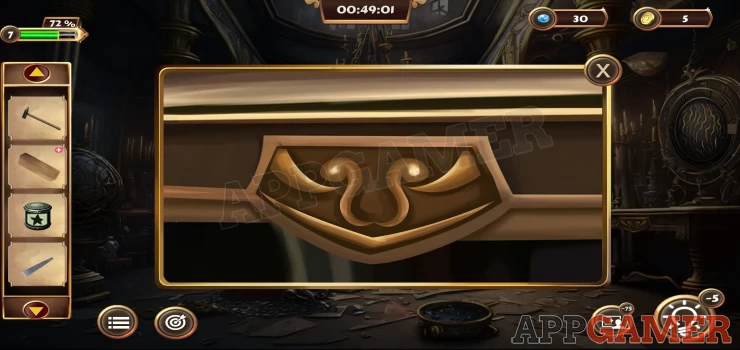
Open this and you can collect a Chisel Part. (handle)
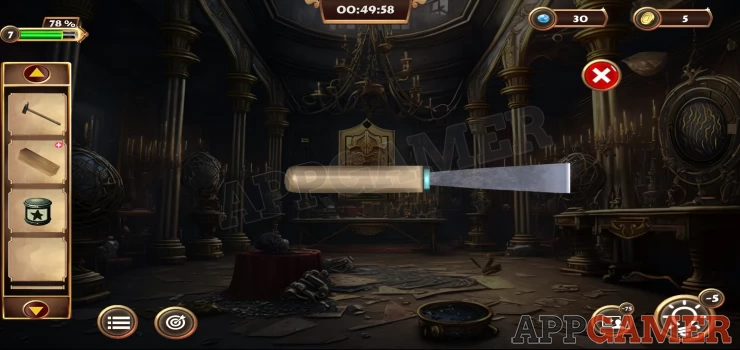
View the Chisel handle part in your inventory and then add to it the other chisel part to make the Chisel. This completes the objective.
Objective - Obtain The Miniature Ring
Next view the block of Wood in your inventory and add to it the chisel and the hammer. This will cut the wood to shape.
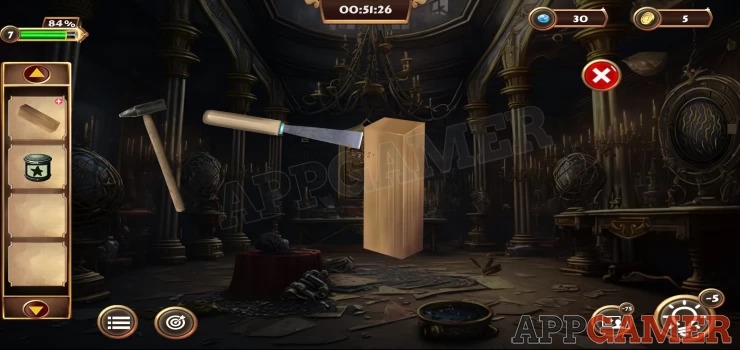
Collect the cut wood and then you can tap to view a large round object on the table on the far right.
Add the wooden block to it and then tap both blocks to move them and open the front. Collect another 'Patch'.
Now look on the back wall just to the left of the center gold cabinet. Tap on the high shelf just below the left of the chandelier.
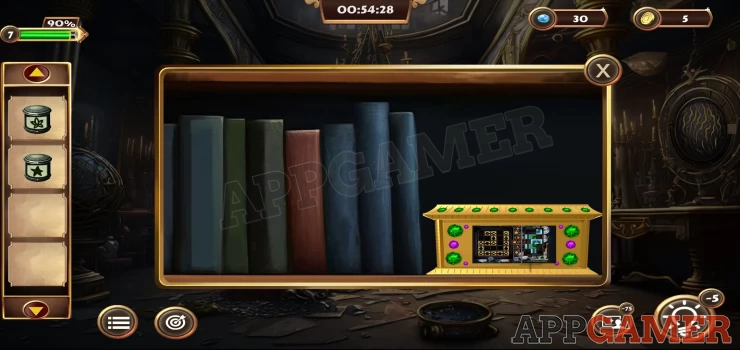
Collect the gold box from here. Then view it in your inventory to see the puzzle.
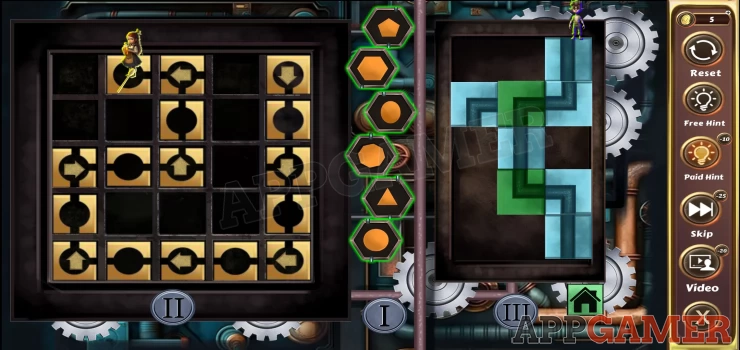
Gold Box Puzzle
There are 3 steps to this puzzle that you need to complete in order. Notice the I, II and III under the 3 sections.
Section 1
- On the middle section you need to tap the shapes in the correct order.
- If you get the order correct they will highlight in green, If you make a mistake they will all cancel and you start again.
Solution: From the top tap 1, 2, 4, 5, 6, 3
Section 2
- For the left section you need to make sure that the Emiley figure can pass through to the end of the path.
- Tap each of the arrows so that they pint in the correct directions
- Then tap on Emiley to make her move to the end.
Section 3
- For the right side section you need to arrange the pipe pieces to make a path for Tinker to pass to the house at the bottom.
- The green pieces are fixed. The blue pieces can be moved.
- Check the solution image below.
Solution: Show
The box opens and you can collect a Paper. View the paper to see a clue. You will need to remember the arrangement of symbols.
Show
Now tap to the left of the room. On the left most column. You will see another puzzle. Add the 2 Patch items to it to begin.
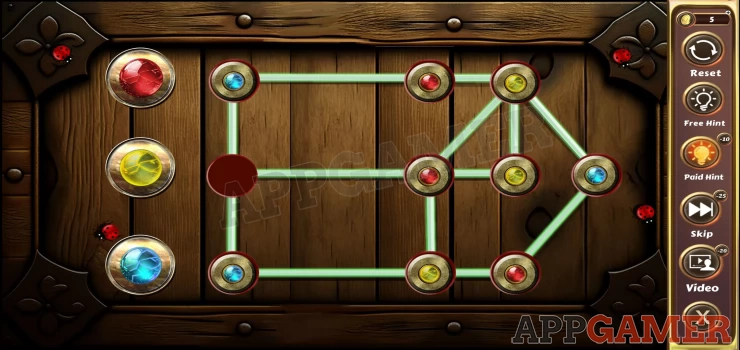
Patch Puzzle
You now need to drag the 12 'patches' to the slots at the top to arrange them into the correct positions.
Follow the clue on the paper to complete this.
Solution: Show
Once done you can collect a Pendant. Now view the large gold cabinet at the end of the room.
Add the pendant to the slot at the top to open it.
Collect the Ring from inside. This completes the objective and allows Emiley to shrink.
You have completed Level 7. Move on to Level 8.
We have questions and answers related to this topic which may also help you: Show all
 With 20 years of experience in creating video game content for the internet and over 30 years as a gamer, Mark is now a passionate mobile App Gamer. Loving a challenge, he is always ready to get stuck in to both survival builders and puzzle solving games. He has been providing content for AppGamer since 2014.