Grim of Legacy Level 5 Walkthrough
More Escape Room: Grim of Legacy
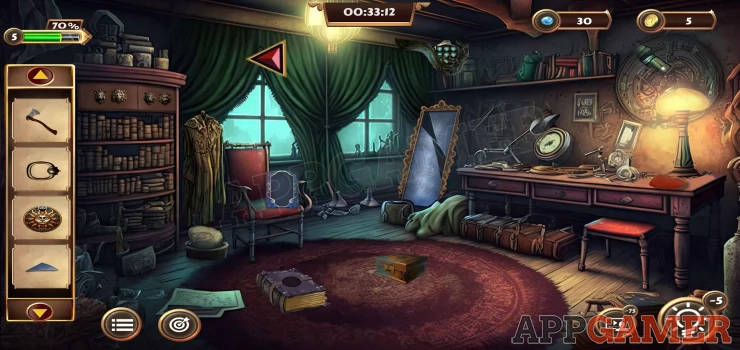
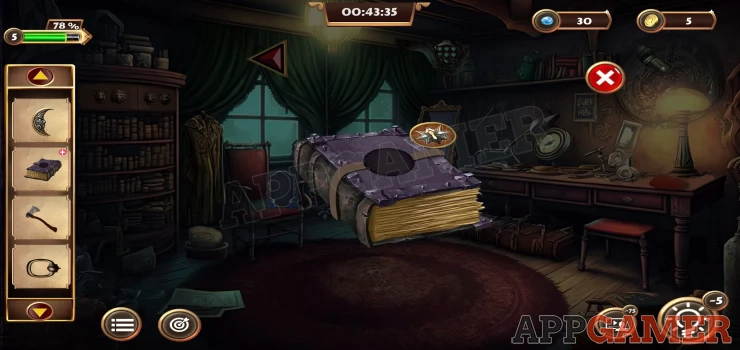
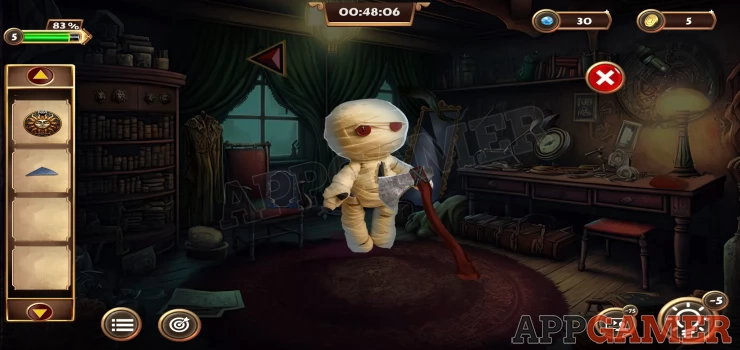
In Level 5 of Escape Room: Grim of Legacy you are back to playing as Camilo the Archaeologist as you explore the house of a Magician to find a way to use the magical Globe that you have collected.
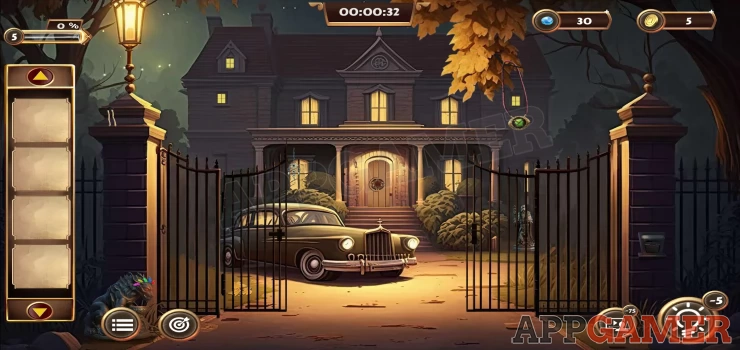
Objective - Unlock the Door
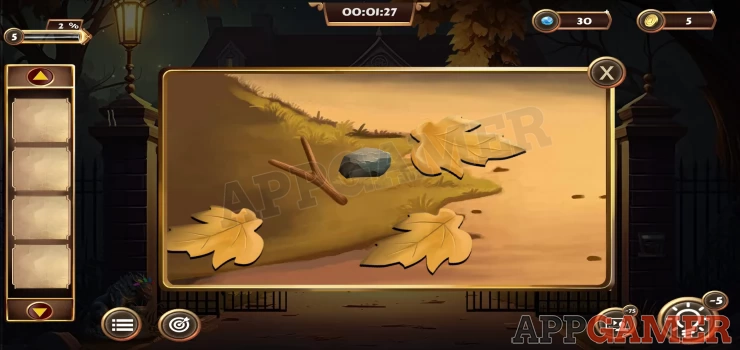
First tap on the left gate, at the bottom below the car to see some leaves, then tap to move them and collect fro underneath a Stone and a Stick.
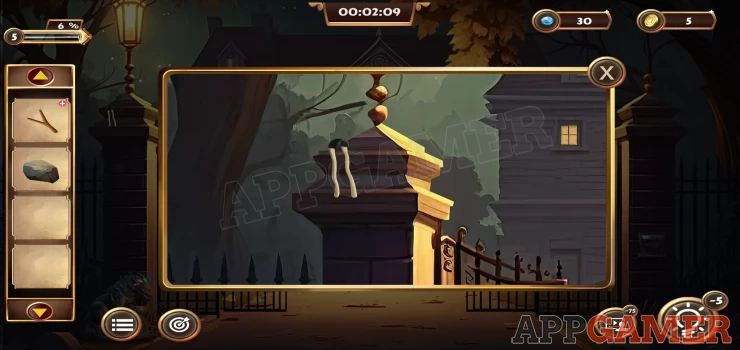
Then from the top of the gate pillar on the left collect a rubber band.
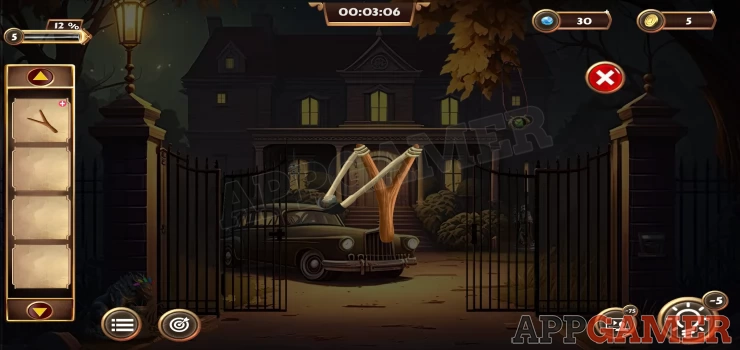
View the stick in your inventory and add the rubber band and the stone to make a Slingshot, collect this.
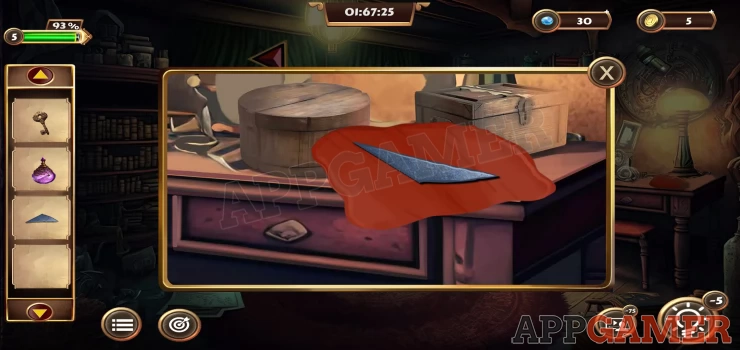
Now use the slingshot on the green object hanging on the tree above the right gate. You can then collect the Amulet.
Next view the letter box that is on the Right gate pillar. Open it to see some letters.
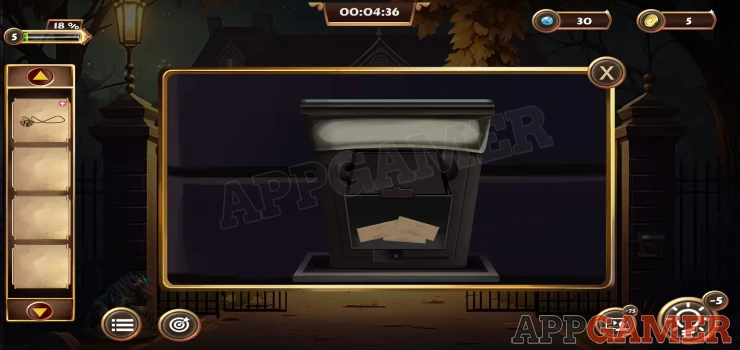
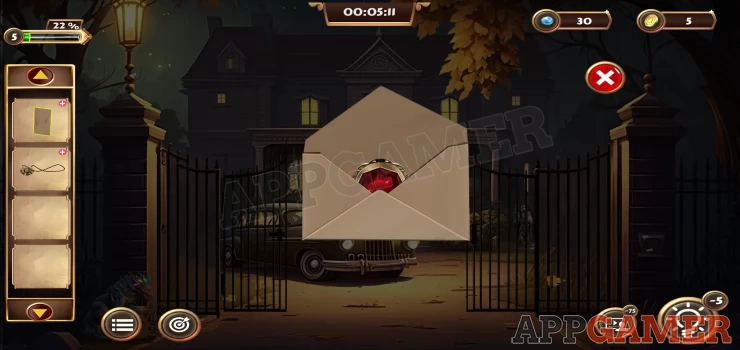
Collect a letter, then view it in your inventory and open it to collect a Red Gem.
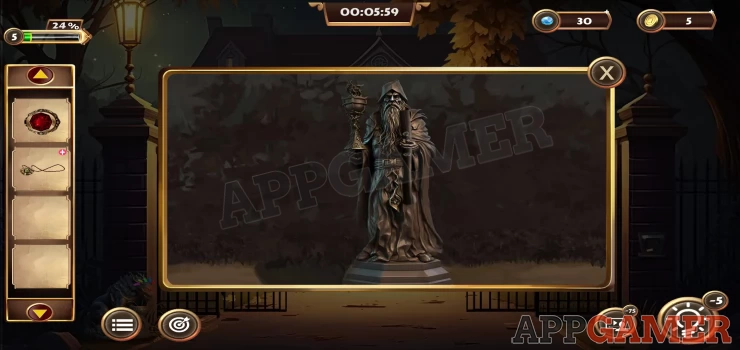
View the statue of a wizard that is behind the right side gate, then collect from it a Staff.
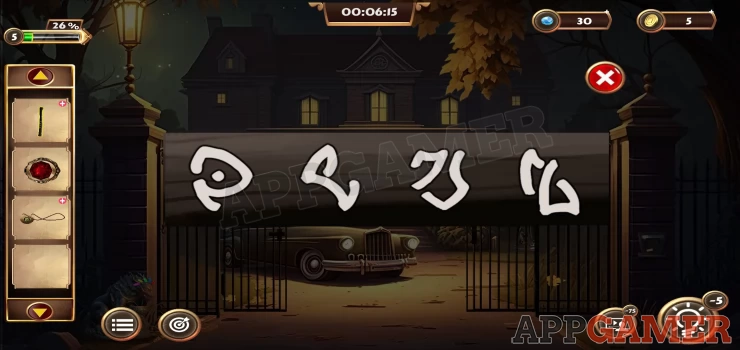
View the staff in your inventory and then look closer and you will see 4 symbols, these are a clue.
Show
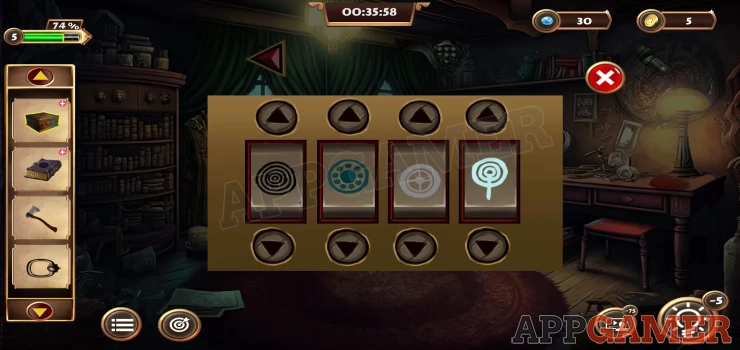
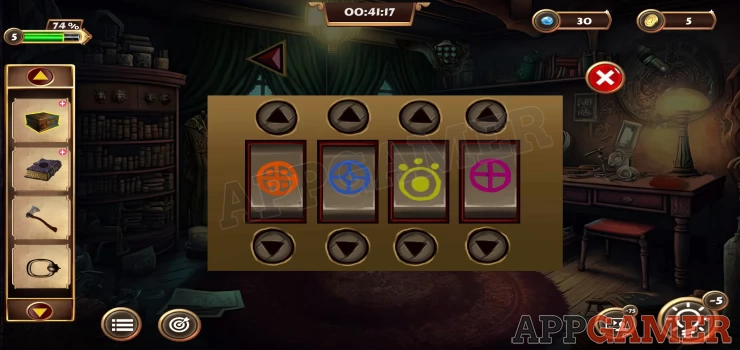
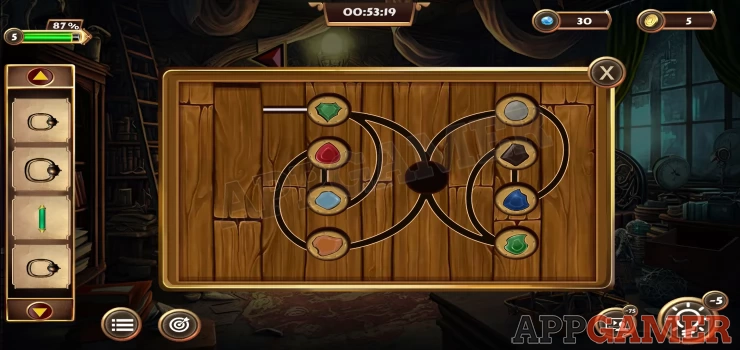
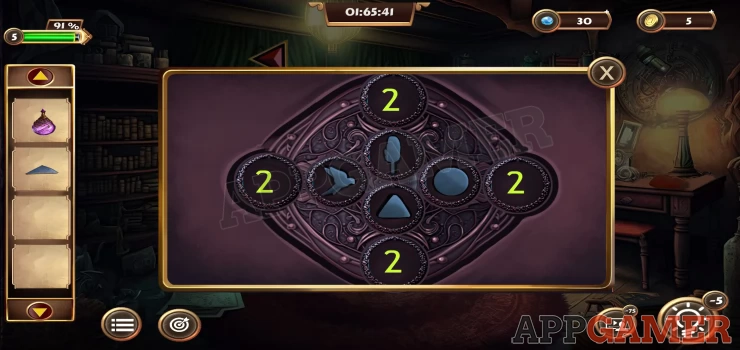
Now view the amulet in your inventory, this is a puzzle.
Amulet Puzzle
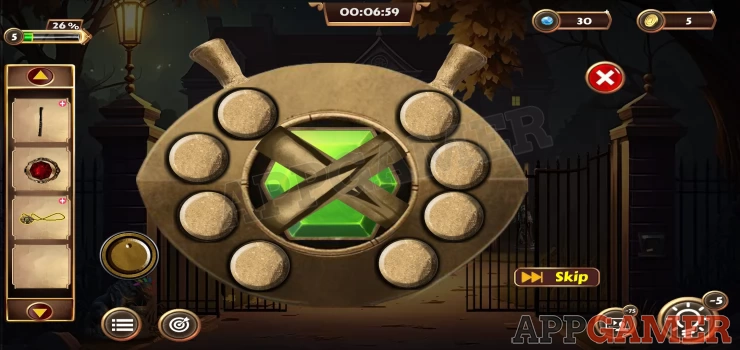
- There are 8 circles around the sides, 4 left and 4 right.
- You can select any of these and then tap the button on the bottom left to change the symbol on it.
- The clue for this is the 4 symbols on the staff.
- Check the solution below
Solution: Show
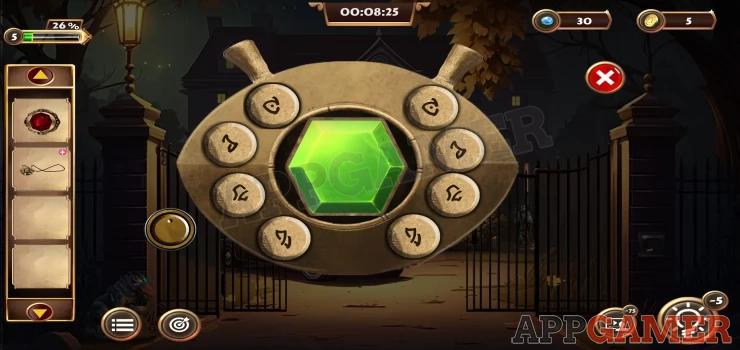
Once done you can collect a Green gem from the center of the amulet. Now tap on the window of the house to the left of the door. There is a Dream catcher there.
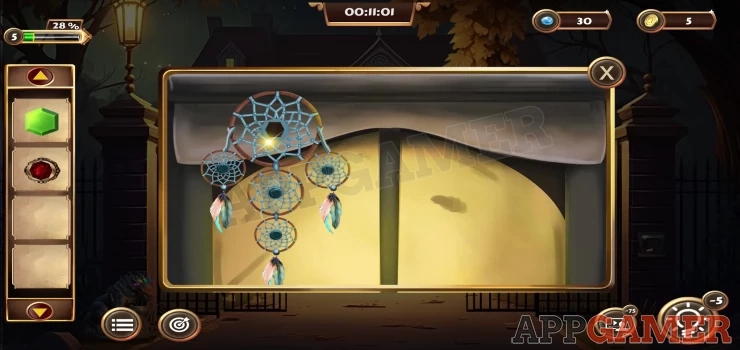
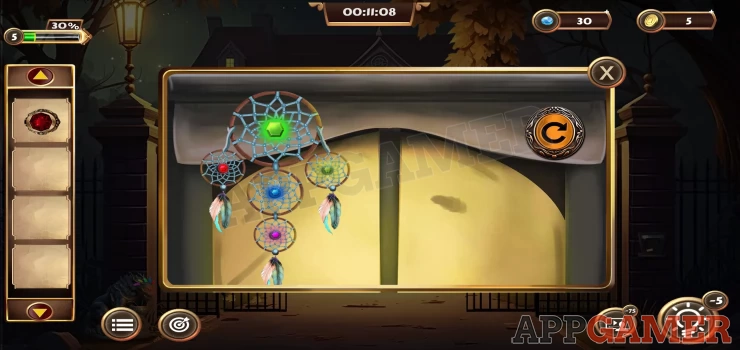
Add the green gem to the top of the dream catcher and you will see each of the 5 rings lights up with a color in a sequence. This is a clue. You can tap the button on the right to see the sequence again.
Now view a small statue on the ground by the left gate pillar. It has 5 colored horns on the head.
Set these in the correct order to solve the puzzle.
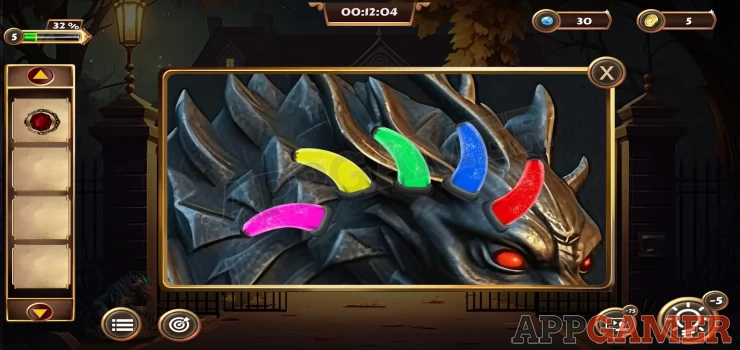
Solution: follow the dream catcher order: green, red, blue, purple, yellow.Show
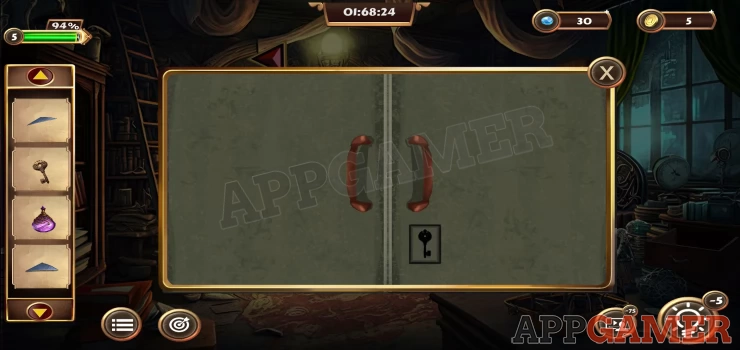
Once done you can collect a blue gem. Now view the front door of the house, there is a circle puzzle in the center.
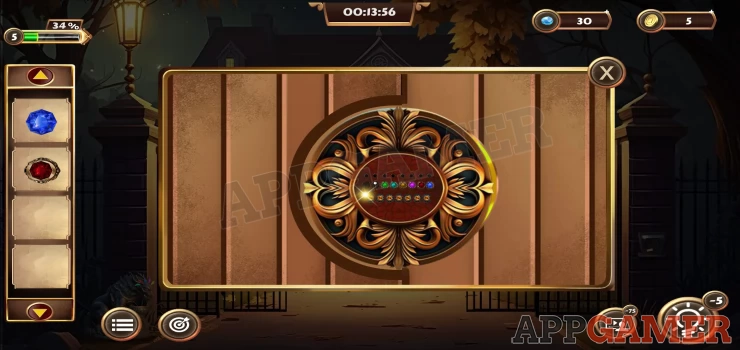
Add the red and blue gems to start.
Door Puzzle
- You need to place the gems on the door into the correct order.
- Use the arrow buttons below to swap pairs of gems around
- When a gem is in the correct position it will highlight green.
Solution: Show
The door opens and this completes the task. You can go inside
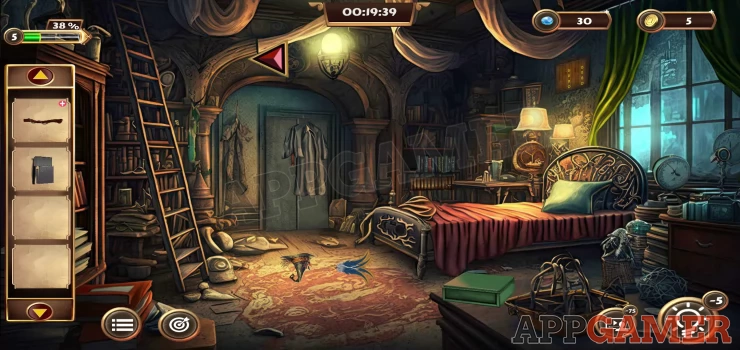
Objective - Get the Knob

First collect a lighter from the floor at the bottom of the stairs. Then tap on the floor on the left of the stairs to find a Stick to collect.
Then tap the doorway behind the chair on the right to open it and go through to a bedroom.
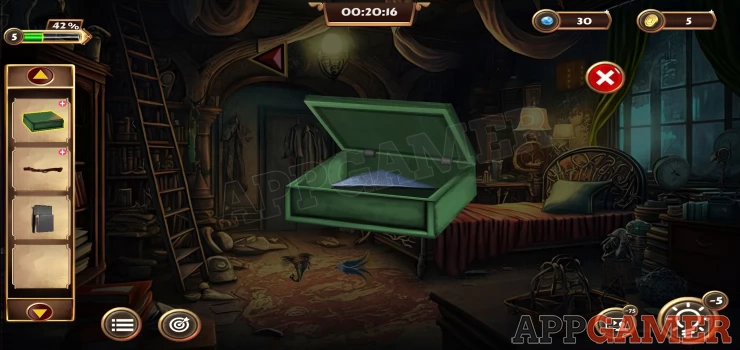
Collect the green box from the table on the lower right. You can then open it in your inventory and collect a Glass Piece.
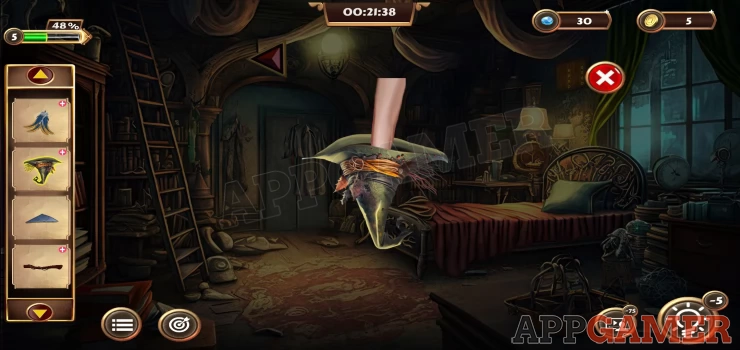
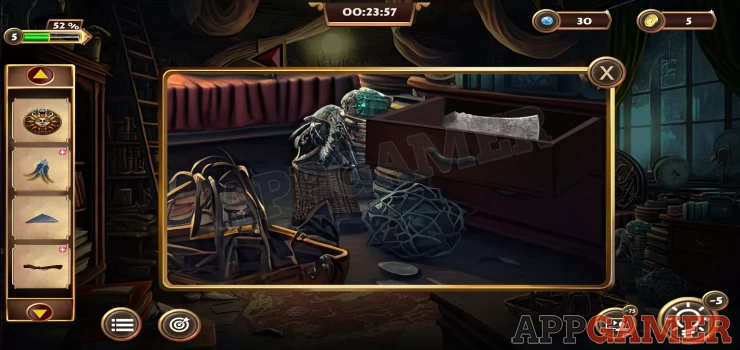
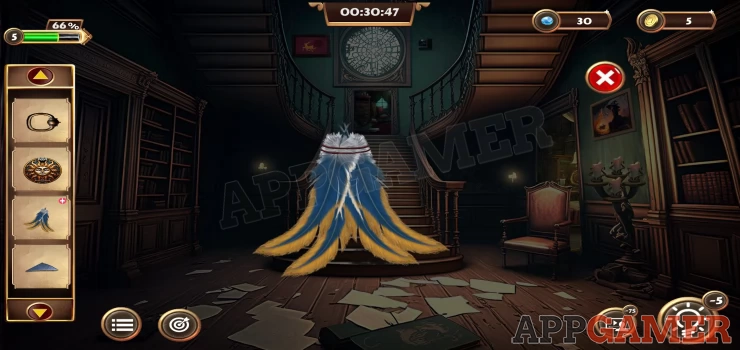
Then collect from the floor in the center a Magicians hat and a Feather (bunch of feathers).
View the magicians hat in your inventory and tap it to take things out of it until you collect a Sun pendant.
Next tap to view the drawers on the bottom right of the room, Open the top drawer and collect an Axe head.
You can now view the Stick in your inventory and add the Axe head to make and collect the Axe.
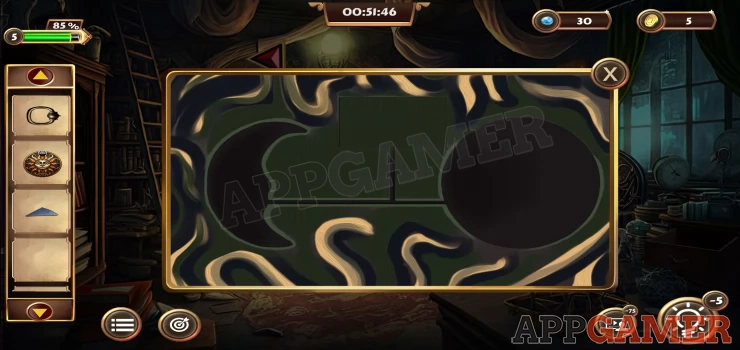
Tap to view the bookshelf on the far side of the bed to see the line of books then tap again to move them apart to find a puzzle.
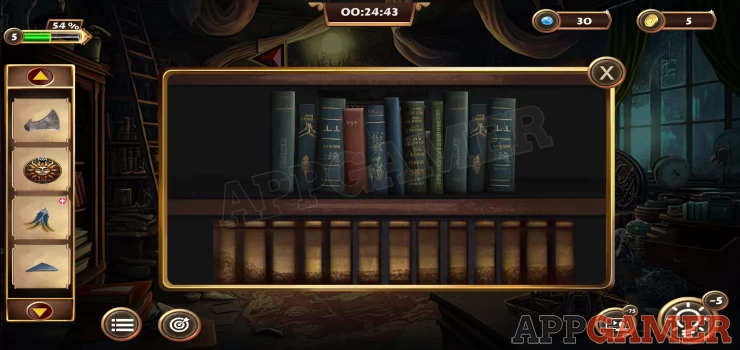
Bookshelf puzzle
- The lines of bars will move past the center pin.
- Tap the pink button on the right to move the pin out.
- You need to time the tap for when the head of the pin is in the gap of the bars.
- Just keep moving the pin each time it is clear to get it to the far right side.
Once done you can collect a Knob. Go back out to the entrance hall and then tap on the chair to view the arm. Collect from the arm a rubber thread.
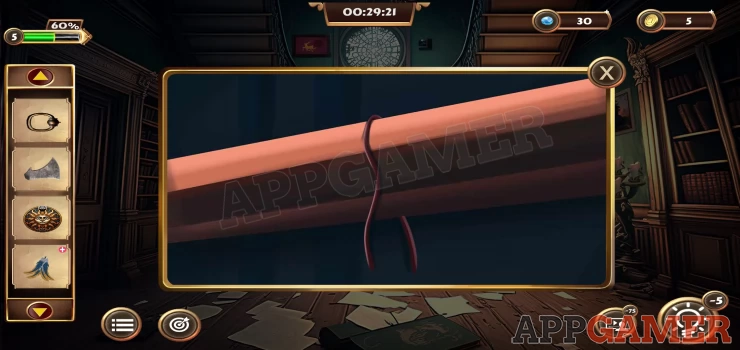
Now view the feather in your inventory and add the rubber thread to it. Then collect it again.
Tap to view the stairs, there is dirt on them.
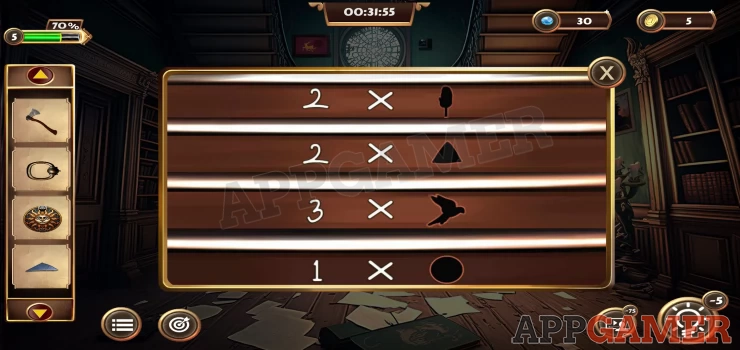
Use the feather on the stairs to clean them and you will see a clue for later.
Show
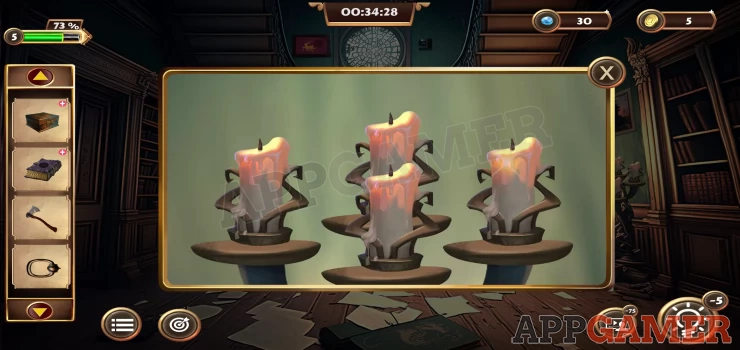
Next view the candles on the right side of the room. You can use the lighter on these to light them. Notice the colors that light up and the order, this is another clue.
Now tap on the door at the top of the stairs in the center to open it and go through to a study.
Collect the large 'Mystical book' from the floor and also the 'Wooden box'.
View the wooden box in your inventory to see a puzzle lock.
Wooden Box lock
- Tap the arrows to set the 4 symbols.
- Notice that various symbols appear in colors.
- The clue is the candles.
Solution: You just need to find symbols that match the color of the candles in the order that they are lit.Show
Collect a Moon pendant from the box.
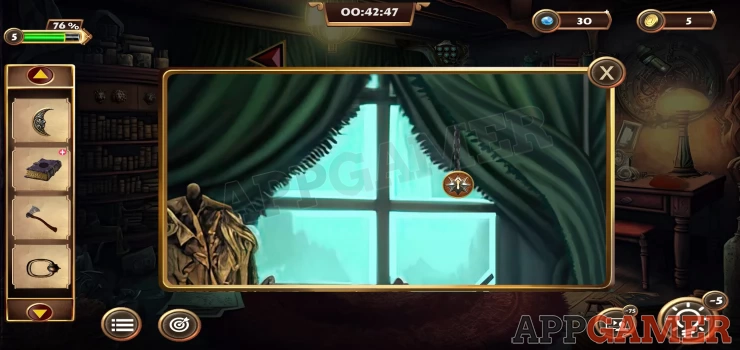
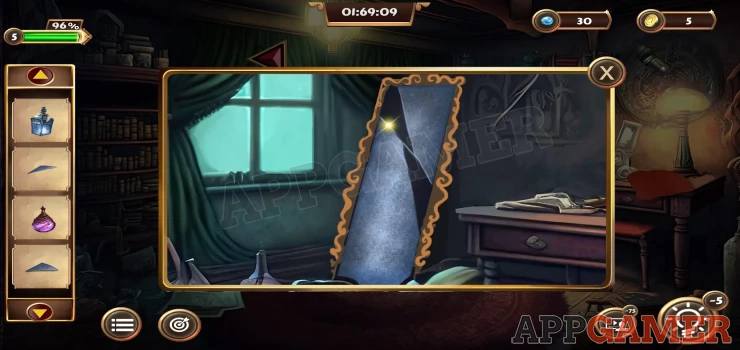
Next you need to tap on the window on the left to view it. (you need to do this without tapping on the back arrow)
Then tap on the curtain to lift it and find a Star Pendant.
View the Mystical book in your inventory and add the star pendant to the center to open it. You will then see a clue.
Now tap on the top shelf on the right, above the broken mirror to see a shield in some sort of root. Use the Axe on the root to cut away the shield and collect it.
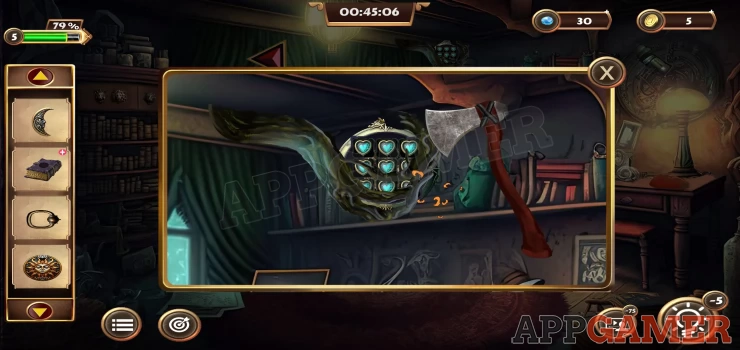
Now view the shield in your inventory. Tap on the heart shapes to remove them. You may need to tap in different locations to find the correct order to clear them all but it is easy to do.
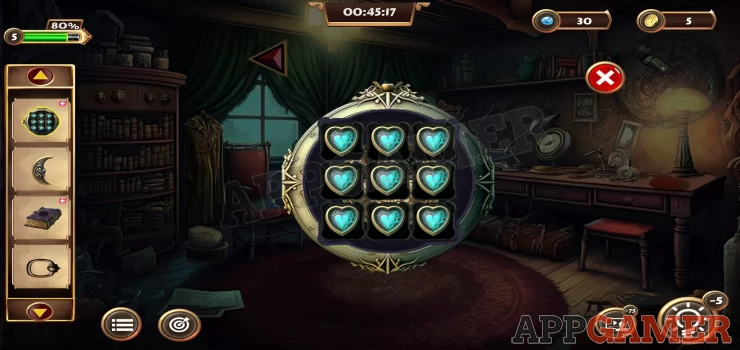
Once they are gone you will collect a scroll.
Now tap on the red chair below the left window to see a magical frame.The cat will jump in and out of it.
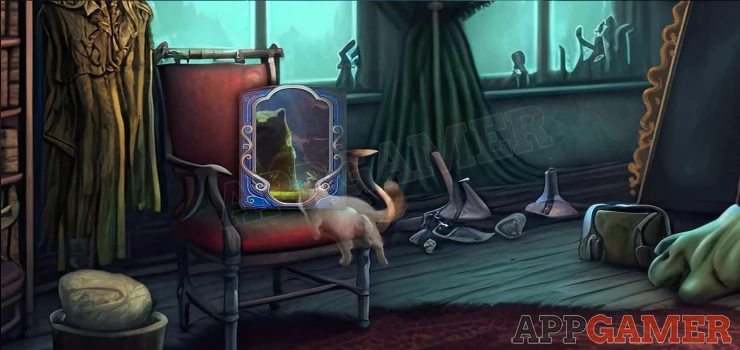
You can then collect a Voodoo doll from the frame. View the Voodoo Doll in your inventory and then use the Axe on it to cut it open and collect a Raindrop pendant.
Back out to the hall and notice the 2 pictures at the top of the stairs to the left and right of the round window.
First view the left one.
Deer Puzzle
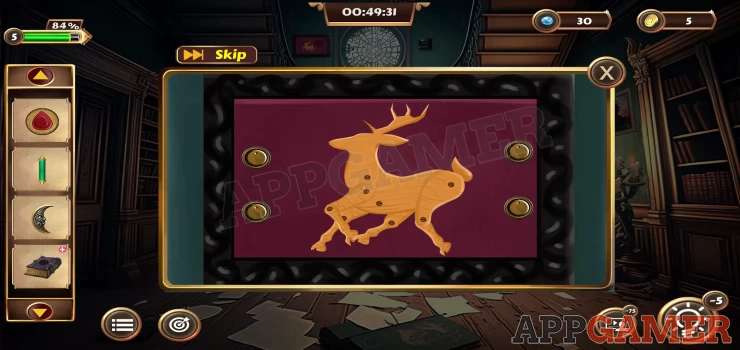
- Use the buttons to move the legs of the deer.
- Follow the clue in the mystical book to set the leg positions correctly
- Check the solution below.
Solution: Show
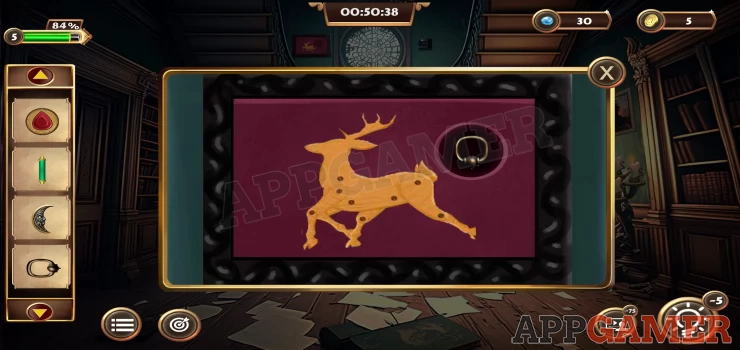
Collect a second Knob.
Now move into the room on the right (bedroom) and tap to view the end of the bed.
Add the moon pendant and the sun pendant here to open a panel and you can collect a third knob.
Next tap on a panel above the bed, to the left of the window to see another puzzle.
Add the Raindrop Pendant to it to begin.
Pendant Shape Puzzle
- To solve this you need to arrange the 8 pendants correctly.
- Under each pendant is shape, you need to match the pendants to the shape.
- You can move them along the lines using the empty one to help you arrange them.
- Check the solution image below.
Solution: Show

Collect the fourth knob from the puzzle, this completes the current objective.
Objective - Collect the Wand
Go back out to the hall and view the painting on the right wall above the candles. Notice the 4 animal heads and the numbers below them. This is a clue.
Now go into the study at the top of the stairs and tap on the top of the book case on the left. There are 4 animal heads here. Add the 4 knobs to the heads.
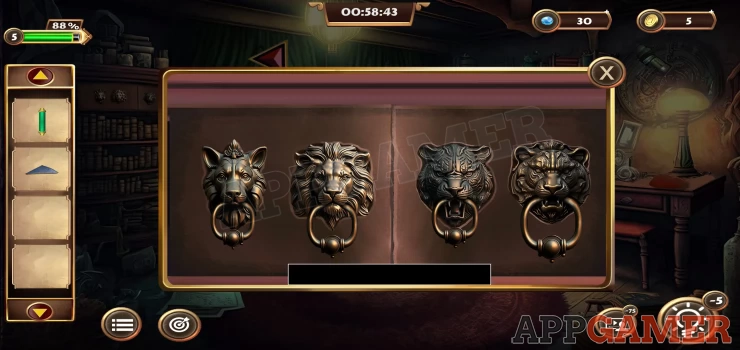
- Now you need to tap on the the heads in the correct order. The painting was the clue.
- As you tap a green bar will fill up to let you know you are tapping correctly. If you make a mistake it will empty.
Solution: the numbers on the painting are not an order, they are the number of times to tap each head. So tap the first 1 twice, second one 4 times, third one once and the last one 3 times.Show
Collect the Mystical Potion from inside.
Now back out to the hall and view the small picture on the right of the round window (top of the stairs). This is missing a piece. Add the scroll to it to complete the picture, you can now see various objects, birds, mountains, trees, moon.
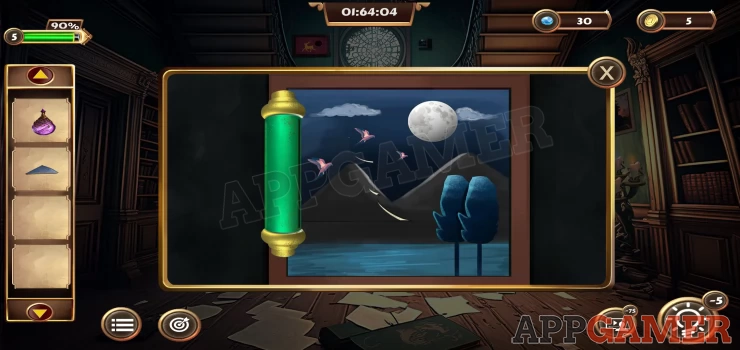
Check the clue that is on the stairs again to see some multipliers for the matching shapes for these items.
Show
Then go back into the study. Tap on the center drawer on the desk on the right.
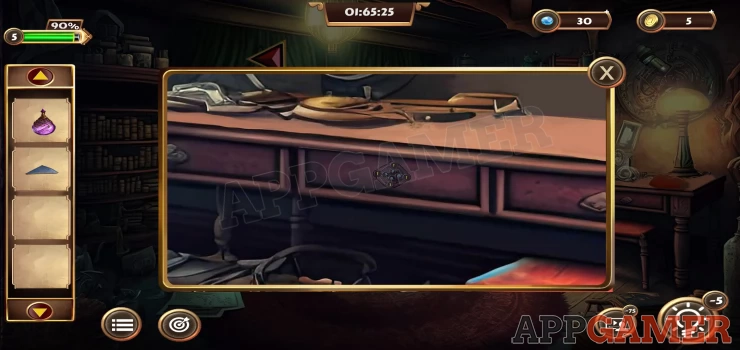
View the lock on the drawer to see the puzzle. You will see the same shapes.
Use the number of each item from the picture and use the multiplier clue to get the correct values for the 4 shapes.
Solution: Show

Collect the key.
Next tap the right side of the same desk to see a red cloth. Then open the cloth to collect a second Glass piece.
Go back to the bedroom and tap to move the coat hanging on the door at the back (center). Then view the door.
Use the key to open it and collect the Magical Water. Go back to the study and view the broken mirror.
Add the 2 glass pieces to it and then use the Magical water to repair it.
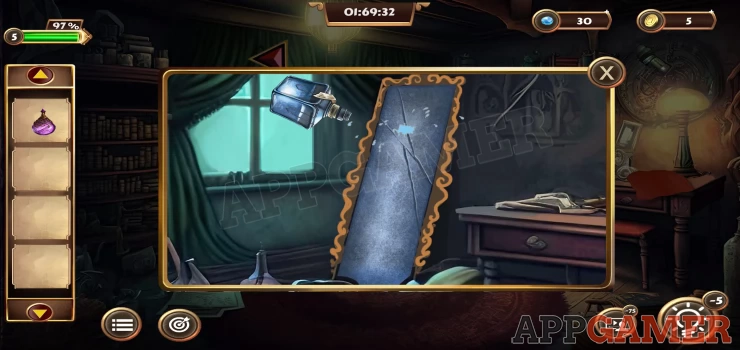
Then use the Mystical Potion on the mirror and you will see a portal open.

Hidden Object puzzle
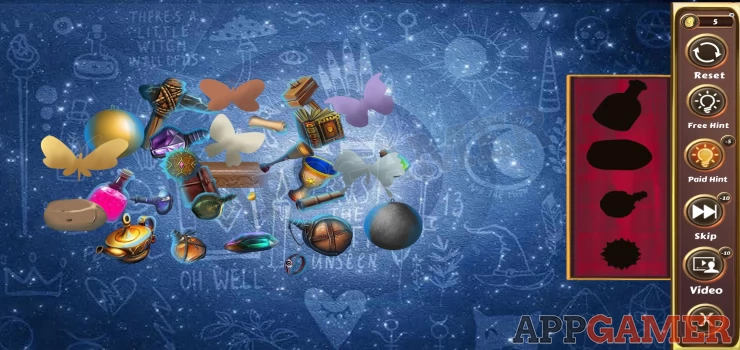
- Tap the portal to see the puzzle.
- Find the 4 items that are shown in silhouette on the right.
- There are 3 groups of 4 to find.
- Some items are small or hidden under other objects.
- Check the solutions below.
Solutions:
Show
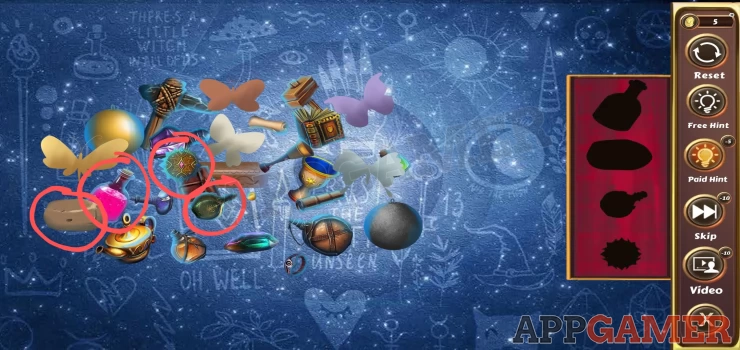
Show
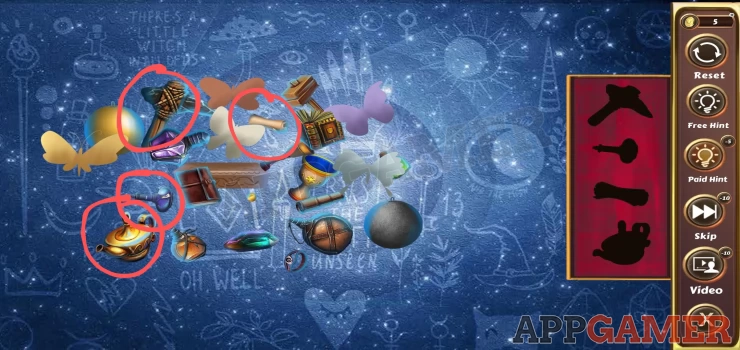
Show
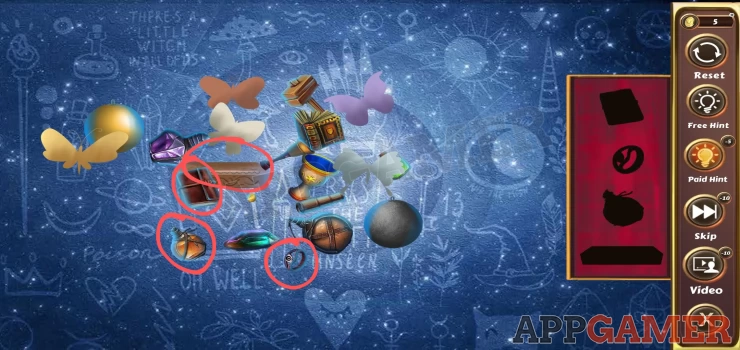
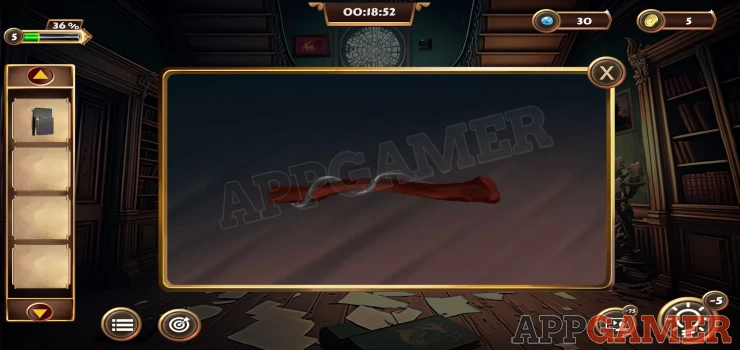
Once done you will collect the Magic wand.
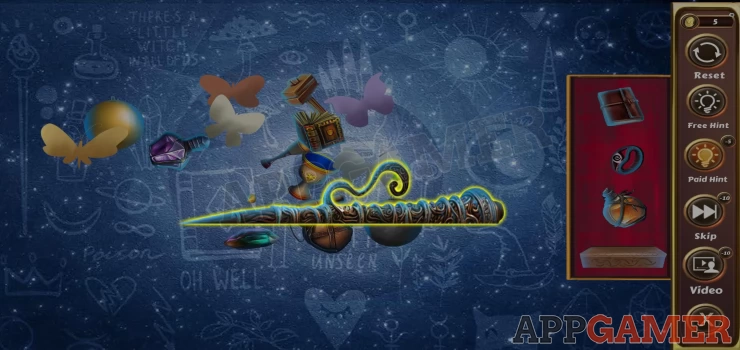
This completes the objective and the level. Watch the final scenes to see what you need to do next. Then move on to Level 5.
We have questions and answers related to this topic which may also help you: Show all
 With 20 years of experience in creating video game content for the internet and over 30 years as a gamer, Mark is now a passionate mobile App Gamer. Loving a challenge, he is always ready to get stuck in to both survival builders and puzzle solving games. He has been providing content for AppGamer since 2014.