Grim of Legacy Level 2 Walkthrough
More Escape Room: Grim of Legacy

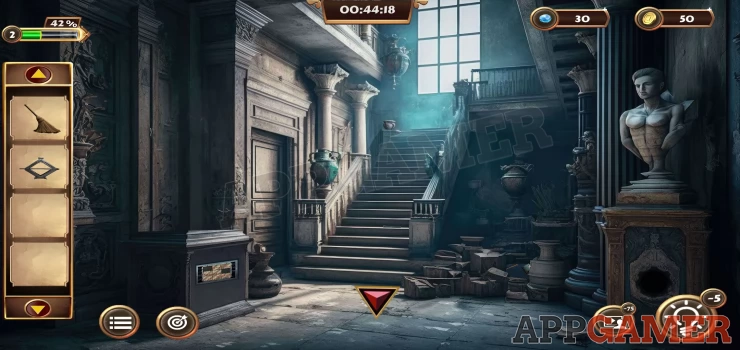
Level 2 of Escape Room: Grim of Legacy takes place at a museum. You arrive at the front entrance at night and need to find a way to get in.
Objective - Get into the Museum
First view the ground in the center and collect the Rod that you see there. Then tap on the wall on the right side of the building next to the vending machine.
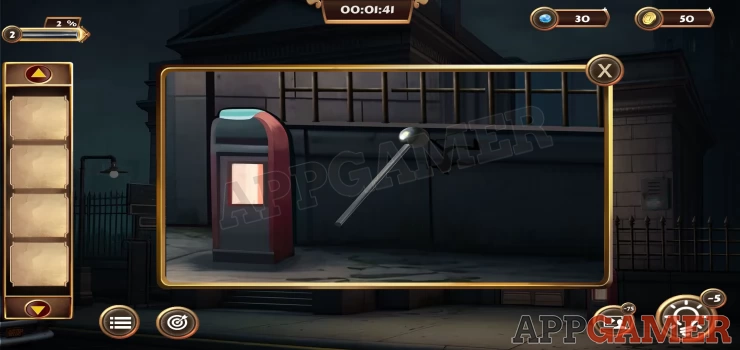
Use the rod on the wall where the indicator is and it will break the wall so that you can collect a Gate Piece. Then tap on the hole in the wall that you have made to look on the other side.

Collect the hammer from the ground and also the cloth above it. Then tap on the fish bones to then collect a key.
Next tap on the match box on the top right to open it and collect a Battery, and then on the toy car on the right to move it and collect a Lens.
Use the Key on the locked box on the top left to open it and collect a Magnifier, then use the hammer on the stone on the far left to break it open and collect some Glue.

Now view the magnifier in your inventory. Then add to it the glue and finally the Lens to complete is and collect the working Magnifier.

Go back to the starting view, and then tap on the lower left under the street light.
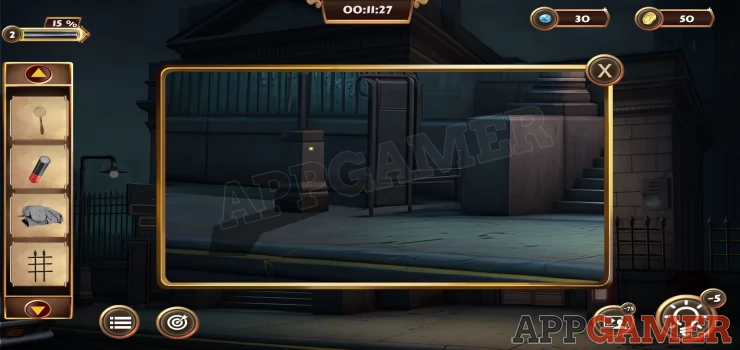
Place the Gate piece there to use as a ladder. You will then see the light above.
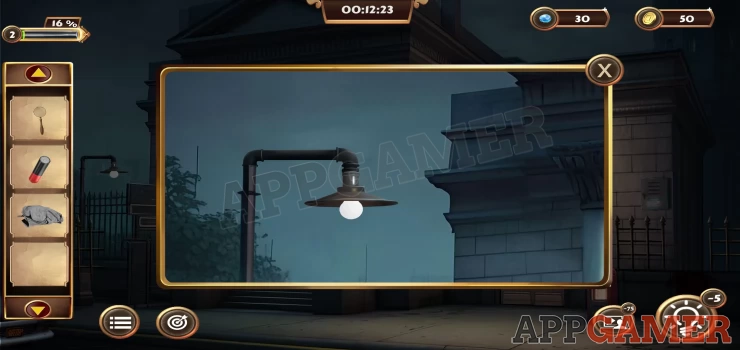
Use the cloth on the light bulb so that you can collect it.
Then also tap on the sign next to the light that is near the main door to the building.
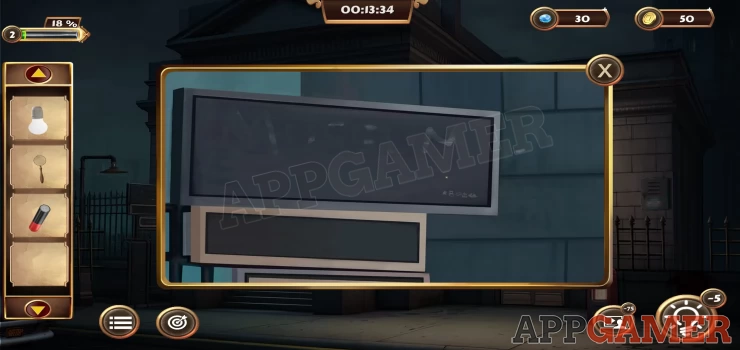
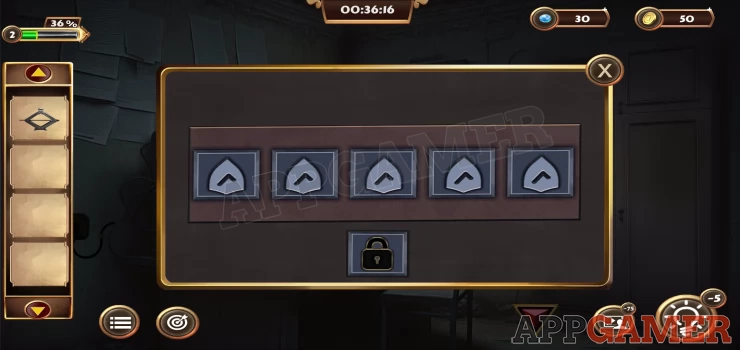
There are some small symbols on the right side. Use the magnifier on these to be able to see them.
Show
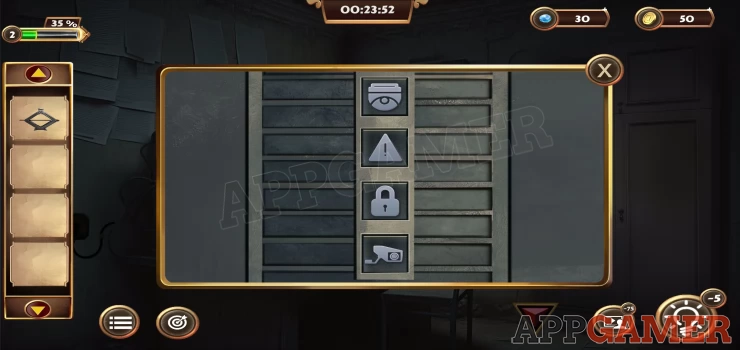
Now view the doors on the building on the right and then examine the lock. You need to enter 5 symbols. Use the symbols you saw on the sign, then tap the lock to open the door.
Enter the side room. It is dark so first tap a light fitting that is top center of the dark room.
Use the Bulb on the indicator you see here to place it.
Now you will need to exit the room and view a power supply box on the wall to the right of the door.
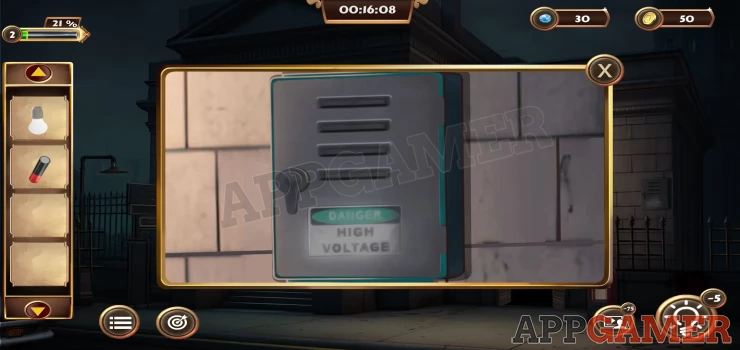
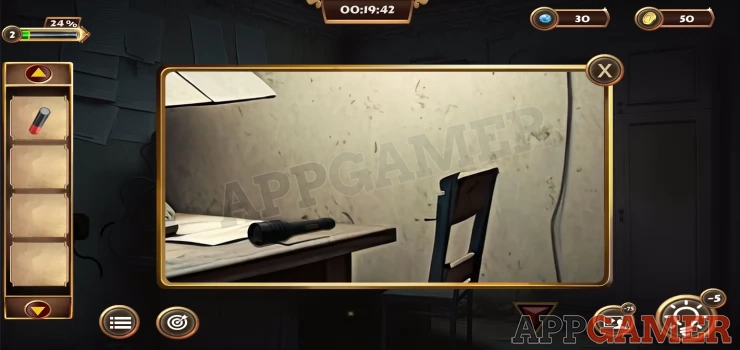
Open this and tap the switch to turn on the power. You can now go back into the side room and the lights will be on. Tap on the right side of the desk by the chair to see a torch on the desk, collect this.
Then view the torch in you inventory and tap the end to open it.
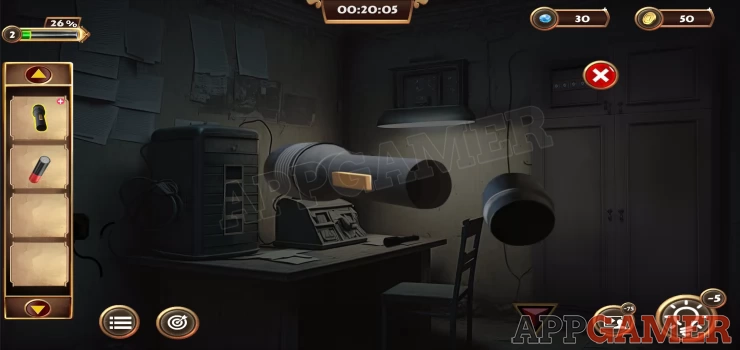
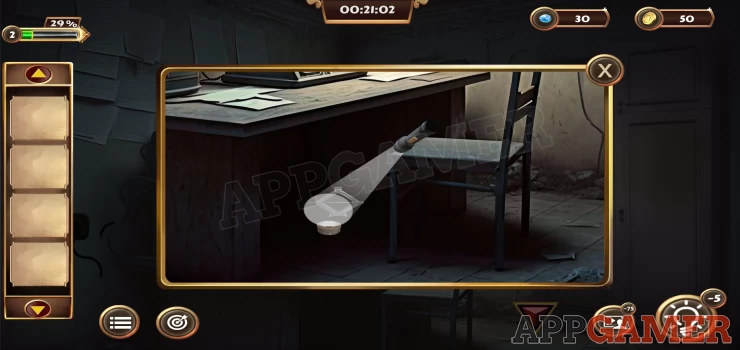
Use the battery on the open torch to add it and you can then collect the working torch. Now tap under the desk and use the torch on this view to find 2 items, collect the Tape and the Weight Lifter (jack)
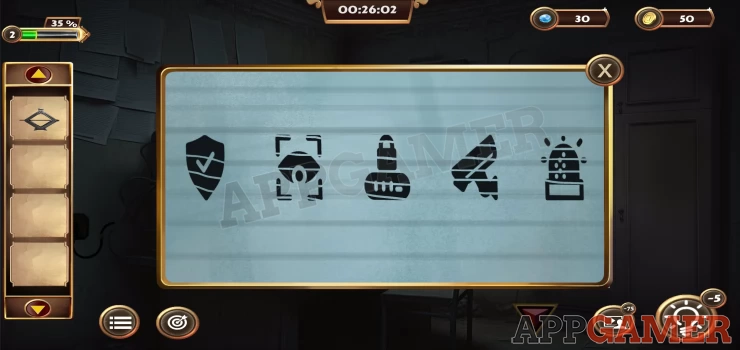
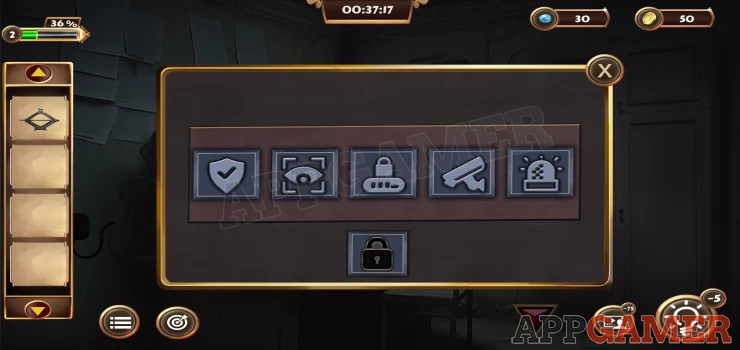
Next tap on the papers on the wall above the desk. You will see 5 symbols.
Then tap on the top of the cupboard on the right of the room to see a code entry.
Use the symbols from the paper then tap the lock button to open this cupboard and you can collect and Diary.
Show
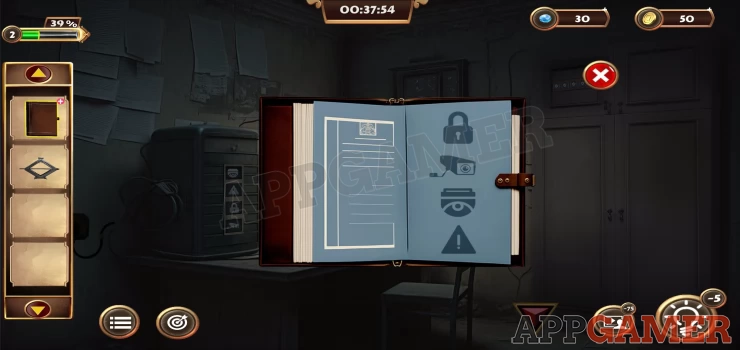
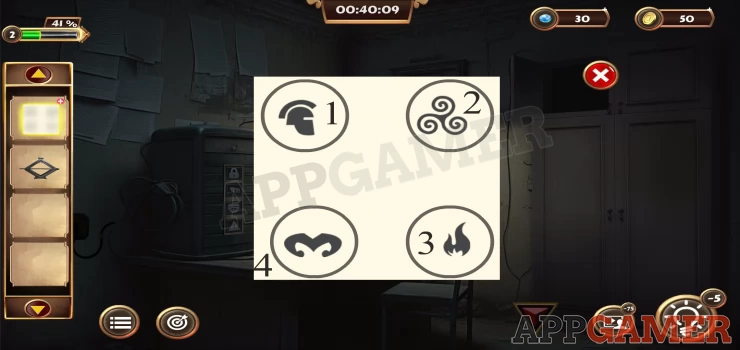
Open the diary in your inventory and you will see 4 more symbols as a clue.
Next view the power cable on the left of the machine on the desk. You cannot turn the power on as you need to fix the cable.
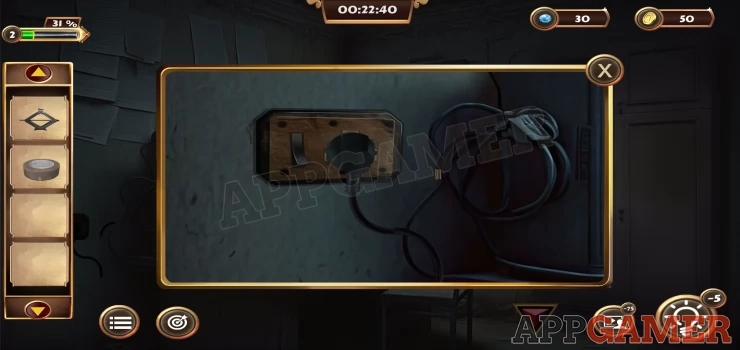
Use the tape on the broken cable and then tap the switch to turn on the power. You will see 4 symbols light up on the front of the machine.
You can tap pairs of the symbols to swap them around. Arrange them to match the ones seen in the diary. Once done you will get a paper that prints out on the right. Collect this.
View the paper in your inventory and you will see another set of 4 symbols. Notre thre numbers next to each symbol
Now exit the room and tap on the main doors to the large building. The lock here requires the 4 symbols. Enter them in the order as numbered on the paper.
Show

The door unlocks and this completes the task.
Objective: Find the Secret Path
Tap the open doors to enter the Museum.
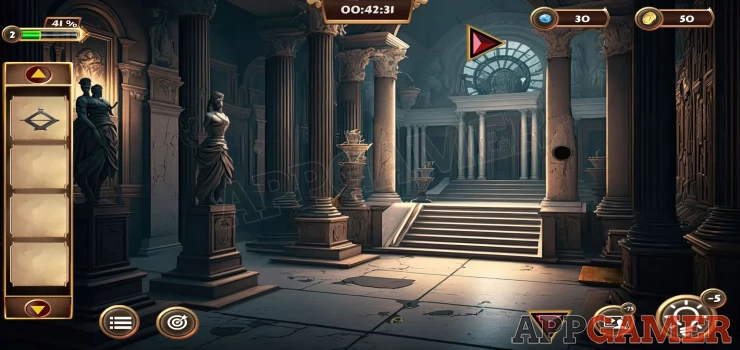
Museum
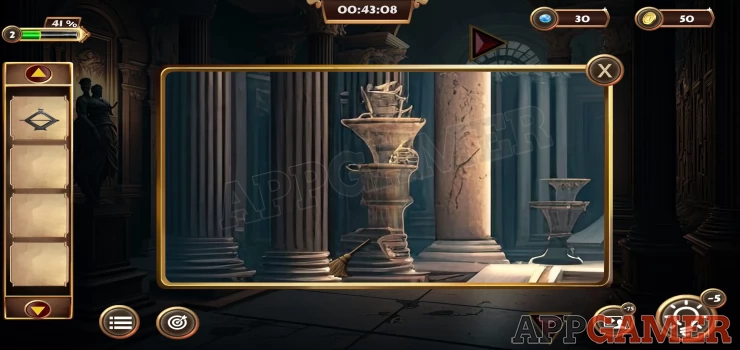
First tap on a shaped fountain / pillar among the columns on the left of the steps. Collect from the base a Broom.
Then tap the top Arrow to move through to the next room.
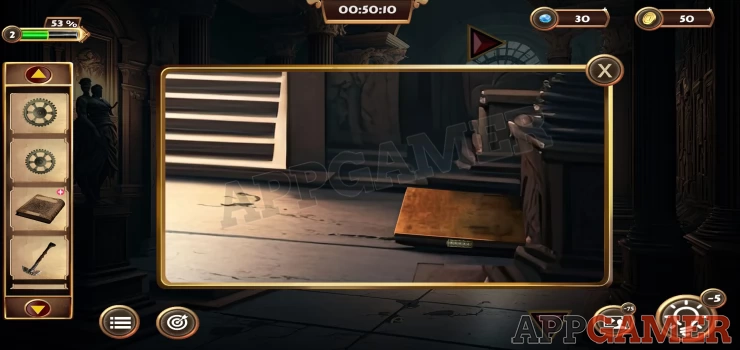
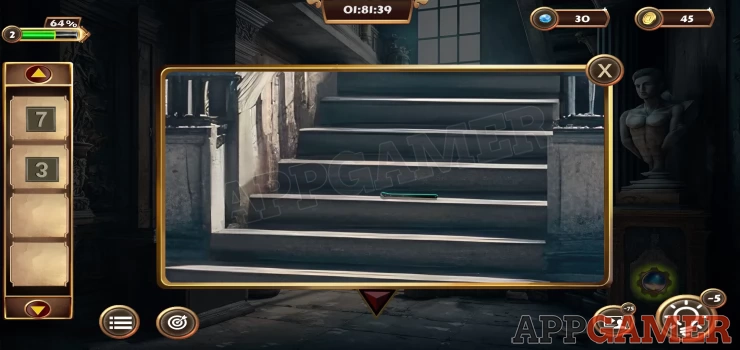
View the pile of stones on the floor on the right of the stairs, Then tap again to look behind them.
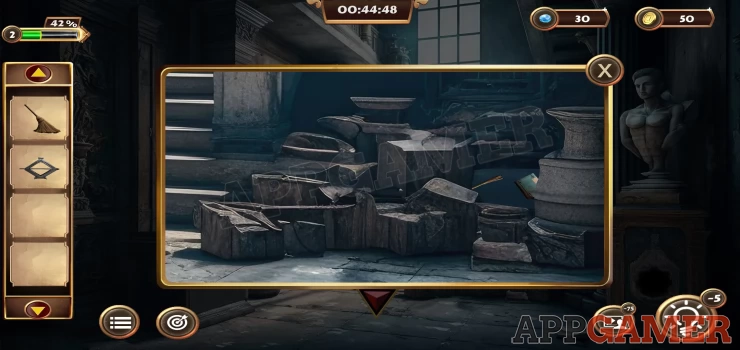
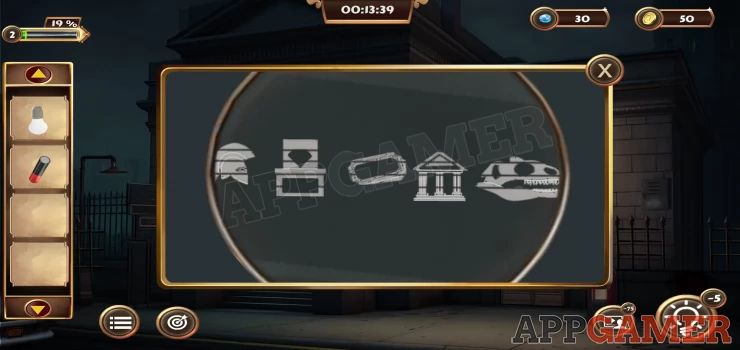
You need to find the 6 objects that match the silhouettes on the screen.
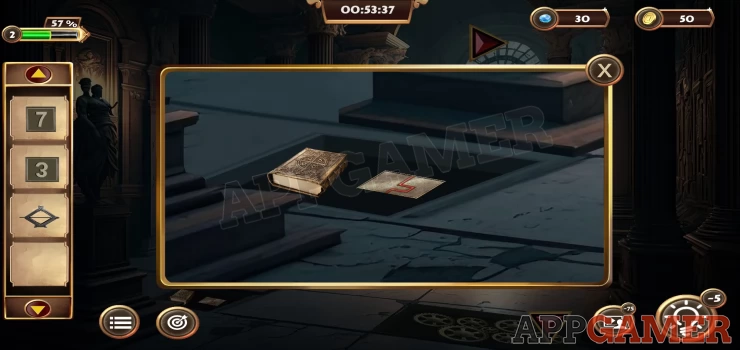
Once you find them all you can then collect from the ground a Hammer (on the left), a book, (on the right) and then 4 gear wheels. (2 are hidden on the top and bottom right).
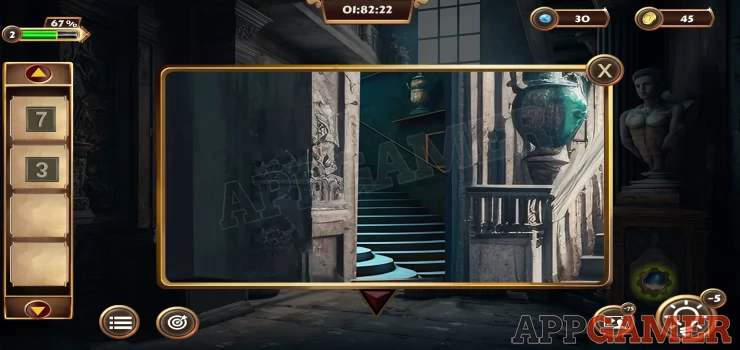
Next tap on the small pot at the top of the stairs to the left to look inside it.
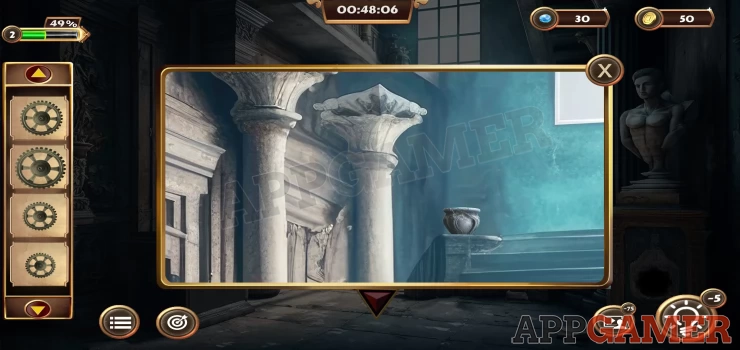
Collect the 2 Stone Pieces (numbered tiles).
Now back up to the entrance hall and tap on he ground on the right to see a wooden box with a code entry.
View the book that is in your inventory and open it to see a clue. Use this to unlock the box.
Code: JAMESShow
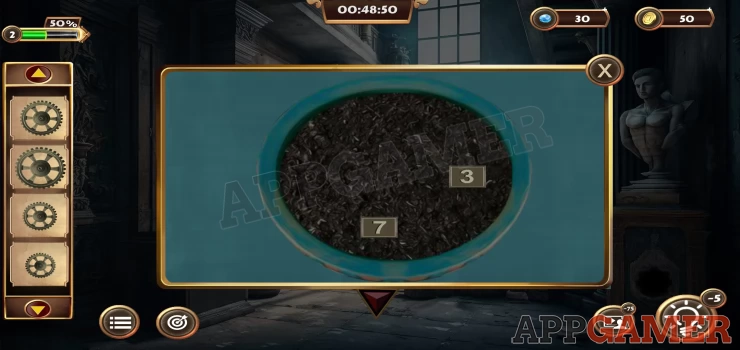
Collect a fifth Wheel. Now view the floor in the center and you will see a part of another wheel in a crack. Use the hammer here to break the stone and reveal the mechanism.
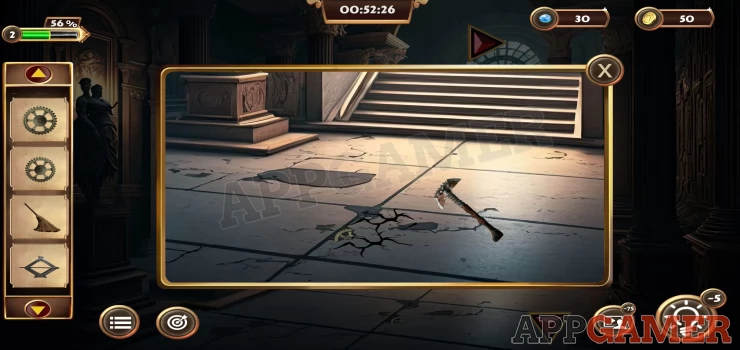
Then use the broom to clear away the stone chips. You can then view the mechanism.
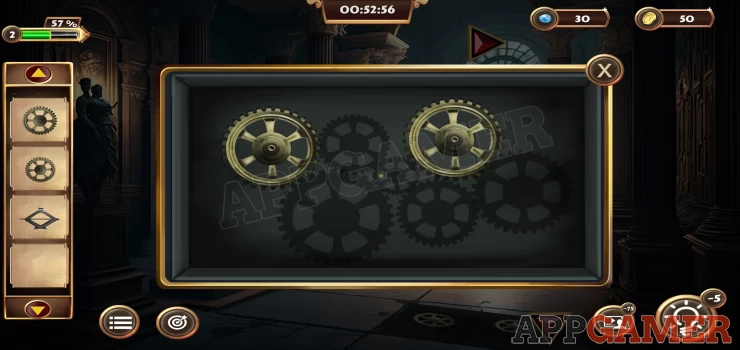
Add the 5 wheels to it and this will activate and move a pillar.
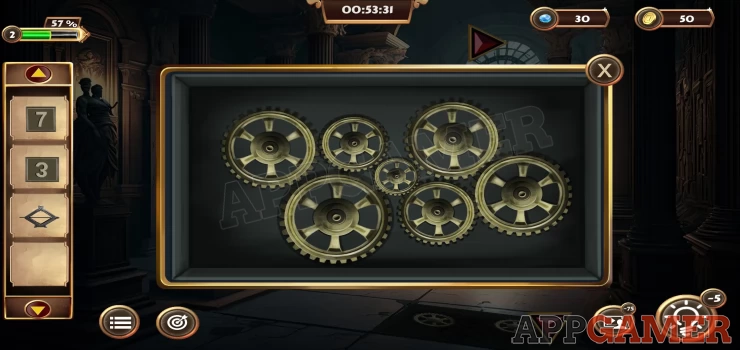
Collect the book and the steel piece.
Return the the second room and view the base of a pillar on the left. There is a puzzle panel here.
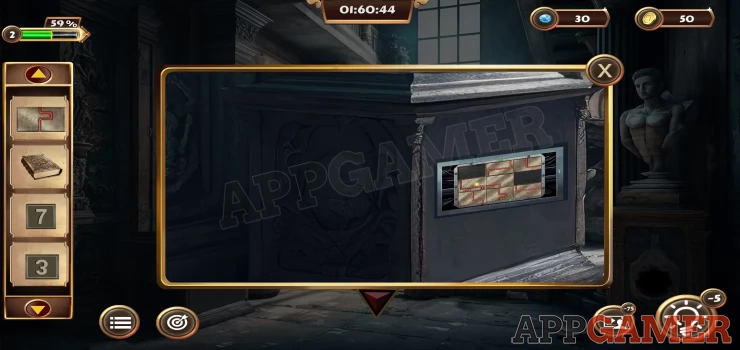
Add the steel piece to start the puzzle.
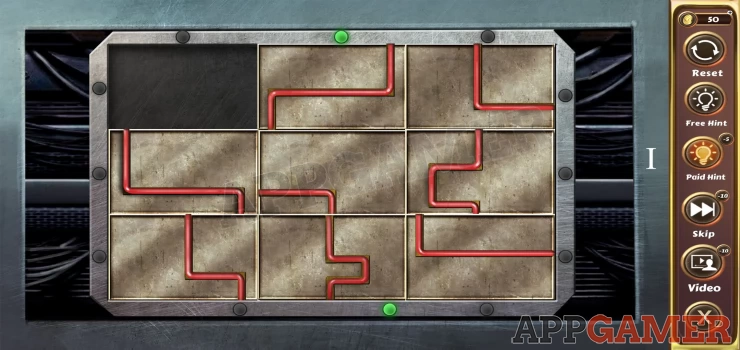
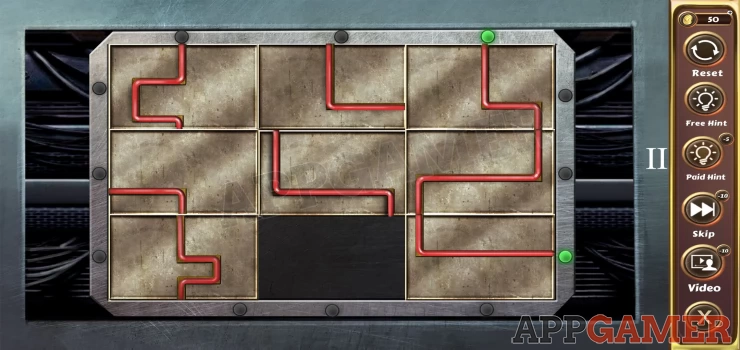
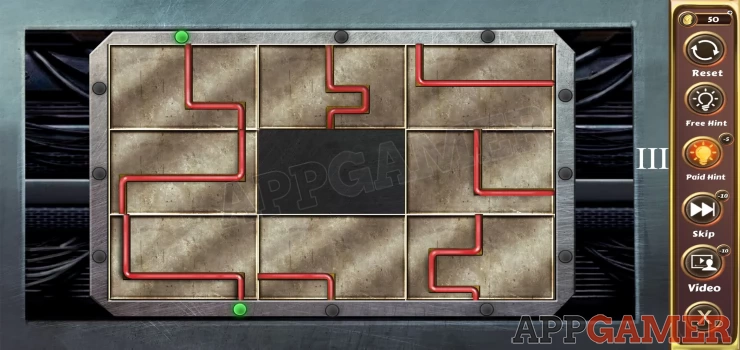
Pipe Puzzle
- Swipe to move the pieces around the board
- You need to match up the pieces to make a continuous path from one green light to the other.
- There are 3 levels to the puzzle, and the lights will change for each one.
- Check the solutions below.
I: Show
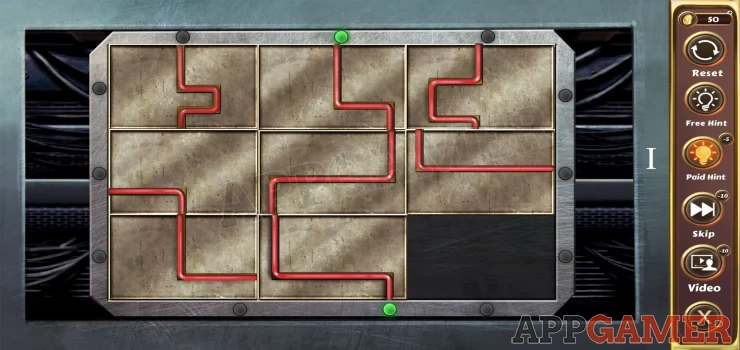
II: Show
III: Show
The box will open and you can collect a Pendant. Now view the base of the statue on the right of the room. There is a hole in it.
Place the pendant in the hole and you will see a panel open on the other wall.
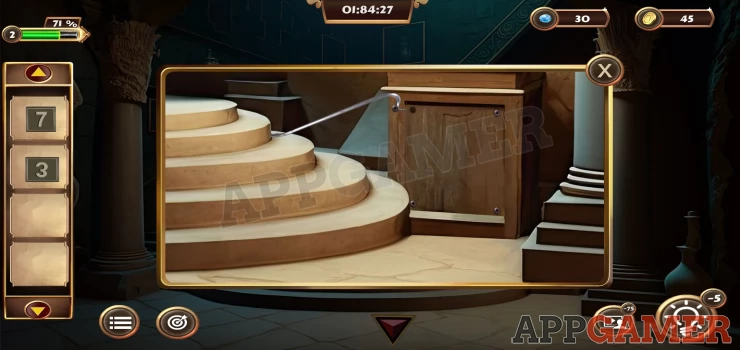
Place the Weight Lifter (jack) into the gap, then look on the stairs in the center to find a Spanner.
Use the spanner on the weight lifter to raise it and open the gap on the wall.
This complete the task to find the secret path.
Objective: Obtain the globe
Go through the secret doorway into a hidden room.

Secret Room
First collect a crowbar from the ground on the left. Then view the bow on the right with the candelabra on top.
Use the crowbar here to remove the front cover and then tap the panel inside to open it and find a Pendant Gem.
Next view a small bowl to the left of the candelabra and look inside to find 2 more stone pieces to collect.
Next tap on the large jug on the far right of the scene to the right of the pillar. This has a panel at the top. Open it to find a key to collect.

Tap on a black panel on the left side by the pillar on the left. Use the key to open this and collect from inside a 'Fantasy Liquid'

Back out to the entrance hall and view the pillar on the right that has a round hole in it. First add the book to the pillar to place it on the ground.
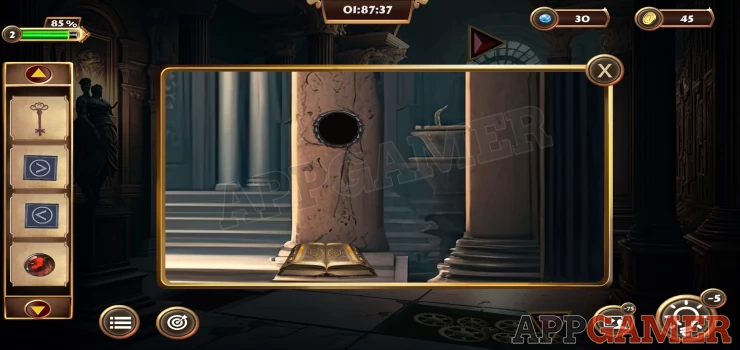
Then add the Pendant gem to the hole. This will change the book which you can collect to see a clue.

Show
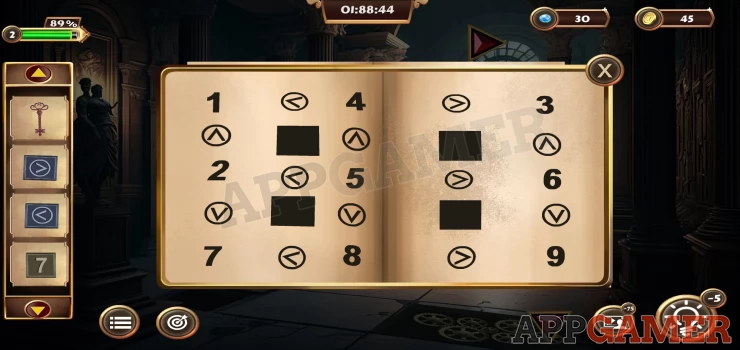
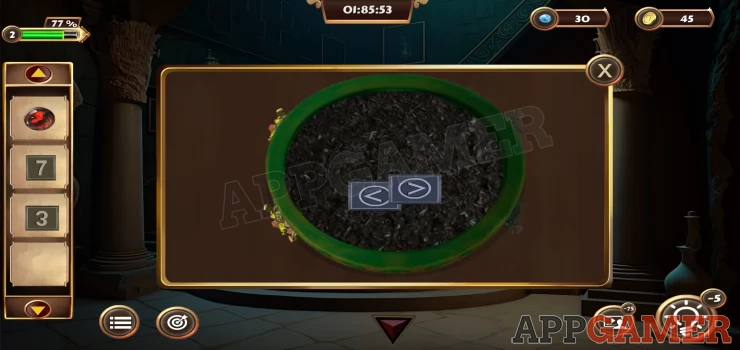
Now return to the secret room, tap the large urn in the center and then view the base to see a puzzle.
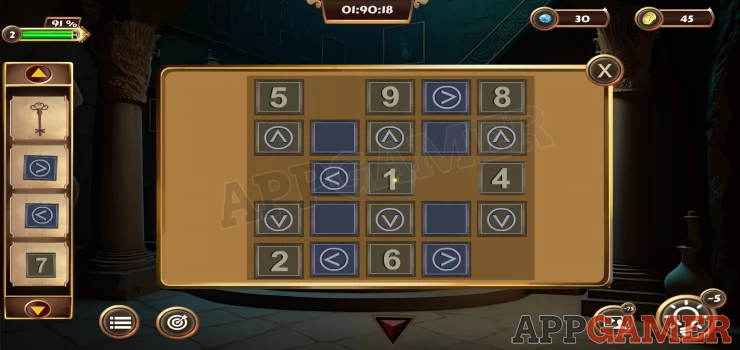
- Add the 4 stone tiles to the puzzle board to start.
- Tap pairs of numbers that are connected by an arrow to swap them
- Rearrange the numbers to match the clue seen in the book.
Solution: Show

Now you can tap the top of the urn to look inside.
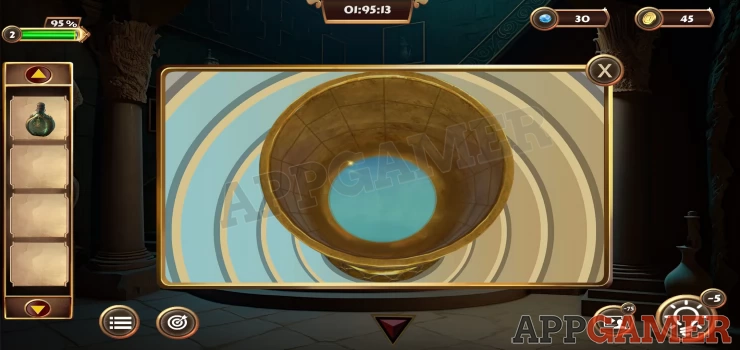
Add the Fantasy Liquid here and as it wills the Globe that you are seeking will appear.
Well done this completes Level 2 of Grim of Legacy. Move on to Level 3.

We have questions and answers related to this topic which may also help you: Show all
 With 20 years of experience in creating video game content for the internet and over 30 years as a gamer, Mark is now a passionate mobile App Gamer. Loving a challenge, he is always ready to get stuck in to both survival builders and puzzle solving games. He has been providing content for AppGamer since 2014.