Chapter 3
More Dream Escape - Room Escape Game
This is our guide to Chapter 3 of Dream Escape, another mysterious escape room game from Jusha.
After meeting Tyler at the end of Chapter 2 you now head to a hospital to look for a book and more information.
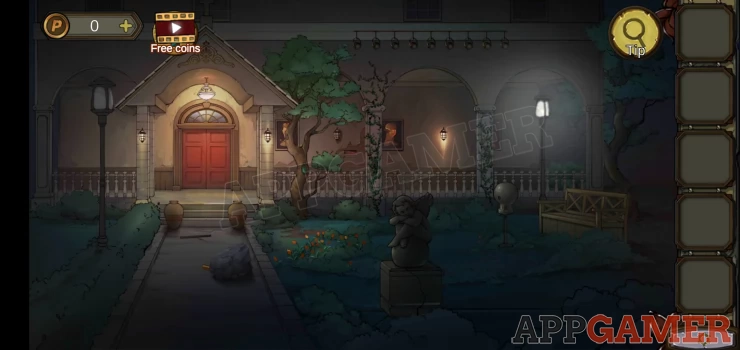
From the path in front of the door collect a wooden stick.
On the same path nearer you tap on the large rock.
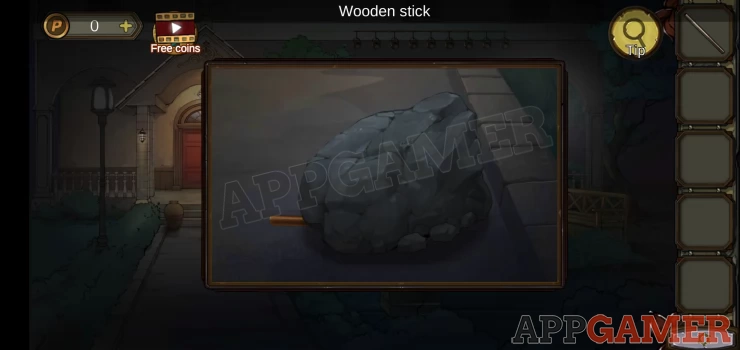
Use the wooden stick on this to move it and collect a Garden shovel.
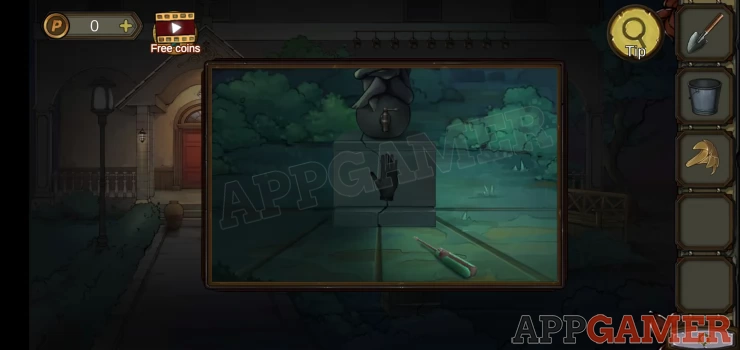
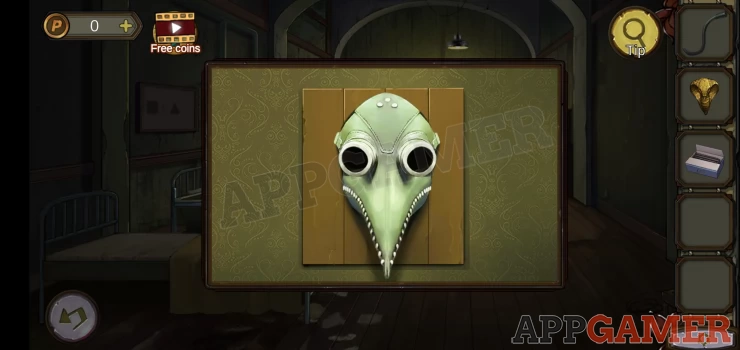
On the right of the scene is a lamp. View this to see a puzzle.
Hint: solve this by using the arrow to move the white spots into the white circles.
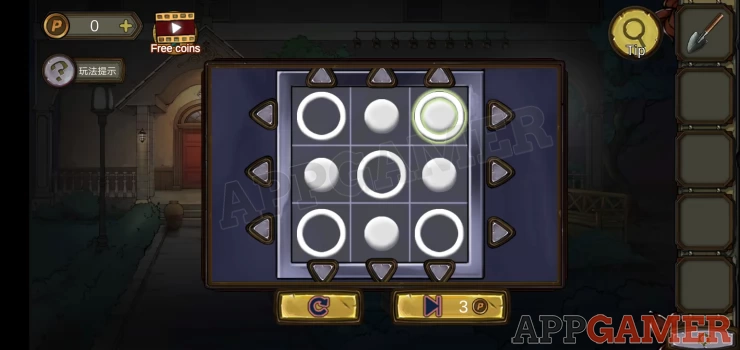
Once done, collect the long pointer.
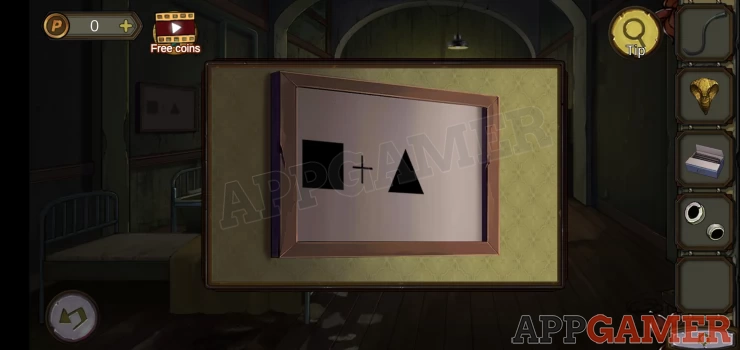
Tap to view 3 painting that are on the wall to the right of the door. The paintings are a clue.
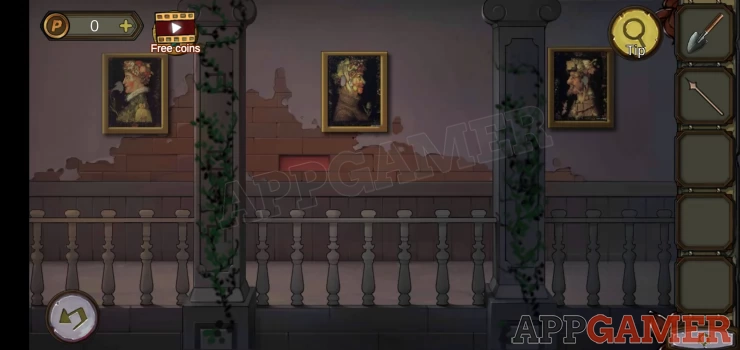
Now tap on the bench that is on the right of the scene. There is a puzzle here.
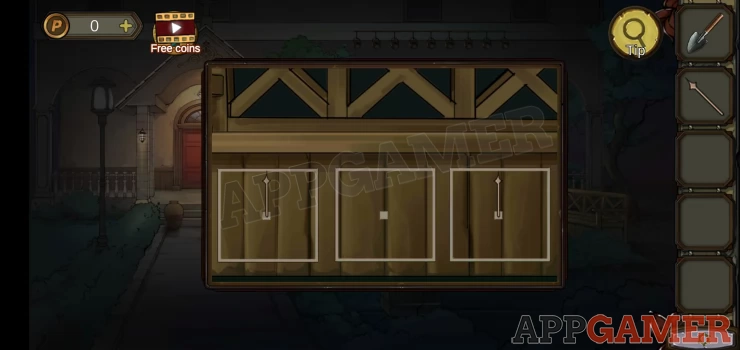
Add the long pointer to the center square. Then set the pointers to the correct directions.
Solution: check the direction the eyes are looking in the paintings are pointing. Left, Right, Down.Show
Collect a Flower copper card and an empty bucket.
Tap on the angel statue that is closest to you, bottom center.
Collect a screwdriver. Notice the Hand print on the base.
Now use the bucket on the tap on the statue and you will get a bucket of water.
Next tap to view the tree to the right of the door. There is a hole in it.
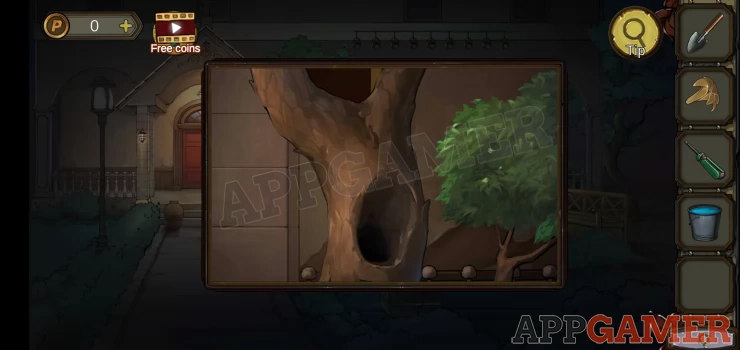
Use the bucket of water on the hole to fill it.
Collect the Mushroom Copper Card.
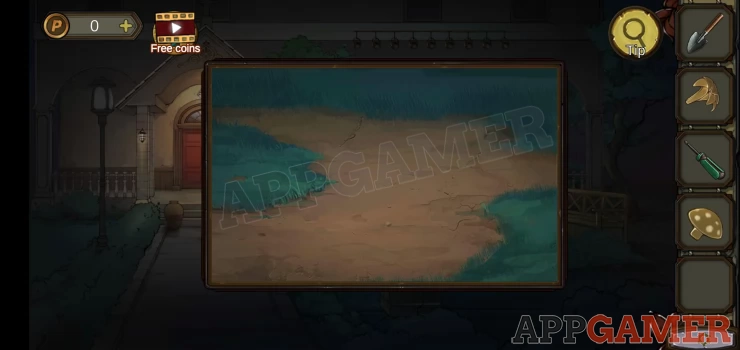
Tap on the ground between the path and the angel statue to view it.
Use the garden shovel in this to dig and then collect a Potato copper card.
Return to the 3 paintings on the wall.
View each and add one of the 3 copper cards to each depending on the shape missing.
Something opens.
Below the center painting a red box will open. Collect a key.
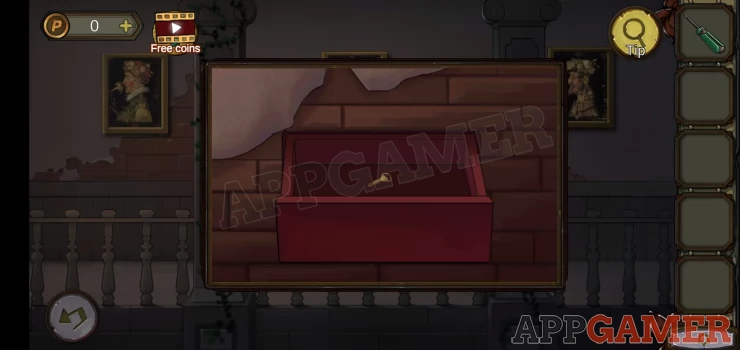
You can now tap on the red door and use the key to open it.
Enter the hospital.
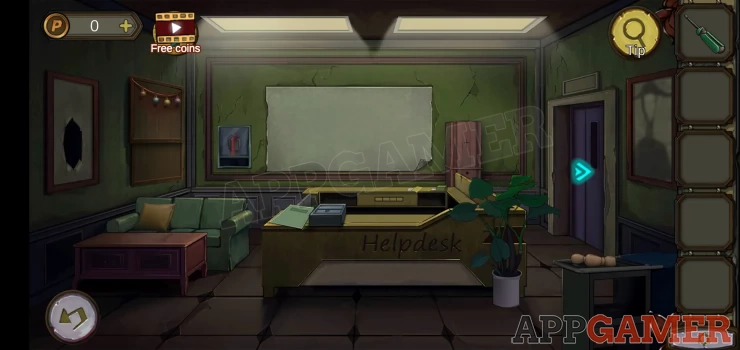
On the bottom right tap to collect a doll body.
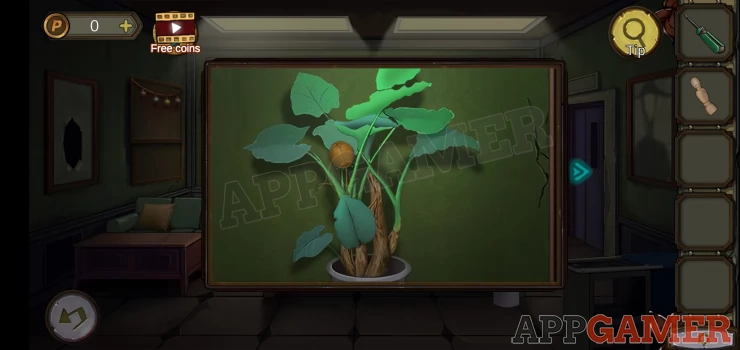
Then tap the potted plant to the left of this to collect a Hard Fruit.
Tap on the sofa to the left and then tap the bottom left corner of the cushion, 1 brown bell.
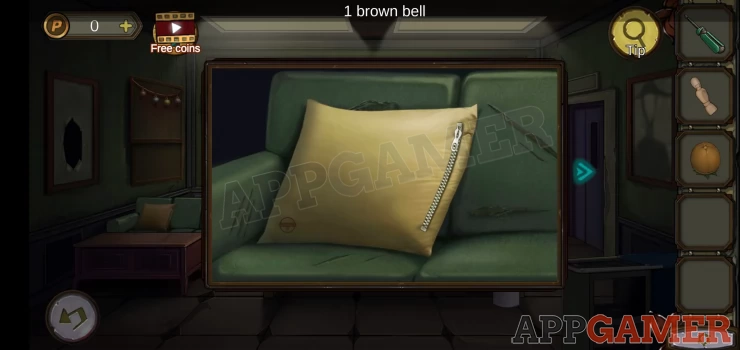
View the fire extinguisher on the left of the white screen to see a clue of 4 blue bells.
Collect the Insulated gloves.
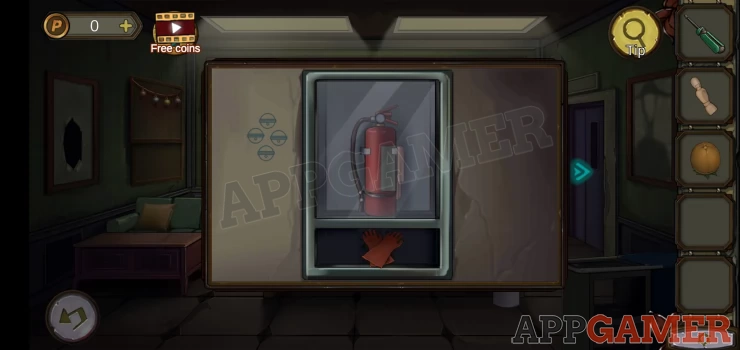
Next, view the unit on the right of the white screen to see a clue of 3 purple bells.
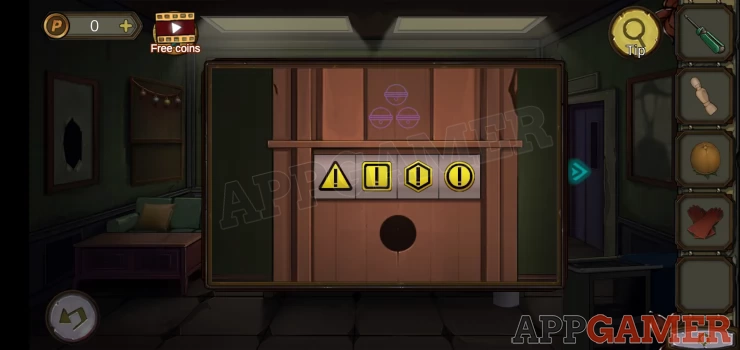
On the wall top left of the sofa tap to view the wooden board. On the left see the clue of 2 yellow bells.
On the board are 4 bells hanging.
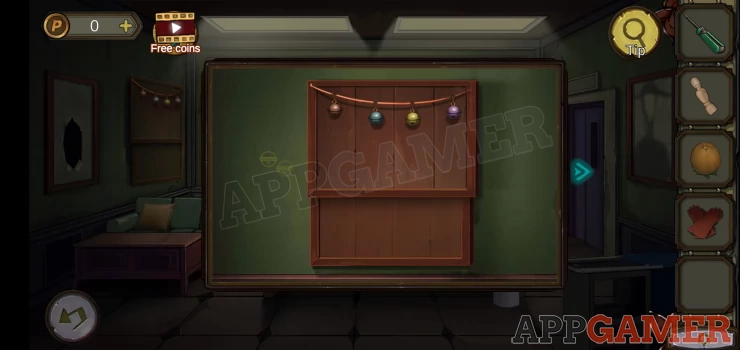
Solution: Tap the bells the right number of times each. 1 brown, 4 blue, 2 yellow, 3 purple.Show
Collect the Doll's right arm.
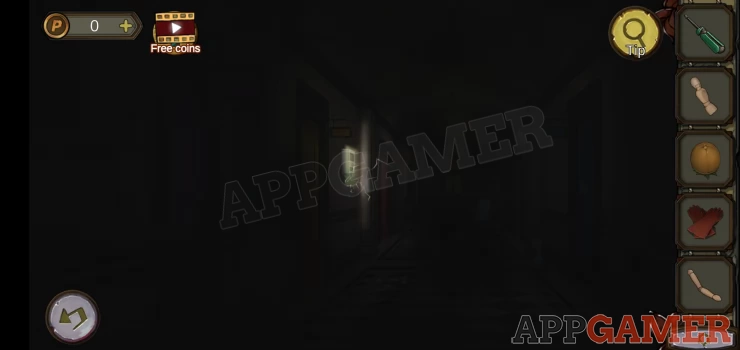
Now tap the doors on the right to go through to the next room. It is dark.
Use the insulated gloves and View the electricity box for a puzzle.
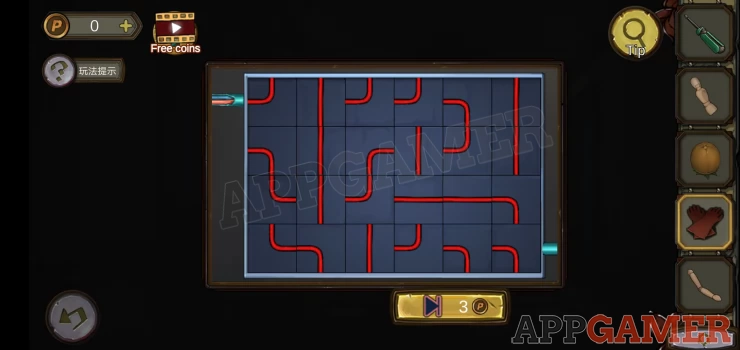
Hint: tap the squares to rotate the wires and complete the circuit. You do not need to use all squares, just make a connection.
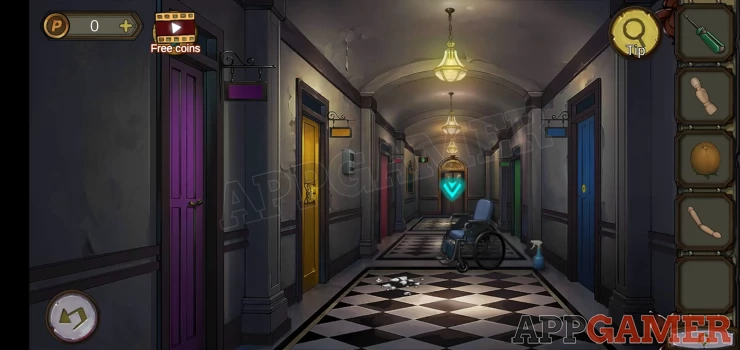
After a cut scene you are in a corridor with colored doors.
Tap on the broken glass on the floor and collect Half a nutcracker and a power switch button.
Then also collect the blue 'watering can with iodine solution' bottle from the right.
Tap to view the wheelchair.
Add the power button to the slot on the right and tap it top open the seat. Collect the Doll's left arm.

Back up to the lobby and use the iodine spray on the white screen to reveal a clue.
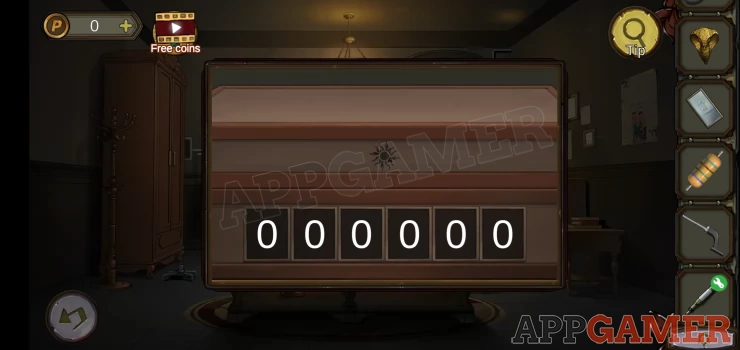
Just below the screen is a desk and at the back of it is a drawer with a 4 digit code lock.
Solution: get the code from the screen clue above.Show
Code: 9862Show
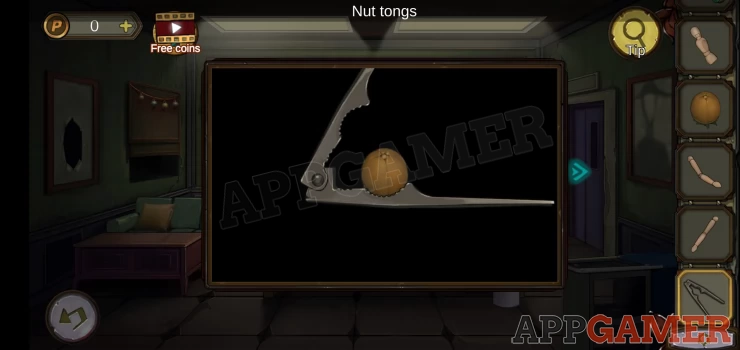
Collect another half a nutcracker.
Combine the 2 halves to make the nutcracker.
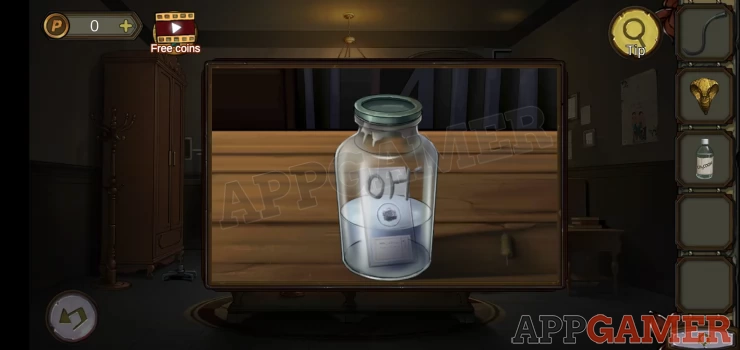
Then use the 'hard fruit' in the nutcrackers to open it and collect a water drop stone.
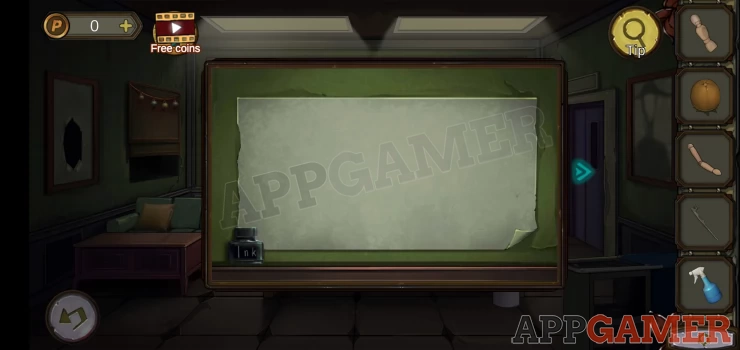
Tap on the front left of the desk to see a blue box and a green folder.
Open the folder to see a paper with clues. Note the yellow warning symbol.
Add the water drop stone to the blue box to open it.
Collect the Doll right leg.
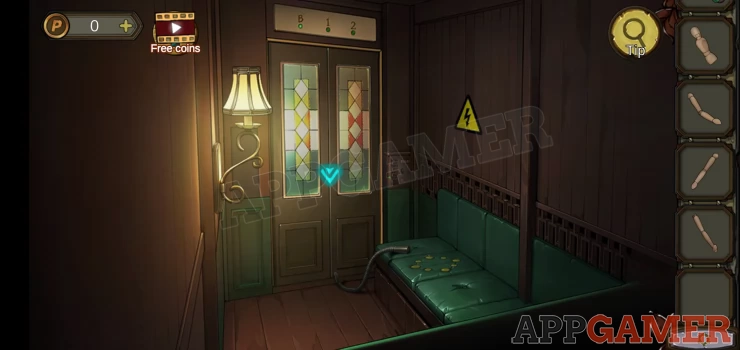
Go back into the corridor. Check the colored doors and make note of the yellow warning symbols on some.
Then tap the elevator at the end of the corridor.
Collect the thin tube from the seat.
There is another warning symbol on the wall.
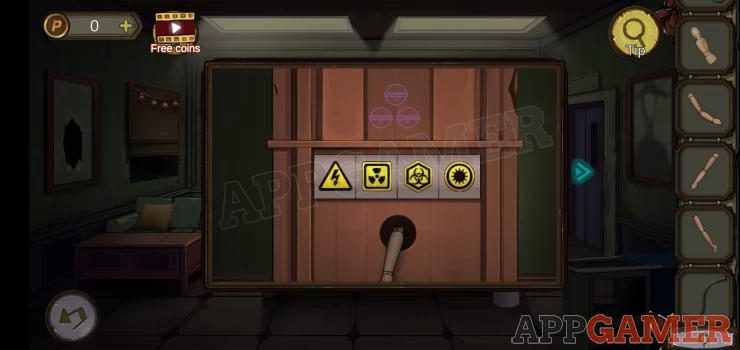
Return to the lobby and tap again on the red unit to the right of the screen.
There is a puzzle here with 4 yellow symbols.
Hint: tap to set the symbols inside the 4 different shapes to match the ones seen on the doors and other clues above.Show
Solution: Show
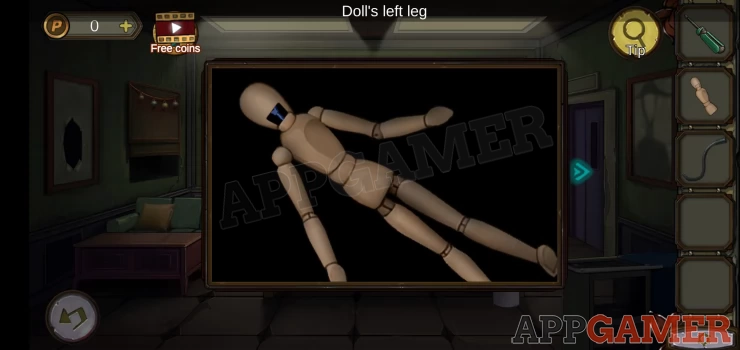
Collect the Doll left leg
Select the doll body in your inventory and add to it the 2 legs and 2 arms.
You can then collect a blue key
Return to the corridor and use the blue key to open the blue door. Go in.
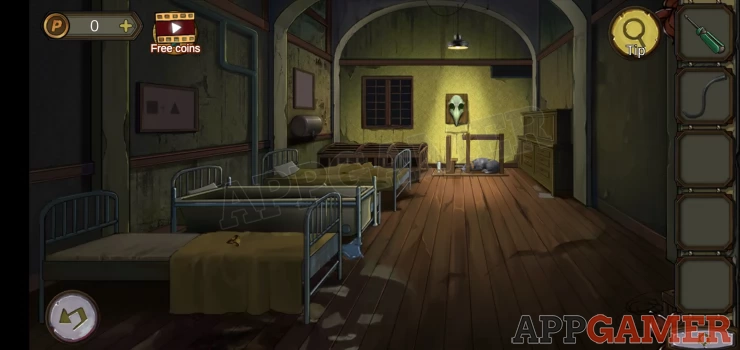
On the front left bed is a snake head statue to collect.
On the back left of the room is a water cylinder. View this.
Use the screwdriver to open it and collect a Damaged bell.
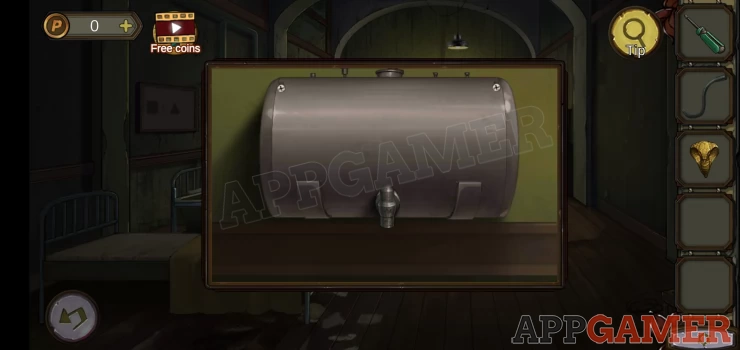
View the bell and collect from it a 'copper tongue'
Next view the dog at the back right of the room.
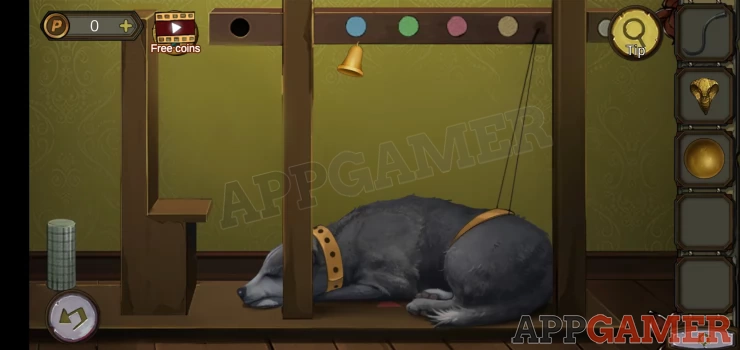
Above the dog is a bell, add the copper tongue to it and then tap to ring it and make the dog stand up.
Collect a box of nails. Note the clue on the base, Triangle - Square = 1Show
On the wall above the dog is a mask, view this and collect the eyepiece.
Then view the picture on the left wall. Use the eyepiece on this to reveal a clue.
Square + Triangle = 5Show
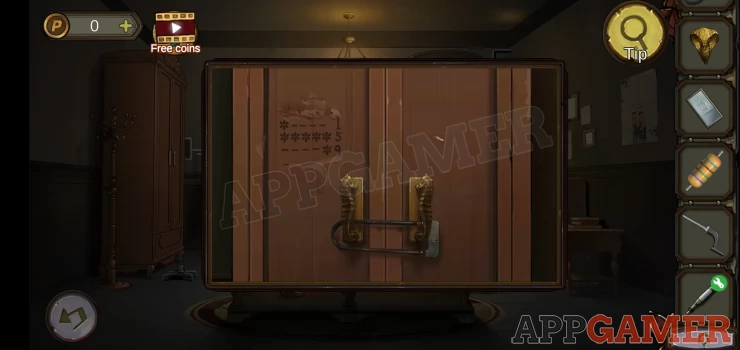
Now tap on the large cupboard on the back right of the room. Take note of the symbol on the left door.
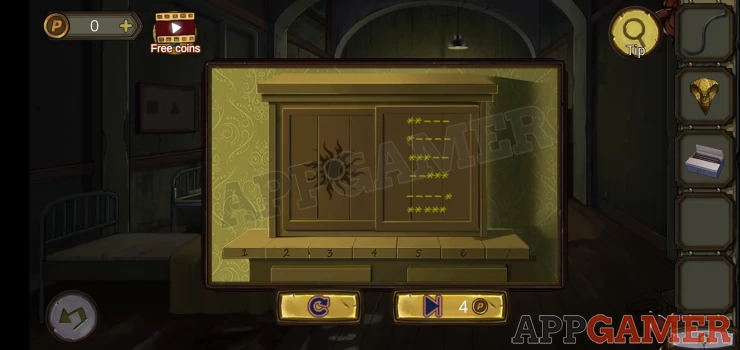
Hint: you need to tap the 7 boards below the cabinet in the right order.
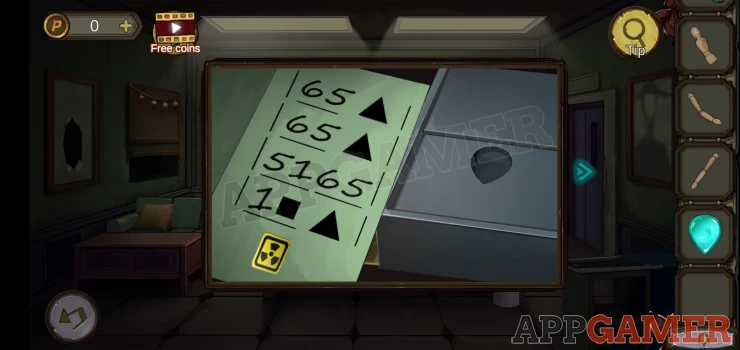
Solution: Check the paper on the desk in the lobby. This has 4 sets of numbers with some replaced with squares and triangles. The previous clues tell use that Triangle = 3, Square = 2Show
Code: 653 653 5165 123Show
Collect the lubricant and a wooden stick.
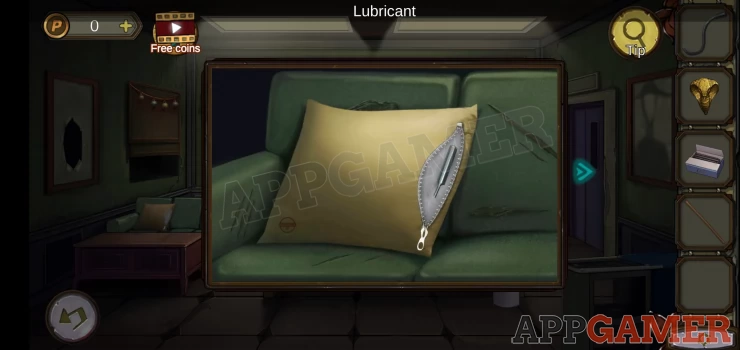
Back out to the lobby and view the cushion on the sofa again.
Use the lubricant on the zip and then open it and collect a Rocker Handle.
Return to the blue door room and view the bottom of the bed on the left.
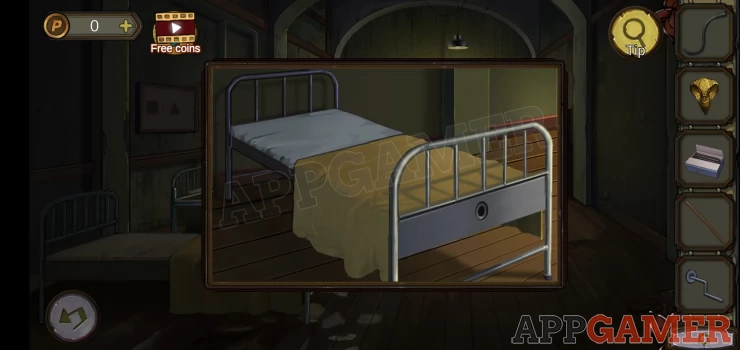
Add the rocker handle to it and tap to raise the bed.
Collect an Iron Hook.
Combine the hook with the wooden stick and the nails to make a wooden stick with hook.
Now tap on the bath that is next to the bed on the left.
Use the hook on the plug hole to empty the bath. Collect a purple key.
Exit to the corridor and open the purple door with the key. Enter the office.
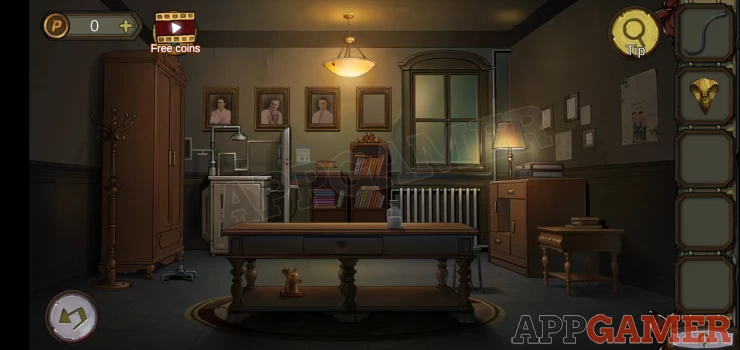
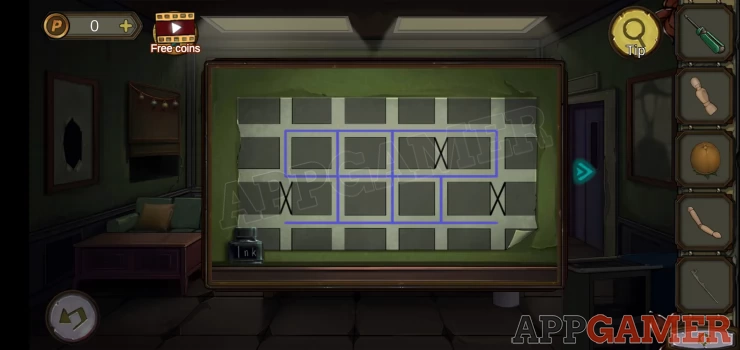
Tap to view the small table on the bottom right. There is a puzzle lock.
Hint: move the squares around to assemble the picture.

Show
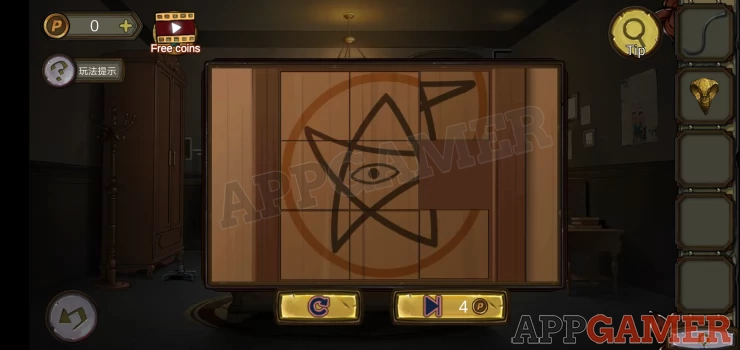
Collect glacial acetic acid.
Now tap on the bottle on the center table to view it.
Use the acetic acid on the lid to open it.
You can then collect frosted glass from inside.
Collect a resistor from the right of the bottle
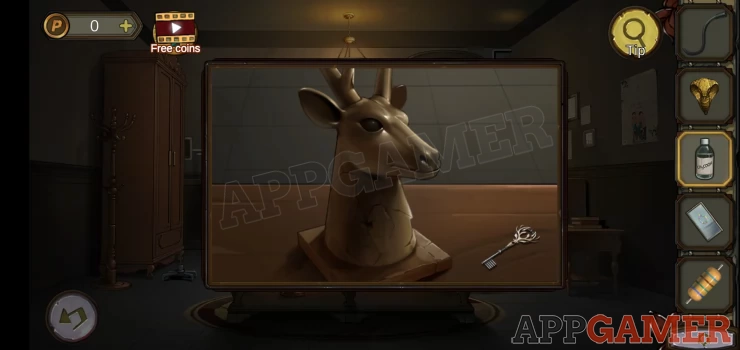
Below the table is a deer head statue, view this and collect the key from next to it.
Tap to view the window and then use the acid again on the bolt.
Once clean collect the Telescopic Rocker.
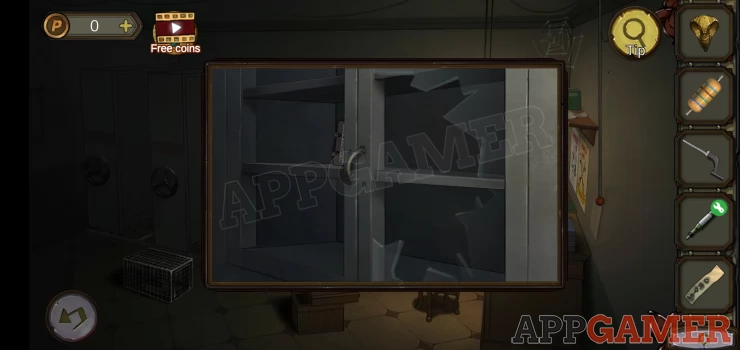
Go back into the ward room (blue door) and view the cage that is in the back left.

Use the key on the lock top open it. Collect the grinders.
Return to the office room (purple door) .
There are 4 frames on the wall, view the one on the right to see that it is missing a picture.
Remove the paper and then use the 'grinders' on the wall behind. This will reveal a clue.
You will collect a broken grinder.
Tap to view the bottom of the cupboard on the left. Note the clue on the door.
Then view a box on top of the drawers on the right.
Hint: note the symbol on the lid, this matches one found in the ward room.
Solution: the cabinet in the ward room had the same symbol and then 6 sets of stars and dashes. The clue on the bottom of the cupboard shows how to translate the patterns into numbers.Show
Code: 213795Show
Collect an X-ray Lamp
On the left of the room now is a complicated looking machine. View it.
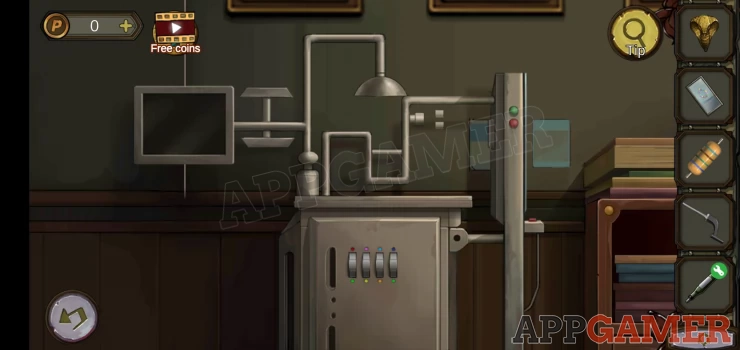
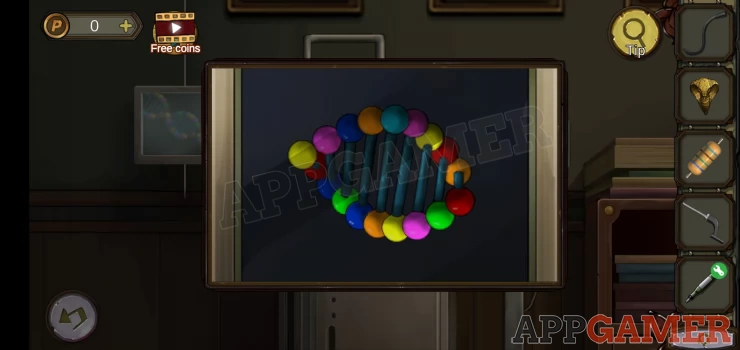
Add the X-ray lamp to it and then add the frosted glass. You can then view the image on the left to get a clue.
Now view the bottom panel of the machine to find a 4 digit code entry.
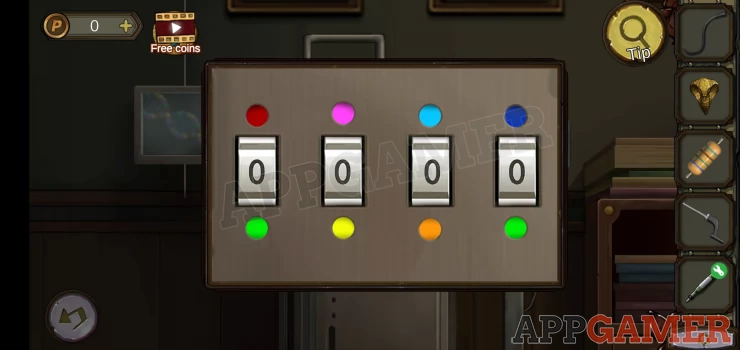
Hint: Each entry has colored lights above and below.
Solution: In the DNA image there are 9 pairs, count 1-9 left to right. Match the color pairs on the code and get the number.Show
Code: 8653Show
Collect a Gear
Exit to the hallway and view the Yellow Door.
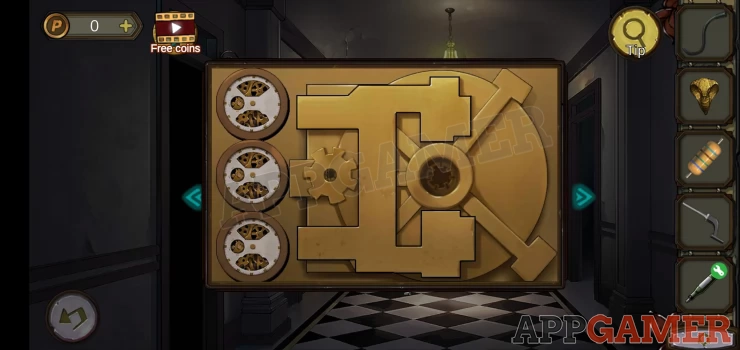
Add the gear to the mechanism and then set the dials.
Solution: Check the clue found on the wall behind the photo in the office.Show
Enter the archive room.
View the cup on the small stool and collect the wet note paper.
Above the stool on the back wall is a shelf. From the top of this collect a 'Half Track'
Then just below the shelf is a small white paper on the wall. View this and collect from the top a resistor.

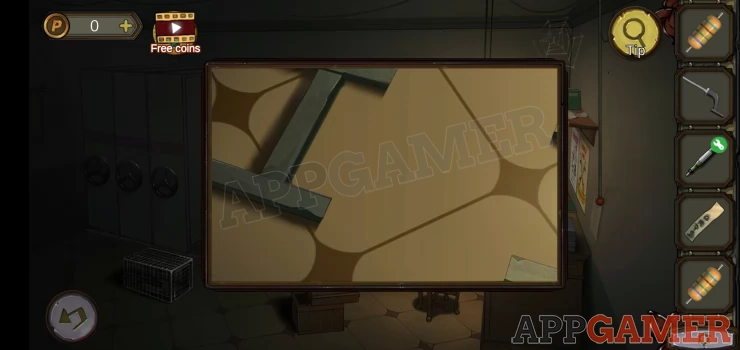
On the floor to the left of the stool is a brown box with a puzzle top.
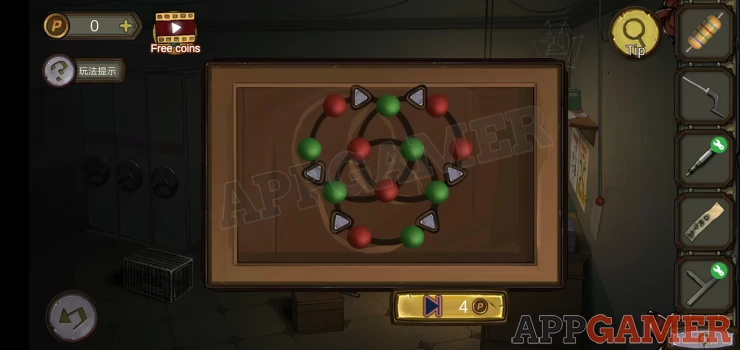
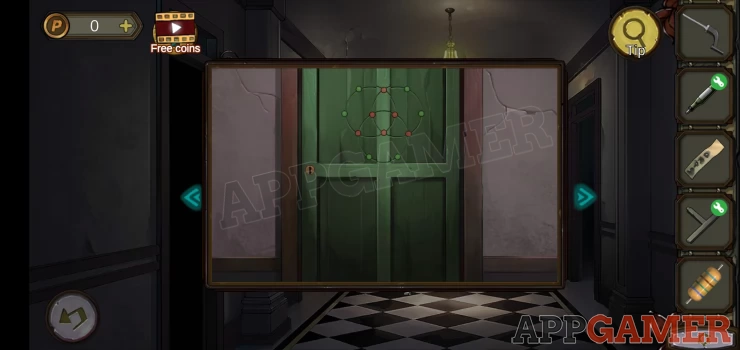
Hint: Use the arrows to arrange the red and green circles. There was a clue for this on the green door in the corridor.
Solution: Show
Collect a second 'Half Track'
Combine the 2 pieces to make the track.
Tap between the cabinets to find out that you cannot move them, but then add the track to fix it.
You can now access the 3 racks.
The first on the left is locked with a smiley face lock.
View the second from the left to see a broken cabinet, collect a password paper
Then view the third from the left and collect some Insulating glue.
Go back to the office room and view the radiator under the window.
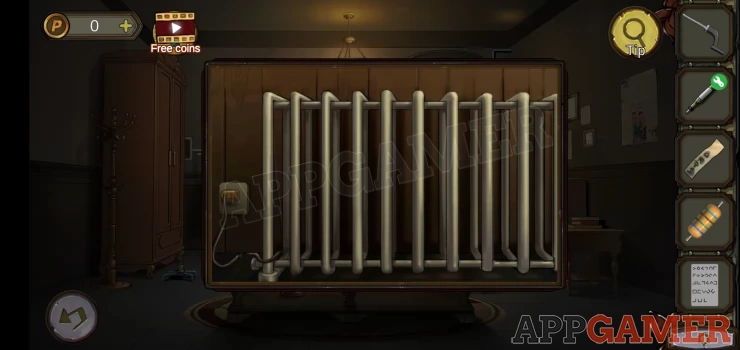
Use the glue to fix the broken wire and the radiator will heat up.
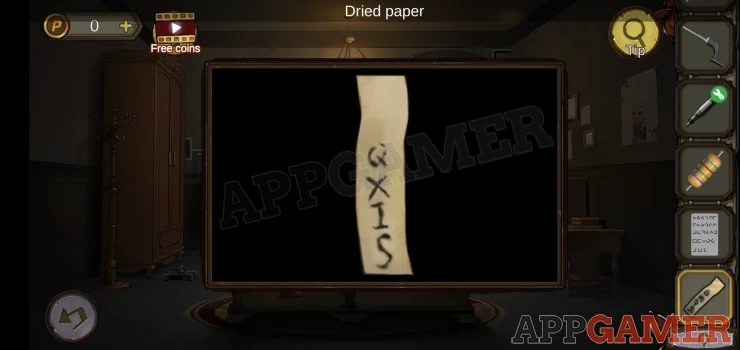
Add the paper to the radiator and it will dry.
View the paper to see a clue
Show
Return to the archive room.
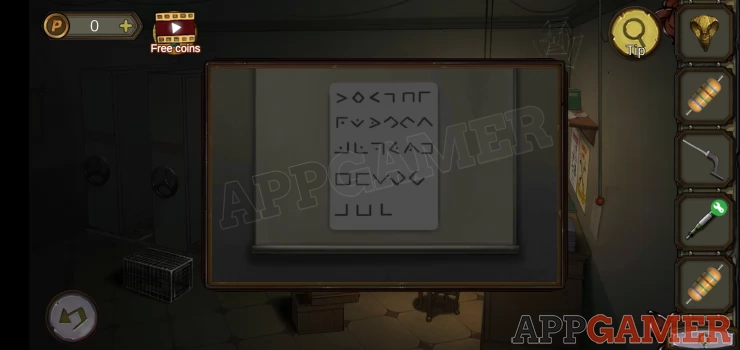
Tap the white screen on the back of the right cabinet. Then add the password paper to it.
Back up and tap the red switch button on the far right to turn on a projector light.
You can now view the screen again to see a clue with symbols and letters.
Show
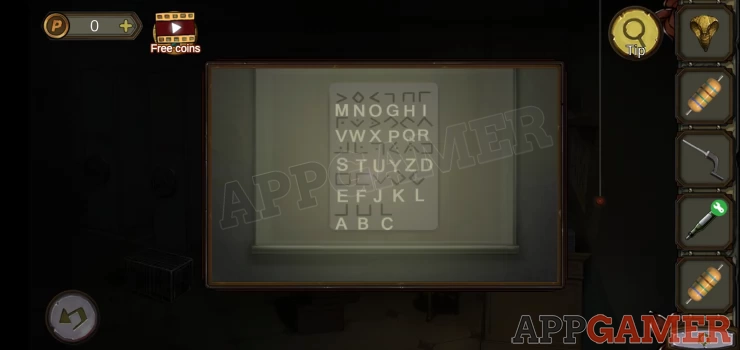
Switch the light again to let you see the room and now tap on the end of the right hand cabinet to see a padlock with a code lock. This has 4 symbols.
Solution: check the dried paper for 4 letters, use the password paper on the screen to translate these to symbols.Show
Collect a hammer
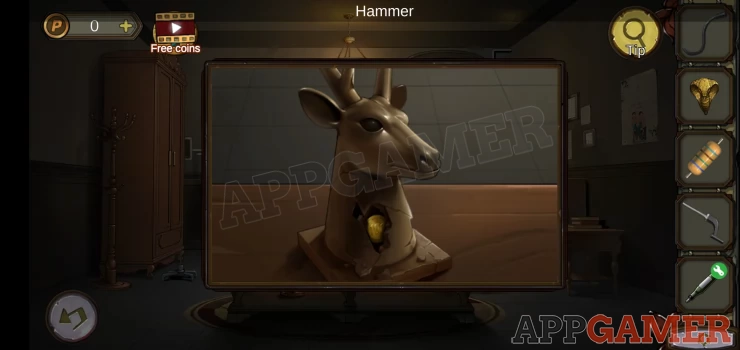
Go back to the office room and view the deer head statue below the table.
Use the hammer on this to break it and collect a special gold coin.
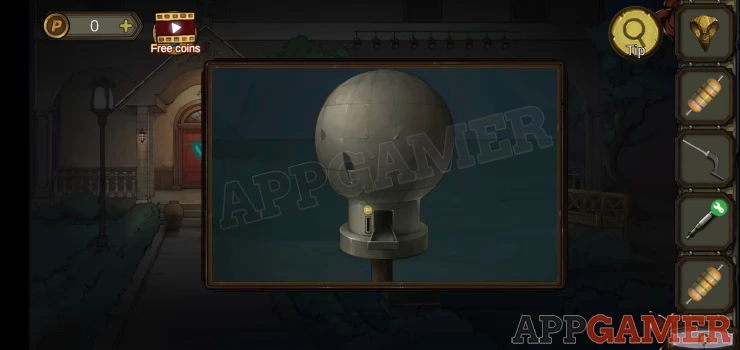
Now back out into the front garden area again and tap on the the circular object on the right in front of the bench.
Use the coin on this and you will collect a circular saw blade.
Combine the broken small electric grinder with the saw blade. You now have a working electric saw.
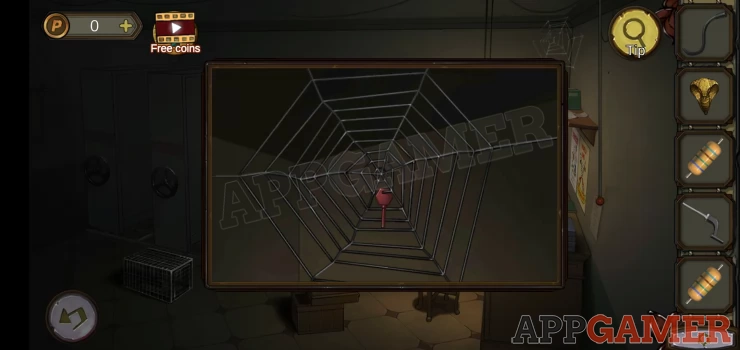
Return to the archive room and look in the top right corner to find a cobweb that appears to be made of wire.
Use the saw on this to collect a Red key.
Go to the corridor and use this to open the red door. Enter the examination room.
Continue in Chapter 3 - Part 2
We have questions and answers related to this topic which may also help you: Show all