Chapter 2 - Part 2
More Dream Escape - Room Escape Game
This is our guide to Part 2 of Chapter 2 of Dream Escape, another mysterious escape room game from Jusha.
In part 1 you have found your way into the bar but it is deserted.
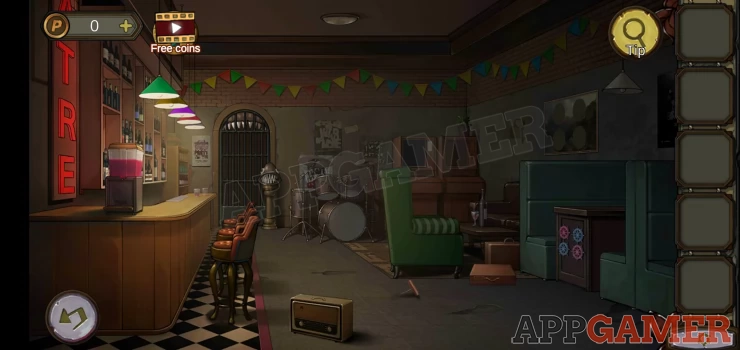
On the floor under the green chair is a corkscrew (opener) to collect.
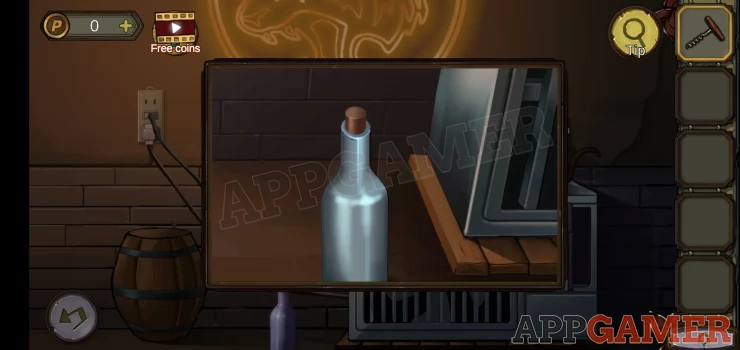
Exit the bar and view the air conditioner with the cat again.
Use the corkscrew on the bottle to open it and collect a drum head.
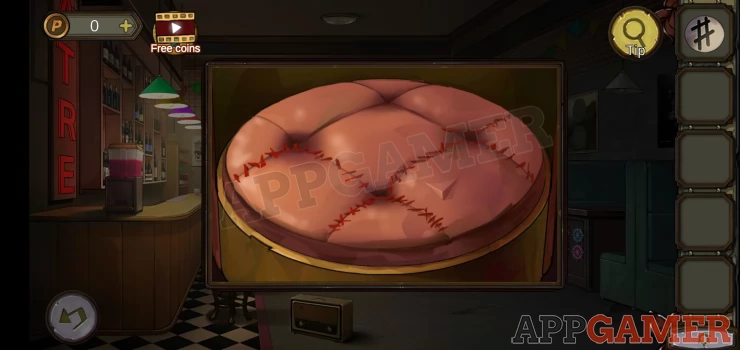
Go back into the bar and tap the closest bar stool to view the top and then again to break the stitching and collect some paper trays from inside.
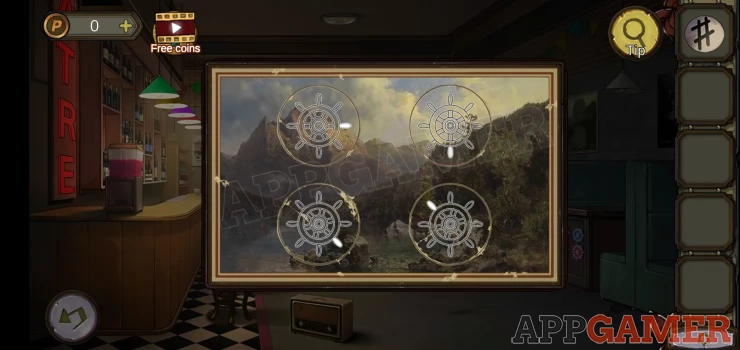
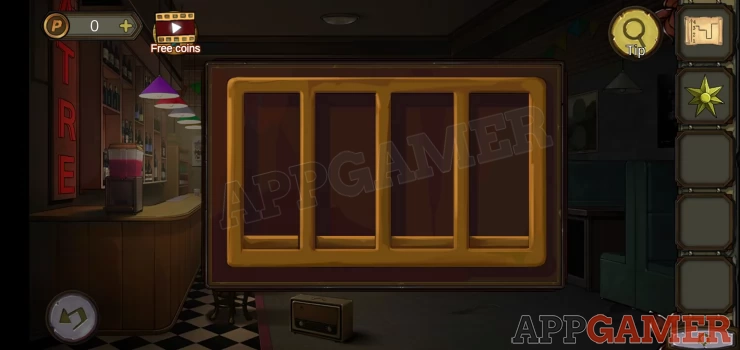
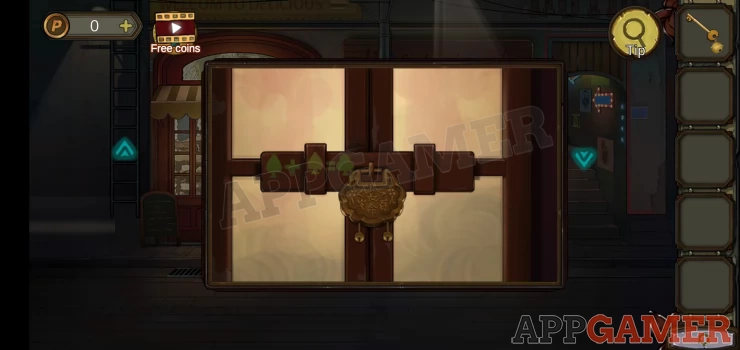
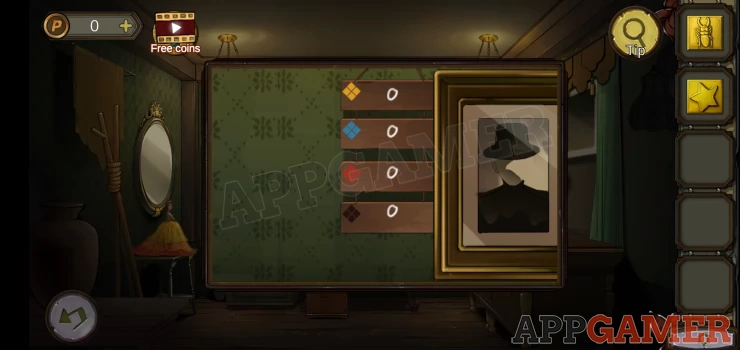
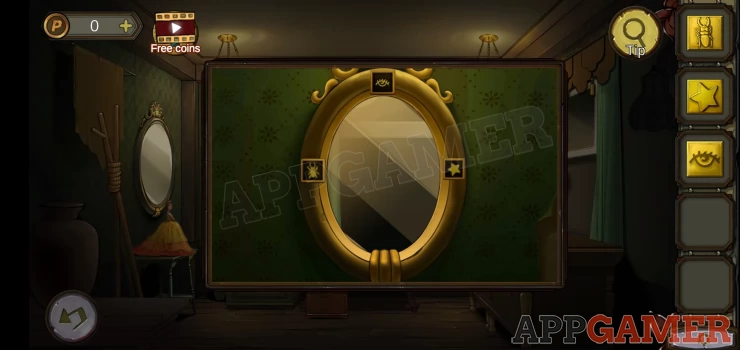
Then tap to view a picture on the right wall (top right). There are 4 circle missing.
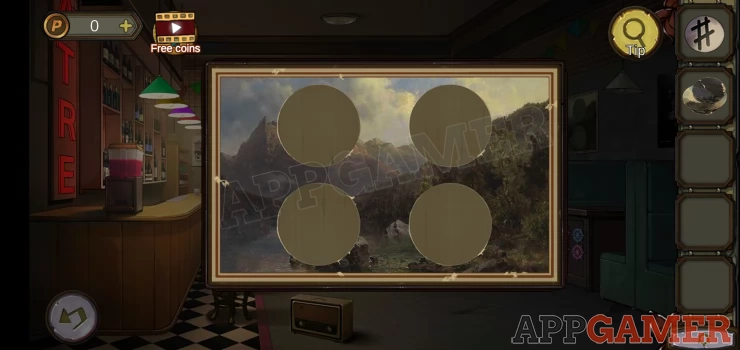
Add the 4 paper trays and you can then rotate them to make the picture complete. Note the positions of the 4 ships wheels. (they each have 1 white spoke)
Show
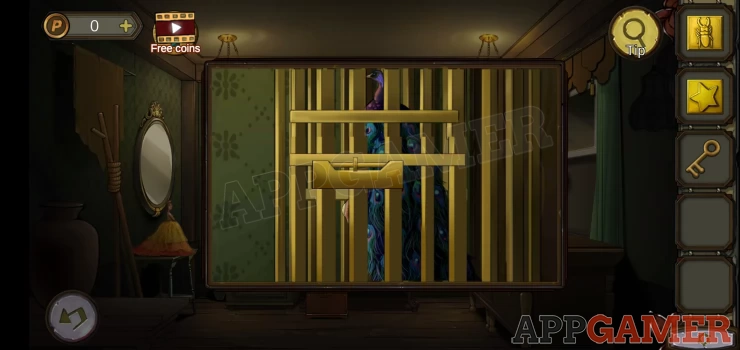
Now tap a box below the picture that has 4 similar wheels on it. Use the positions above to set them and open the box.
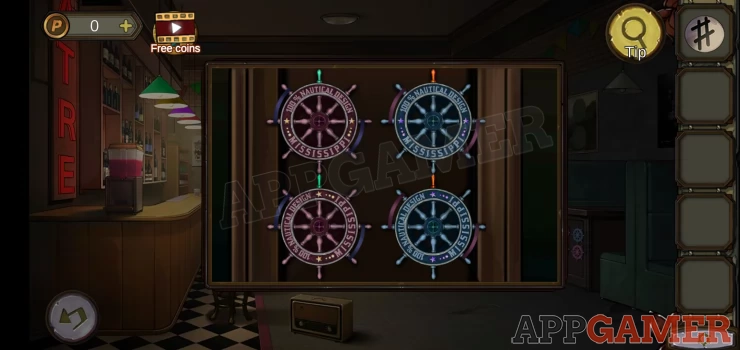
Collect a can and a tape.
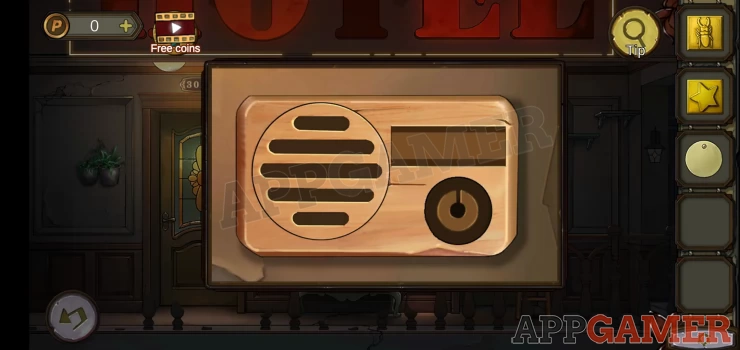
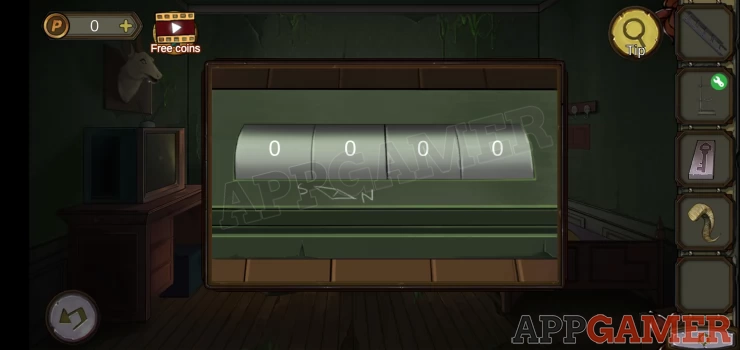
Now tap to view the radio on the floor.
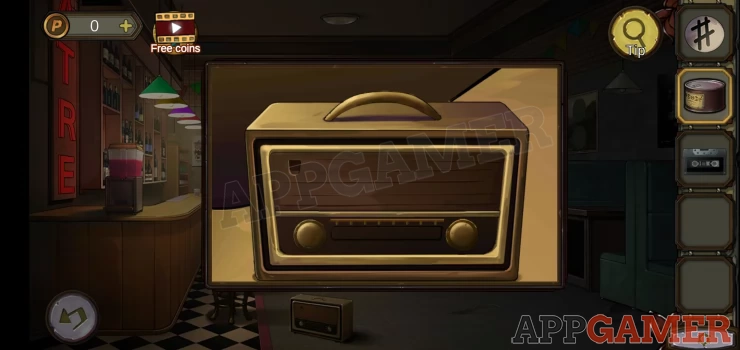
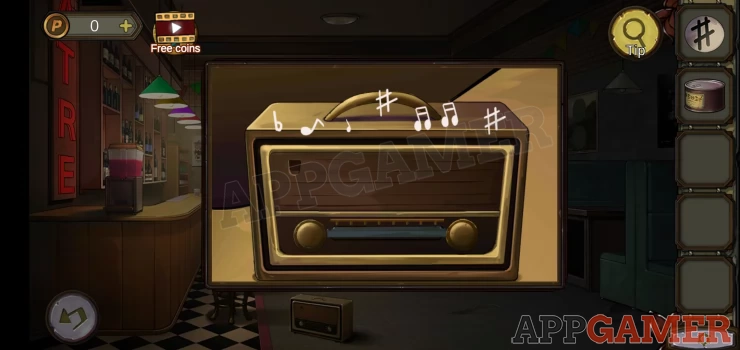
Add the tape to it and pay attention to the notes that you see.
Show
Now tap on the drum set at the back of the room.
Add the drum head to the one with no skin to it.
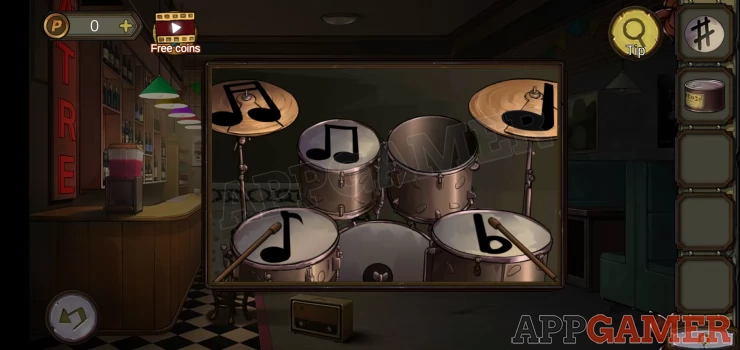
Play the drums by tapping the notes in the order of the clue above.
You can then collect a 'fin'
Now tap on the lights above the bar.
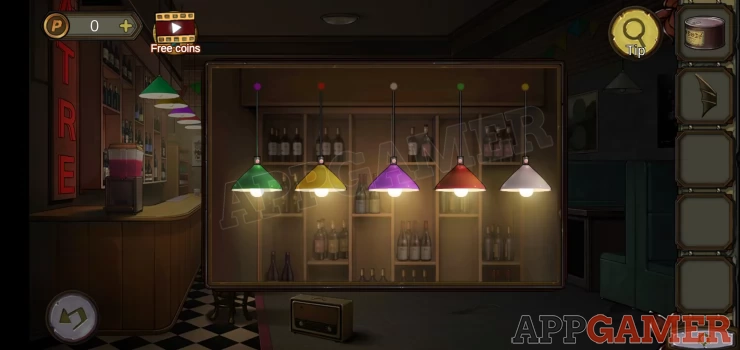
There are 5 lights, you can change the color of the light by tapping on it.
Hint: each light has a different colored connection at the top.
Solution: change the 5 lights to the same colors as the top circle.Show
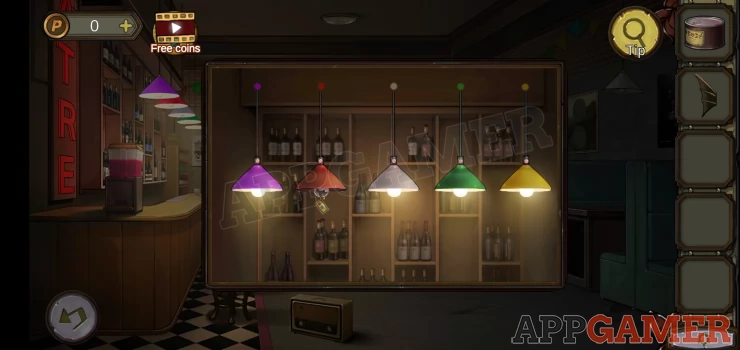
You can then collect a game cassette.
Now tap on the came cabinets on the back right of the room.
Place the game cassette in to start a game of rock paper scissors.
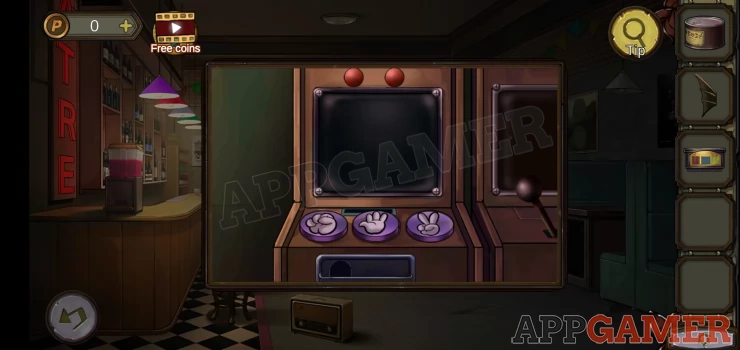
Press one of the 3 buttons to make a choice and try to win the game, when you win twice in a row it will complete the puzzle and you will collect a second fin.
At the back by the door is a fish head. View this
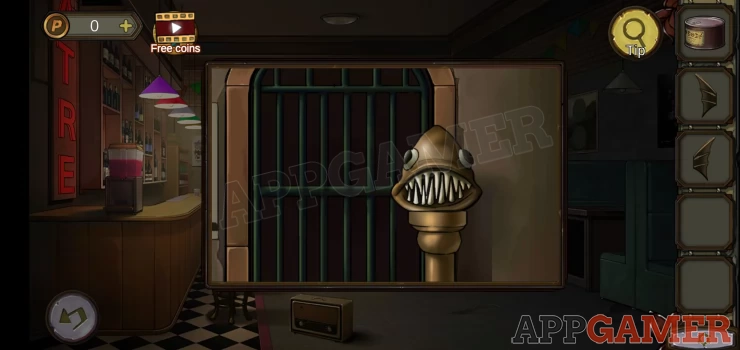
Add the 2 fins to it and the gate will open.
Go through to the back yard.
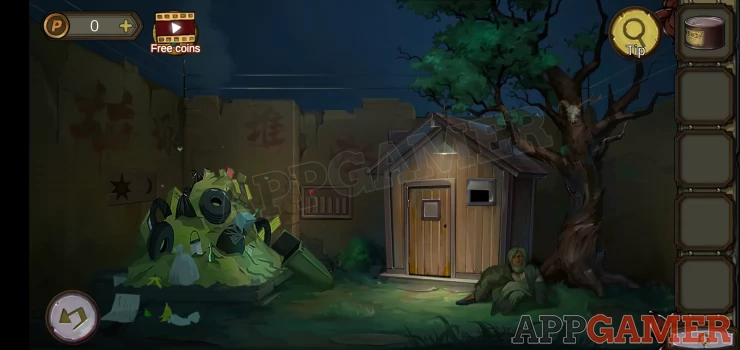
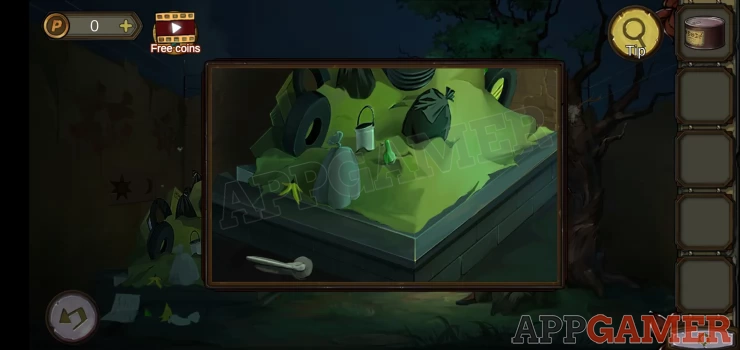
View the rubbish pile on the left and collect a handle.
Then view the shed door
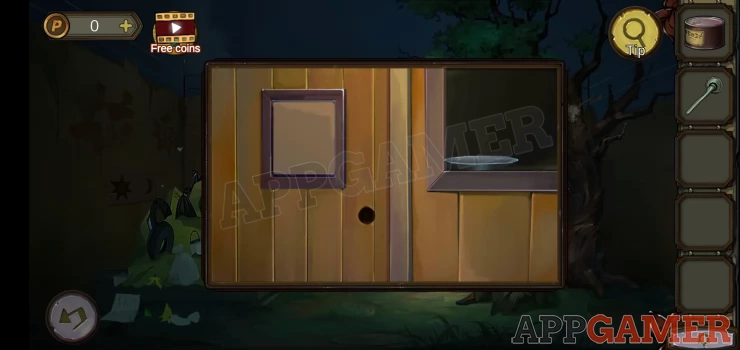
Add the handle to it and open the door.
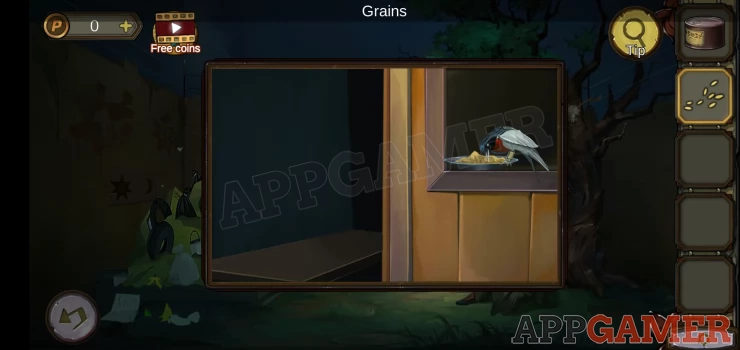
Collect some grains from inside and then add them to the plate on the window ledge. A bird appears.
Tap the bird to collect a 'stationery' paper.
Talk to the man on the right and then give him the can of food. He will give you a red button.
Now tap on the panel to the left of the shed to view it.
Add the red button to the top. This is now a puzzle.
Hint: press the 6 lower buttons in the correct order.
Solution: start with any button then follow with a button where the top color is the same as the bottom color of the last one pressed.Show
Once you have pressed all 6 you can press the red button.
The rubbish is now on fire.
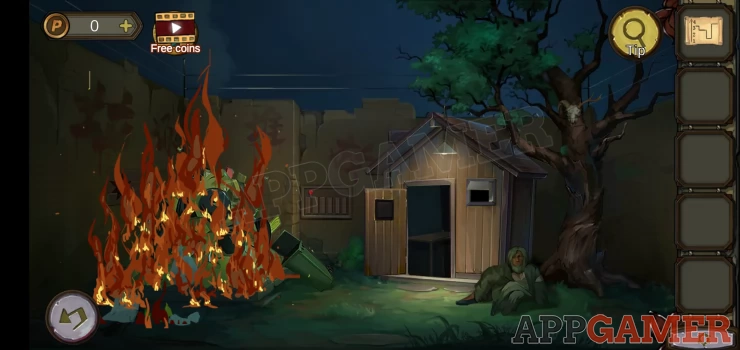
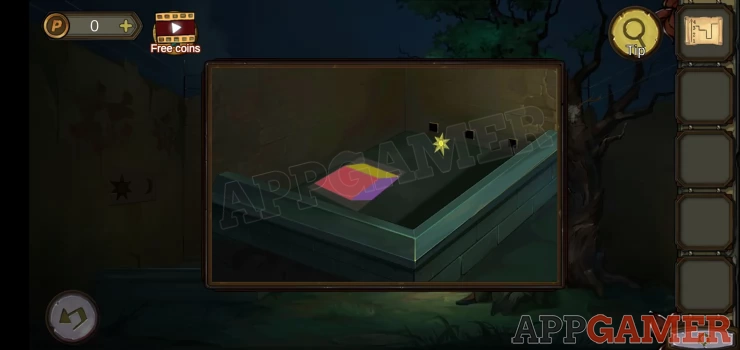
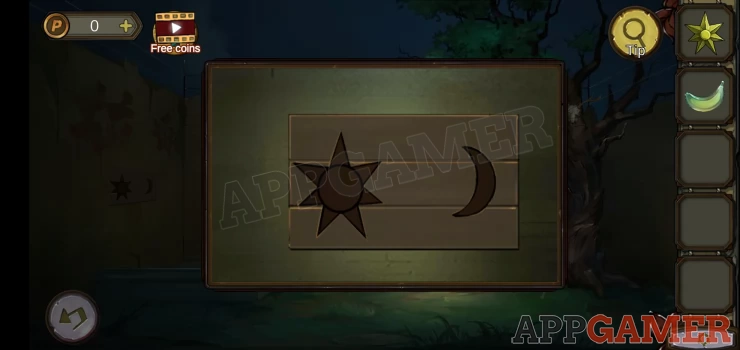
Once it has burned view the pit and collect a Sun stone.
Make note of the cube pattern as well as a clue.
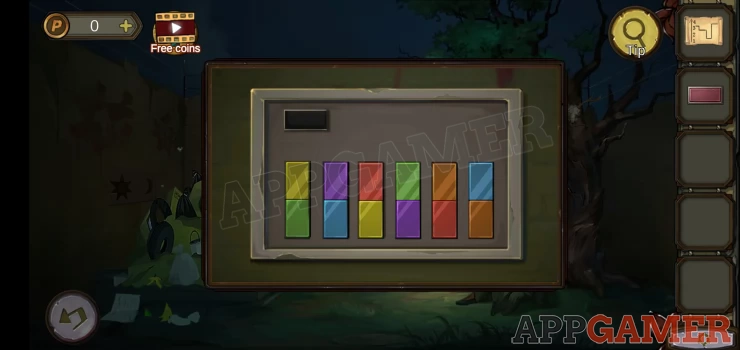
Go back into the bar and tap on a box on the floor just to the right of the green chair.
To open it set the 4 sliders to the correct positions.
Solution: follow the paper 'stationery' clue.Show
Collect a moonstone
Go back out to the outside and tap a panel on the fence to the left.
Add the sunstone and moonstone
Collect a wooden box with round holes.
Now go back through the bar to the street and up to the second floor.
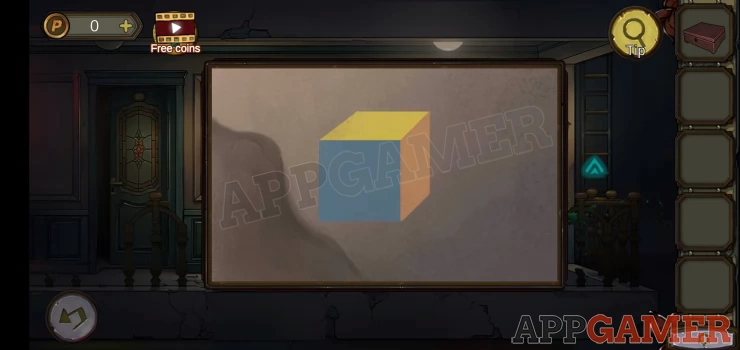
Tap to view another colored cube clue on the right.
Then more up to the third floor.
In the center is a panel with a puzzle.
Use the 2 color cube clues to solve this.
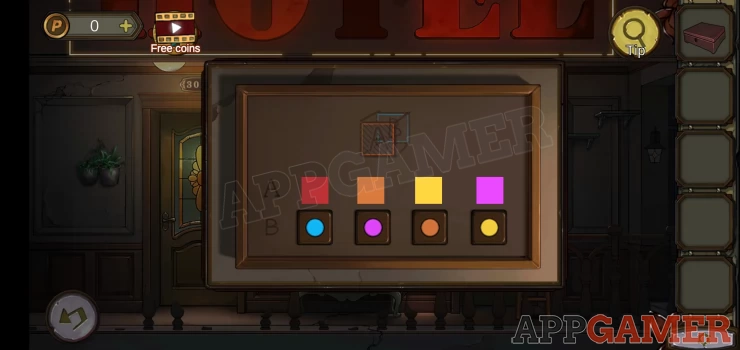
Hint: take the top color A and work out what the B color (opposite on the cube' will be.
Solution: Blue, Pink, Green, OrangeShow
Collect the 'Clockwork'
View the box in your inventory and add the clockwork to it to open it.
Collect a Key with bell.
Go back down to the street and tap again on the door to the right. It has a padlock with a bell.
Use the key to open this and you can enter the Antique shop.

Tap the green curtain on the far right to view it and then again to open it. There is a mask
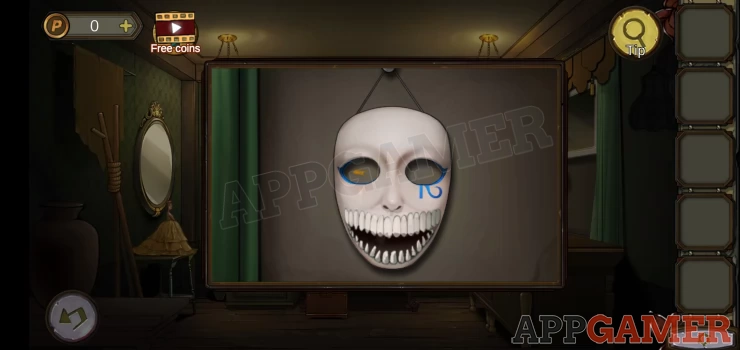
Tap the gold item in the left eye and then again when it moves to the right eye.
When it drops down tap the mouth to open it and then collect the Cube with gold beetle.
Note that shape under the right eye looks like a blue 2
There is an open drawer on the unit on the right below the mask. View this and collect a switch button and a rag.
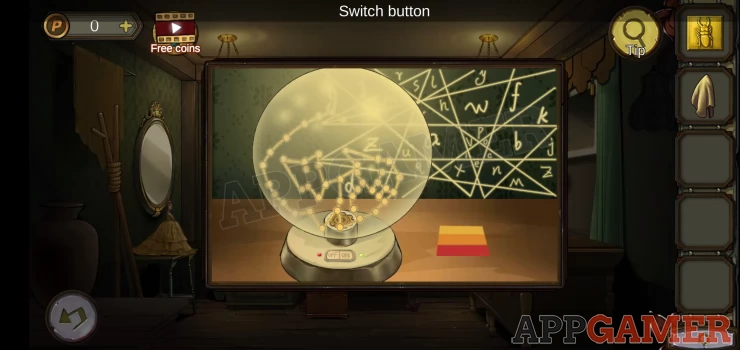
View the glass globe in the center.
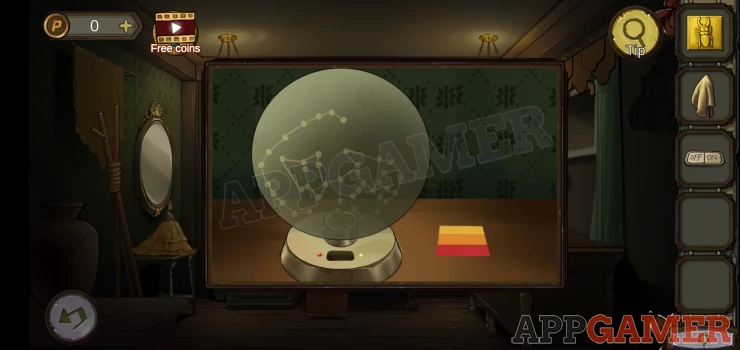
Add the switch to it and then turn it on. Note the pattern of letters on the wall. Also note the colors on the table top.
Show
Now view the box on the floor below the center table.
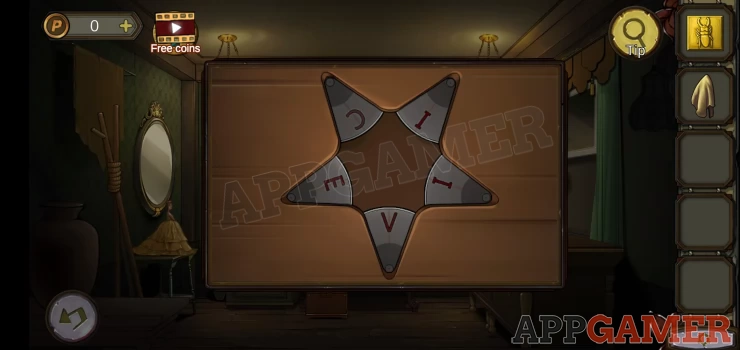
This has a 5 letter lock. Set the 5 letters correctly around the pentagon.
Solution: check the letters shown by the globe that appear around the central pentagon. v o c e i.Show
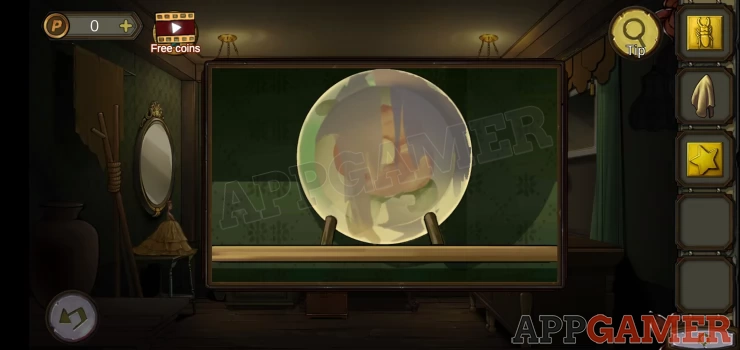
Collect the gold square with the star.
Next tap to view the top plate on the shelves to the left.
Use the rag on it to clean it and reveal a clue (on the right) 7Show
Next view the doll on the left under the mirror.
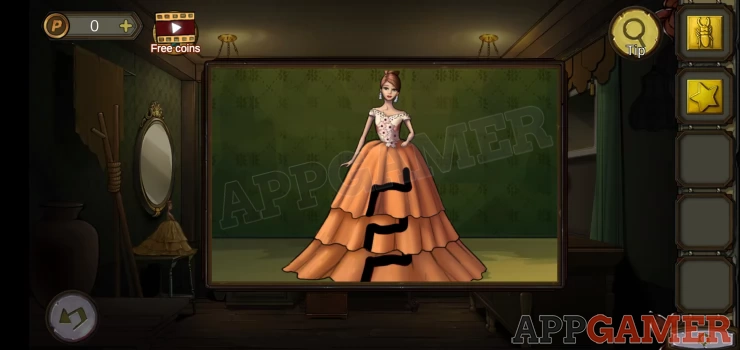
Hint: The skirt has lines on it. You can tap each of the 3 sections to change the lines and the colors.
Solution: Copy the 3 colors that you saw on the table top. It will then show a number 2 shape.Show
Tap the red cover at the top center to reveal the sign for 'Antique'
View it closely to see that the initial letter has a yellow section that resembles a number 4.
Below this sign is a picture of a man in a hat. View this.
Tap it to move it to the right sand find a 4 digit code entry.
Hint: The clues are the colors
Solution: you have found 4 numbers with different colors above. Yellow 4, blue 2, red 7, black 2Show
Collect a key from the picture.
Tap the red cover on the right to reveal a bird cage.
Use the key to open it. Collect a reticulated disc.
Exit the shop to the street and go up to the third floor.
By the left door is an intercom, view this.
Add the reticulated disc on the right then tap and hold until the line turns green, to open a panel. Collect the gold square with an eye.
Return to the antique shop and view the mirror on the left wall.
Place the 3 gold squares that you have into the correct positions. You can then collect a key.
Now head back up to the third floor and use the key to open door 301.
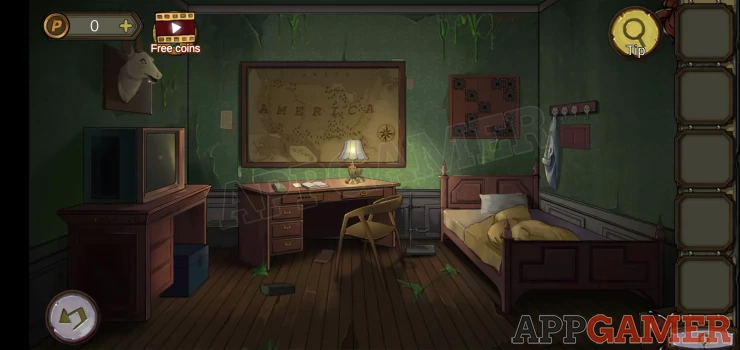
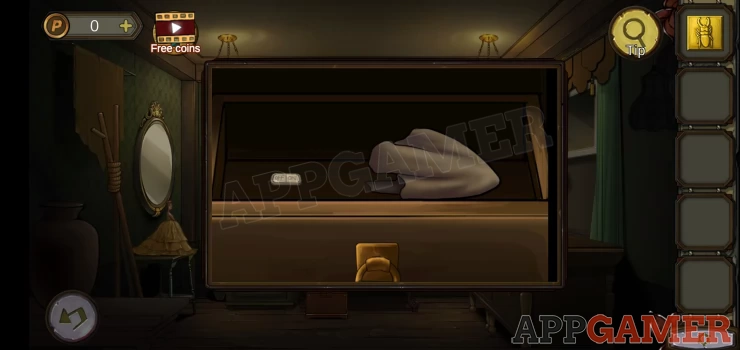
Tap under the bed and collect a ladder. The just to the left of the bed on the floor collect an iron frame.

Then tap on the pillow on the bed and move it to find a clue .
Show
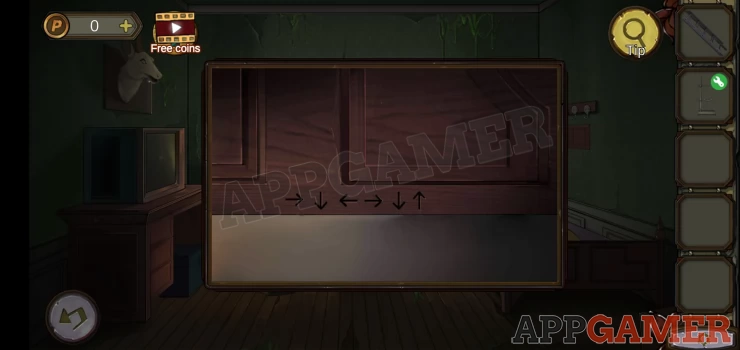
On the wall above the bed is a square picture, view this to discover a puzzle.
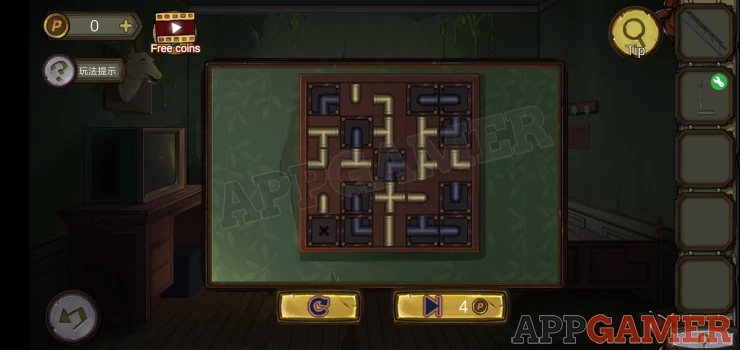
Hint: tap pairs of pieces to swap them, complete it so that all the pipes connect or have closed ends.
Solution: Swap the top 2 ends shown below to complete the puzzle. Show

Collect the Antenna
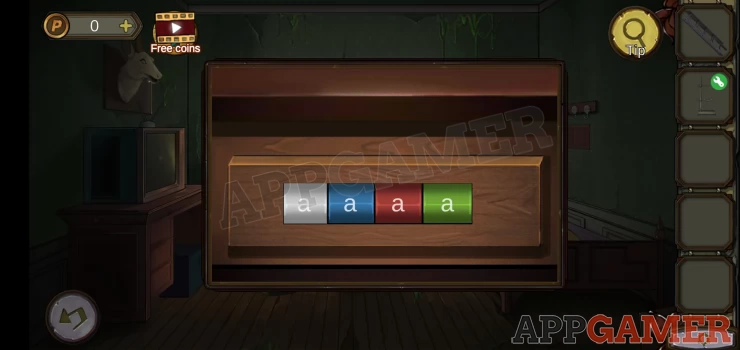
Now tap to view the TV on the left of the room and add the antenna to the top. You will see a picture of a cat.
This is a puzzle.
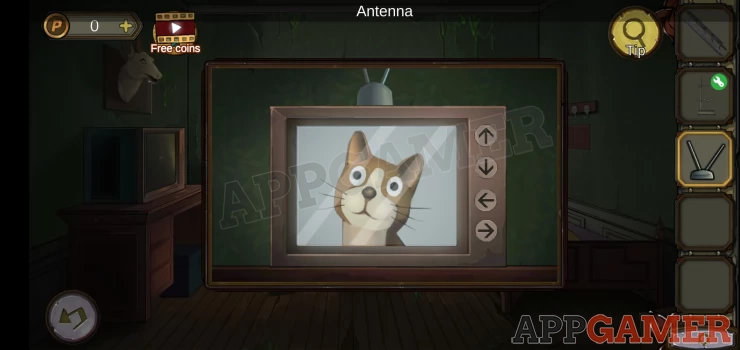
Hint: Use a clue to tap the correct arrow buttons to move the cats eyes.
Solution: R D L R D U You will see the word 'fracture', note the colors.Show
Next tap on the left drawer of the desk in the center. This has a 4 letter lock, the lock has 4 colors.
Hint: get the letters from the clue above.
Solution: f a t eShow
Collect a mould
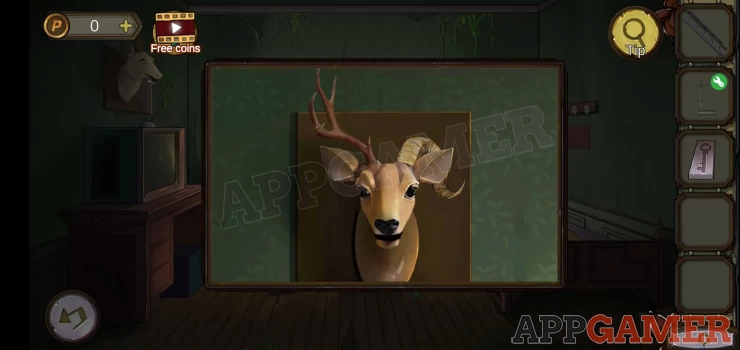
On the left wall above the TV is an animal head, view this and then from the right collect the 'Shofar' horn.
Now view the map on the wall in the center.
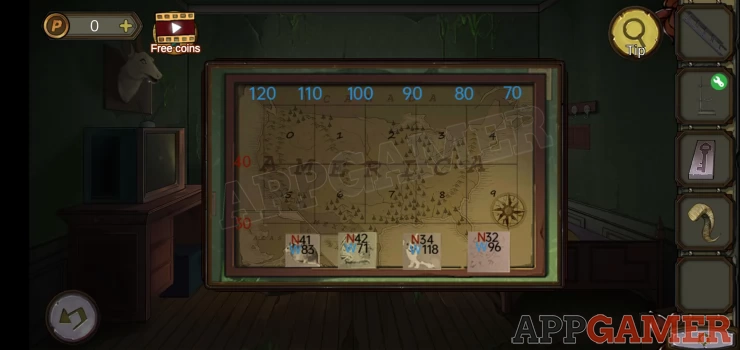
There are 10 grid locations with numbers. at the bottom are 4 notes with grid coordinates.
On the floor in front of the desk is a small green box, view this for a 4 digit lock.
Hint: note the compass symbol on it.
Solution: get the 4 digits from following the coordinates on the map above.Show
Code: 3457Show
Collect the Beaker
Go back outside, through the bar to the back yard.
Use the ladder on the tree on the right to let you view the animal skull.
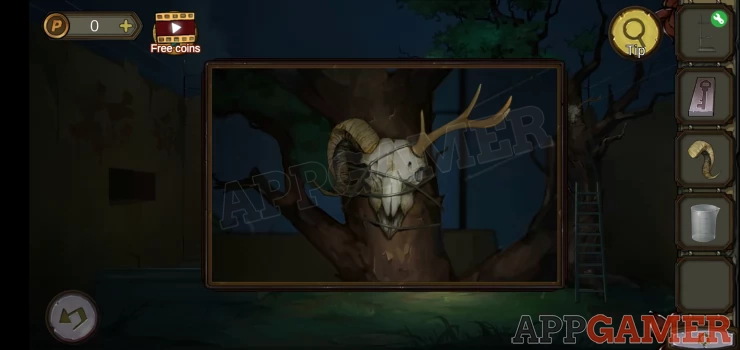
Replace the antler with the shofar to let you collect a copper coin.
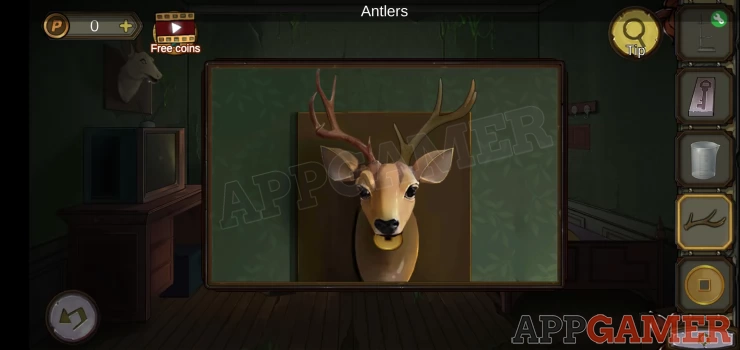
Then return to room 301 and place the antler back on the deer head. Collect a second copper coin.
Back out and down to the second floor. In the center is a panel which when you view it you will see 4 figures.
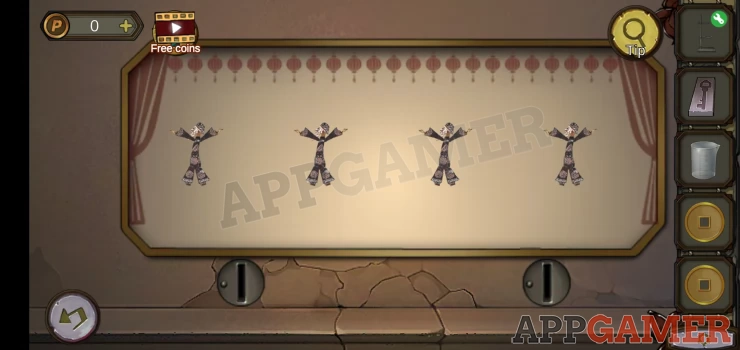
Place the 2 coins in the clots below and the figure will change positions. Remember these
Go back to room 301 and tap to view the coat hooks on the right above the bed.
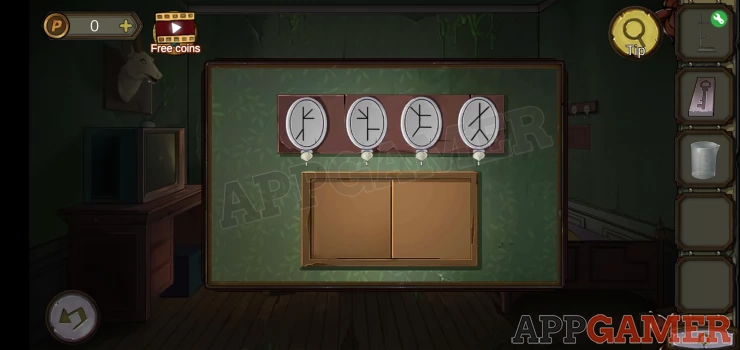
Tap these to change the stick figures shown to match the ones from the panel.
Solution: Show
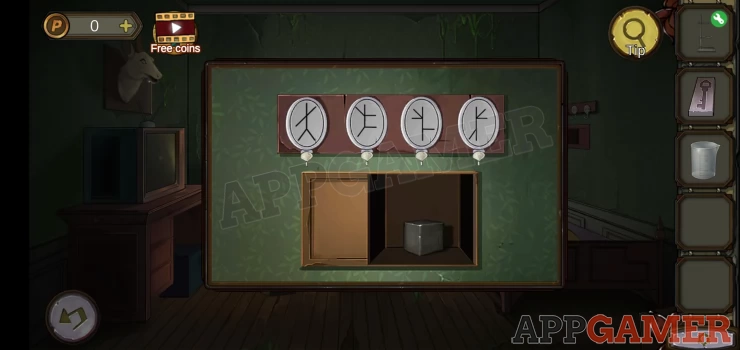
You can then collect a tin Block.
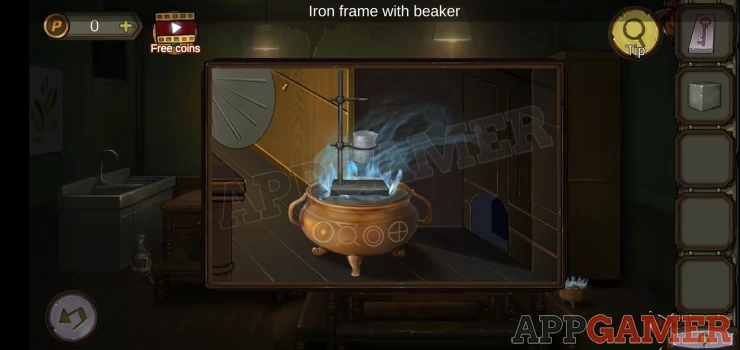
Go back down to the street and enter the shop on the left. View the sulfur that is still burning in the corner.
Combine the iron frame with the beaker and then place it on the flames.
Add the Tin block to the beaker, then collect the cup with tin liquid.
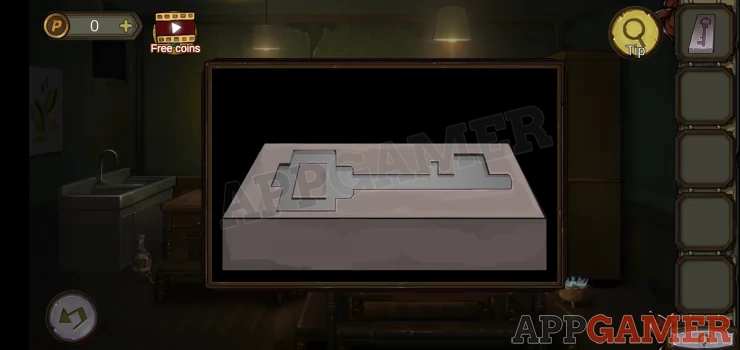
View the Mould in your inventory and add the Tin liquid to it.
Collect the Tin key.
Back up to room 301 and view the large box under the TV on the left.
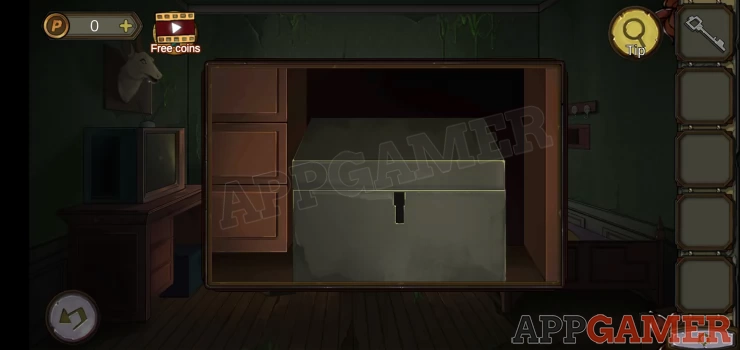
Use the tin key to open it.
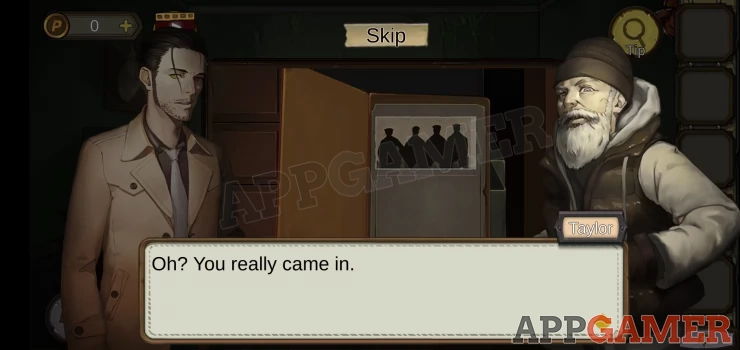
View the notebook you find inside and then follow the conversation to meet Taylor.
We have questions and answers related to this topic which may also help you: Show all