Chapter 5 - Part 2
More Dream Escape - Room Escape Game
This is our guide to Part 2 of Chapter 5 of Dream Escape, another mysterious escape room game from Jusha.
Still on the hunt for Perot and the book you have found your way into a cinema But you need to find some money to by a ticket to get in.
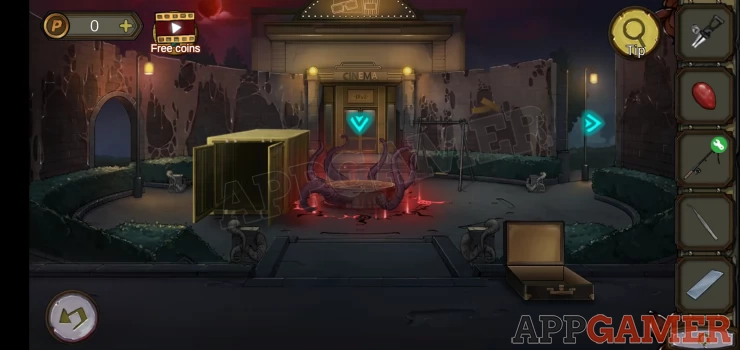
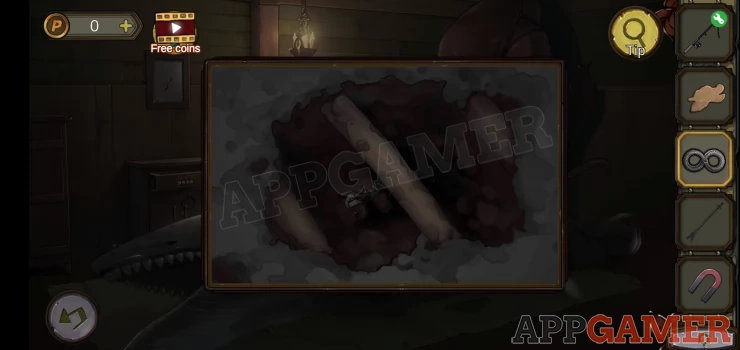
Exit the cinema and you will see some tentacles on the central altar area.
Move through to the dock store room. Tap on the right set of shelves at the back to find this box.
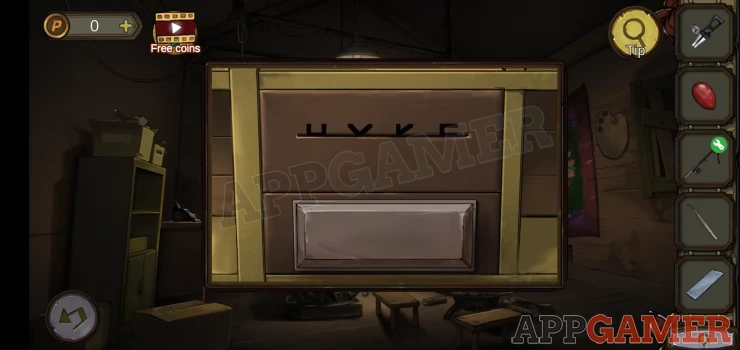
Place the small lens in the slot to get a clue. and tap the panel below to open it.
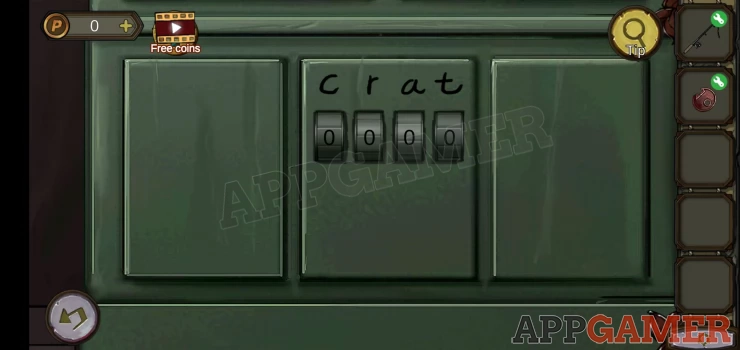
Now enter the code in the lock below.
Solution: HXKEShow
Collect a gear
Return to the cinema and view the Charlie Chaplin poster on the right.
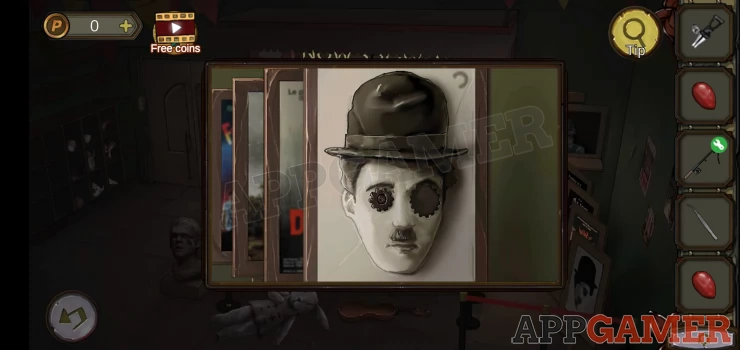
Add the cog to the eye and you can then collect a second half tweezers.
Combine the 2 halves
Return to the dock and view the lower left section of the dock near where the bucket was to find a small hole.
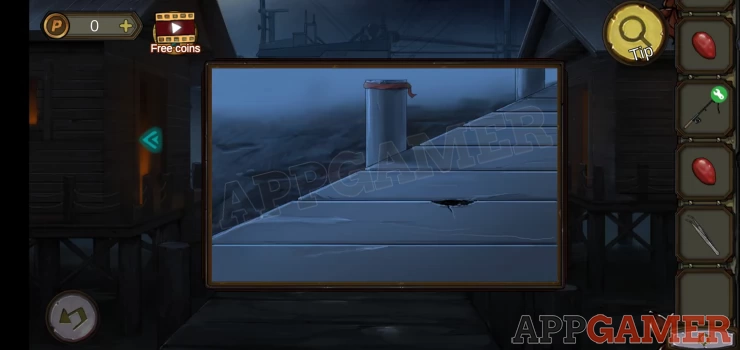
Use the tweezers here to collect a bill with 20 on it.
Return to the cinema and the ticket seller. Give them the money and you will receive a special coin.
Now tap the doors on the left.
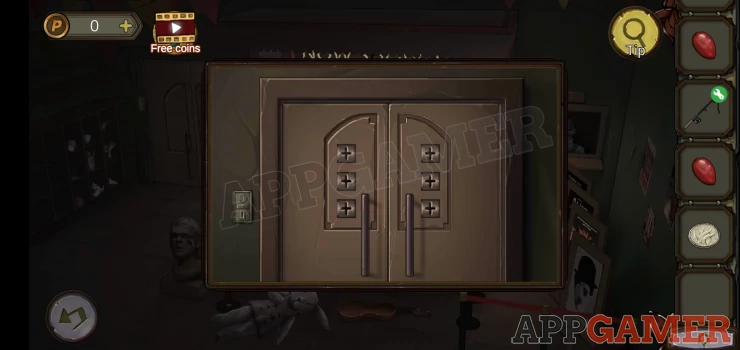
Add the coin to the slot. You will then need to enter a code on the buttons on the right.
Hint: There is a clue on the toy rabbit.
Solution:
+ - . + . -Show
Enter the screen room.
Tap to try to talk to the person there, but they will not talk to you until you get them some juice and popcorn.
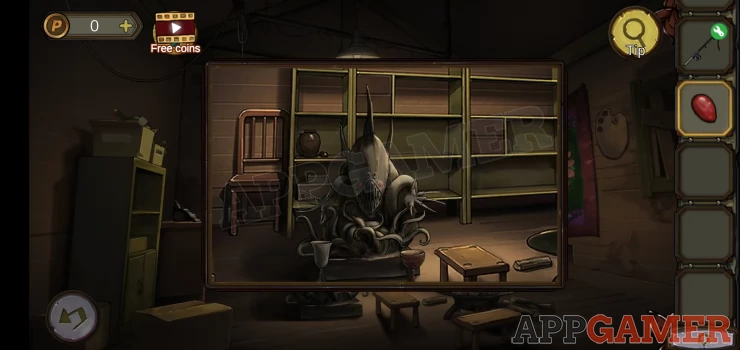
Exit and go to the dock store room. View the monster statue again.
Add the 2 rubies to the face and it will drop 2 cups (one with holes)
Return to the cinema foyer.
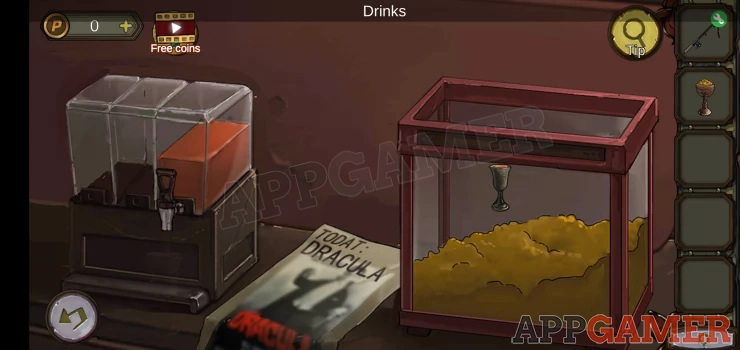
View the popcorn machine again. Use the cup with holes to collect popcorn.
Then add the water tap to the drink machine on the left and use the other cup to collect juice.
Go back into the screen room.
Give the popcorn and the drink to the person.
You will get a chess piece. (Half Pawn)
Follow the conversation. The English is not great but we are told that it is now 7:40 and the movie starts in half an hour.
Go to the dock store room. On the wall to the left of the shelves is a panel, view this.
Add the half pawn to the black circle to start the puzzle.
Use the arrows to move the pawn around until it reaches the center circle.
Once done you can collect a clapper board with a code clue.
Go back to the pool hall and view the ground again by the table where there is a clock.
Solution: set the time to the movie start time. From the clue above this is 8:10.Show
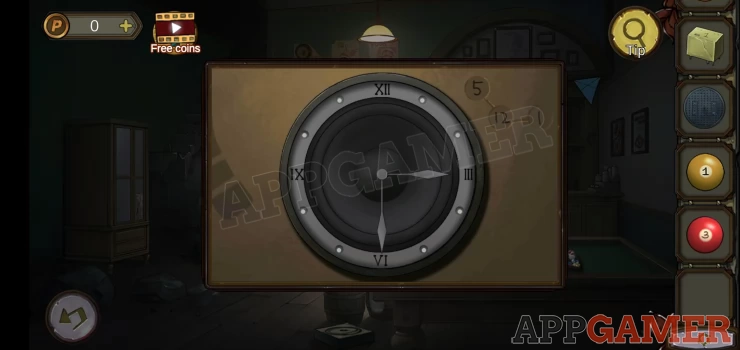
The clock disappears and you can collect the 'Audio' (a speaker)
Go back to the movie screen room and tap the speaker on the right of the screen to view it.
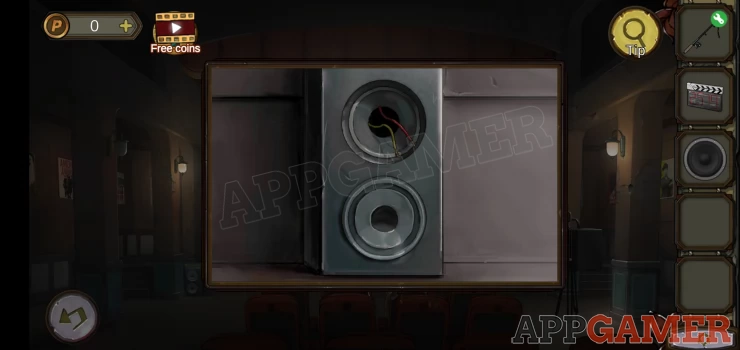
Add the speaker you have to the top, then collect a film from the lower one.
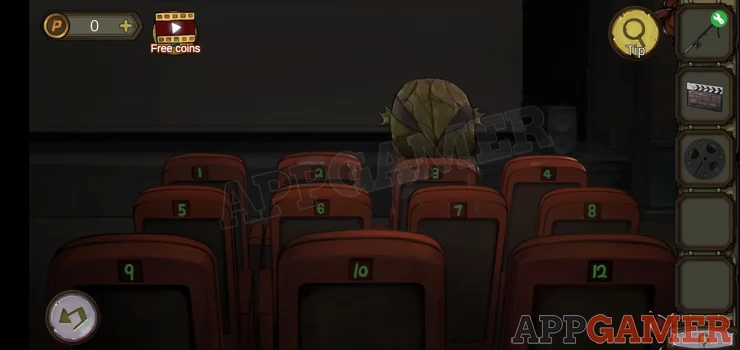
Next view the chairs again to see the seat numbers.
Use a clue above to tap 4 numbers.
Solution: 2 5 7 9Show
You can then collect half a red key
Now view the projector
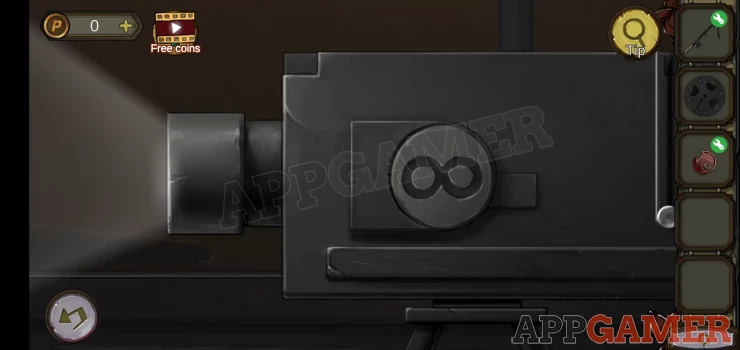
Add the film to it, then view the screen to see a clue.

Tap to the left of the screen to see this green panel. Note the letters above the dials.
Hint: use the screen clue to get he code.
Solution: Count the number of each letter shown on the screen.Show
Code: 3896Show
Collect the circular saw handle and then view the safe inside.
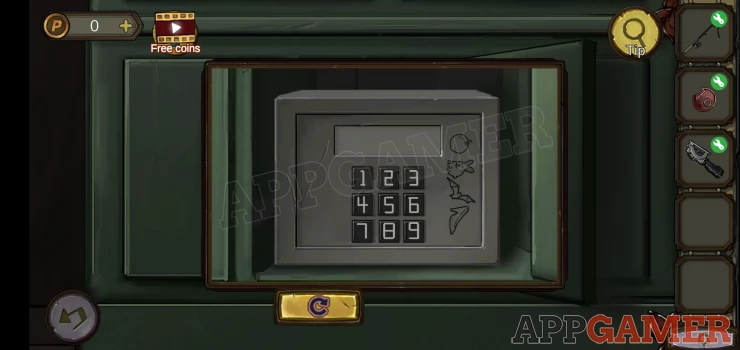
Hint: the clue is the symbols on the right.
Solution: match the symbols to the items on the shelves in the foyer.Show
Code: 9426Show
Collect the circular saw blade.
Combine these 2 parts to make the circular saw.
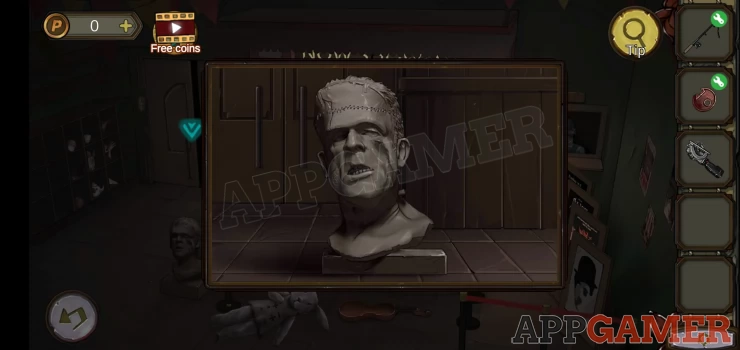
Back out to the foyer and view the bust of Frankenstein's Monster on the floor.
Use the circular saw to cut the top off and collect half a red key.
Combine the 2 halves to make a red key.
Go back to the dock and view the door on the right.
Use the red key to open the door and go in. You meet Perot.
After the conversation ends view the large squid in the back.
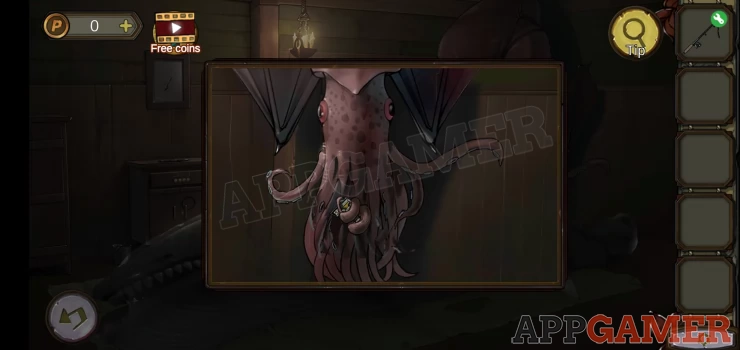
Collect from it a deicer
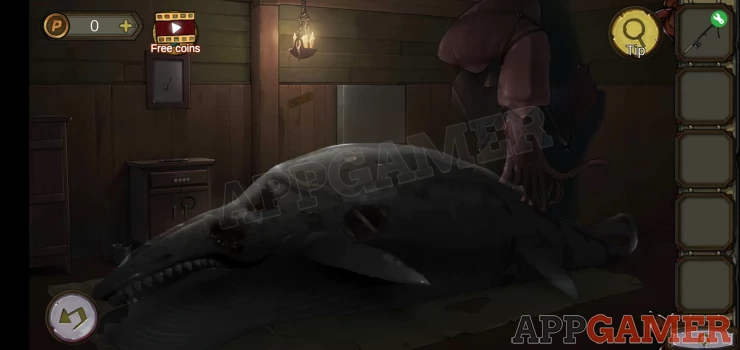
Then view the mouth of the whale. It is frozen.
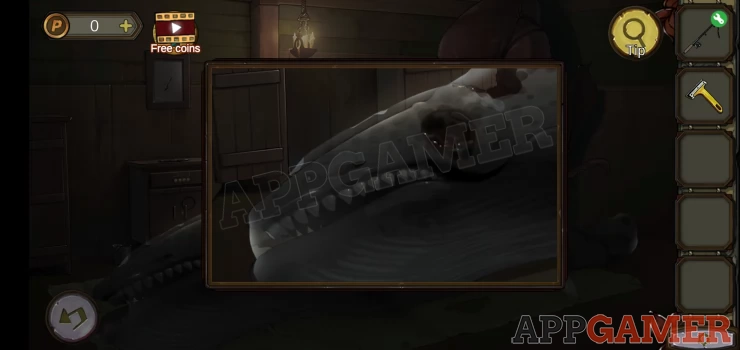
Use the deicer on it and you can collect an 'Irregularly shaped metal piece'.
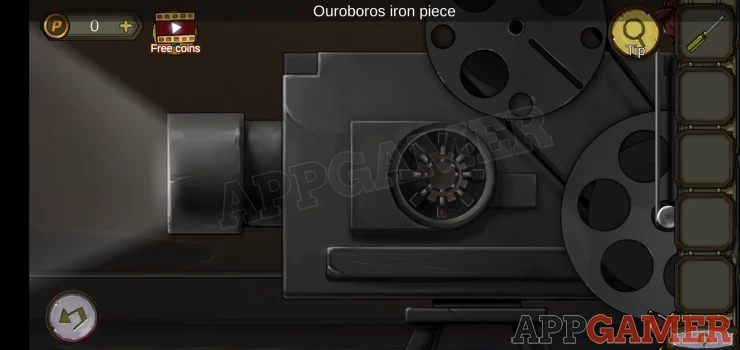
Tap on top of the unit to the left to collect an Ouroboros Iron Piece
Then tap the drawer on the front to see a code lock.
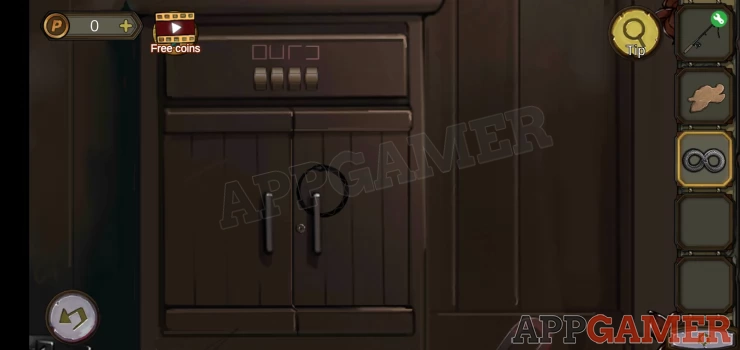
Note the clue above the dials,
Solution: The code can be found form the shapes and the clue on the wall in the cinema foyer. The shapes will indicate the squares to take the numbers from .
Code: 1739Show
Collect a 'Long handle waterweed clip'
From the floor to the right of the drawer collect a magnet (Watershoes)
Now tap on the back of the whale to see a hole in the side.
Use the waterweed clip to collect a Fire hammer from inside.
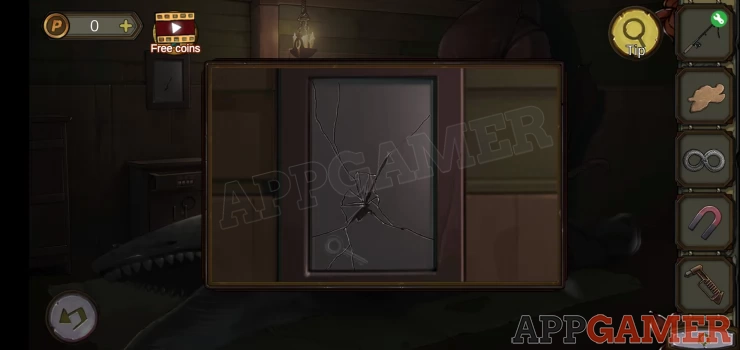
Now tap on the broken mirror above the drawers on the left.
Use the hammer on this to find a key.
View the unit below again and use the key to open the doors.
Collect a screwdriver bit.
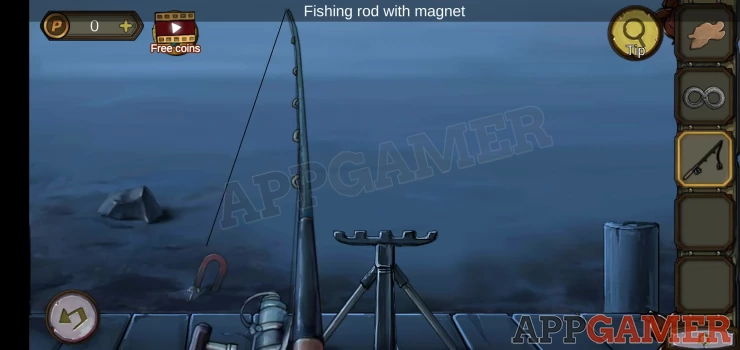
Return to the dock and view the water on the left again where you caught the fish.
Combine the fishing rod with the magnet and then use this on the rock on the left to collect Half a ring.
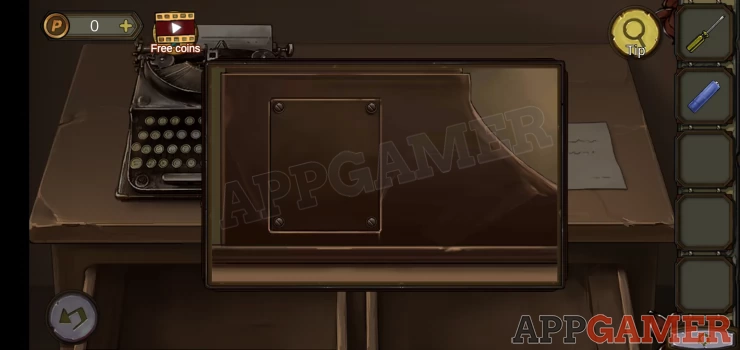
Then move into the store room and view the desk on the left again.

Use the Irregular metal sheet on the left drawer to open it and collect another half a ring.
Combine the 2 halves to make a ring.
Return to the cinema foyer
View the shelves on the left again and use the ring on the hands.
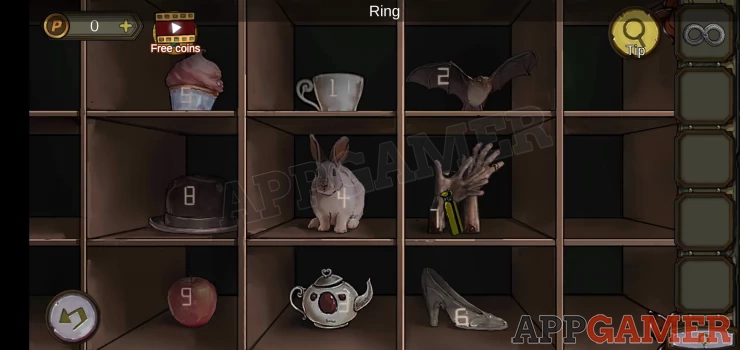
Collect the handle.
Combine this with the screwdriver bit to make a screwdriver.
Then move into the screen room and view the projector again.
Add the Ouroborus sheet to the slot on the side to open it
This is a puzzle.
Hint: the clue for this is the life preserver ring in the down store room.
Solution: copy the pattern of long and short spokes around the ring by tapping the buttons on the projector.Show
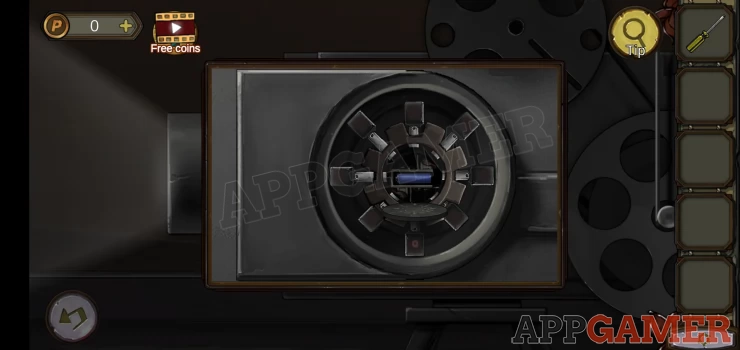
Once done, collect a battery
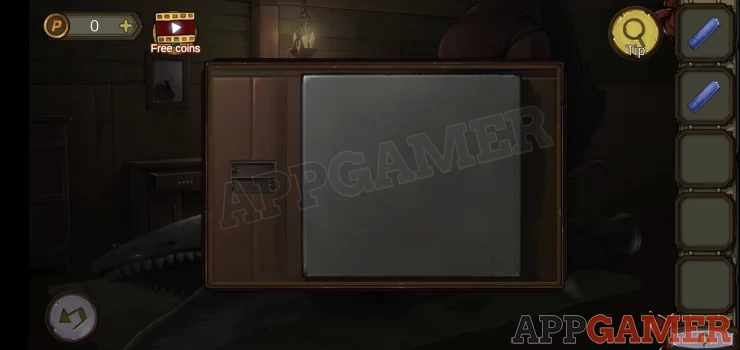
Return to the dock storeroom and view the desk on the left. Tap the typewriter to view the side.
Use the screwdriver to open the panel. Collect a second battery.
Return to the dock room with the whale. On the wall behind the whale is a white panel.
View this and add the 2 batteries to the left.
This starts a puzzle.
Lights on the arrows will flash to show you a sequence of squares, you need to remember and copy the sequence within a short time limit. There are 5 stages with each one harder. The sequence is random.
Once done collect a diamond gem
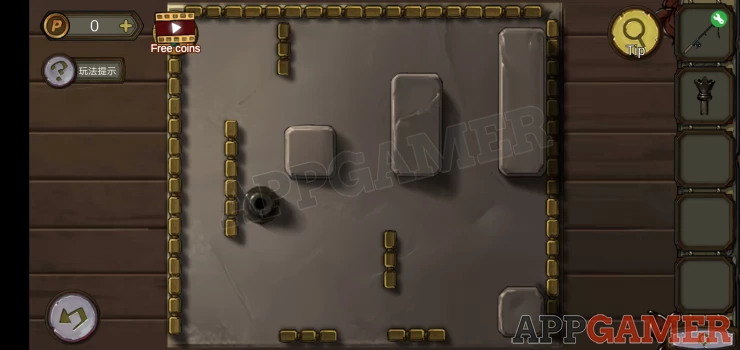
Return to the courtyard in front of the cinema.
View the central altar with the tentacles and place the diamond gem in the middle.
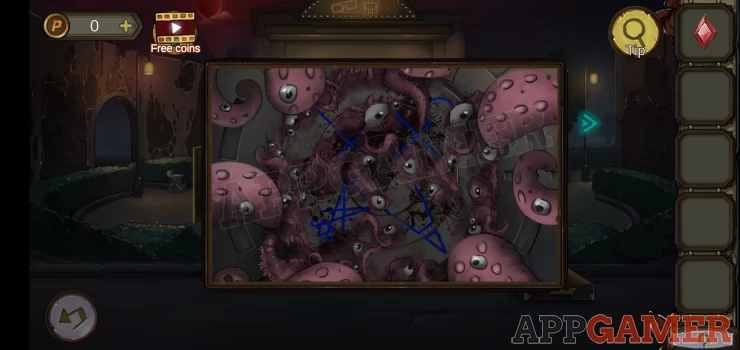
Take note of the 4 blue symbols around the altar.
There are 4 small stone pillars in the courtyard with tentacles on them.
By the arch on the left and the gap on the right. And 2 at the front.
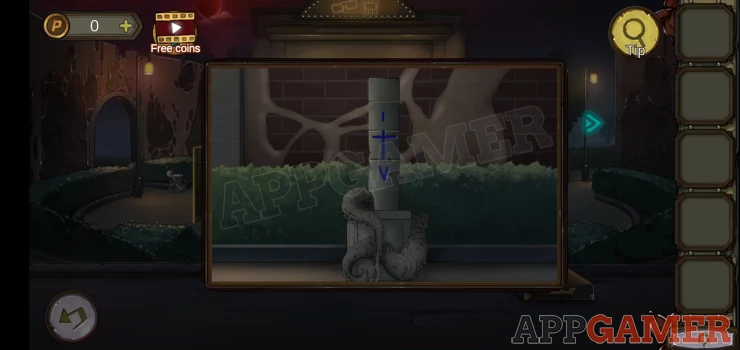
View each and set the symbols on the to match those on the altar.
The central alter is now clear and you can collect a key.
You return to the first area to escape.
View the doors on the far left and use the key to open them.
Enter the Church
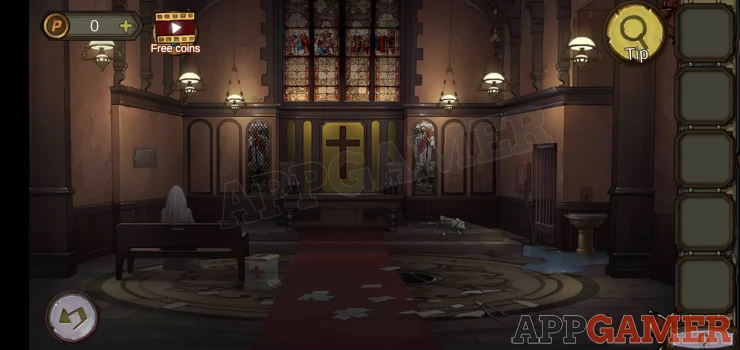
First collect some wire pliers from the floor on the right.
Above this on the floor is a fallen statue.
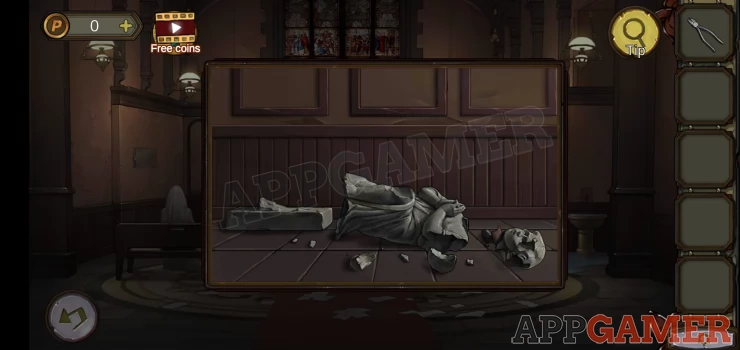
Collect from it an 'Irregular metal piece'
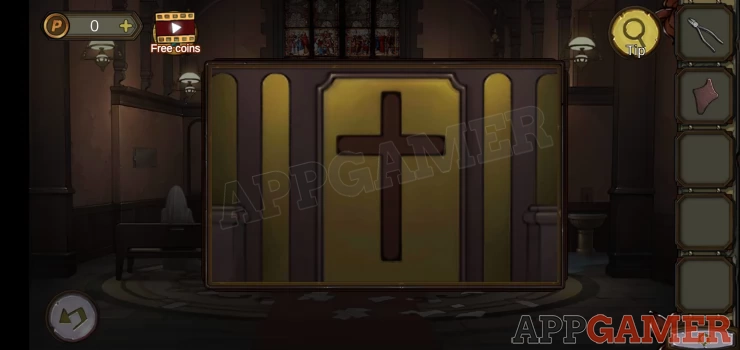
View the large cross in the center. Tap to make it fall and then collect form behind a blank note.
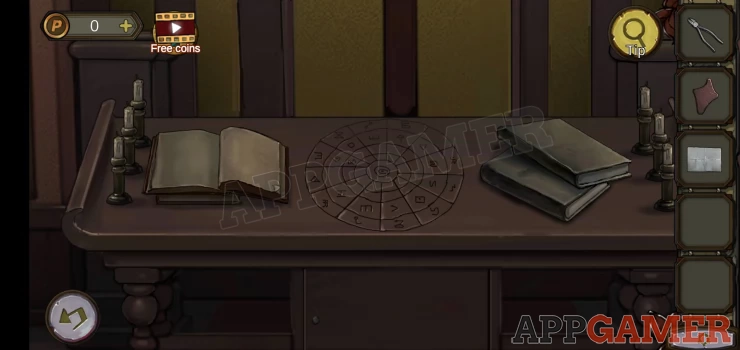
Tap to view the bench in the center below the Cross. Note the clue on top.
Open the cupboard below and collect a crowbar.
Then view the lower left stained glass window.
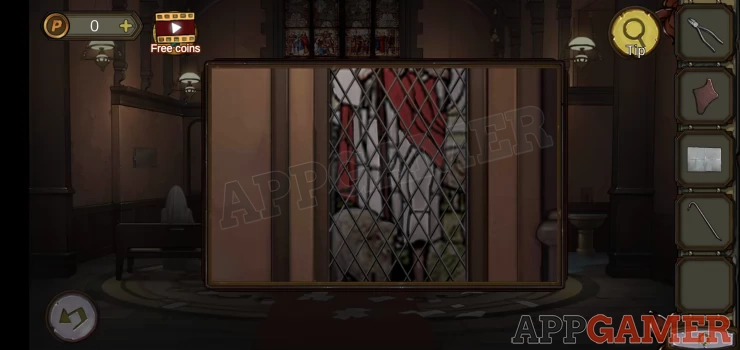
Use the pliers on this to collect some iron wire.
Then to the right of the pew on the left is a box with a cross.
Add the irregular metal sheet to the top then you can collect a Half a piece of metal.
Now view the white statue sitting on the pew.
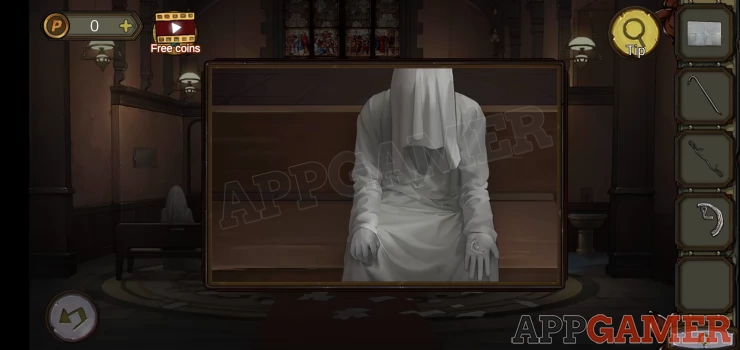
Add the half a piece of metal to the open hand. You can then collect a diode from the other hand and the statue will turn to dust.
Notice on the right of the room is a puddle of water, tap to view this area.
View the overflowing basin.
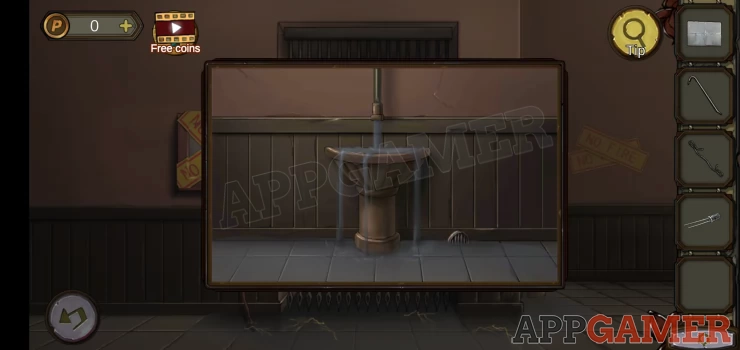
Use the iron wire on the drain to collect a key
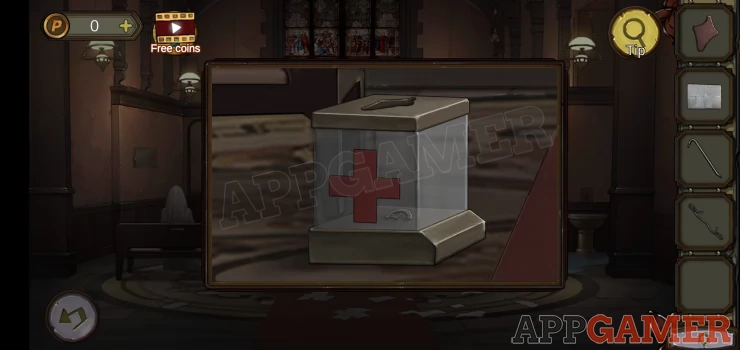
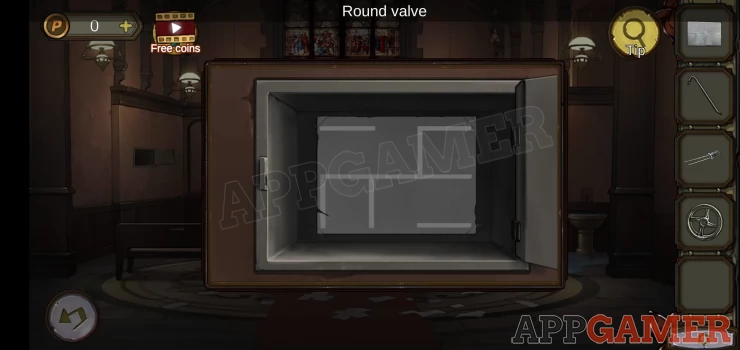
Back up and tap on the left wall to find a locked box. Use the key to open this.
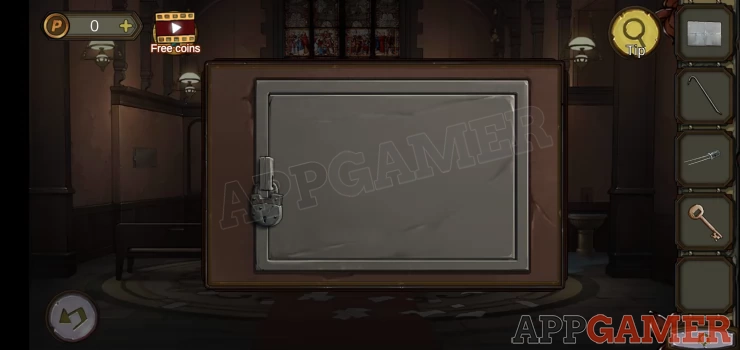
Collect a round valve.
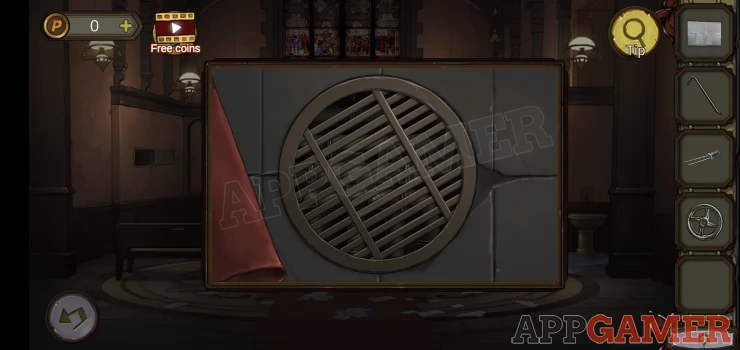
Note the clue on the back of the box.
Show
Now in the center of the floor just under the right of the red carpet is a drain cover, view this.
Use the crowbar to remove the cover. The use the valve on the pipes. This will let you turn off the water.
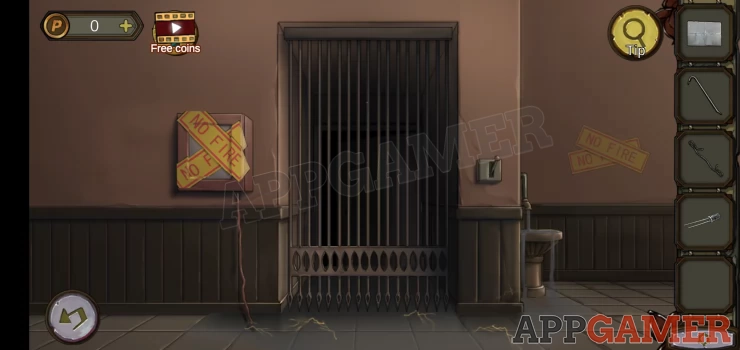
View the gate on the right again and tap the box on the left to open it.
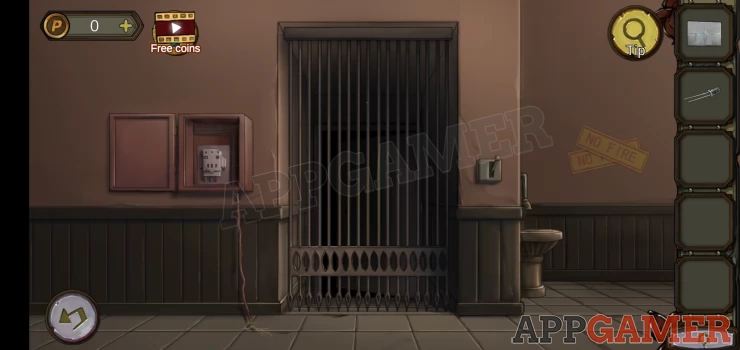
Add the diode to the box and then flip the switch.
Now tap the switch on the right of the door and the gate is open. Go through to the back room.
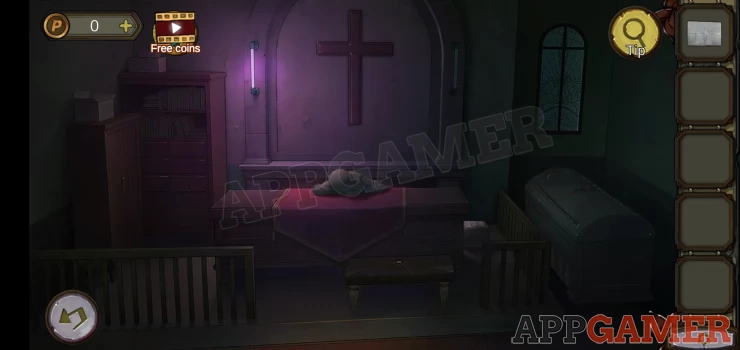
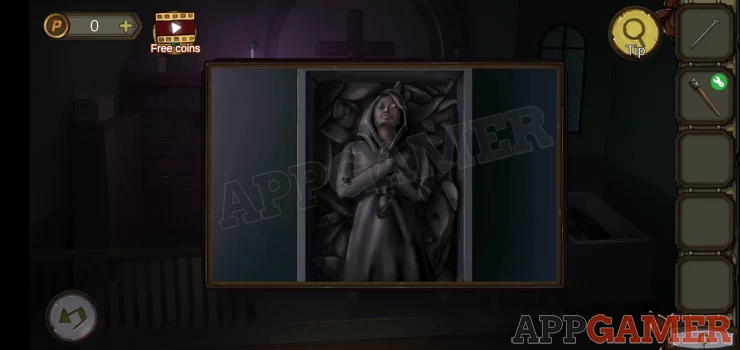
View the slumped figure on the altar and collect from it a nail.
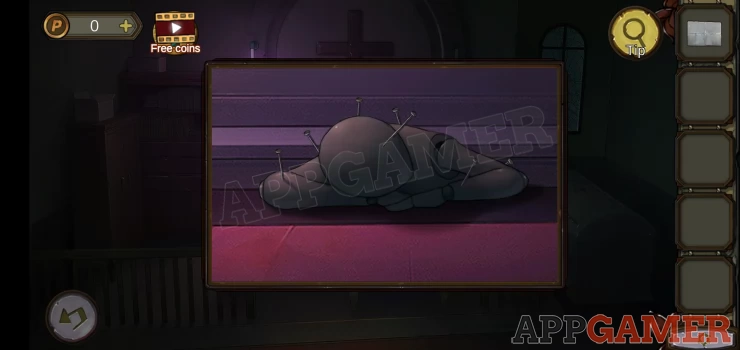
On the right of the altar is a box. View this to see a puzzle.
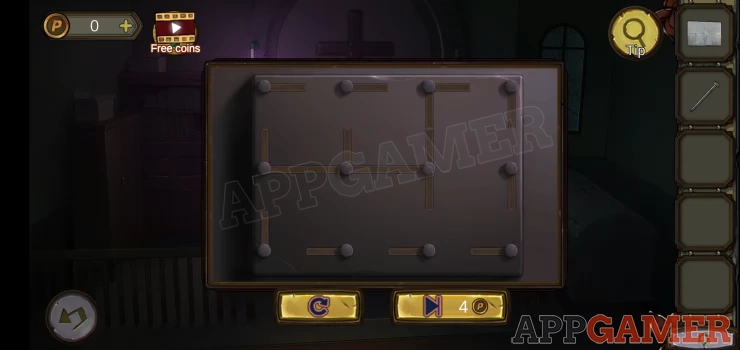
Hint: you can tap the lines to move then and rearrange the pattern.
Solution: Copy the layout of lines from the back of the wall box from the main church room.Show
Collect a torch
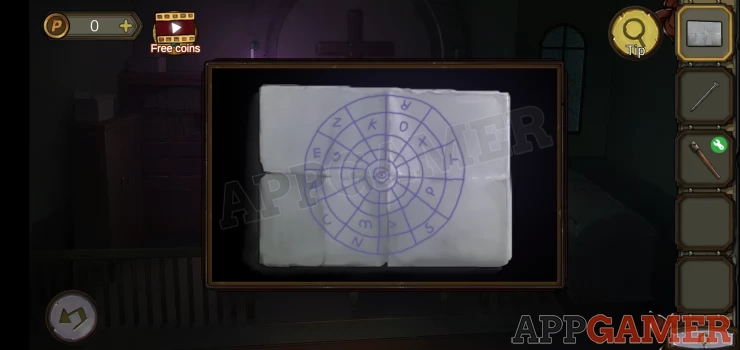
Now view the blank note in your inventory. The lights in this room reveal a clue.
Show
Go back to the main church and view the central table again. In the cupboard below is a locked box.
Hint: the clue is TRAN. These letters appear on the note.
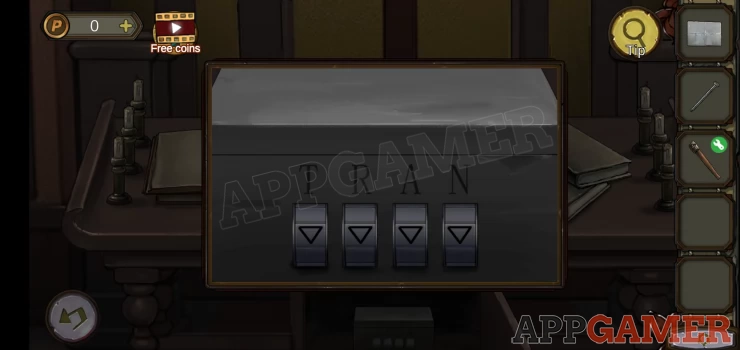
Solution: Find the positions of the letters TRAN on the note. Then view the same pattern on the top of the table and find the symbols from the same locations. Use these symbols on the lock.Show
Code: Show
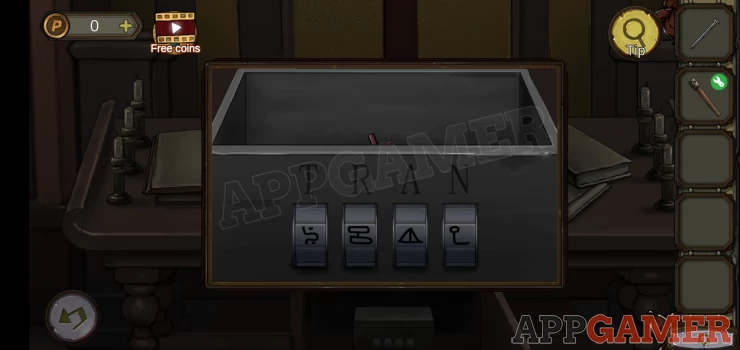
Collect a cross necklace
Return to the back room. Tap to view the sarcophagus on the right.
Add the cross necklace to the top. It will open.
Collect a key from the body.
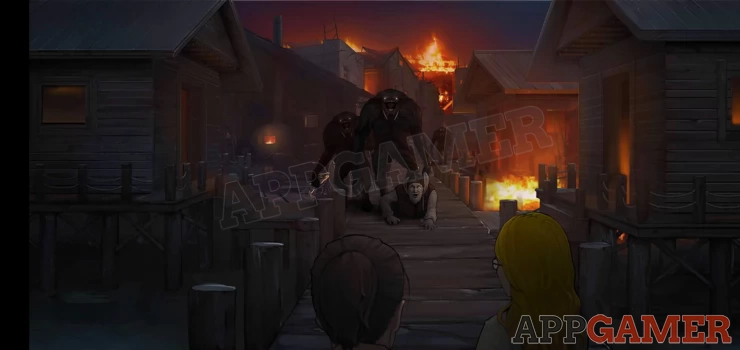
You are chased but escape, you need to kill the monster.
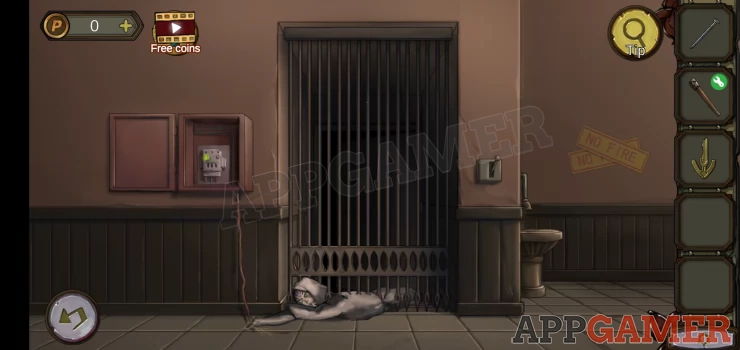
View the drain cover in the center again and tap the valve to turn the water back on. The monster is now dead.
Repeat this to turn the water off again, then tap to view the monster.

Use the nail on the head to remove and collect the blue gem
Open the gate again and return to the back room.
Tap to view the drawers on the left and use the blue gem on the drawer to open it.

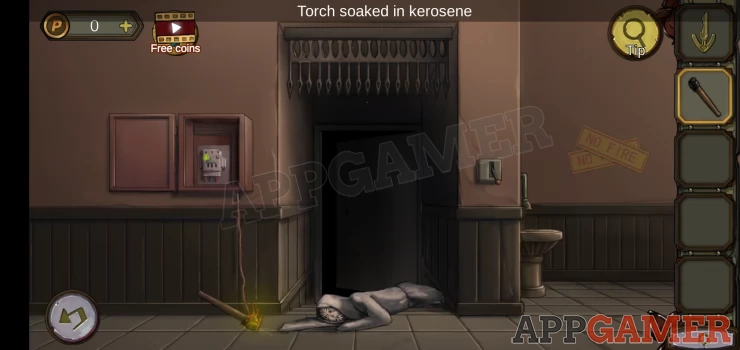
Collect kerosene
Combine the torch with the kerosene. Then go to the gate and use the torch on the electrical wires on the left. This will light the torch.
You now formulate an escape plan.
Exit the church and watch the ending.
We have questions and answers related to this topic which may also help you: Show all