Chapter 5
More Dream Escape - Room Escape Game
This is our guide to Chapter 5 of Dream Escape, another mysterious escape room game from Jusha.
After finding the book that you needed in the Library in Chapter 4, it has now been taken from you and the Doctor Eros has disappeared. You head to a fishing village to keep looking for the mysterious Perot.
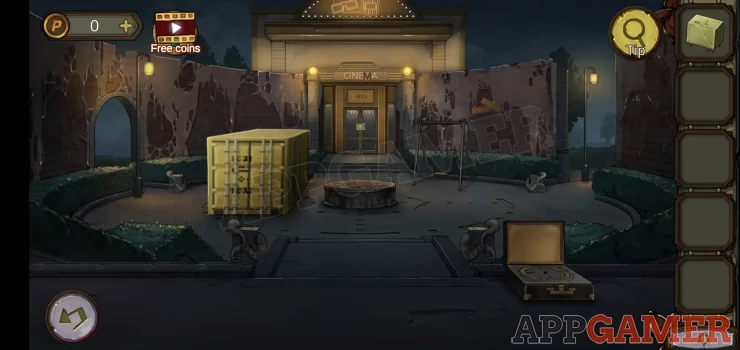
You begin on a street.
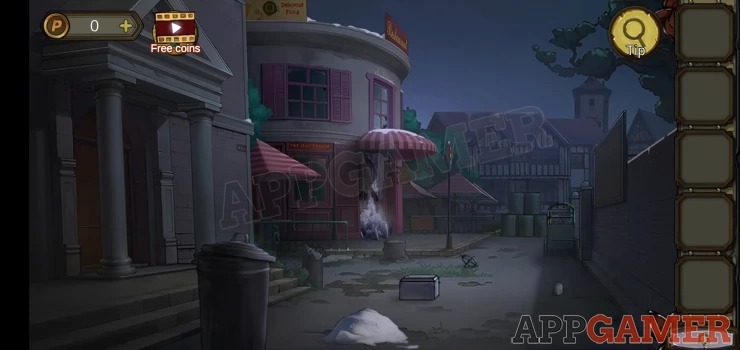
From the ground on the bottom right collect a salt jar. And then just to the left find a Round Valve.
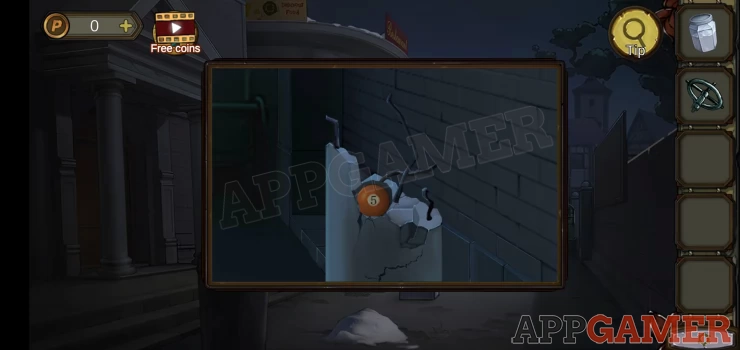
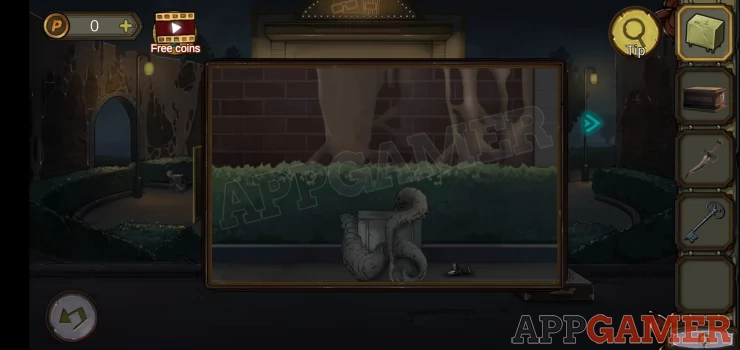
In the center is a broken column, view this and collect a number 5 billiard ball.
To the right of this is a tree stump, view this. Collect a Shredded paper.
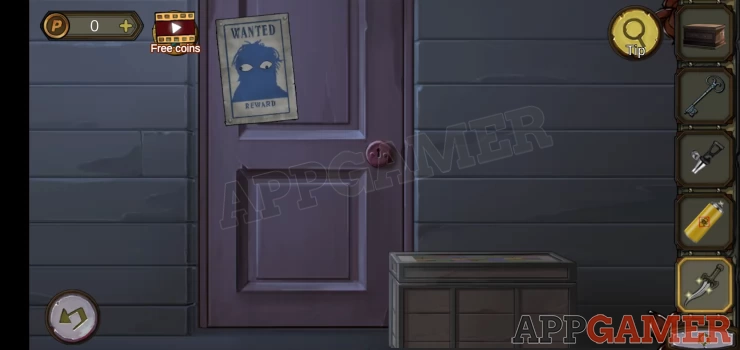
On the top right is a sign, view this.
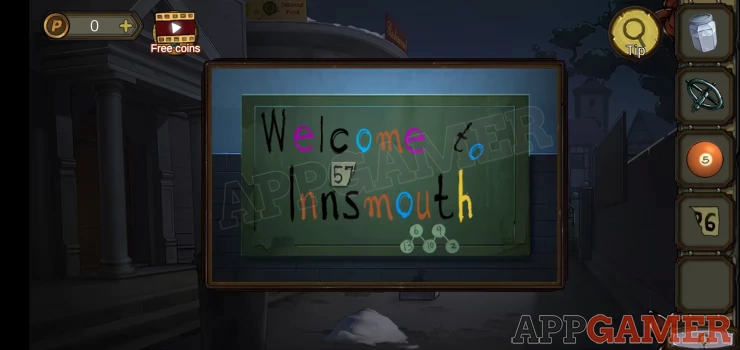
Collect a second shredded paper from it.
There are 2 clues here, note the arrangement of numbers in circles at the bottom and the colors of the letters in the words.
Next, view the large trash can to the left and open the lid.
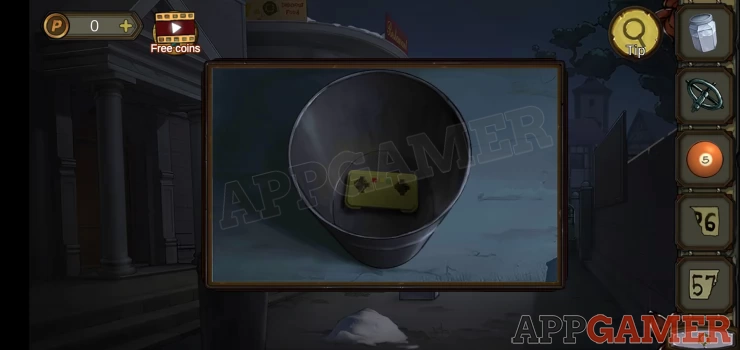
Collect the remote from inside.
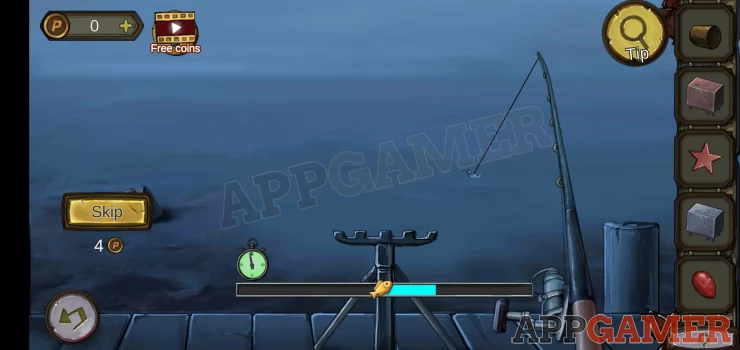
At the end of the street is a traffic signal with red yellow and green lights. View this and watch the sequence of flashes.
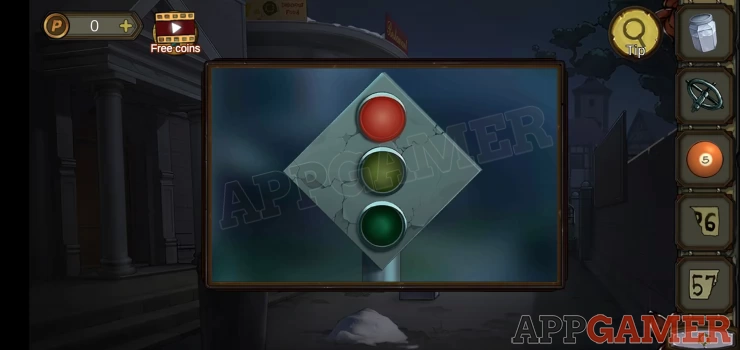
Now view the remote control in your inventory and tap the 3 buttons in the same order.
Solution: Green Yellow Green Red YellowShow
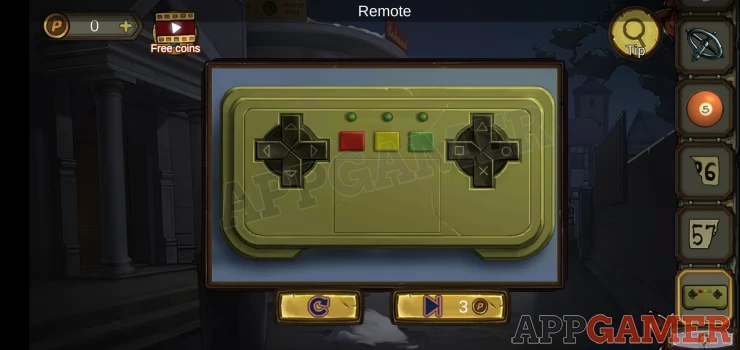
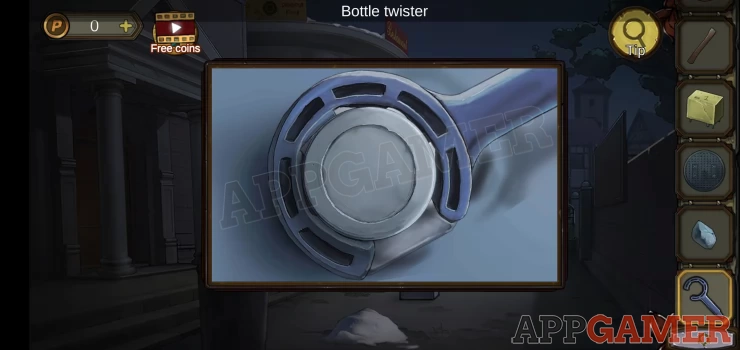
Collect an Iron Handle.
Tap the doors on the left to view them.
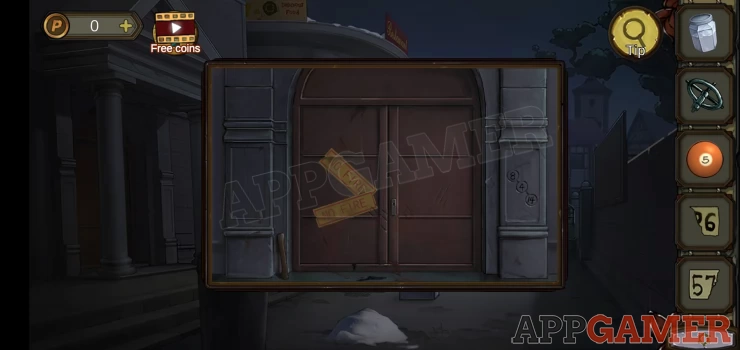
Collect a short stick and note the 3 numbers in circles on the right.
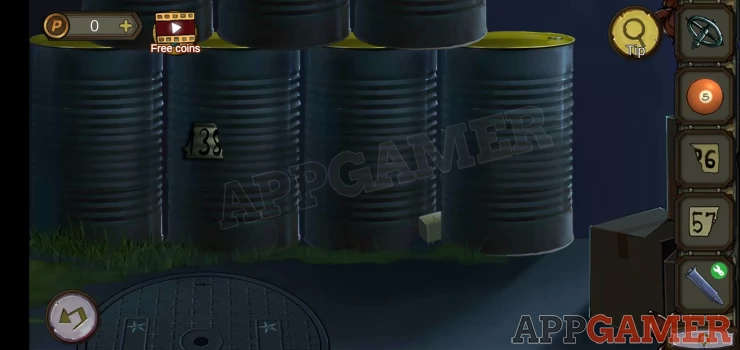
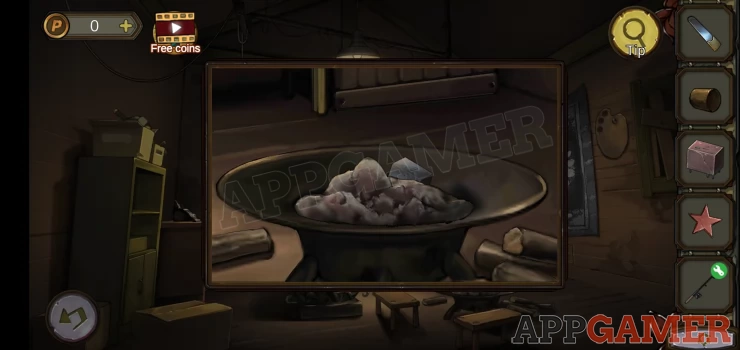
At the far end of the street is a stack of barrels, view this.
Collect a third piece of shredded paper and a Relay,
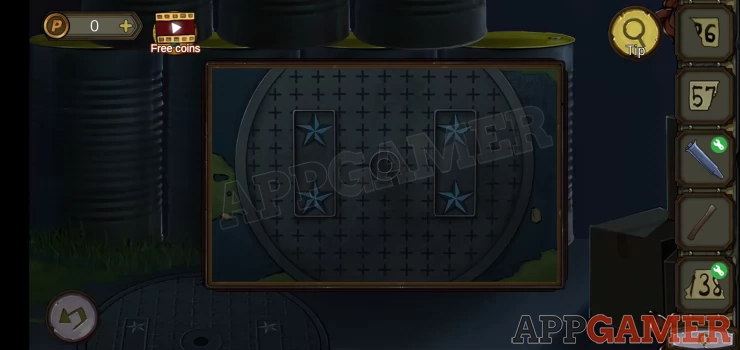
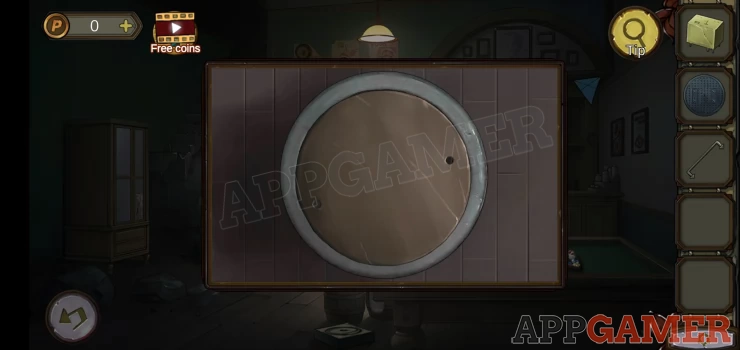
On the ground you will see a well cover. Use the round valve on this to remove it and collect it.
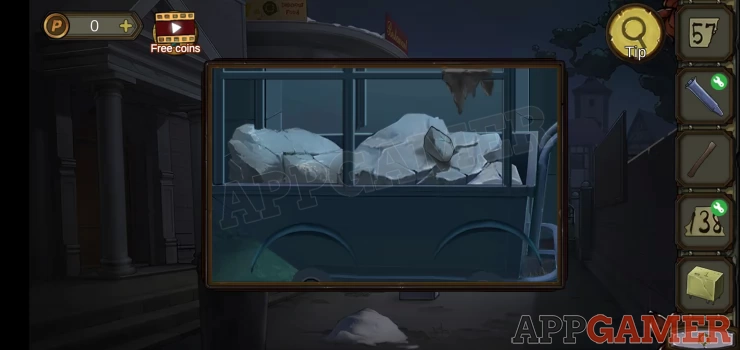
Just to the right of this is a cart with rubble on top. Collect a stone from it.
Combine the 3 shredded papers to get a clue.
You can now view the square box in the center of the street. This has a 5 digit code.
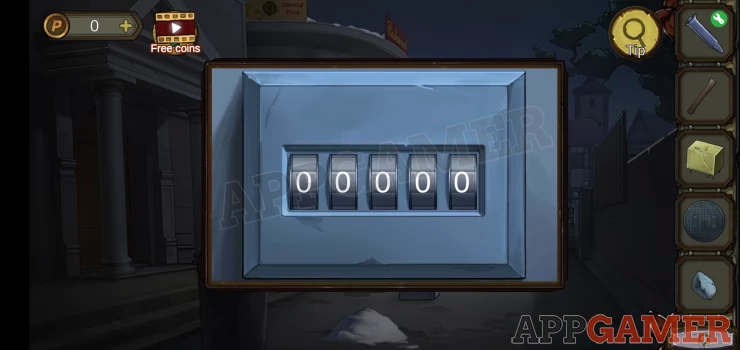
Use the code from the clue to open it. 57386Show
Collect the 'Arc Iron Ring'
Combine the iron handle with the Arc iron ring to make a Bottle twister
View the salt jar in your inventory and use the bottle twister to open it. You will now have Salt.
Now view the doors at the end on the left to see that are covered in ice.
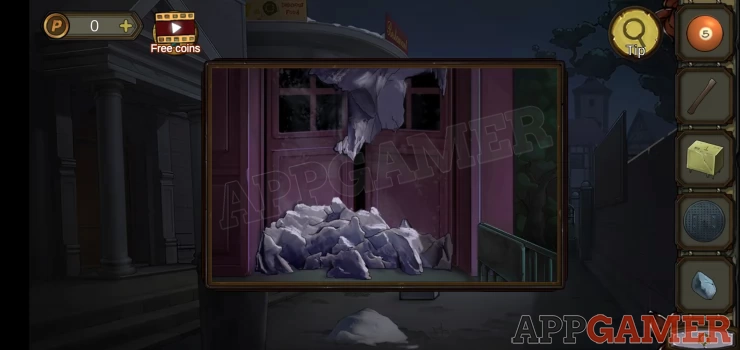
Use the Salt on them to melt the ice, you can then enter the pool room.
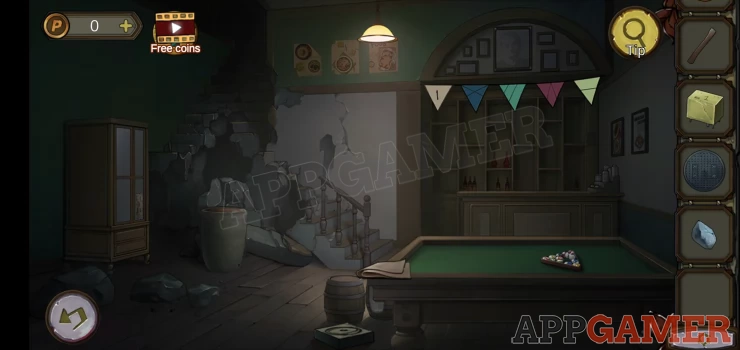
Collect an old newspaper from the pool table.
View this for a clue.
Above the table is a string of bunting, view this.
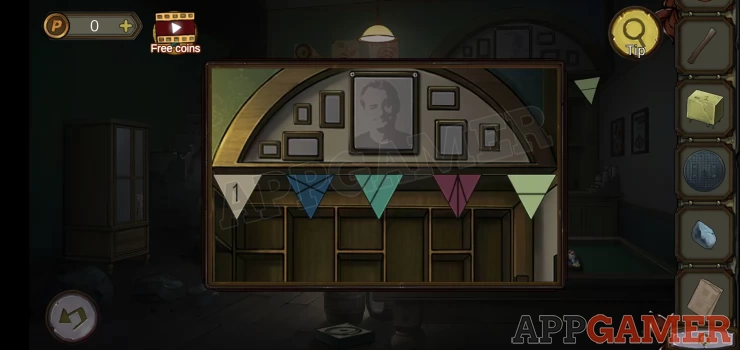
Tap to rearrange the triangles to solve this.
Solution: Order by the number of triangle in each 1, Yellow, green, red, blue.Show
You can then tap the top right of the picture above to collect a nail.
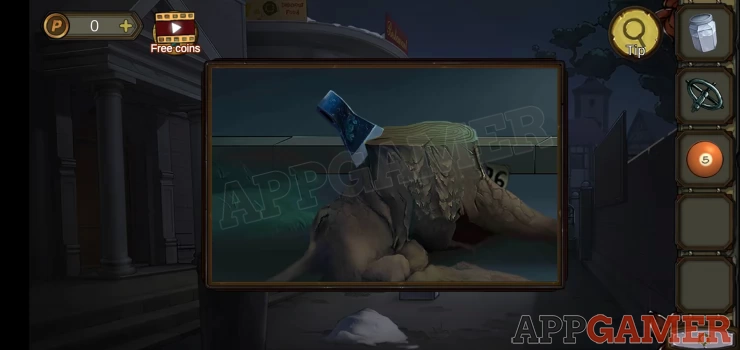
Exit the pool hall and view the tree stump again.
Add the nail to the axe head an then use the stone on the nail to knock the axe head free, collect it.
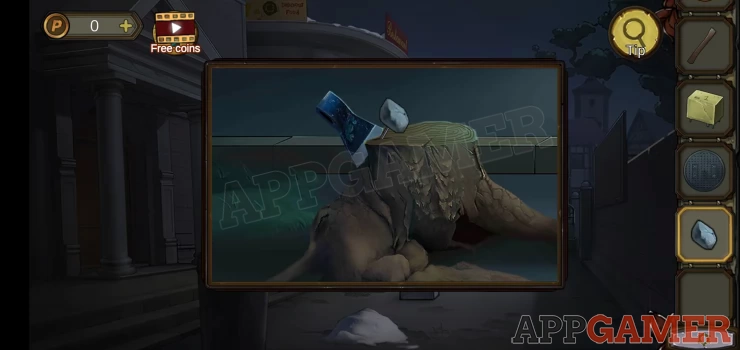
Combine the axe head with the short tick to make an axe
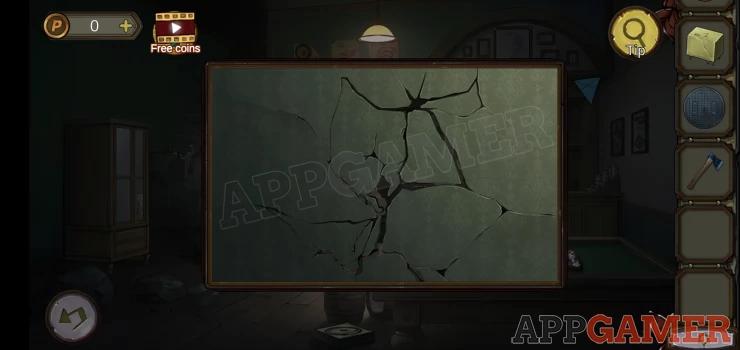
Go back into the pool hall and use the axe on the cracked wall above the broken stairs.
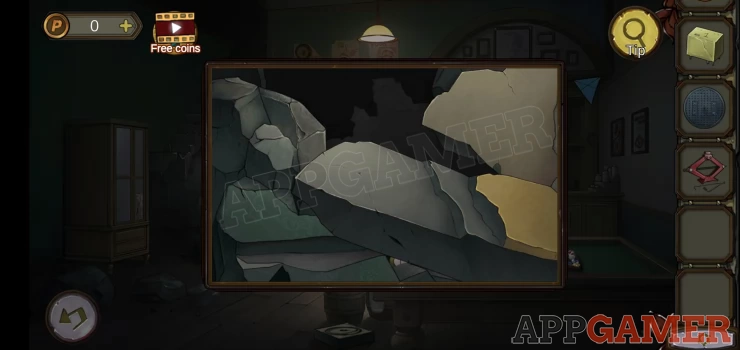
Collect a Jack.
Below the broken stairs is some rubble. View this and use the jack on it to lift a section and collect a number 1 billiard ball.
On the right, just above the pool table is a bar. Tap on the far right of this to view a maths puzzle.
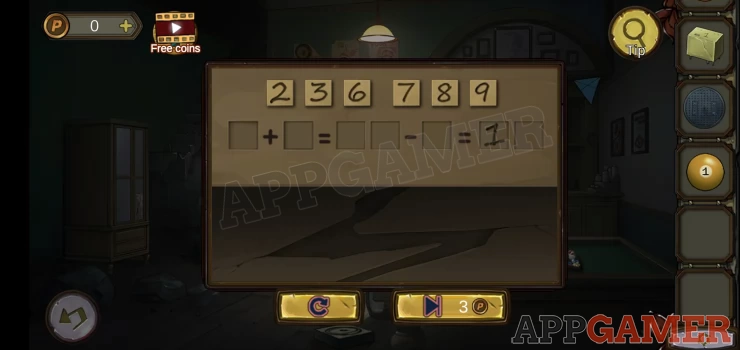
Hint: move the numbers to the correct locations to make the full sum correct.
Solution: 8 + 9 = 23 - 6 = 17Show
Collect Honey
Back out to the street Tap to view the lump of ice that is bottom center.
There is a paw print in it.
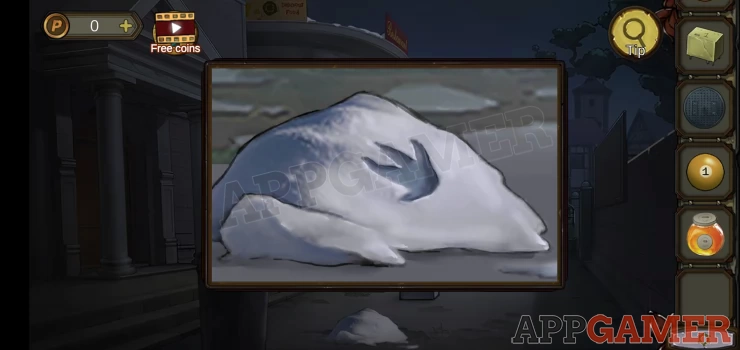
Add the honey to this and it will freeze. Collect the Solidified honey.
Go back into the pool hall. On the far left is a cupboard. View this.
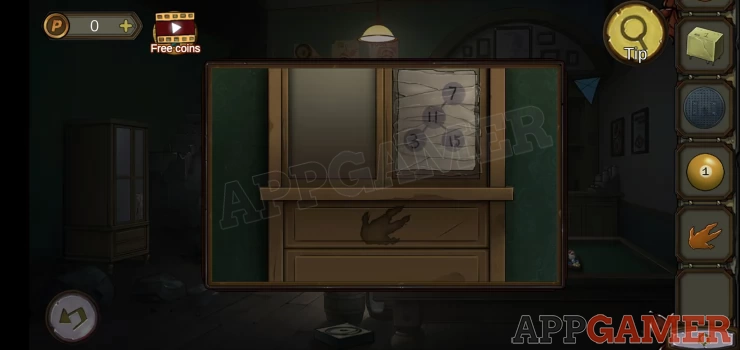
Use the solidified honey on the paw shape to open the drawer and collect a number 3 billiard ball.
Note also the arrangement of numbers on the door above.
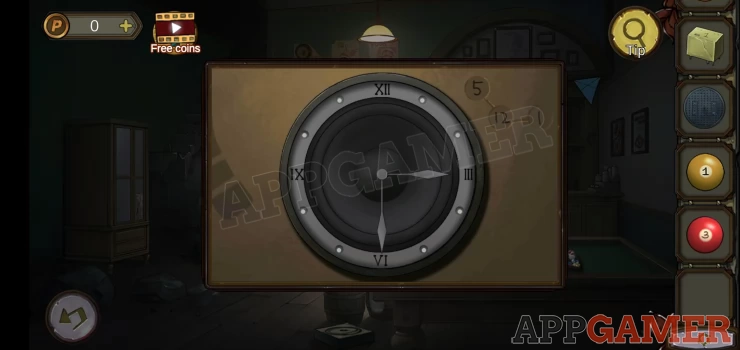
Finally tap on the floor below the barrel in the center to see a clock shape, note the arrangement of numbers in circles here as well.
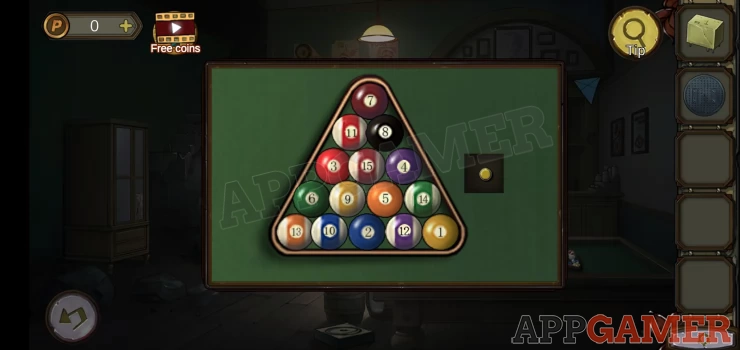
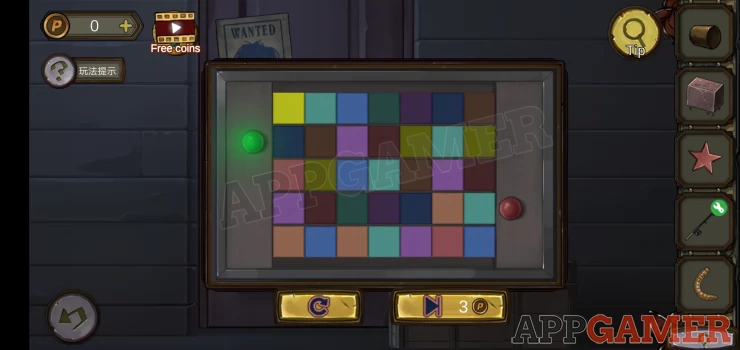
Now view the balls in the rack on the pool table.
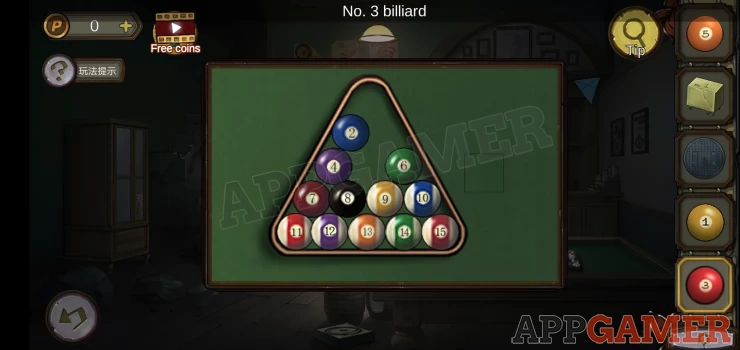
Add the 3 that are missing.
Hint: swap pair of balls to arrange them to match clues found above.
Solution: Show
Collect a yellow button.
Above the bar on the far right is a picture on the wall.
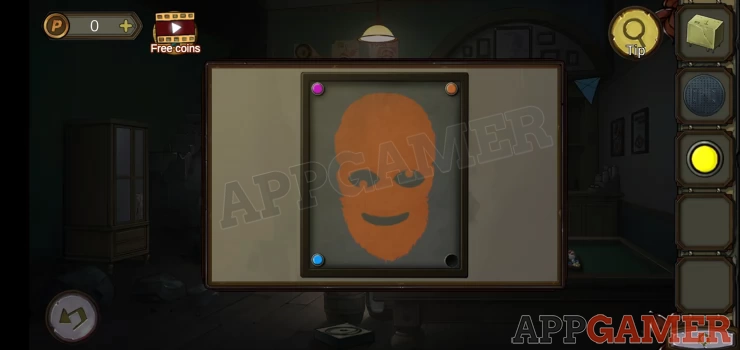
Add the yellow button to the bottom right. This is a puzzle.
Hint: tap the buttons in the correct order
Solution: Check the sign outside Welcome to Innsmouth. Follow the order of the colored letters.Show
Order: pink, blue, orange, pink, blue, orange, orange, blue, orange, yellow.Show
Collect a handle. Also note the eyes on the picture, this is a clue.
On the left of the room by the broken stairs is a large white urn. View this and use the handle on the lid.
Remove the wooden barrel lid and collect it.
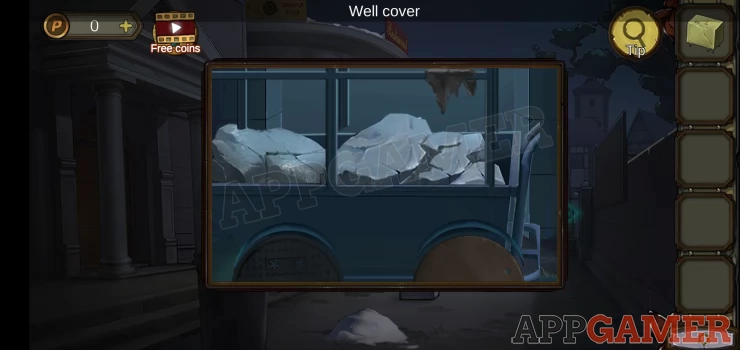
Go back outside and view the cart of rubble again.
Add the lid and the well cover to replace the wheels.
The cart will then move to the side and unblock the passage.
Go through to the courtyard in front of the cinema.
You need to release the doctor from the container.
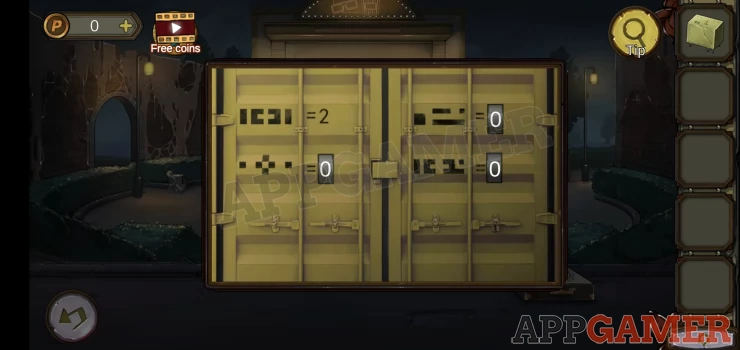
Hint: look at the 4 diagrams, the first shape = 2. Work out the others.
Solution: this one is a bit odd but you need to see sums in the white space between the black lines. The first one is 1+1 = 2, top right is 7-4=3, bottom left 0 X 0 = 0, bottom right, 1 + 4 = 5Show
Open the container to rescue the doctor. Then collect a music box from inside.
View the center circle of the courtyard, this is an altar, and collect a rusty knife.
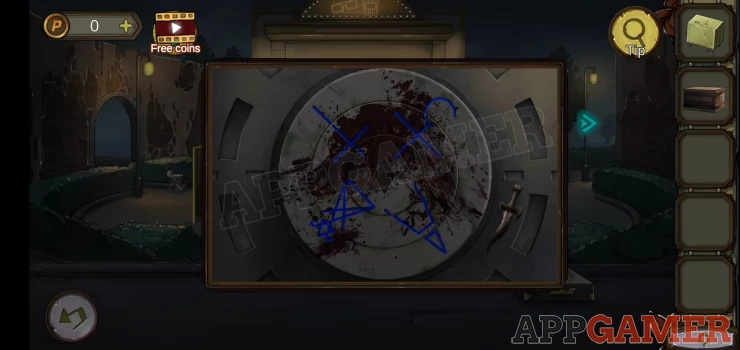
Then tap on the swing frame on the wall to the right. You will see this picture.
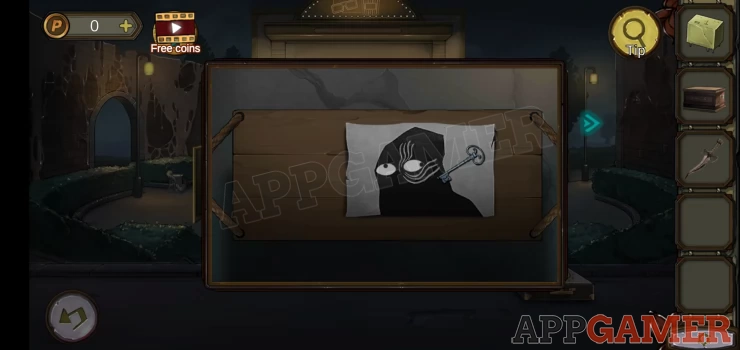
Collect the key and note the eyes for a clue.
Below this, on the ground to the right is a low stone pillar. View this and collect a Faucet from next to it.
Next tap to view the box on the ground bottom right. This is a puzzle to solve.
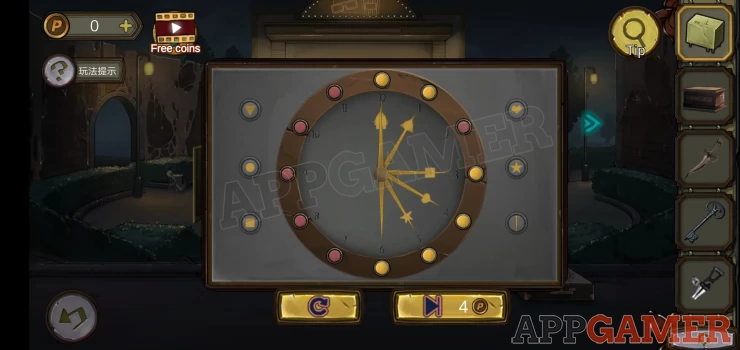
Tap the 6 buttons to move the associated hands around the dial. Some are pairs of hands.
To complete it you need to point a hand at all of the 12 lights on the outside.
Once done collect the Poison spray.
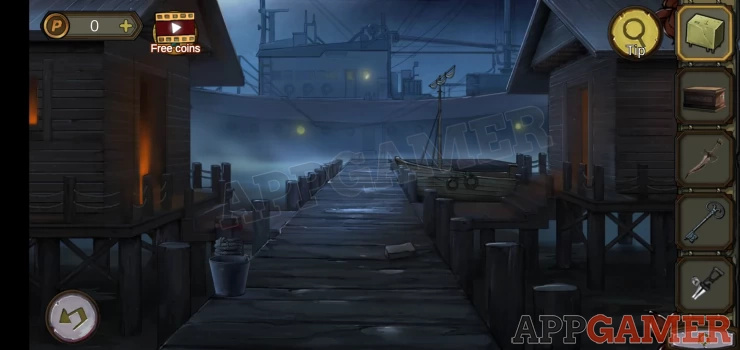
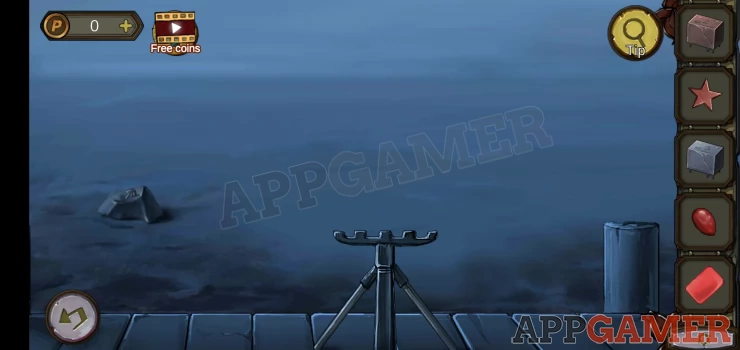
Now move through to the right to the Dock.
Collect a Whetstone from the ground just to the right.
Then combine this with the rusty knife to make a Sharp knife.
View the bucket on the left of the dock.
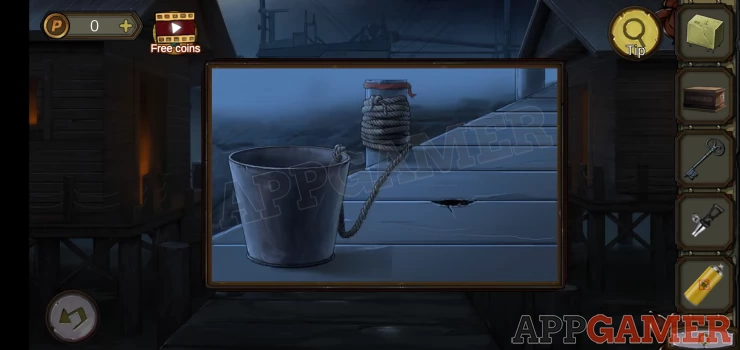
Use the knife on the rope to collect an empty bucket with rope
Now view the door on the right of the dock for another clue, check the eyes.
And also view the door on the left of the dock for another eye clue.
Now tap to view the small boat at the end of the dock.
Collect a Piano Opener from the box next to the bird. Then view the box for a puzzle.
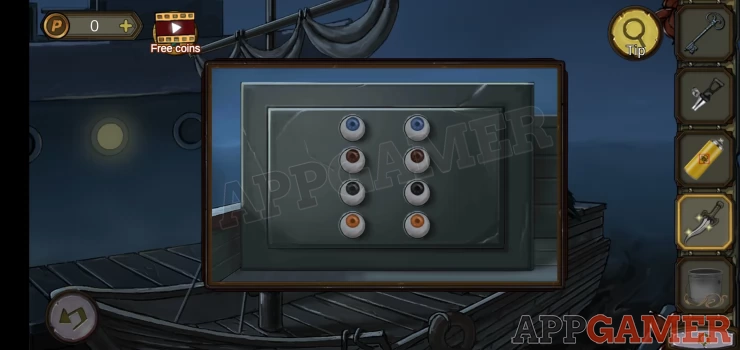
There are 4 sets of eyes of different colors.
Hint tap to move the eyes to point in the directions to match the clues found above.
Solution: Blue - Left, Down Brown - Left, Right Black - Up, Right Orange - Down, UpShow
Collect the Sol agent and a cork.
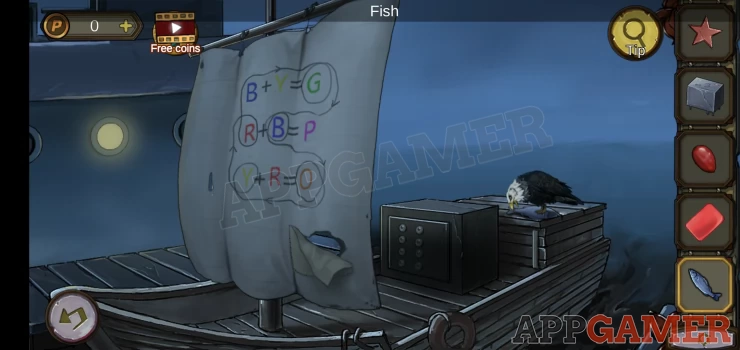
Next tap on the sail on the boat to unfurl it and check the clue.
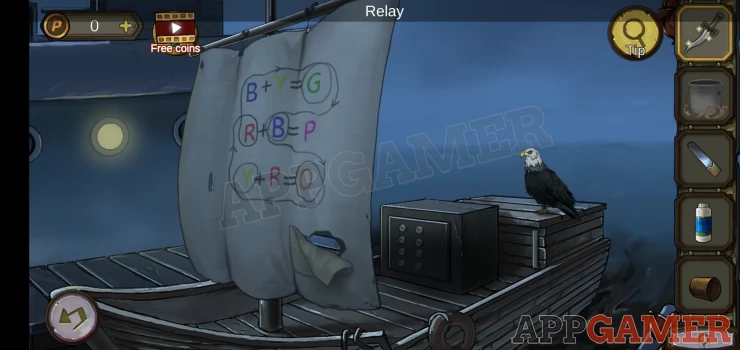
Also collect another Relay from the bottom of the mast that has fallen from the sail.
Back up to the dock and view the door on the left again. The lock is jammed up with glue.
Use the Sol agent on this to remove the glue then use the blue key to open the door.
You enter a store room.
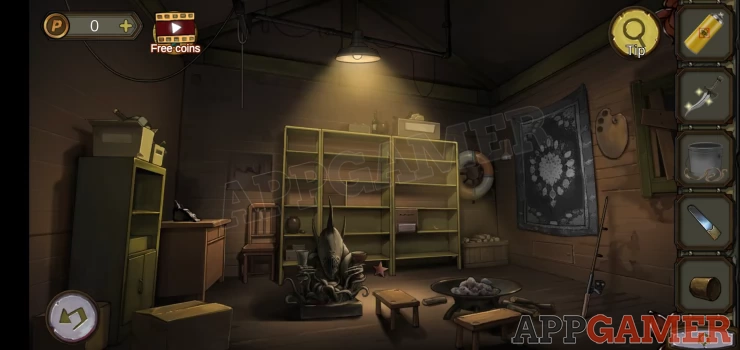
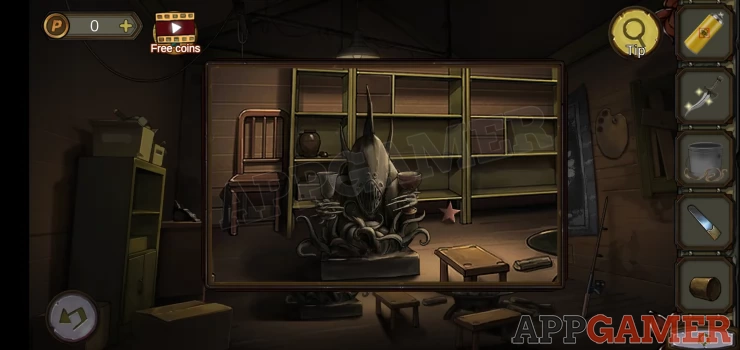
View the monster statue on the floor and collect from behind it a star.
Then collect from the right of the room a fishing rod.
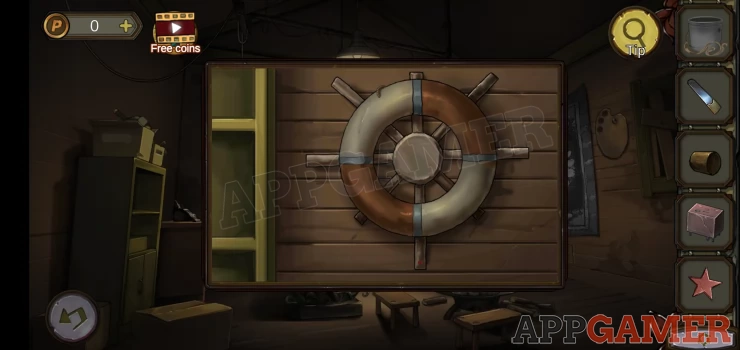
Also view the life preserver on the right of the shelves and collect an insect from the top.
On the ground below this is a bowl with ashes / rocks. View this and collect from it a Relay.
Exit to the dock and View the door on the right again. Then tap on the large chest to the right.
There is a color puzzle here.
Hint: start from the green light and tap the squares in the right sequence to get from there to the red light on the other side.
Solution: the first square is blue. Then follow the clue on the sail with the colors that are circled and follow the direction of the arrow. For unknown reasons Purple is also in the sequence. Blue Orange, Yellow, Red, Green, PurpleShow
Collect a Ruby
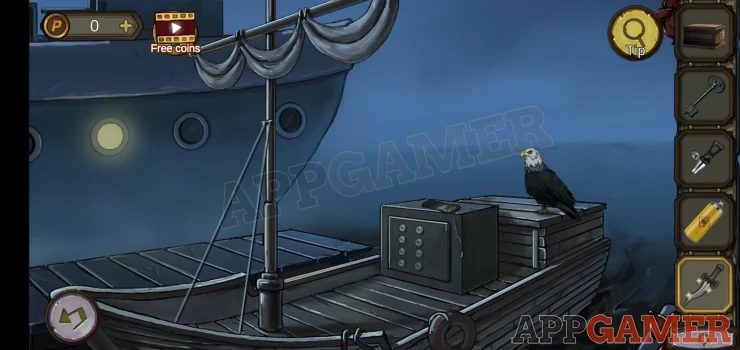
Now tap on the large ship at the far end.

Note the clue on the right.
Use the poison spray on the crab to kill it. Then collect the crab.
View the crab and use the sharp knife to cut open the shell. Collect a Red paint block.
Return to the store room. view the desk on the left.
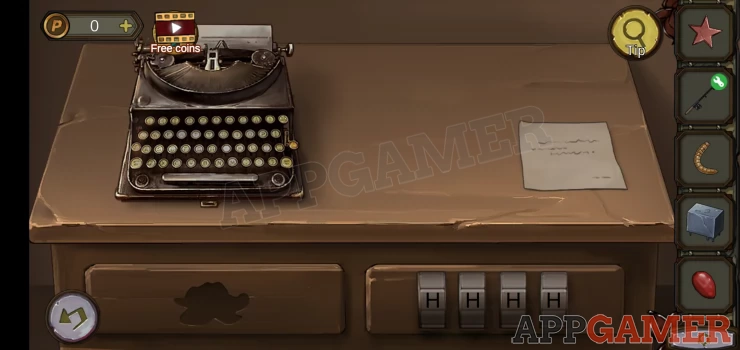
Read the note on the desk for a clue. 'Behind the cube'.
Open the drawer on the right with the code lock
Hint: the letter blocks on the side of the big ship are the clue.
Solution: SOFAShow
Collect a fishing line.
Combine the fishing rod with the line and the insect.
Exit to the dock and tap the water on the left side.
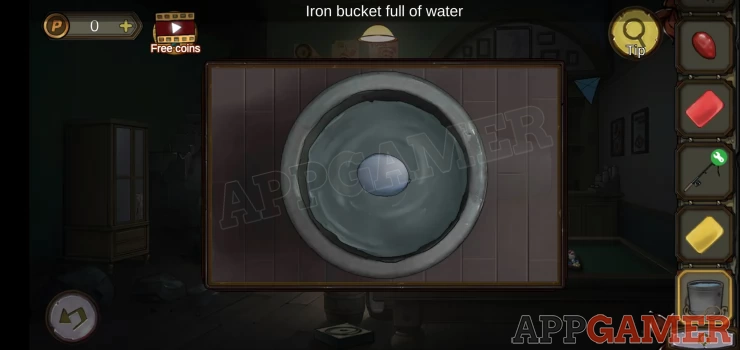
First use the bucket on this to get a bucket of water.
Then place the fishing rod on the stand to start a fishing puzzle.
Tap the reel to move the slider to match the fishes movements. Once you have done this long enough you will collect the fish. And keep the fishing rod.
Go back to the small boat and give the fish to the bird. It will eat it and you can collect a fish bone.
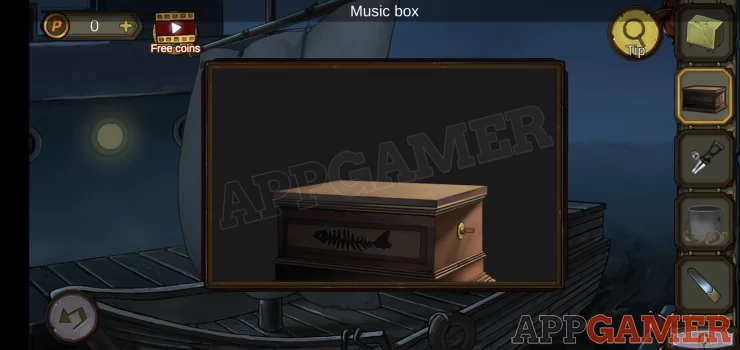
View the music box in your inventory and add the fish bone.
It opens and you can collect a yellow paint block
Go back to the start area and enter the pool hall.
View the white urn again.
Add the cork to the hole that is at the bottom. Then add the bucket of water.
You can now collect a balloon. View this in your inventory and tap to pop it, collect a blue paint block.
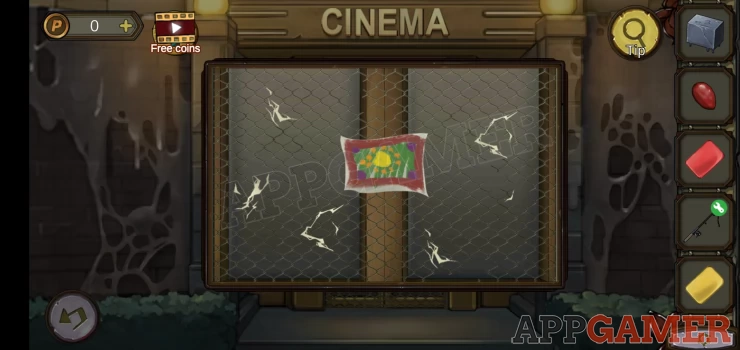
Move to the courtyard and view the door of the cinema, there is a picture on it this is a clue. Note the colors.
Next go to the dock store room and tap the right wall to see a brush, a canvas and a paint palette.
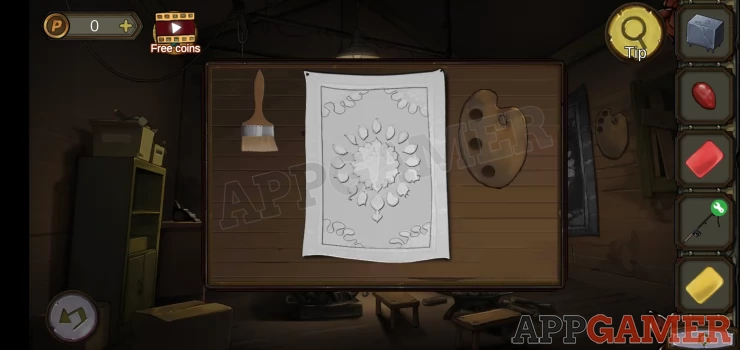
Add the 3 paint blocks to the palette, then you can use the brush to select colors and color the canvas.
Hint: use the picture clue from the cinema.
Add colors multiple times to mix for the correct color. The sail has a color mixing guide.
Solution. Make the center yellowShow
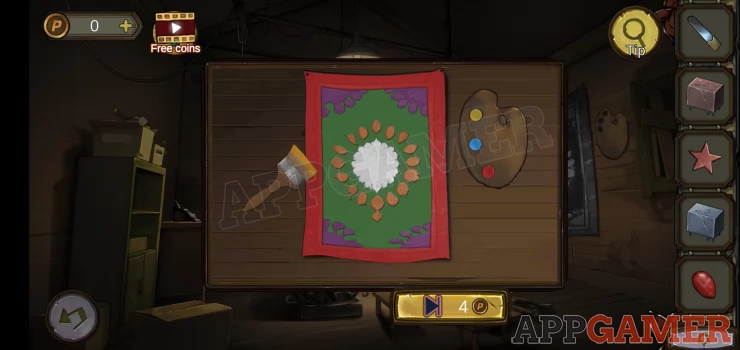
Once done a panel will open below and you can collect a handle.
Return to the cinema door and view the control box on the right.
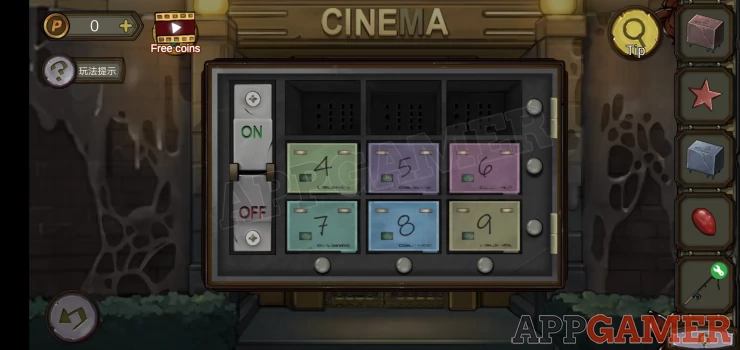
Add the 3 relays that you have. to the slots and the handle on the left.
You now need to solve a puzzle for the relays.
Hint: swap pairs of them until the lights on the right sand bottom all turn green.
Solution: All rows and columns need to add to 15Show
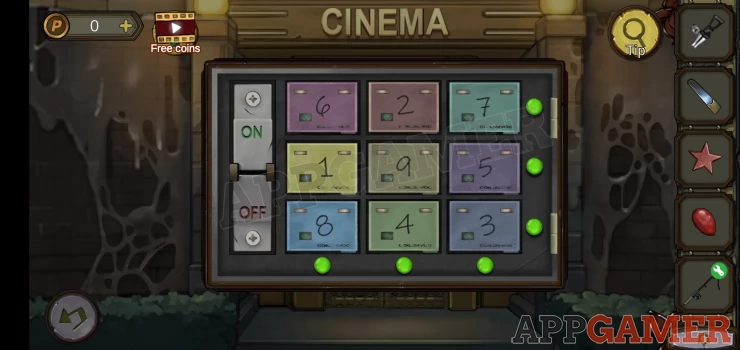
Flip the switch and you can now open the cinema door and go in.
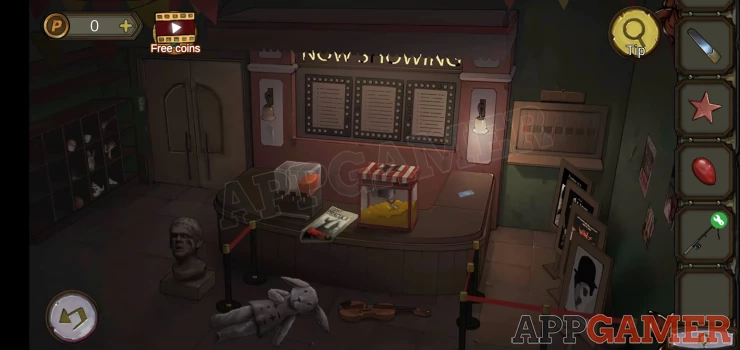
View the popcorn machine on the front desk
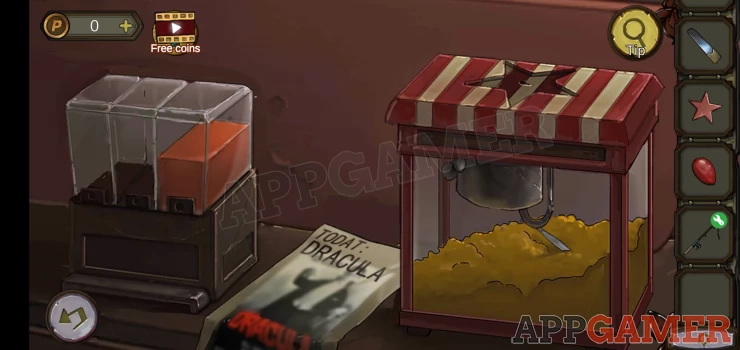
Add the star to the top to open it and collect a Half Tweezers.
Note the Dracula poster on the desk.
Back up and collect also a Small Lens from the right of the popcorn machine.
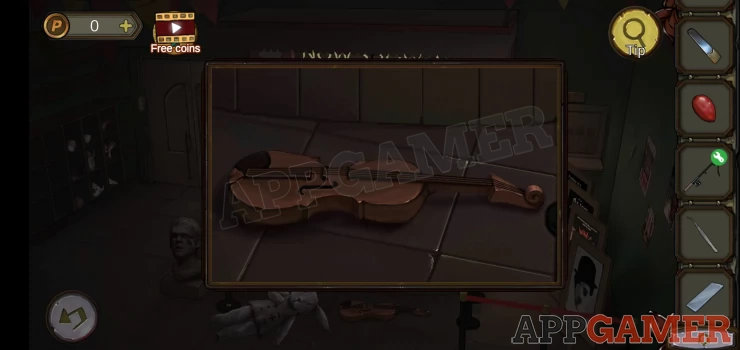
On the floor is a violin. View this and use the piano opener to remove the top and collect a ruby.
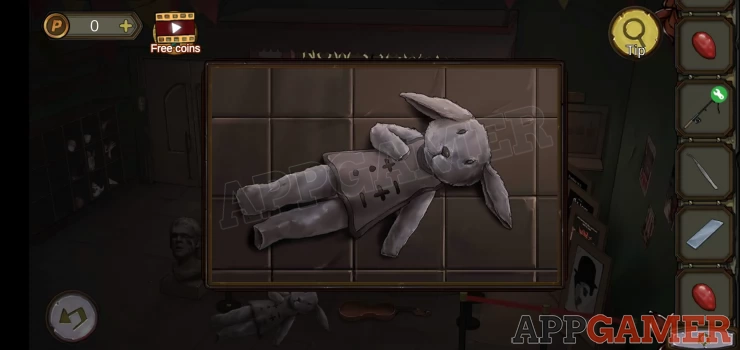
To the right of this is a toy rabbit, with a clue on it.
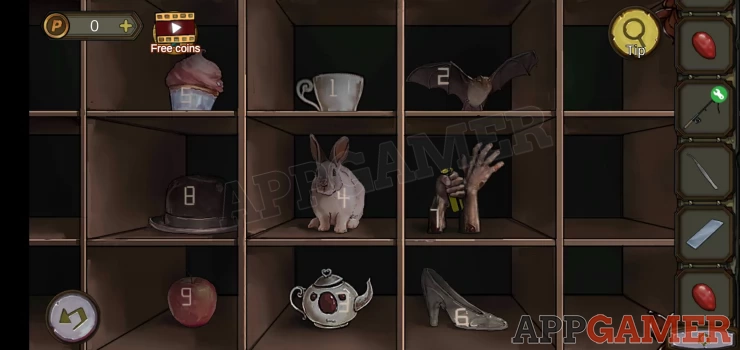
On the far left of the room is a shelf, view this to see a range of items with numbers, this is a clue for later.
Tap to view the poster on the back wall behind the front desk to see another clue.
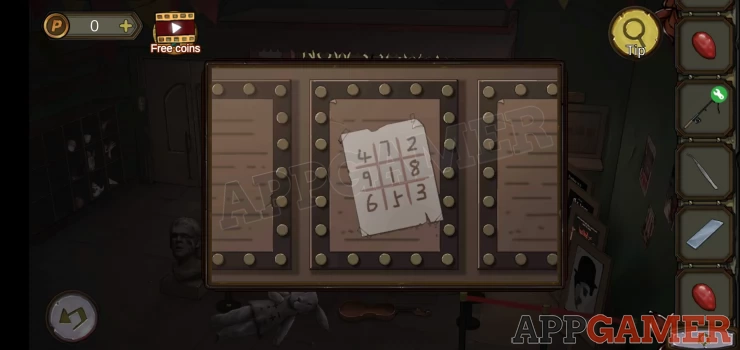
View the panel to the right of the desk to see this code entry.
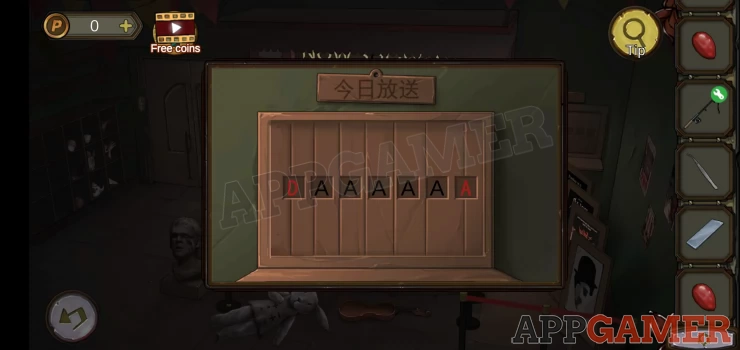
Hint: D and A are fixed.
Solution: DRACULAShow
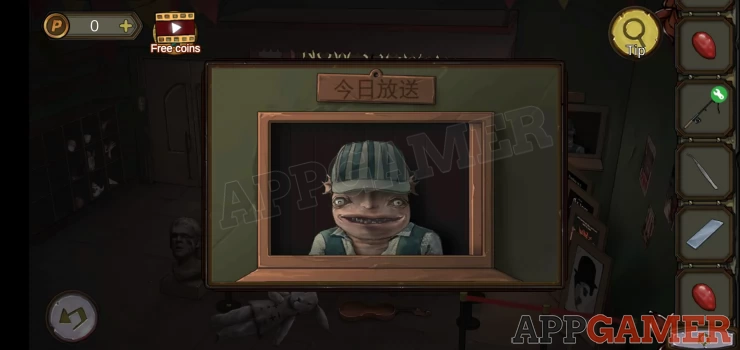
The ticket window opens but you now need to find money to buy a ticket so that you can enter the theatre.
Continue in Chapter 5 - Part 2
We have questions and answers related to this topic which may also help you: Show all