Hidden Escape: Murder Mystery Chapter 10 - The Killer Walkthrough
More Hidden Escape: Murder Mystery
This is our walkthrough for Chapter 10 - The Killer of Hidden Escape: Murder Mystery. A puzzle adventure game from Vincell Studios. Set around a Cruise ship reality show where you will need to find objects and solve puzzles.
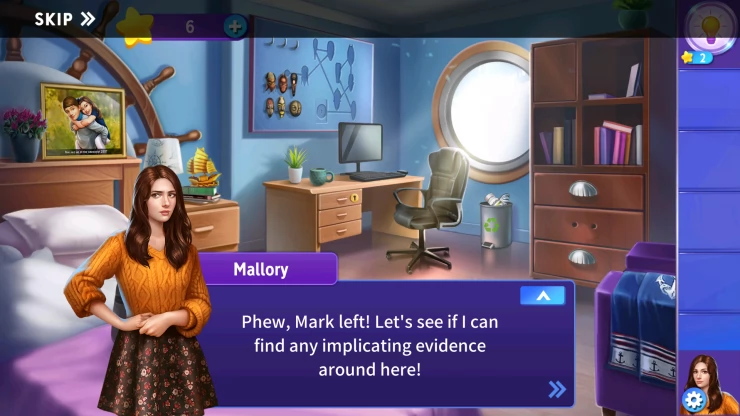
In Chapter 10 we reach the end of the game as Mallory and Mark work to discover the identity of the murderer.
Chapter 10 - The Killer Walkthrough
You begin in Mark's room. Could he be the killer?
View the Photo on the bead headboard, it is Mark and Ava. Notice the caption for a clue. Then tap on the bag on the bed, it has a padlock with a 4 digit code.
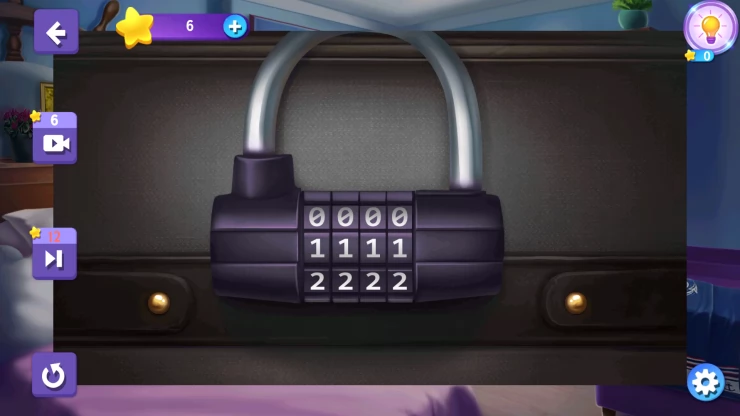
Solution: use the year from the photo 2007Show
Collect a mask from the bag (1 of 3). Then tap on the blue bag on the floor, Collect from it another Mask (2 of 3) and a Phone Password clue.
Next tap on the waste bin under the window and collect the Drug bottle and Drawer Clip.
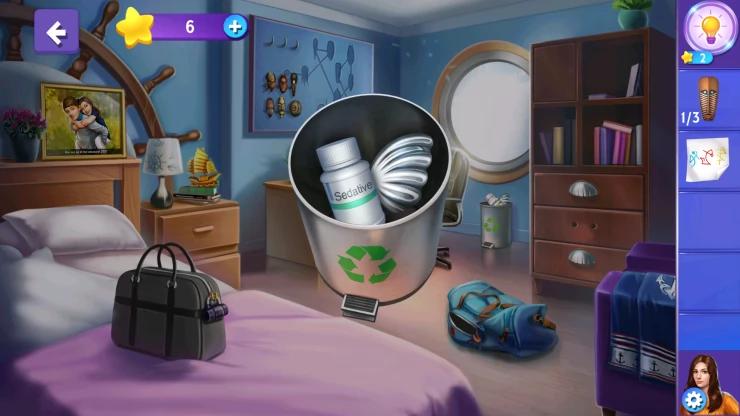
You can now add the drawer clip to the middle drawer on the large cabinet on the right. This opens the drawer.
Collect the Jacket and a third mask (3 of 3).
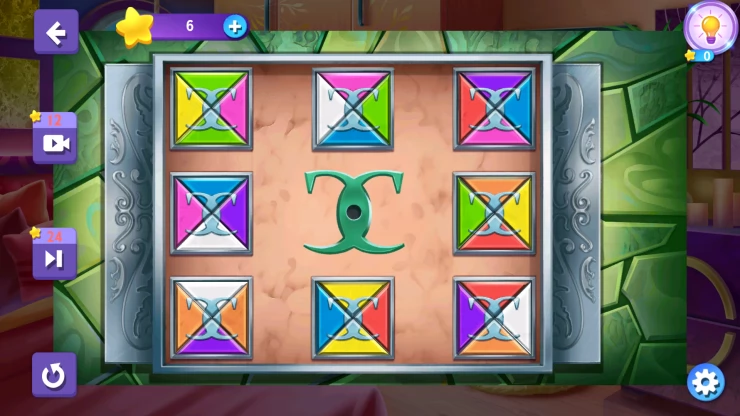
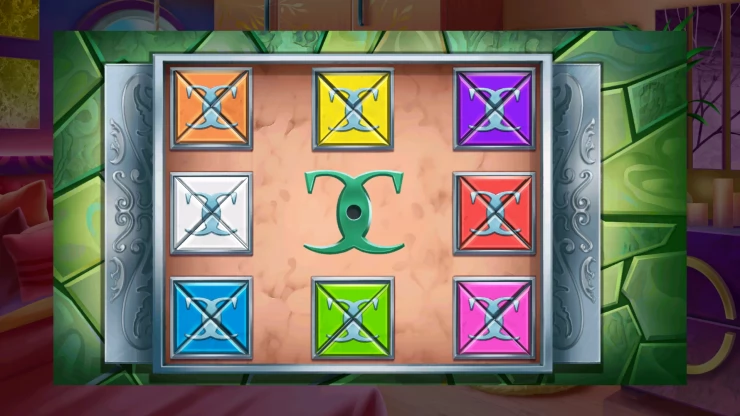
Now add the 3 masks to the board on the wall above the desk. This starts a puzzle.
Masks Puzzle
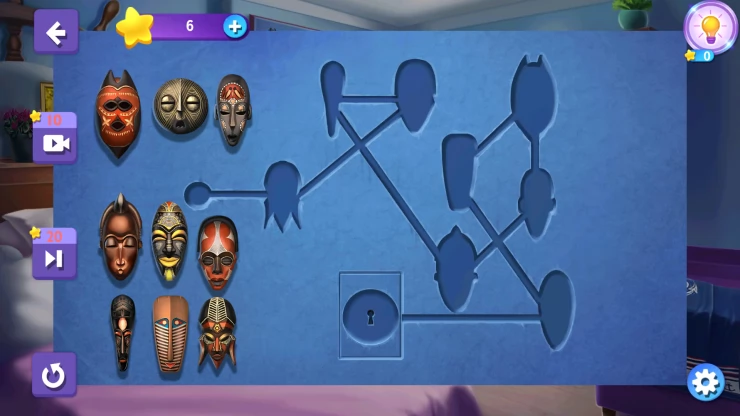
- Tap on a mask to add it to the small circle on the left.
- Than add more masks to fill in and move the line of masks towards the final slot.
- When all masks are added they need to fit the oulines that are on the board.
- Start with the circular mask (top center) as this is the shape of the final outline.
- Work out the order of mask shapes to add by working backwards from there and matching the outline shapes to the mask.
Solution: Watch the video below for the order.

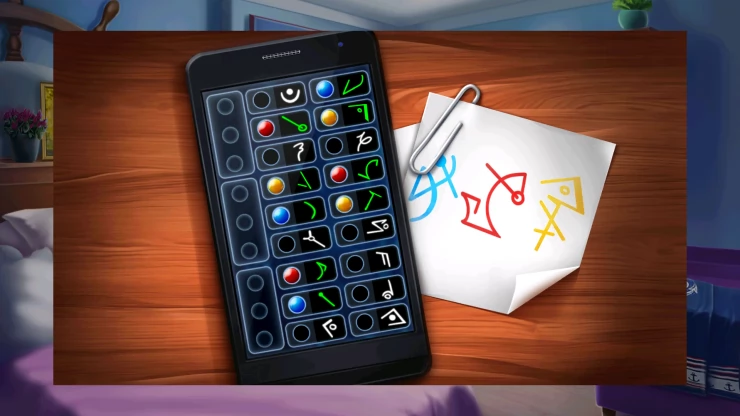
You can now collect a key from the wall. Take this ans use it on the top drawer of the desk. You will then find Mark's Phone.
Mark's Phone
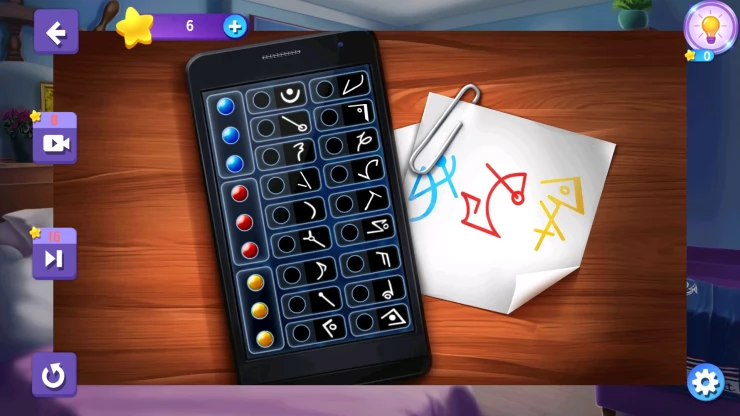
- The phone is locked but you have a paper with a clue to the code.
- Add the paper to the phone to see the clues.
- Drag the 3 dots of each color on the phone to 3 shapes that will combine to make the clue shape of that color.
- When you find a correct match it will turn green.
Solution: Show
You now have collected the evidence of Mark as the Killer. You will then meet Mark and confront him.
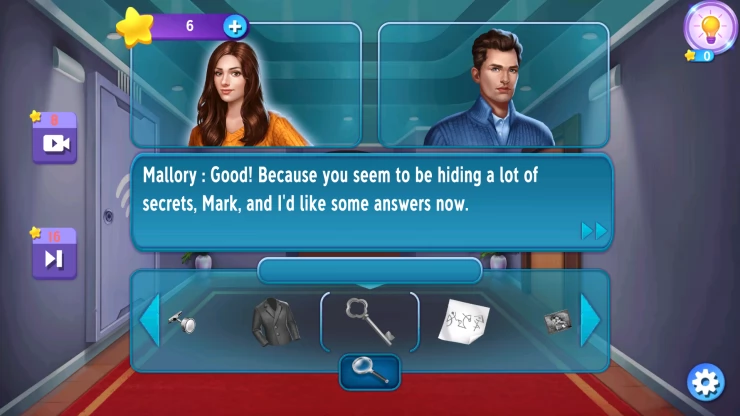
Ask the questions and present the evidence as follows: Sedative Bottle, Mark’s Jacket, Text from Ava, and Cuff link.
After Mark is taken away you can then access Ava's room on the right. Go inside.
Ava's Room
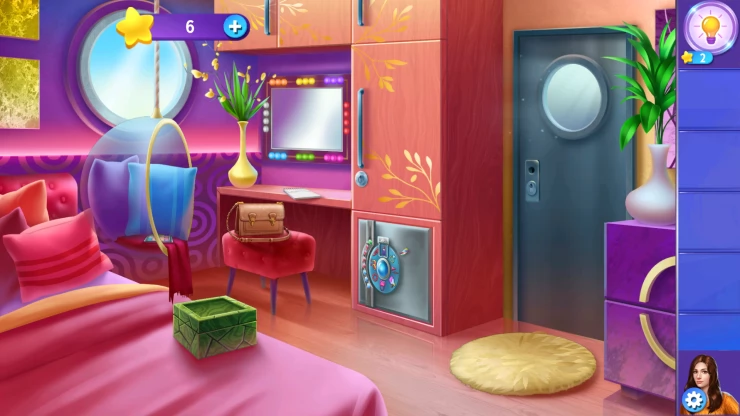
First tap on the hanging chair by the window to move it and then collect a Make up box piece from it. Next add the piece to the green box on the bed to start a puzzle.
Make up Box Puzzle
- Drag and arrange the triangle pieces into the correct locations.
- The clue for this is the lights around the mirror.
- To move a piece you must drag it to the center to place it and then move another to the original location.
Solution: Show
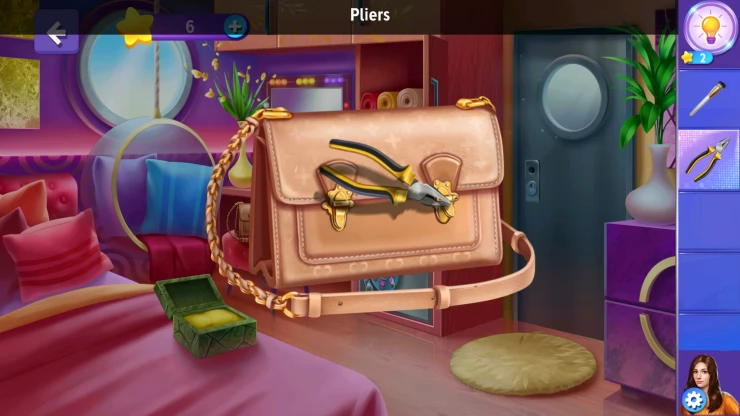
When the box is open collect a key and a brush. Now use the key on the locked cupboard door to the right of the mirror, you can now collect some Pliers.
Next view the bag on the stool and use the pliers to fix the clip so that you can open it.
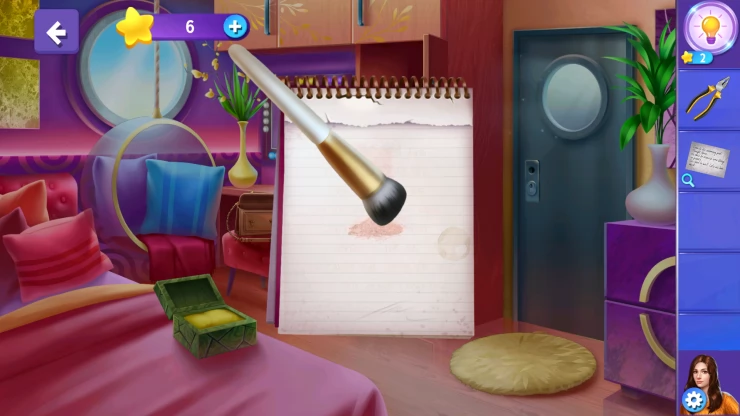
Collect a note from it and read it. You then need to also collect some Powder form the bag. Now view the notepad that is on the desk under the mirror. Add the powder to it. Then use the brush on it. You will collect a Clue.
Next use the Clue on the safe at the bottom of the cupboard. This will start the puzzle to open it.
Safe Puzzle
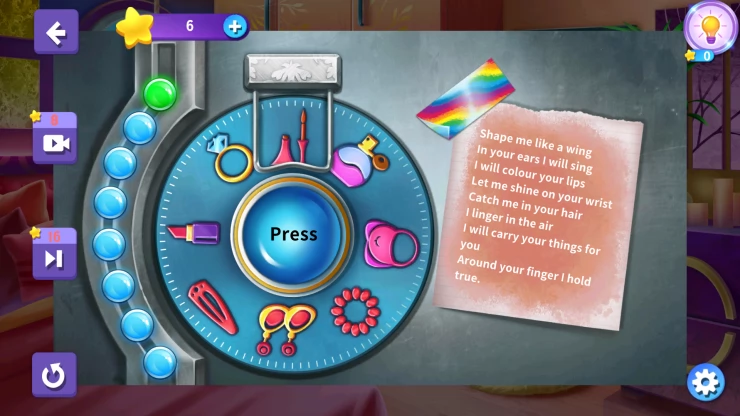
- Read the lines on the note to get clues for the symbols to select.
- Turn the dial to the correct symbol and tap the Press button to select it.
- If you get one wrong you will start again.
Solution: Nail Polish, Earrings, Lipstick, Necklace, Hair Clip, Perfume, Purse, Diamond Ring.Show
Collect a paper clip and Ben's work contract.
Noe view the paperclip and then use the pliers on it. This will give you a lock picker.
Use this on the door to start a puzzle
Lock Pick Puzzle
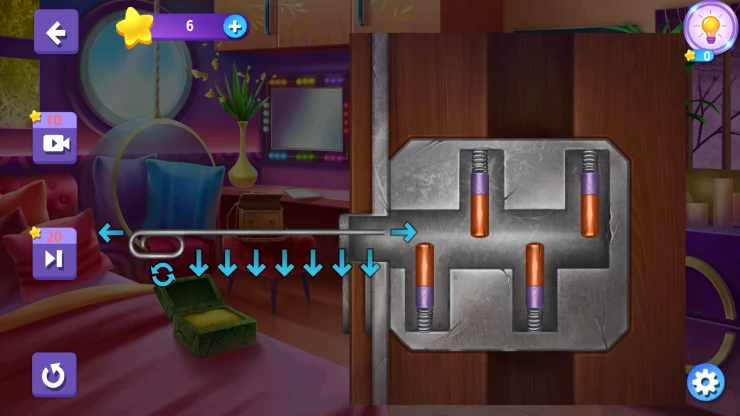
- Use the arrows to bend sections of the pick down.
- You can then move the pick into the lock (or out)
- You can also turn the pick so that the bend sections are up or down.
Solution: Check the video for how to complete this.

Tap again on the door to Ben's Room.
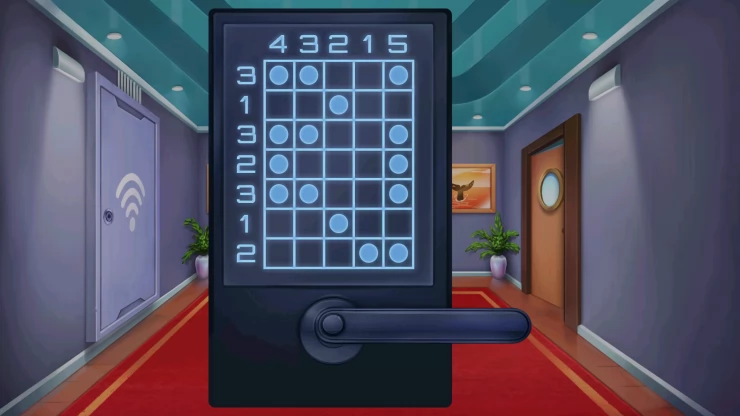
Ben's Room Lock
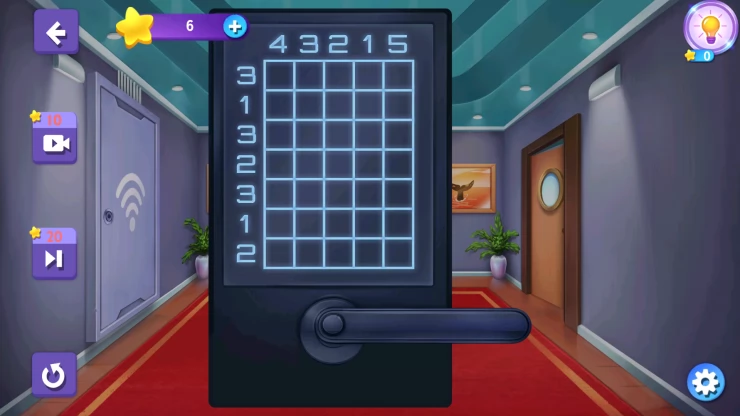
- You need to complete the same puzzle as the last time you entered but this one is more difficult.
- Add circles to the grid so that the number in the rows and columns adds up to those shown.
Solution: Show
Ben's Room
Look at the Work contract that you have, notice the card symbols at the top. These are the same as those on the book shelf.
View the Book shelf.
Book shelf puzzle
Tap to pull out the books that match the color and symbol from the letter.
Solution: Show
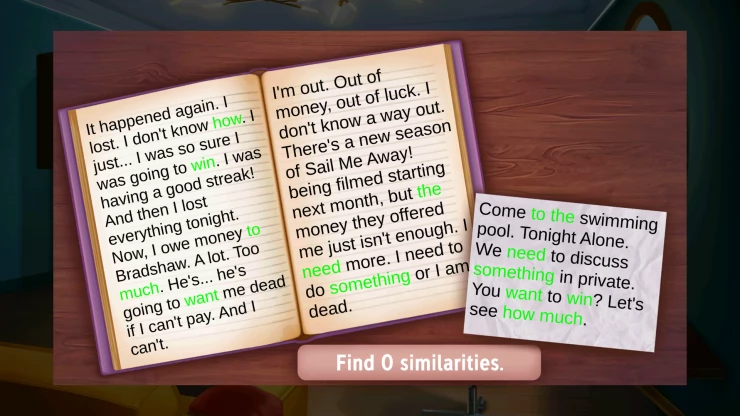
Now collect an access card from the shelf and then open the book to look inside. This starts a puzzle.
Handwriting Puzzle
- You need to find 8 similarities.
- In this case just find words in the note that appear in the book.
- Tap on the work on the note and then on the same word on the book.
Solution: Show
Now use the access card on the glass cupboard to the left of the bed. This opens the door.
Tap the white shirt from inside.
Ben arrives and you confront him with the evidence.
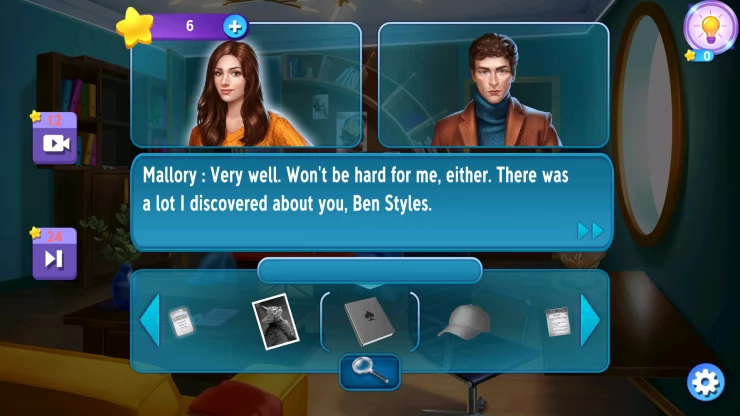
Present the evidence items as follows: Bank Balance, Cap, Poolside CCTV, Text from Bookie, Hallway CCTV, Note to Ava, Ben’s Shirt, Work Contract, Party Hall CCTV, Cuff link, Footage of Bar, Recovered Footages.
Follow the rest of the conversations to see the end of the story and complete Chapter 10.
If you have any questions about the game please check the Answers Page to ask there.

 With 20 years of experience in creating video game content for the internet and over 30 years as a gamer, Mark is now a passionate mobile App Gamer. Loving a challenge, he is always ready to get stuck in to both survival builders and puzzle solving games. He has been providing content for AppGamer since 2014.