Hidden Escape: Murder Mystery Chapter 9 - Between the Lies Walkthrough
More Hidden Escape: Murder Mystery
This is our walkthrough for Chapter 9 - Between the Lies of Hidden Escape: Murder Mystery. A puzzle adventure game from Vincell Studios. Set around a Cruise ship reality show where you will need to find objects and solve puzzles.
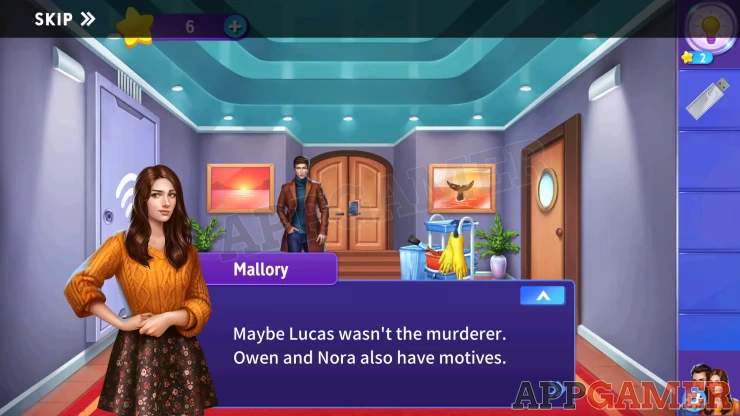
In Chapter 9 you continue with the partnership of Mallory and Mark. THe show has been cancelled but you still want to check the recorded footage to try to find more details on the murder.
Chapter 9 - Between the Lies Walkthrough
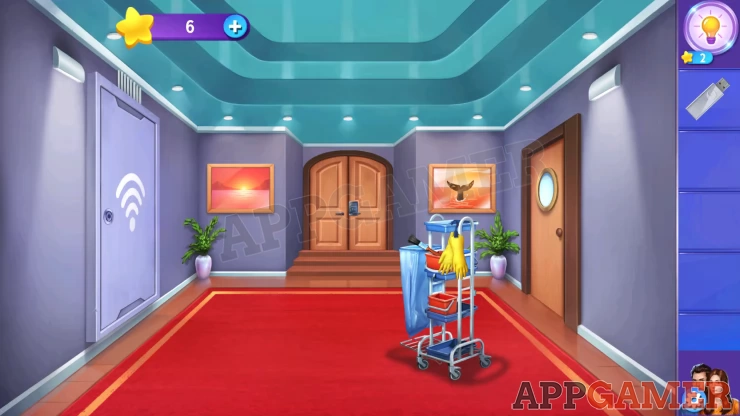
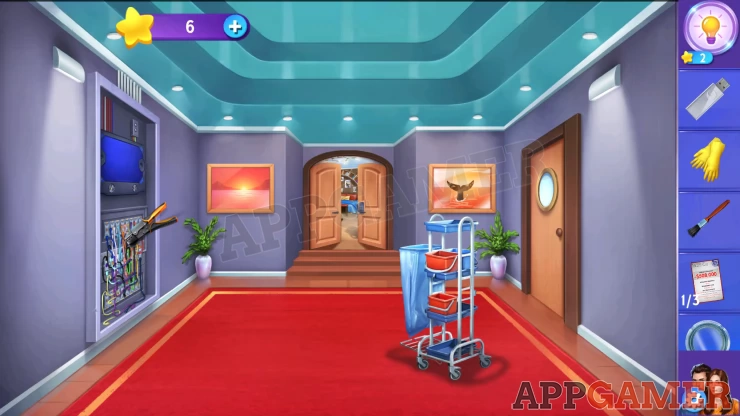
Collect the Gloves and the brushes from the trolley in the corridor. Then tap on the door directly ahead to see the lock.
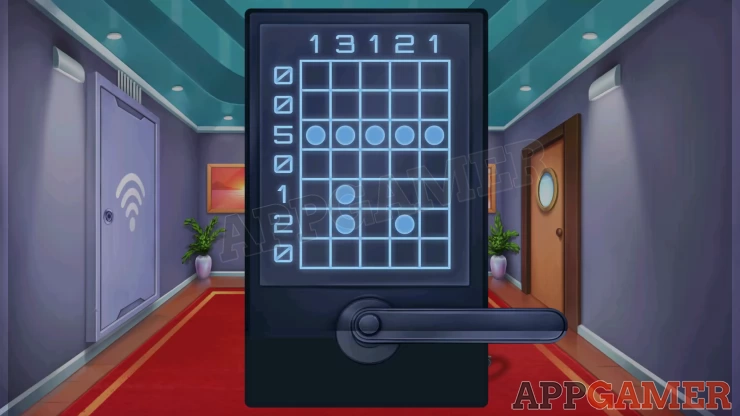
Door Lock Puzzle
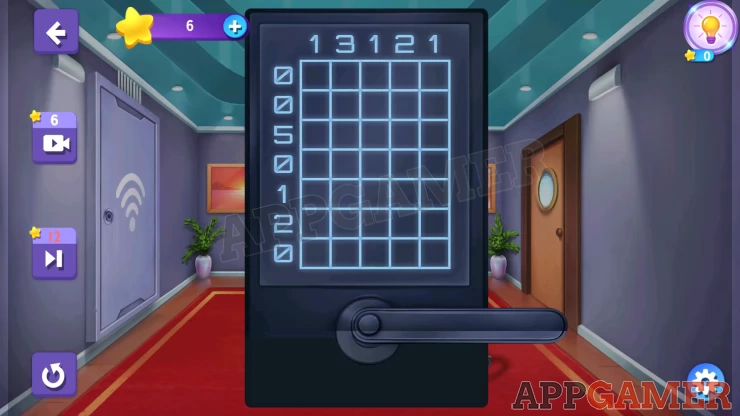
- To solve this tap on the squares to highlight them.
- You need to place dots in the squares to total up to the numbers shown on the left and top.
- Check the solution below.
Solution: Show
Go though into Ben's room. It is fancy
Ben's Room
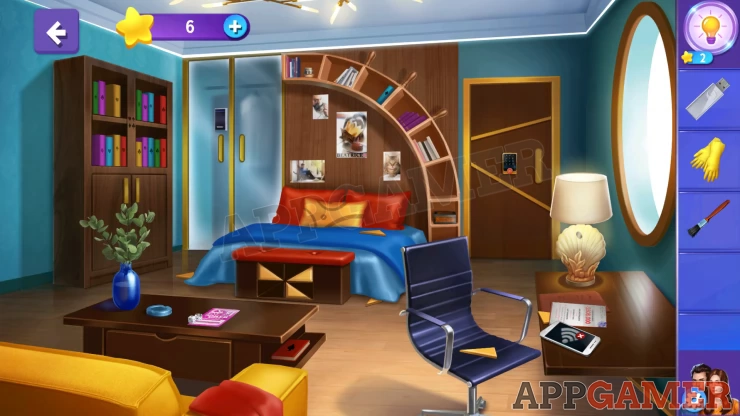
Collect a bank statement from the table on the right, Ben is broke. (evidence 1 of 3)
Then collect a yellow triangle piece from the desk and another from the chair. (2 of 5)
You can then find 3 more triangle pieces by the bed, one on top and 2 on the floor. (5 of 5)
Now add the 5 triangle pieces to the box at the foot of the bed. The box opens and you can collect 2 books.
Find 2 more books in the room, a blue one on the curved shelf above the bed and a red one on the coffee table by the yellow sofa.
Also notice the cat picture on the wall above the bed. It is a clue.
Collect an 'Ashtray Glass' from the top of the coffee table and then open the drawer on it and collect a Crimping Tool and a Round Key.
Now add the 4 books to the cabinet on the left wall. This starts a puzzle.
Book Shelf Puzzle
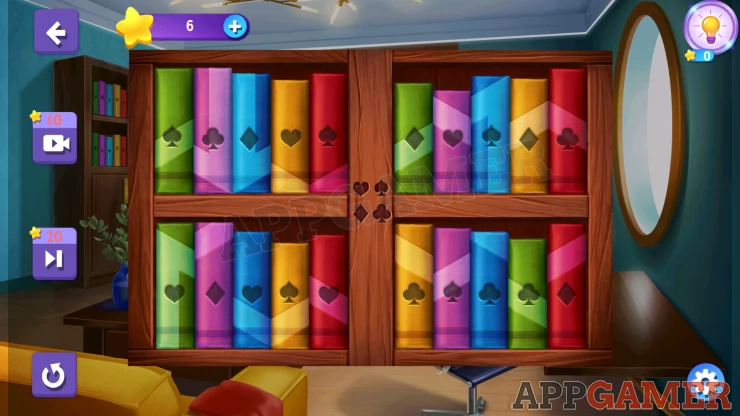
- Tap pairs of books to swap their positions.
- Arrange the books so that the correct symbols are on the spines and the lines across them form a large symbol
Solution: Show
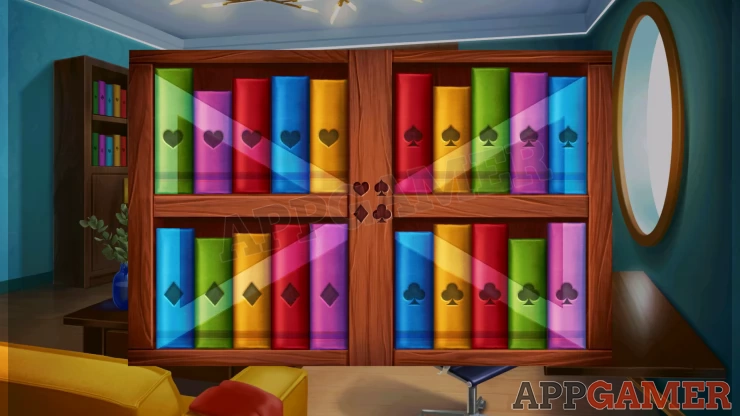
Remember the shape
Back up out to the corridor and use the Round Key on the WI-Fi door on the left. Then use the Crimping tool on the opened panel to repair the wires.
Finally use the gloves on the open panel to examine the wires and start a puzzle.
Wi-Fi Wires Puzzle
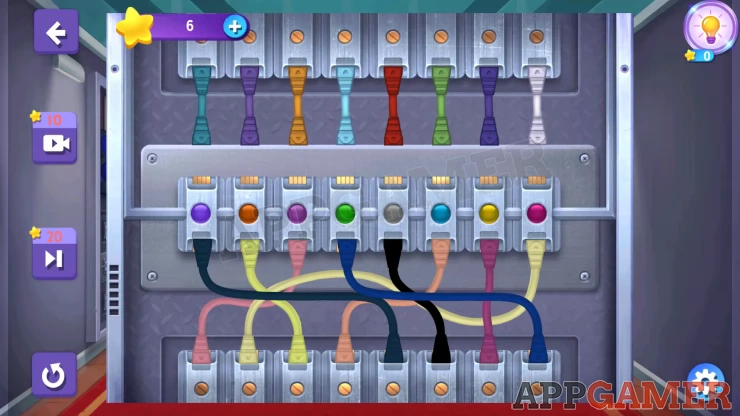
- The top set of cables are unplugged
- Yo need to decide where to plug them in on the center row.
- This is a color mixing puzzle to make the color of the light in the center.
- You need to find the color cable at the top that will mix with the one connected at the bottom to make the color of the light in the center.
- If the light illuminates then you have the correct cable, if not tap again to release it and try another.
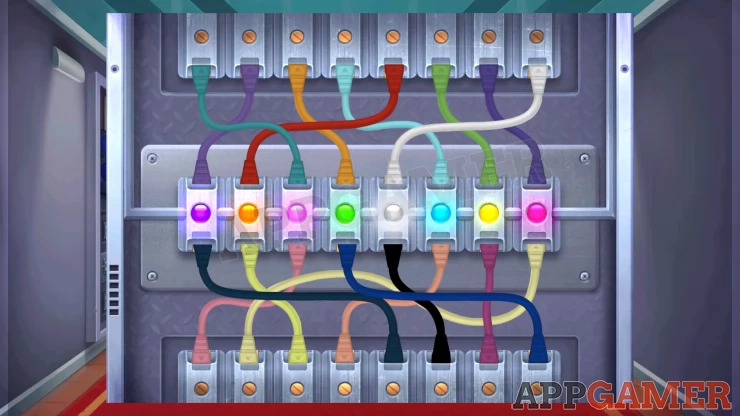
Solution: Show
Next tap on the screen above the wires to see a wave display.
Wave Puzzle
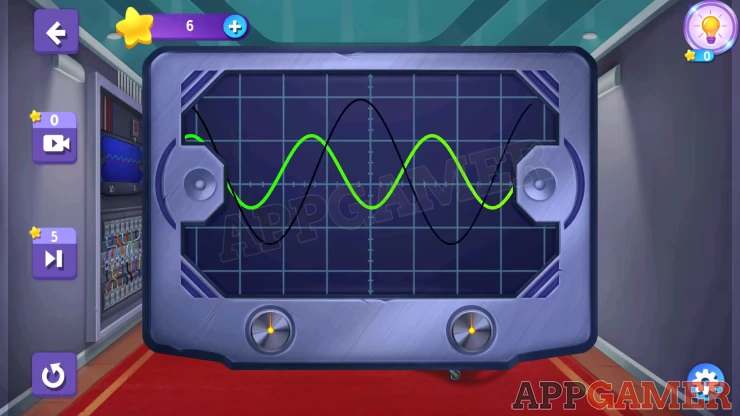
- Use the 2 dials below the screen to adjust the green wave pattern
- Make the green wave match the black one.
- The left control changes the height of the wave and the right one changes the width.
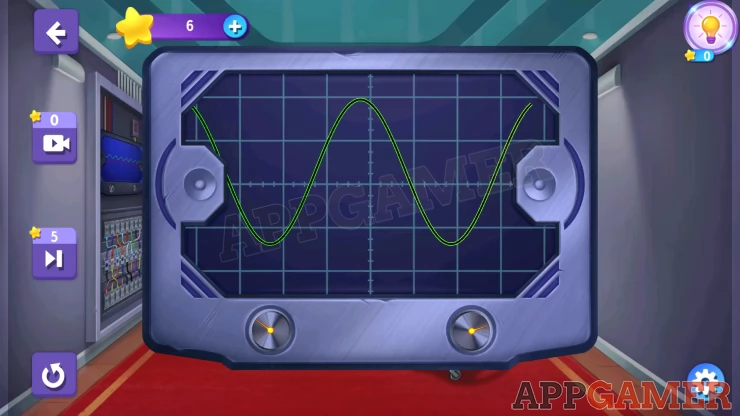
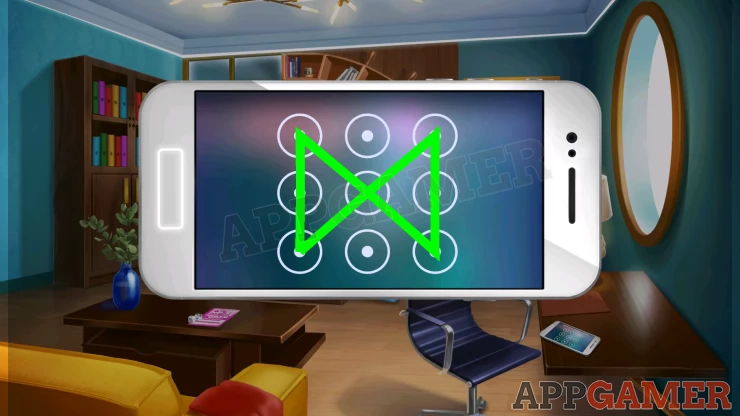
Once you match them you will then need to repeat this with a red wave. Then you can go back into Ben's Room and tap on the phone on the desk on the right. You need to draw a symbol to unlock it.
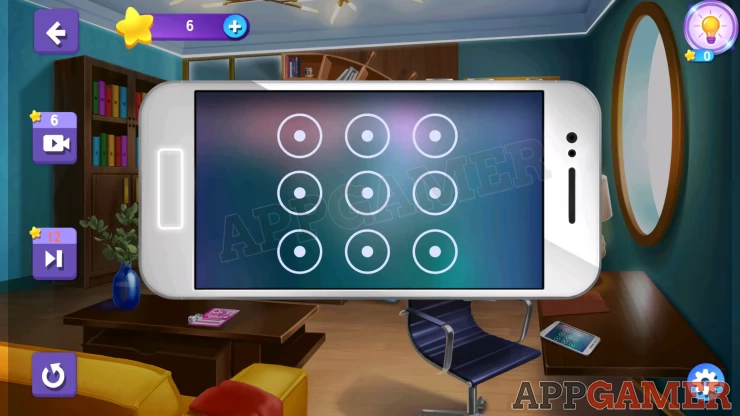
Solution: Use the symbol found on the book shelf.Show
Now tap on the door on the right of the bed, then tap the red button on the pad.
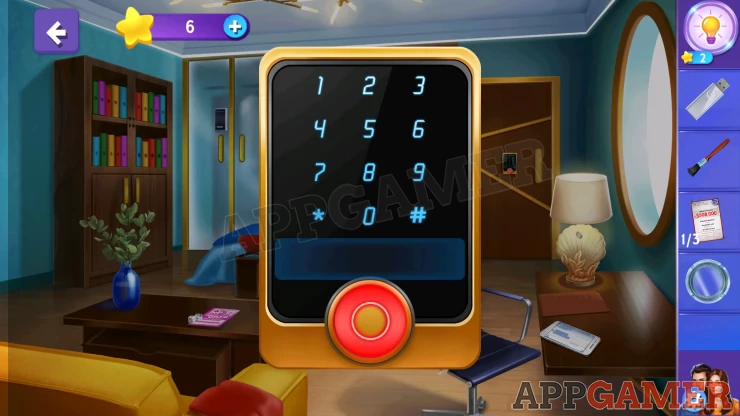
This sends a one time password to the phone, so check the phone to get it.
Code: 739081Show
Use this code on the door top open it. You can then enter the office room.
Ben's Office
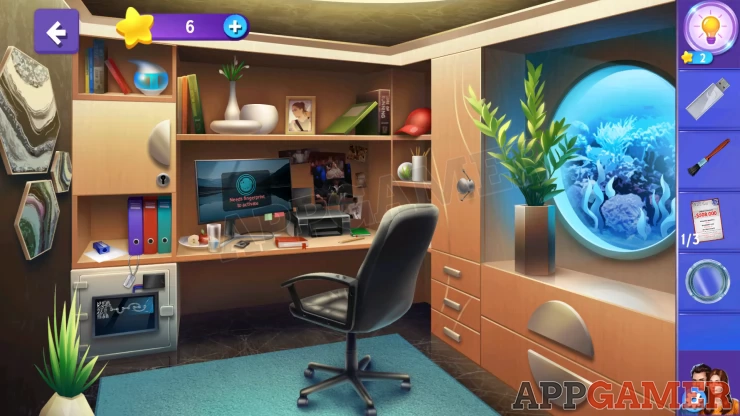
First tap on the desk to view it. You can collect the Pencil and then open the red book to collect a Locker Key
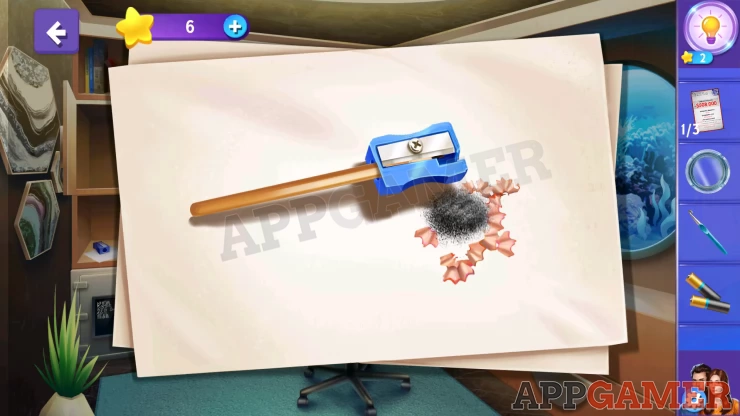
Back up and use the key on the locked cupboard door on the left of the room. Collect a crochet hook and a screwdriver. Then below this on the shelf is a paper with a pencil sharpener. View this and add the pencil to it, you will collect some 'Lead dust particles'
Now tap on the tall cupboard door on the right, the handle is loose as the screws are out.
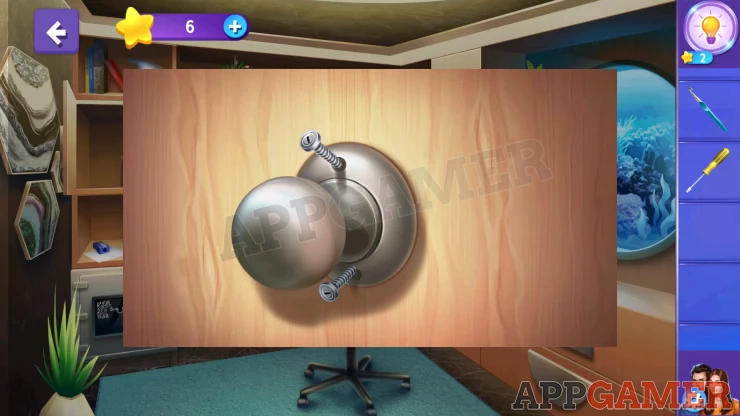
Use the screwdriver on these to fix the handle and then you can open the door. Collect some batteries.
On the left below the pencil sharpener is a safe. You cannot open it but use the crochet hook on the small black panel at the top of the door top open that and then add the batteries to the compartment. Then you will see the screen.
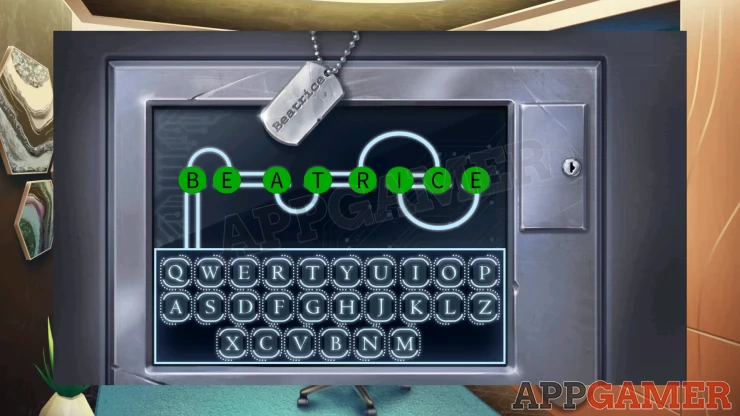
Safe Code
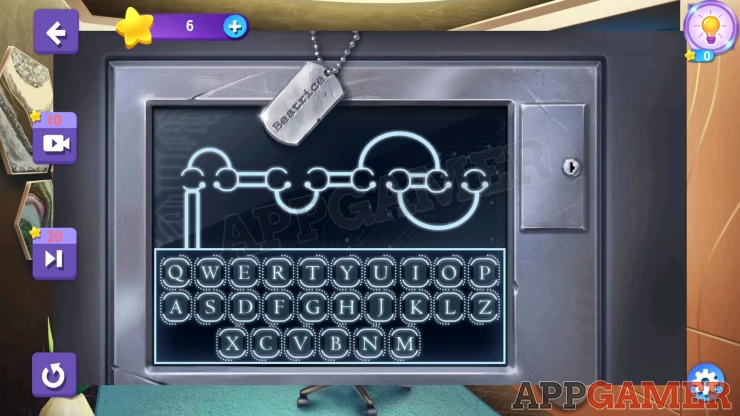
- Use the keypad to enter the code.
- The clue is the name on the tag above it (also on the cat picture in the main room).
- As you type letters they will appear from the lower left and fill in the the spaces.
- They will move along the lines on the screen and some so you need to consider how to try it in correctly to make it fit.
Code: Type the letters as follows: EICRTAEBShow
Collect the Scotch Tape from the opened safe, and some Printing Paper.
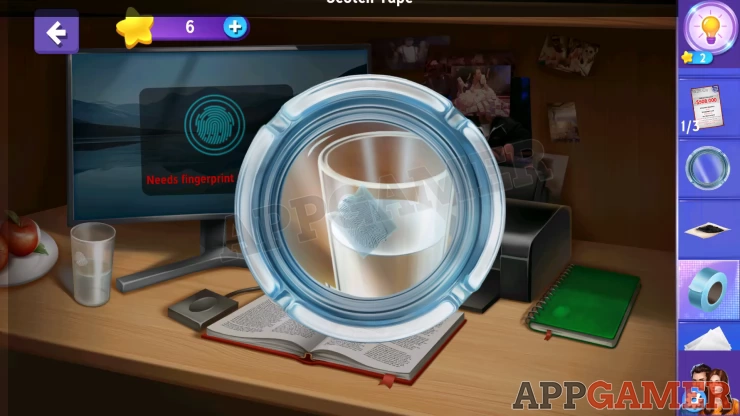
Fingerprints
You can now use the items to collect some fingerprints. View the desk again. Use the ashtray on the glass on the left to view a finger print. Then add the dust particles and use the brush on it. Then finally add the scotch tape to collect it.
There is a second fingerprint on the green book on the right. Repeat the process to collect this one as well.
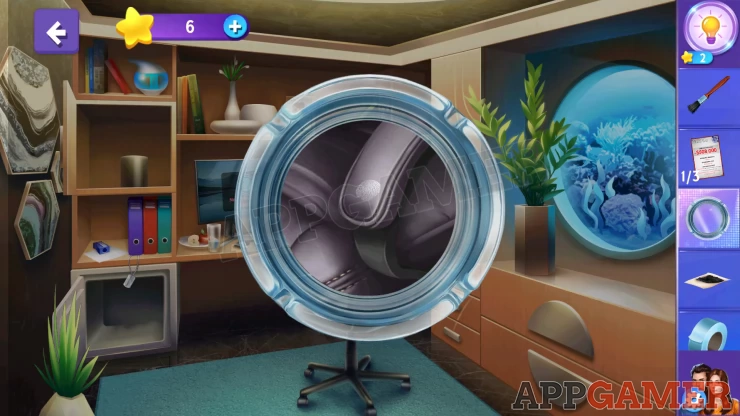
In the same room there is a also a fingerprint on the red hat on the shelf to the right. And another one on the arm of the black chair. Collect them both. (4 of 6). You will also collect the red hat as evidence.
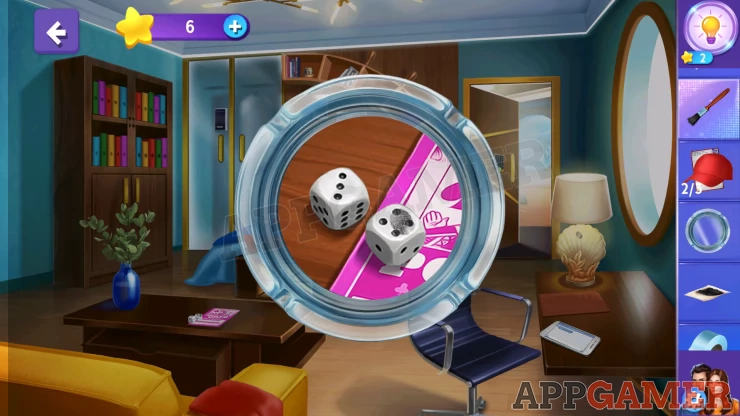
Back out to the main room, you can find another fingerprint on the lamp on the desk to the right. And the final one is on the dice on the coffee table.
Return to the office and view the desk. Then tap on the fingerprint samples to view them.
Arrange the 6 prints sections to form 1 large print in the space shown.
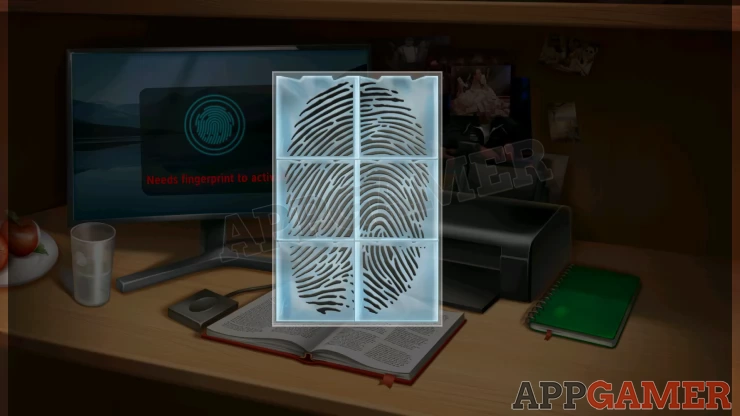
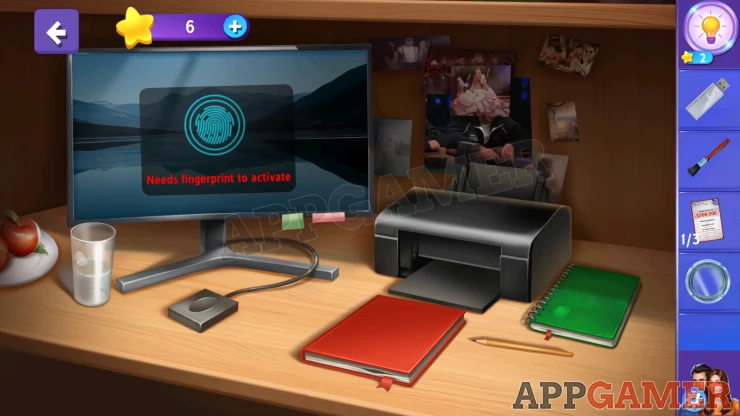
Now you can use the fingerprint sample on the sensor by the computer screen. Then add the USB drive to the computer to view it.
Tap on the folder and you will start a mini game to access the system.
Computer access puzzle

- At the top are 5 pattern images. one will be highlighted at a time from left to right
- At the bottom are 5 sets of patters that you can move, you can more the top and bottom sections left and right.
- Arrange the sections of the bottom 'center' pattern to match the highlighted one above.
- You have a time limit to complete this puzzle.
- Watch the video below for help
You can now view the screen to see some images from the CCTV. tap and select the images that have suspicious activity in them. There are 4 to select.
You then need to print the images. Add the paper to the printer and then tap the print button
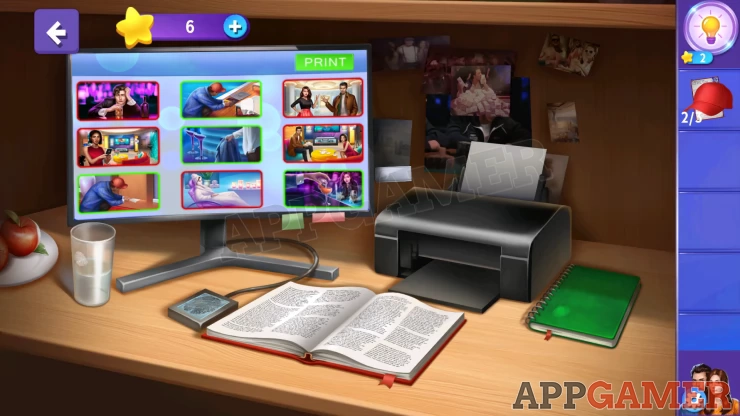
Collect the prints which are added to the evidence. Then complete the conversation for Chapter 9.
Move on to Chapter 10.
 With 20 years of experience in creating video game content for the internet and over 30 years as a gamer, Mark is now a passionate mobile App Gamer. Loving a challenge, he is always ready to get stuck in to both survival builders and puzzle solving games. He has been providing content for AppGamer since 2014.