Hidden Escape: Murder Mystery Chapter 7 - The Discovery Walkthrough
More Hidden Escape: Murder Mystery
This is our walkthrough for Chapter 7 - The Discovery of Hidden Escape: Murder Mystery. A puzzle adventure game from Vincell Studios. Set around a Cruise ship reality show where you will need to find objects and solve puzzles.
In Chapter 7 you continue to play as Mallory as you begin another day of the Sail me Away contest. Finally we have a murder to investigate.
Chapter 7 - The Discovery Walkthrough
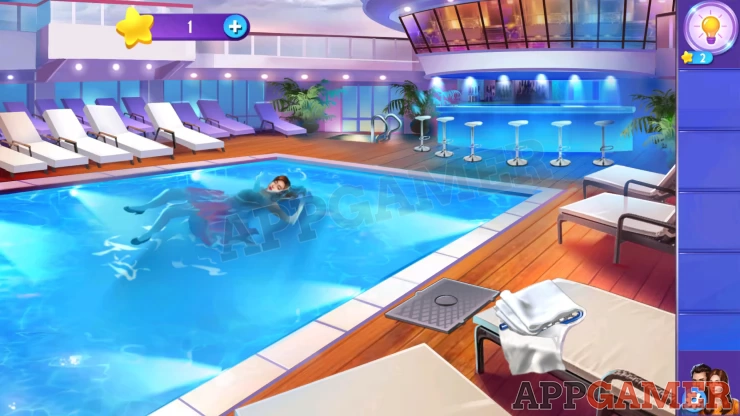
Ava is dead in the Pool and the water is electrified.
First tap on the towel from the sun lounger on the lower right, this will move it and you can collect a Skimmer Net. You then need to make your way to the Pump room, tap the rails by the left of the bar area at the back to go down,
Pump Room
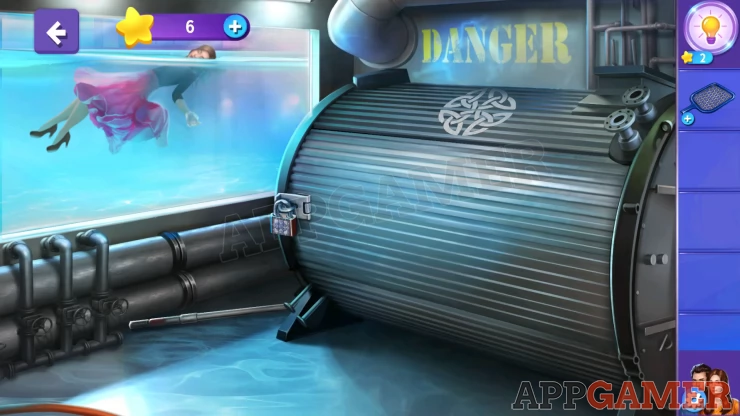
Collect the Cleaning stick from the floor on the left. Then you can select the skimmer net in your inventory and add the stick to it.
Now view the padlock on the pump case. This is a puzzle
Padlock Puzzle
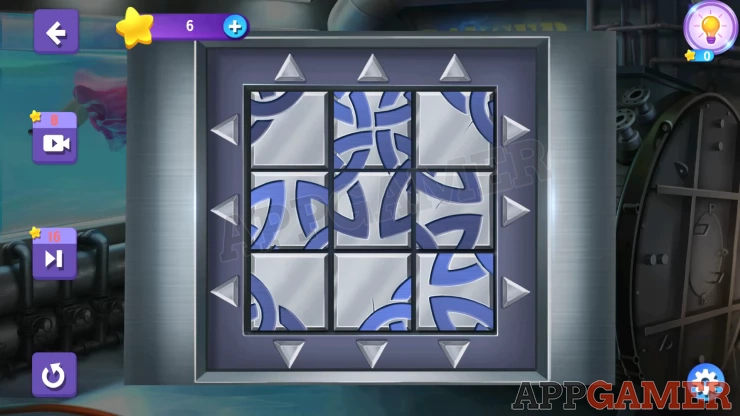
- Use the arrow buttons to move the rows and columns.
- Arrange the pieces to make a complete image.
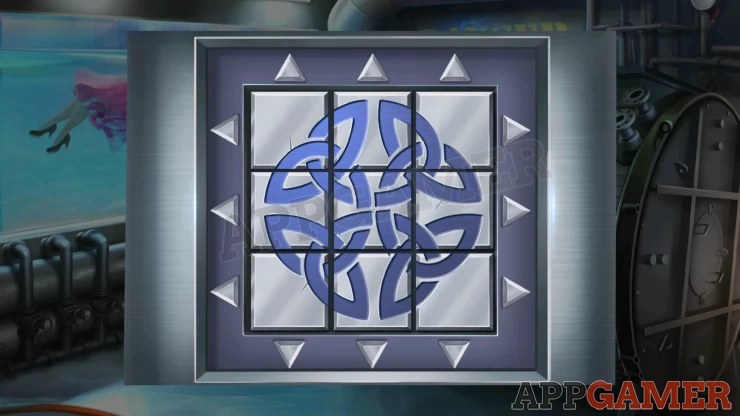
- Check the image below for the solution
Solution: Show
With the case open you can collect a crowbar. Now back up to the pool again and use the crowbar on a small floor hatch on the right. This will reveal a pipes puzzle.
Pipes Puzzle
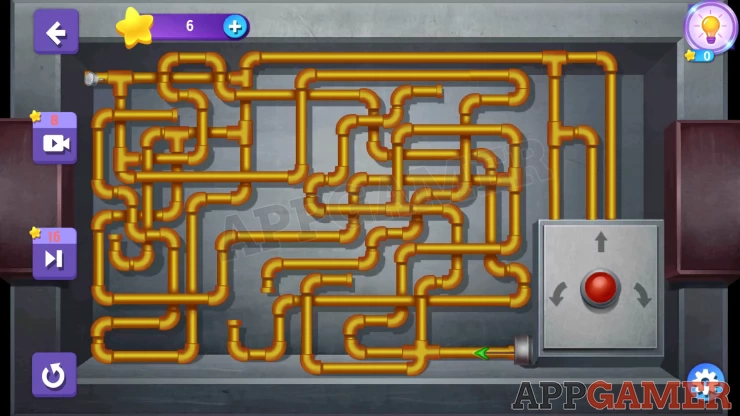
Use the red control button on the right to move the green arrow from the bottom right to the top left of the pipes maze.
You need to find a complete path.

Once done you will collect some Pipe Valves. Go back down to the Pump Room.
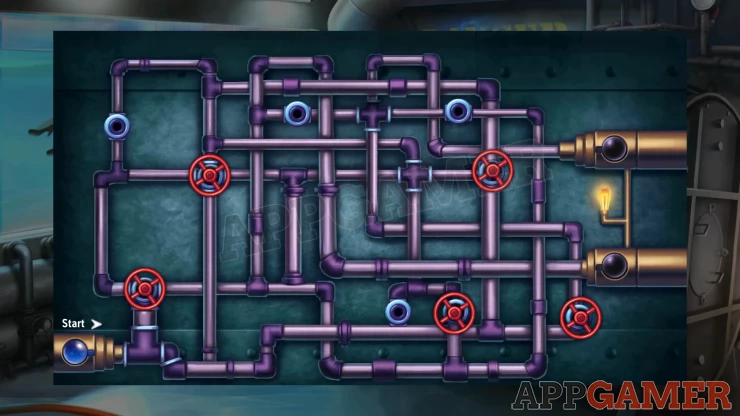
Add the valves to the leaking pipes to start another puzzle.
Water Pump Puzzle
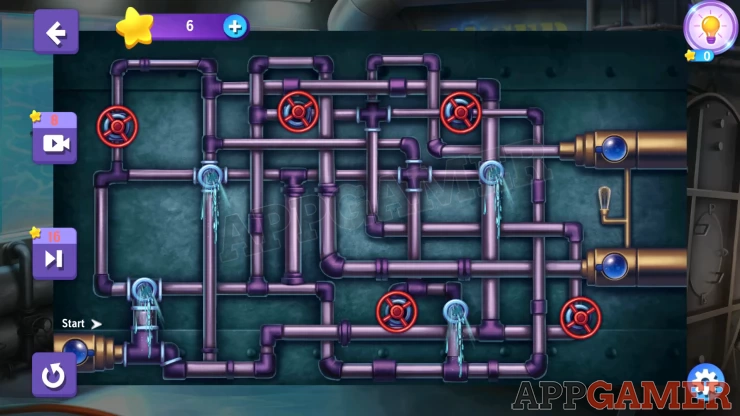
To solve this you need to move the red valves to the correct locations to stop the water leaks.
Follow the pipes or try out locations to see what works.
Solution: Show
Once the water has stopped leaving the electrical panel is open and you can access it.
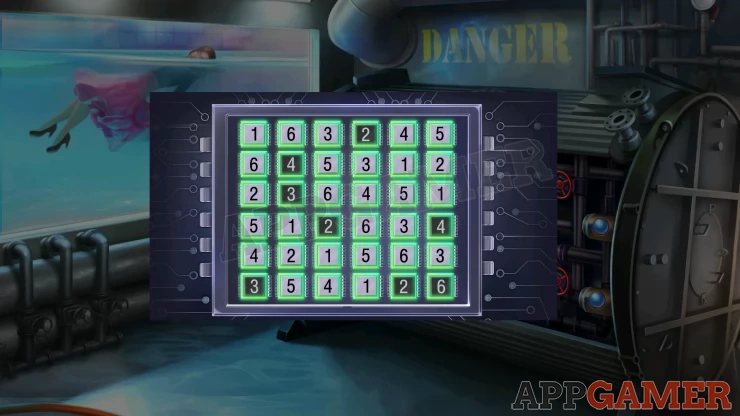
Electric Panel Puzzle
Tap the white circuits to set the number on each.
You need to set numbers so that each row and column has no repeating numbers.
Solution: Show
Once done head back up to the pool side, use the net you have made to collect the cuff link from the water.
You will then meet with the Captain.
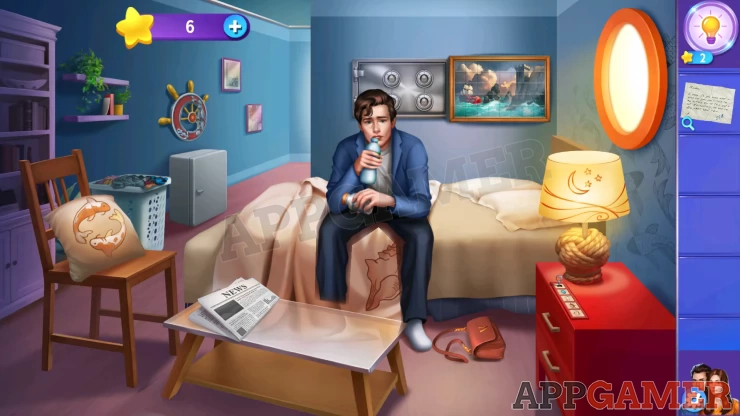
You will then head to Lucas' room to look for him.
Lucas' Room
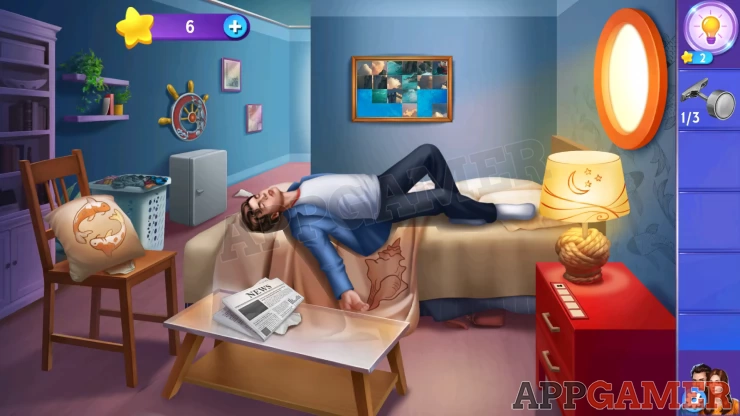
First collect a paper piece from under the cushion on the chair and then tap the newspaper on the table to move it. You will see a clue about a stolen ring and then you can collect a second paper piece (2 of 5).
Collect a third paper piece from the floor behind Lucas' head. (3 of 5), then tap on the clothes basket behind the chair to look inside.
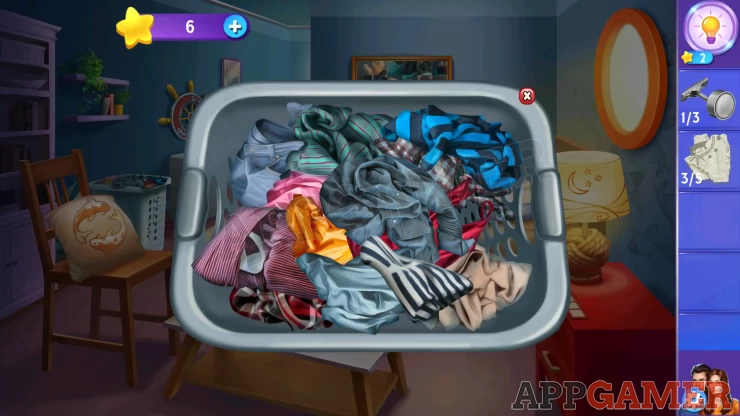
Drag the items around to reveal another paper piece (4 of 5) and a clothes hangar to collect.
Now open the small grey cabinet on the floor to the right and collect a water bottle. Next use the hangar below the bed to drag a purse out from underneath. You can then tap the purse to look inside.
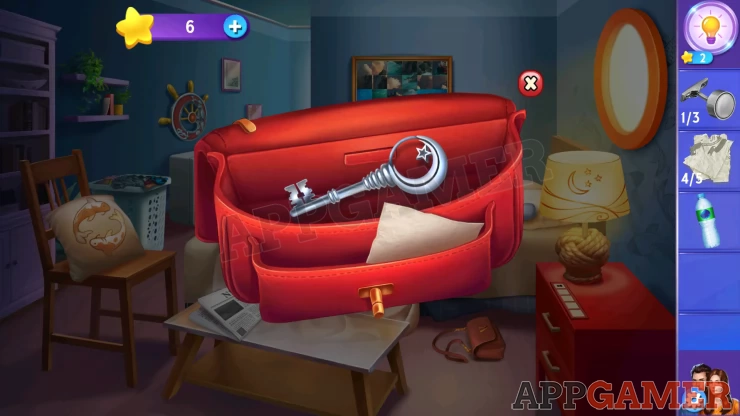
Collect the key and the final paper piece (5 of 5).
Paper Puzzle

You can now assemble the papers to make an image.
You need to fit them intro the white box on the screen.
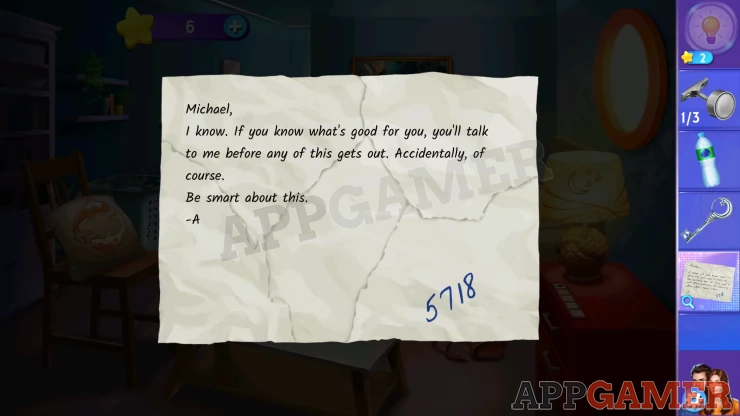
You then collect Ava's Note. Read this for a clue.
Show
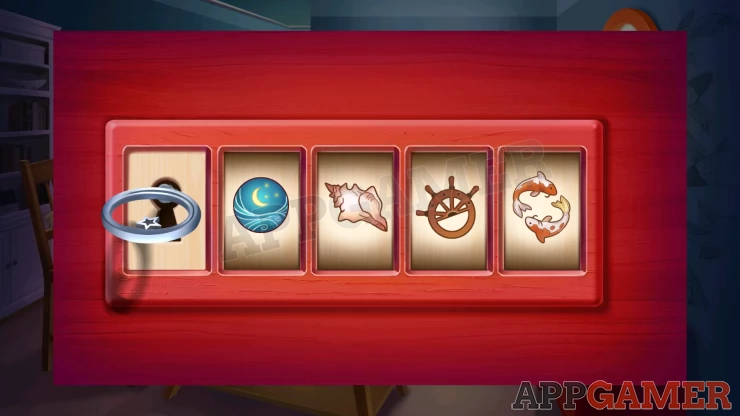
Now use the key on the red drawers to the right to activate a code lock.
Red Drawers Lock
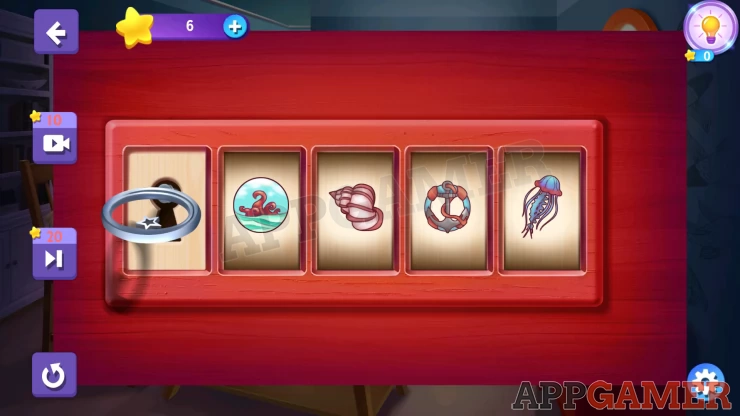
- Drag each of the images to change them.
- Each set of images is different.
- You need to set them to match 4 items in the room.
Solution: Show
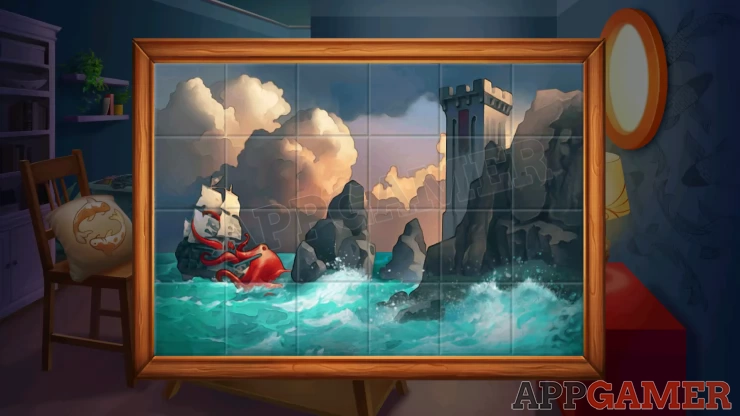
Collect the passports and the painting pieces from the drawer. Next use the painting pieces on the jumbled wall picture to start a puzzle.
Painting Jigsaw Puzzle
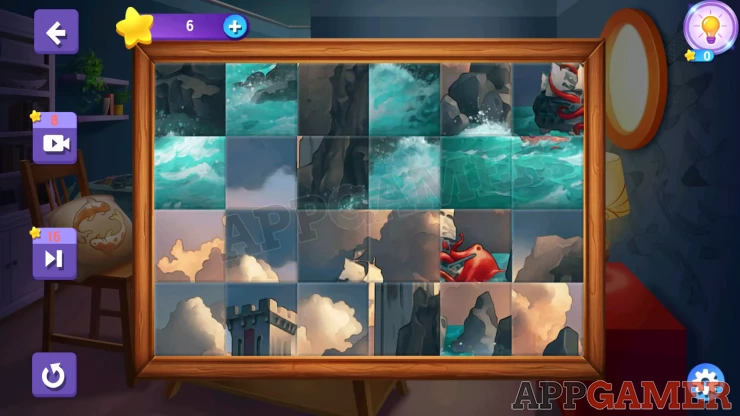
- Tap pairs of squares to swap them around
- Assemble the complete picture.
Solution: Show
You will then reveal a safe with 4 dials. View this
Wall Safe
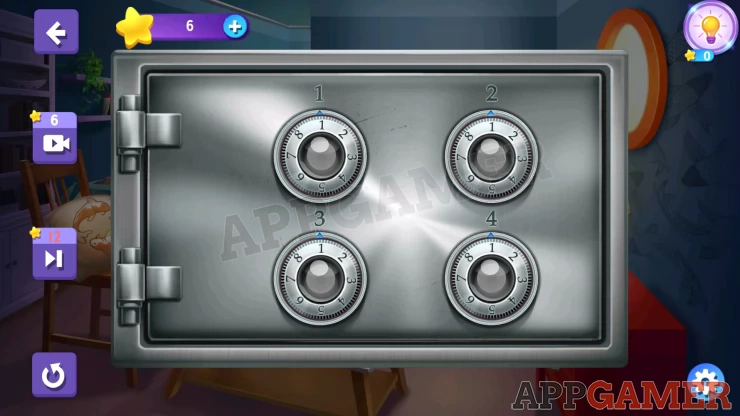
- Use the clue found in Ava's Note to open this.
- Turn the dials to set them, turning some dials will move others.
- Hint: set dial 2 last.
Code: 5 7 1 8Show
Collect the Ring from the open safe and then take the medicine bottle.
Now use the medicine bottle and the water on Lucas. He will wake up.
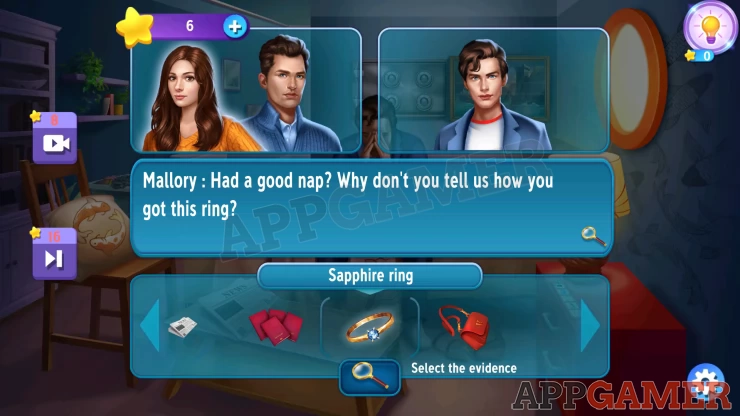
You now have a challenge to present evidence to Lucas. As the questions are asked select the appropriate evidence item
Solution: Ring, Passports, Ava's Note, Cuff LinkShow
After this follow the rest of the story and complete chapter 7.
Move on to chapter 8.
 With 20 years of experience in creating video game content for the internet and over 30 years as a gamer, Mark is now a passionate mobile App Gamer. Loving a challenge, he is always ready to get stuck in to both survival builders and puzzle solving games. He has been providing content for AppGamer since 2014.