Hidden Escape: Murder Mystery Chapter 8 - Confessions Walkthrough
More Hidden Escape: Murder Mystery
This is our walkthrough for Chapter 8 - Confessions of Hidden Escape: Murder Mystery. A puzzle adventure game from Vincell Studios. Set around a Cruise ship reality show where you will need to find objects and solve puzzles.
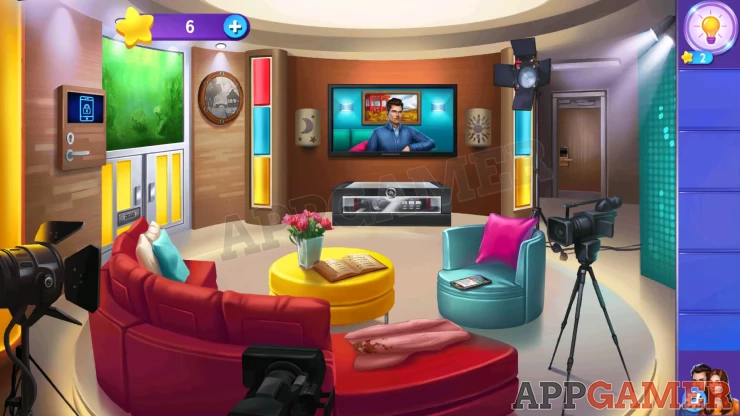
In Chapter 8 you continue with the partnership of Mallory and Mark as you meet to investigate the mysterious murder. You begin in the Confession Room
Chapter 8 - Confessions Walkthrough
Collect the pink garment - Nora's Shrug - from the red sofa, then collect the Steel Button that as underneath it.
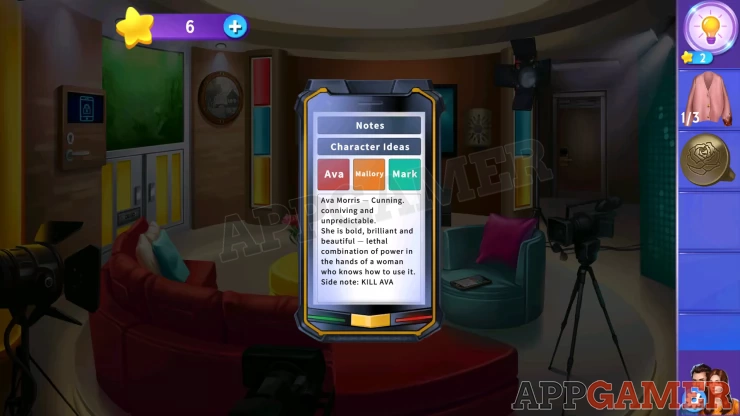
Next view the phone on the chair to see notes from Owen. You will then collect it.
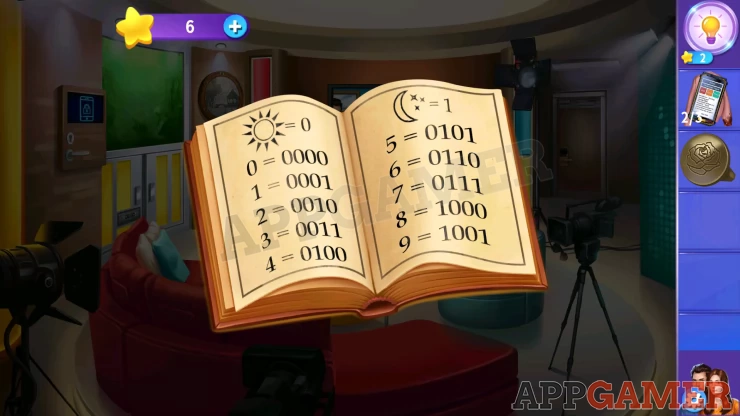
Now view the book on the round table, it has clues you will need.
Now tap the blue chair. it will move under the light on the wall. You can then view the light.
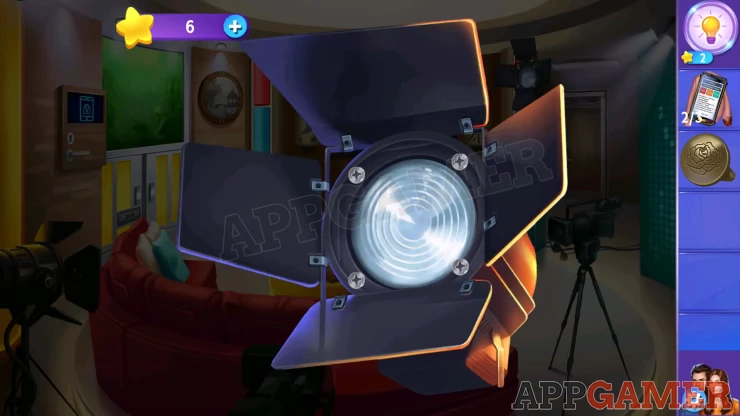
Use the button on the screws to remove them. Then collect the bulbs from inside.
Now view the round picture on the left wall and add the bulbs to it.
Round Picture Puzzle

- To solve this you can tap the bulbs to change their color.
- Each bulb will color in a part of the scene.
- Complete the correct colors to finish the puzzle.
- The clues for the colors can be seen on the moving images on the TV in the room.
Solution: Top and bottom - Blue, Trees top left - Green, Gazebo top right - Red, Ground bottom left - orange, ground, bottom right - Yellow.Show
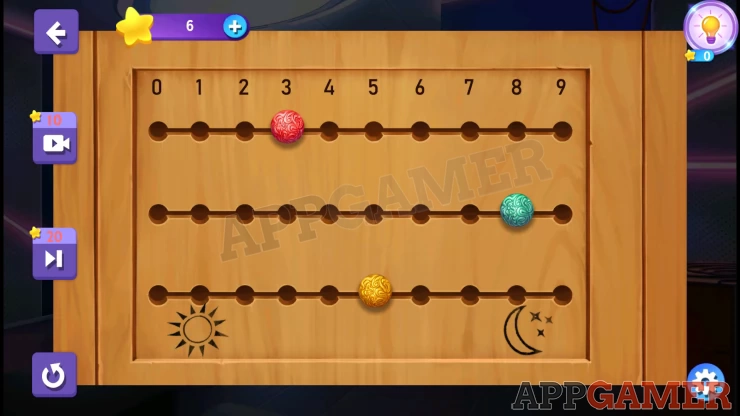
You will now see a time displayed. Tap on a yellow panel on the left wall below the green aquarium. This has a 4 digit input. use the time here.
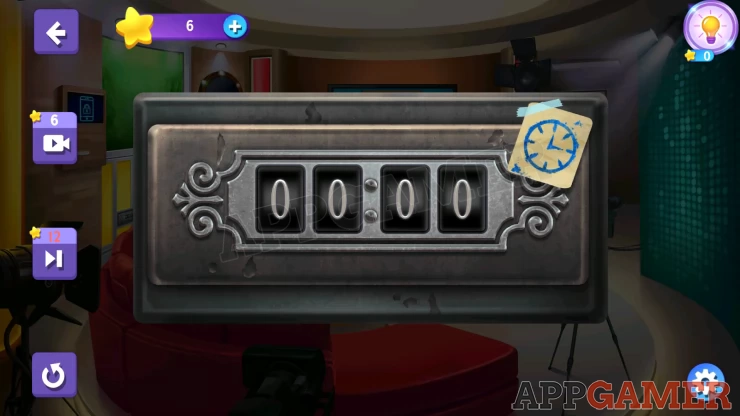
Code: 09:58Show
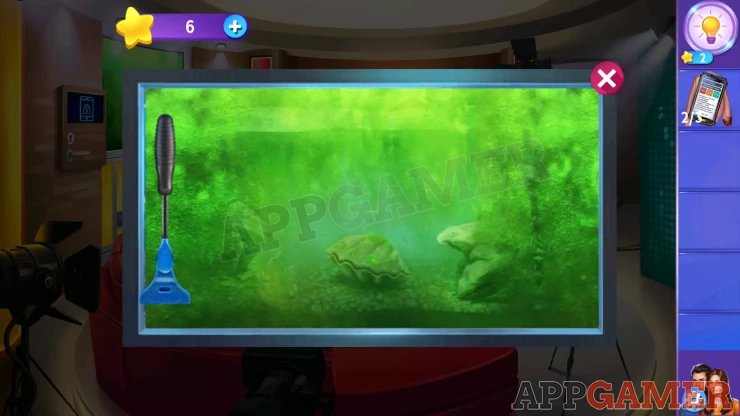
Collect the Aquarium glass cleaner. Then tap on the aquarium glass above and use the cleaner on it.
Collect the 2 door buttons that appear. Notice the bubbles coming from the Clam shell. Now tap on the door on the right of the room. You can add the 2 buttons here. Then you need to tap them in the sequence of the bubbles.
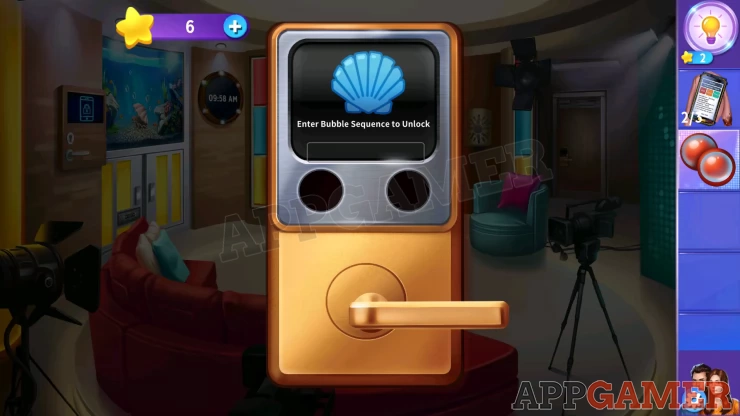
Solution: Left, Right, Left, Right, Right, and LeftShow
Enter the Office
Admin Office
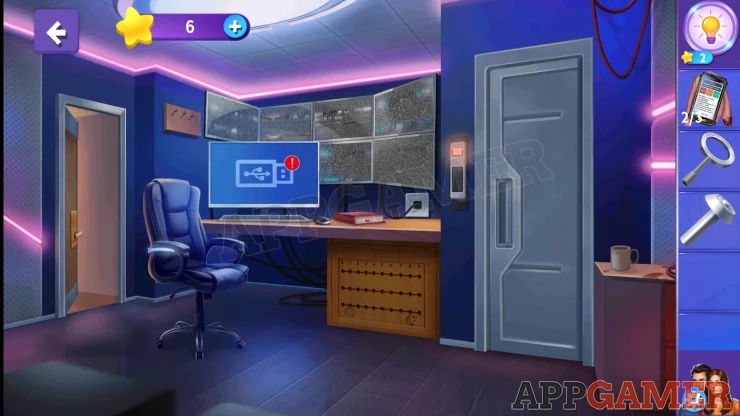
Collect a Glass door key from the hooks on the top left, then tap on the book on the desk to collect a Phone box key.
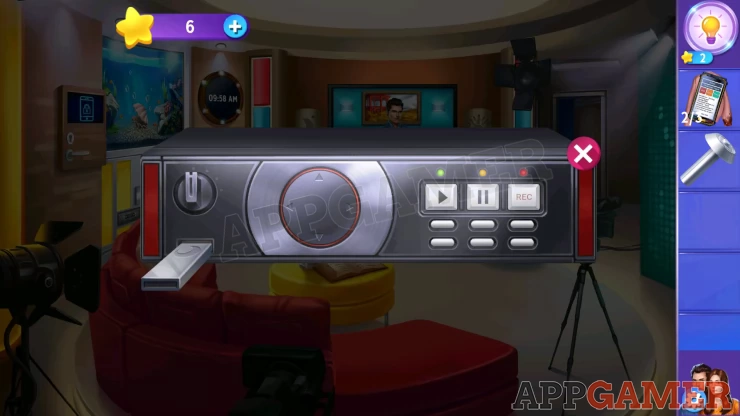
Back out to the confession room and use the glass door key on the glass box below the large TV screen. You can then view a recording device inside. Collect the USB flash drive.
Return to the admin office.
Notice a cable under the wall monitors, tap this and then on the socket on the wall to plug them in. Then add the USB drive to the computer.
Admin computer password
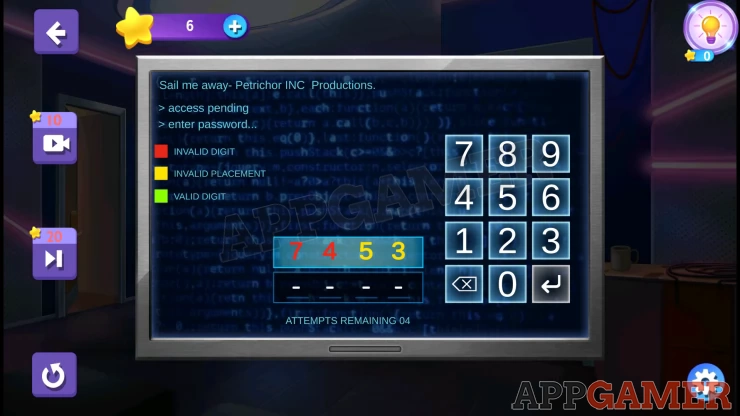
- You can now tap the screen to see the password entry.
- Enter 4 digits and tap the enter button. You will see feedback on your choice.
- You have 5 chances to get it correct.
- The code will change with each attempt. You need to work through the puzzle yourself.
Head back to the confession room again and use the Phone box key on the panel on the wall on the far left. You can then tap to view the puzzle here.
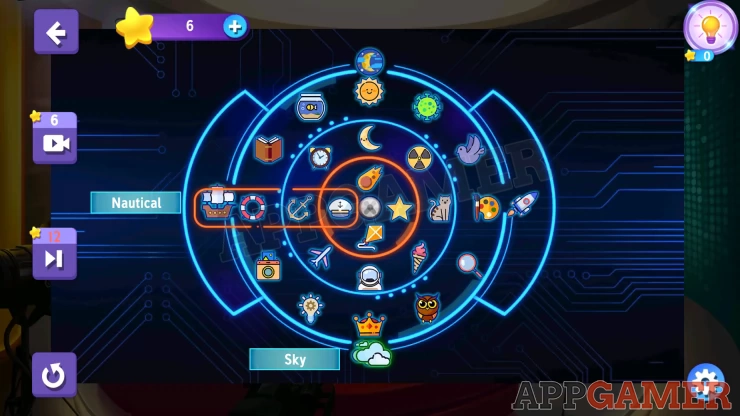
Phone Box Icons puzzle
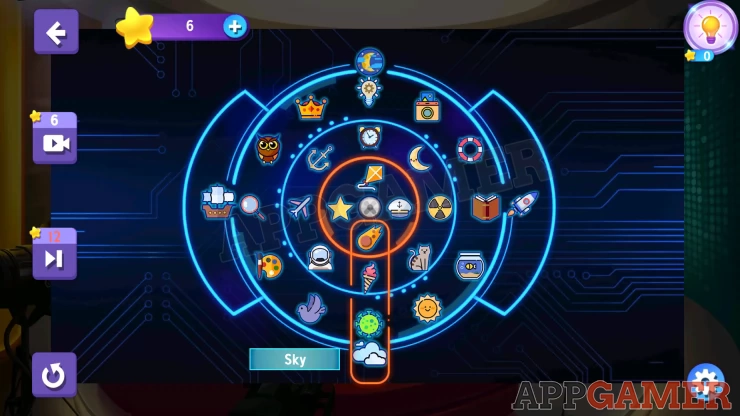
Starting with the 'Sky' group at the bottom. Rotate the rings so that you have 4 symbols in the orange column that match this description.
Show
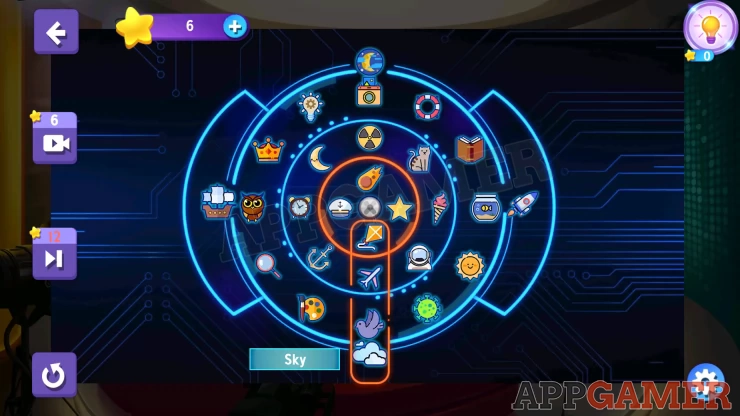
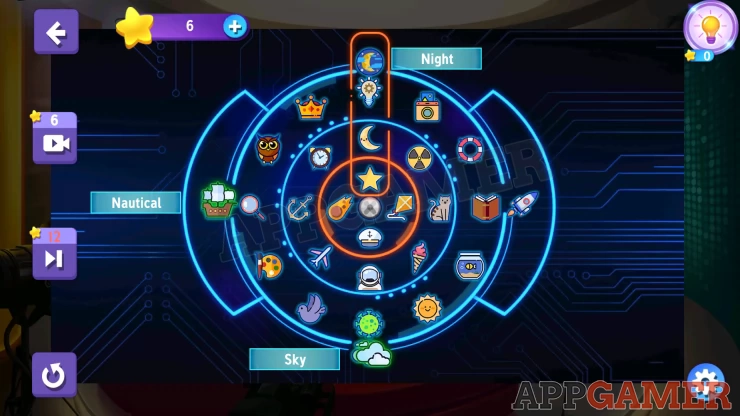
Then you move on to the 'Nautical' set on the left.
Show
Next is the 'Night' set at the top
Show
And finally the Outer Space set.
Show
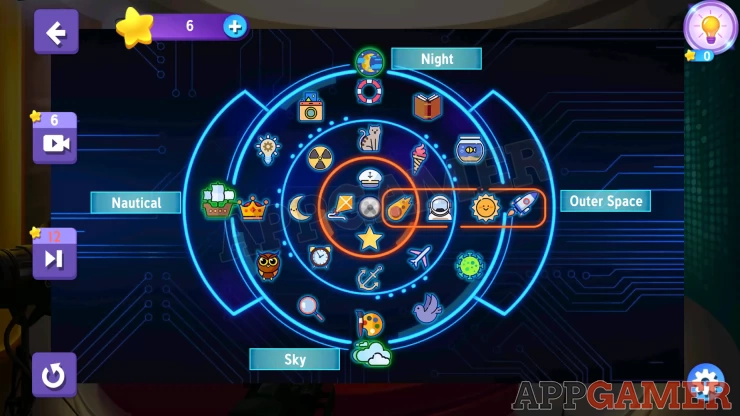
This unlocks the phone cabinet. Collect the 3 cupboard knobs from inside.
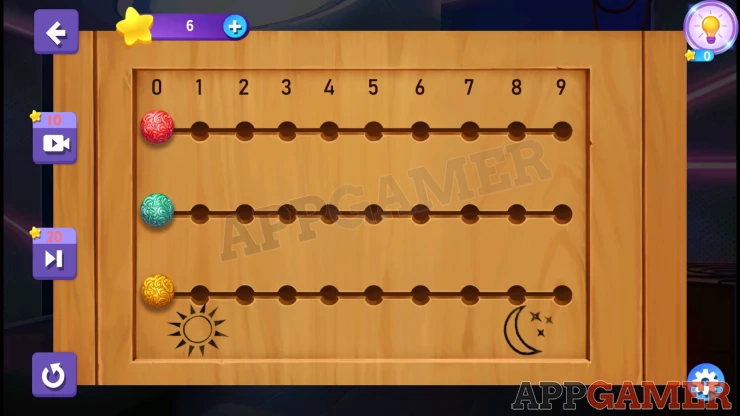
Next tap on the 3 colored panels to the left of the TV screen. Red, Blue and Yellow. With each one you will see a sequence of flashes from the moon and sun symbols. You can use the clues in the book on the table to get binary numbers from these.
Red = 0011 Blue = 1000 Yellow = 0101Show
Now go back into the office and add the knobs to the panel below the desk. Using the clues from the book get the numbers for each row.
Solution: Show
From the cupboard collect the switched box key, an access card, Owens business card as evidence and a razor blade.
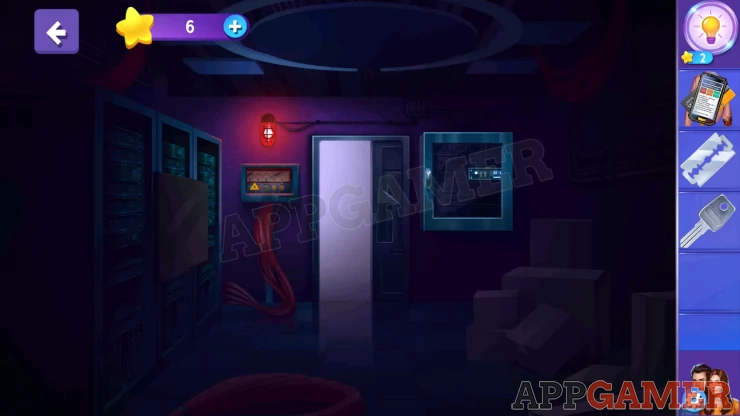
Use the access card on the door panel on the right to open it and go through to the dark server room.
Server Room
First tap on the wall box on the left of the door to open it and then view the buttons inside.
Light Panel puzzle
Watch the sequence of lights and then tap the butons to copy the sequence.
There are 3 levels to complete.
Solutions: Show
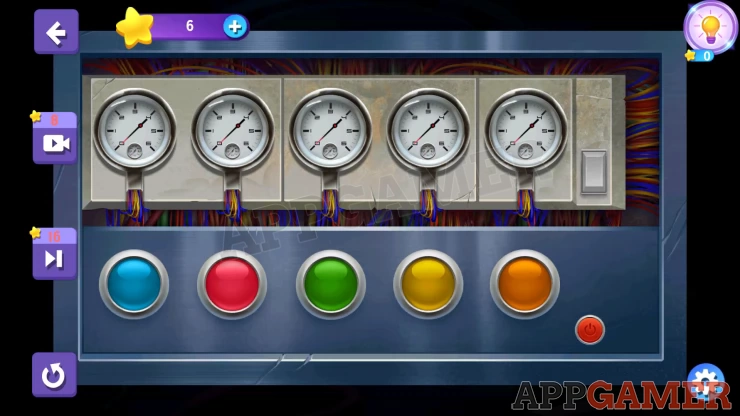
Next use the razor blade on the sealed box on the floor on the right, collect the Cable Wires. Then use the key on the wall switch box to the right of the door. Then collect from inside a Server Switch.
Now notice the red server switch on the top left of the rack on the left of the room. Tap this to remove it. Add the server switch that you have, and then the cables to it. You can then access the screen in the center.
Server Screen Passwords
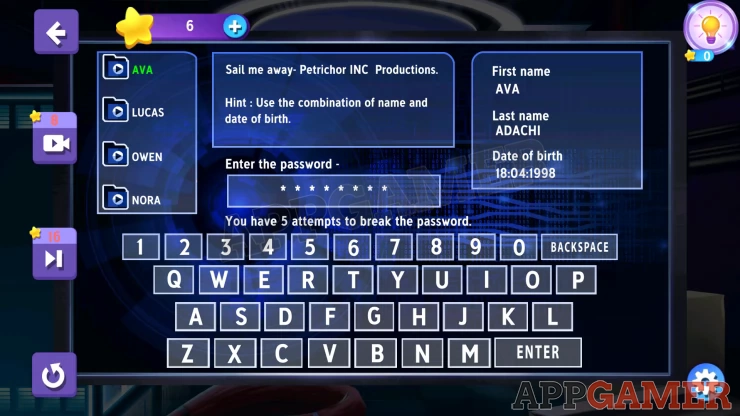
You now need to enter a password for each of the 4 names to access the files.
- Use the clues you see including first name, last name and date of birth.
- Look at the number of character (*) that you need to give you a clue.
- You have 5 tries to guess each one.
Solution: The passwords can change , for me they was. ADACHI18, THORNE08, 08WEATHERS, 21ELLISShow
Now tap on the screen again to see another puzzle to complete.
Server Puzzle
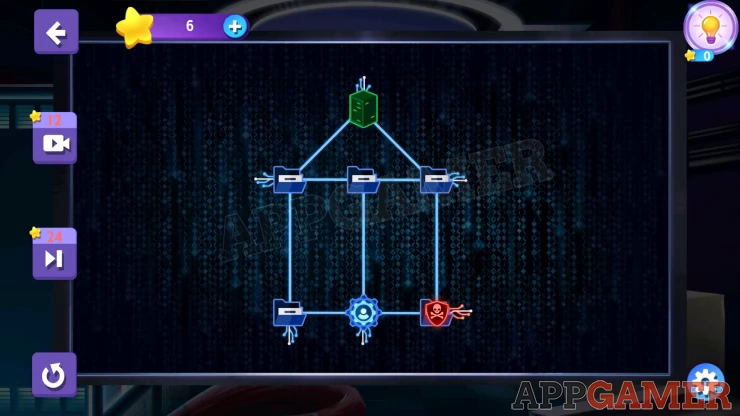
- You need to move tour icon (bottom center) to the green server icon at the top.
- Tap the files icons to move to them.
- After each move the 'virus' (red) icon will try to catch you. You must avoid this.
- There are 4 levels to complete.
Once done back out to the office and view the computer screen.
Computer screen puzzle
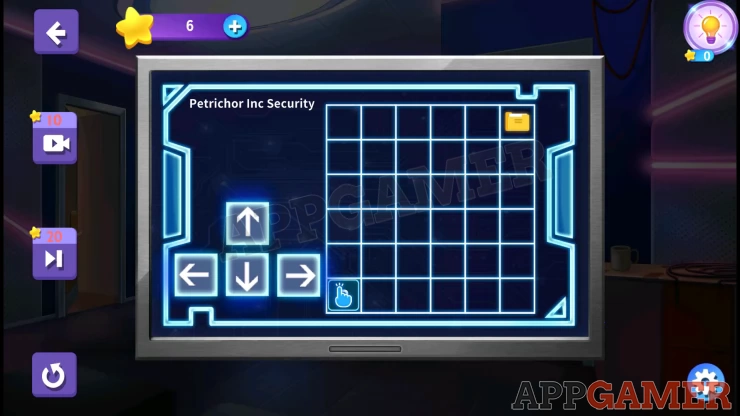
- Use the arrows to move the hand around the grid.
- You need to fill the entire grid and arrive at the file icon to complete the level.
- There are also 5 hidden files in the grid. These will block your moves, but you do not need to fill those squares.
- There are 2 levels to complete.
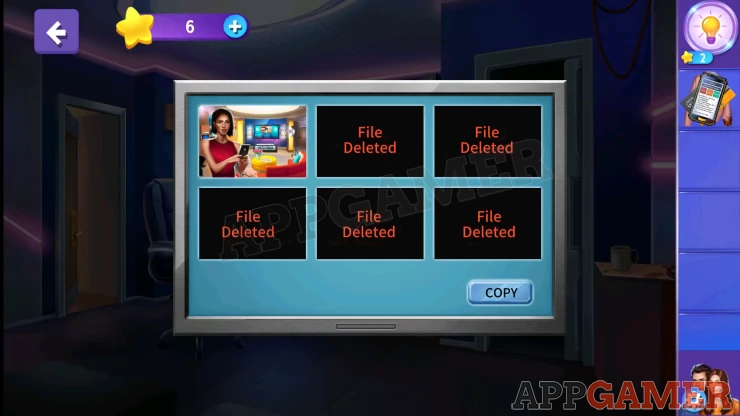
Now tap the screen to see the files. You can then tap on the Copy button to save the files to the USB drive.
You then have another challenge to present the evidence to Nora and Owen.
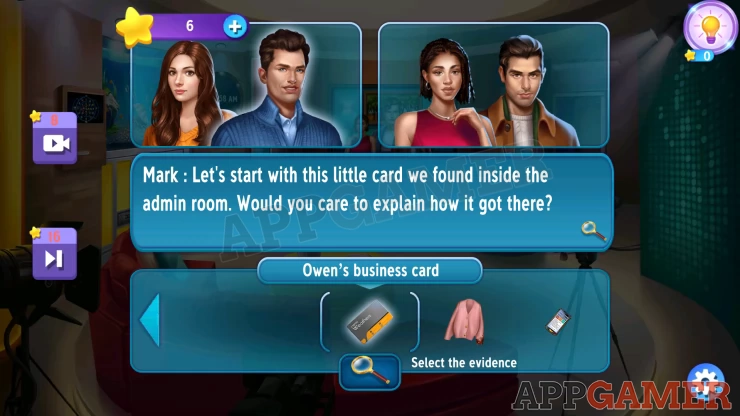
Use the items in this order: Owen's Business Card, Nora’s Shrug, CCTV Footage of Nora, and Owens Phone.
We have questions and answers related to this topic which may also help you: Show all
 With 20 years of experience in creating video game content for the internet and over 30 years as a gamer, Mark is now a passionate mobile App Gamer. Loving a challenge, he is always ready to get stuck in to both survival builders and puzzle solving games. He has been providing content for AppGamer since 2014.