Hidden Escape: Murder Mystery Chapter 2 - Late Night Woes Walkthrough
More Hidden Escape: Murder Mystery

This is our walkthrough for Chapter 2 - Late Night Woes of Hidden Escape: Murder Mystery. A puzzle adventure game from Vincell Studios. Set around a Cruise ship reality show where you will need to find objects and solve puzzles.
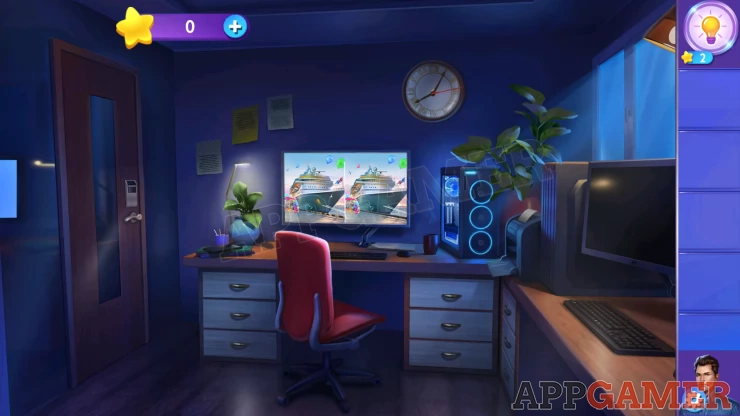
In Chapter 2 you play as Mark, the Producer of the Reality TV show. You start in his office.
Chapter 2 - Late Night Woes Walkthrough
Open the top left drawer on the desk and collect an Access Card.
Then open the top right drawer on the desk and look inside for a puzzle.
Drawer Puzzle
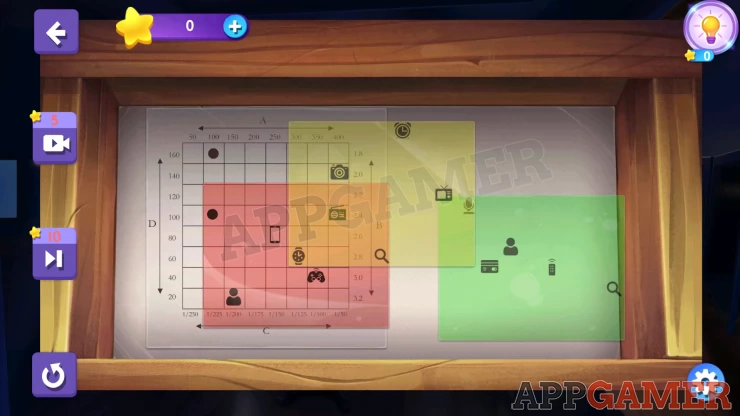
- To solve this slide the 3 colored sheets around over the grid to match up shapes.
- Move the red one up to match the circle first
- Then the Green one to the left to match the person outline.
- Finally move the yellow one to match the magnifying glass.
Solution: Show
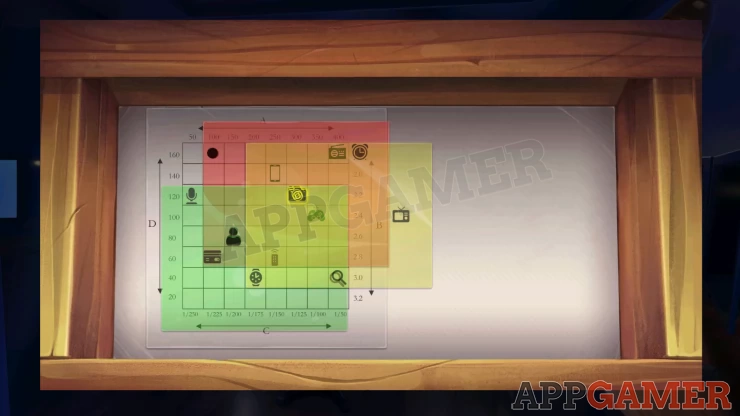
This will let you collect the Icon clue paper. Next tap on the Computer monitor to view the screen.
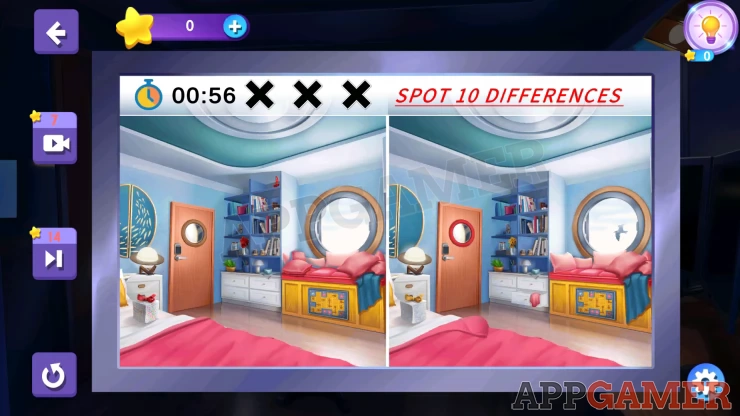
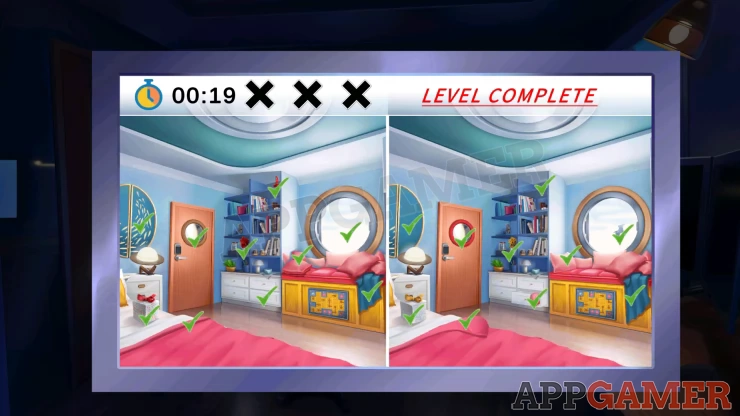
Spot the Difference

For this puzzle just tap on the 10 differences in the 2 images.
You have 60 seconds to find them all.
If you tap in the wrong place 3 times you will fail and have to restart.
Soluition: Show

Once done you will get a second level with another pair of images.
Solution: Show
With this complete you can then tap on the screen again and use the Print option to print and then collect the printed paper from the printer on the right.
Now use the access card on the door on the left to open it and move through to a studio.
Studio
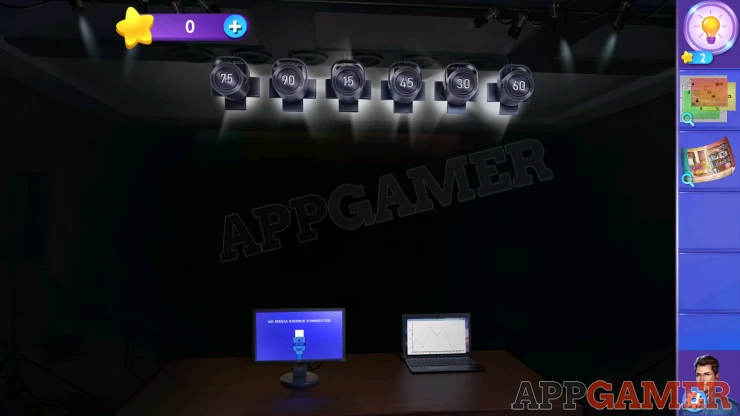
The lights are off and you need to solve the lighting puzzle. To get a clue tap on the laptop.
Lights Puzzle
- The graphs shows 3 positions 01 - High, 02 - middle, 03 - low.
- Then 6 numbers on the bottom which match those on the lights.
- Move the lights to match the correct positions.
Solution: Show

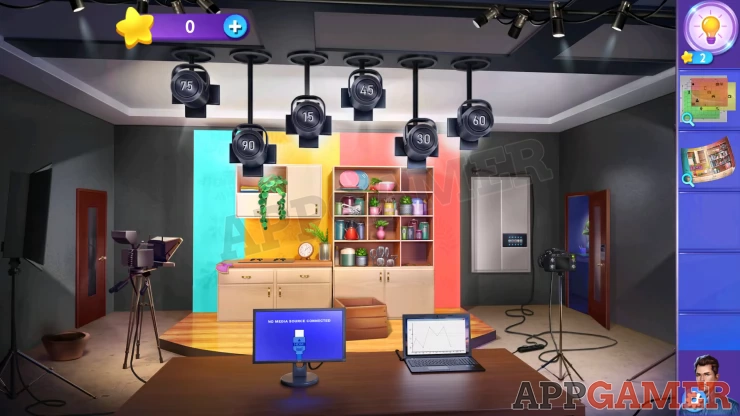
Now the lights are on, you need to find the missing items that have been put in storage.
First tap on the wooden crate on the floor to move it and then collect the key that is underneath.
Now use the key on the door on the left of the room to open it. Enter the Storage room.
Storage Room

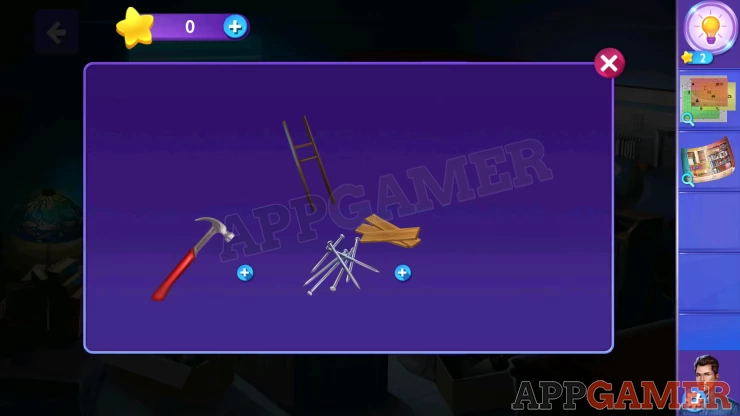
Collect 3 wooden plans from the room, one on the left, one on the right and one on the floor at the back.
To the right of the wooden crate in the center is a broken ladder frame, collect this.
Open the top right drawer on the large locked cabinet, you can then collect a knife from here. Then use the knife on the taped up box on the floor on the left. Collect some nails from inside.
Now tap to collect the hammer from the tool board on the right side behind the globe.
Now view the ladder frame in your inventory and add to it the Hammer, the nails and the wooden boards. This will repair the ladder.
Place the ladder on the wall below the plug. You can then tap the plug to unplug it.
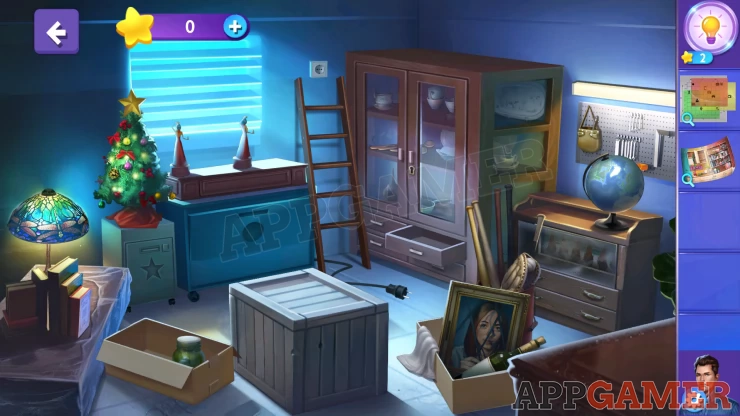
Collect the star from the top of the Christmas tree. You can then add it to the safe below the tree to open it. Take the Crowbar
Now use the crowbar on the wooden box in the center to open it. Collect some Mannequin pieces.
Next collect a white cloth from the box to the right of the large crate. Then use this cloth on the panel on the from of the drawers on the right side, below the globe.
Once it is cleaned you will see an image of 6 mannequin dolls. Now add the Mannequin pieces you have to the top of the box be the window. Then view them. You now need to arrange these to match the image.
Mannequin Puzzle
Tap each doll to turn it.
Copy the positions in the image below for help.
Solution: Show

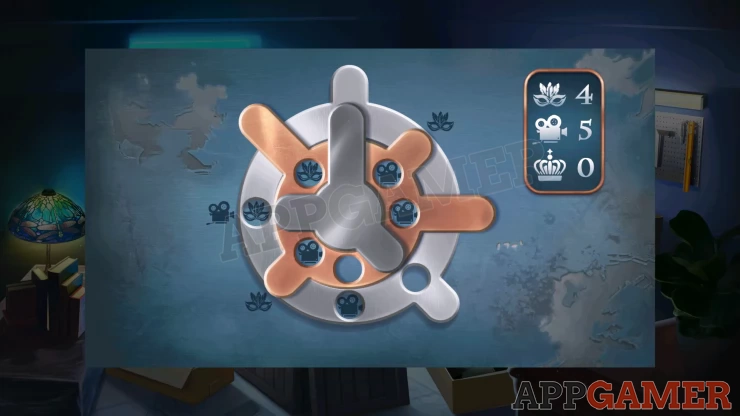
Once done collect the Key dials piece. Place this on the round slot on the blue cabinet below. Then view it to see the puzzle.
Dials Puzzle
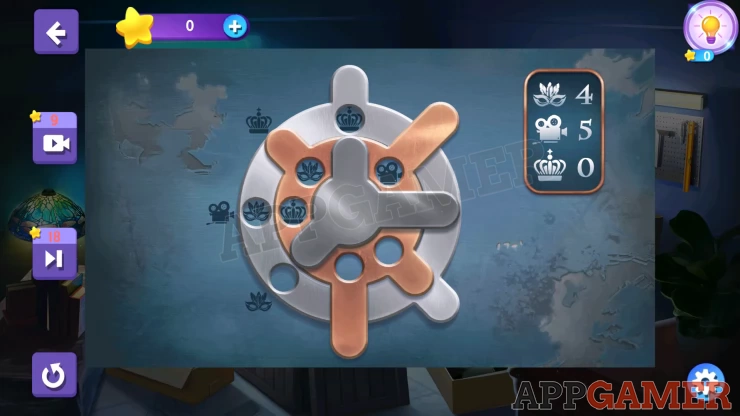
- Turn the 3 dials to reveal different symbol in the holes.
- Match the number of symbols show on the top right. 4 Masks, 5 cameras, 0 crowns.
Solution: Show
Collect the key and the HDMI cable from the cabinet that opens.
Use the key on the locked cupboard and collect the Pan, the ladles and the cups.
Now back out to the Studio and view the display cabinet under the lights.
You now need to place the items you have collect in the correct places.
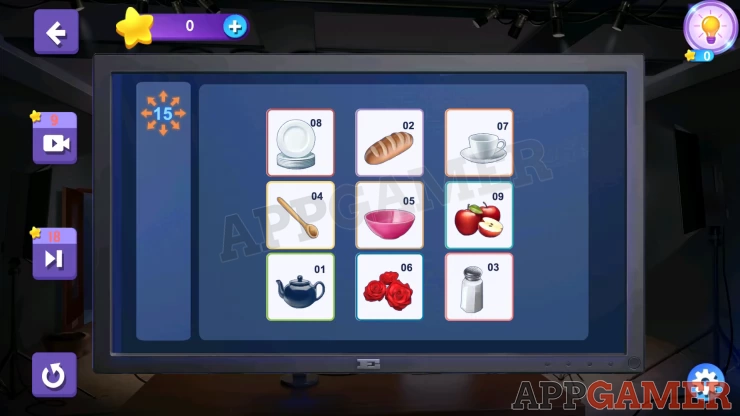
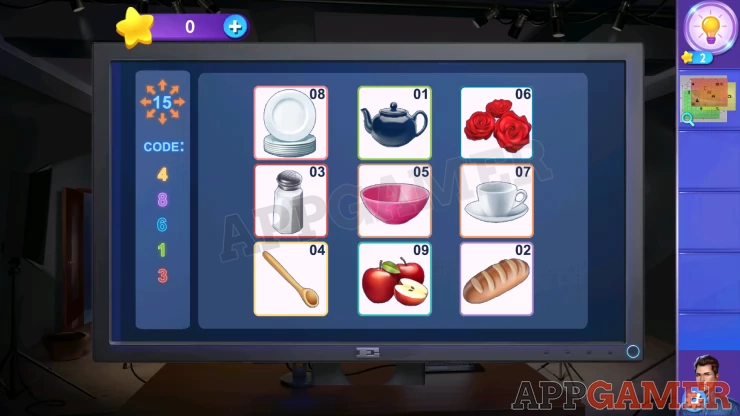
Kitchen arrangement
- You can use the picture that you printed out in the office for reference.
- Some items in the cabinet need to be moved.
- The pink 'Home' sign is the pink cloth in the left side drawer.
Now use the HDMI cable on the screen to the left of the laptop. Then view the screen for a puzzle.
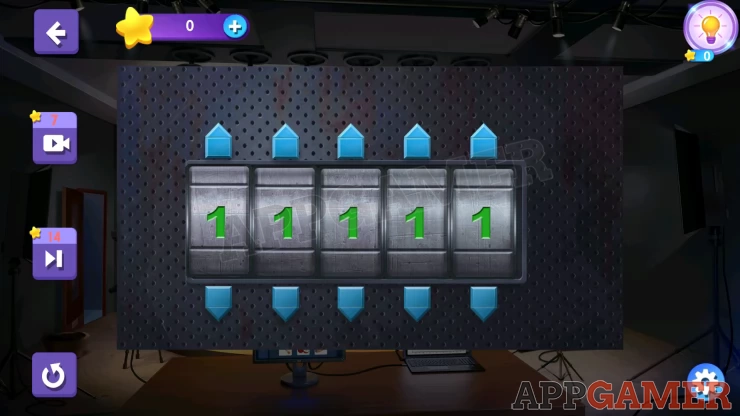
Numbers puzzle
- The clue for this is the number 15 in the top left.
- Arrange the tiles so that each row, column and diagonal all add up to 15.
- Check the solution below
- You will then be shown a code on the screen. You might need to view it again to see it.
Solution: Show
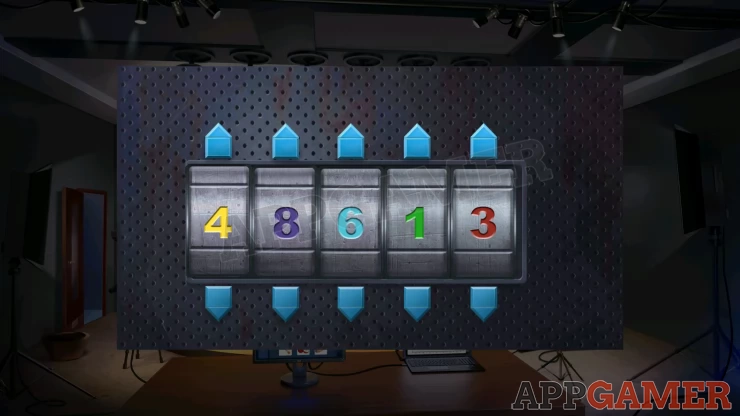
Now view the white wall locker on the right side of the room and enter the code.
Code: Yellow 4, Purple 8, Blue 6, Green 1,Red 3Show
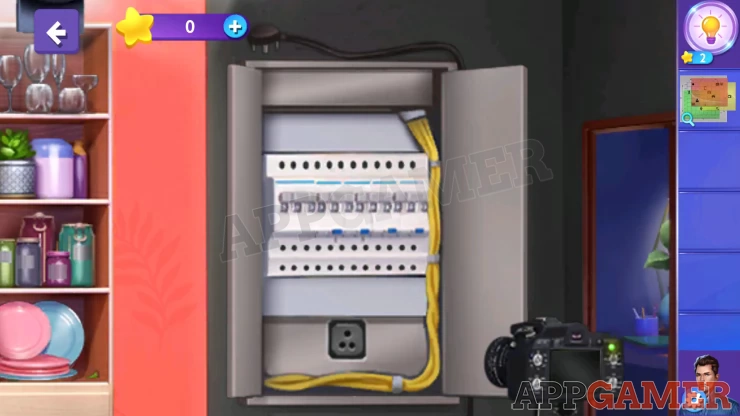
With the cabinet open tap the black plug that is at the top and then place it in the socket at the bottom.
You can now tap on the camera on the right side to view the back.
Camera Puzzle
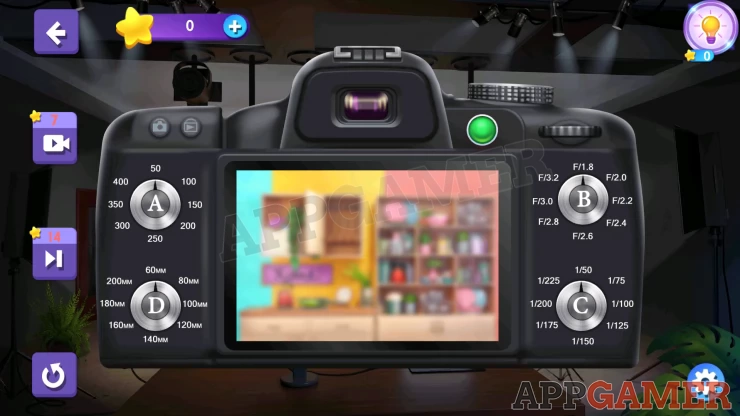
- You need to set the 4 dials, A, B C and D.
- The clue is the icon clue paper from before.
- Look at the position of the camera icon.
Solution: A - 300, B - 2.2, C - 1/125, and D - 120Show
You will then get the memory card from the camera. Head back to the Office
Office
Add the memory card to the computer on the right. Then tap on the monitor to see a puzzle.
Triangle Puzzle
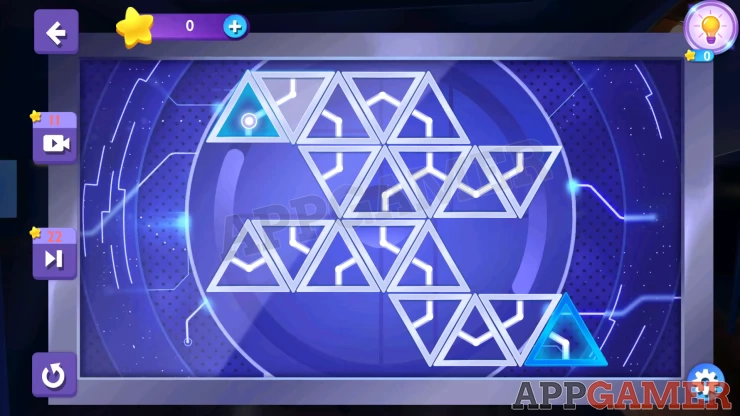
- You need to move the dot from the top left to the blue triangle on the bottom right.
- Tap an adjacent triangle to move to, as you do so it will rotate.
- Keep moving the dot towards the end.
- You may need to back track sometimes to arrange the lines and allow you to move forward.
Once you complete the first level there are 2 more levels to complete.
When you finish. the phone will start to ring. Tap to answer it.
Speak to Maggie to find out that you are now on the Show.

We have questions and answers related to this topic which may also help you: Show all
 With 20 years of experience in creating video game content for the internet and over 30 years as a gamer, Mark is now a passionate mobile App Gamer. Loving a challenge, he is always ready to get stuck in to both survival builders and puzzle solving games. He has been providing content for AppGamer since 2014.