Chapter 6 - Part 2
More Dream Escape - Room Escape Game
This is our guide to Part 2 of Chapter 6 of Dream Escape, another mysterious escape room game from Jusha.
You have now found your way from the bedroom up to the top deck of the ship.
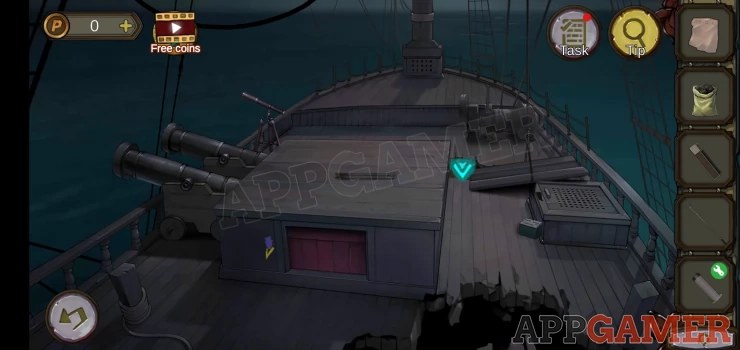
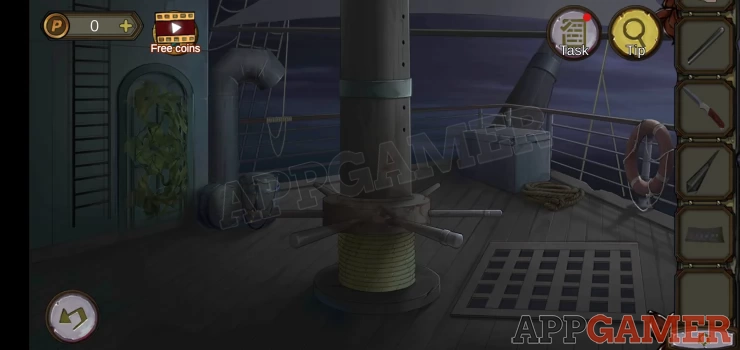
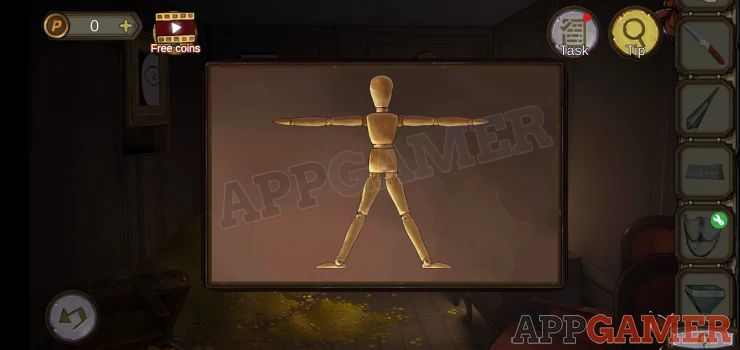
From the center platform collect a bundle of thin steel pipes. Note the drawing below.
Then tap to the canons on the left to find a red slider.
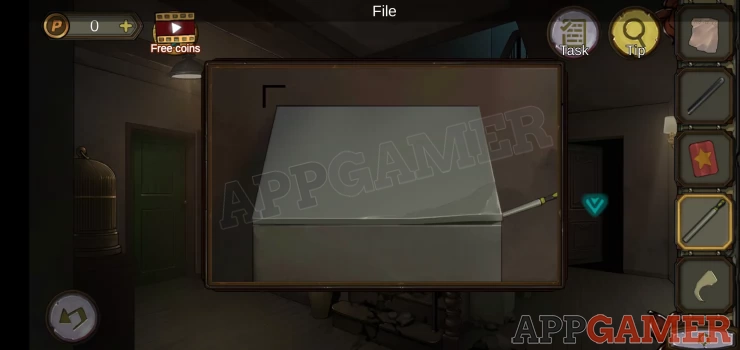
Next tap the box on the right to view it.
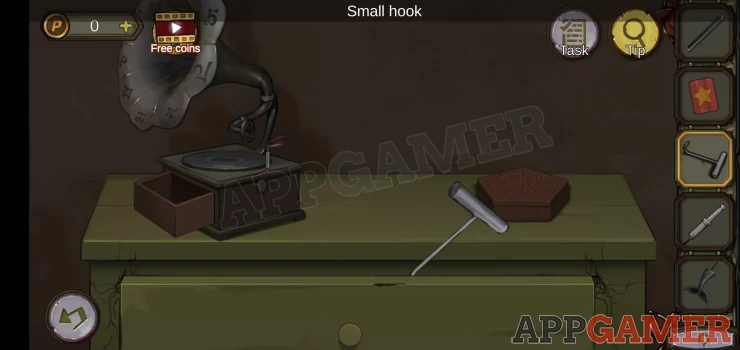
Collect a small hook
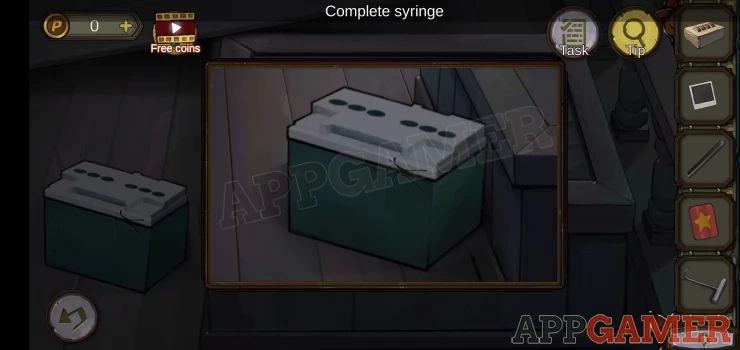
Combine the Syringe with the syringe piston. Then view the battery on the left.
Tap to remove the lid and then use the syringe on it to collect acid.
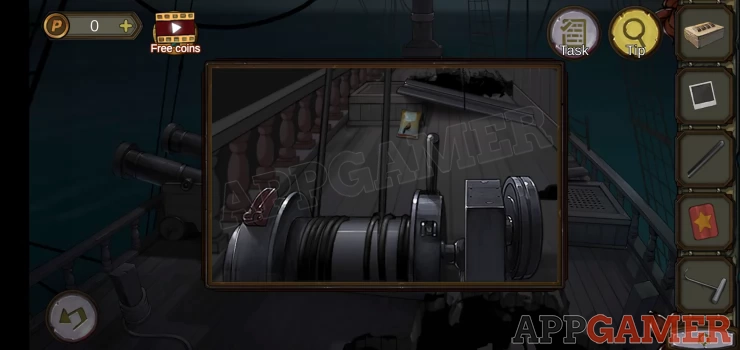
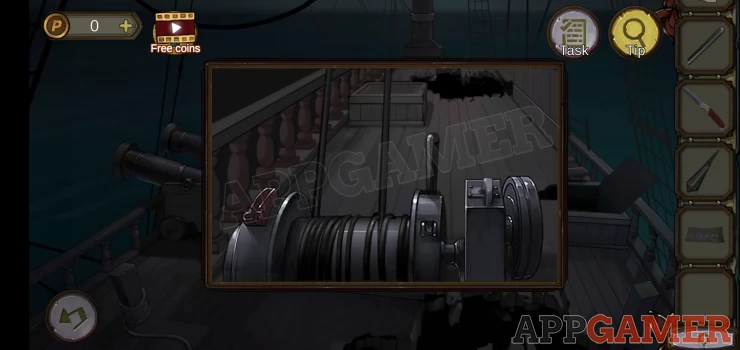
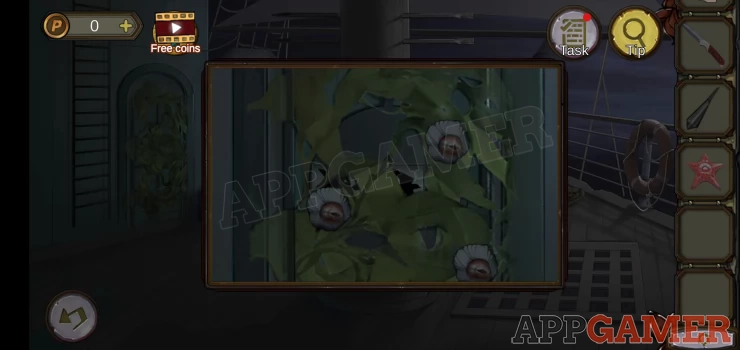
Tap the large winch on the right hand side of the deck to view this area and collect Bird feed
Now tap the front of the ship (top center) to view the bowsprit.
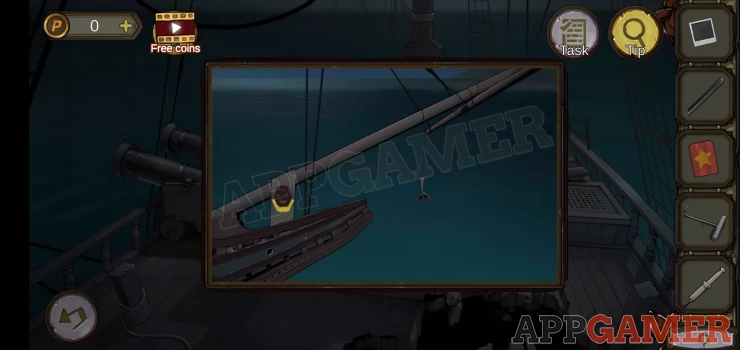
Use the harpoon to collect the pendant that is handing. Also notice the drawing.
Go back down and out to the hallway. View the birdcage on the far left.
Add the birdseed to the green pot and a parrot will enter.
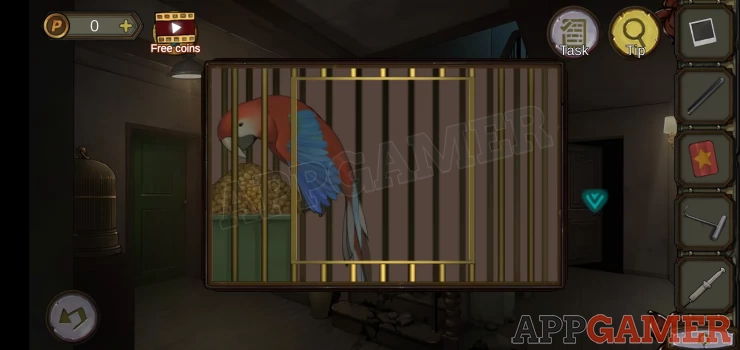
You can now view the painting by the stairs (the parrot was blocking it previously). It has a clue.
Show
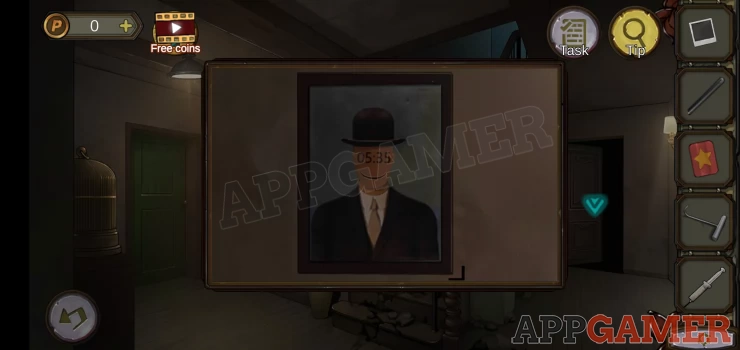
Go back into the bedroom and view the clock on the desk.

Hint: you have a time on the painting, check the diary pages for another clue.
Solution: Set the clock hands to 5:35 and then the date on the right to 1915 12|25Show
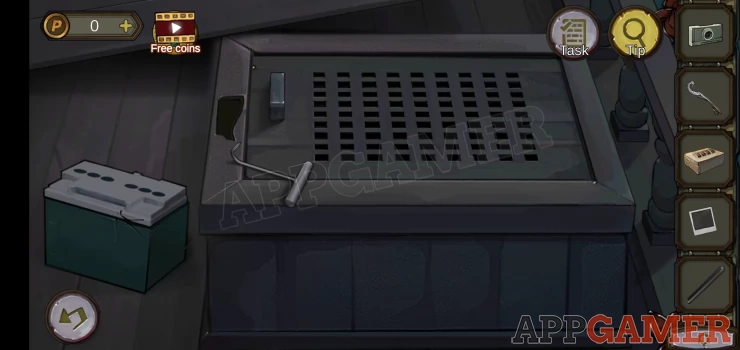
Collect a battery.
Now view the camera in your inventory. Add the battery and the photo paper. We can now use it to take Photos.
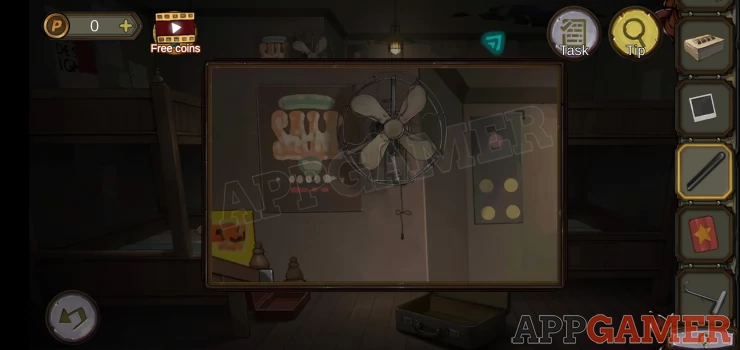
First tap to view the fan on the wall above the desk.
The notice the black corner shape on the wall to the right just above a dice image. Select the camera and tap on this.
A frame will appear and you will be able to take a photo.
We now need to find 3 more like this.
Exit to the hall and view the painting of the man in the hat. There is another corner. Repeat the process to take a photo.
Next, on the floor to the right of the stairs is a white box. Take another photo.
Then tap on the brown cupboards on the left to find another photo opportunity.
Now check the cigar box in the inventory
Hint: each dial has a corner shape above it.
Solution: Check the 4 photos. Each one has a letter on it and relates to one of the 4 corners.Show
Code: BQKYShow
Collect another diary page and eye drops.
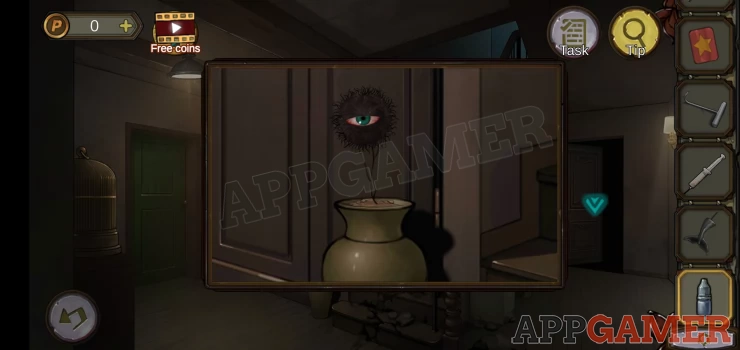
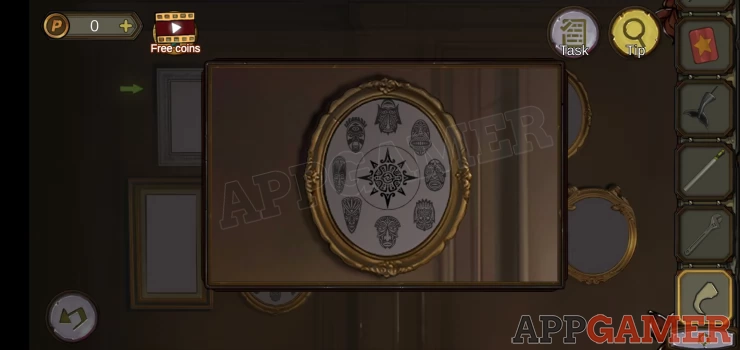
To the left of the stairs is a pot with a plant in it. It appears to have an eye.
Add the eye drops to it and it will move the eye, note the sequence of directions.
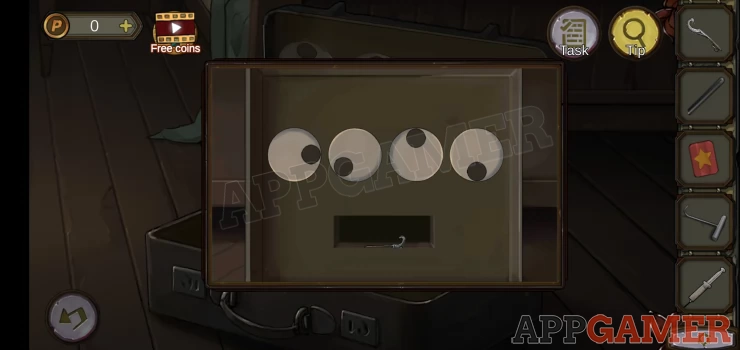
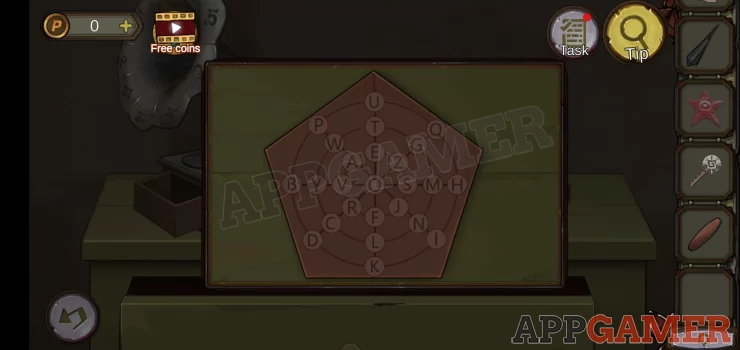
Go back to the bedroom and view the open case on the floor again. One the lid are 4 eyes.
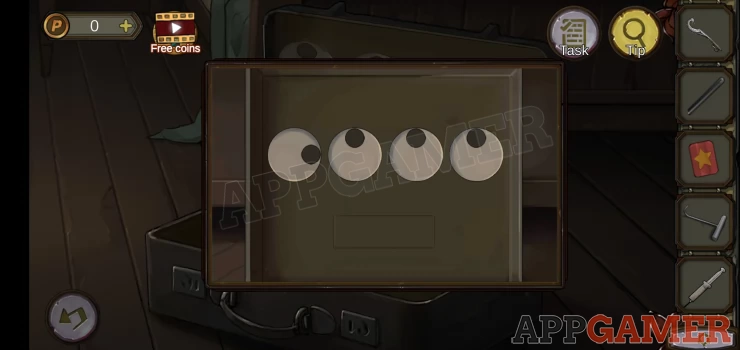
Set the eyes to point in the same order as on the plant.
Solution: Right, Down/left, Up, Down.Show
Collect a Half key.
Combine the two half keys to make a key.
Back out to the hallway, first tap on the green drawers on the right.
Use the small hook on the top drawers to open it and collect a file.
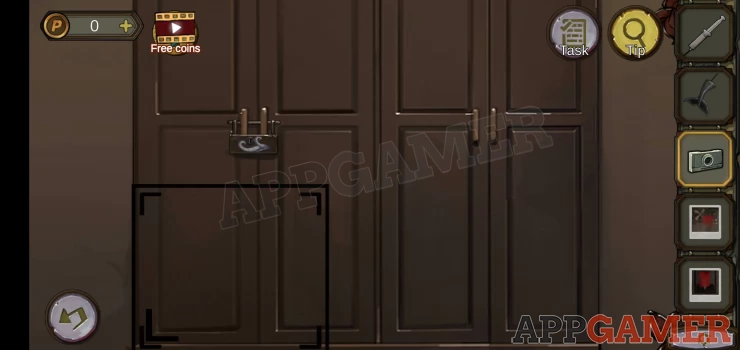
Next view the cupboard doors on the left. There is a padlock.
Use the key to open this and open the door.
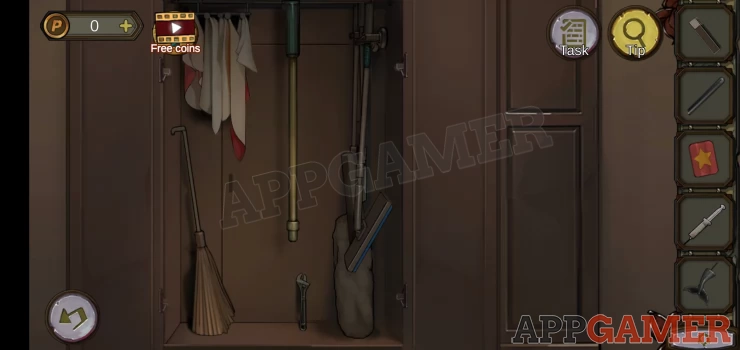
Tap the items in the cupboard to remove them, you will collect a wrench.
At the back is a secret door. Open this and go though to a secret room full of gold.
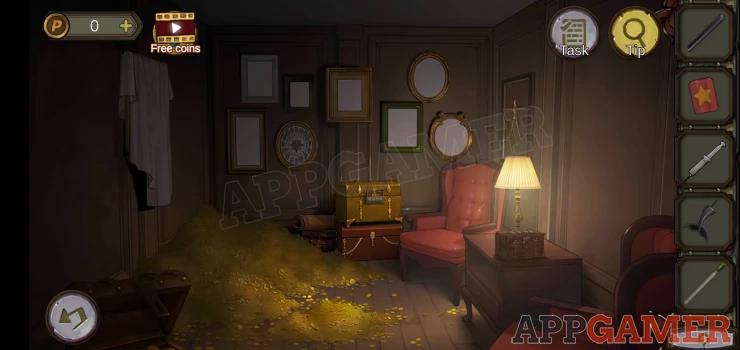
Notice the frames on the back wall. Only one has a picture in it.
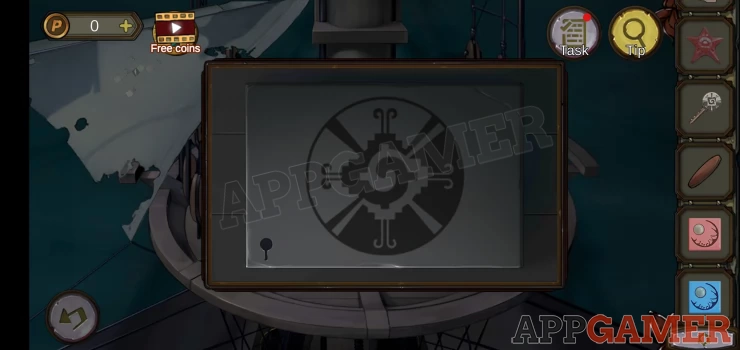
Below this is a large gold chest. View this to see a 4 symbol lock.
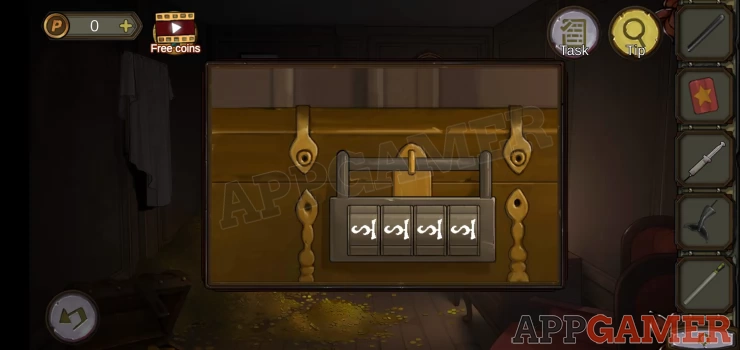
Hint: note the symbols are the same as the ones on the gramophone horn.
Solution: use the 4 highlighted symbols from the horn, clockwise from the top.Show
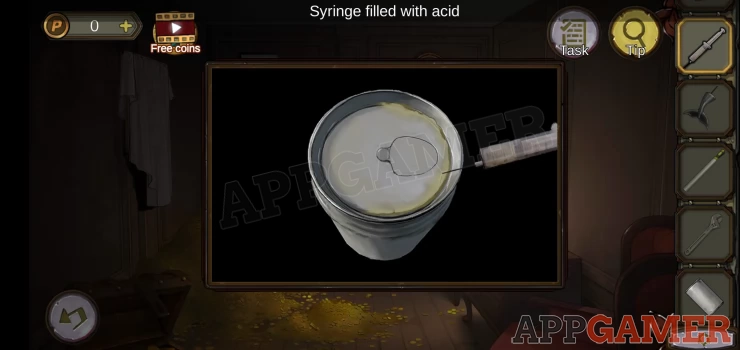
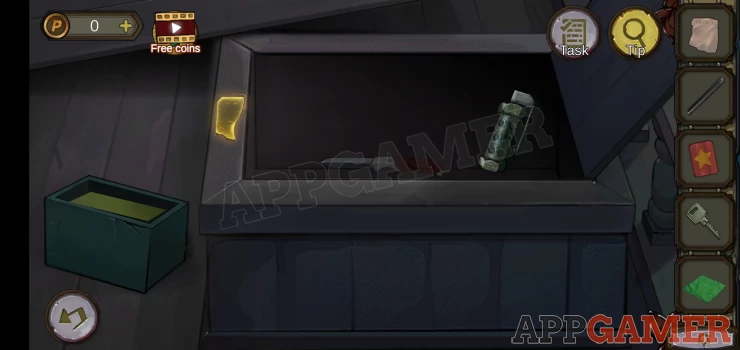
Collect a Can.
View the can and use the syringe of acid on it to remove the top.
Collect a metal piece.
Next tap on the brown box on the right, under the lamp.
This has a 4 symbol lock.
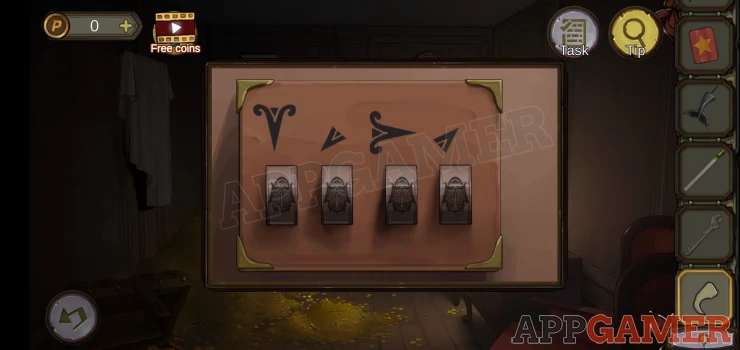
Hint: the clue is on the wall.
Solution: the 1 frame on the wall with a picture has machine symbols. On the box are 4 arrow shapes, use these to find the matching direction symbols on the picture.Show
Inside is an eye. Tap this and then when you back out you will see that the picture on the wall have changed.
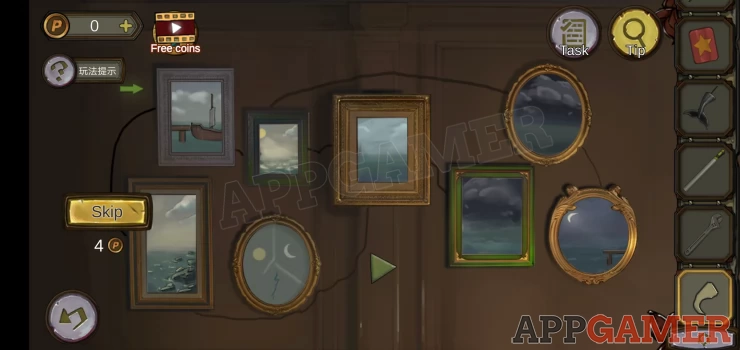
View the pictures and tap on the one with 3 segments to change a highlighted path between the pictures. When you tap the green play arrow, bottom center, the boat will sail from picture to picture from the top left. It needs to reach the bottom right. .
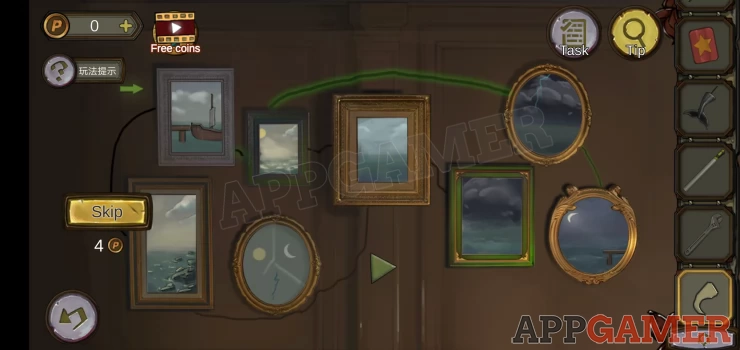
Once done collect a metal block.
On the top left of the room there is another painting covered by a cloth. uncover it and view this and the paint will melt away.
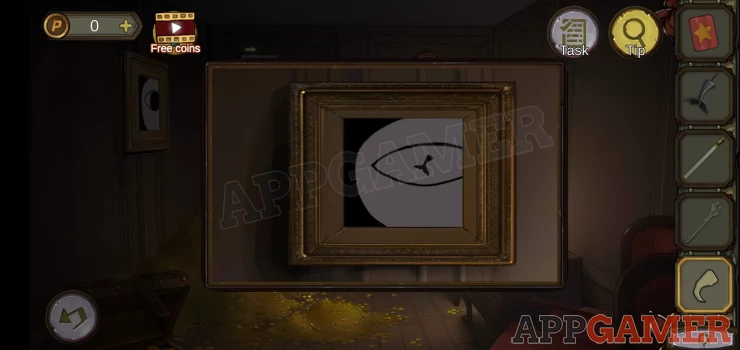
Add the fish tail pendant to the slot in the center and you can then collect a half rudder.
Now back out to the lower floor and go to the engine/boiler room again.
View the large boiler in the center with the ABC plate.
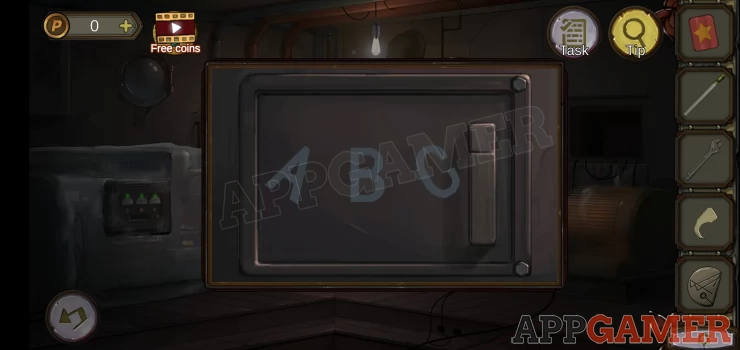
Use the wrench on this to open the cover.
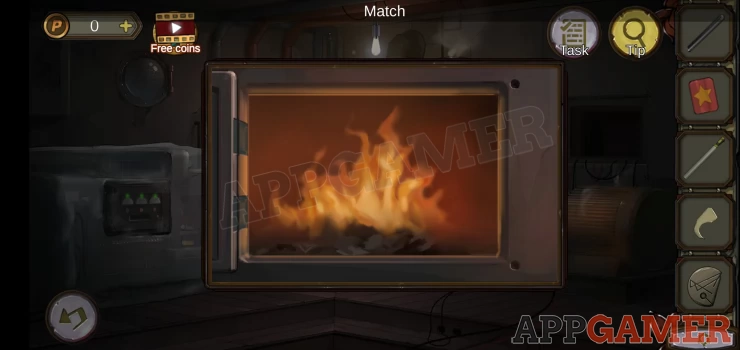
Add the coal and then use the matches to light it.
Now go to the room on the right of the lower deck where the locked prison cell was.
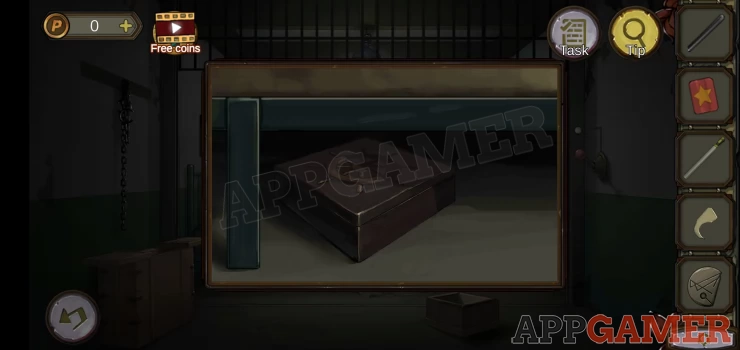
Under the bed there is a small box, view this.
Use the half rudder item on it to open it and collect a compass.
View the compass and add the metal block to it. This starts a puzzle mini-game.
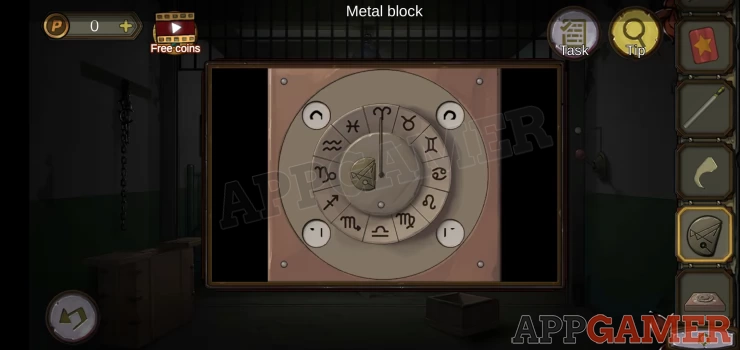
Outer symbols parts will spin. When they stop work out the symbol that the 4 parts will make when put together. Tap the matching symbol on the circle to set it.
You need to do this 5 times to complete the game. You can then collect a key.
Go back up to the main floor hallway, view the white box on the floor by the stairs.
Use the file to open it.
Collect a damp cloth.
Then go back up to the top deck of the ship. View the box on the right.
Add the metal piece to the slot on the left to open it and collect a switch blade and a flash bomb.
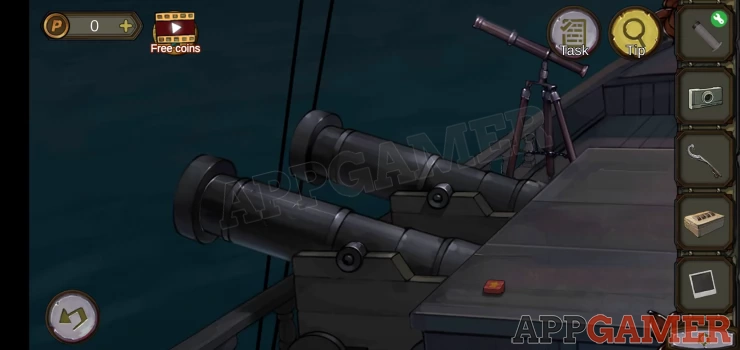
Then view the canons on the right, tap on the telescope at the back and use the damp cloth to clean the lens.
You then see a clue.
Go back down to the main floor hallway and you can now use the key to open the green door on the left.
Go through to a dark room. You are surrounded by red eyes.
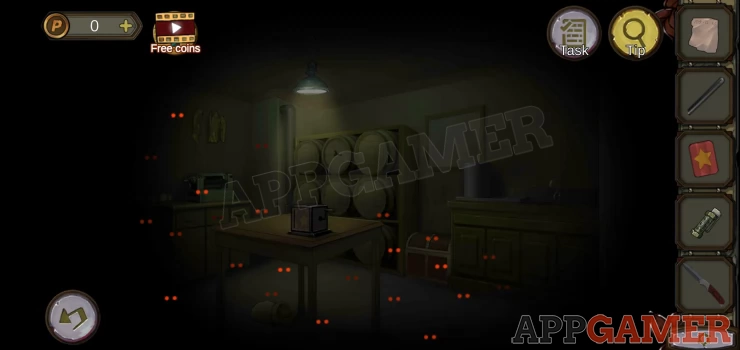
Use the flash bomb here to clear the room.
First tap the box on the table.
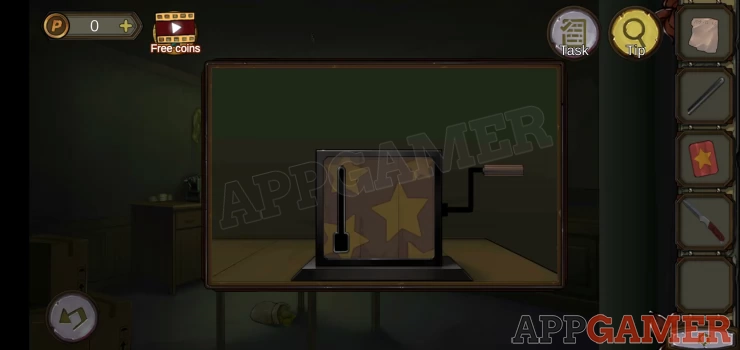
Add the red slider to the left and tap and hold the handle to wind the toy until the top opens.
Collect a pendulum.
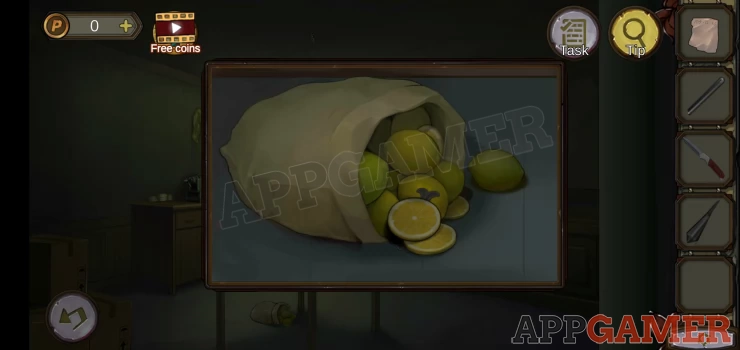
View the bag of fruit under the table, tap to remove one and collect a 'metal piece'
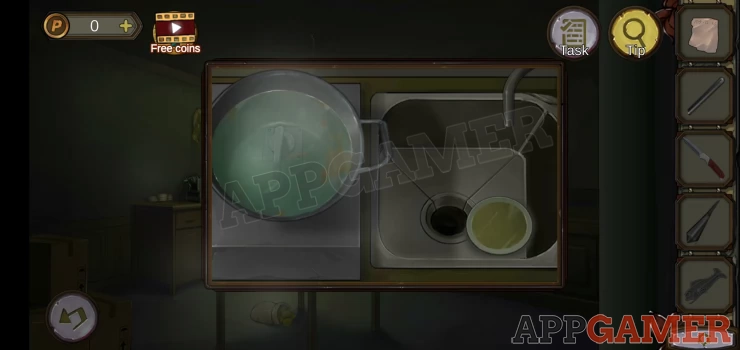
Next view the sink on the right. tap the small dish of liquid in the sink to empty it and see a clue in the bottom .
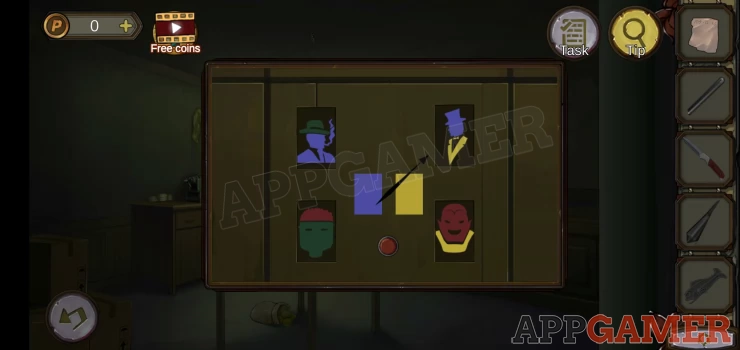
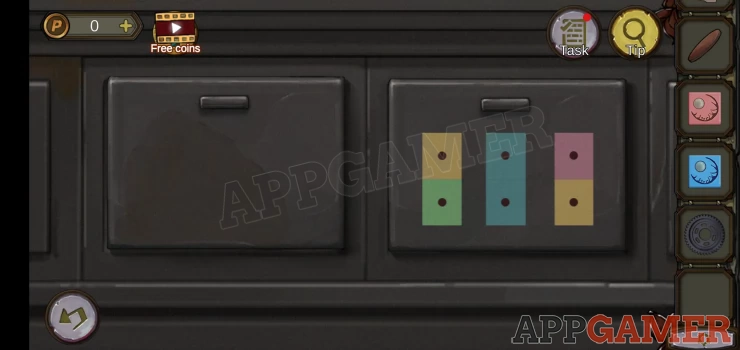
Now tap the brown box below the sink. This has a puzzle with 4 figures.
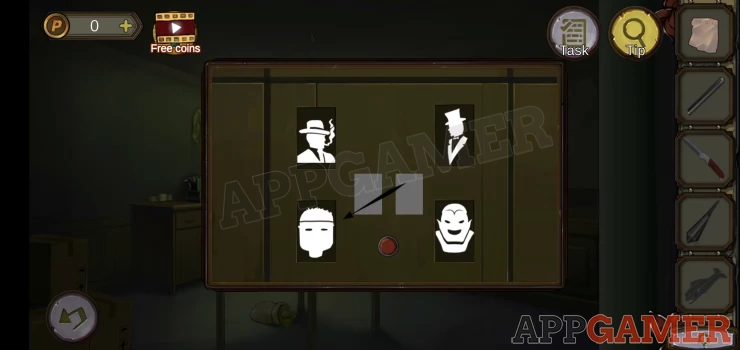
You will also have seen these around the ship in colors. Press the red button to start a mini game.
The pointer will spin and point at a random white figure and you can tap the 2 squares to set the correct colors for each.
Do this for all 4 to complete the puzzle.
Solution: Show
Collect another metal piece and a long copper spoon.
View the sink again and use the long copper spoon on the large bowl on the left to collect a handle.
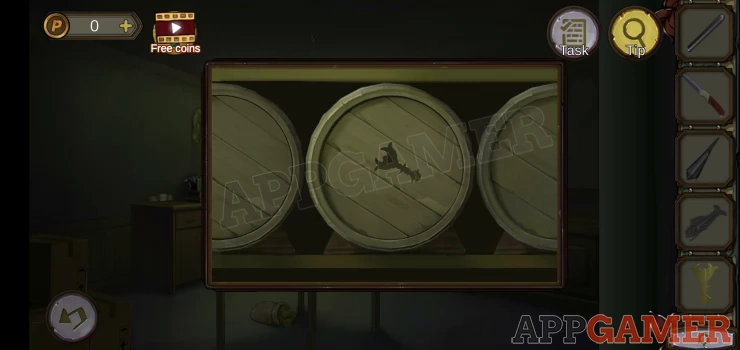
Then view the rack of barrels on the left.
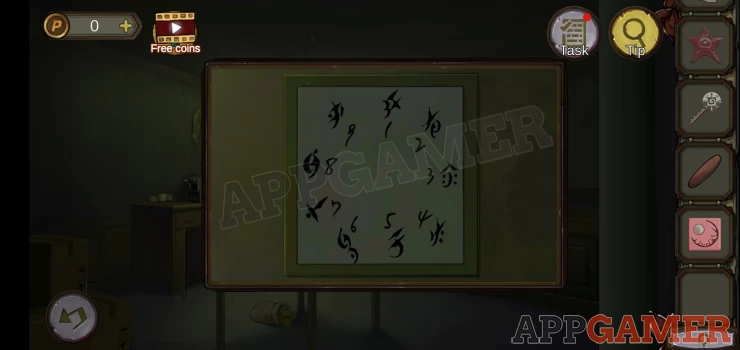
Add the correct shaped metal sheet to the slot to open a barrel and collect a piece of diary paper, and a note.
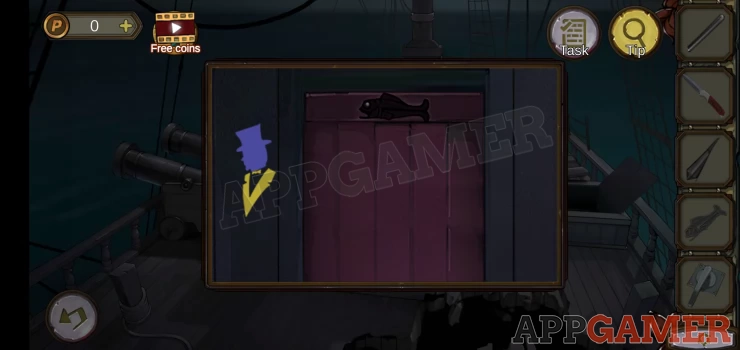
Exit the room and go up onto the top deck. Tap to view the red panel near the bottom.
Use the fish shaped metal sheet on the top slot to open it and collect Insect Repellent.
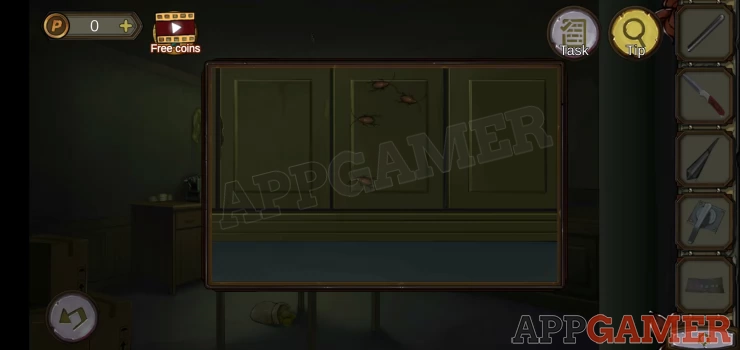
Go back down to the galley room, view the cupboard behind and to the left of the table. There are insects on it.
Use the repellent to clear them away, then open it and collect a screw.
Go back up to the top deck and view the large winch at the end on the right.
Add the handle to this and then also the screws to fix it.
Tap this to use the winch and a steel plate will appear allowing you access to a new area.
View this new area with the mast
Collect from the barrels to the left a Broken fishing net.
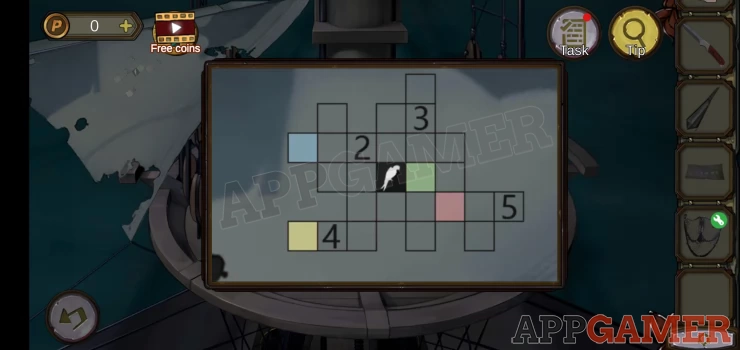
Next view the top section of the mast with the small holes.
Add the bundle of thin steel pipes to it to make steps.
You can now use these to go up to a crows nest.
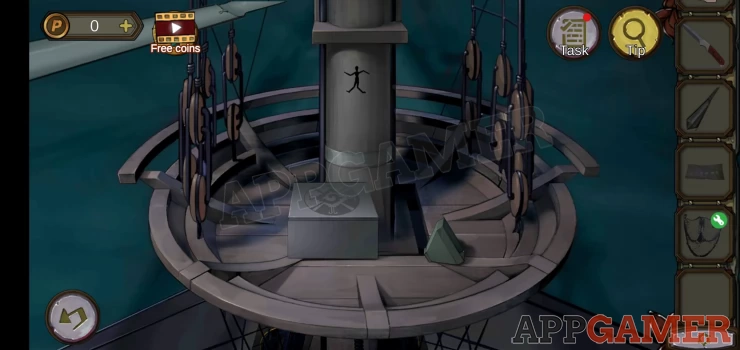
Collect a funnel and also Note the clue figure on the mast
Now go back down to the main floor, through the cupboard to the secret room with the gold.
On the top right wall there is a picture of a wooden doll.
Hint: tap the limbs to arrange them to match the clue above.
Solution: Show
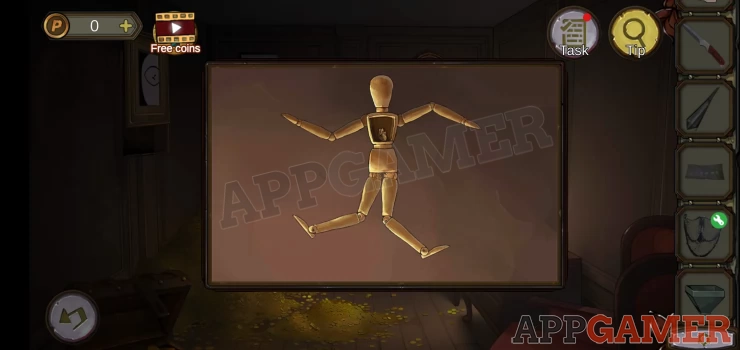
Collect a 'heart'
Return to the galley room and view the wooden chest next to the sink.
Add the heart to open it.
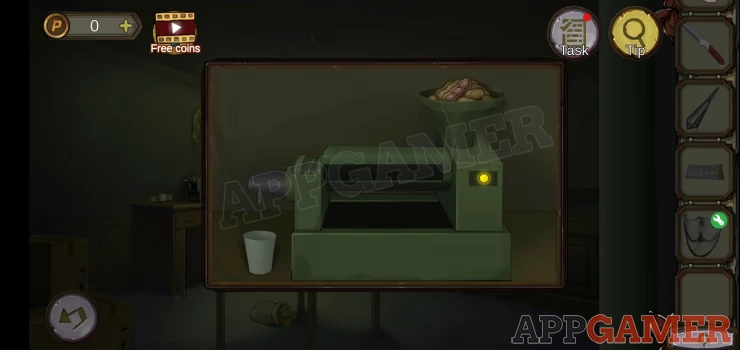
Collect a bunch of peanuts.
Now view the grinder machine on the unit to the left.
Add the funnel to it and then place the peanuts in the funnel. Press the button to activate the machine. Then collect the peanut oil.
Go back to the deck and the area with the mast.
View the turntable and ropes at the bottom an use the peanut oil on them to un-stick it, then tap it so that the sail will unfurl.
Go back up the mast to the crows nest. You can now see the sail on the left with a clue.
Hint. There are 4 numbers, note how these show the number of square the bird in the center needs to pass through to get to them. There are also 4 colors.
Go back down the mast and tap on the large box at the back. There is a 4 digit code required.
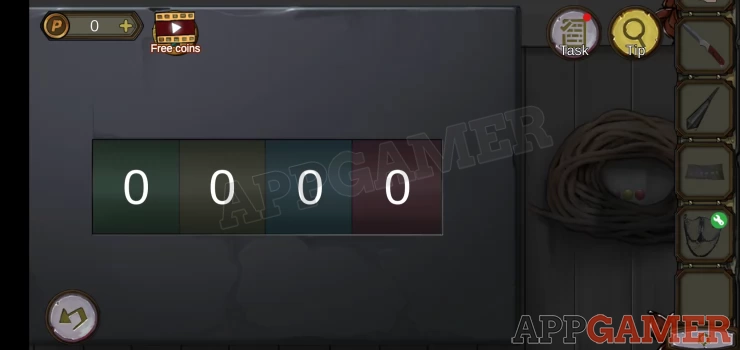
Hint: the numbers each have a color.
Solution: from the clue above count the number of steps to get to the color from the center.Show
Code: 1543Show
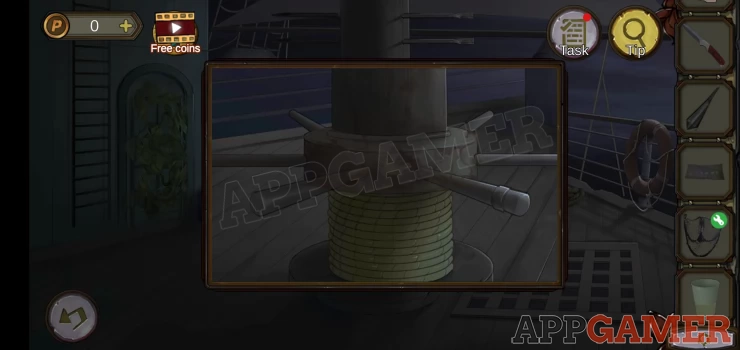
Collect a round runner. Also note the clue. Then tap the rope on the right to move it and collect a sewing kit.
View the sewing kit. It has 6 colors on it.
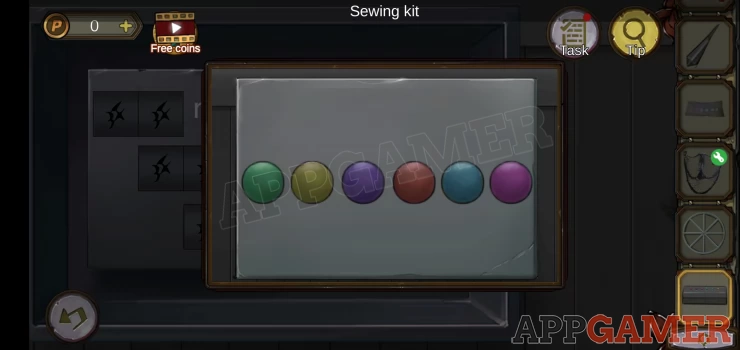
Hint: you also have a note with 6 colors.
Solution: swap the colors on the kit to match the note.Show
Collect the 'sewing' - needle and thread.
Combine the broken net and the sewing to make an intact fishing net.
Now tap the side of the ship on the right to view the sea.
Use the net on the water and you can collect a starfish
Now back up to the first are of the deck and view the canons on the left.
Add the round runner to the canon to let you use it and start a minigame.
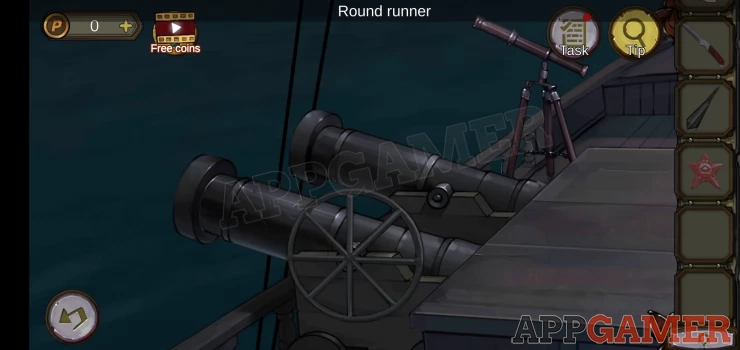
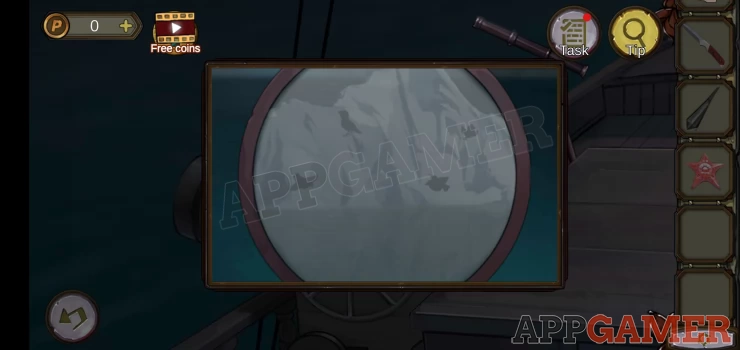
Hint. fire the canon when the target is on the 4 loose rocks to destroy them.
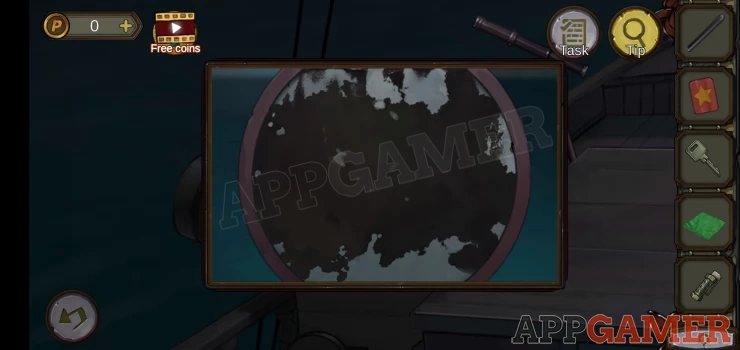
You can then use the telescope to view a clue on the mountain.
Show
Go back to the mast area and view the door on the left. with green on it.
Use the switchblade on the shells to remove them and find a puzzle lock with bird shapes.

Hint: use the clue from the mountain that you shot with the canon to set the symbols.
You can then enter the control room.
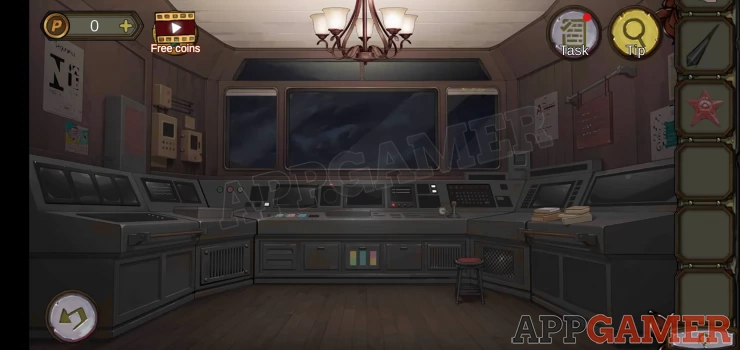
View the books on the console on the right.
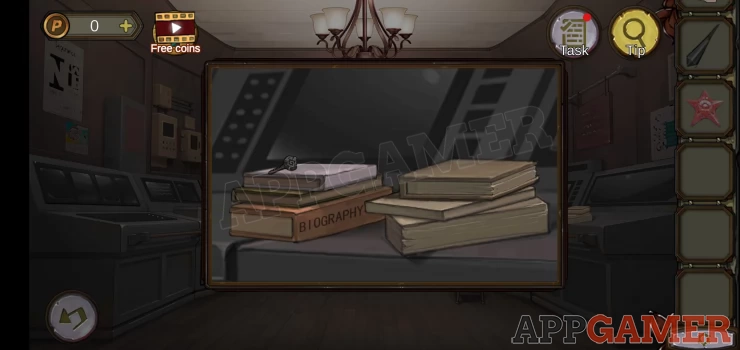
Collect a key, and note the Biography.
Tap the top book on the right to open it and collect a button.
Above this on the wall is a sign. View this for a clue.
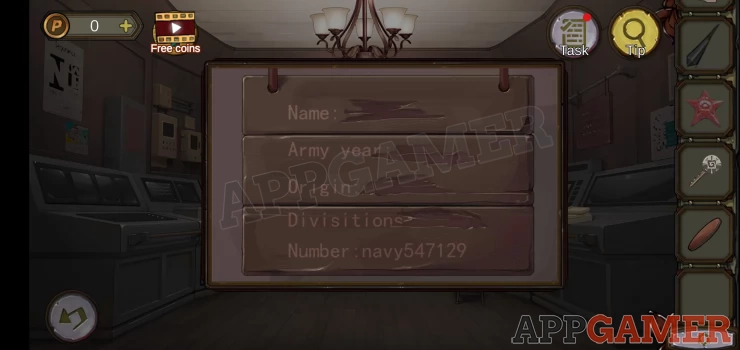
Clue: navy547129
You now need to go back down to the middle deck hallway.
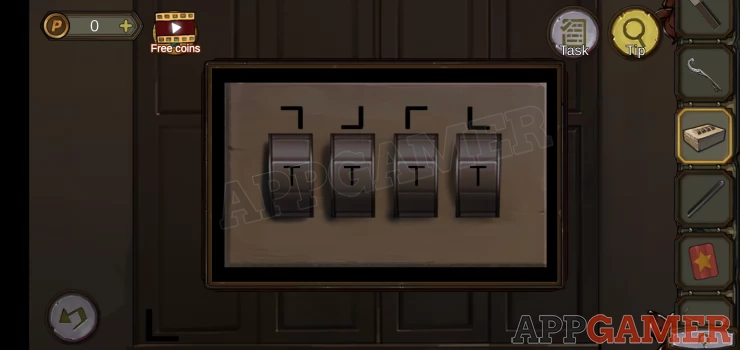
View the green drawers on the right and tap on the brown box. This has a pattern of letters on it.
Add the pendulum to it to let you use it.
Solution: tap out the word BIOGRAPHY to move a counter around the box.Show
Open it and collect a Cube.
Next check the galley room on the left and view the picture frame on the wall above the sink area.
This shows 9 numbers with an associated symbol for each.
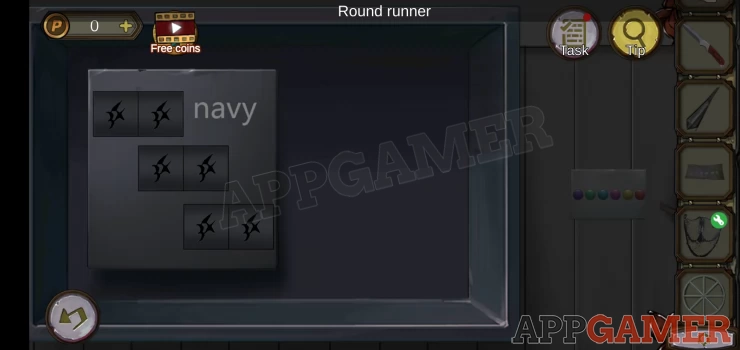
Go back up to the top deck and the front mast area. view the large box again, inside is another box with the word navy. This is a puzzle.
Solution: get the symbols that match the numbers from the clue above and set them. The pairs are 54, 71, 29Show
Collect a second cube.
Then go up to the crows nest and view the box with a patterned lid.
Use the key to open it and collect a gear.
Enter the control room again and first view a set of boxes on the left wall.
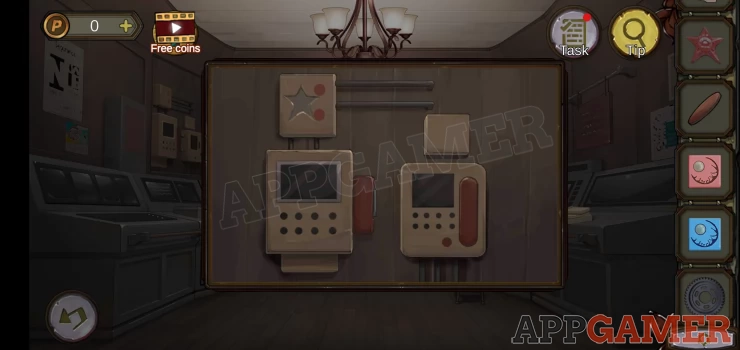
Add the starfish to the top left to reveal a clue. (blue dots)
Next tap to view the bottom center panel of the central console.
Open the left panel and collect a drawstring.
Back up and tap on the top right window with a blind.
Use the drawstring on this to pull down the blind and reveal a clue. A dice with 2 colors.
Go back to the central console again and see the panel on the right.
Hint: this has 3 dice style inputs, tap the color sections to change the number of dots.
Solution: you have the dice on the blind. Another dice style pattern with 2 blue sections on the wall to the left. And 1 more dice pattern below in the bedroom on the wall by the fan.Show
Code: Yellow 5, Green 2 | Blue 6, Blue 6, Red 1, Yellow 4Show
Collect a green cube
Now tap on the left console to find this panel.

Add the gear to the top right and the button to the lower right.
Press the button to find a puzzle.
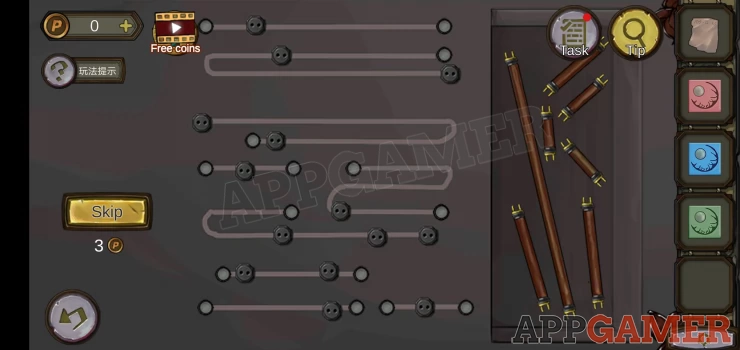
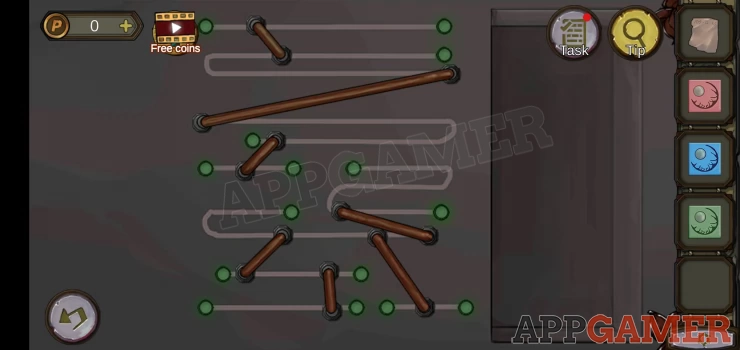
Hint: drag the connectors on the right to find between pairs of sockets on the left to complete all the connections.
Solution: Show
Now view the top of the central console to find this puzzle.
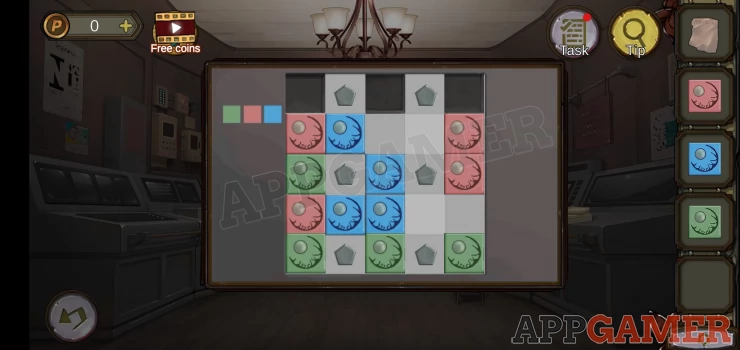
Add the 3 cubes to it to start.
Tap adjacent squares to move the cubes.
Solution: arrange the cubes in columns with green on the left, red in the middle and blue on the right.Show
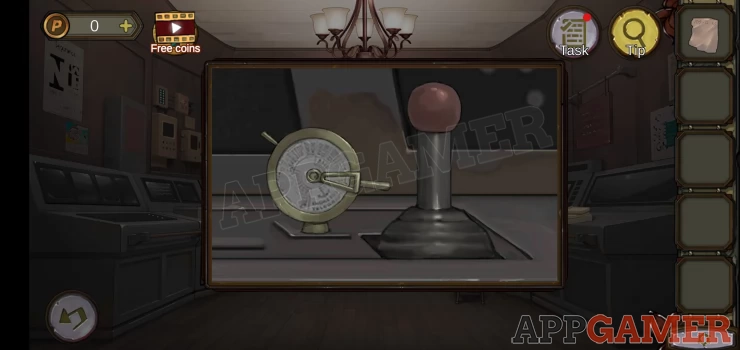
On top on the central console to the right is a control lever.
Use this to start the ship.
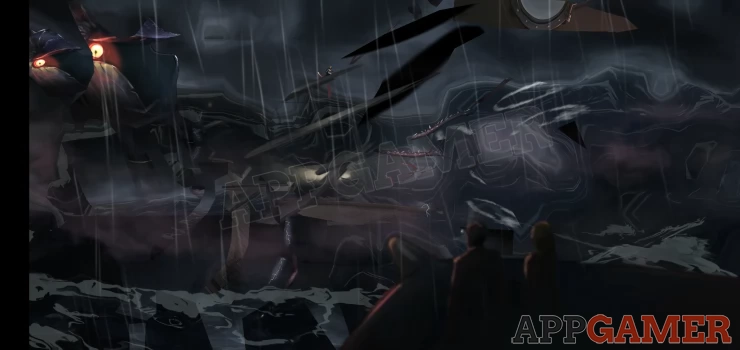
You will need to answer a phone on the left then you will get the ending cut scene.
We have questions and answers related to this topic which may also help you: Show all