Chapter 1 - Part 2
More Dream Escape - Room Escape Game
This is our guide to part 2 of Chapter 1 of Dream Escape, another mysterious escape room game from Jusha.
You have made your way upstairs in the mysterious house and have entered the Office room.
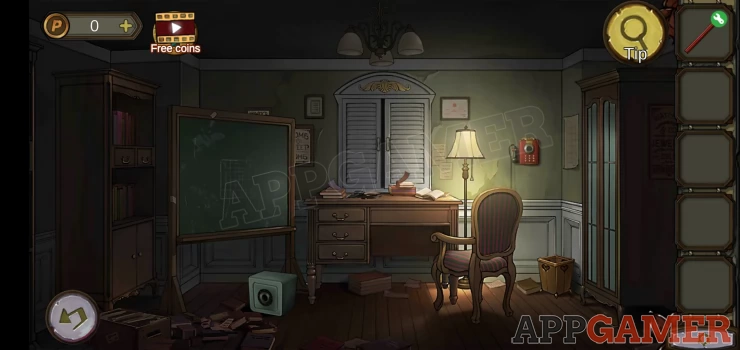
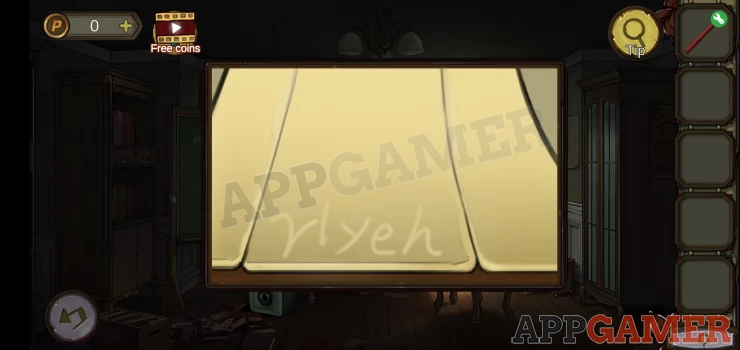
First tap to view the lamp shade on the right.
Note the clue letters written there.
Clue: rlyehShow
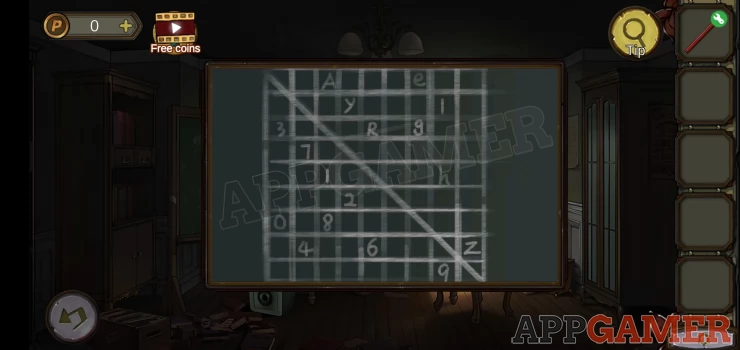
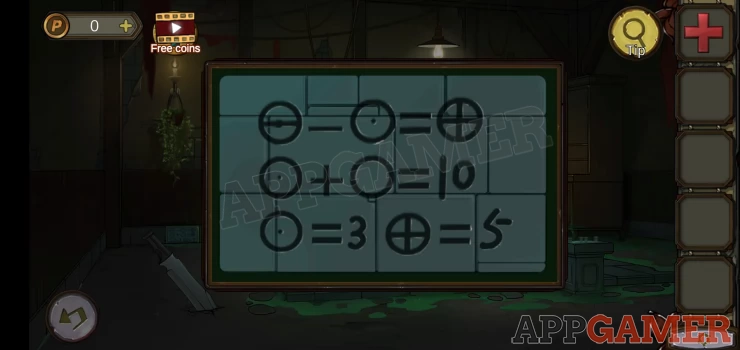
Next tap to view the green chalk board on the left
This is another clue
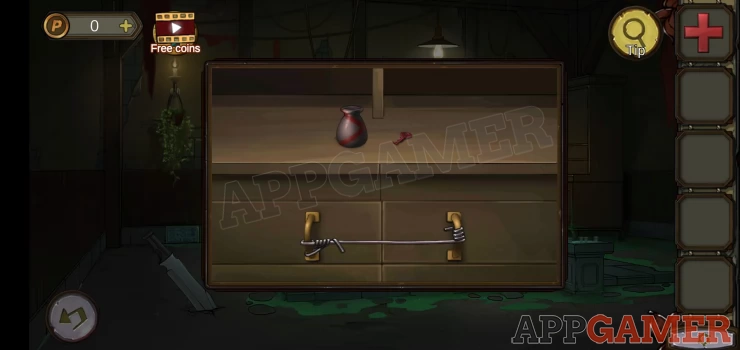
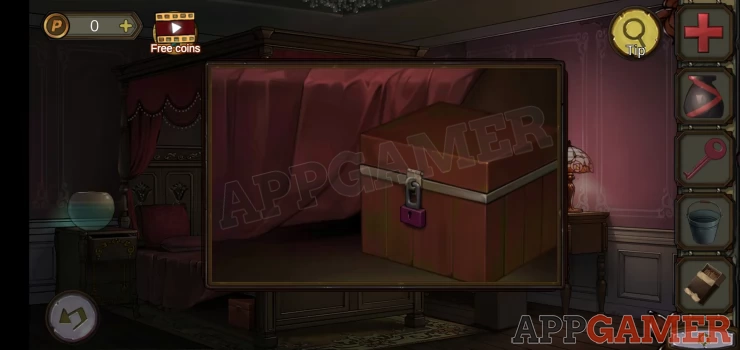
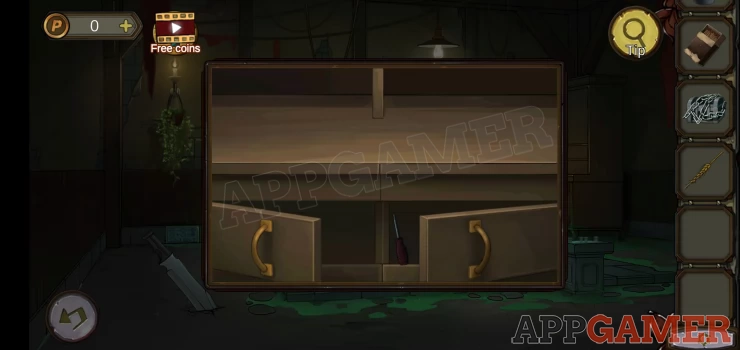
Now tap to view the desk
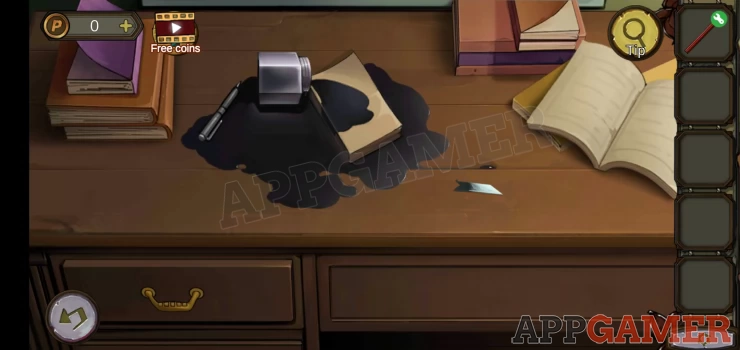
Collect a blade.
Combine the blade with the new pencil to collect a pencil (now sharpened).
Then tap on the note book on the desk that is covered in ink.
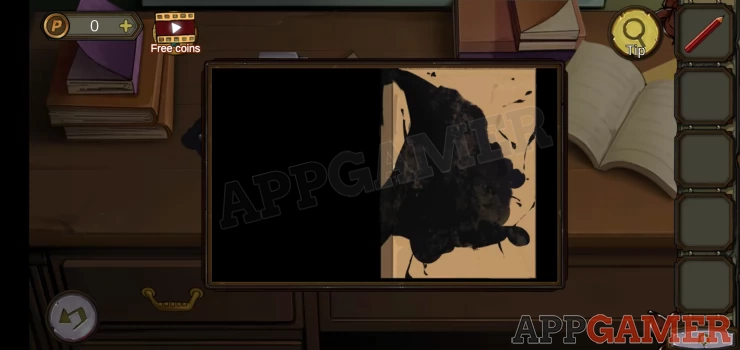
Then tap again to open it, you will get a blank page.
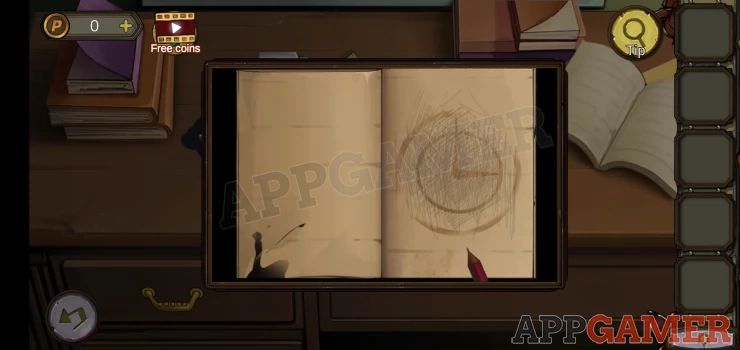
User the pencil on this to reveal a shape drawn on it. A clock shape.
Show
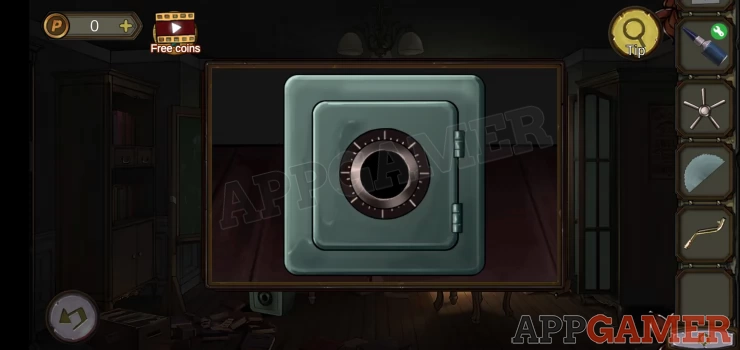
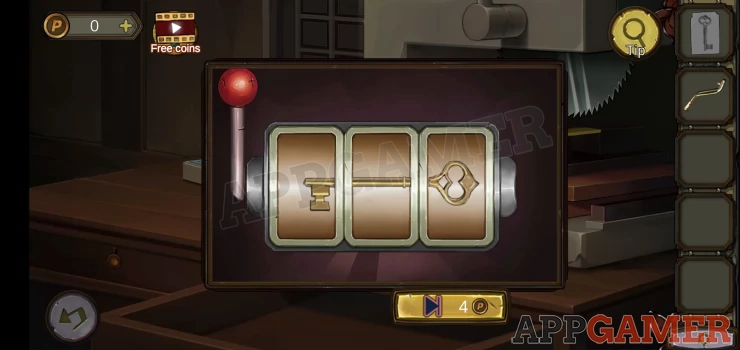
Now tap on the drawer bottom left. This has a 5 digit code lock.

Hint: Use the clues found above to get the code.
Solution: translate the letters from the lamp to numbers by matching them diagonally across the board diagram.Show
Code: 14706Show
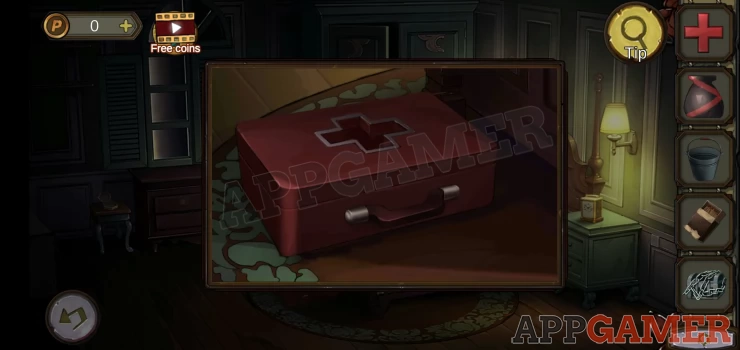
Collect the detergent
You now need to back out and go downstairs to the living room.
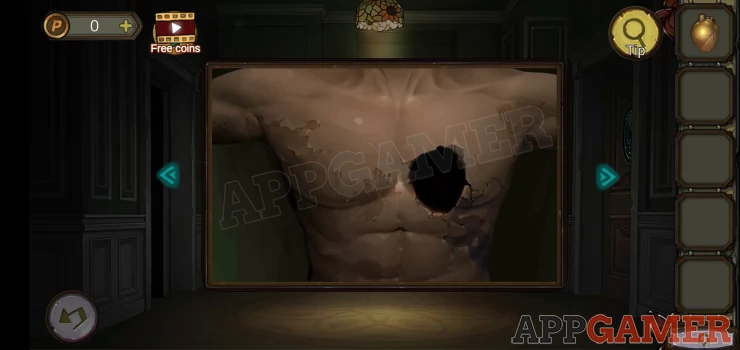
View again the picture on the wall that is covered with dirt
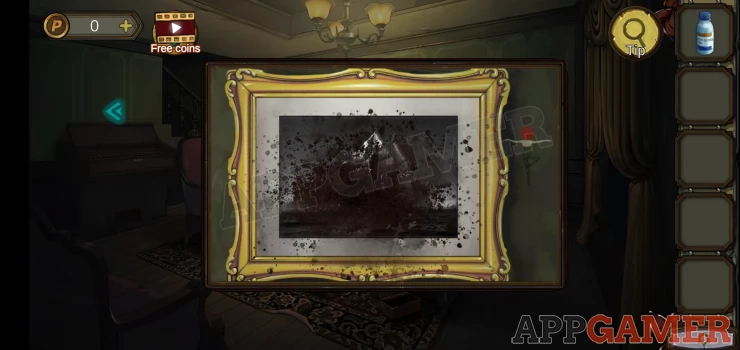
Use the detergent on the picture to clean it and reveal a clue.
Go back upstairs to the office room. Tap on the far right to find a cupboard door with a 4 letter lock.
Use the clue from the picture to open it.
Code: LOVEShow
Collect a pocket watch
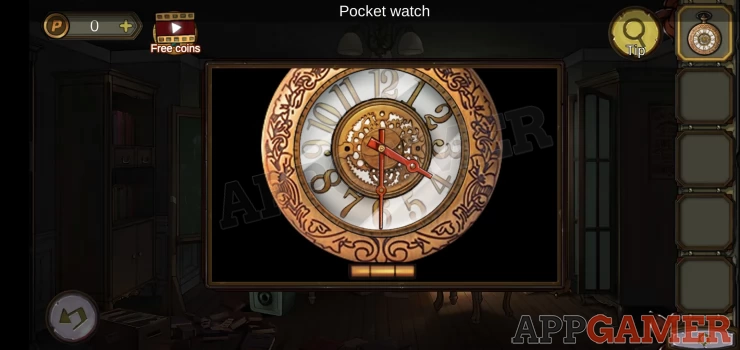
View the watch and set the time on it by tapping the hands.
Solution: set the time as on the notebook. 3 o'clock
Collect an Ethylene Ripener
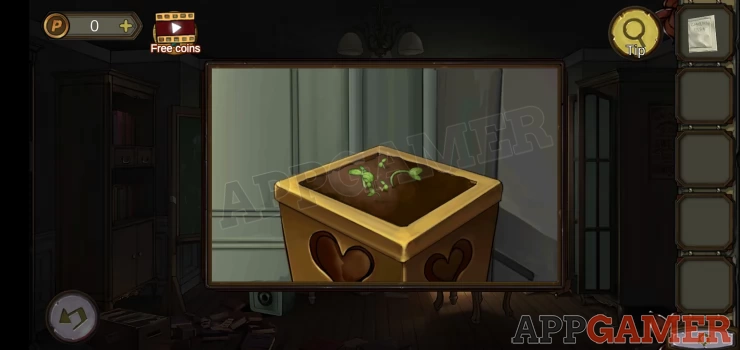
Next tap to view the square pot in the bottom right of the room. This has some seedlings growing.
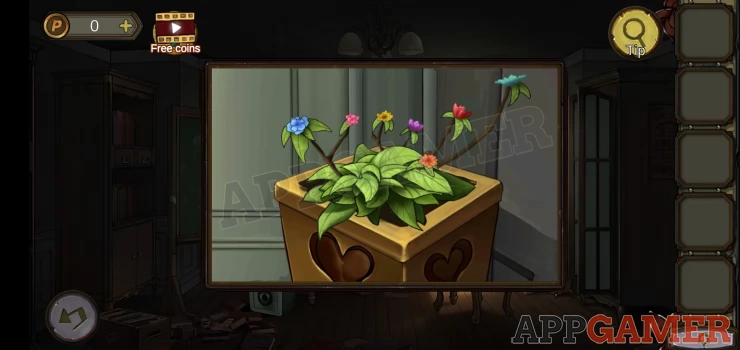
Use the ripener on it to make the flowers grow.
The flower colors are a clue.
Show
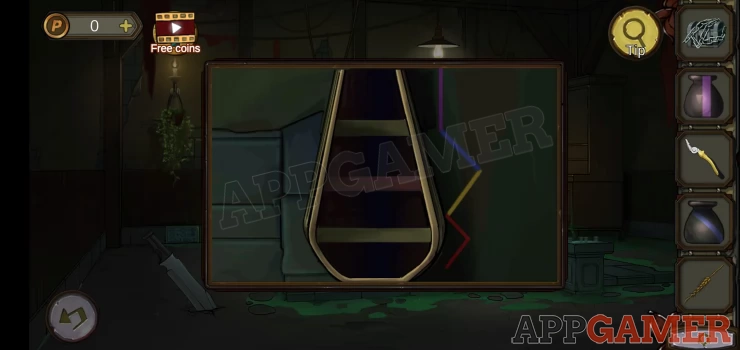
Now tap to view a book shelf on the top left of the room. There are books that you can rearrange.
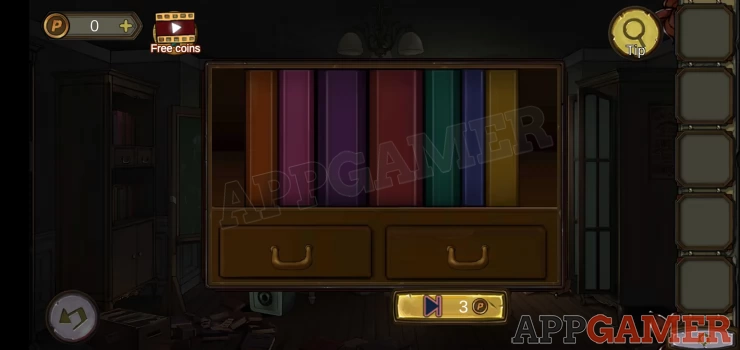
Solution: Switch the books by tapping pairs to match the order of the flower colors.Show
Order: Show
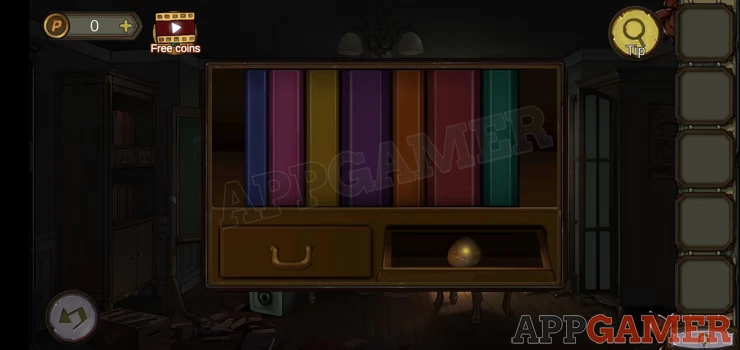
Collect a heart
Back out to the landing and tap on the small statue to the right.
Place the heart in the hole and you can collect a key.
Go back downstairs to the back room.
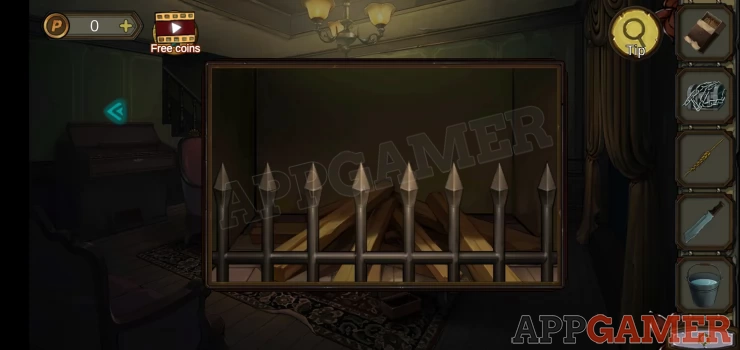
On the floor is a trap door with black and yellow tape. View this
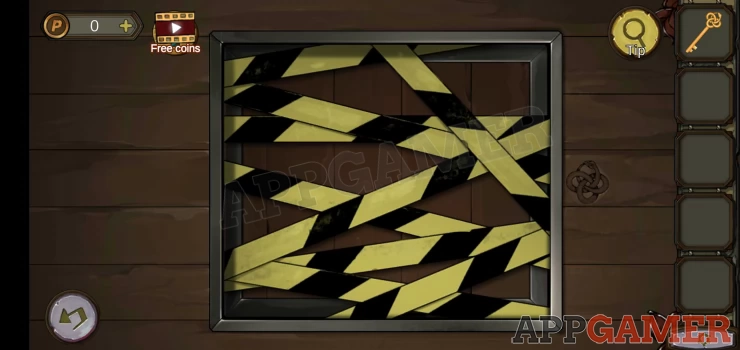
Tap to remove the tape and then use the key to open it.
Go down to the basement.
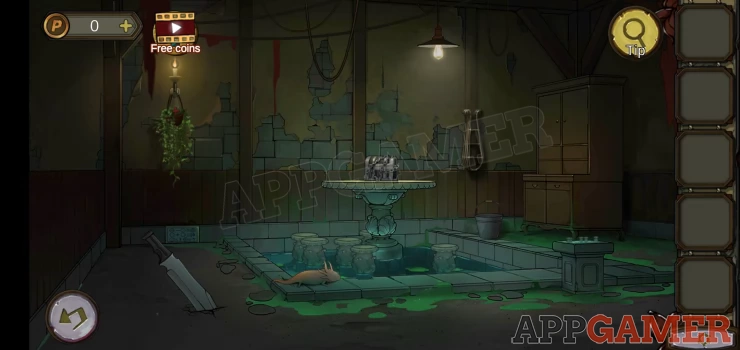
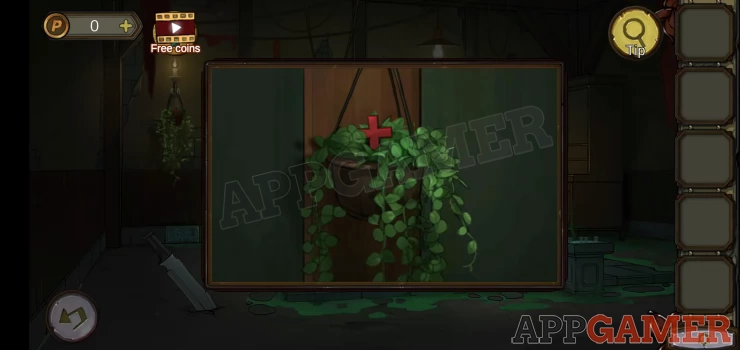
From the left tap on the hanging plant and collect from it a red cross.
Below the plant is a lighter colored brick with a diagram on it, view this for a clue.
Show
On the right tap to view the cupboard and collect a red key and a red bottle.
Then from the ground just to the left of the cupboard collect a drum (bucket).
At the bottom right is a stone table with a puzzle on top
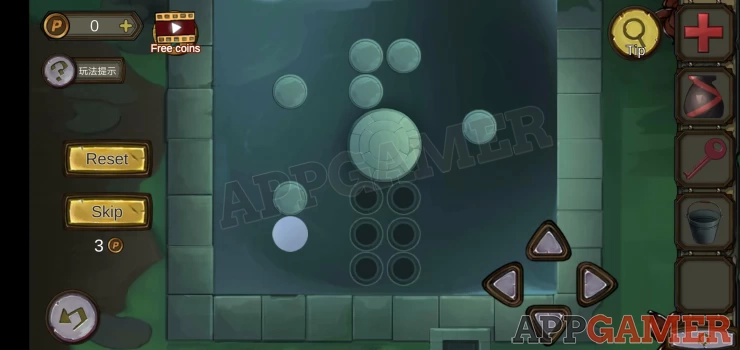
Hint: use the arrows to move the single white circle around the board. Push the 6 other discs onto the 6 slots at the bottom.
You can now tap the large platform in the center of the water and collect an Iron box and some matches.
Now go back upstairs to the bedroom on the left.
Look under the bed to the left to see a locked box, use the red key to open it and collect a purple bottle.
Then move to the bedroom on the right.
Tap the end of the bed to find a red box under it with a cross shape.
Place the red cross that you have on the box to open it.
Collect a blue bottle and a 'Half iron pliers'.
Back out to the landing and tap on the red banner again on the wall.
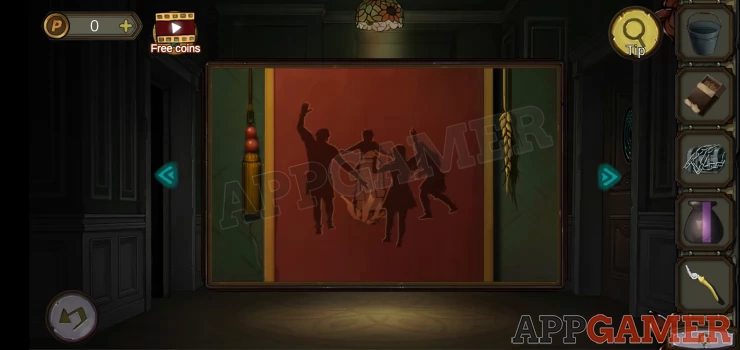
First collect the straw hanging on the right.
Then tap to pull the cord on the left. There is a keypad lock. View this to see a clue.
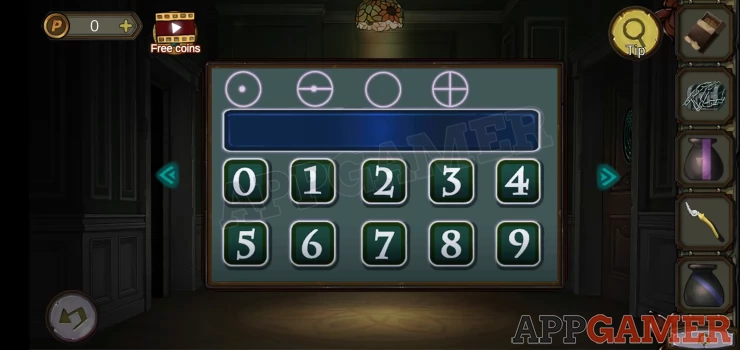
Hint: the symbols match those seen in a clue in the basement.
Solution: use the clue s to work out the 4 digit code to match the symbols.Show
Code: 3875Show
Collect a yellow bottle.
Go back to the basement and tap on the right to view a shaped shelf unit on the wall.
Hint: there are 4 shelves, note the colored lines on the right.
Solution: place the 4 bottles on the shelves to match the colors of the lines on the right.Show
Collect a second half iron pliers.
Combine the 4 halves to make the iron pliers.
View the cupboard on the right again and use the pliers on the wire to open it. Collect a screwdriver.
Go back to the kitchen and tap to view a small barrel on the top right shelf.
Use the screwdriver to open this and collect an oil can.

Go back to the basement and view the machete that is stuck on the left.
Use the oil on this to release it and collect the machete.
Go back to the kitchen and use the bucket on the water in the sink to fill it.
Then move to the living room and tap on the fireplace.
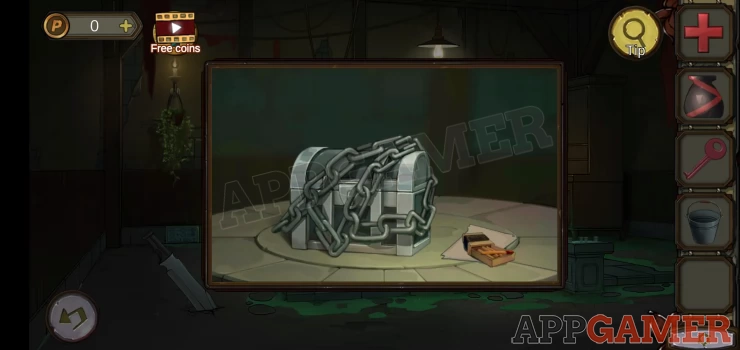
Use the matches to light the fire, then place the iron box with chains into it.
Then add the bucket of water to make steam.
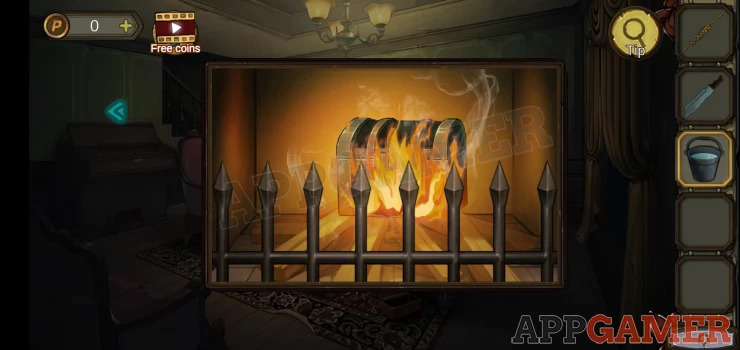
Then use the machete on it to break the chains.
Collect from the open iron box a key drawing and an envelope.
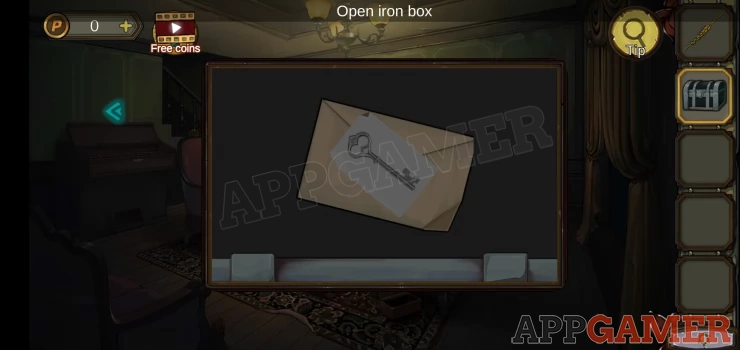
Open the envelope for a clue
TEL 89653
Go back up to the Office room and tap on the wall telephone.
Enter the number and follow the conversation.
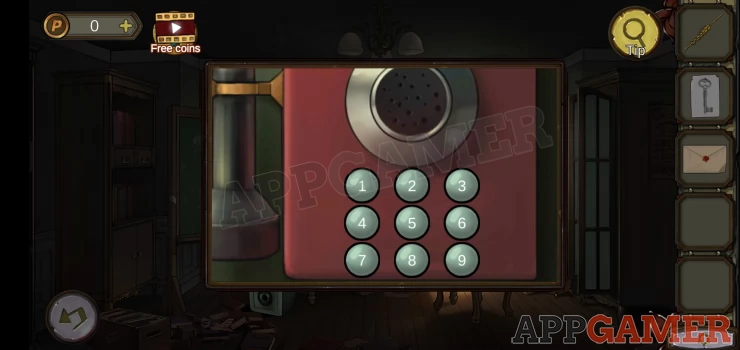
You will now end up in the garage with an old car.
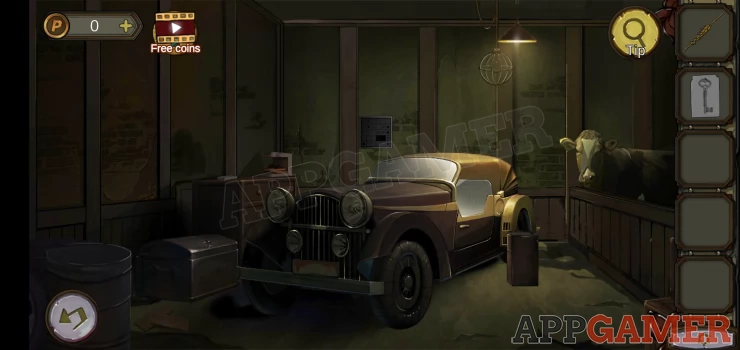
On the right is a cow. Tap to view it.
Give the straw to the cow and you can collect a crank handle.

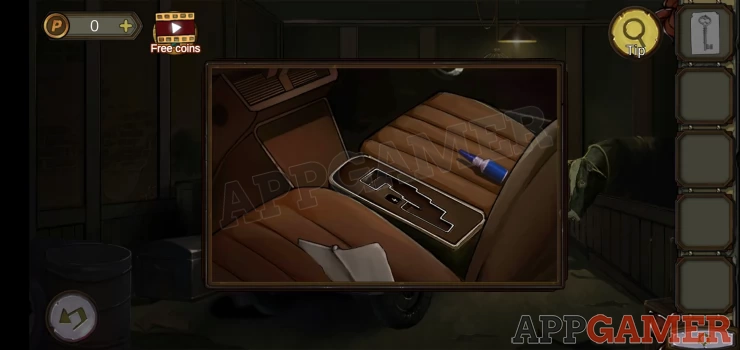
Now tap on the car door.
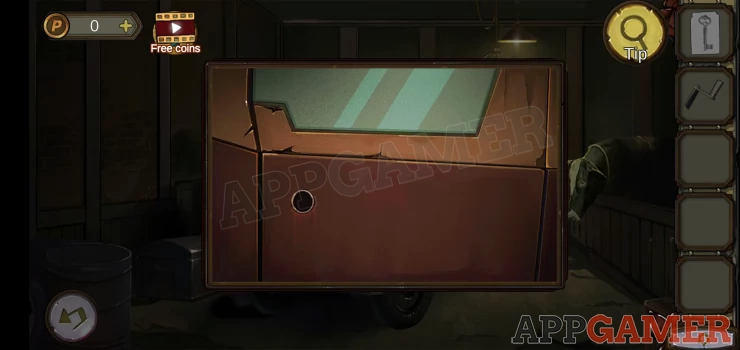
Add the crank handle to the hole and open the car door.
Collect adhesive and a rag.
Exit the car and view the front of it to see the licence place that is dirty.
Use the rag to clean this and see a clue.
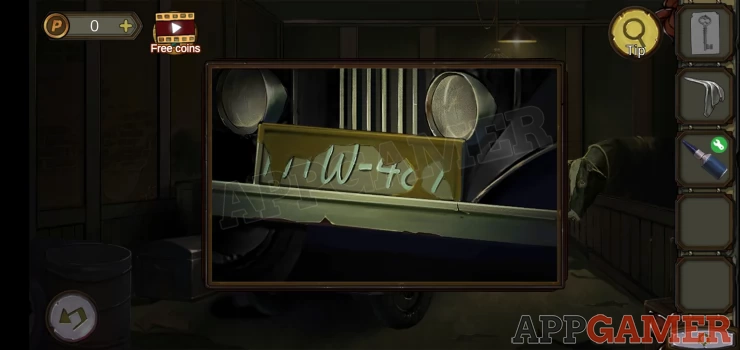
Now tap to view the drawers on the far side of the car. Collect the handle 'turntable' from the bench.
View the drawer on the right. This has a code lock.
Hint: use the clue above.
Solution: NTW - 487Show
Collect a Half gear knife
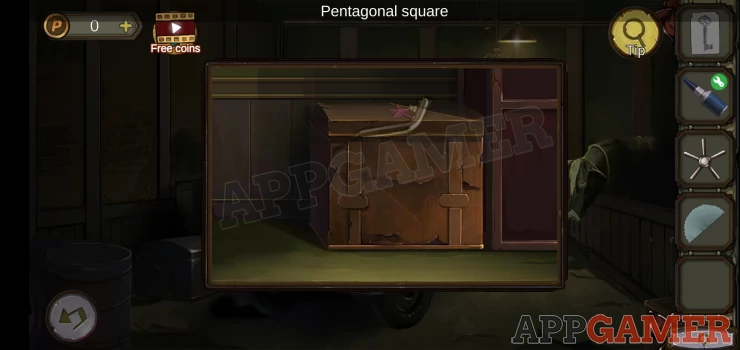
Now tap the box to the left of the drawers to view it and collect an earthworm.
Exit the garage to the house and go down to the basement.
To the left of the water is a creature, view this and give the earthworm to it to get it to move.
You will then be able to collect a Star. (pentagonal square?)

Return to the garage and the box on the lower left.
Add the star to the box with the star hole.
Collect an Oil pipeline.
Exit the garage and go upstairs to the office room.
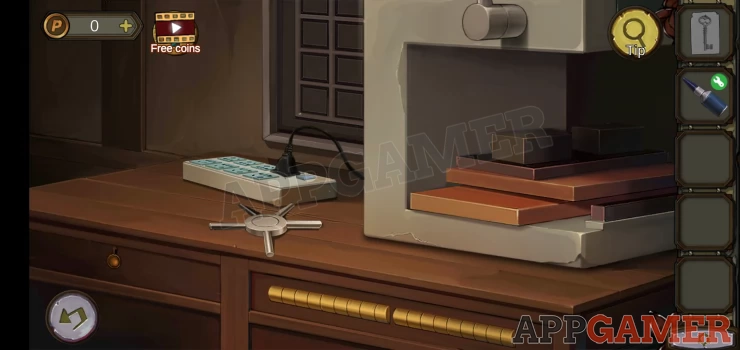
Tap to view the small safe on the floor to the left. Add the turntable.
Open the safe to collect a second half gear knife.
Combine the adhesive with the 2 halves of the gear to get a Complete gear knife.
Return to the garage.
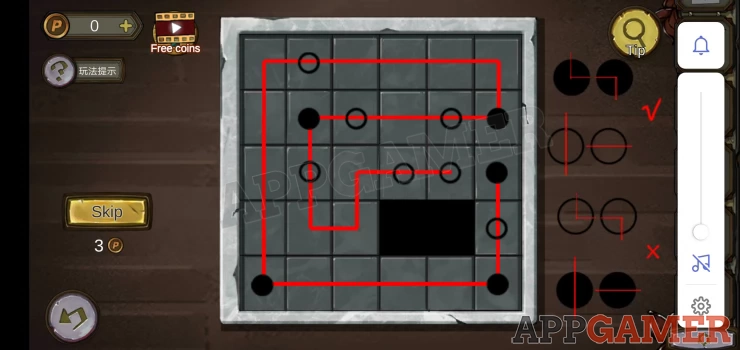
Tap on the panel on the wall above the car to see a puzzle.

To complete this you need to draw a line through each of the squares, you can only pass straight through the open (white) circles, you must turn left or right when passing through the black circles.
Solution: Show
Collect metal sheets.
Now view the drawers again.
Add the metal sheet to the machine on the right and the completed gear knife.
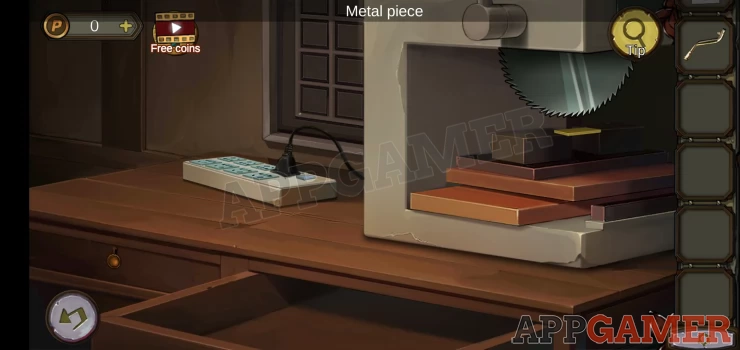
You can now use the machine to make a key.
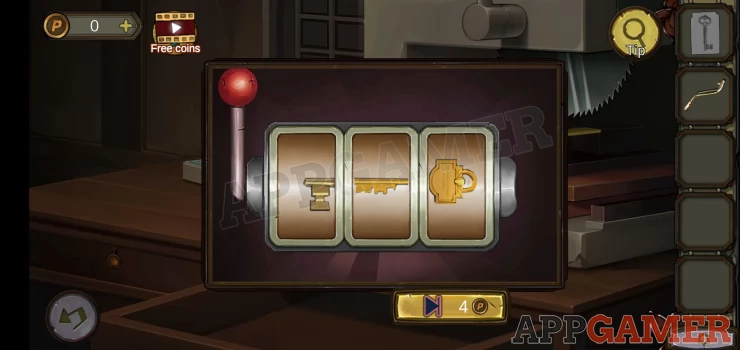
Hint: check the key drawing that you have and use it to choose the correct design to make.
Pull the red handle and collect the key.
Solution: Show
Use the key to open the drawer on the left to collect the shifter.
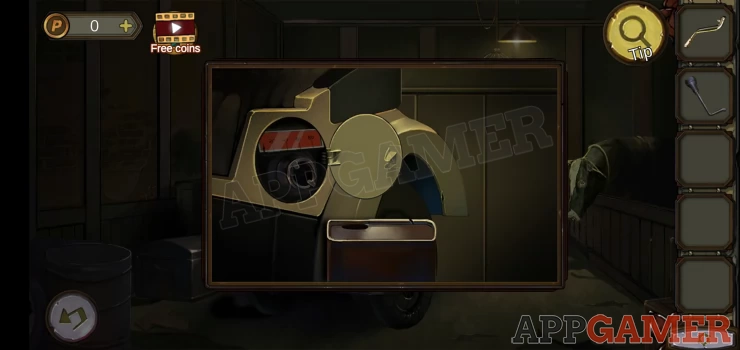
Now tap on the back right hand side of the car with the fuel canister.
You will need to use the oil pipeline to connect it and fill the fuel tank.
Then enter the car again and place the shifter in the center.
You now have the car ready to run.
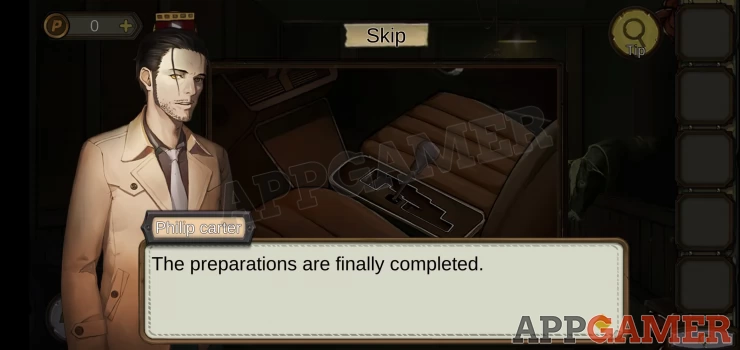
This completes the chapter. Move on to Chapter 2.
We have questions and answers related to this topic which may also help you: Show all