Chapter 2 - The Institute
Adventure Escape: Asylum Guide
Having escaped your room in Chapter 1 or Adventure Escape Asylum you are now in the crumbling hallways of the Byers Institute. A girl stands with you and when you tap she advises you to leave and then disappears.
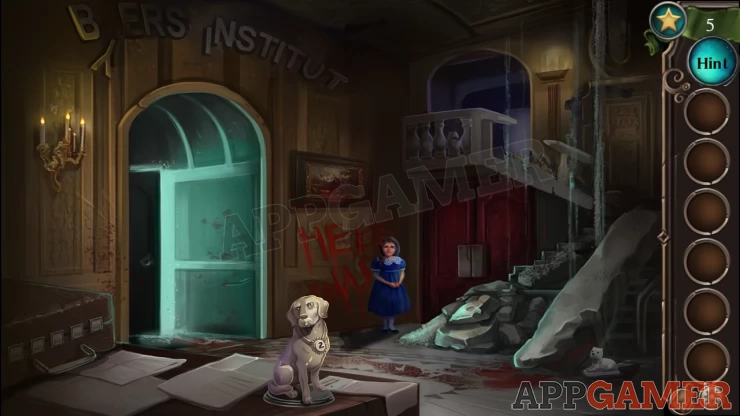
Collect the large dog figure in the center with the number 2 on the collar. Then also collect the small figure with 3 on the collar in the lower right. You can also tap and read the newspaper pages on the table.
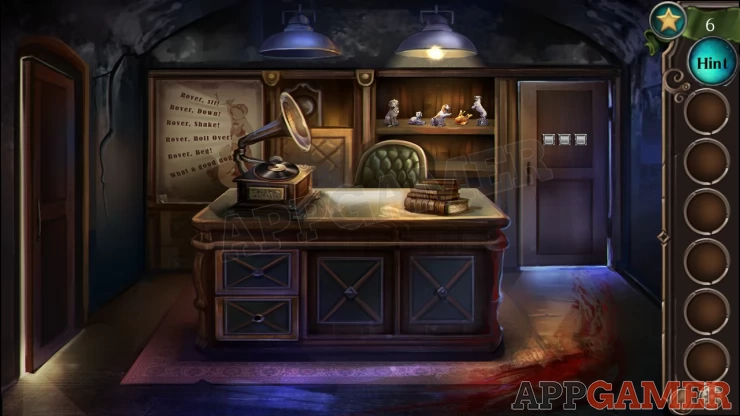
Tap the archway to the left to move through into an office room. There are two more dog figurines to collect on the floor and desk and if you tap the draws to the left of the desk you will find a fifth one. Notice the poster on the wall to the left, there are 5 lines with commands to the dog.
Star: Tap the light on the ceiling that is on to collect a star.
Tap the book case on the back wall to view a shelf with some clear spots visible in the dust. Tap each of the dog figures in the inventory in turn and tap the shelf to place it. Once all 5 are on the shelf tap them in pairs to swap their positions until they line up in the order to match the poster. Sit, Down, Shake, Roll over, BegShow
Once you have them in the right order take a note of the numbers on each of the dog figurines.
Show

Back up and tap the door to the left to return to the entrance and tap the briefcase on the desk to enter the number. 23612Show
Go back to the study and place the record on the phonograph. It will tell you the passcode to the closet 314Show
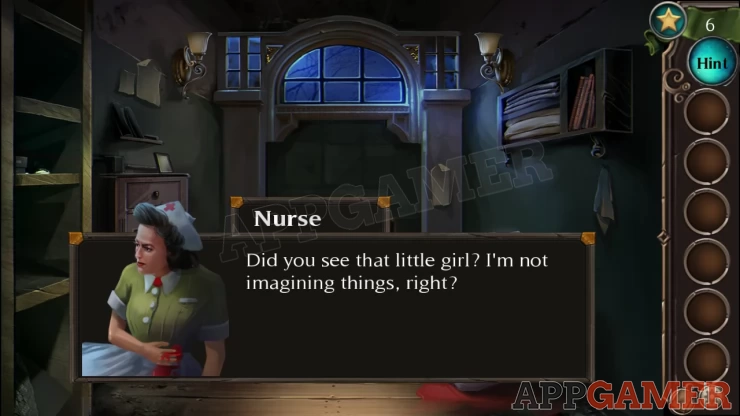
The ghost girl is here again to warn you to leave and she disappears after you tap on her. There is an injured nurse on the floor who tells you a bit about what’s going on. Take the magnetic key card from the nurses belt and complete the chapter.
That completes chapter 2 of Adventure Escape Asylum. Next we move on to chapter 3, if you have any questions for this game please head to the Answers Page to ask there.
We have questions and answers related to this topic which may also help you: Show all