Level 20: Unlock Walkthrough
More 50 Tiny Room Escape
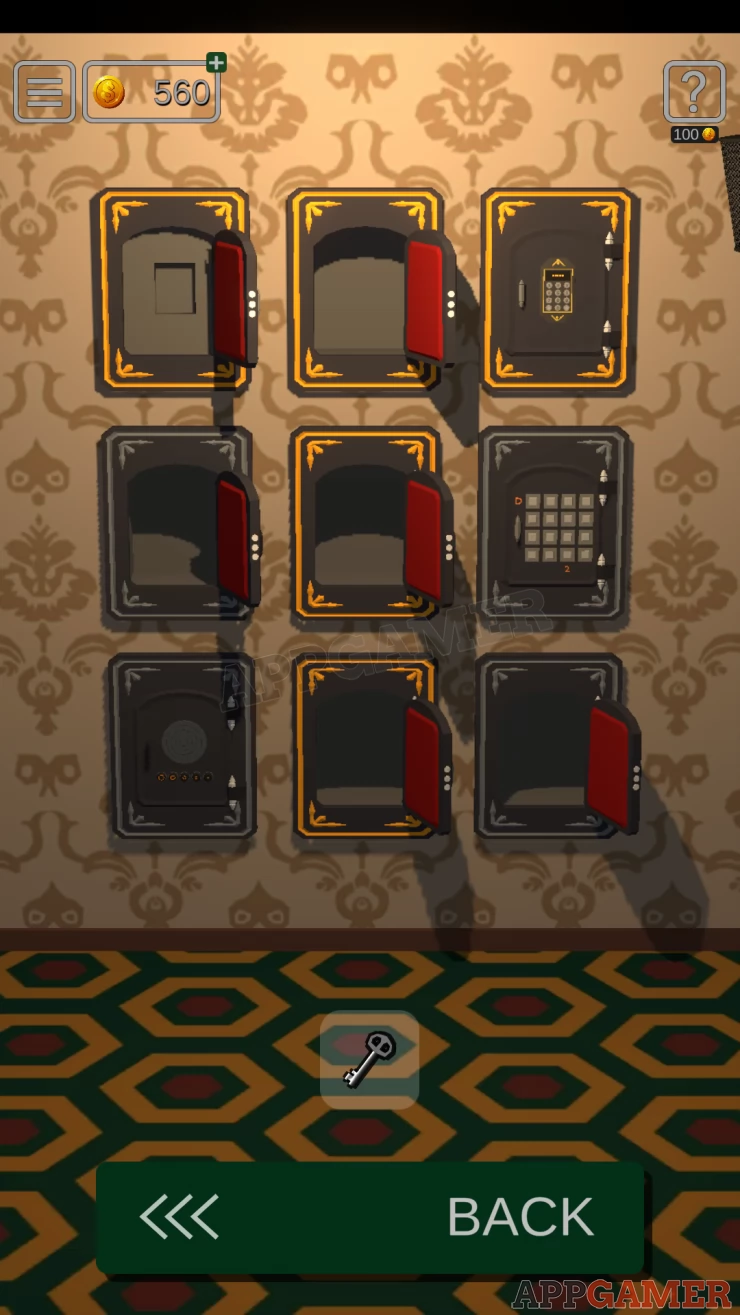
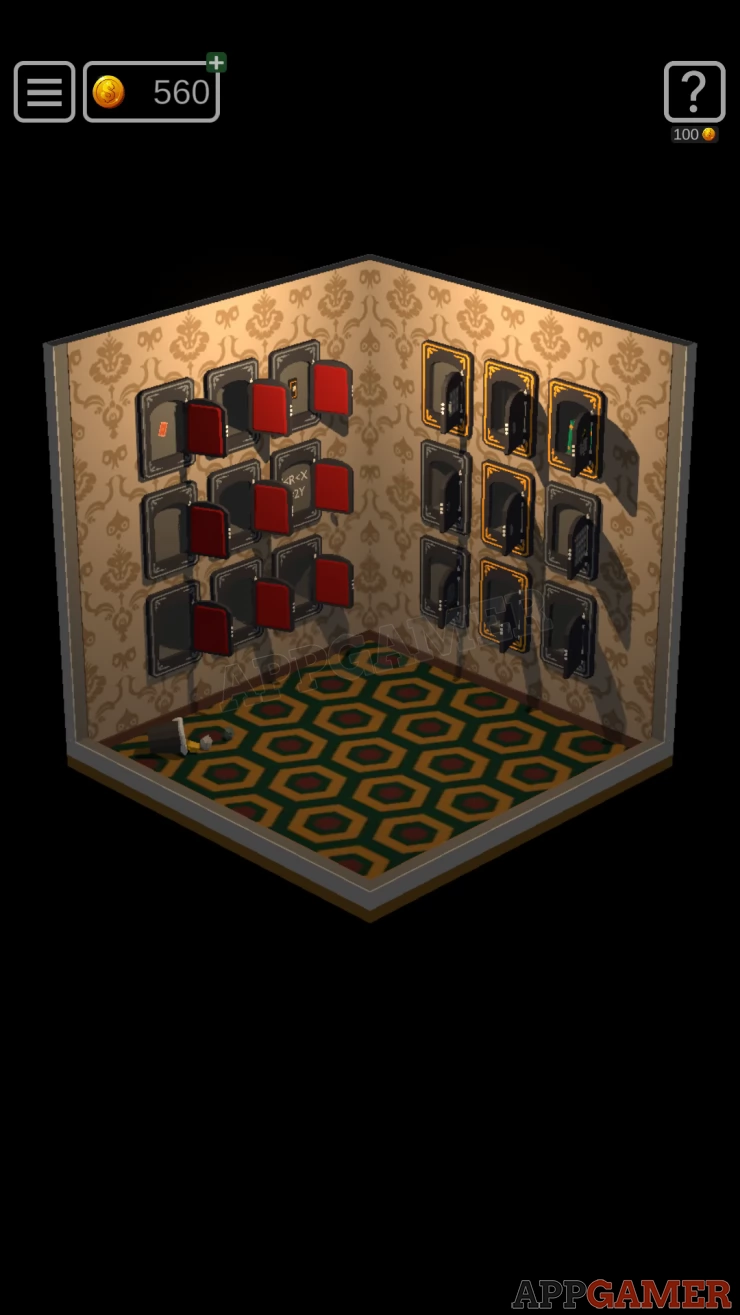
Continuing on in Act 2 of 50 Tiny Room Escape, after completing Level 19 you have now reached the final level in Act II. This special room has 27 safes arranged on the walls which you need to open to complete the level
Level 20: Unlock
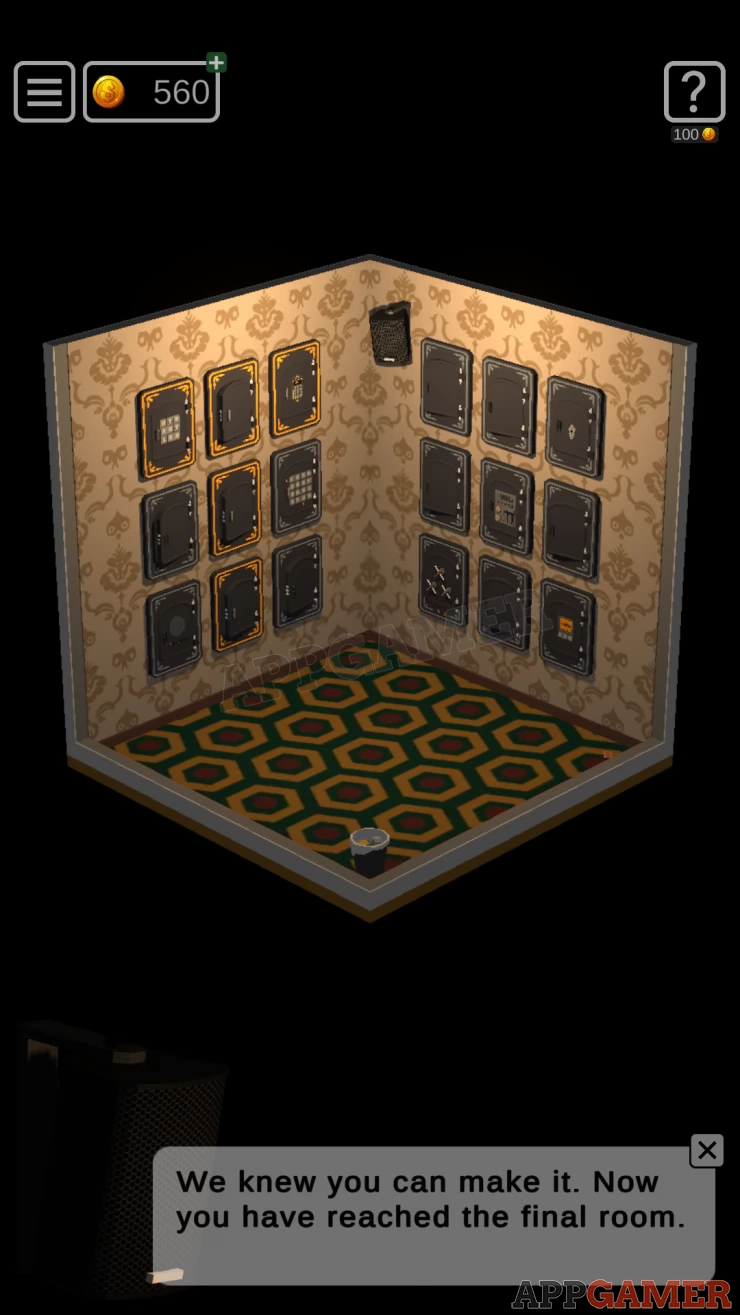
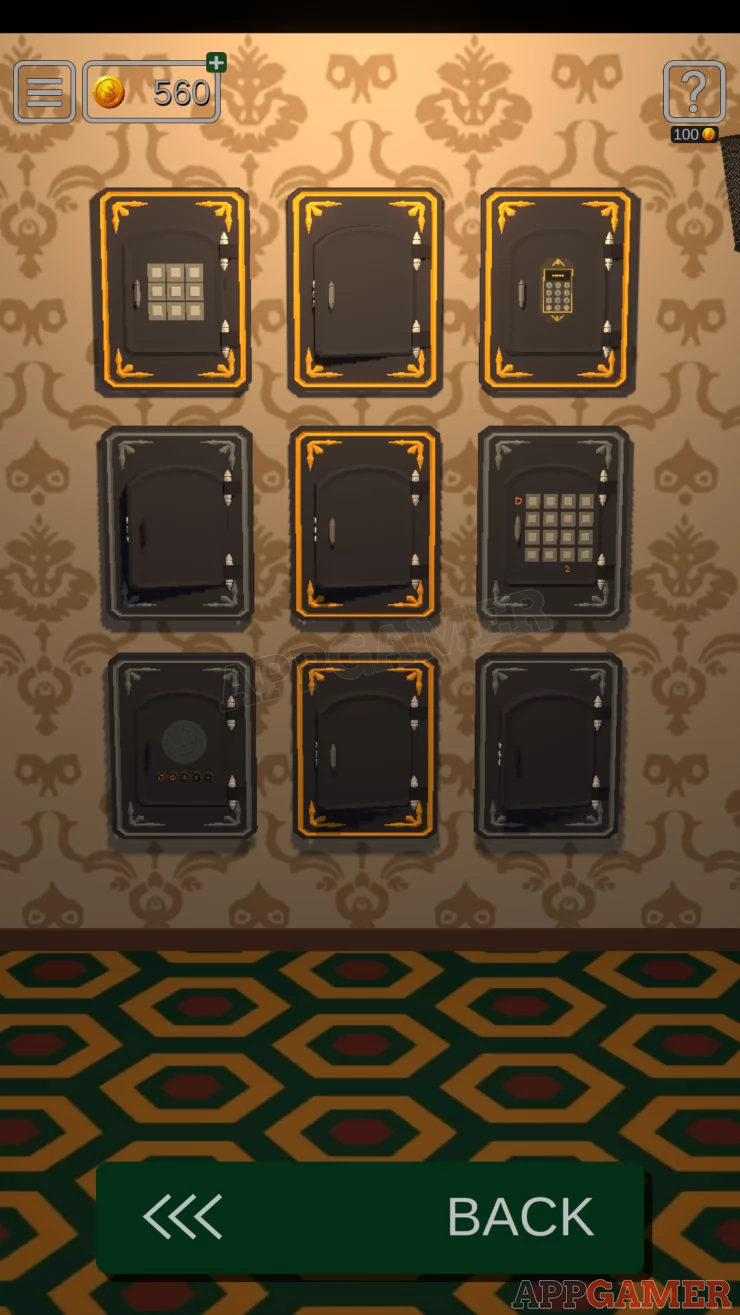
There are 9 safes on 3 of the 4 walls arranged in 3x3 grids. Some will open by themselves as you progress. Follow the instructions here to open them all.
Collectible: On the floor in the right corner
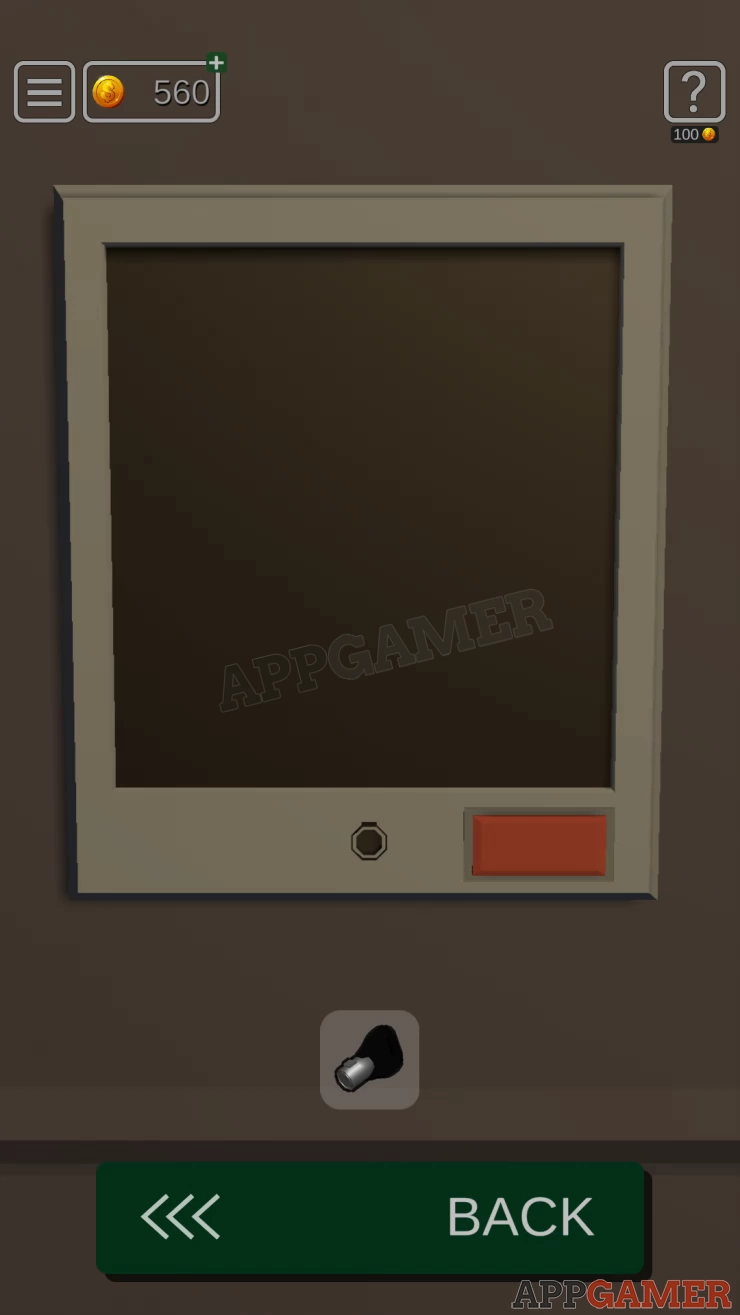
Safe 1
On the left wall at the start you will see the the 3x3 grid has some of the safes highlighted in a T shape.
View the top left safe on this wall to see it has a 3x3 grid of buttons.
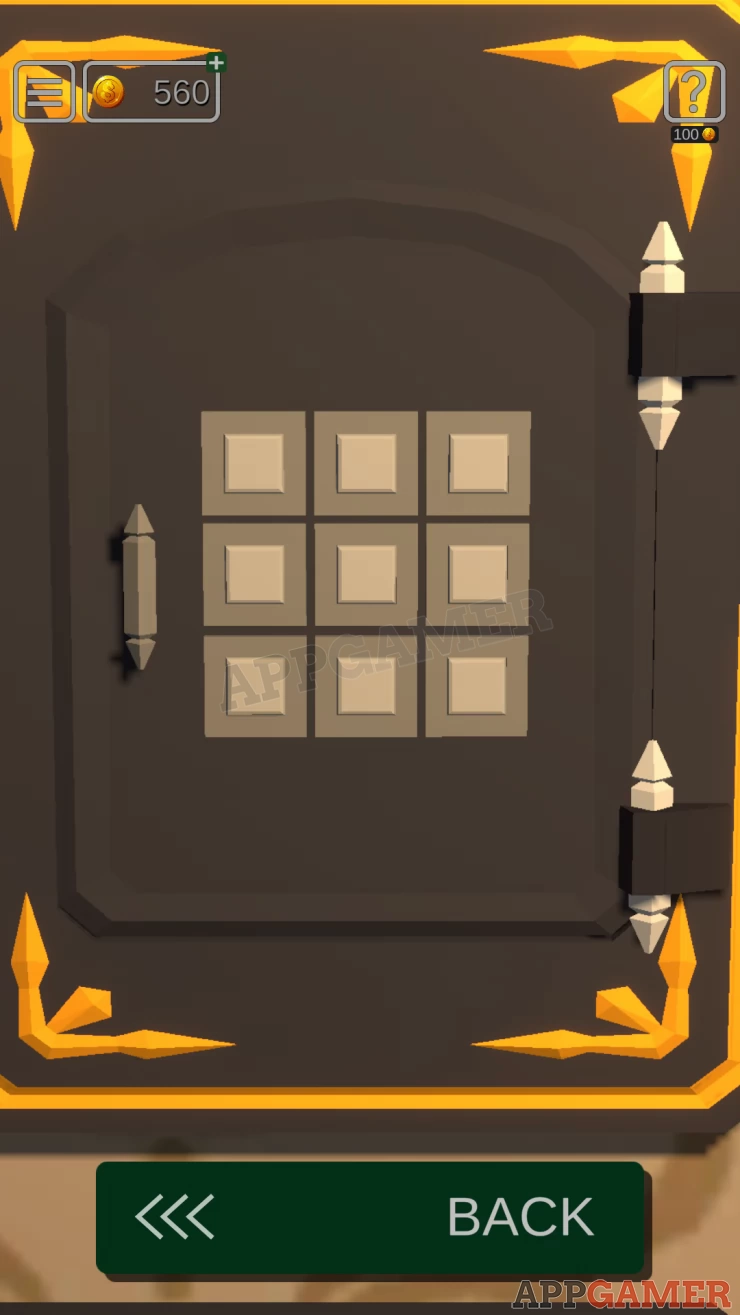
Tap the buttons in the same T shape to open it.
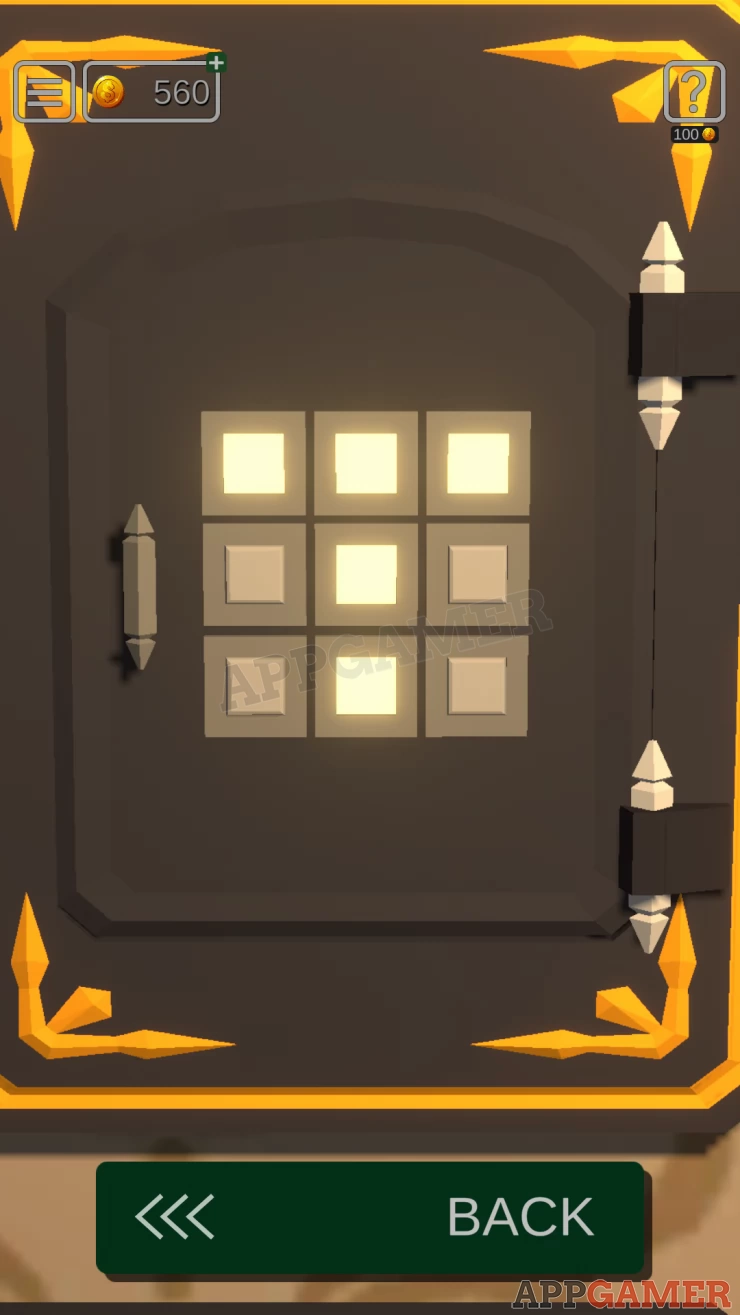
Collect a Key from inside. You can also now open 5 other safes on this wall.
Safe 2
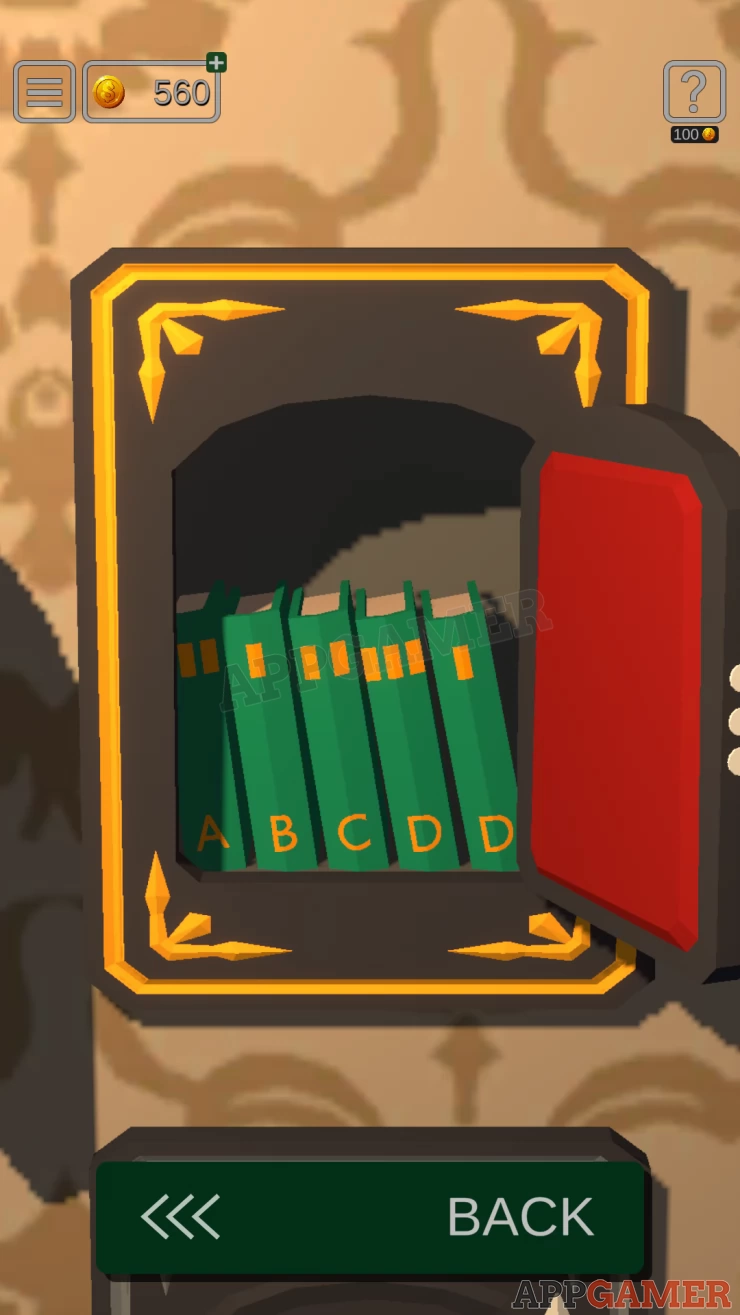
Turn to the wall on the right, 5 safes on this wall are already unlocked. Then look at the top right safe to see that it has a key hole.
Use the key here to open it. Collect a Book.
Open the book to look inside to see some codes
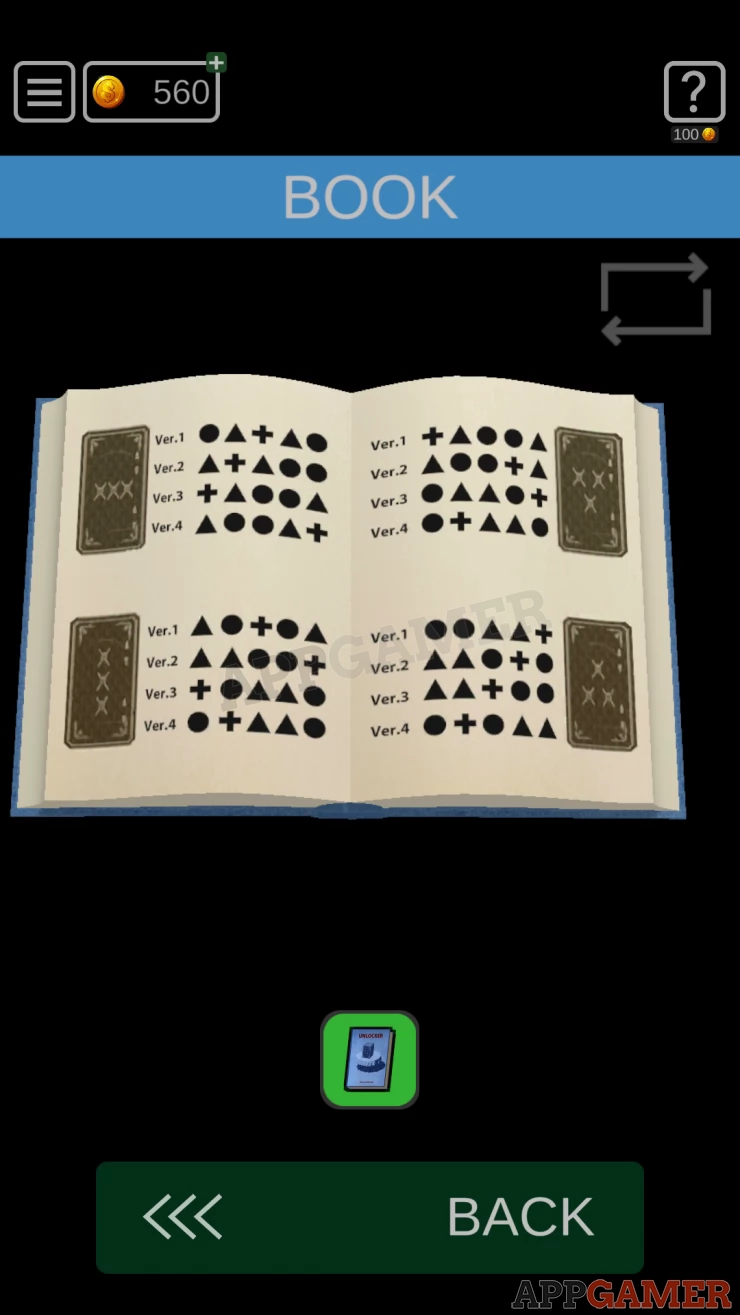
There are 4 different types of safe shown and then symbols codes for versions 1 to 4 of each.
Safe 3
The safe on the bottom left of the same wall has 3 X handles on it the same as the safe design on the bottom right of the book. It is a Ver. 5
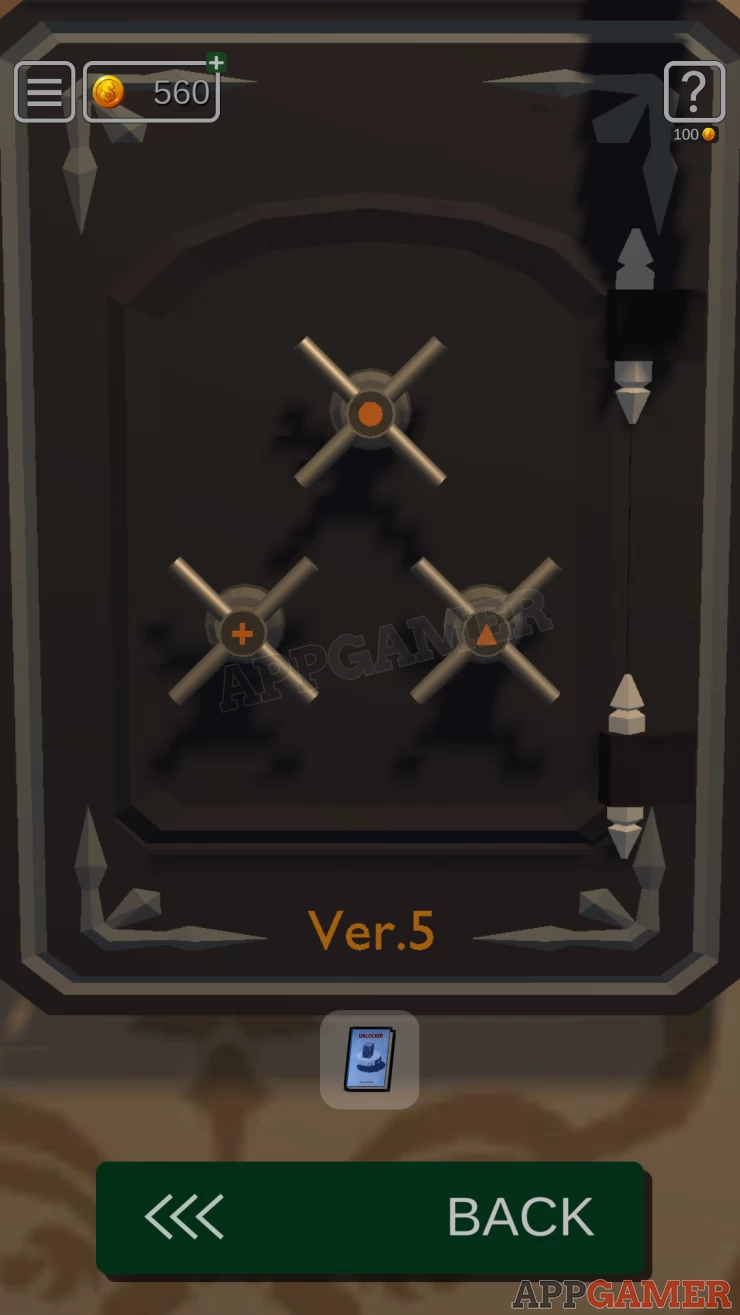
Work out the code from the ones shown for version 1 to 4. Notice how the other symbols move through each iteration. Then tap on the handles marked with the matching symbols.
Code: +, Circle, Triangle, Circle, TriangleShow
Collect a Paper
Safe 4
View the paper to see 5 numbers with arrows explaining how to re arrange them. Get the 5 digit code from this.
Turn back to the first wall (left) and view the top right safe. This has a keypad entry for a 5 digit code. Enter the code you found from the paper.
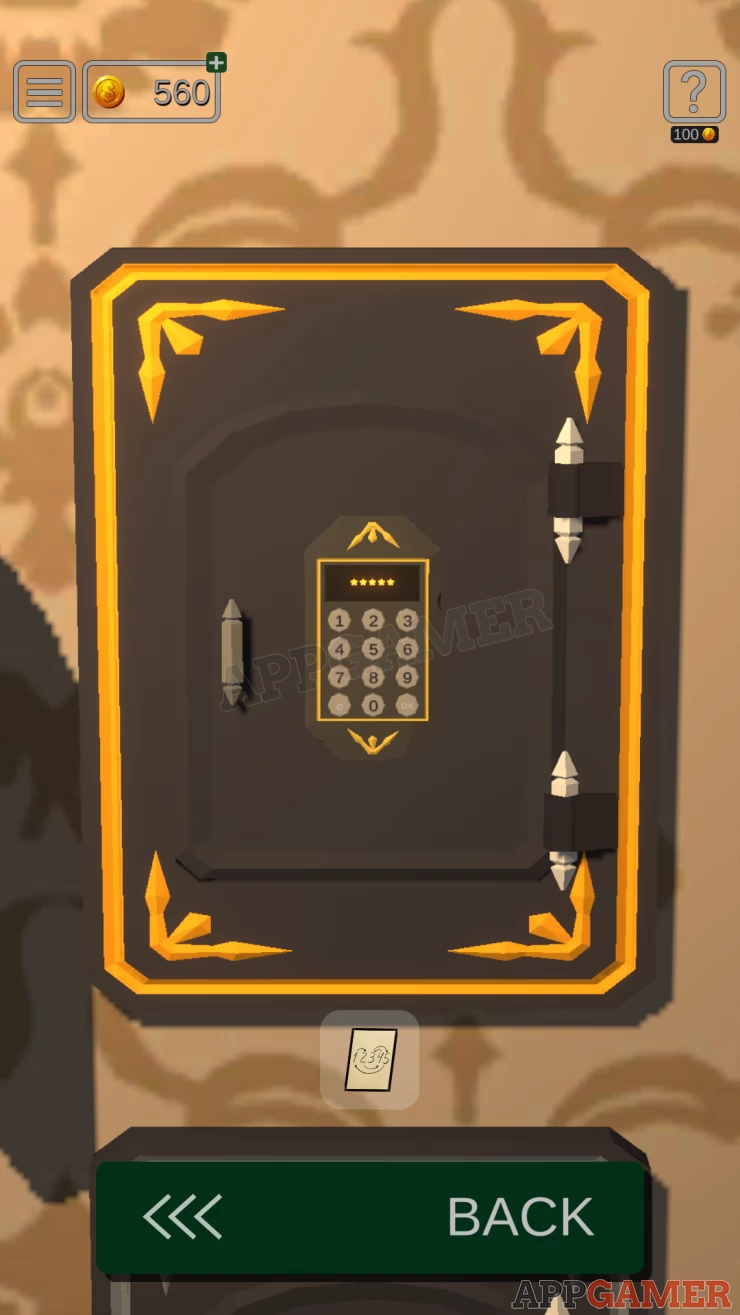
Code: 51423Show
Inside there are 5 books with letters and lines to give numbers.
Safe 5
- Look at the safe immediate below. It has a 4x4 grid of buttons.
- The left side has the letter D and we can assume the others rows are C B and A.
- The bottom has the number 2 and we assume the other columns are 4, 3 and 1
- Use the clue from the books in the previous safe to tap the 5 correct buttons
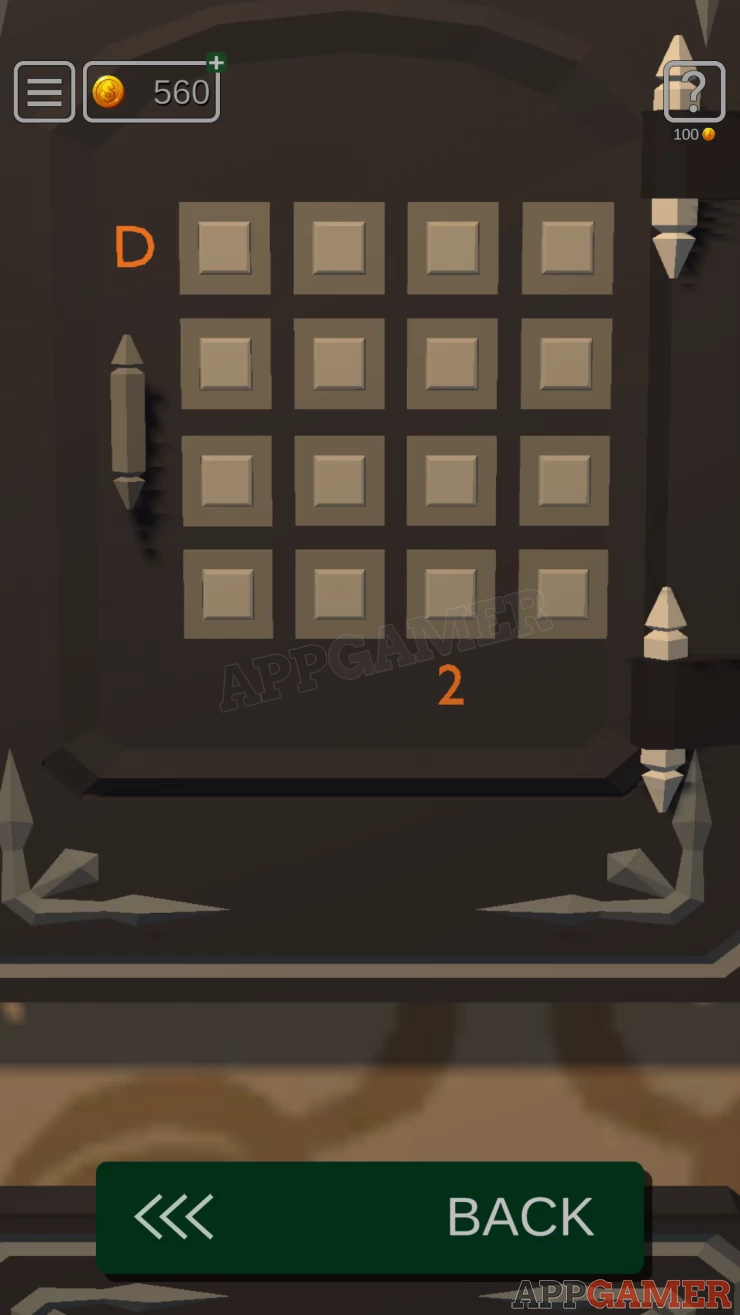
Solution: A3, B1, C2, D3, D1Show
Collect 3 gears from inside.
Safe 6
- Turn left to see another wall of safes. Again 5 are already unlocked.
- View the safe on the middle, right. It has a handle with some gears and some missing gear.
- Add the 3 gears to it that you have to complete the mechanism and connect all of the gears together.
You can then turn the handle to open the safe
Solution: Show
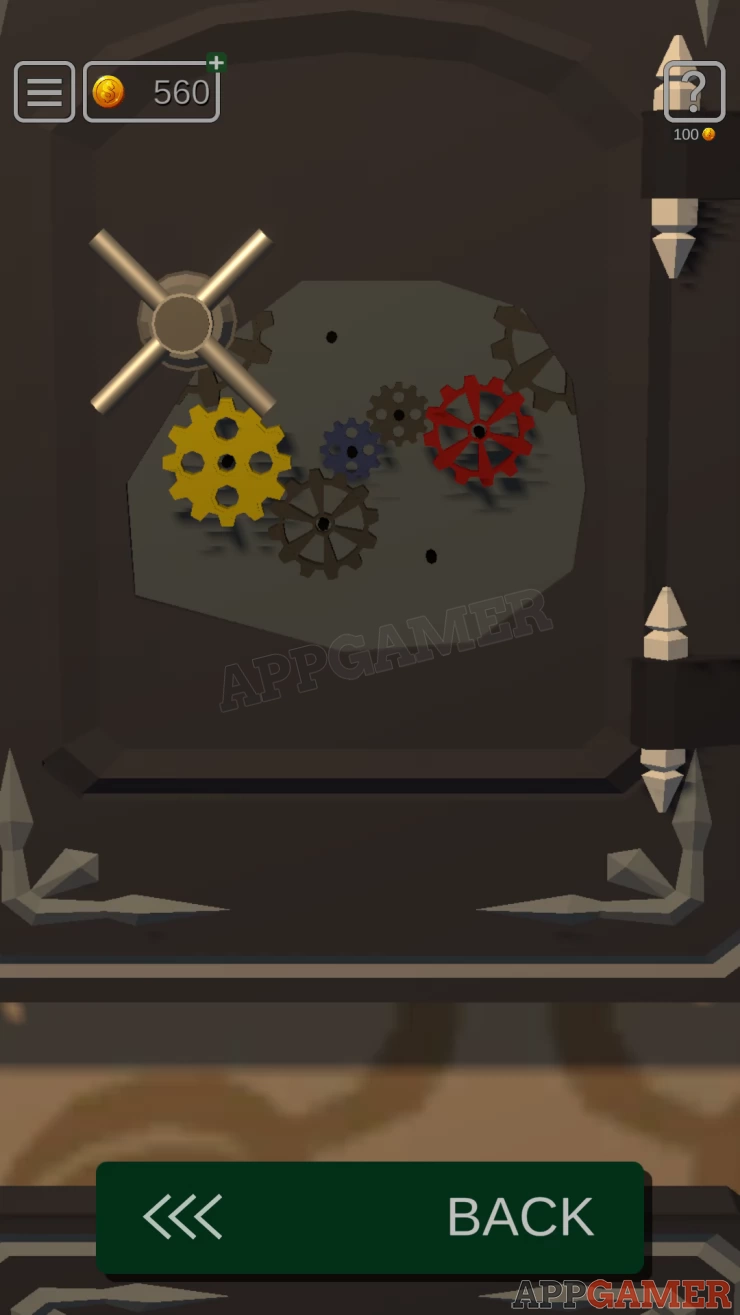
Inside is a clue for the next safe.
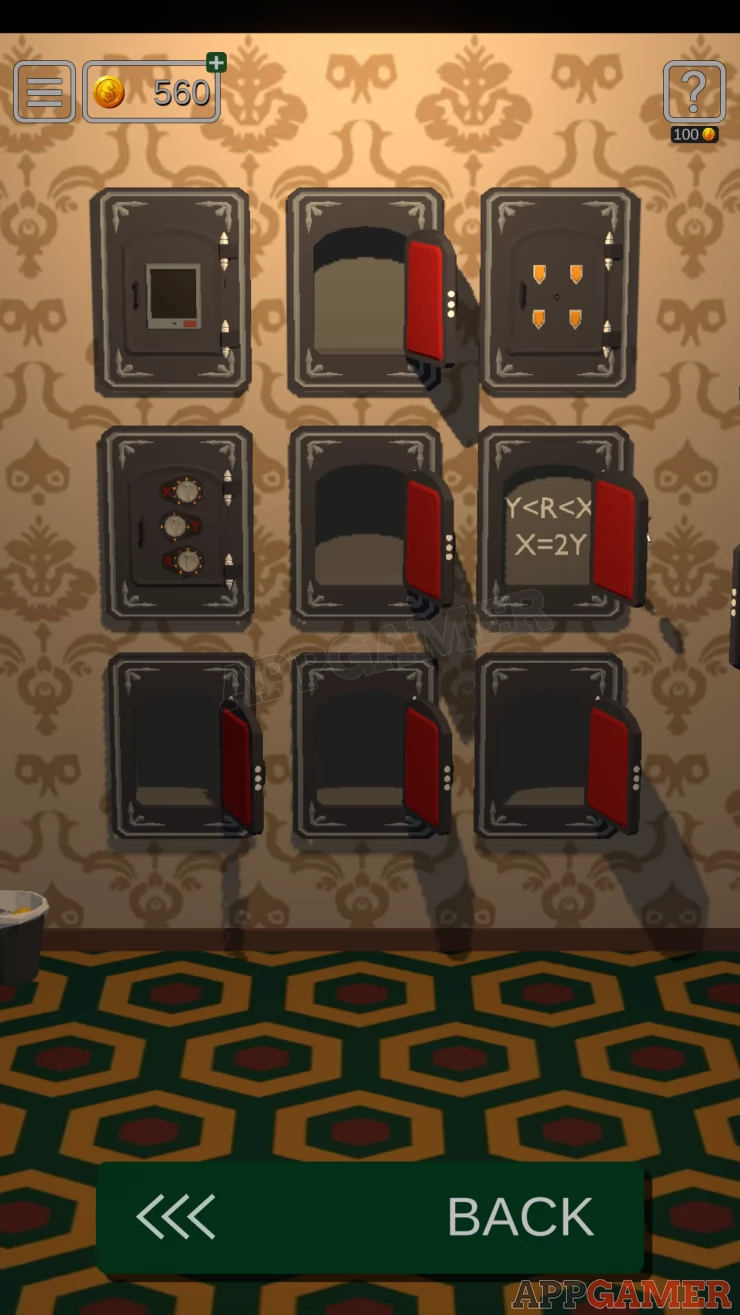
Safe 7
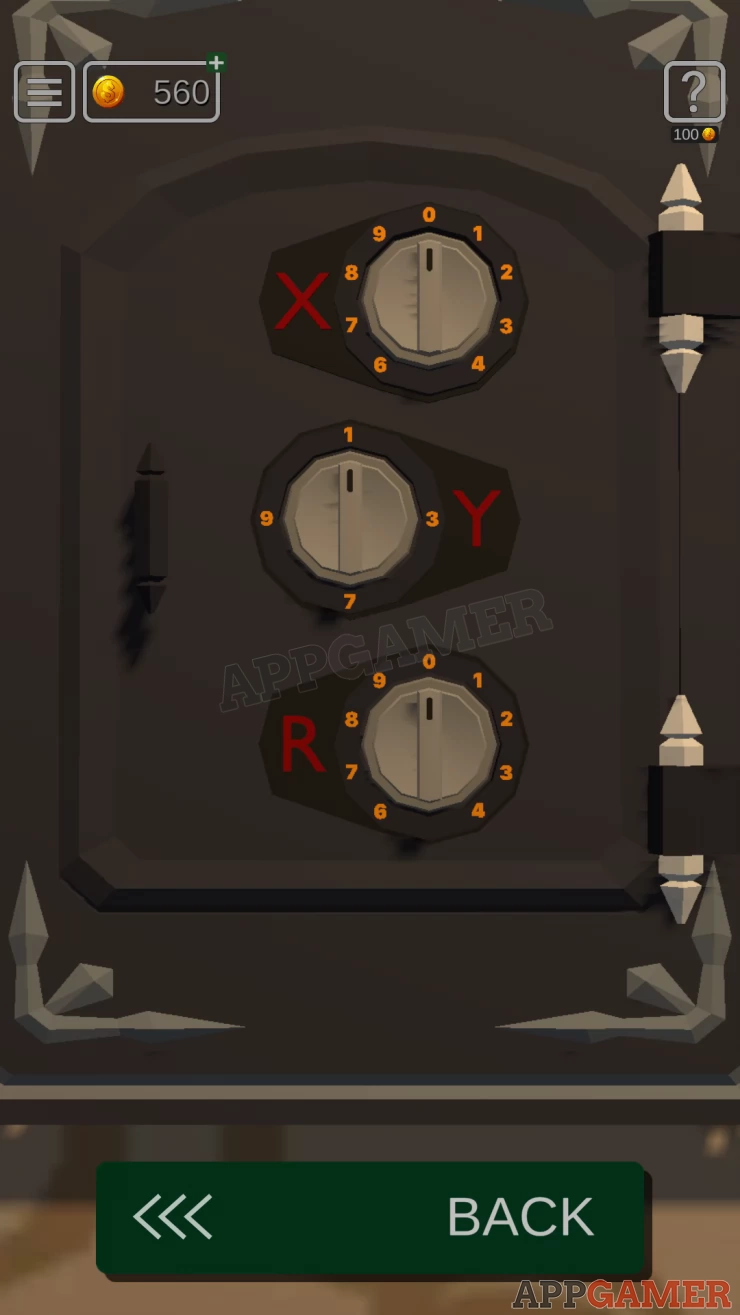
This is the safe on the middle left of the same wall. There are 3 settings for X , Y and R
From the clue we know that
Y < R < X and X=2Y
Solution: For the second equation to be true Y has to be 1 or 3, X has to be 2 or 6. From the first equation X cannot be 2, it would be too small to be bigger than R. So : X = 6, Y = 3, R = 4 (there is no 5)Show
Open this safe to find a Gizmo.
Safe 8
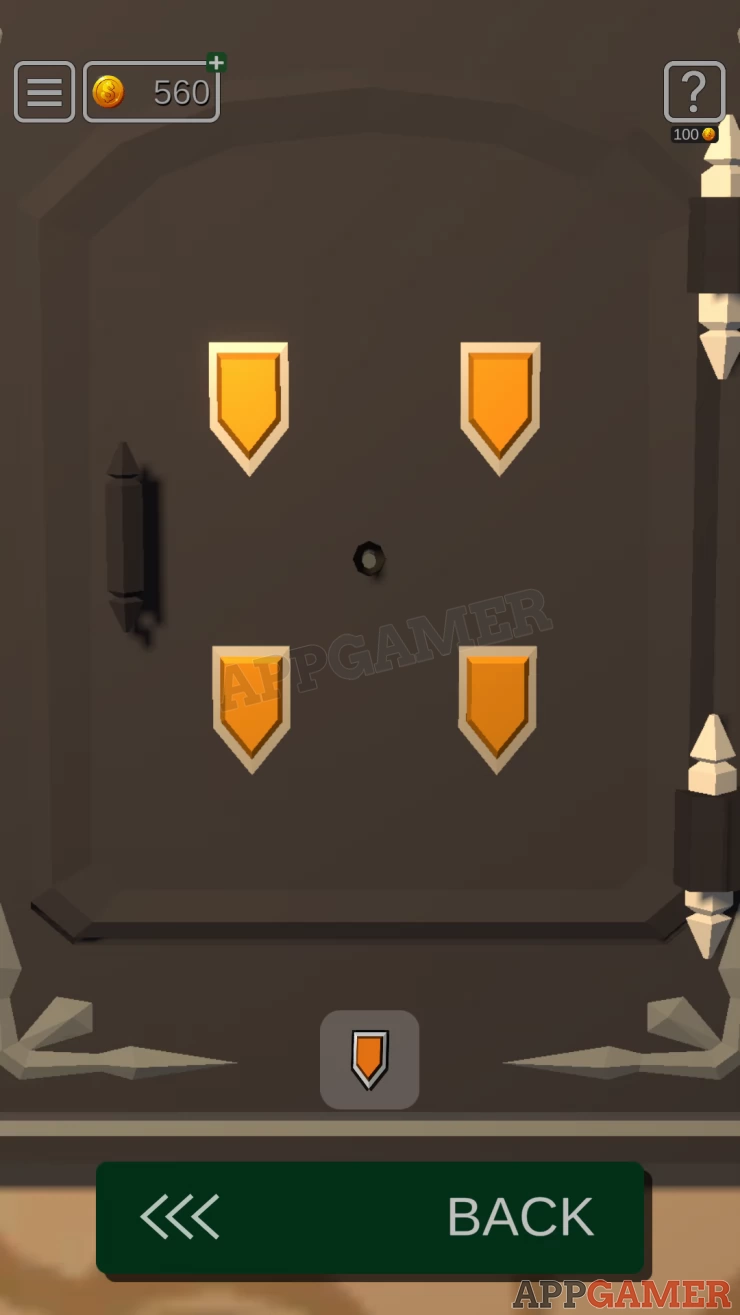
View the top right safe on this wall to see 4 arrow gizmos and a hole in the center. Add the Gizmo to it. It will be misaligned.
You need to tap the gizmos to move them and get them all pointing straight down.

When the safe opens you will find a switch. Tap this to turn off the lights.
Safe 9
Turn to the right with the lights off to see the one safe has a glowing pattern on it. View this.
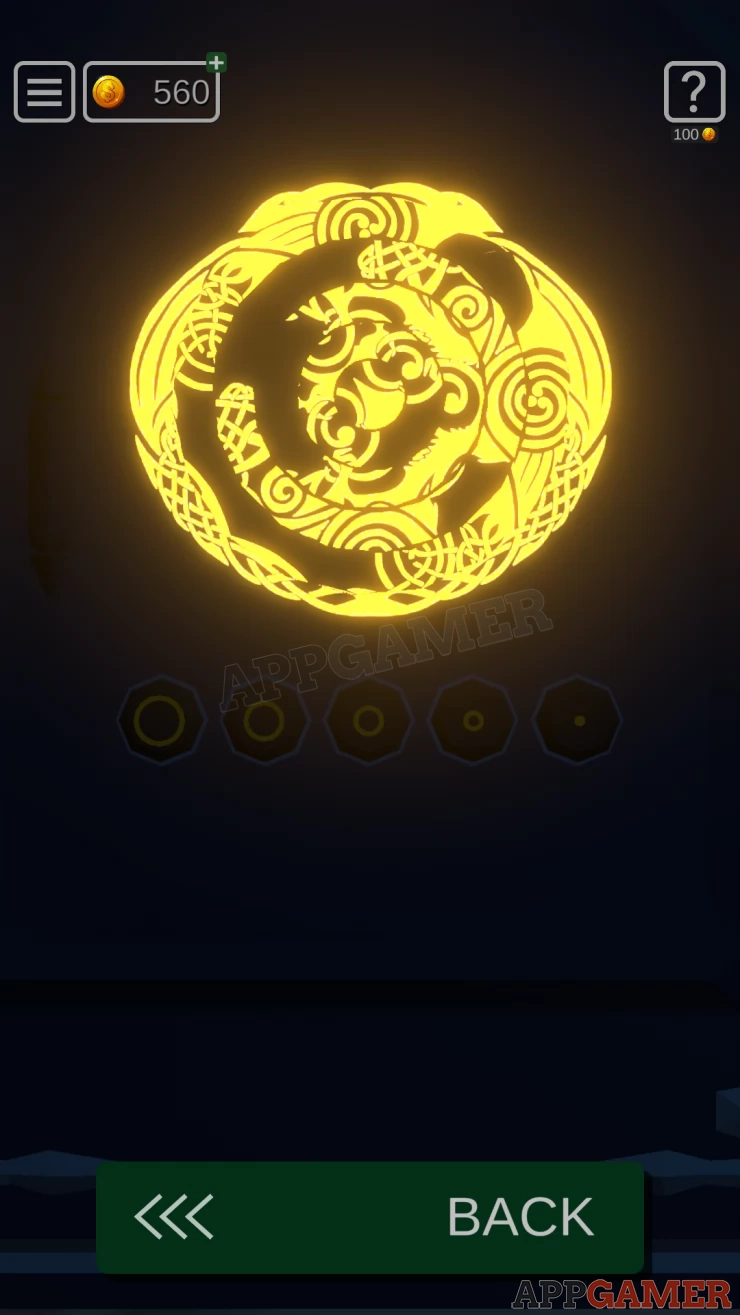
- There are 5 buttons at the bottom that control the 5 rings of the pattern.
- Use the buttons to rotate the rings and complete the image.
Solution: Show
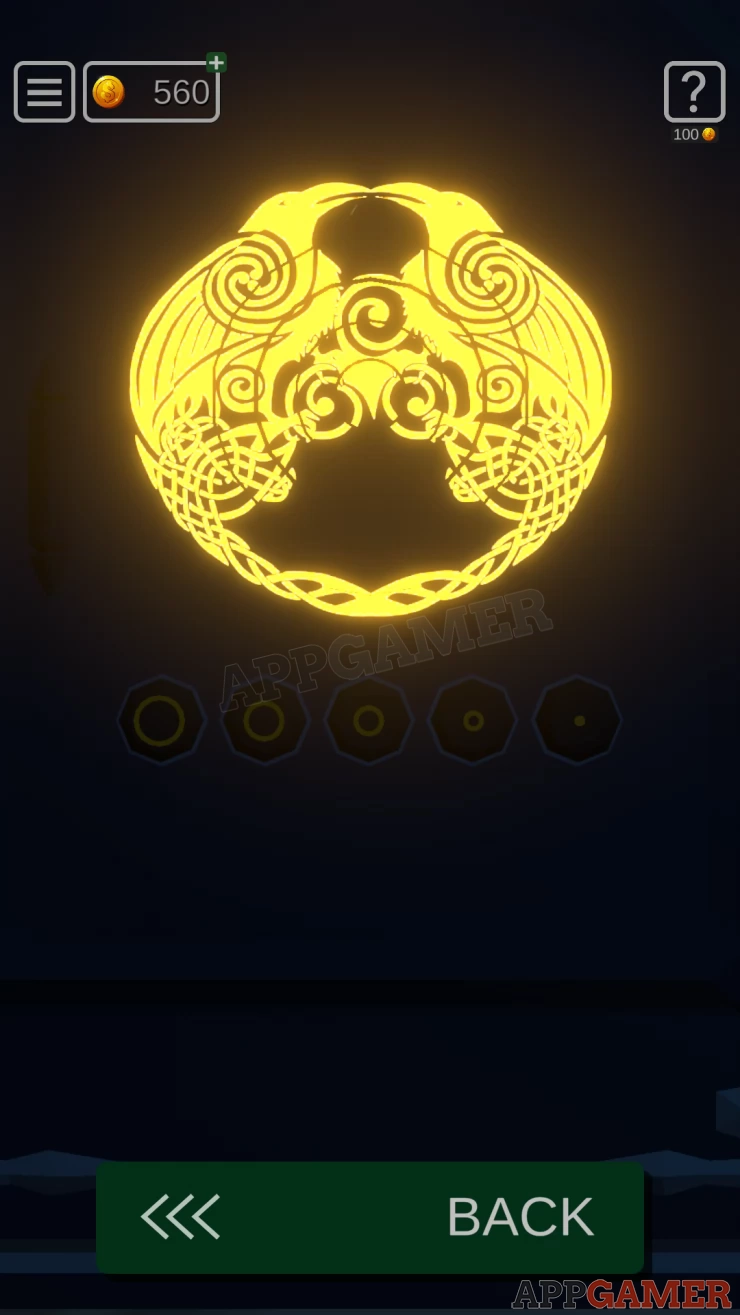
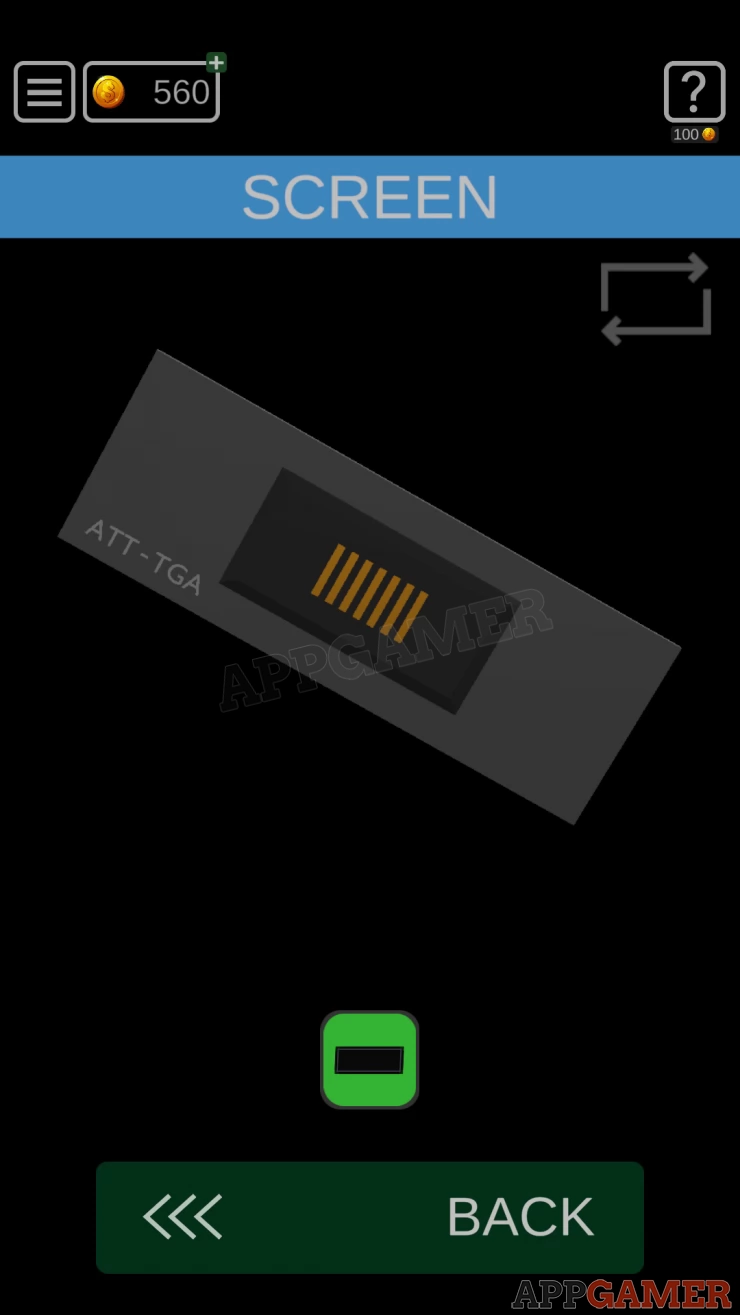
Collect the Screen fro the safe.
Safe 10
You can turn the lights on again, then turn to find a safe in the center of the wall with a variety of dials and switches.
First view the Screen on your inventory and turn it around to see a clue on the back. This is a clue.
Show
Now add the screen to the slot at the top of the panel, you will see a green bar.
- Now you need to set all of the controls to fill in the green bar until it is full.
- Use the clue from the back of the screen to set the 2 sliders on the lower right.
- Try the various switches to see which ones raise the bar level
- Tap the 3 yellow dials to raise the bar as much as possible
When you have them all correct the bar will be full. The safe will open.
Show
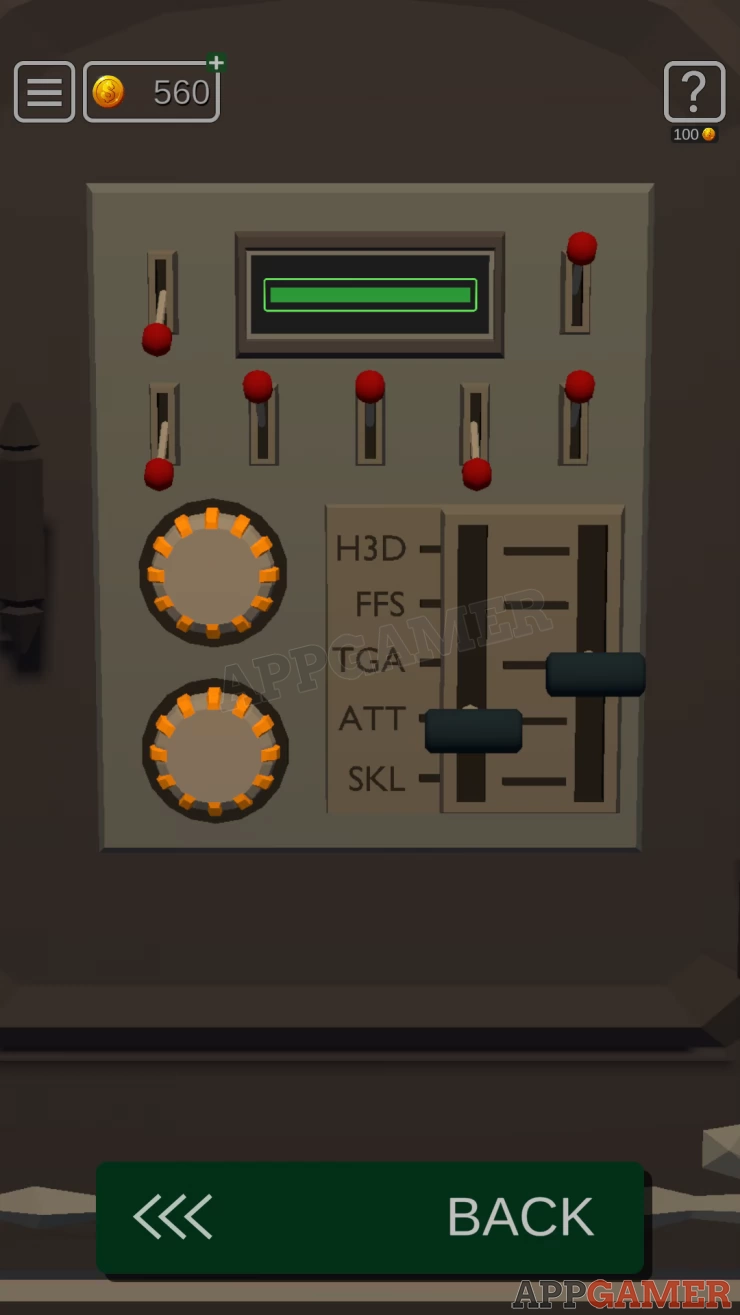
Collect a Paper.
Safe 11
View the bottom right safe on the same wall.
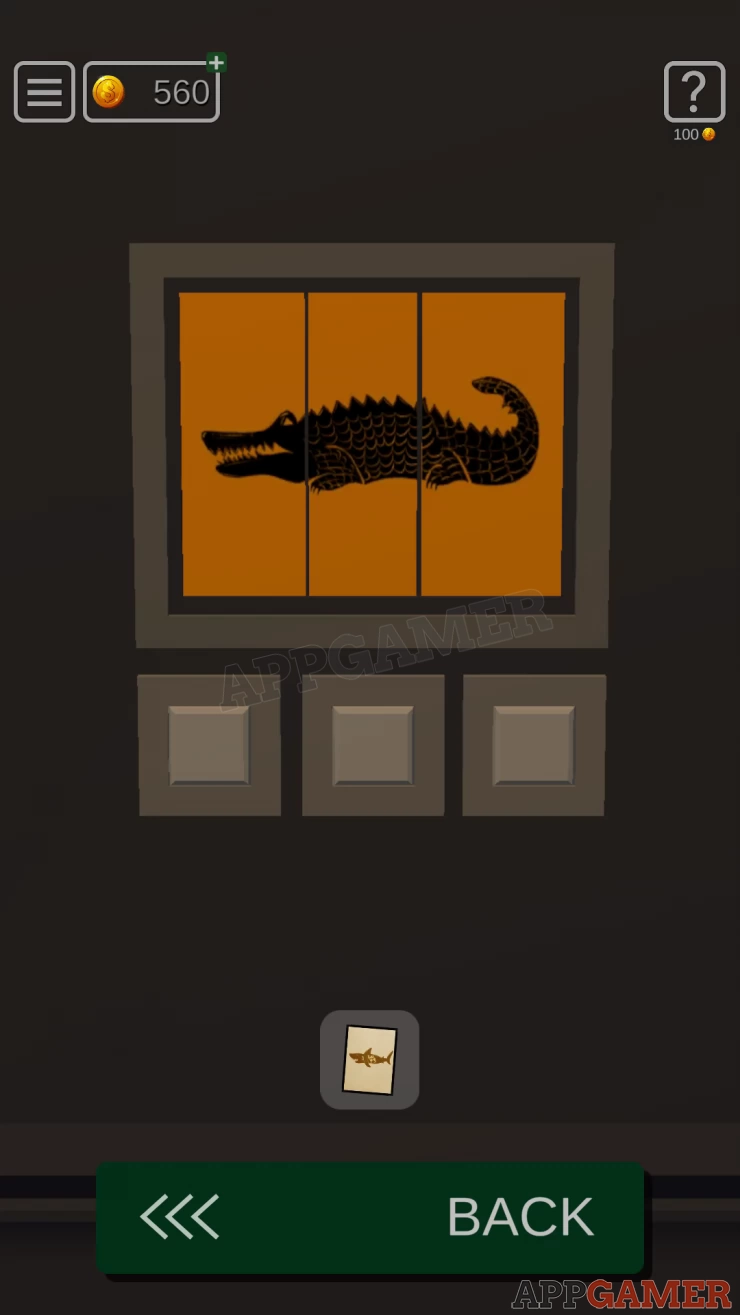
- The image is made up of 3 parts.
- You can use the buttons below to change each of the parts to different animal sections.
- The clue is the paper you have collected.
Solution: Examine the Paper and you will see a Shark, inside this is a Camel, and then inside the camel is a snake. Set the 3 sections to match those animals.Show
Collect a Key
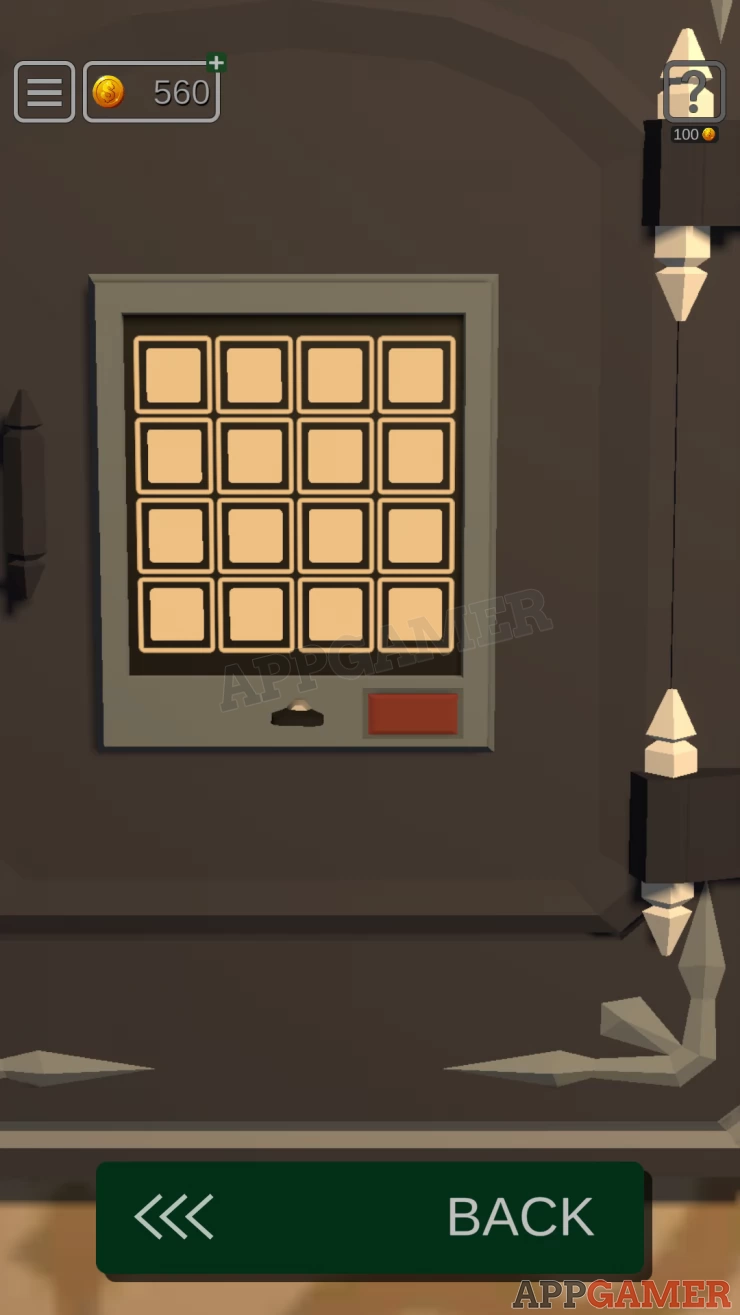
Safe 12
There is one final unopened safe on the opposite wall. View this.
Use the key on it and you will see a 4x4 grid appear.
- This is a puzzle to turn on all of the lights.
- When you tap any square on the grid it will toggle the light on or off and also change all of the ones on the same row and column.
- Find a way to get all of the lights on.
- You can rest the puzzle with the red button.
Solution: The simple method is to tap each of the squares once, you can start with any row or column and work your way through each quare in order until you have tapped them all.Show
Once this safe opens (and if you have opened all of the other safes) the exit door will now be unlocked.
Collectible: Inside safe 12
Turn to the exit door and escape.
Move on to Level 21.
We have questions and answers related to this topic which may also help you: Show all
 With 20 years of experience in creating video game content for the internet and over 30 years as a gamer, Mark is now a passionate mobile App Gamer. Loving a challenge, he is always ready to get stuck in to both survival builders and puzzle solving games. He has been providing content for AppGamer since 2014.