Chapter 2 - Academic Interest Walkthrough - Part 3
More Lost Lands 9
Welcome to our Lost Lands 9 Walkthrough, another in the popular line of Mystery escape room and puzzle games from Five-BN games. This is part 2 of out guide to Chapter 2.
Following Chapter 2 Part 2, the wizard Maaron has spoken to the injured dwarf and now traveled to the Trilly Valley to find the strange creature that has caused the destruction.
Chapter 2 - Academic Interest Walkthrough - Part 3
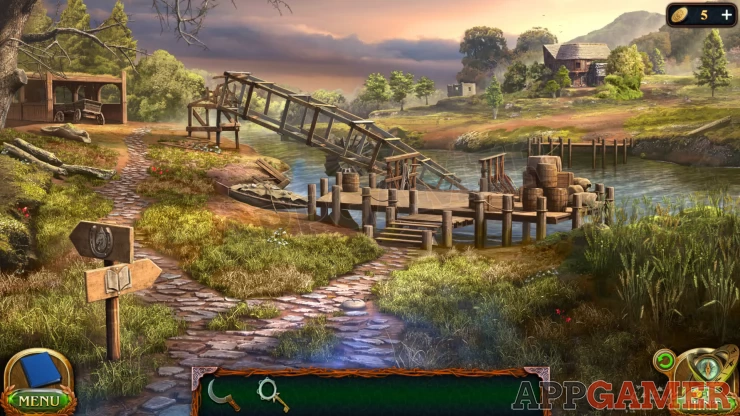
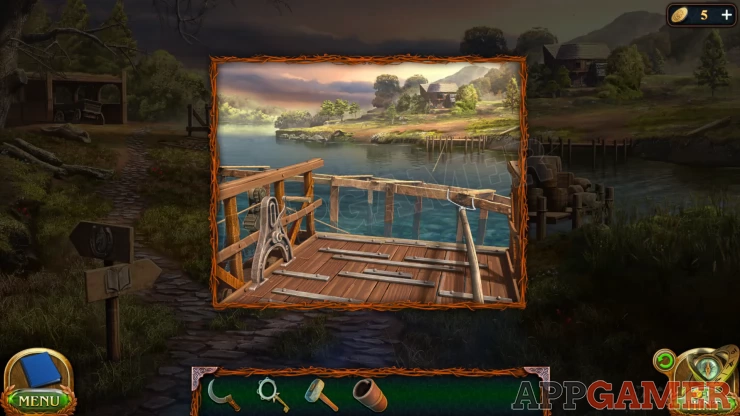
You are at a ferry dock on the side of the river that you need to cross. There is a fallen windmill blocking the ferry and a stable on the upper left.
Collection Item: Rune stone in the center of the path to the dock.
Morphing Object: A small house on the far side of the river to the left of the main house.
First tap to view the stable building on the left side of the scene.
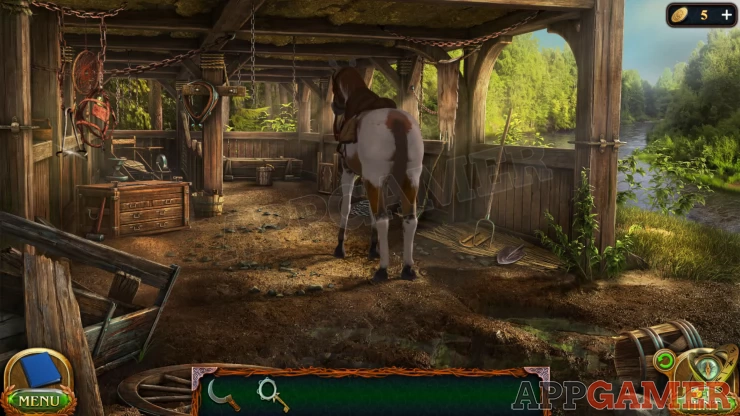
Collection Item: Dream catcher hanging on the top left.
Morphing Object: Shovel / fork head on the ground to the right of the horse.
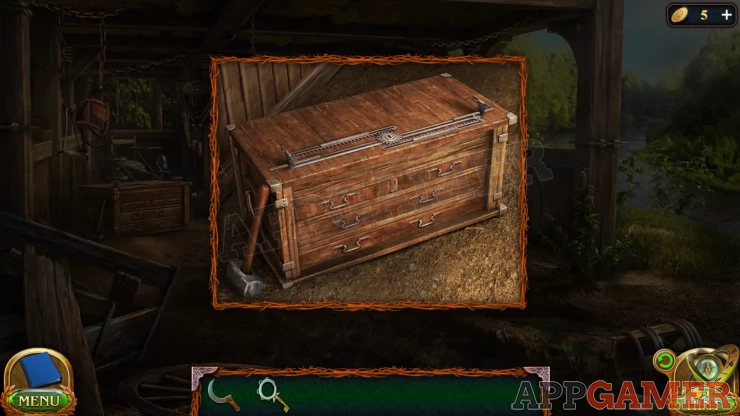
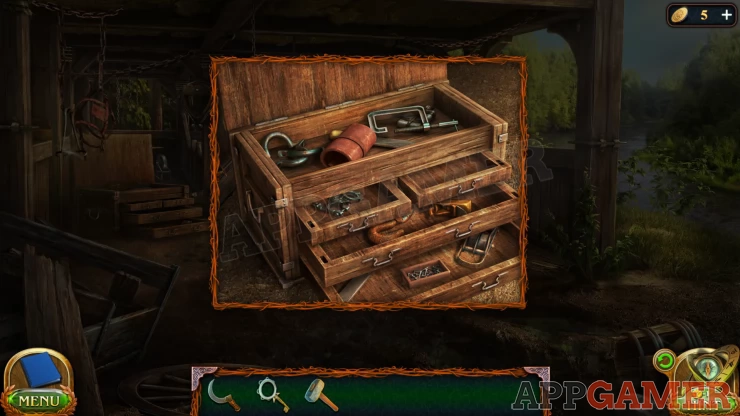
View the large chest to the left of the stable. Collect the Hammer from the side.
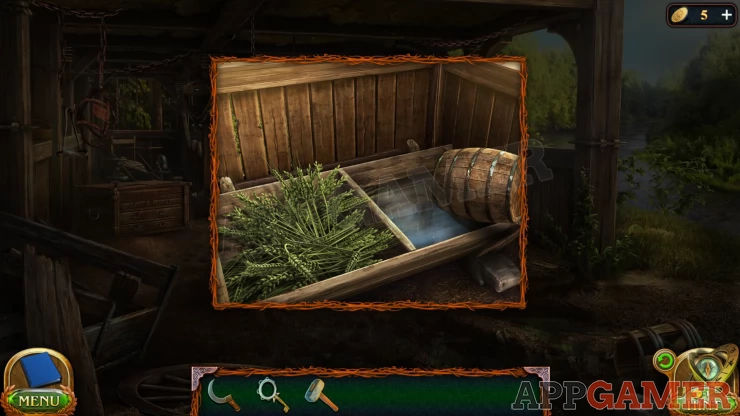
Then view a trough at the far end of the stable, it is missing Oats and water.
Now you can back up tot he first view again and then tap on the grasses on the right side of the dock.
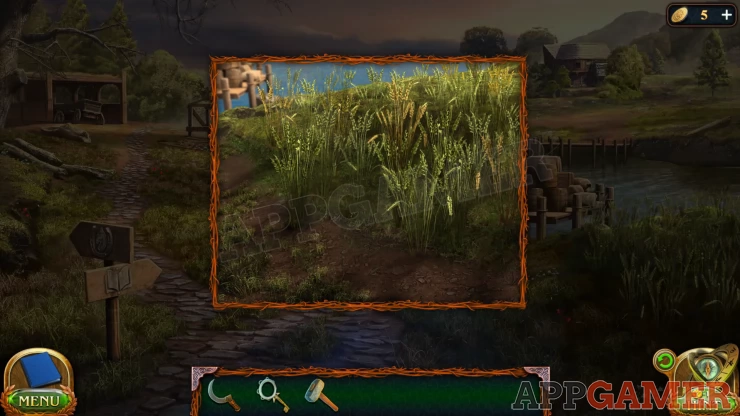
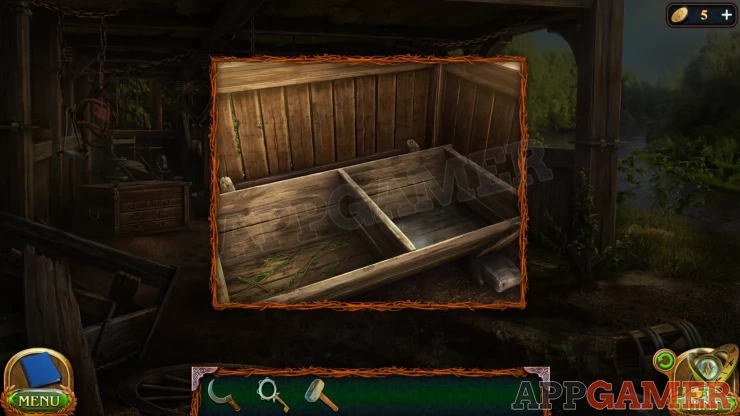
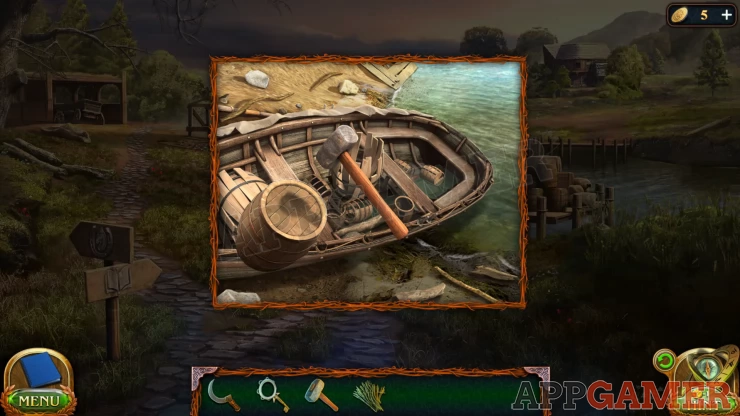
Use the sickle here to cut and collect some Oats. Next view the small covered boat to the left of the dock.

Clear away the debris and then use the Sickle to cut the rope to look inside the boat.
Tap on a small barrel on the right side of the boat and then use the hammer on it to break it open. You will collect a barrel of Water.
Return to the Stable and view the trough. place the oats and the water here and then back up so that the horse will move forward.
You can now collect a Key from the ground where the horse was standing. Next view the chest again and use the key to open it. Collect a Set of Tools.
Now view the broken base of the windmill. Add the set of tools here.
Windmill Puzzle

- To solve this you just need to tap the boards in the correct order to remove them.
- Select boards that are not being blocked by other boards until they are all removed.
- The tools will be used automatically to pry, cut or unscrew the fastenings to remove them.
Once complete the windmill frame will float in the water next to the dock, blocking it.
Go back to the stable and collect a Pitchfork from the right. Then you can return to the dock and use it to push the frame away.
The rope for the ferry will connect and now you can cross to the other side.
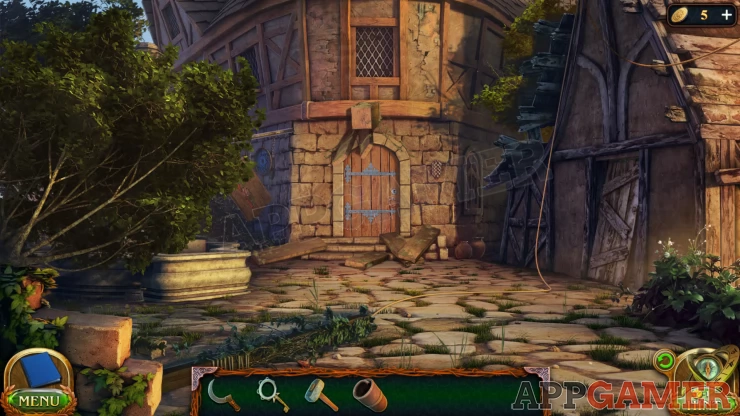
Collection Item: Dream catcher on the school building wall to the left of the door.
Morphing Object.: small wooden toy on the ground to the left below the fallen tree.
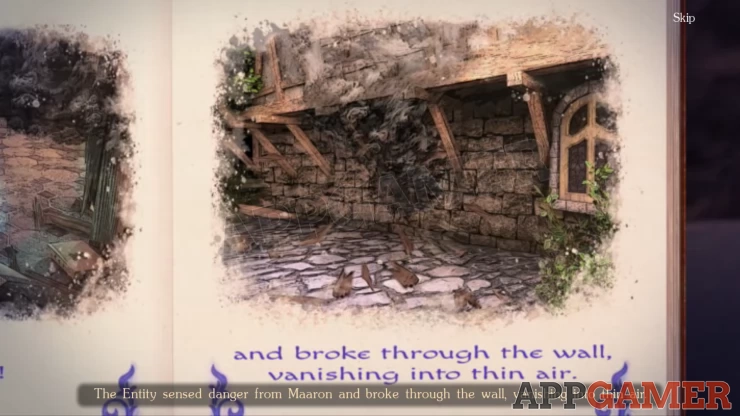
Use the key on the door to the school house to try to get in. The door is blocked though. Part of the wall above the door collapses.
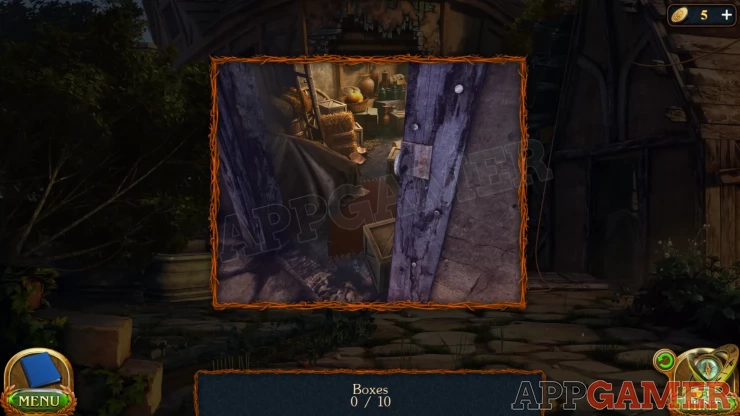
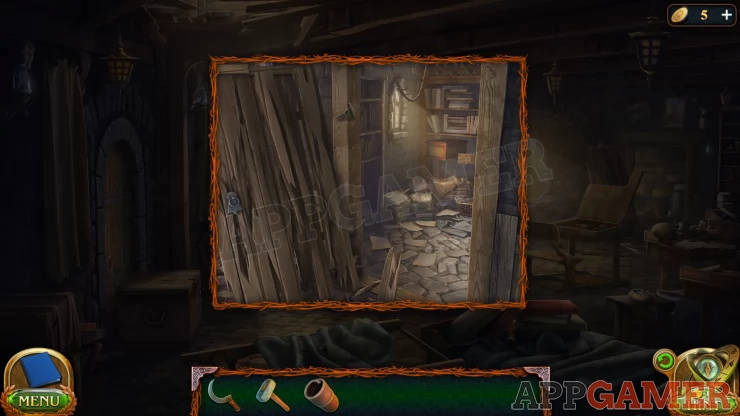
Now tap on the store room door on the right and it will fall open. Look inside. You need to find 10 boxes in the store room.
Once you collect the boxes they will be placed by the main building so that you can climb up and get inside.
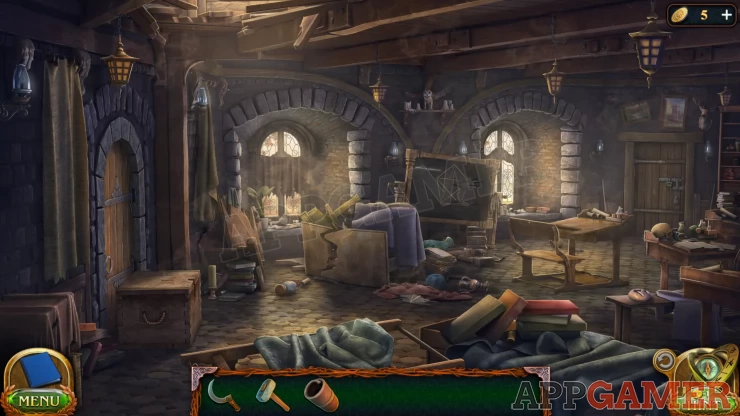
Collection Item: Rune stone on a a small table on the lower right.
Morphing Object: Pot / ball on the floor in the center of the room.
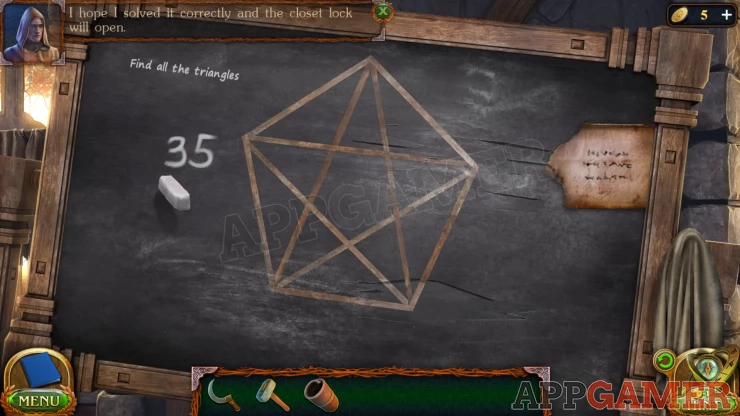
First you need to view the blackboard with the diagram drawn on it.
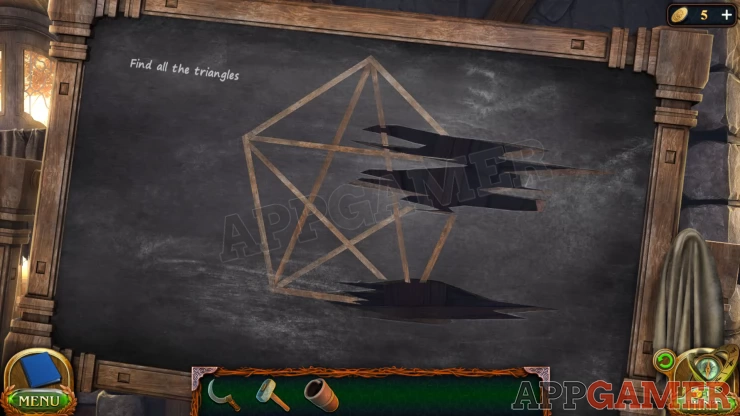
If you look on the other side there is a note that the solution to the triangle problem is a the code for the door.
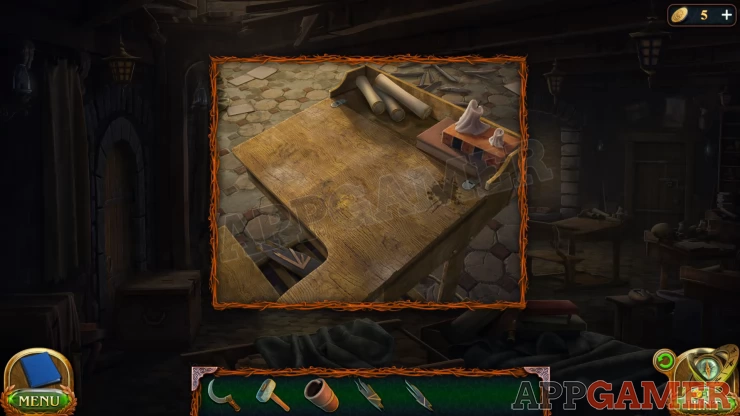
Now you can collect a Piece of board from the floor int he center of the room, then tap on the window on the left side to view it.
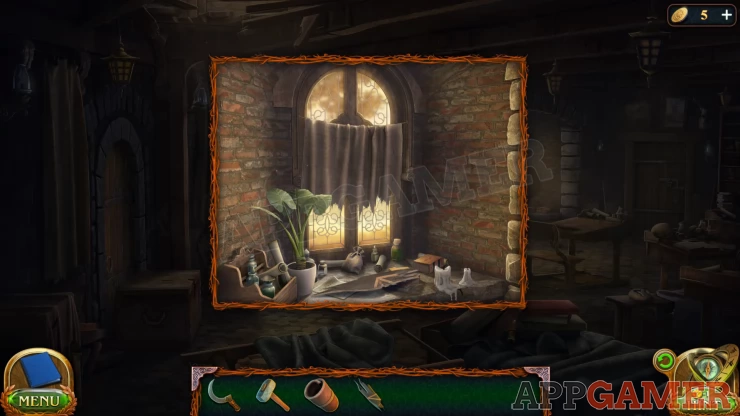
Collect another Piece of board here. Then view a desk to the right of the blackboard.
Collect a third piece of board from the ground then open the desk and collect some Chalk from inside.
View the black board again and then you can add the 3 pieces of board to fix it and then the chalk to start the puzzle.
Triangle Puzzle
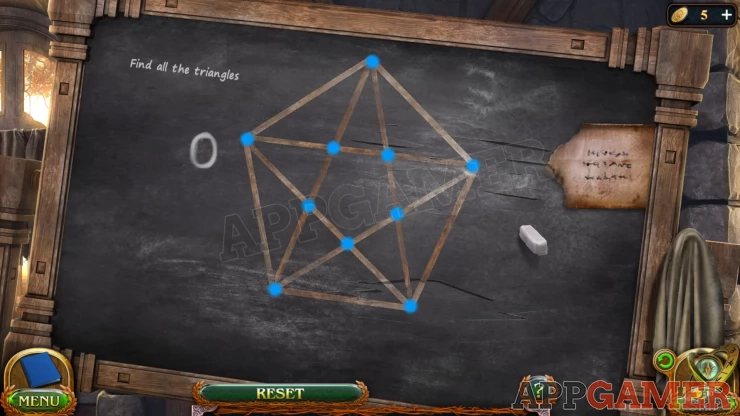
- Use the chalk to mark out all of the triangle that are present in the diagram.
- After drawing each one the game will rub it out and ad it to the total.
- You need to find all of the different triangles to complete it and get a number for the total.
Solution: Show
Once done view the locked door on the right of the room. There is a combination lock
Code 035Show
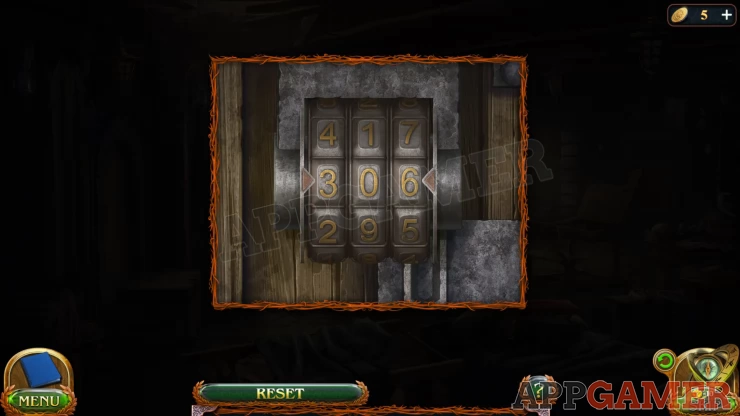
The door opens and the strange entity escapes.
New Task: Follow the tracks.
First look in the opened store room on the right and you can collect a Casket (small box).
Open this in your inventory and take out the items until you find a note about a hidden horseshoe.
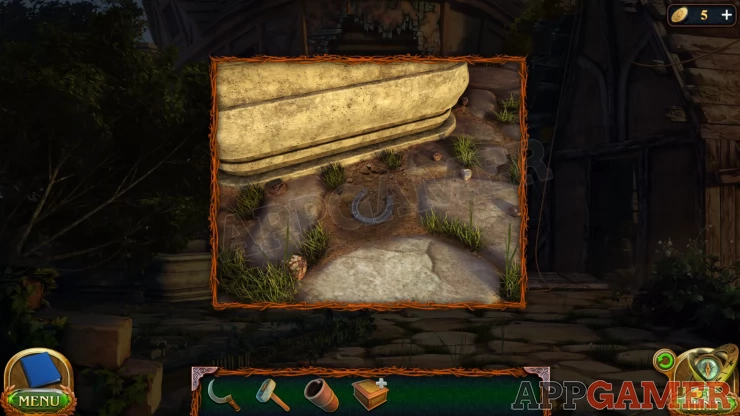
Now move the chest that is blocking the door on the left and head out into the school yard. View the stones next to the fountain on the left to see a loose one. You can lift this and collect a Horseshoe (1 of 4).
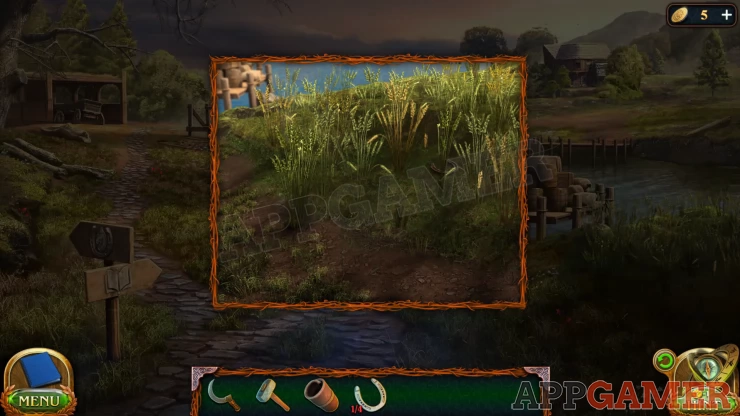
Now travel back to the river bank and look in the long grass on the right. Collect another Horseshoe here.
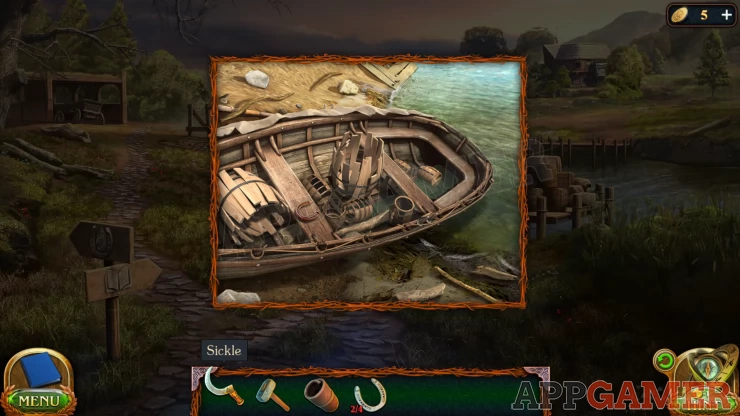
Next look again in the small boat. Collect another Horseshoe from here.
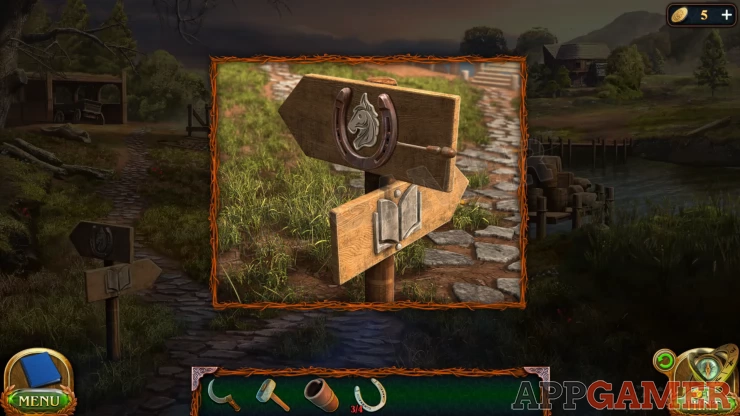
Finally look at the signpost on the left and then use the set of tools on it to remove and collect the Horseshoe (4 of 4).
Enter the stable and look in the opened wooden chest again, Collect some Nails. Then tap on the horse.
Add the nails and the horse shoes to the ground then then lift the horses leg. Use the sickle to clean the hoof.
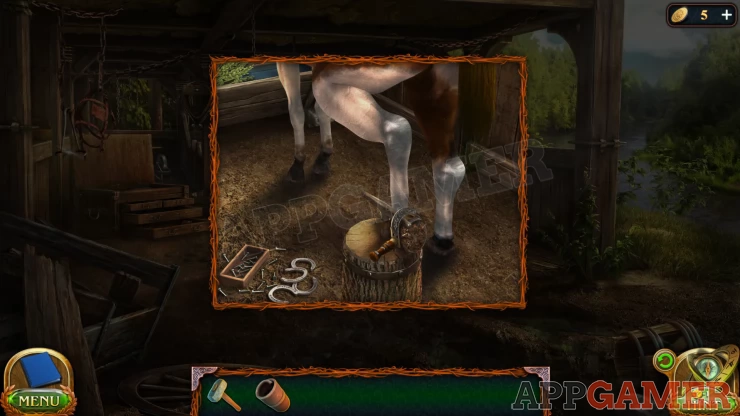
Then use the hammer on the hoof and you will fit 4 new horseshoes.
Now that you have the horse return to the school and tap the road in the distance to follow after the entity. This completes the task.
You reach a cliff that you need to climb up.

Collection Item: Rune stone in the rocks / and grass on the lower right.
Morphing Object: Round shield / wheel on the side of the building on the right.
First look in the tent on the left and view the plans on the table,

Tap to move the plans and then collect from underneath a note, Climber Reminder.
Next view the gate at the bottom of the cliff. Collect the End of the rope.

Tap on the horse and then try to add the rope to the saddle. It tells you that you need to make a loop.
Next view the anvil in the building on the right. Place the rope on the anvil. Take one of the metal pieces from the ground and then use the hammer to connect it to the rope.

Look on the tent on the left again and collect a Bolt and Nut from the table.
Then back at the anvil, add the bolt and nut to the metal buckle and use the set of tools again to fasten it.
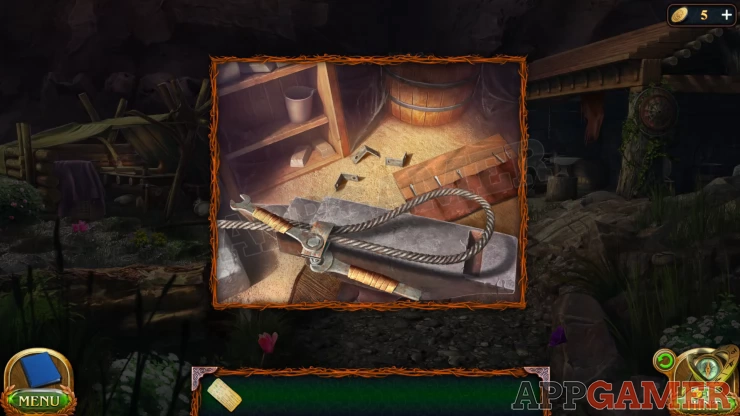
Collect the Rope Loop. Then view the horse again and add it tot he saddle, you can now make the horse move and lift the gate.
Enter the mine, you need to locate climbing equipment.
Find the Climbing equipment
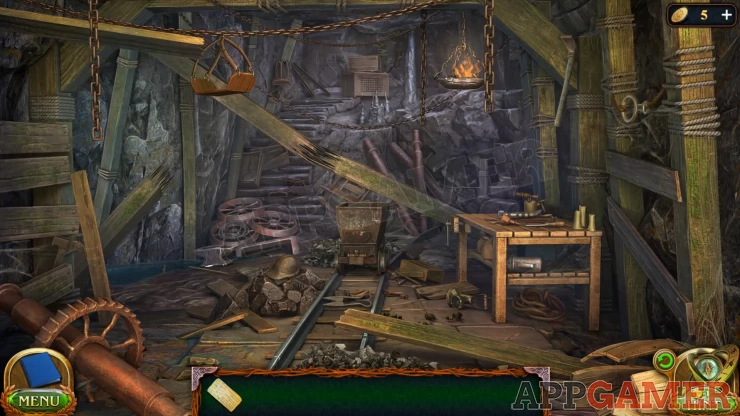
Use the Climbers note on the table on the right to place it there and view the list of items.
Main scene:
- Climbers hammer: on the lower left behind some boards.
- Cable: on top of 3 wheels on the left side.
- Helmet: On the pile of ruble to the left of the tracks.
- Crampons: on the steps above the 3 wheels.
- Safety Straps: hanging above the steps on the left.
- Seat: Hanging from the chain on the top left.
- Ice Ax: In the wall high above the table on the right.
- Rope: Under the table on the right.
- Figure 8: Select the shears / scissors from the tracks in front of the cart and then use them on the rope son the right wall to release the figure 8.
View the boxes at the top of the stone steps.
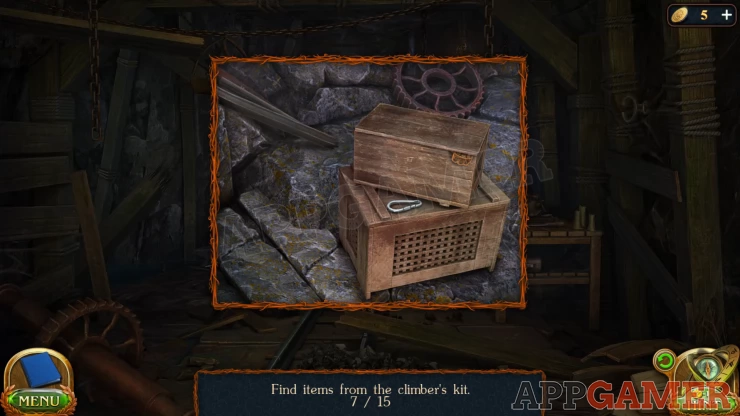
- Carabiner: On the boxes
- Fingerless Gloves: Move the planks on the left to find a pry bar and then use it to open the top box to find it.
View the pool of water on the lower left.
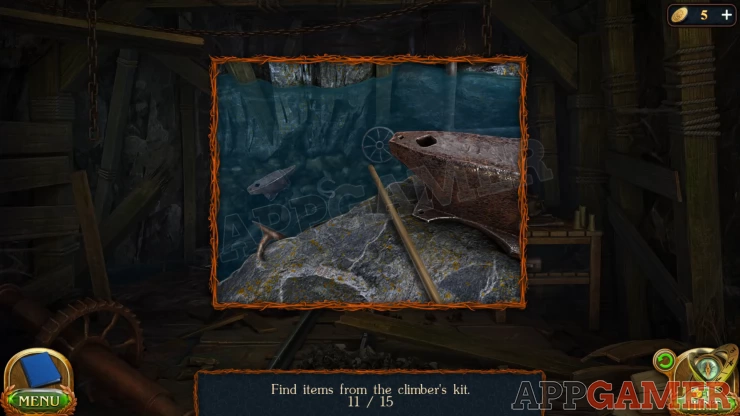
- Rock Hook: Combine the hook with the long stick and then use it on the water to collect it
View the cart on the tracks.
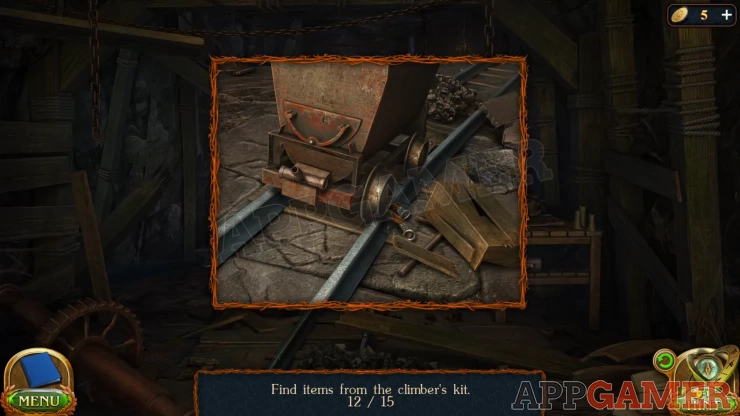
- Loops: Loft the box on the right and then use the handle that is underneath to move the cart. You can then collect the loops
View the table on the right.
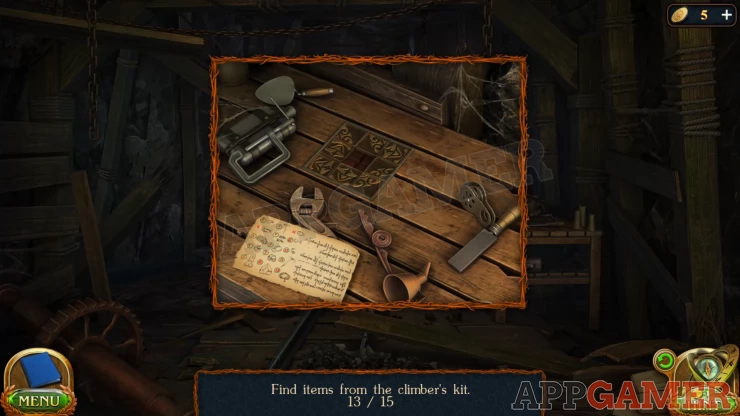
- Block Roller: on the table.
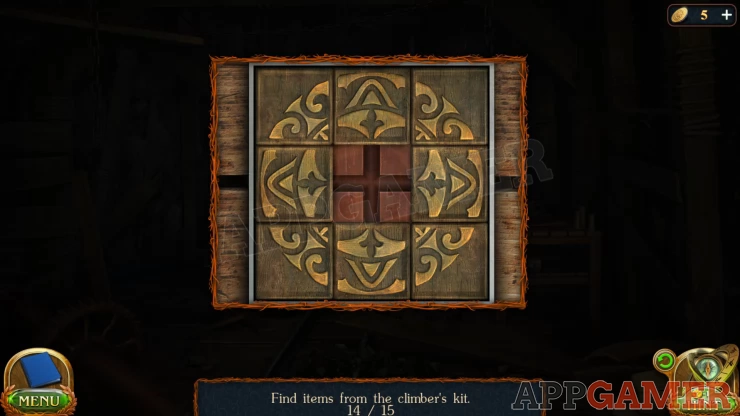
- Ascender: View the puzzle block in the center of the table, solve this my arranging the sliding pieces to complete the pattern.
You will collect the Climber Equipment
You now have a climbing challenge. Use the equipment on the cliff face to start.
Climbing Challenge
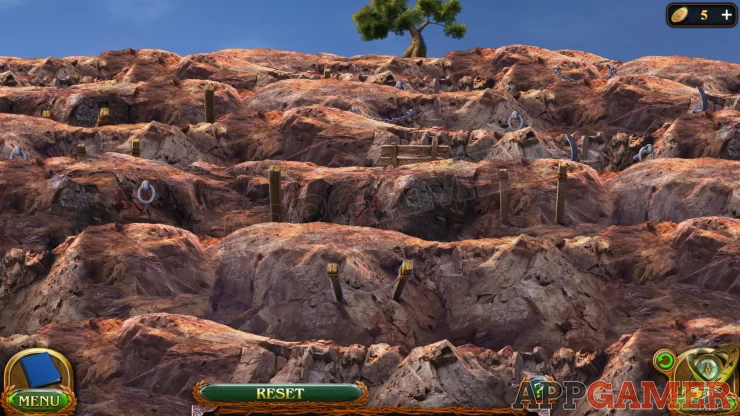
Work your way up the cliff by selecting supports on each level.
Some will be too weak and break so you have to start again.
Solution: There is more than one way up but these worked for meShow
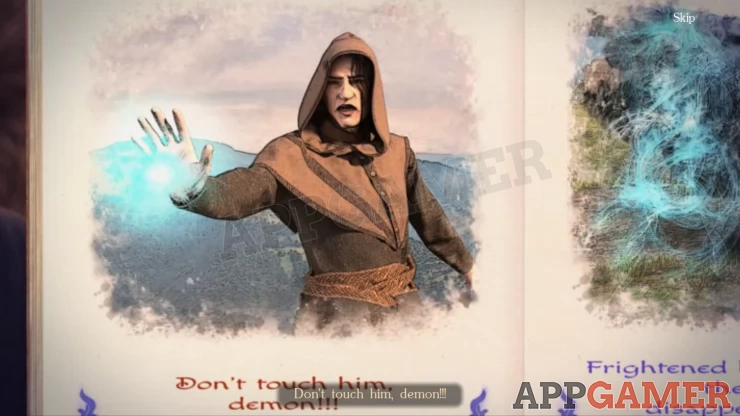
When you reach the top you will find Folnur and save him from the Entity.
| Chapter 2 - Academic Interest Walkthrough - Part 2 | Back to Top | Chapter 3 - First Brotherhood Walkthrough - Part 1 |
 With 20 years of experience in creating video game content for the internet and over 30 years as a gamer, Mark is now a passionate mobile App Gamer. Loving a challenge, he is always ready to get stuck in to both survival builders and puzzle solving games. He has been providing content for AppGamer since 2014.