Chapter 2 - Academic Interest Walkthrough - Part 2
More Lost Lands 9
Welcome to our Lost Lands 9 Walkthrough, another in the popular line of Mystery escape room and puzzle games from Five-BN games. This is part 2 of out guide to Chapter 2.
Following Chapter 2 Part 1, the wizard Maaron has left the Academy through the Dolmen and arrived as Druid's Hill.
Chapter 2 - Academic Interest Walkthrough - Part 2
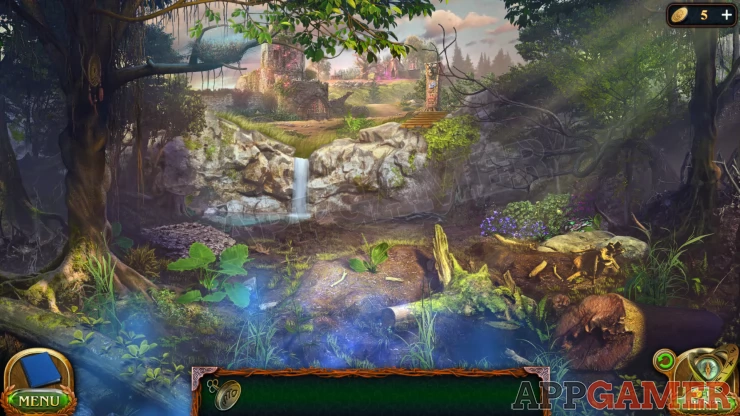
Collection Item: Dream Catcher on the tree on the left.
Morphing Object: pine cone / toadstool by the rock on the bottom right.
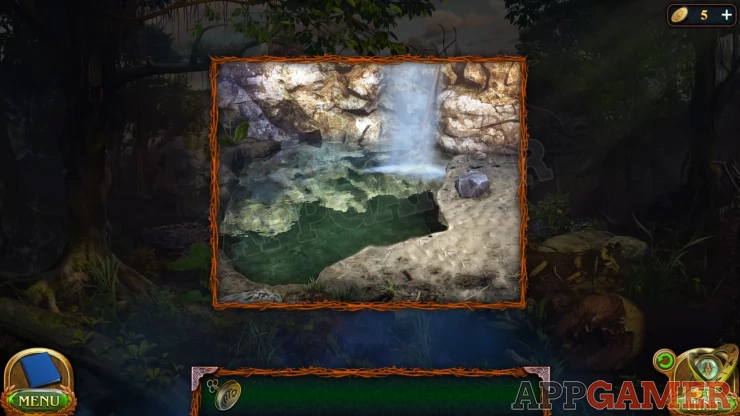
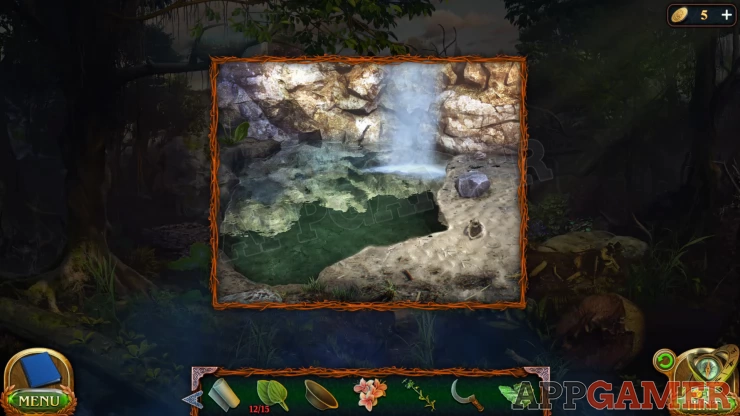
View the Water fall in the center. Then tap on the flowing water to find an old shovel behind it. It will break and you will collect a Shaft.
Now tap to the right of the water call to see wooden planks above, use the shaft on this to pull it down.
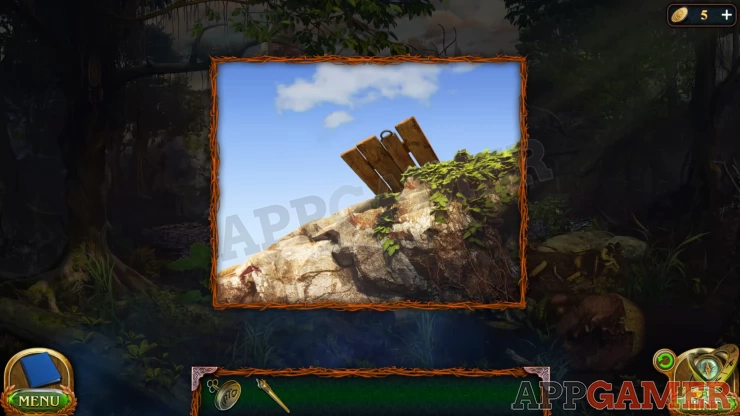
You can now go up the ladder created by the planks to the top area.
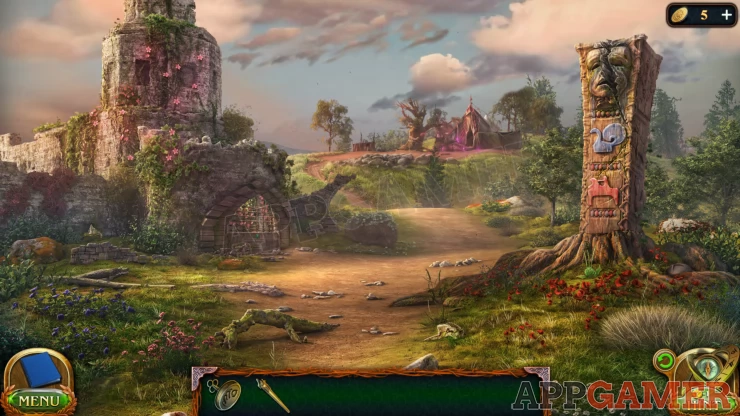
Collection Item: Rune stone on the ground to the right of the Totem.
Morphing Object: Pink flowers on the top section of the castle ruins.
Now tap on the tent settlement at the top of the hill to go there.
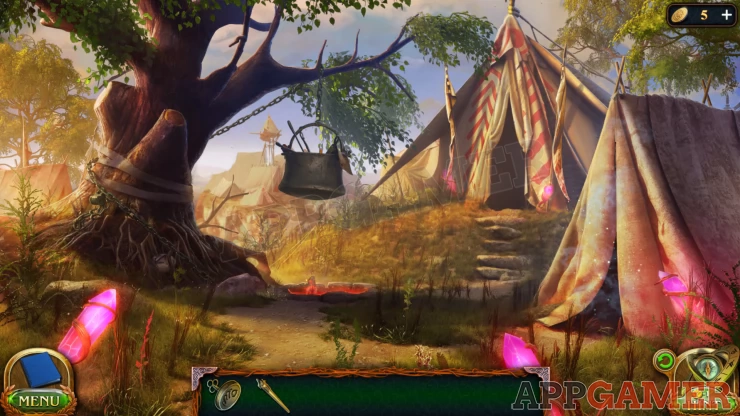
Collection Item: Rune stone in the roots at the base of the large tree.
Morphing Object: Small tent in the distance seen between the tree ad the hanging pot.
Tap the open tent in the center to go inside to talk to Druid Kraunyyr. You will receive a Spell Formula.
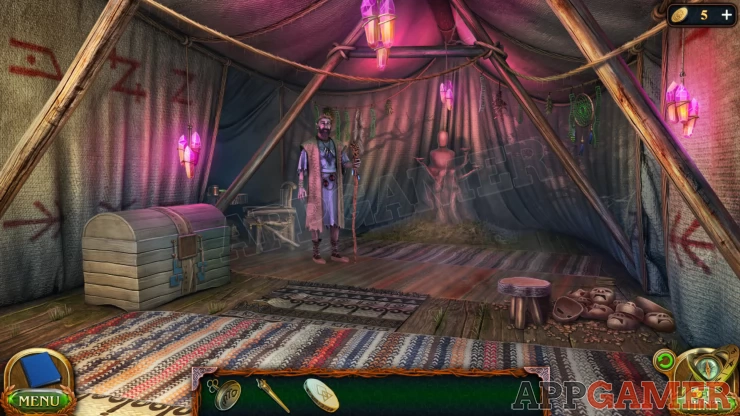
New Task: Treatment
Collection Item: Dream catcher hanging on the top right of the tent.
Morphing Object: Bone / Skin hanging at the back of the tent just behind the Druid.
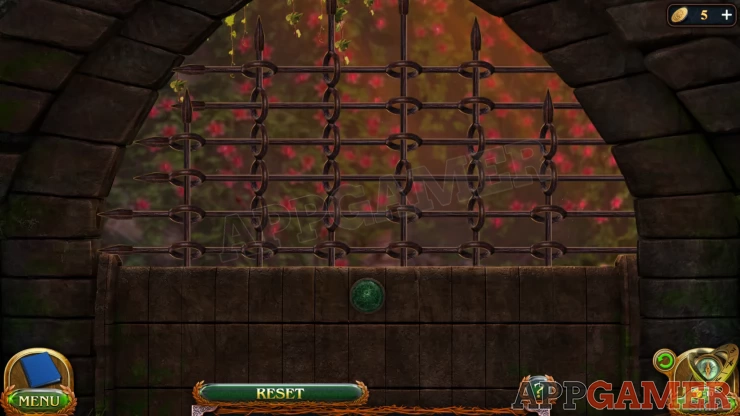
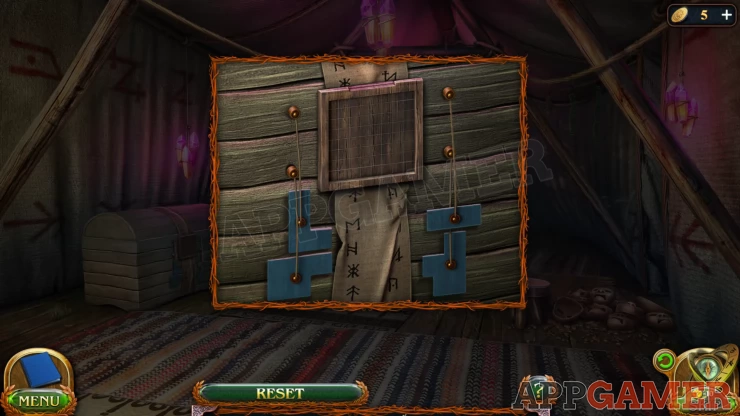
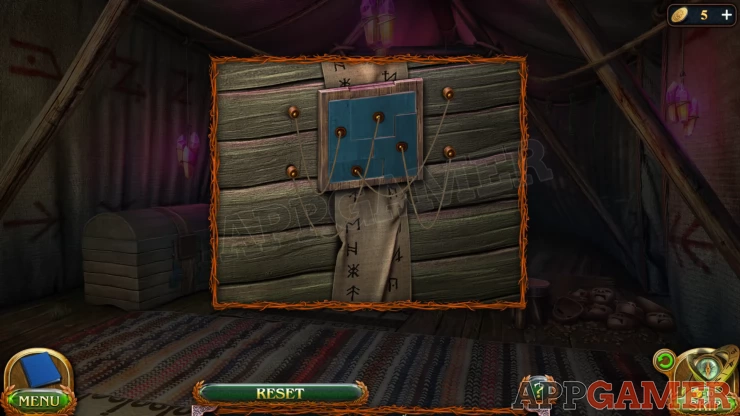
Exit the tent and now view the smaller tent on the right with the barrier blocking your entrance.
Place the Spell formula next to the tent to start a puzzle.
Tent Spell Puzzle
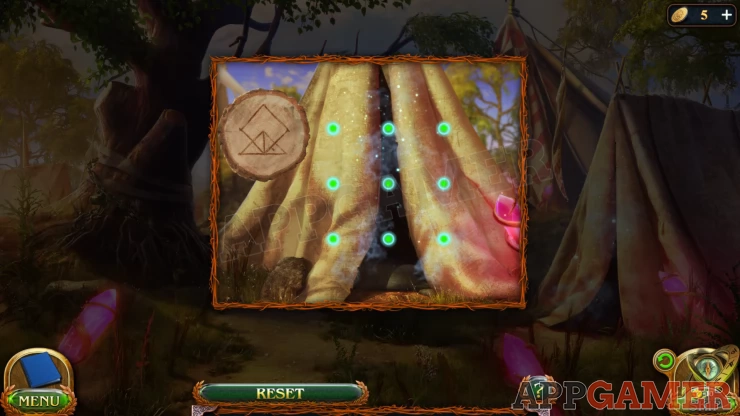
- There is a grid of 9 green dots over the tent.
- Copy the design on the formula by drawing lines between the dots.
- You must complete the drawing using 1 lines without going over any lines you have already drawn.
- Hint: start in the center.
Solution: From the center draw the lower triangle, then go down to the bottom center and draw the rest of the shape.Show
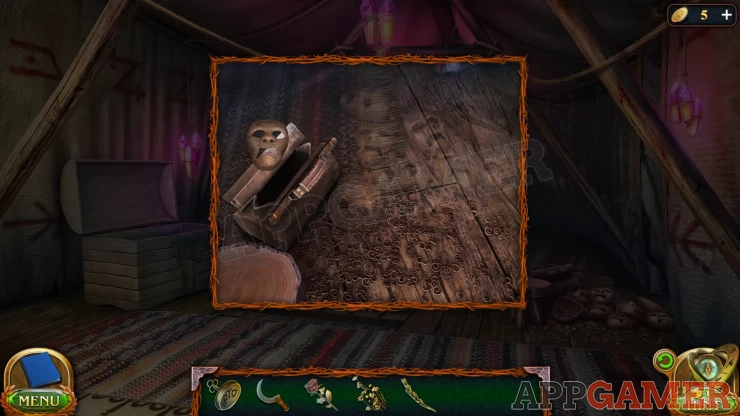
Enter the Treatment tent to find the injured dwarf.
Collection Item: Rune Stone under the wood slab table on the left.
Morphing object: Bottle / Box on the table on the back right.
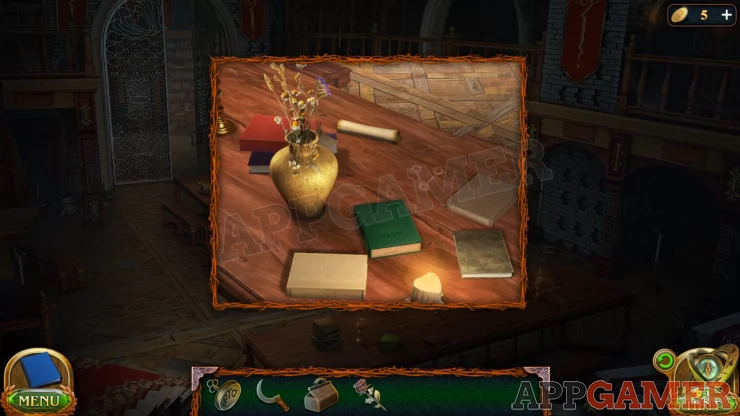
View the table on the left and collect the Ointment recipe and a Piece of the Puzzle.
Next view the red chest at the back of the text with branches growing around it.
Use the puzzle piece on it to start the puzzle.
Red Chest Puzzle
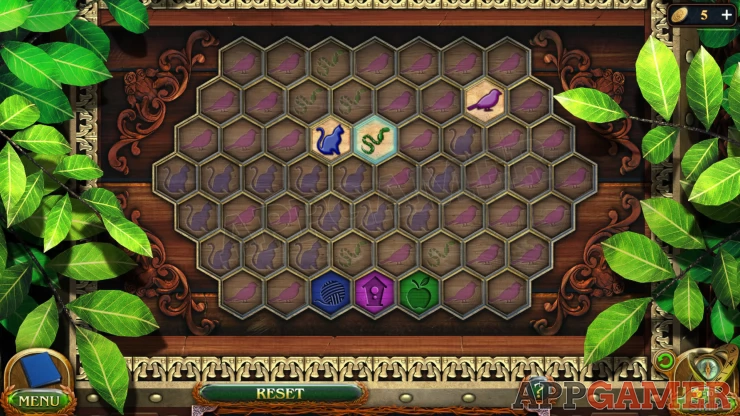
- Move the 3 colored animal tiles from the top of the puzzle to the correct slots at the bottom.
- You can only move a tile to a space on the board with the same background.
- When you move a tile it will change the background to something else.
- Purple Bird => Blue Cat, Blue cat =>Green snake, Green Snake => Purple Bird
- You will need to move each tile carefully to make a path for the others to follow.
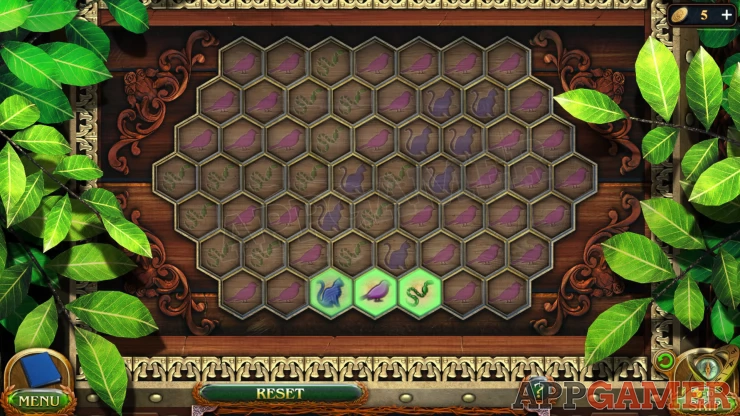
Once the chest is open collect the Chain Key and a Bandage.
Manuscript: also found in the chest.
Check the ointment recipe to see what items you need to collect. Then exit the tent.
Tap on the bottom of the large tree to see a chain.
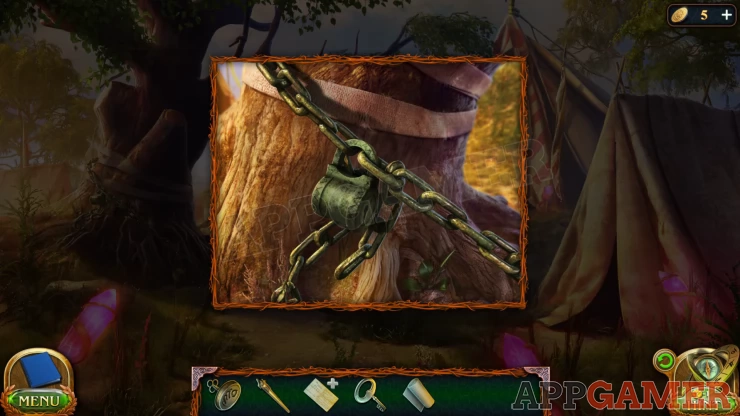
First tap on the green plant at the base of the tree to collect the Leaves of Healers Tongue (3 of 15). Then use the chain key on the lock to release the large pot.
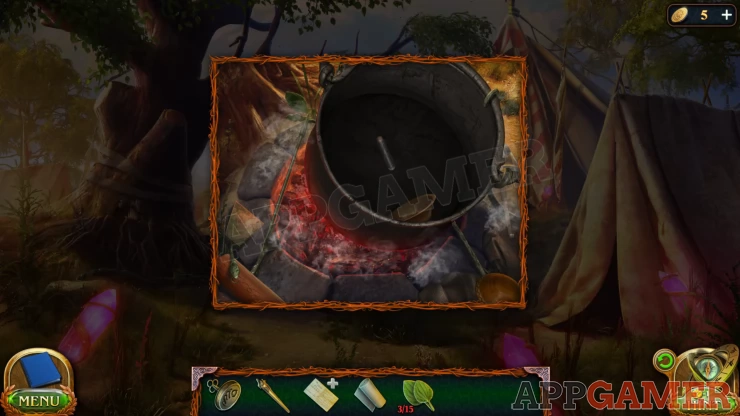
You can now view the large pot on the ground, tap inside to remove the items until you collect a Bowl. There is also an Empty flask inside that you need but cannot take yet. Collect more Healers Tongue (5 of 15) from the top left.
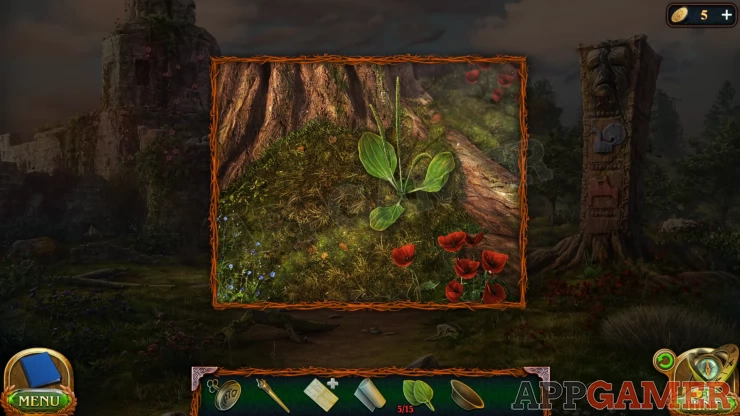
Back up to the view with the castle and then tap on the small green plant on the bottom right below the totem. Collect another Healers Tongue (8 of 15).
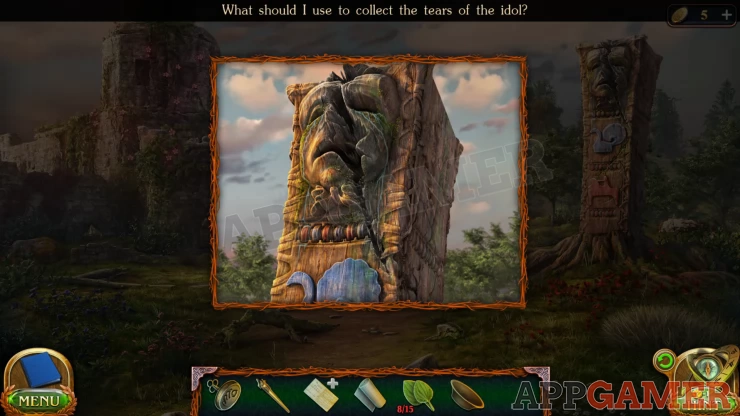
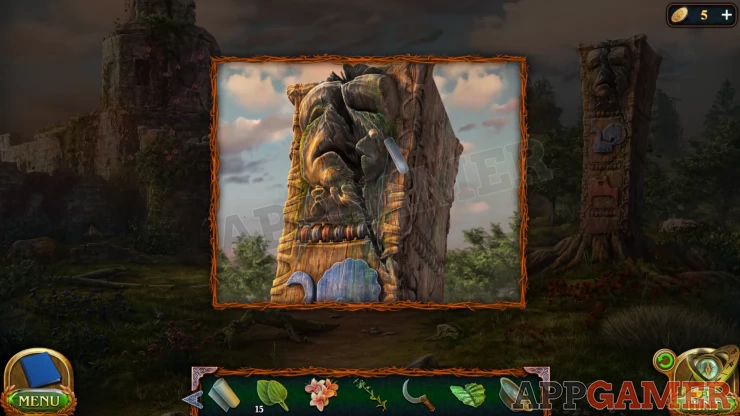
Then tap on the Totem (Idol) itself to see the top. There is a prompt about collecting the tear of the idol. You cannot do this yet but you need to view the totem first.
Next tap on the gate to the castle on the left. There is a puzzle to open the door.
Castle Door puzzle
- The puzzle has 6 vertical bars and 6 horizontal ones.
- The bars cross each other and go through each other.
- You need to remove them in the correct order, You cannot move ones that are blocked by others passing through them.
Solution: Vertical bars are left to right, V1 to V6. Horizontal bars are top to bottom H1 to H6. the Order is: V1, H4, V4, H3, V6, H5, V5, H2, V2, H1, V3, H6Show
Collect the Firefly Ivy Flowers from inside the opened gate.
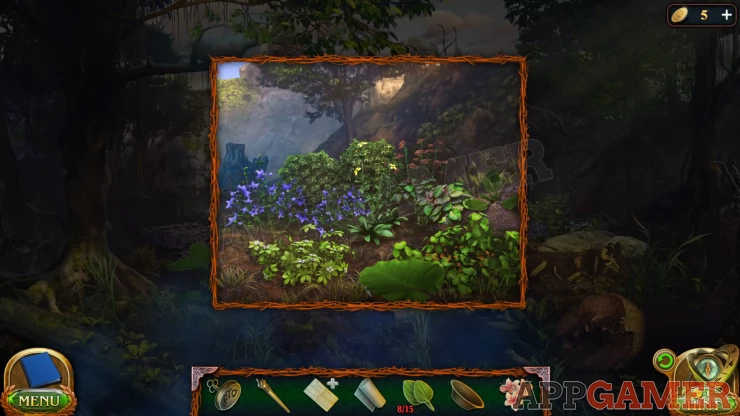
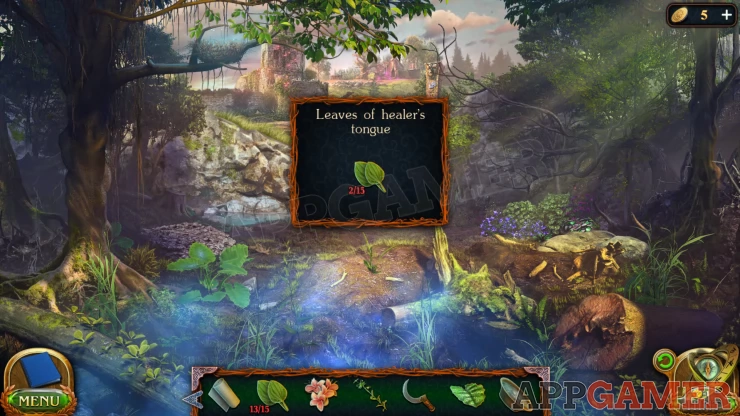
Now back up to the first area of Druid's Hill with the waterfall. Tap on the flowers on the right side and then collect some Stem of beetle milk (small yellow flowers) from the center. And more Healers Tongue (11 of 15) from the right.
Then move a large green leaf at the bottom to collect a Sickle
Tap the top of the tree on the left. to look up, then use the Shaft on the tree tops to hit the branches and dislodge some pollen.
Now view the base of the tree on the left.
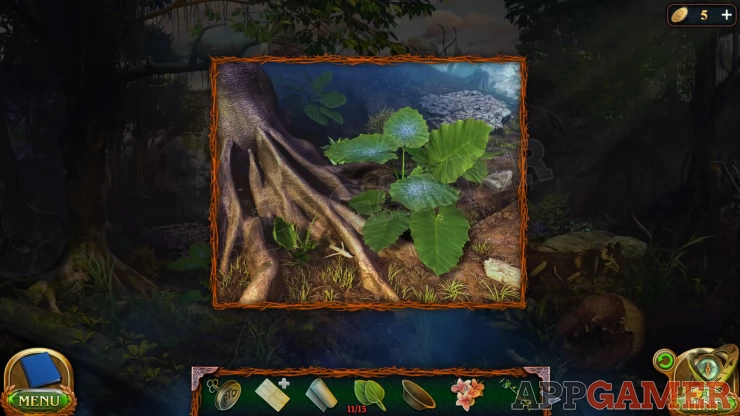
Collect more Healers Tongue (12 of 15). from the bottom left by the tree and then collect the leaves from the green plant on the right to get Forest Fairy Pollen.
Now view the waterfall again, collect another Healers Tongue (13 of 15) from the back left side. Then tap on the silt ground on the right to make a hole. Use the Bowl here to collect Silt.
Finally that is one more Healers Tongue plant in the center of the scene. Collect the last 2 Leaves of Healers Tongue (15 of 15)
Go back to the area with the tents. First look inside the large pot on the ground again and collect the flask. You can do this if you have viewed the idol previously.
Back up to the area with the Idol and view it, use the flask to collect the Tears of the Idol.
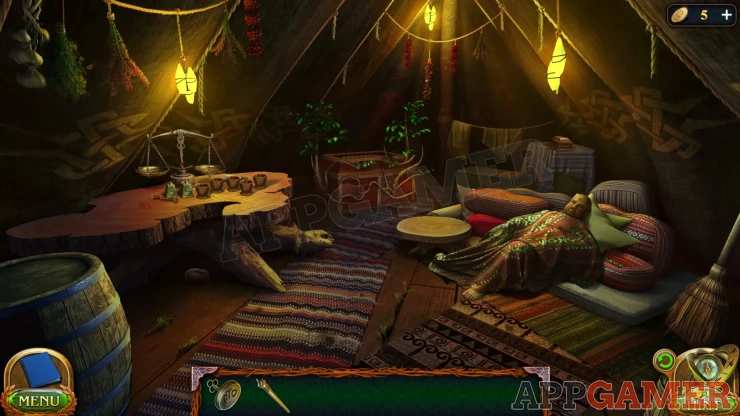
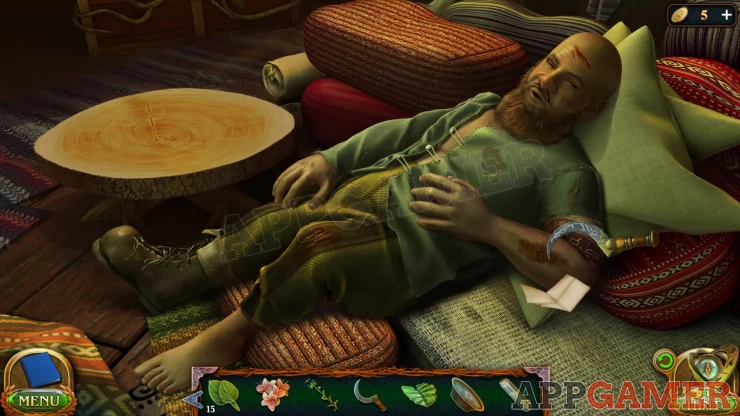
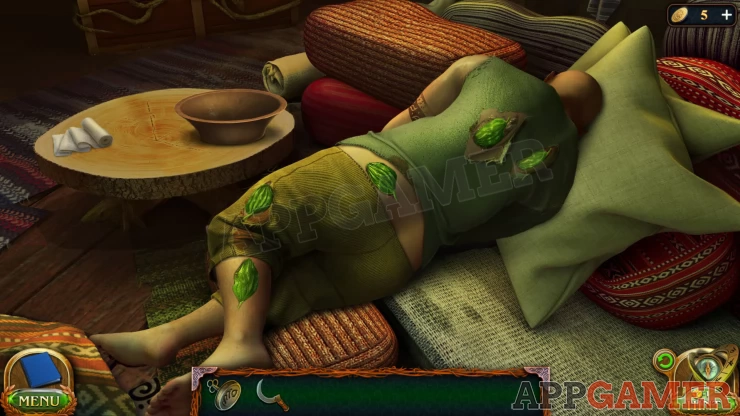
Go back to the tents and look inside the one on the right with the injured dwarf. View the dwarf and remove the blanket from him.
Use the sickle on his arm to collect some dried Blood of the Victim.
View the ointment recipe in your inventory and add the 6 ingredients to it. You will collect the Set of ingredients.
Then view the table on the left of the tent and add this to the table to place them all.
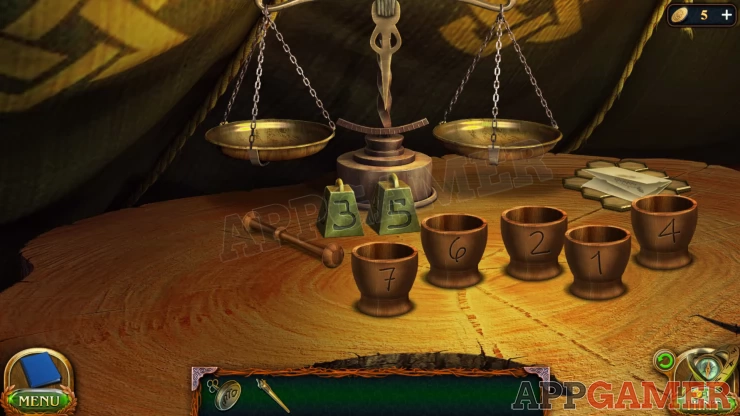
Make the Ointment
- The first step is to use the weights and the 5 small cups to measure out the correct amounts of silt.
- Use the scales to weight items so make the 5 small cups weight the same as the numbers on them.
- You can combine them to make the scales balance to get the correct amounts.
Solution: Follow these stepsShow
Now select each of the 5 ingredients on the table and add the to the cups of silt according to the instructions. Then use the Pestle to grind the ingredients in each cup.
Add the contents of the 5 cups to the bowl and use the pestle again to mix them. Collect the Ointment.
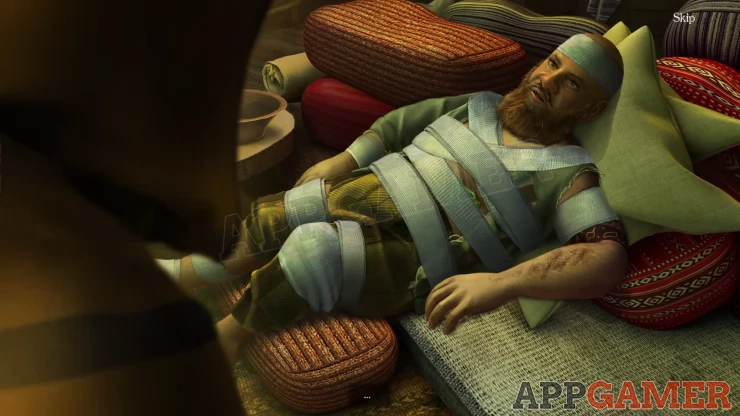
View the dwarf again and place the Ointment, the Healers tongues and the bandage on the round table. Then remove the blanket.
He has 15 wounds to find and place the ointment on. Move his clothes to find the wounds. you will also need to move his head and lift his arm. There are 10 areas to cover on his front side.
Then turn him over and find 5 more areas in the same way.
He is then wrapped in bandages and will start to recover.
New Task: Telepathy
Return to the Library in the Academy, you need to find a book about Telepathy. Once there tap on the archway on the right leading to a passage.
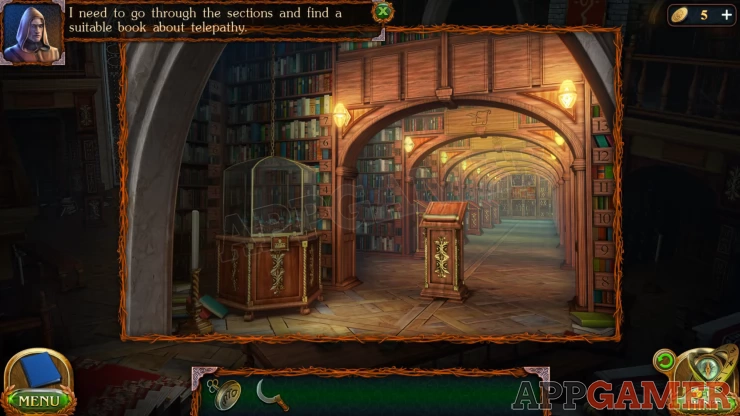
The tap on the stand in the center to see a scroll with a list of the library sections. You need Section 5 - Spells, notice the symbol.
Move forward down the passage until you reach the section of books that has the matching symbol above the arch. Then view the stand on the left with another scroll showing the shelf numbers. You want Shelf 4, Telekinesis and Telepathy.

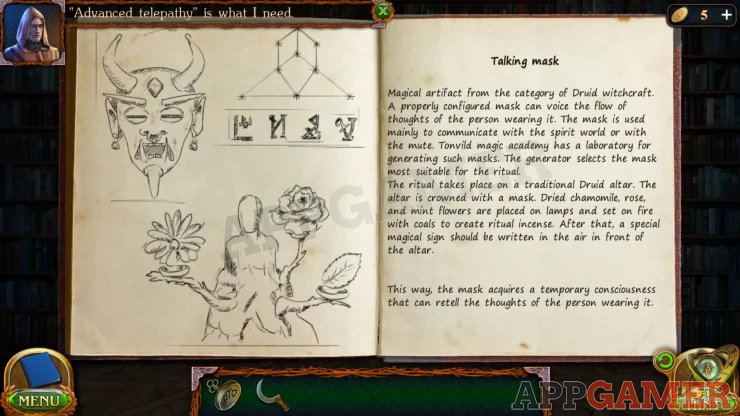
Check the shelf to find the book. It has details on how to make the talking mask.
New Task: Talking Mask
Make note of the instructions in the book.
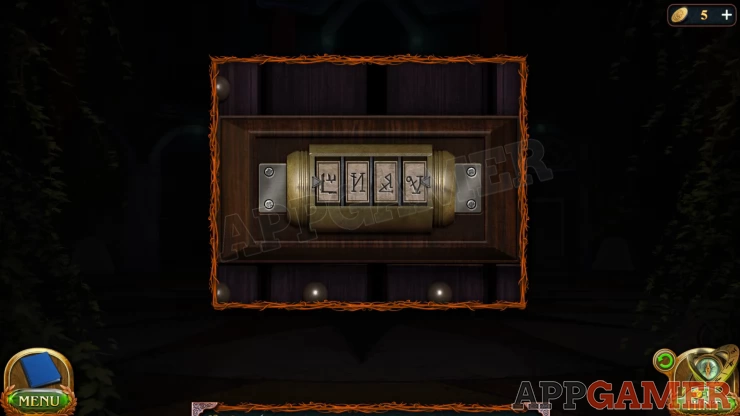
Go back to the Entrance hall of the Academy and view the large door on the left. It has a code lock.
Laboratory Door Code
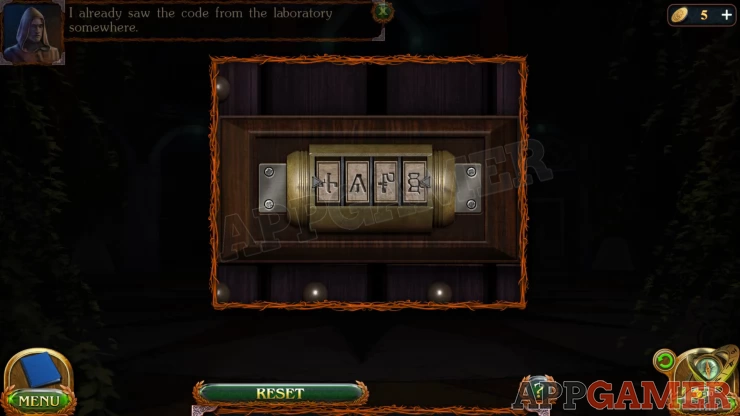
- You need to enter 4 symbols.
- The symbols can be found in the Book on Telepathy.
Solution: Show
Enter the Laboratory.
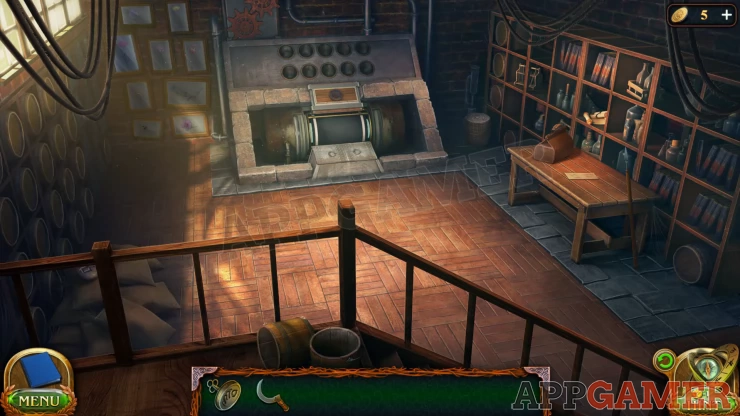
Collection Item: Rune Stone, on some sacks, lower left of the room, just under the handrail.
Morphing Object: Sack / barrel on the back right corner of the room.
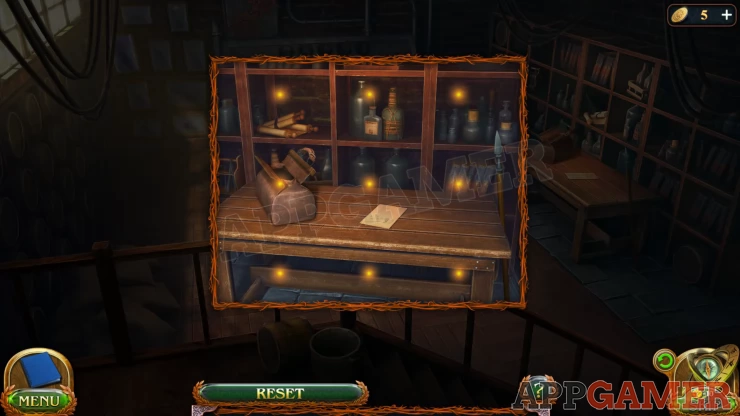
View the table on the right of the room.
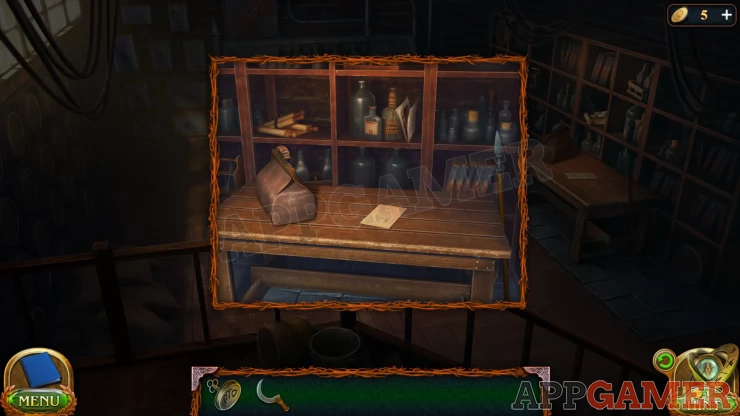
Manuscript: on the shelf above the table.
Read the note on the table about the bottomless bag. Then tap on the bag to start a puzzle
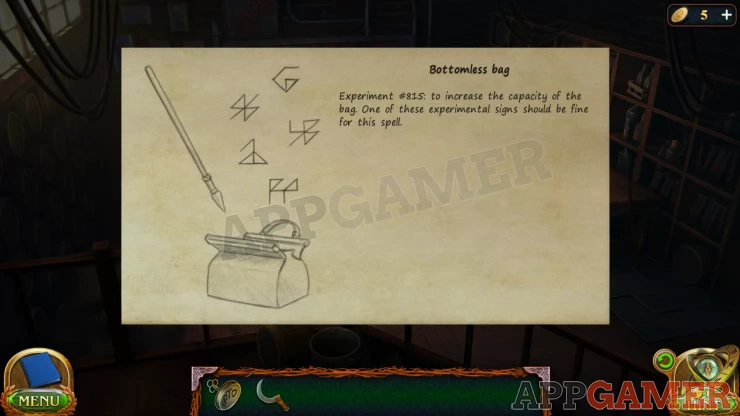
Bottomless Bag
- The paper shows various patters that can create a bottomless bag.
- You will see a grid of 9 dots. Yo need to connected them in a single line without repeating a connection.
- After you draw a matching pattern you need to tap the spear / stick on the right to test the bag to see if it has worked.
- You may need to try various symbols until the bag is bottomless.
The one that worked for me was: Show
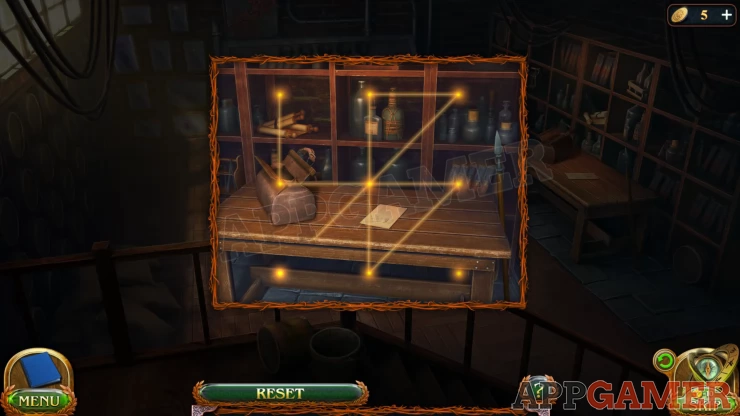
You will then collect the Bottomless Bag
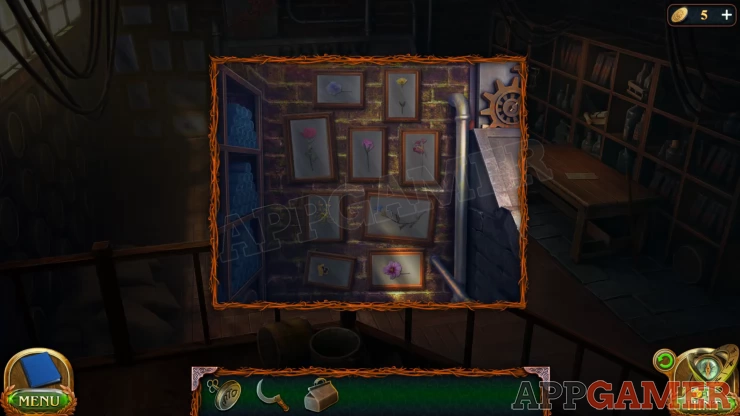
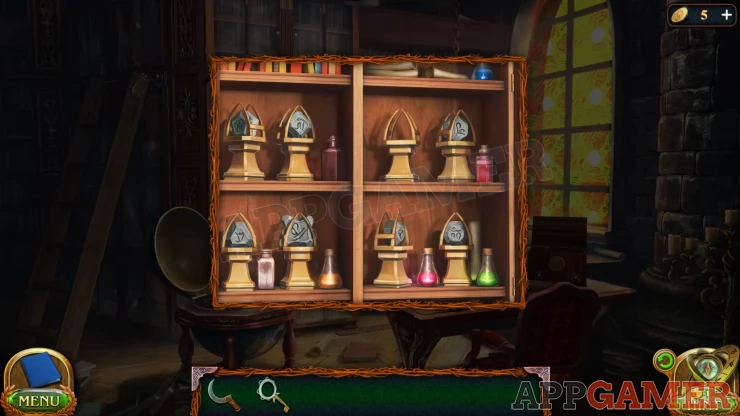
View the frames on the left side of the generator to see a range of flowers and herbs in them. Collect the Dry Rose.
Go to the main room of the library and view the long table in the center again. Collect the Dry Chamomile from the vase.
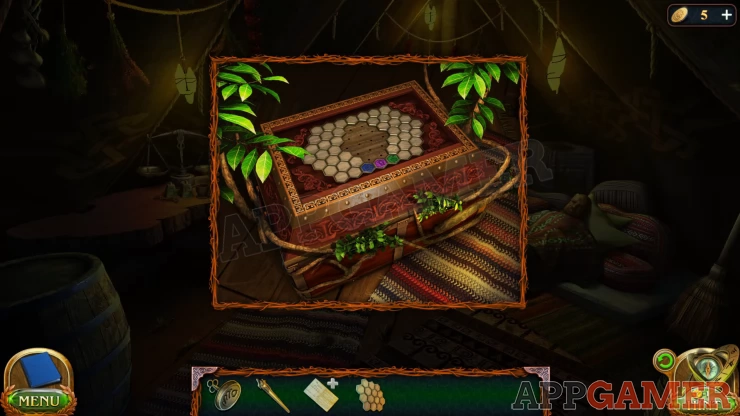
Now you need to return to the Druid's Tent View the large chest on the left to see a puzzle lock
Herb Chest Puzzle
This is a simple puzzle to place the 4 blocks onto the board to make them fit
Solution: Show
Open the chest and collect the Dry mint.
Now view the pile of masks on the floor on the right of the tent. Place the bag onth floor and you will collect them as a bag of Blank Masks.
Go back to the Laboratory room in the Academy and view the generator. You your personal signet on the top panel to open the doors at the bottom.
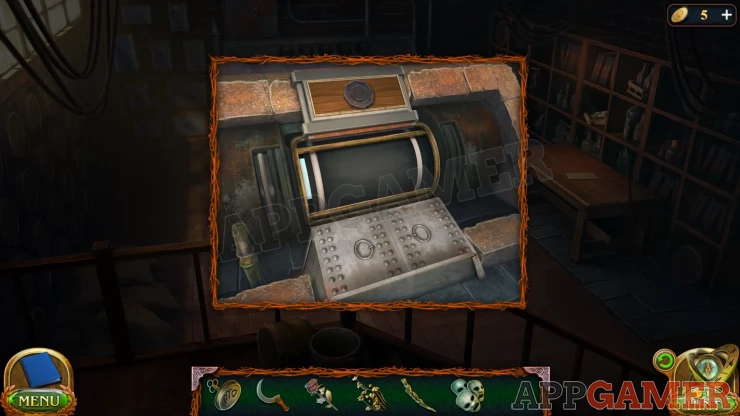
Place the blank masks into the opened box to start a puzzle.
Masks Puzzle
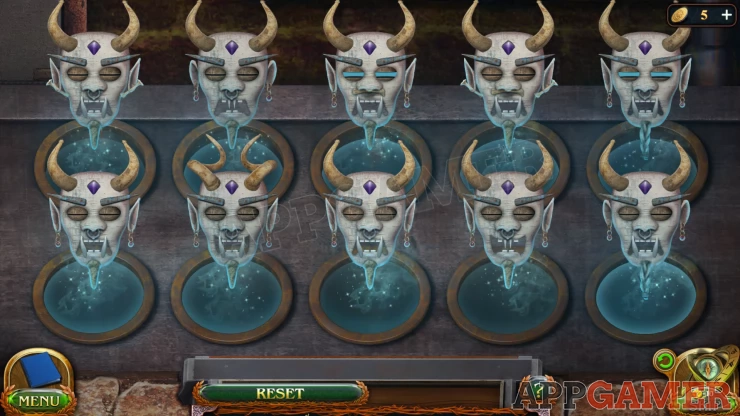
- There are 2 identical masks within the 10 shown.
- Look for odd ones out amongst the features on the other masks
- You need to tap to remove one at a time that has a single element on it that is different from the others.
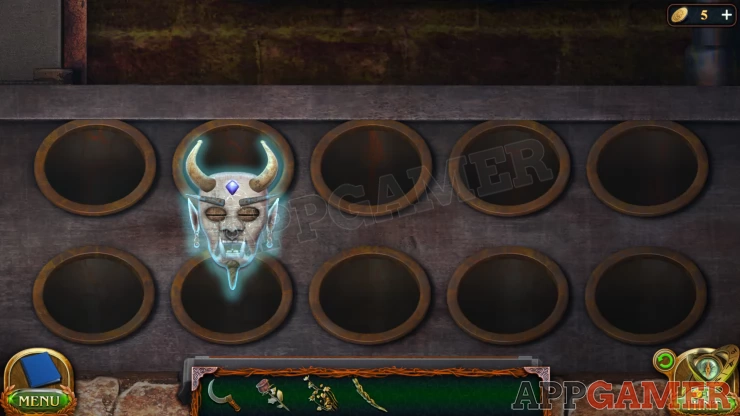
- When 2 remain they will fuse to form the Ritual Mask for you to collect.
Solution: The positions and differences may be different for you. I found the individual differences in the follow order. Horns, Mouth shape, Teeth, Ear shape, Beard design, Eyes, Nose ring, Earrings.Show
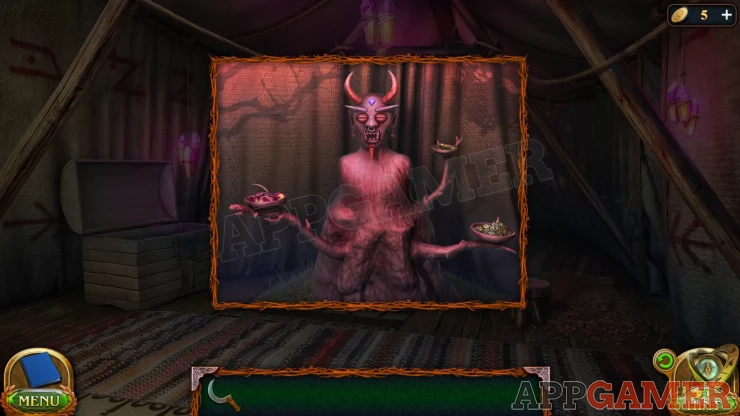
Return to the Druids Tent. View the statue figure at the back and add the 3 herbs and the mask to it.
Back out of the tents and view the large pot on the round on the left. It is sitting on some hot coals.
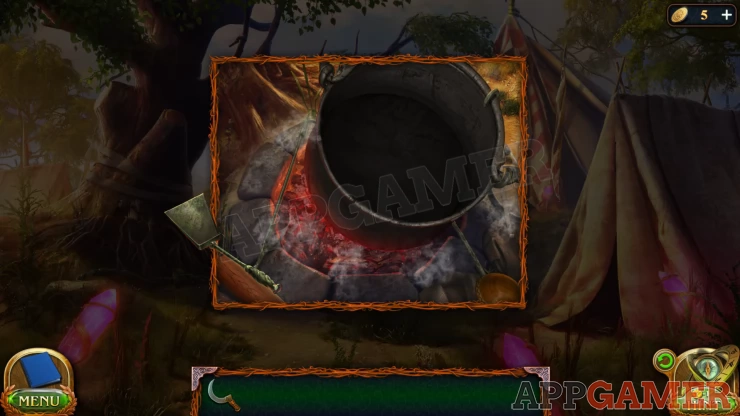
Tap the small green handle on the lower left to use a small shovel and collect some Hot Coals
Go back inside the tent and add the the hot coals to the 3 herbs. You will now see a pattern appear.
Ritual Mask Puzzle
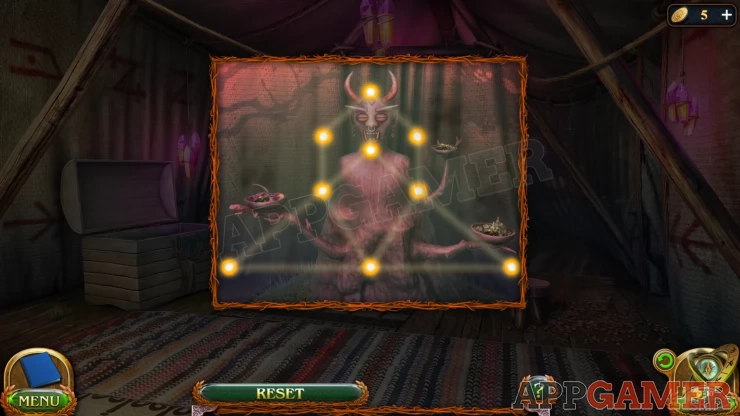
As before you need to draw the lines on the pattern without repeating a line.
Start at the top center or center points.
Once done you can collect the Talking Mask.
Go back to the healing tent and place the mask on the dwarf. This completes the task.
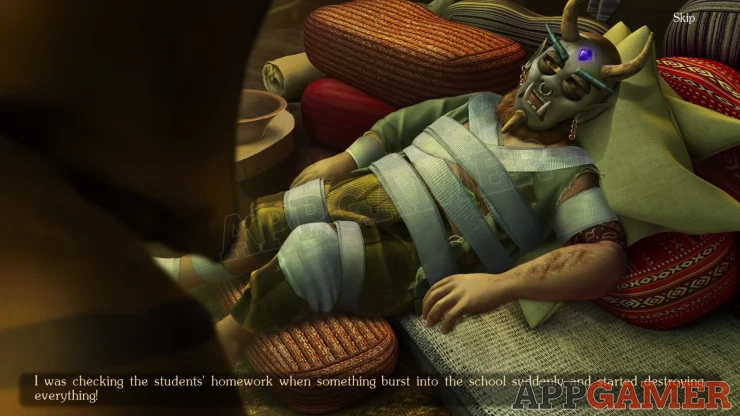
The dwarf will tell you about the incident and where to go next, Trilly Valley. You will collect the School Key.
New Task: Scene of the incident
Go back to the Academy and find the map in the Rectors Office again. Use the tracing overly to find the correct rune symbol for Trilly Valley.
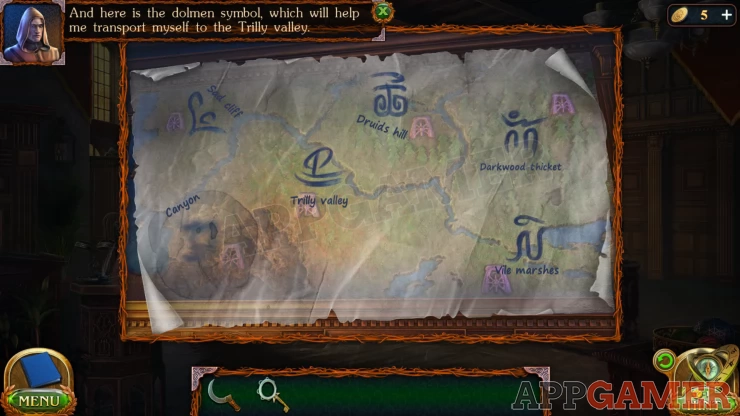
You can now go to the Archive Room again and select that Rune.
Bottom Row, 2nd from the left.Show
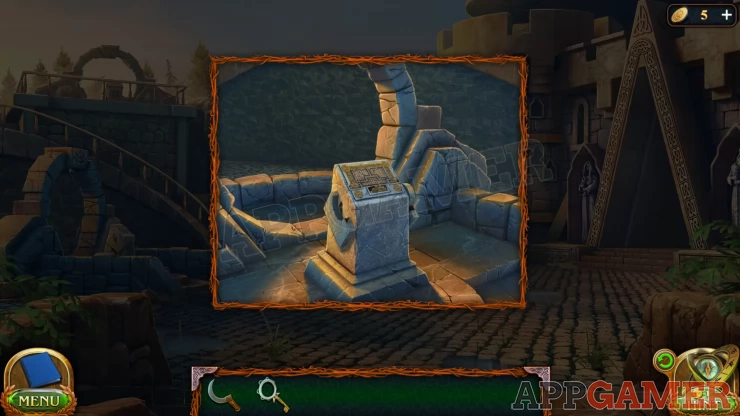
Go to the Courtyard and use the rune stone on the Dolmen on the left.
Dolmen Puzzle
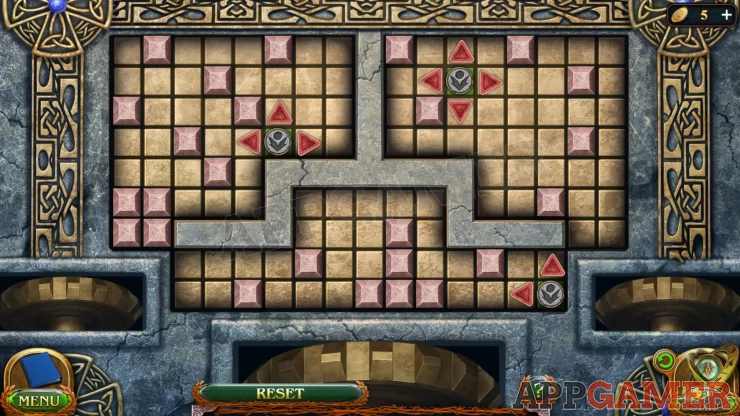
- The puzzle has 3 sections
- In each section is a chip that can be moved around, it will move as far as it is able to in any chosen direction.
- As it moves it wills the board with green squares. You cannot pass over green squares.
- Move each chip around to fill the entire board.
Hints:
Top left board, move to the righr first.
Top right board, move down first, then left.
Bottom board, move up first.
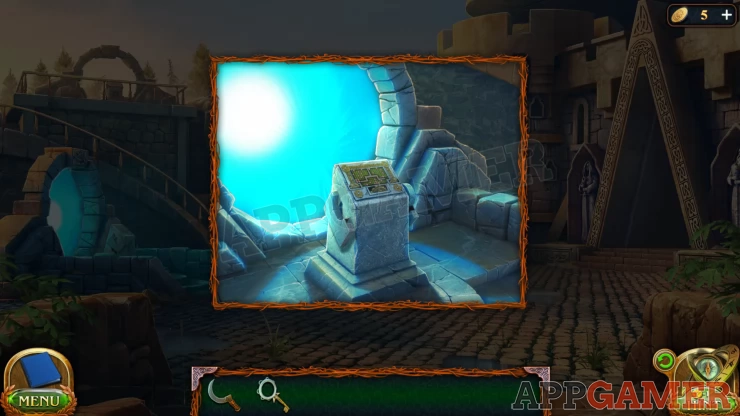
Once done the Dolmen activates and you can travel to Trilly Valley.
Continue the guide in Chapter 2 Part 3
| Chapter 2 - Academic Interest Walkthrough - Part 1 | Back to Top | Chapter 2 - Academic Interest Walkthrough - Part 3 |
 With 20 years of experience in creating video game content for the internet and over 30 years as a gamer, Mark is now a passionate mobile App Gamer. Loving a challenge, he is always ready to get stuck in to both survival builders and puzzle solving games. He has been providing content for AppGamer since 2014.