Chapter 2 - Academic Interest Walkthrough - Part 1
More Lost Lands 9
Welcome to our Lost Lands 9 walkthrough. Titled as Stories of the First Brotherhood, this game is another in the popular line of Mystery escape room and puzzle games from Five-BN games. This is our walkthrough for Chapter 2 of the game. You will need to have completed Chapter 1 to unlock it.
Chapter 1 followed the young Fonur who has released a strange entity but has been saved by the apearance of a magician. In chapter 2 we will learn about the Magician called Maaron who is also a feature of other Lost Lands games.
Our walkthrough is broken down into logical parts to cover each section of the chapter. It will help you locate the items you need, and give full solutions for the puzzles you will face. Please note that the game can be confusing at times as items that you need to collect may not let you pick them up until you have found a need for them.
This means that you will need to return to areas multiple times to find items. If you are unable to pick up any item that is mentioned in the guide then you may have missed tapping on an earlier scene or item that activates the need for the new item.
If you have any questions or problems playing the game please head to the Answers Page to post your question there.
Keep an eye out while playing for collection items and morphing objects, these are collectible items hidden around the scenes of the game. Most scenes will hone one of each in them to find.
Lost Lands 9 Chapter 2 - Academic Interest Walkthrough - Part 1
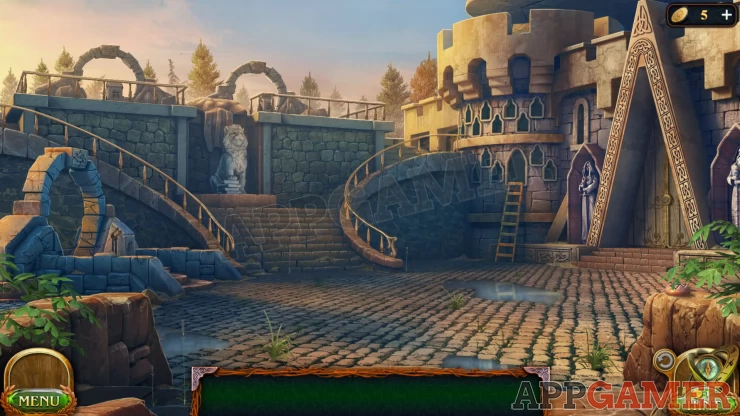
Chapter 2 begins with the introduction to the next part of the story read to the children. The Magician Maaron has arrived at the Academy. You need to check the mail.
Collection Item: Rune Stone on the low stone wall on the far right of the scene.
Morphing Object: A docration at the bottom end of the stair railing on the right of the stairs.
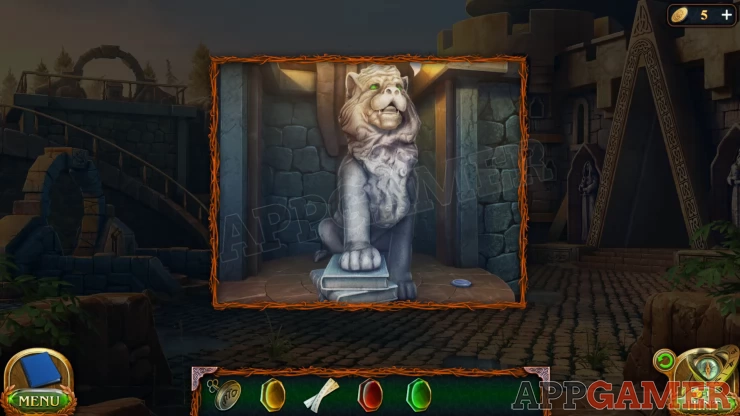
New Task: Postal Lion.
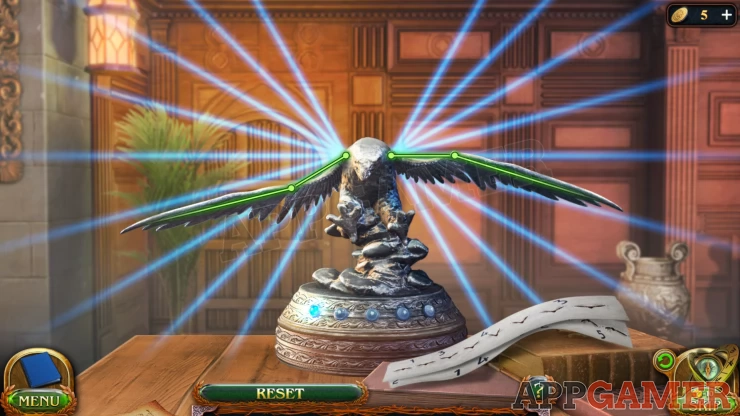
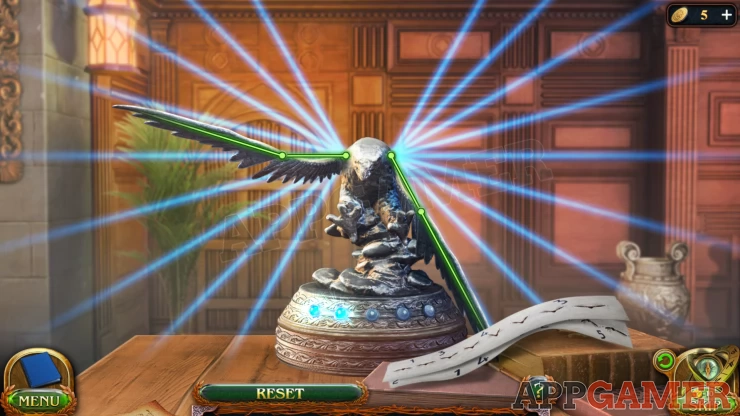
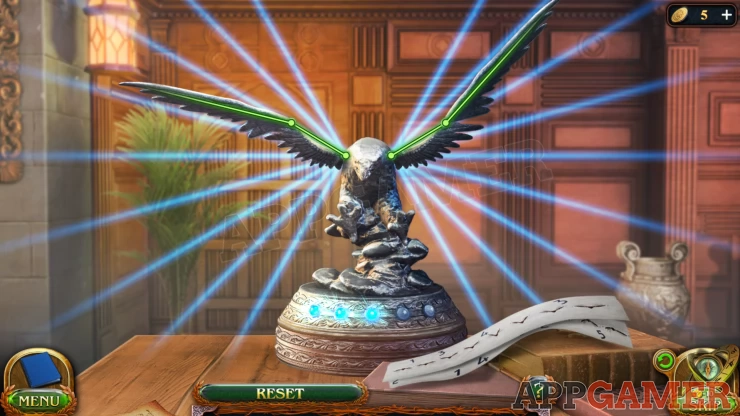
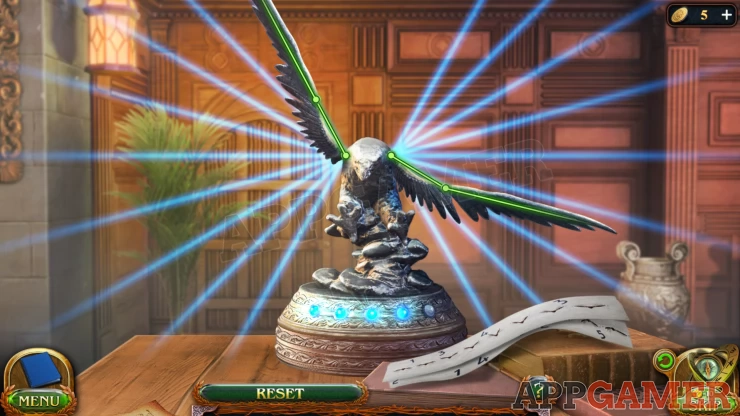
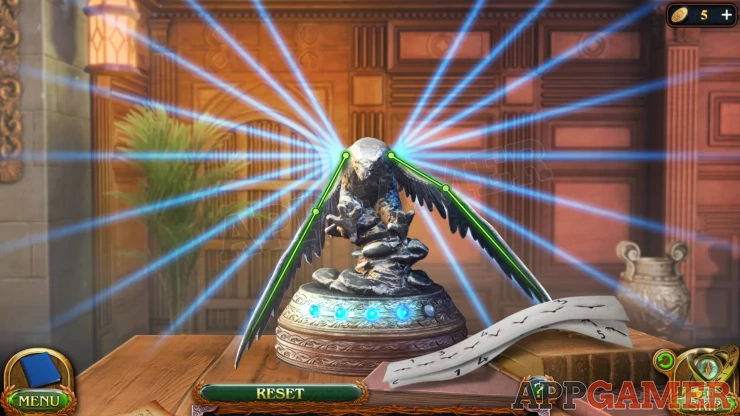
View the Lion statue with the green eyes on the stairs. Once you speak your name the mouth will open. Collect the Cryptex that appears.

Now view this in your inventory to start a puzzle
Cryptex Puzzle

- Tap to rotate each of the 5 sections of the cryptex.
- You need to make a line connection from the left to the right
Solution: Show
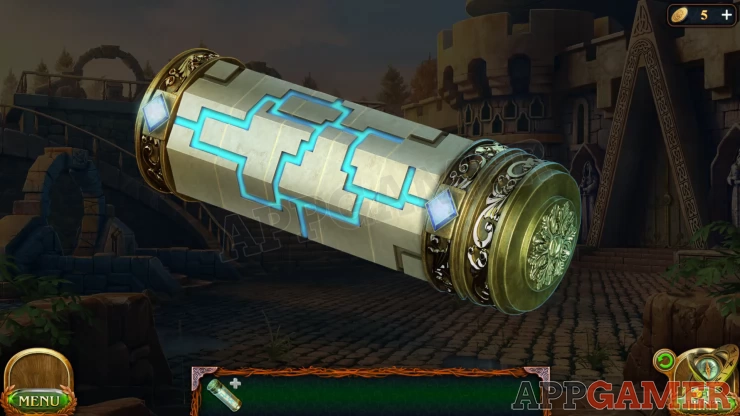
The cryptex opens and you will collect a Personal Signet and then read the note inside.
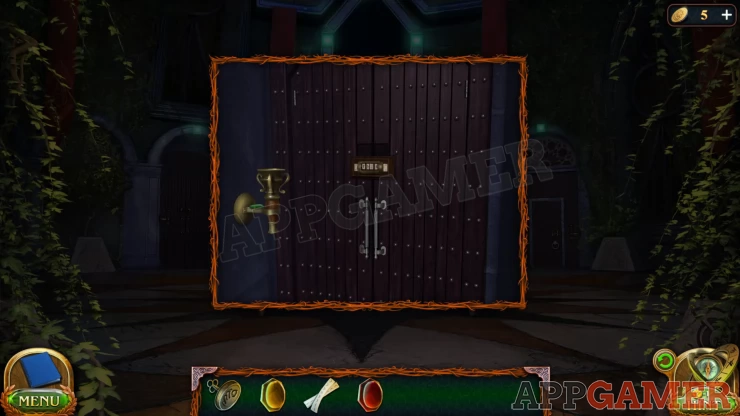
New Task: Meeting with the rector.
View the front door of the academy and use the Signet on the lock.
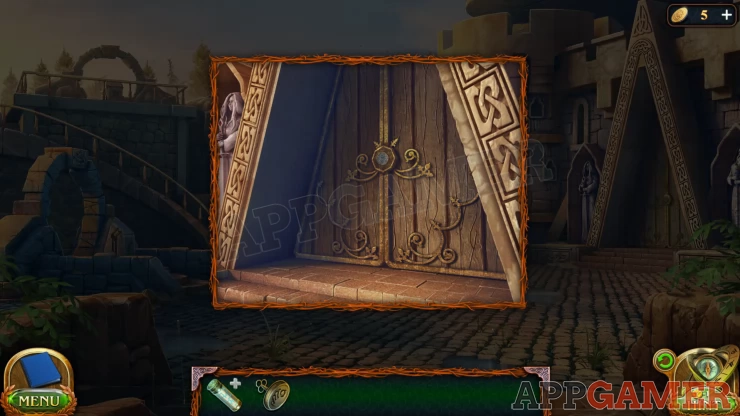
The doors will open and you can go inside.
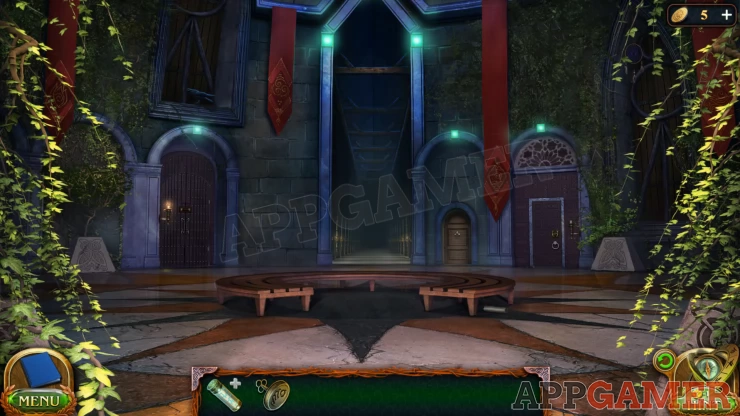
Collection Item: Dream catcher on the large wooden window shutters on the top right of the scene, behind some plants.
Morphing Object: Bird on the window ledge on the top left of the scene.
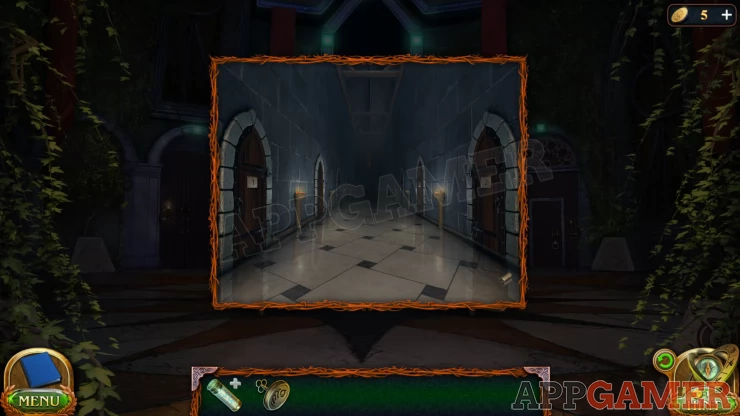
Tap the long dark dark corridor in the center to move forward and then tap again at the end to see that it is in darkness.
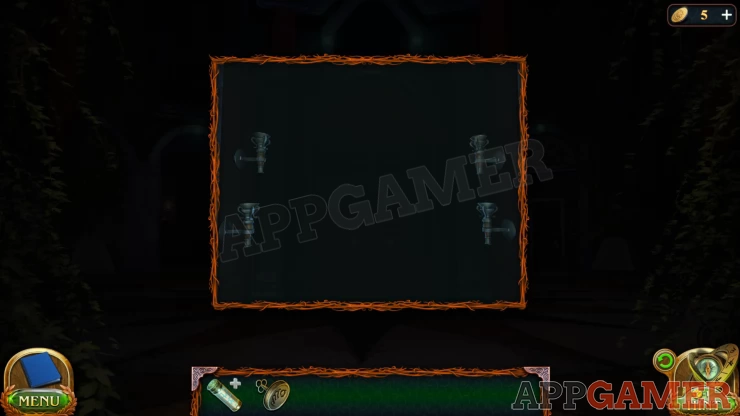
There are 4 candle holders here. Make sure to tap to get the message that you cannot see well.
Now back up and collect a Candle (1 of 4) that is on the floor of the corridor on the right.
Then back up again to the entrance room and collect another Candle (2 of 4) fro under the circular bench.
Now view the larger door to the right of the bench and collect a Candle (3 of 4) from the holder here.
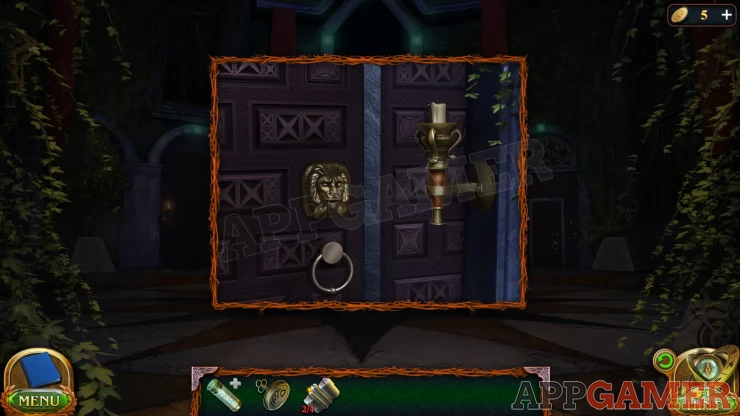
Then finally view the door to the left of the bench to find a lit candle (4 of 4).
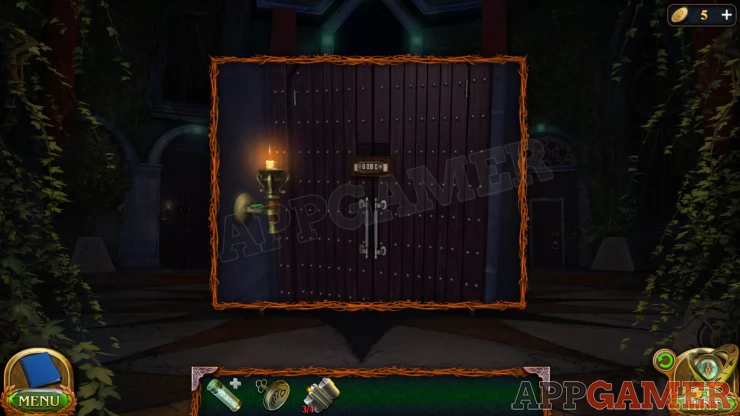
Now you can return to the end of the corridor and place the 4 candles in the holders. This reveals a door with a puzzle
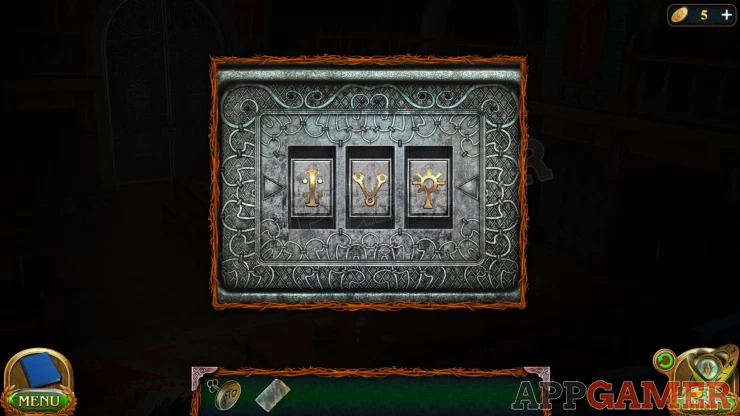
Door Puzzle
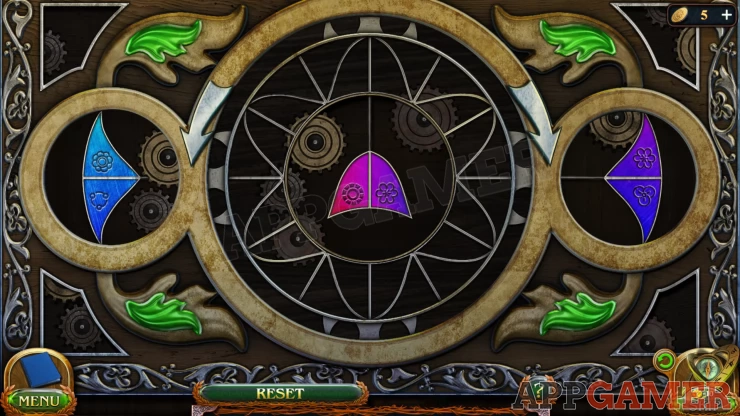
- There are 3 colored shapes (chips), left center and right.
- Tap the chips to slide them in and place them into the circular frame.
- After adding a chip you will then get another one with different colors and symbols on it.
- Yuo need to place all of the ships onto the frame and align them so that the symbols match with those next to it.
- The colors will also form a gradient around the circle.
Solution: Show
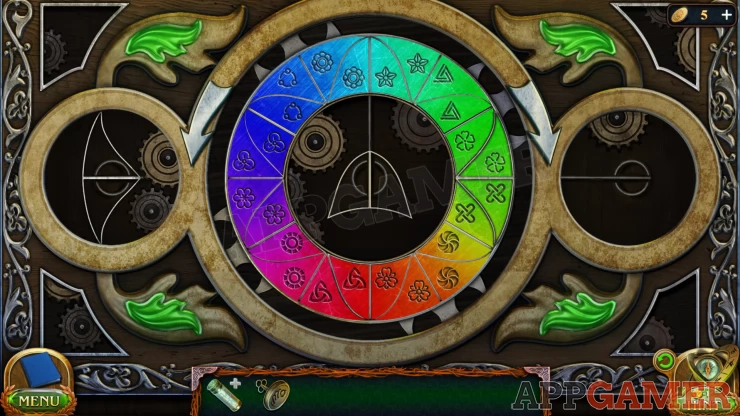
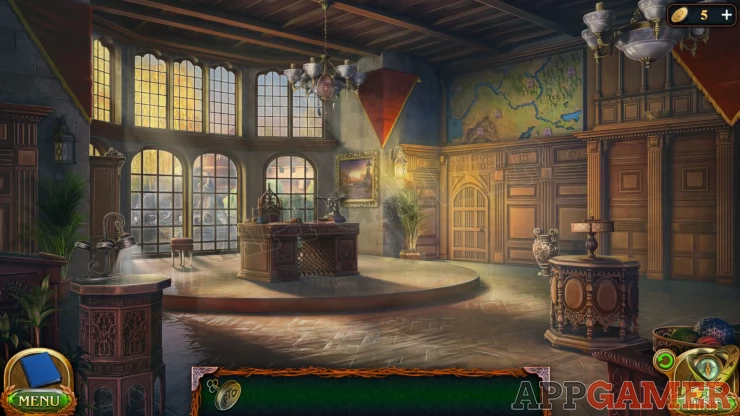
Once done the door opens and you can enter the office of the Rector. Cassandra explains the task you have been summoned for.
New Task: Wounded Dwarf
New Task: Portal to the druids
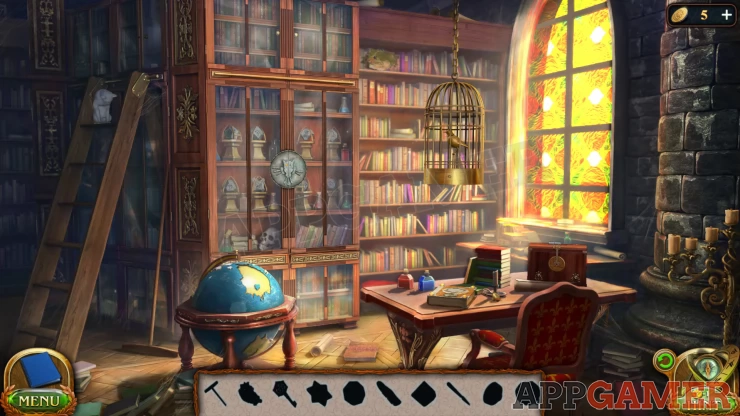
Collection Item: Dream catcher on the hanging light above the desk.
Morphing Object: Bowl / Crown on a shelf on the top right.
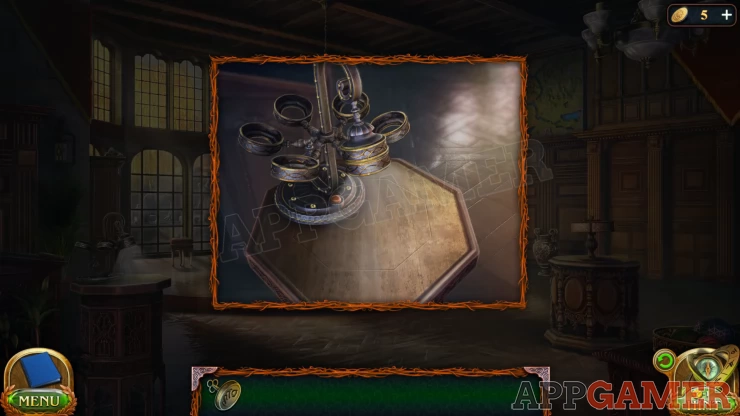
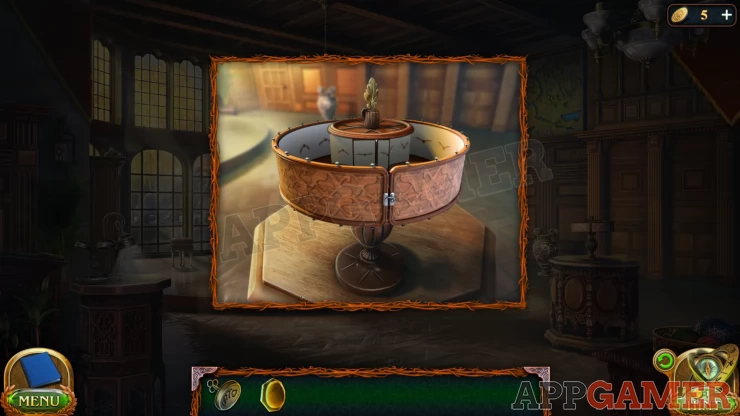
First view the small round table on the left, it has a strange light on it. Press the red button to see that it rotates.
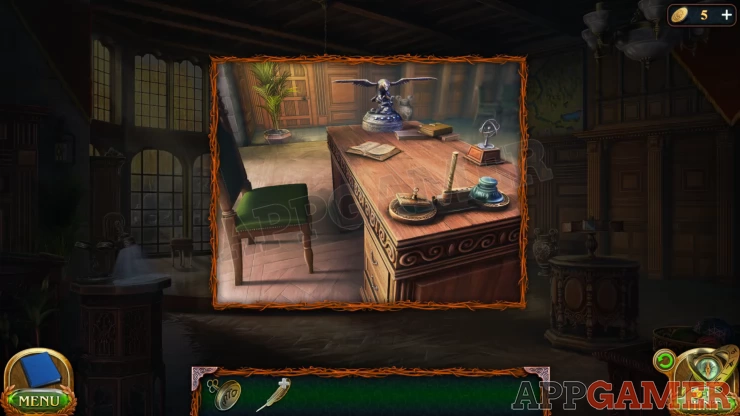
Next view the desk. Then tap on the bird statue to get a message that it is mechanical.
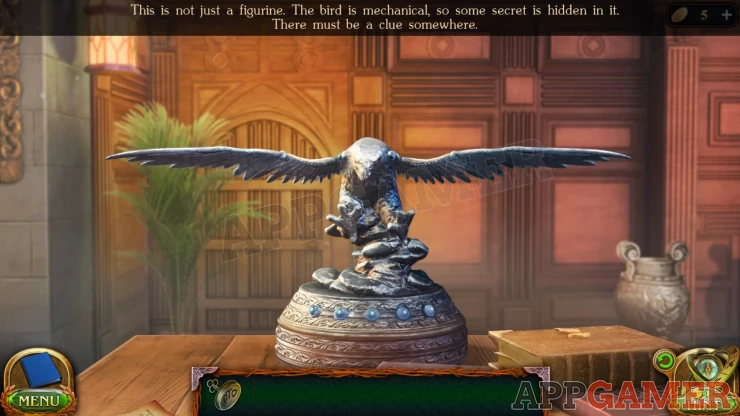
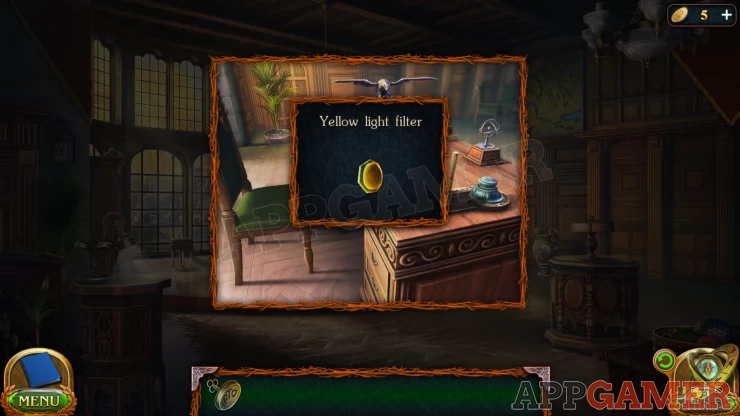
Collect the Yellow Light Filter from the desk top.
Now look at the round table on the right of the room. It has a Praxinoscope.
You can spin this to see the moving images of the bird, then you ca open it and collect the Animation Tape. Then also collect the Red Light Filter.
Back up to the Entrance Hall of the academy and view the door on the left again where you found the lit candle. You can collect a Green Light Filter here.
Now exit to the courtyard and view the Lion again. There is a Blue Light Filter to collect.
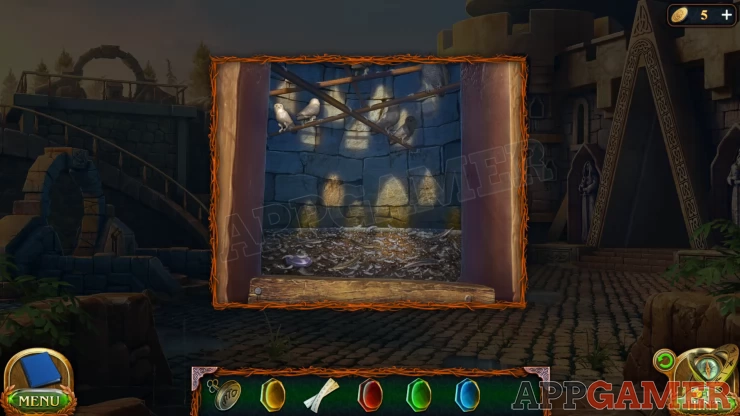
Finally tap the large opening to the bird house with the ladder near the center to look inside. Collect a Violet Light Filter.
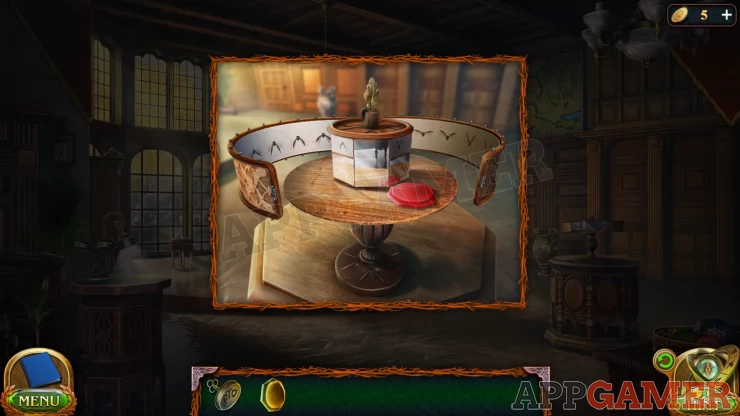
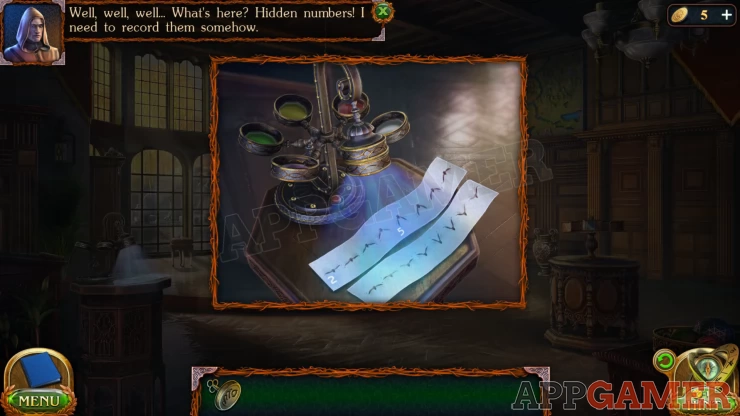
Return to the rectors office and view the lamp on the left again. Place the 5 light filters into it and then add the animation tap to the table. You can now tap the red button to shine the light and reveal some hidden numbers. You need to find a way to write them in place.
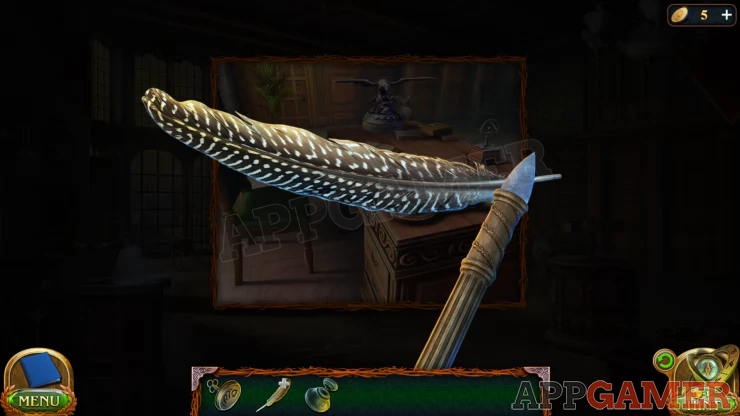
Back out to the courtyard again and view inside the bird house. Collect an Owl's Feather. Then return to the office and view the desk again.
Collect the Stationery Blade and the Inkwell. (you may need to examine the feather in your inventory first before it will let you take the blade).
Then you can view the feather in your inventory and add the stationery blade to is to sharpen and collect a Quill for writing.
Go back to the table with the lamp and add the inkwell and then place the quill.
You can now use the quill to mark the numbers on the paper strip. Then press the lamp button to change the color of the light and repeat this process until you have marked 10 numbers.
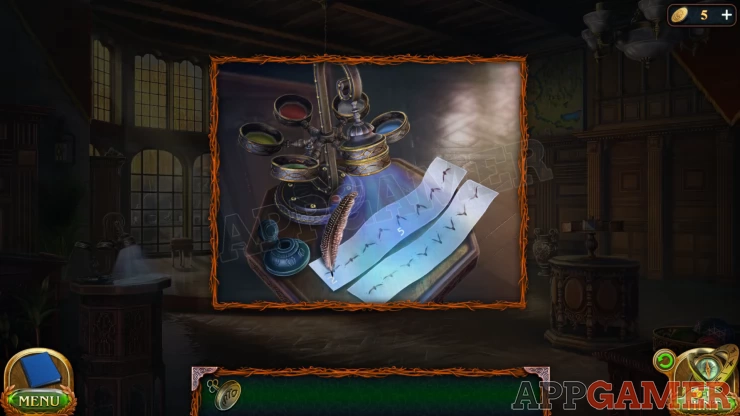
Collect the Storyboard (paper strips) and then return to the desk and view the Mechanical bird. Add the Storyboard to it to start a puzzle.
Mechanical Bird Puzzle
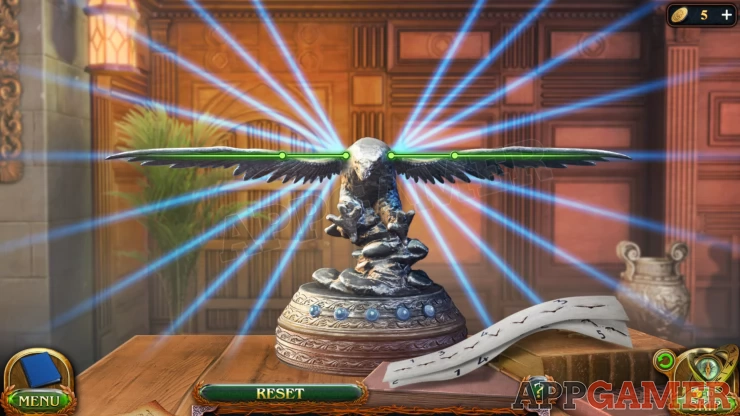
- The wings on the bird can be moved.
- Both of the wings have 2 sections that can be moved up or down to form different shapes.
- Examine the paper strips to see the different images of birds.
- Use these clues to position the wings correctly.
- You need to set the positions 5 times.
Solution:
You will see that there are two number 1's on the paper, one under a left wing and 1 under a right wing. Set the left and right wings according to these. This will light up the first of 5 lights on the bird. Then repeat this again with the other 4 numbers to get all 5 lights on.Show
Once complete a drawer will open in the desk. Collect the Tracing paper with symbols and a Library key.
Back out to the entrance and use the key on the larger door on the right. This will let you into the library.
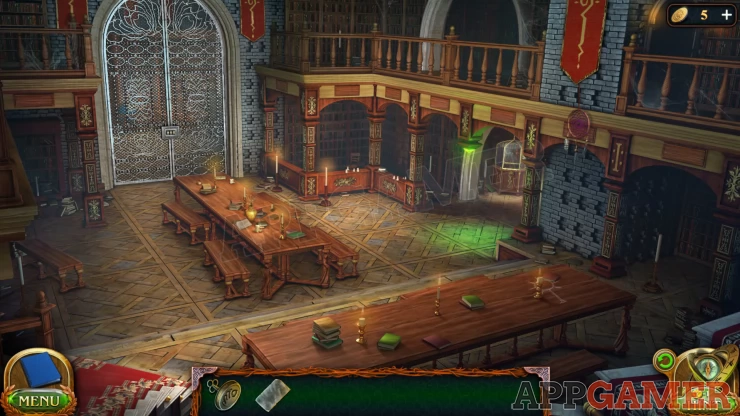
Collection Item: Dream catcher on the wall on the right below the red banner.
Morphing Object: Chair / ladder that is behind a panel at the back of the room in the center of the scene. To the right of the very large gate.
View the large gate on the left of the room. You will see a lock that needs 3 symbols. The clues for this are in the room. Look for 3 symbols that match ones on the lock.
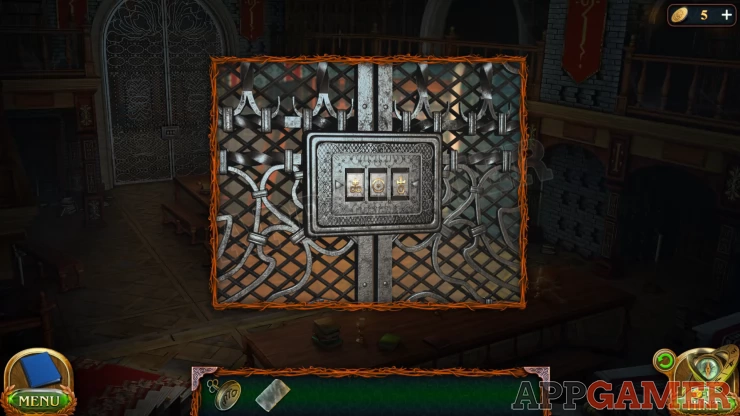
Solution: You can find the 3 symbols as follows. 1: On the wall on the right below the red banner as some wooden sections with gold designs. It is the one to the right of the bricks. 2: on the long table nearest you on the right. 3: view the long table neat the gate. Tap the books to move them and find another symbol. Enter them into the gate lockShow
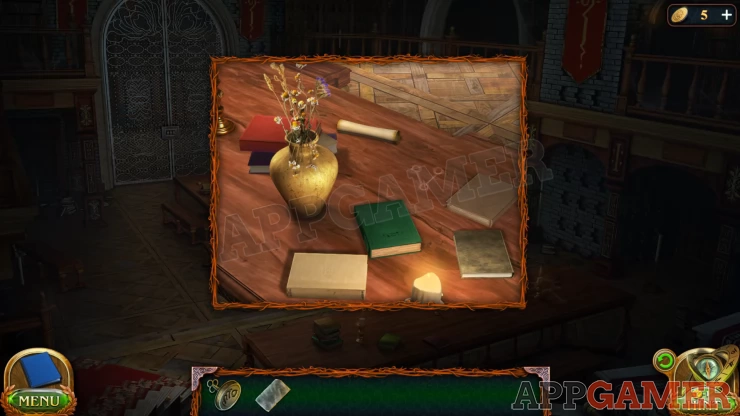
Manuscript: on the long table when you view it.
Go through to the Archive room.
Archive Room Search
You now need to search the room to find the Rune stone to activate the Dolmen.
First collect the Mop (Broom) that is leaning on the case on the left by the ladder.
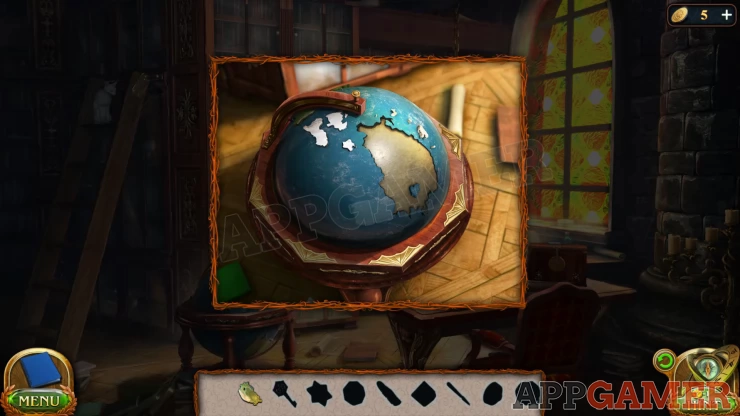
Then use the Mop on the book shelves on the right behind the hanging birdcage, this will know down a Continent to collect.
Next view the Globe and add the continent to it. It will open and you can collect an Envelope Knife and a Ball of Thread.
View the desk on the right and collect a gold Door handle.
Tap on the bottom of the glass fronted case in the center of the room (behind the globe) to see a loose panel. Use the Envelope knife here to remove the panel and collect a Key.

Now use the ball of thread on the cat at the top of the ladder, it will move and you can view the cabinet at the top of the ladder.
Place the door handle on the cabinet door and you can open it to collect a cube item, Element of the combination lock.

View the wooden box on the desk and you can add the element to complete the combination lock.
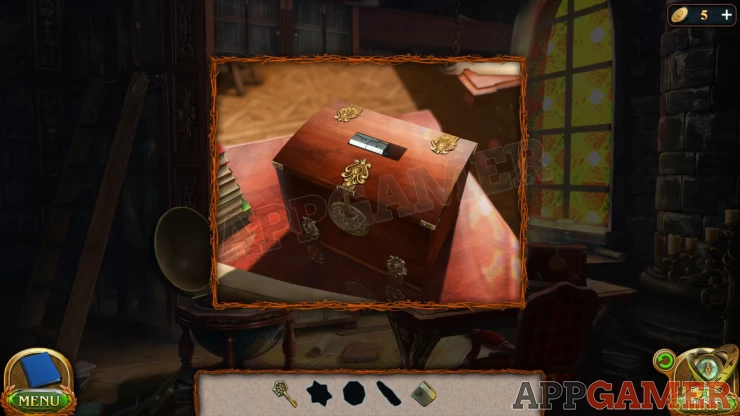
View the lock and tap each part until you reveal a complete pattern.
Solution: Show
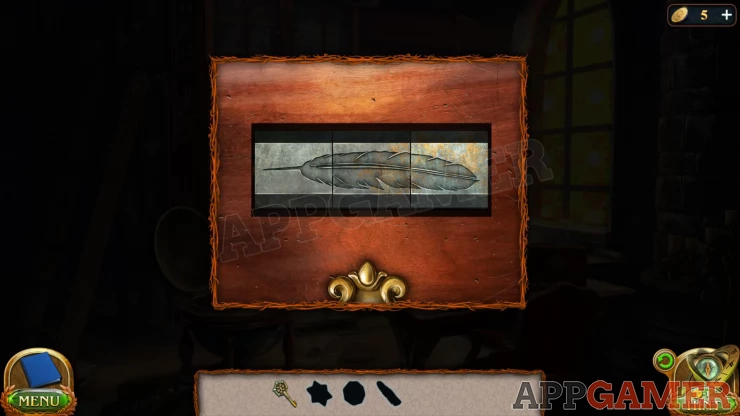
Collect a Metal feather from the box.
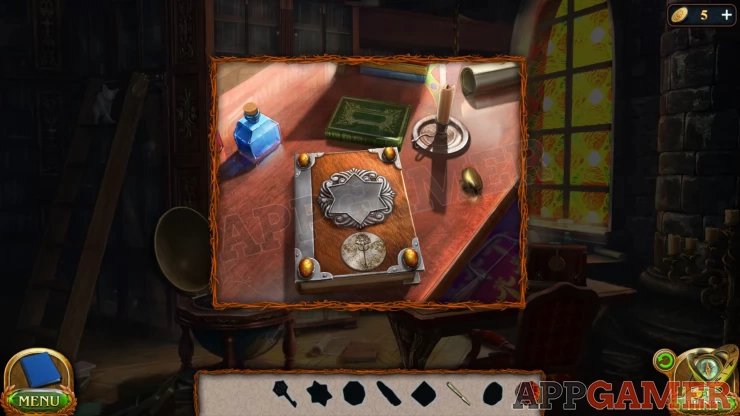
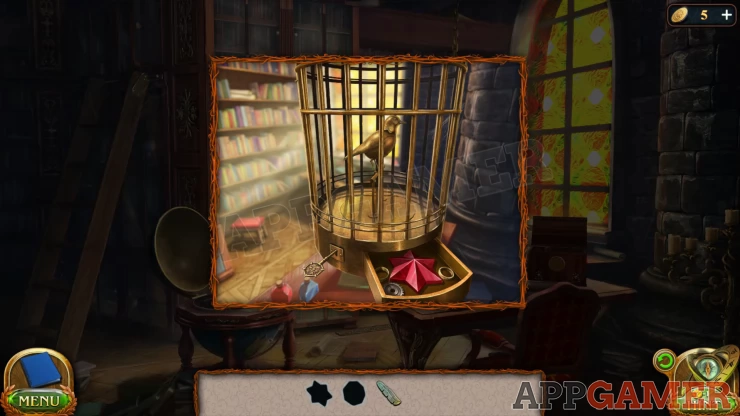
View the birdcage and use the key in the lock to open a drawer. Collect a Crystal Star.
Now view the book on the desk and add the crystal star to the front. The gems on the corners will flash in a sequence, tap the gems in the same sequence to open the book.
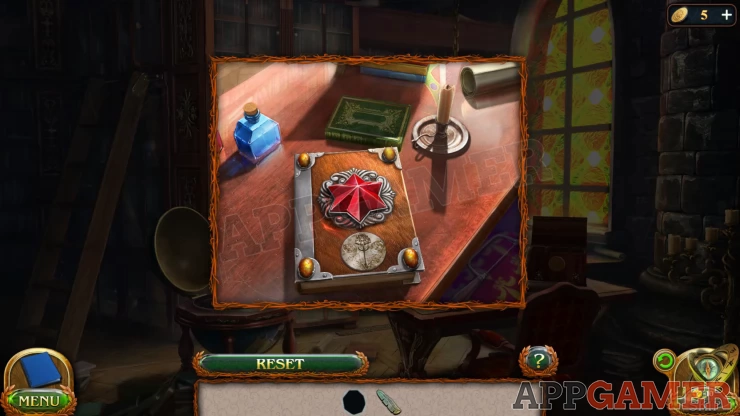
Collect the yellow Glass eye.
Now view the top of the glass cabinet in the center of the room to see an owl emblem.
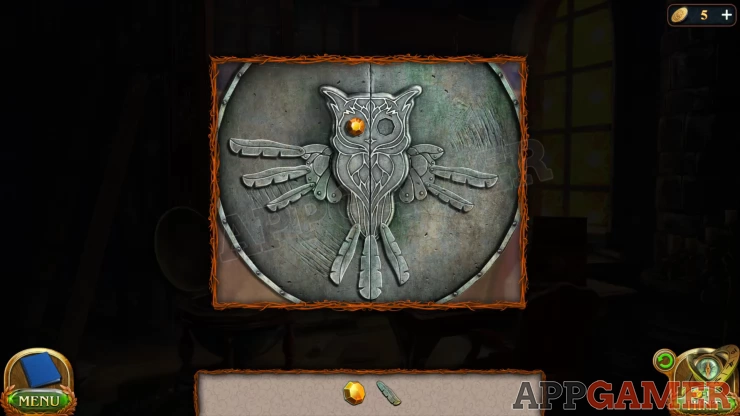
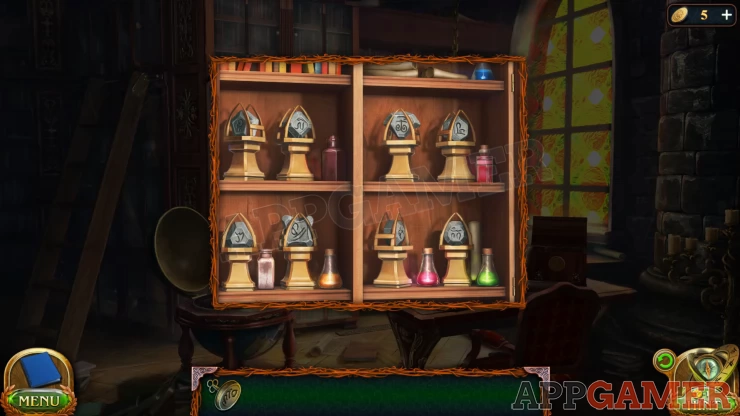
Add the metal feather and the glass eye to it and the cabinet will open. You can now access the rune stones but you need to know which one to take.
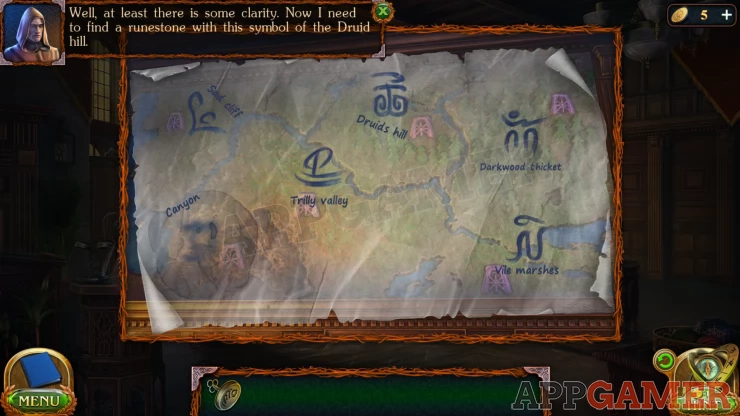
Return to the Office of the Rector and view the map that is on the right wall at the top.
Place the Tracing paper on the map and will reveal the symbol of the rune you need for Druids Hill.
Go back to the archive room and take the matching Rune.
Solution: Top shelf, 3rd rune (second from the right)Show
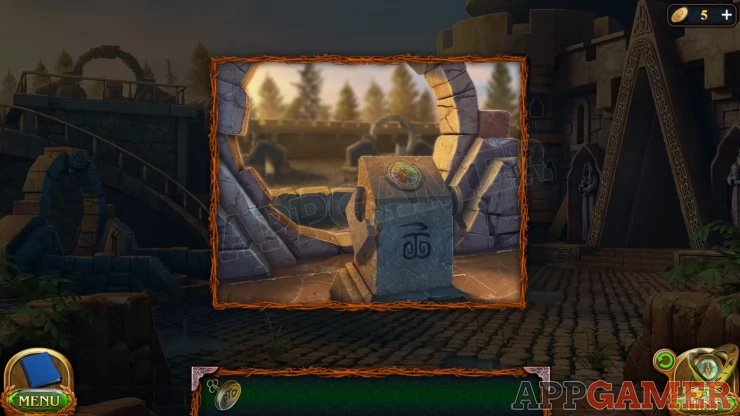
Now you can go to the Courtyard to find the Dolmen to use the rune on. There are 3 of these circular portals. Use the one on the right at the top of the steps. Add the Rune to it.
Dolmen Puzzle
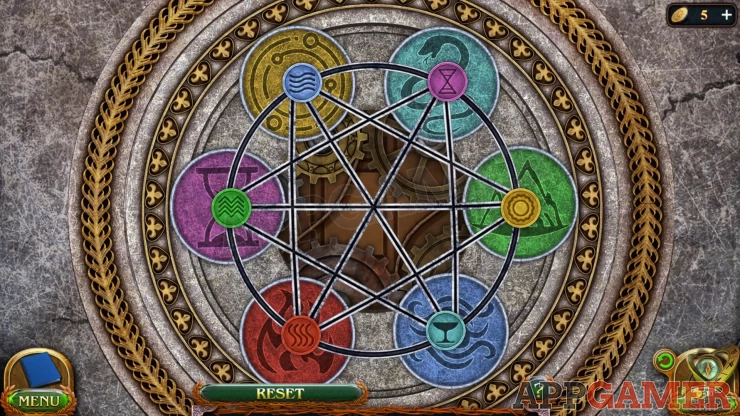
- There are 6 large colored circles, and 6 small colored tokens that can be moved.
- Tap 2 tokens that are connected by straight lines to swap their positions.
- Every time you make a move all of the tokens will rotate positions anticlockwise around the circle.
- You need to arrange them so that they are all positioned on the matching color circle.
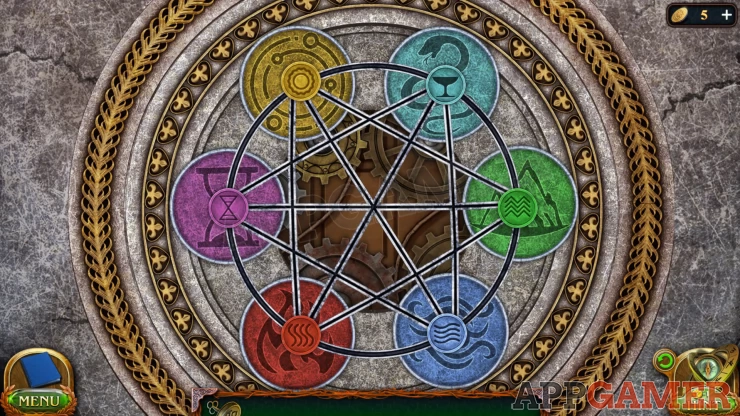
Once done the Dolmen is active and you can pass through to Druid's Hill, this will complete the task.
Continue the guide in Chapter 2 Part 2
| Chapter 1 - Unchildlike Mischief Walkthrough - Part 3 | Back to Top | Chapter 2 - Academic Interest Walkthrough - Part 2 |
 With 20 years of experience in creating video game content for the internet and over 30 years as a gamer, Mark is now a passionate mobile App Gamer. Loving a challenge, he is always ready to get stuck in to both survival builders and puzzle solving games. He has been providing content for AppGamer since 2014.