Level 8 - Nowhere Higher
Spotlight X: Room Escape Guide
This is a walkthrough for Level 8 of Spotlight X Room escape - Nowhere Higher, the third level in Chapter 2. You made it past the electrified gate in Level 7 and now find yourself in an attic space of the house.
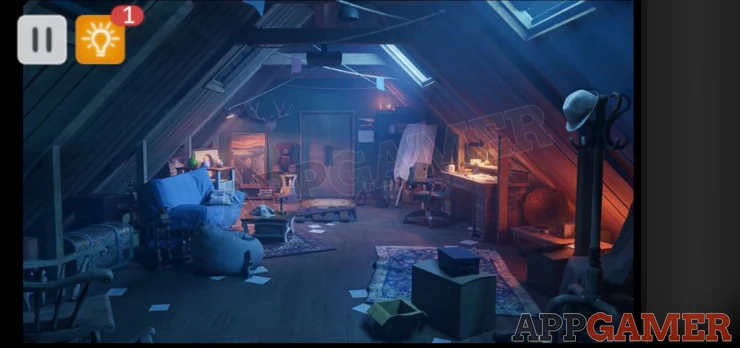
Tap the center doors to move forward.
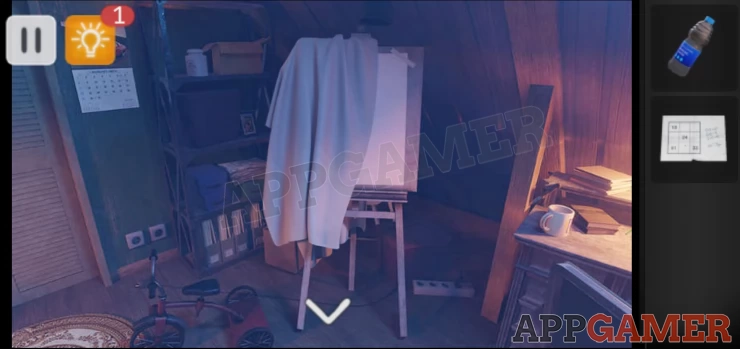
Tap the easel on the right to view it then tap the cloth on the easel to collect it.
On the shelves to the left tap the white jar on the top shelf to collect coffee.
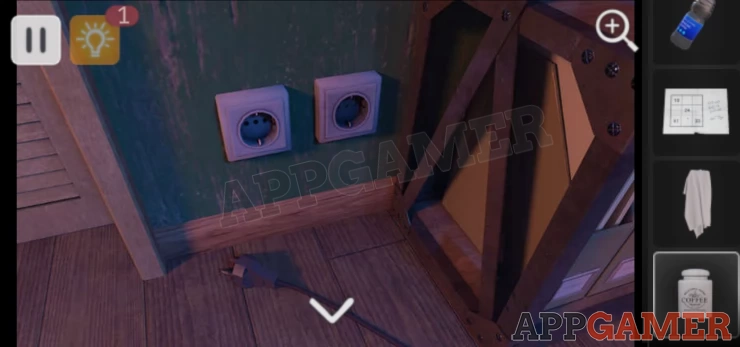
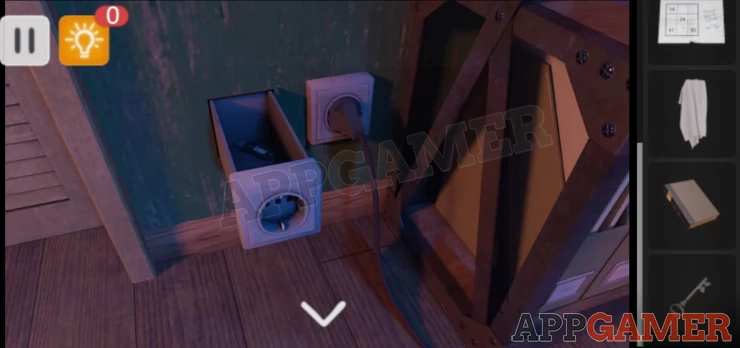
Next tap the power sockets on the wall to the left of the shelves to view them. Then tap the plug to connect it.
Now back up and tap the power socket strip on the right of the easel to view that. Tap the red switch / light on the right to turn it on.
Back up and tap the safe on the floor to the left of the doors.
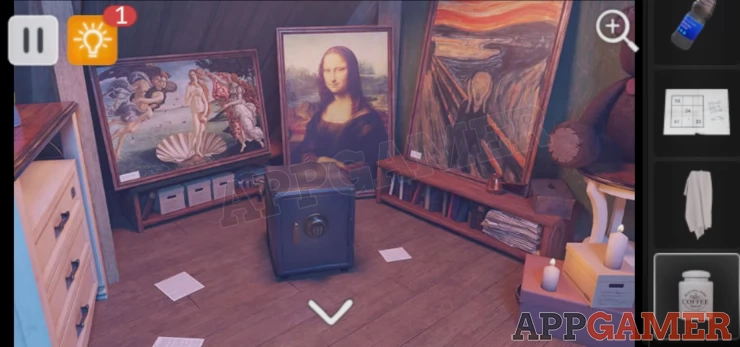
On the unit on the right tap to collect a Turka. On the unit to the left below the Nascita de Venere painting tap to collect a book.
Tap the white draws to the left of the safe to view them, open the bottom drawer to collect a handle.
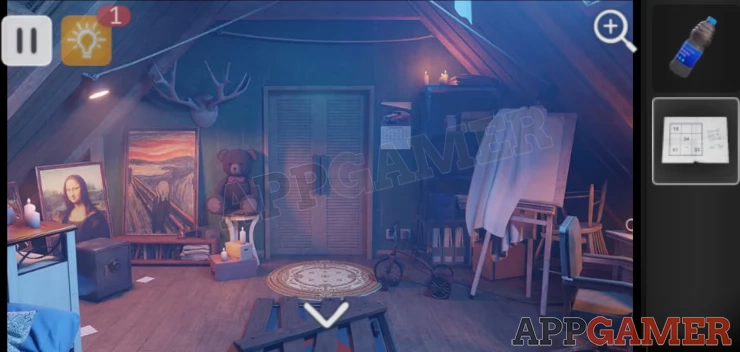
Back up to the initial view and then tap the desk on the right of the room to view it.
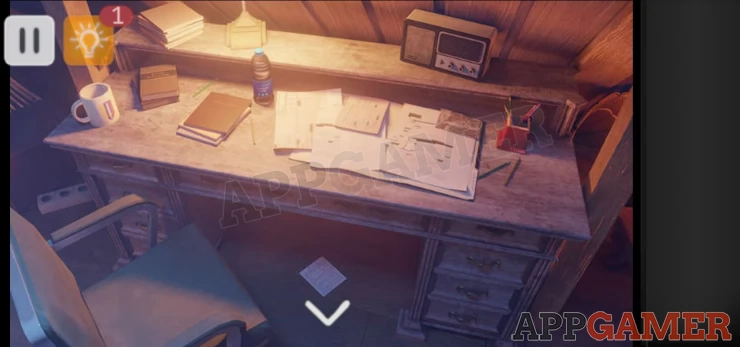
Tap to collect the water bottle from the desk. Tap to open the top right drawer and then collect a Paper. You can also collect a Knife that is hidden just behind the hint button on the top left.
Back up and then tap the blue sofa to the left to view it and the table. Tap the cloth on the table to remove it and find some fresh bread. Use the knife to cut the bread to get 2 slices.
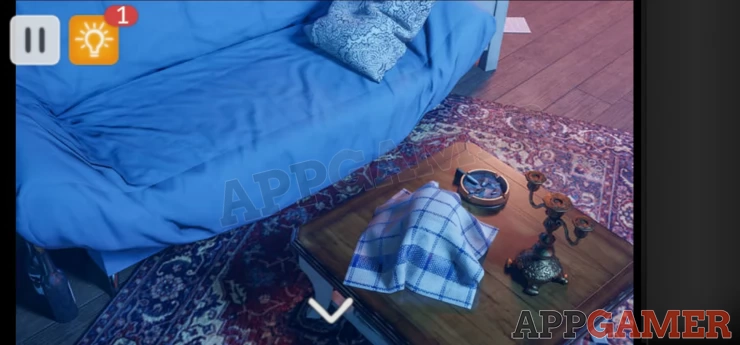
Next use the knife to slice the blue cover on the sofa and collect a key.
Back up and move forward, then use the key on the double doors to unlock them. Open the doors to view in side a cupboard.
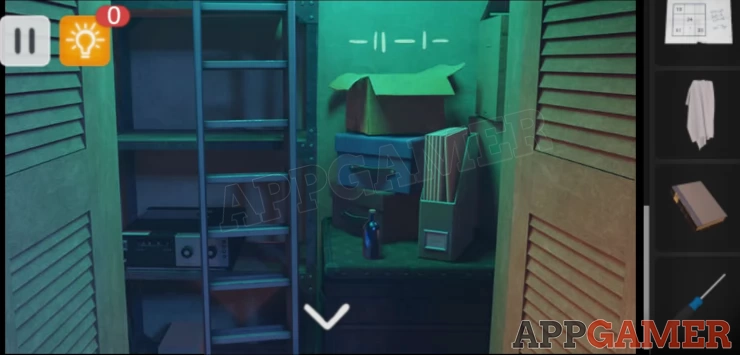
Tap to collect the ladder. Tap to collect the bottle of Liquid on the shelf.
Notice the marks on the wall above.
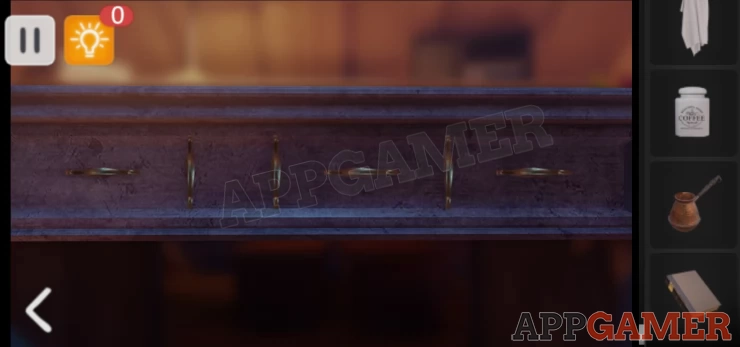
Now return to the desk. Tap the top center draw to see 5 handle and a space for a missing one. Place the handle you have found.

Now tap the handles in turn to rotate them. You need to rotate to match a pattern. But each one you tap will also turn the ones next to it.
Hint: Copy the pattern shown in the marks on the wall in the cupboard.Show
Show
Open the drawer to collect a screwdriver
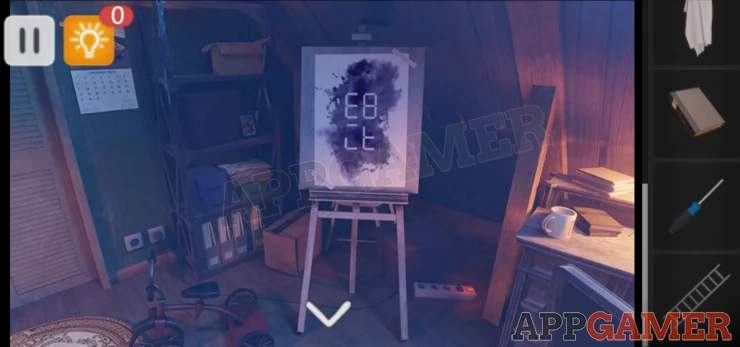
Return to the view of the Easel and use the bottle of liquid on the paper to reveal some numbers segment shapes. This is a clue.
Return to the safe view and then tap on the white drawers unit. The top draw is locked with a 4 digit code.
Use the clue above and the clue written on the drawer to open it.
Hint: the clue on the drawer tells you to remove segments to reveal the answer.Show
Solution: The segments shown on the paper on the easel nee to be removed to find the actual numbers. The second number though is a 0 as you cannot have a blank entryShow
Code:
10 47Show
Open the drawer to collect a Key
Back up and tap on the power sockets on the wall to the right of the door. Use the screwdriver on the left one to open it and find a secret compartment. Collect a USB Flash Card.
Back up to the initial view again and use the ladder to place on the rafter near the top of the screen.
Tap the projector that is hanging from the rafter to view it. Use the USB flash card on the USB ports to place it.
Back up and then use the sheet cloth above the doors at the end to hang in front of the projector so that you can see the image. The letters give you a clue.
Back up to the initial view and tap on the lower left of the scene to view the chest / trunk. This needs a 4 digit code. Use the letters above and the paper with the squares on it to find the code.
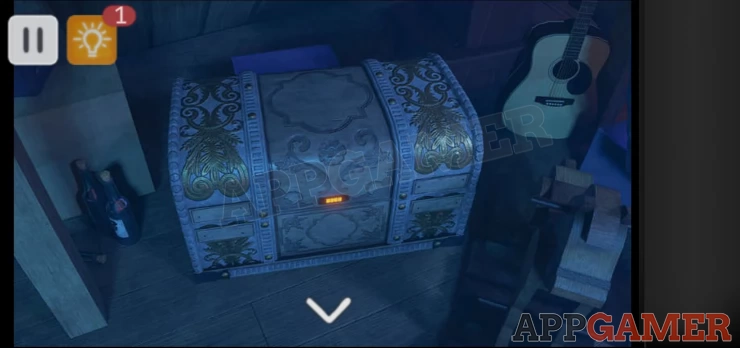
Hint: There are 4 numbers on the paper, the paper also has a clue to use alphabetical order, and to multiply.Show
Solution: From the projection find the order (alphabetical) to use the 4 shown numbers in - 24, 10, 61, 33. Next multiply the digits for each number together.Show
Code: 8069Show
Open the chest to collect a hammer.
Star Secret: Art Critic
Return to the view of the safe. View the book found above to see numbers associated with various artists. The 3 paintings are by the artists - Botticelli, da Vinci and Munch.
Hint: Use the book to get the associated numbers for these - 15, 228, 95. (book order)Show
Solution: Each number has marks to the left or right. The marks tell us which number to disregard from each. 15 has 1 mark to the left - remove 1 left number to get 5 228 has 2 marks to the right. We remove the 2 right numbers to get 2. 95 has 1 mark to the right - remove 1 number to get 9Show
Code: 529Show
Star Secret: Coffee Pause - take a coffee
Tap on the lower right of the initial scene where you see a glow to view a hot plate / burner and a toaster. If you have connected power above then the toaster will be on. Tap the button to turn on the burner.
Place the Turka on the burner then add the water and the coffee.
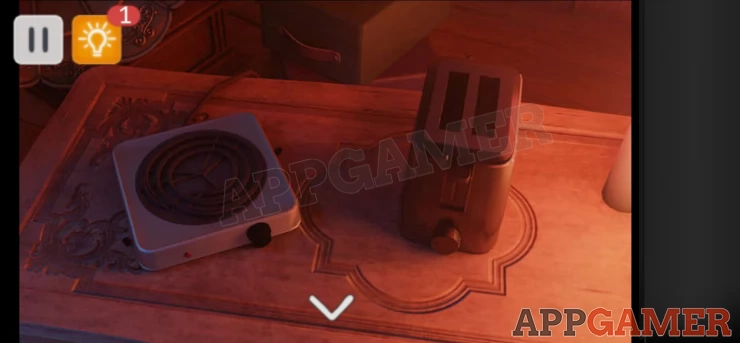
Star secret: Roasted - Make Toast
Place the bread slices into the toaster and press the lever to start it. Wait for a minute and you can collect the toast.
Back to the room tap on the floor in front of the cupboard to find a trap door. This is boarded closed.
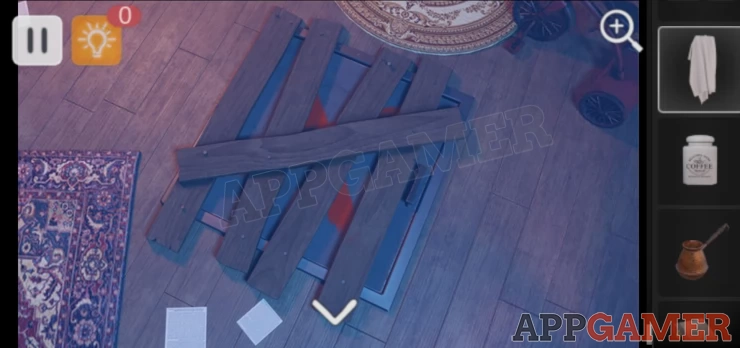
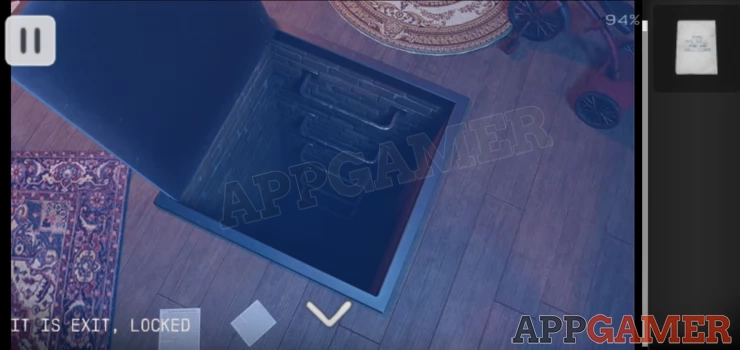
Use the hammer to remove the boards and then use the key to open the trapdoor. You can now exit and complete the level.
You can now move on to level 9. If you have any questions for this game please head to the Answers Page to ask there.
We have questions and answers related to this topic which may also help you: Show all