Level 5 - Say Hi
Spotlight X: Room Escape Guide
This is a walkthrough for Level 5 of Spotlight X Room escape - Say Hi. You made it through another corridor in level 4 and now you are in a bedroom.
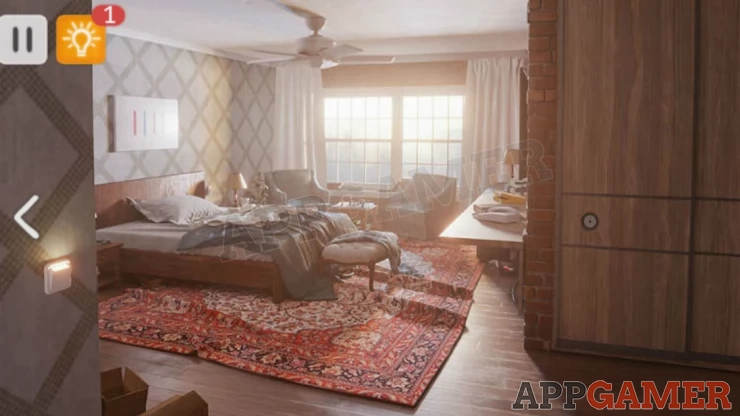
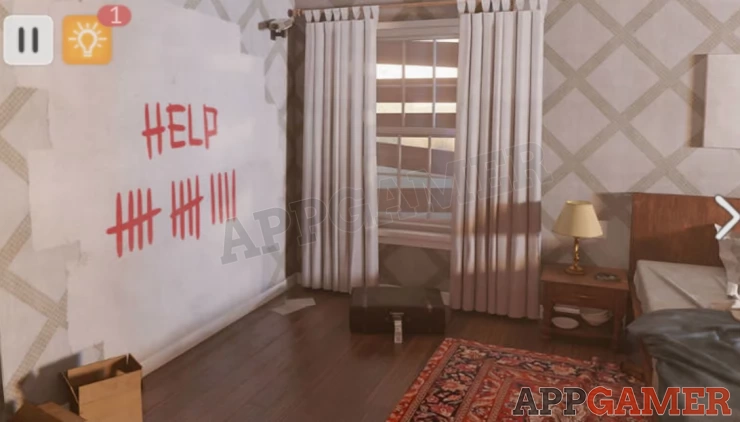
Tap the arrow to the left to view the left side of the room. Notice the HELP message painted on the wall with a number of red lines. This is a clue.
Tap on the bedside unit with the lamp on it to view this and then tap to open the draw and collect a circular piece.
Tap on the case on the floor. This has a combination lock and a clue. The clue is the luggage label. It has been on a flight from France to UK.
From the main view tap the shelf on he wall opposite the bed with the white phone on it, to view the wall with the TV.
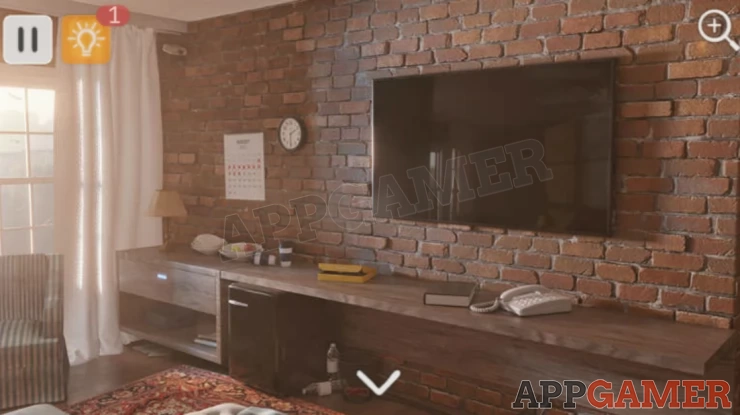
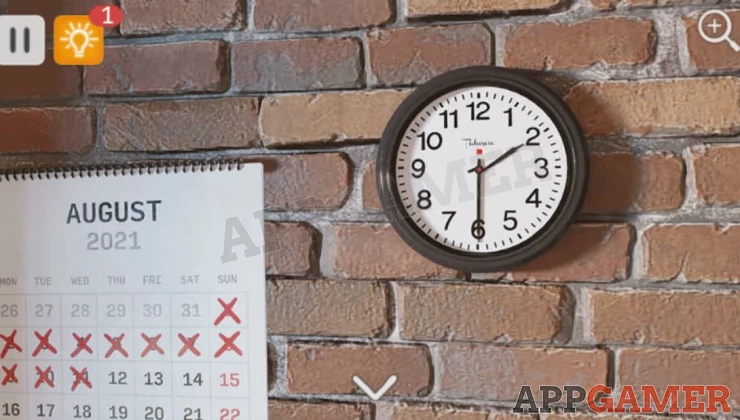
Tap the clock to the left to view this and the calendar next to it. Notice the time. 2:30
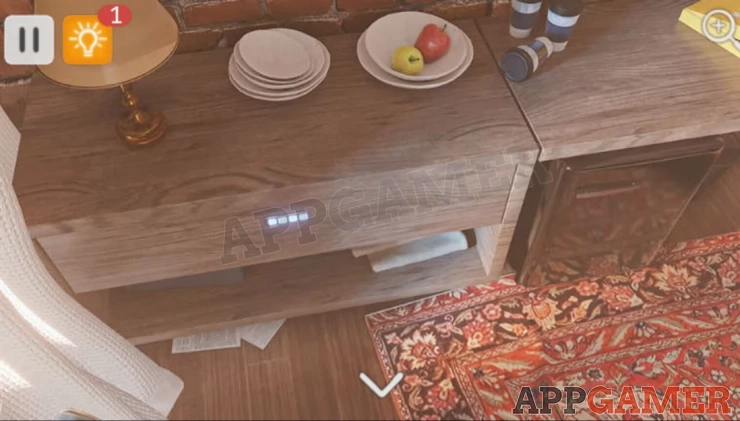
Next tap the unit below the calendar to view this and then tap the fridge to the right to open it and collect a bottle. Notice the locked draw with the combination entry. There is the word HELP written above it.
Finally tap on the book on the shelf below the TV. This shows you a list of Country Calling Codes. We can now return to the suitcase that was on the floor to the left and open it. Tap the lock to enter the combination.
Combination: Country codes for France and UK - 3344Show
Once opened collect the white Key Card.
Go back to the main view and use the key card in the white Card Holder on the left wall. This will activate the TV. View the TV to see a clue.
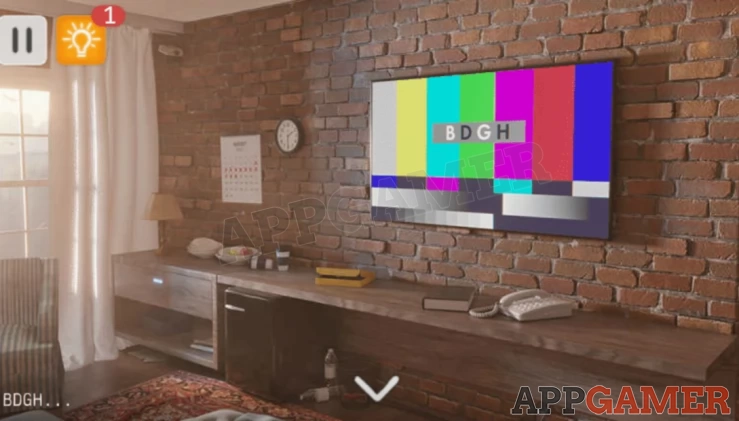
BDGH - notice the colours.
From the main view tap the wardrobe to the right to then tap the wardrobe door to view the circular lock, this is missing a piece, use the circular piece you found earlier to place it here.
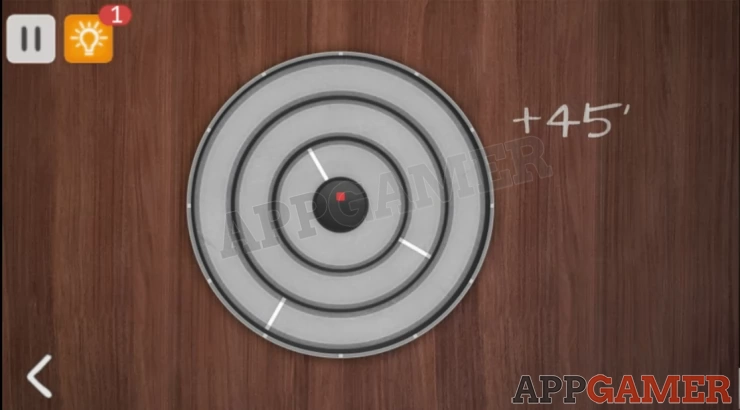
Next set the dials to unlock the wardrobe.
Hint: + 45' Time on the clock + 45 minutes = 3:15Show
Solution: Set all 3 dials to the right (3) position.Show
The wardrobe can now be opened. Tap to collect the flashlight from the top shelf. Then tap the safe in the center shelf. Notice the clue on it 'Check mate'.
Next, from the main view tap the windows to view the far side of the bed. First tap on the plant pot by the chair to view it and then collect a key.
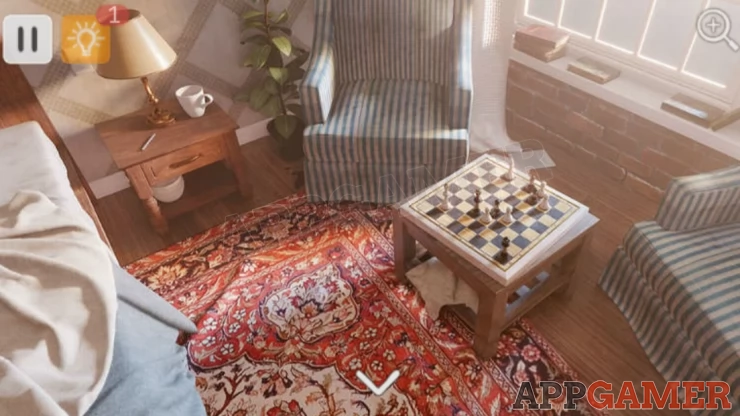
Next you can view the chess board. If you tap the pieces the only one that moves is the white bishop on H6.
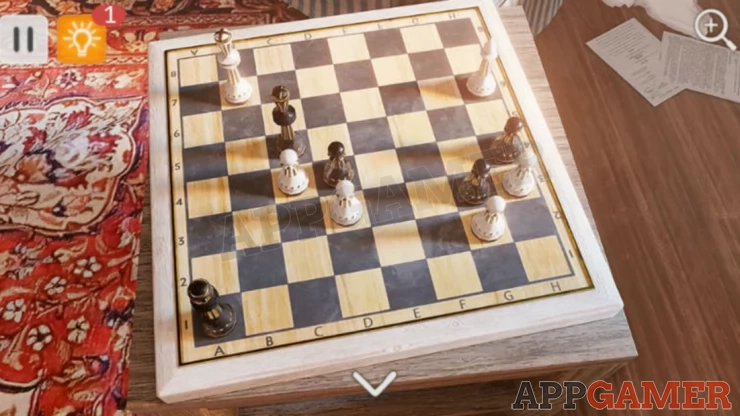
Star Secret: Following the clue above tap the piece at H6 to move it off the board, then tap F8 to place it back and 'find checkmate in one move'.
Now we use a clue above to get a code from the chessboard.
Hint: White B, Black D, White G, Black HShow
Solution: Get the numbers from the pieces that match these on the board. 7424Show
Return to the wardrobe and tap on the safe again. Use this combination to open it. You may need to press # at the start.
From the safe collect a corkscrew and some money.
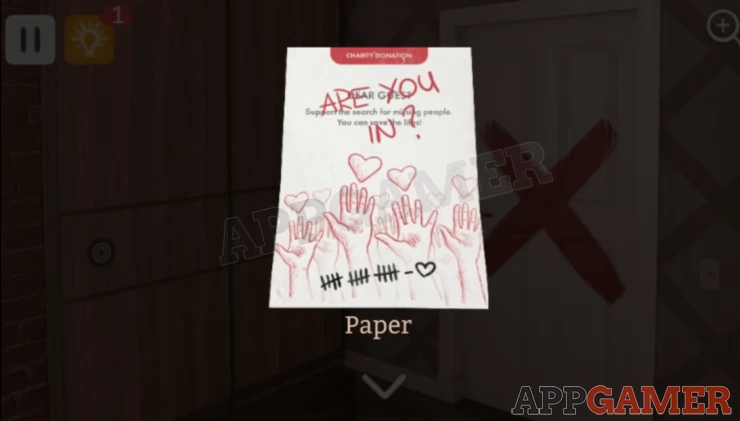
Star secret: Tap the mail box on the wall to the left of the exit door to collect a paper. A paper about a charity. Next use the money on the mailbox to donate it. Thanks
Check the paper to see a clue written in black.
Show
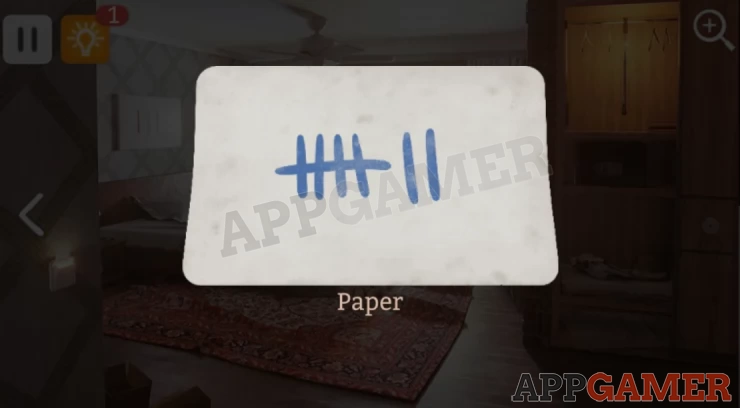
Use the corkscrew on the bottle to open it and find a paper inside with another clue. This has blue lines.
Show
Tap the painting above the bed to view it. Notice the coloured lines. Red, blue, red, black. We can use this with clues of coloured lines from the room to get a combination.
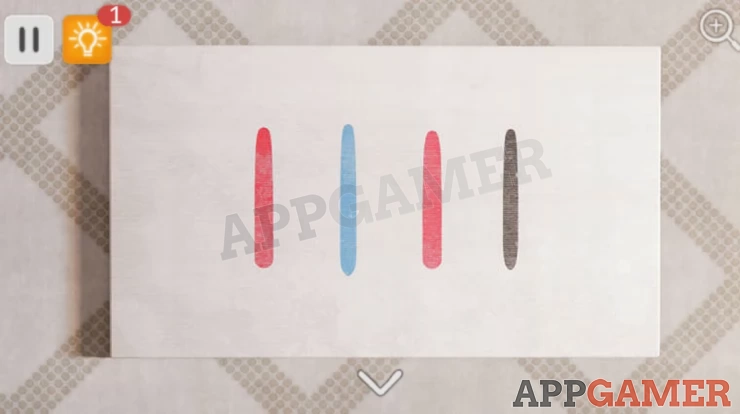
Hint: Red lines - HELP on the left wall - there were 14 Black lines - Charity paper: 15 lines - hearts (there are 7 hearts on the paper) 15 - 7 = 8 Blue lines - Paper from the bottle - 7Show
Solution: Red, Blue, Red, Black - 1748Show
Return to the TV view and tap the locked draw to the left below the clock. Use the combination to open it.
Collect a hammer.
Go to the exit door. Star Secret: Use the hammer on the eXit door to break it down. Nice Try. The door is barred but you will earn a star.
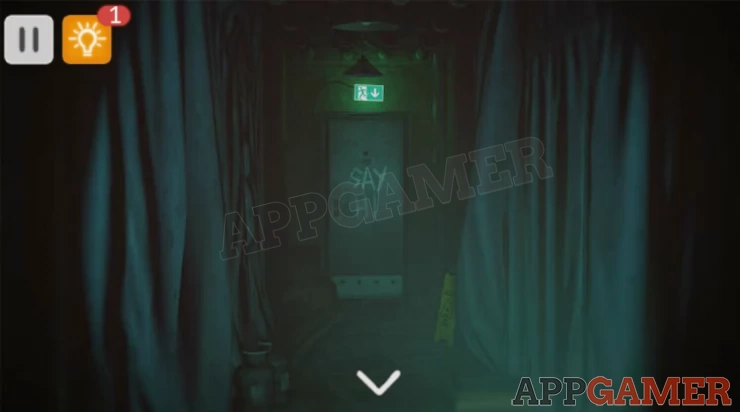
Return to the left view with the HELP sign and use the hammer on the wall to break it open.

Pass though the hole into a dark passage. Use the torch to light the way and see the real exit door.
Use the key on the door to open it and find the hooded figure waiting for you. Tap the doorway to end the level.
Next we wait for the release of level 6. If you have any questions for this game please head to the Answers Page to ask there.
We have questions and answers related to this topic which may also help you: Show all