Chapter 6
More Lost Ruins Revenge on Atlantis
This is our full walkthrough for chapter 6 of Lost Ruins Revenge on Atlantis. A new Adventure Escape mystery game from Haiku.
In Chapter 5 you passed all of the trials set by the Atlanteans and they will now hear your reasons for visiting them.
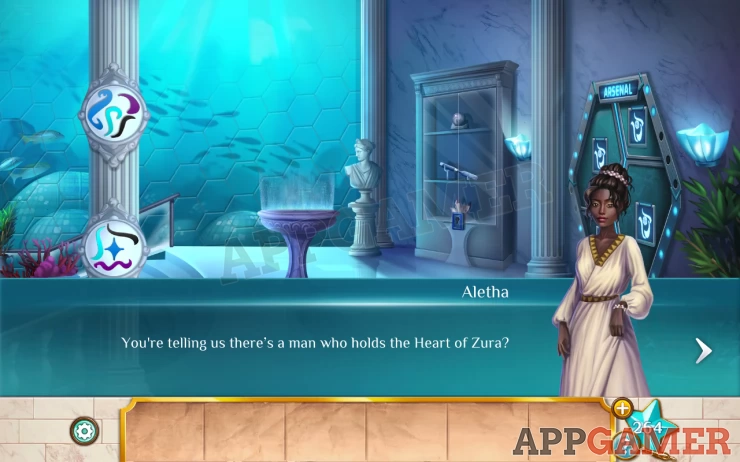
As you explain Professor Burns arrives and makes a crack in the glass wall. You need to find a way into the Arsenal to recover the trident before the place floods.
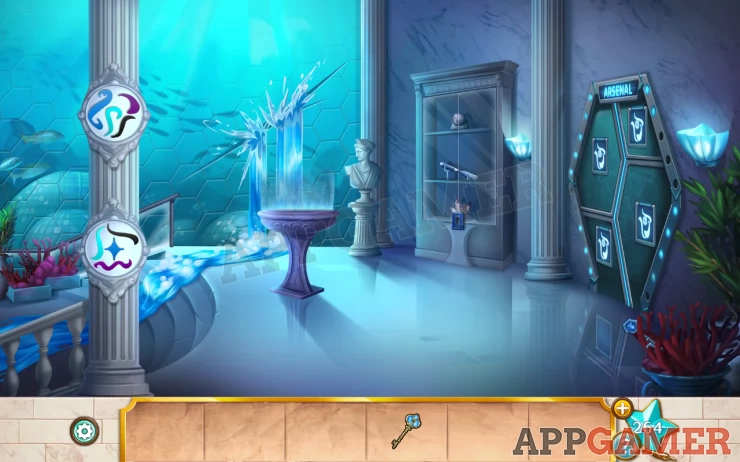
You are given a tool box key.
Star: on the wall light to the left of the arsenal door.
There is a second (small) key in the plant on the bottom right. Collect this.
Then use the small key to open the glass fronted cupboard on the right. Collect a Chisel.
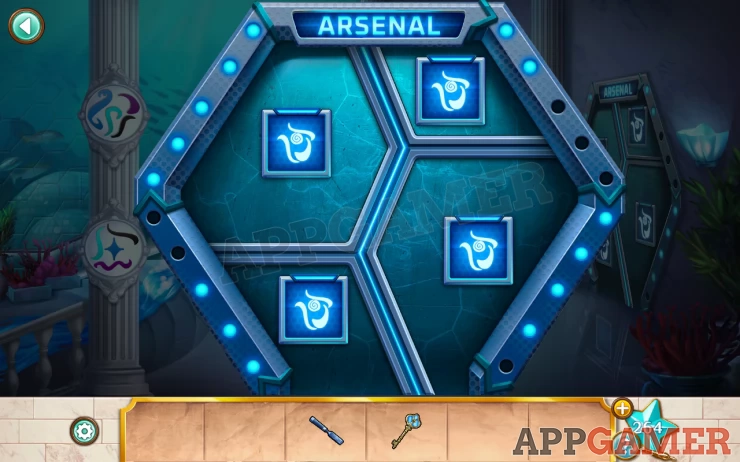
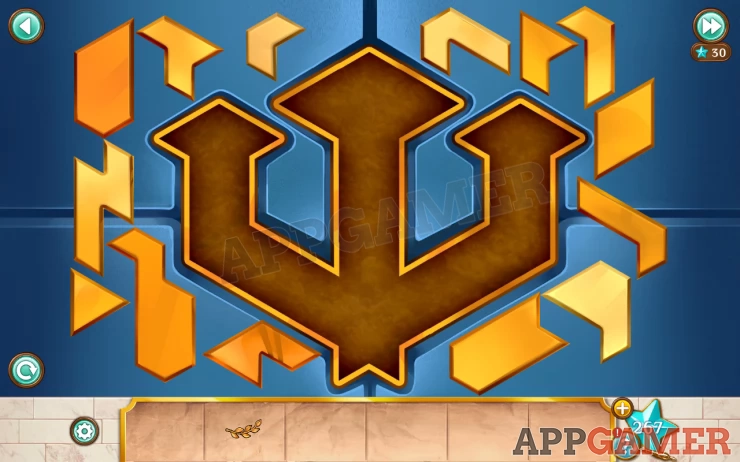
View the door to the arsenal. You cannot open it yet but it has a clue.
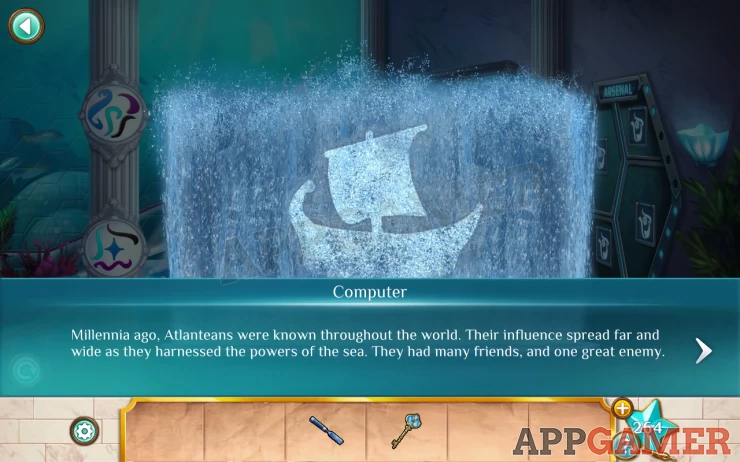
Now view the fountain. This is the computer and you will access the Arsenal section.
You need a code.
Hint: the door to the arsenal has the clue.
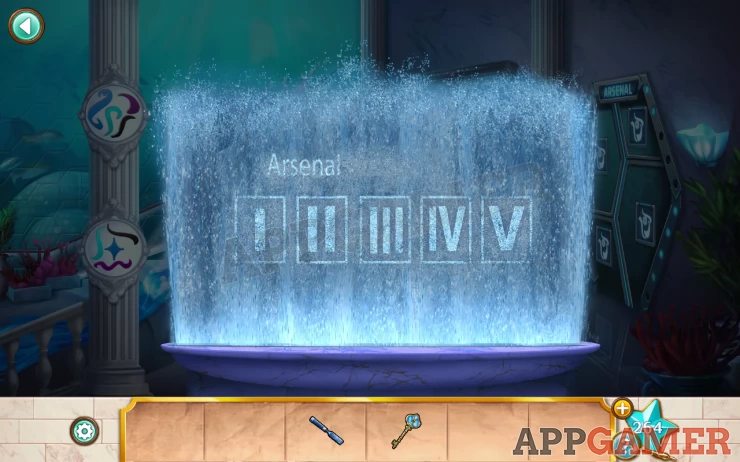
Solution: the lights around the outside represent numbers. Start from the top and follow the arrows around clockwise.Show
Code: 2435 - Press II IV III VShow
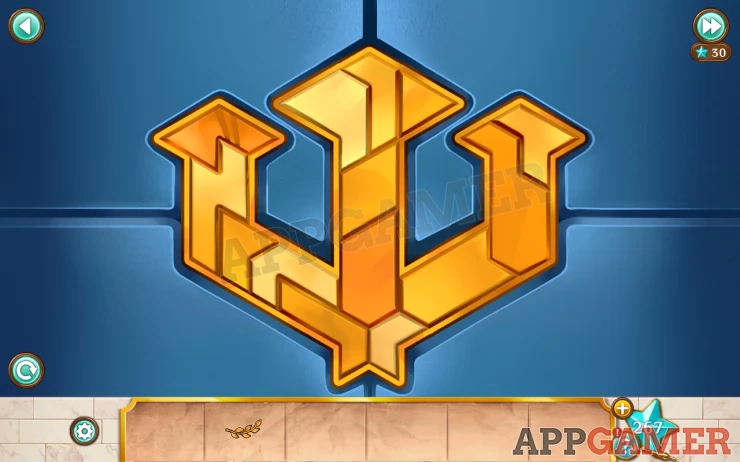
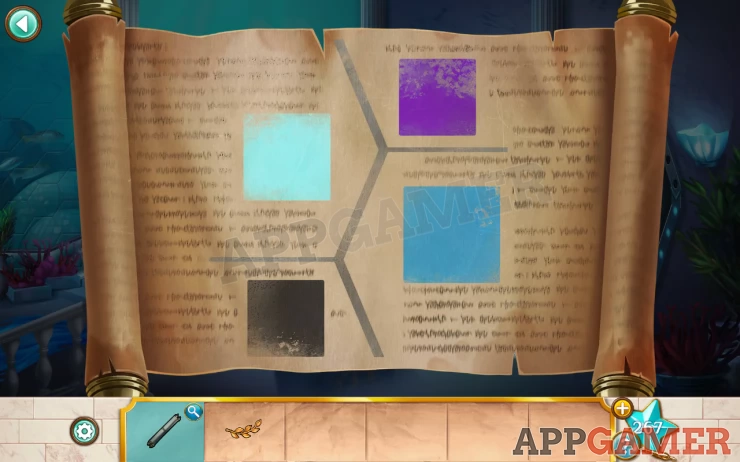
You will open a file regarding the arsenal and the dismantling of Poseidon's Trident. This is informative and contains images that are a clue.
Now go down the stairs on the left.
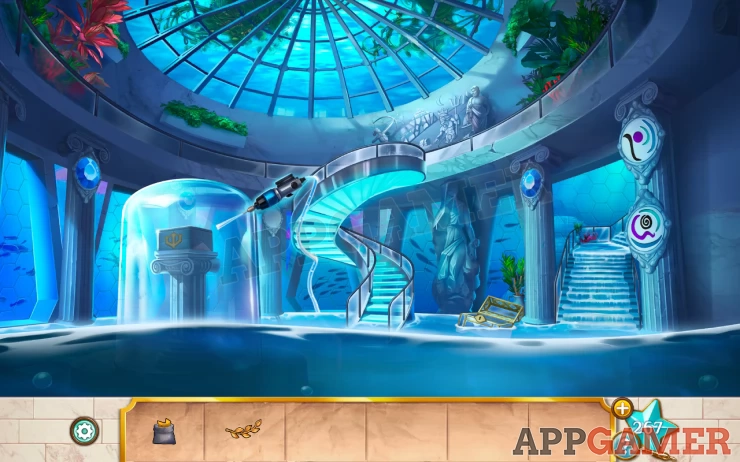
Star: On the large blue gem on the far left.
Use the toolbox key to open the chest floating in the water. Collect a water jet.
Then use the chisel on the middle blue gem (to the left of the spiral stairs). You collect the gem.
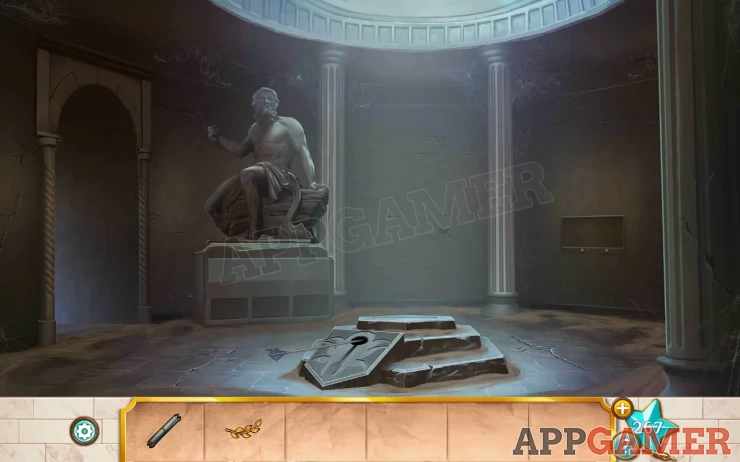
Now tap the central stairs to go up to the top and see a mural.
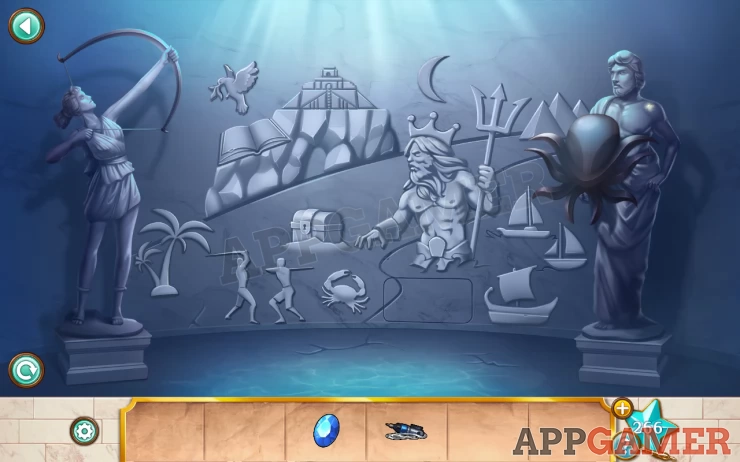
Star: on the shoulder of the figure on the right.
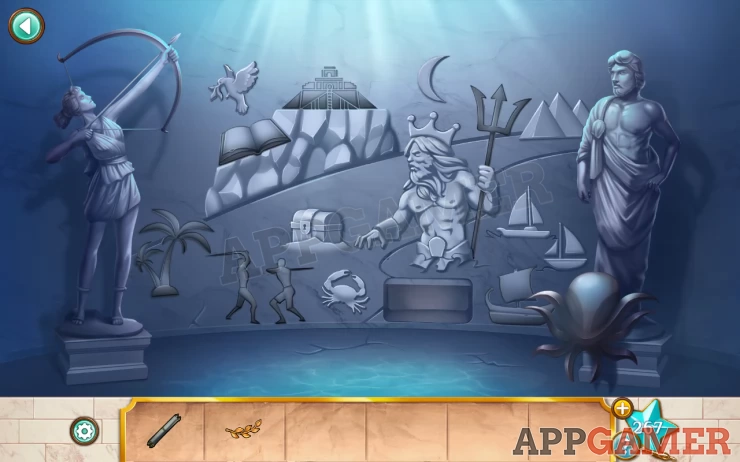
The mural is a puzzle. You need to tap the light colored images in the correct order.
Solution: Press them in the same order that is shown in the animation from the computer.Show
Order: Boat bottom right. Temple top center, Fighters bottom left, Palm tree bottom left, Book top left, Trident top right.Show
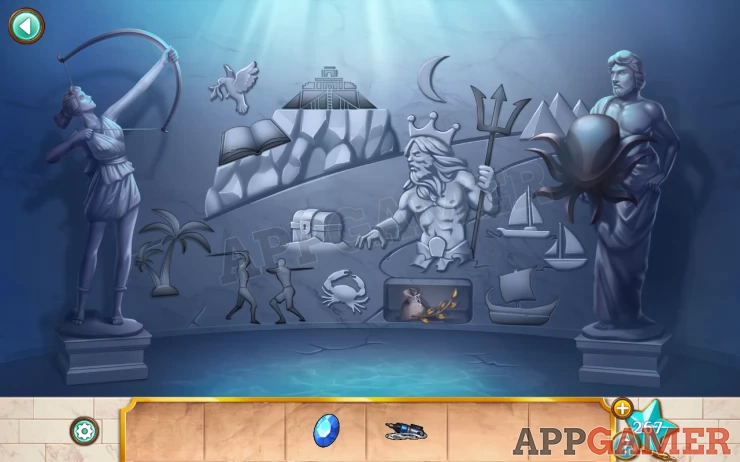
Collect the olive branch and gold pieces.
Now return to the first area.
Use the gem on the stone bust on the center to crush it. You collect crushed gemstone.
.

Go back downstairs. Use the water jet on the glass dome, then add the crushed gemstone. You will cut a hole.
Collect the chest from inside.
View the chest to see the trident shape. You need to open it.
Add the gold pieces on the box then arrange them to fit. A jigsaw puzzle.
Solution: Show
Collect the scroll.
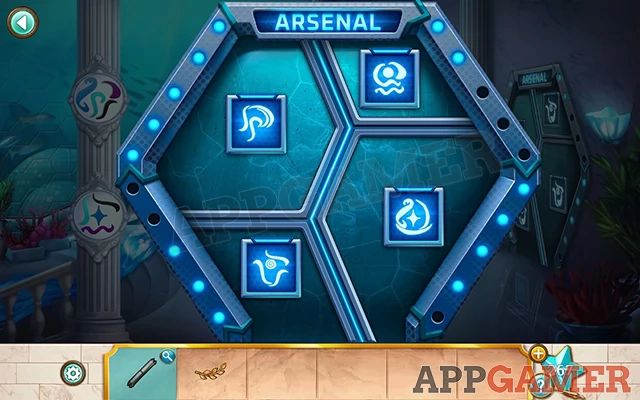
You now have the clues to open the arsenal door.
Hint: there are 4 panels on the door and 4 colors on the scroll. On the pillars up and downstairs there are symbols of various color.
Solution: Look for all of the shapes on the panels that match each color. Combine the shapes To make one symbols for each color. Use these on the door in the positions of the colors on the scroll.Show
Symbols: Show
Enter the arsenal. It seems to be empty.
Collect the arrow. Note the shape on the floor where the arrow was.
Go back out to the large wall mural. Place the arrow in the bow so that you can then collect the octopus shaped shield.
Return to the arsenal room and place the octopus shield in the shape on the floor.
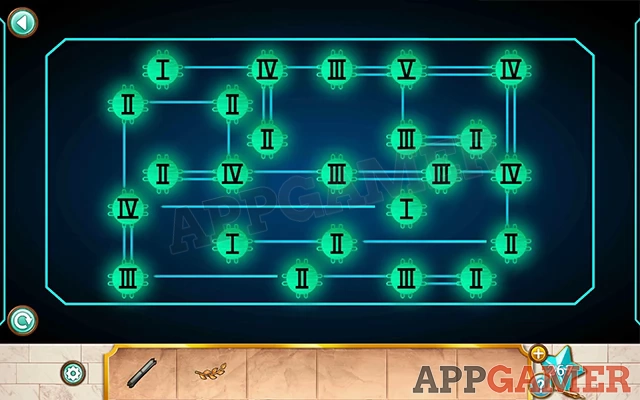
A pillar will rise up. Tap on it to view a new puzzle.
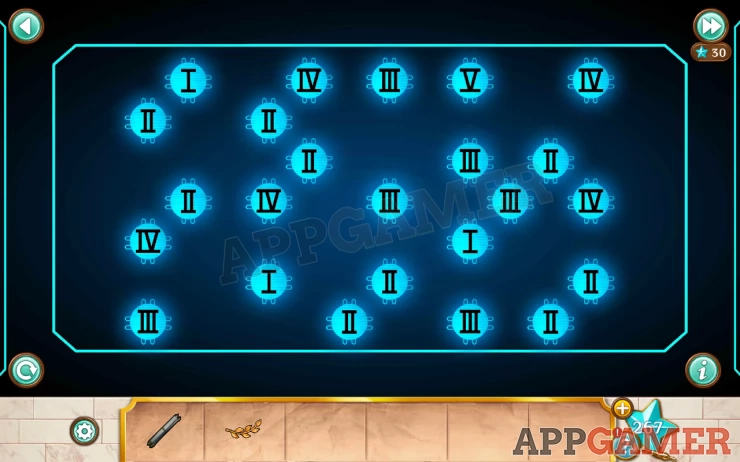
Hint: this is a connection puzzle, Tap pairs of nodes to connect then horizontally or vertically. Each node must have the number of connection shown by the roman numeral.
Solution: Show
You now see a hologram projected around the room.

Check the writing for a clue and then look at the card shapes on the right.
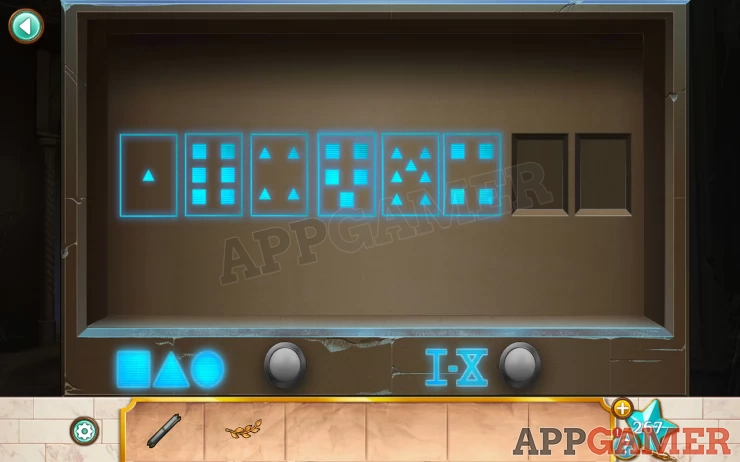
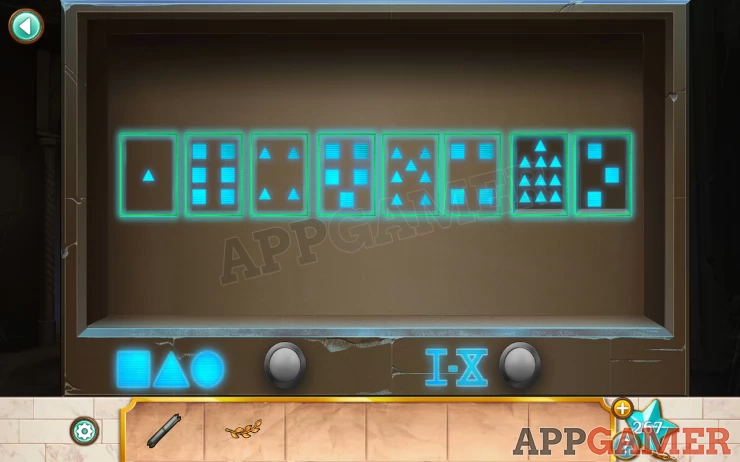
Hint: complete the sequence to solve this.
Solution: the cards alternate between triangles and squares. The triangles go 1, 4, 7, the next will be 10. The squares go 6, 5, 4 the next will be 3.Show
Cards: Show
Then there is a second level.
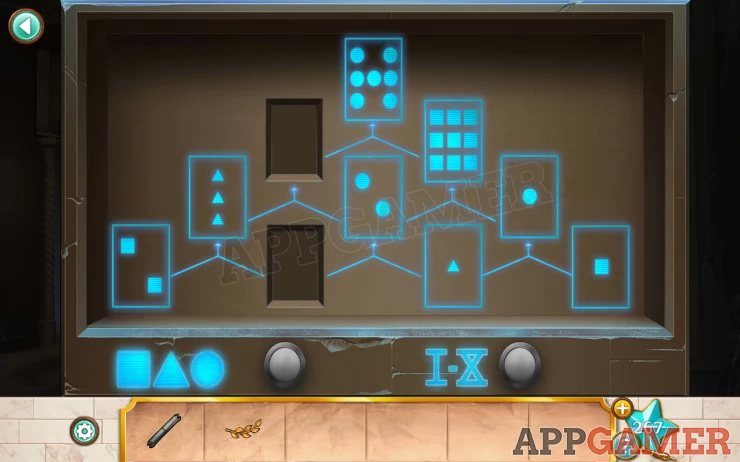
Hint: Each card is derived from the sum of 2 below it.
Solution: On the right we can see that 1 triangle and 1 square give us 1 circle. Then 1 circle plus 2 circles results in 9 squares. From with we see that the circle value is 3 times that of the square. Triangle is 2 times that of the square so we can simplify it to Square = 1, Triangle = 2, Circle = 3 Working back the top missing card needs to equal 21 - 9 = 12 and the one below must equal 6 - 2 = 4Show
Cards: Top - 6 of triangles or 4 of circles, Bottom - 2 of triangles or 4 of Squares.Show
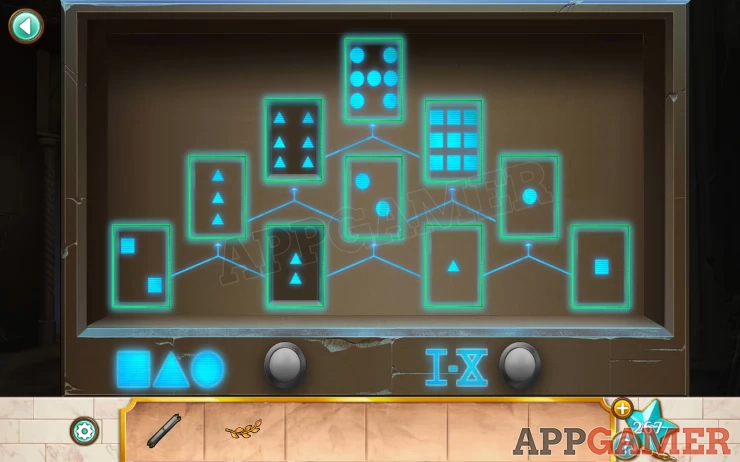
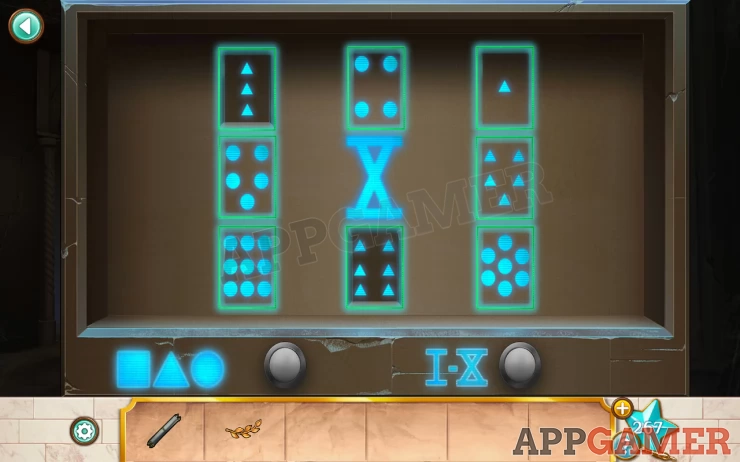
And there is 1 final level.
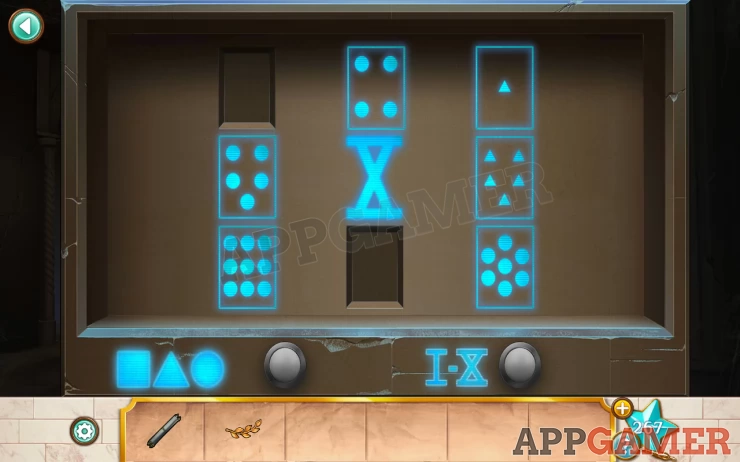
The clue is the X in the center.
Solution: This is easier than it looks. You jut need to make the number of shapes on any line passing through the X in the center add up to 10. E.g. the center row has 5 circles and 5 triangles. The board also has 4 cards with circles and 2 with triangles Just make the top left a 3 of triangles, and the bottom center a 6 of triangles. Show
Cards: Show
Collect the Shell.
Now you need to place the 3 items that you have in the 3 holes below the statue.
Hint: check the hologram writing to find the clues.
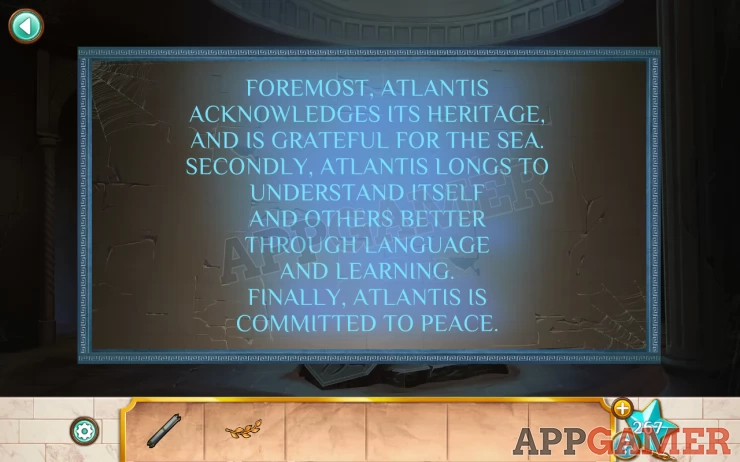
Solution: The first part is about the sea, so place the shell in the slot I. The second part discusses language and learning, place the scroll in slot II. The third is about peace, place the olive branch in slot III.Show
You collect a piece of Poseidon’s trident. And also a scroll with clues to the other 2 pieces. .
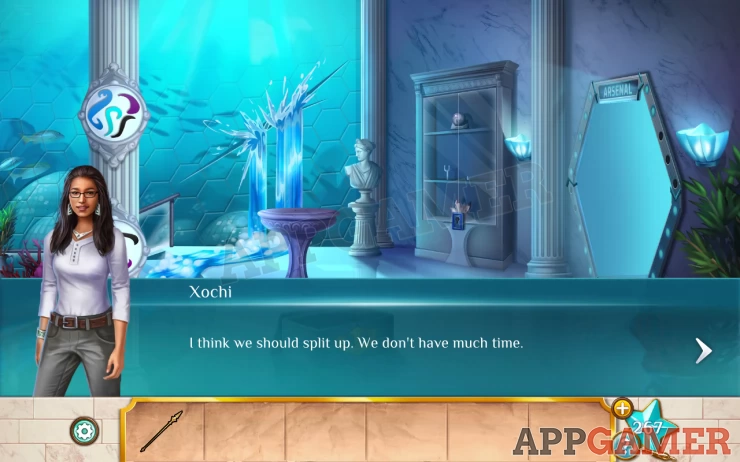
You split up to search for them which completes of Chapter 6. Move on to Chapter 7.
We have questions and answers related to this topic which may also help you: Show all