Chapter 2
More Lost Ruins Revenge on Atlantis
This is our full walkthrough for chapter 2 of Lost Ruins Revenge on Atlantis. A new Adventure Escape mystery game from Haiku.
In Chapter 1 you found your way to the heart of the ancient city but were then ambushed by soldiers. Xochi and Peter have been thrown down into a pit and must now find a way out. Peter is injured and cannot move.
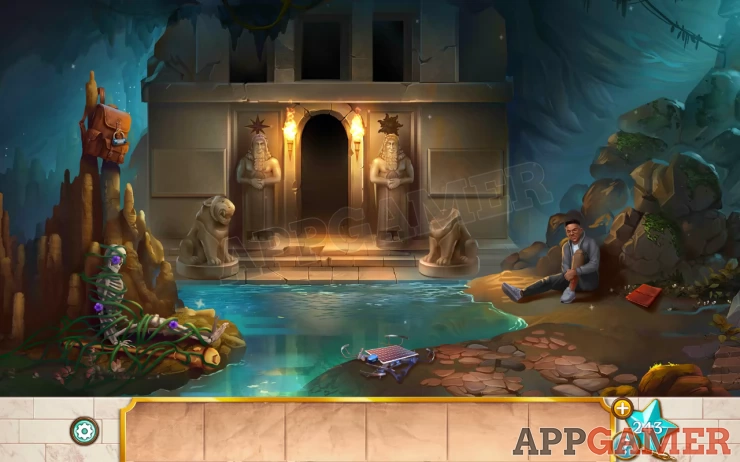
Star: In the water just next to the entangled skeleton.
First collect the journal from the ground on the right. have a look through it for clues.
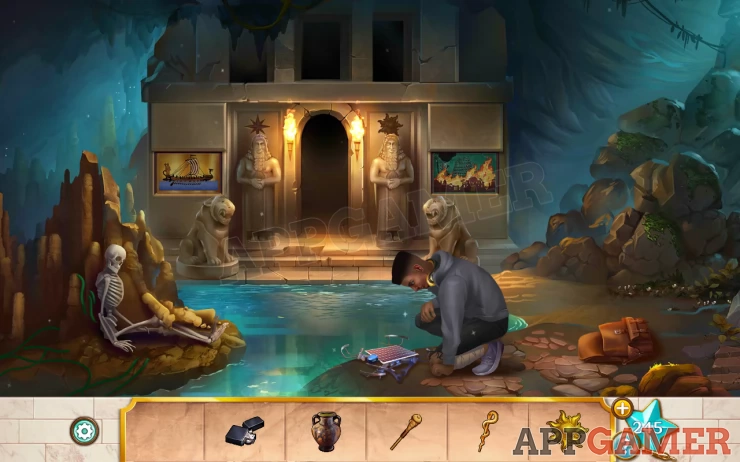
Now tap the central doorway to move through.
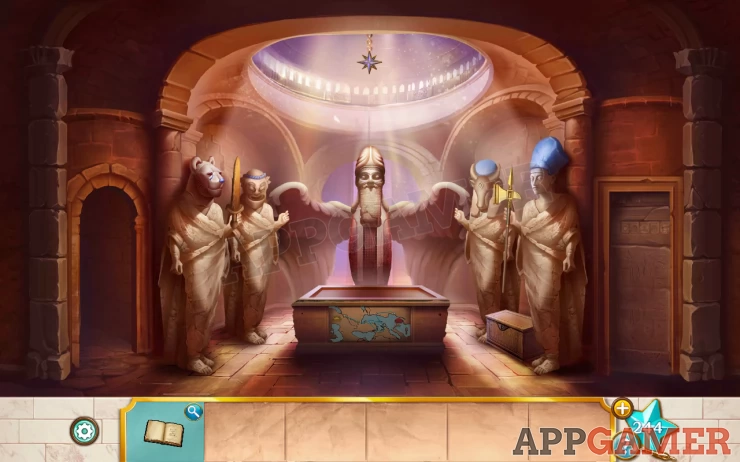
The statues are holding a sword and a 'Warhammer', collect these.
Go back out through the door on the left to where Peter is.
Use the sword on the vines covering the skeleton. Then collect the 'Beekeeper staff' from next to it.

Use the warhammer to collect the bag that is stuck on the rock.
View the bag to see a lock, this requires a 7 letter combination.
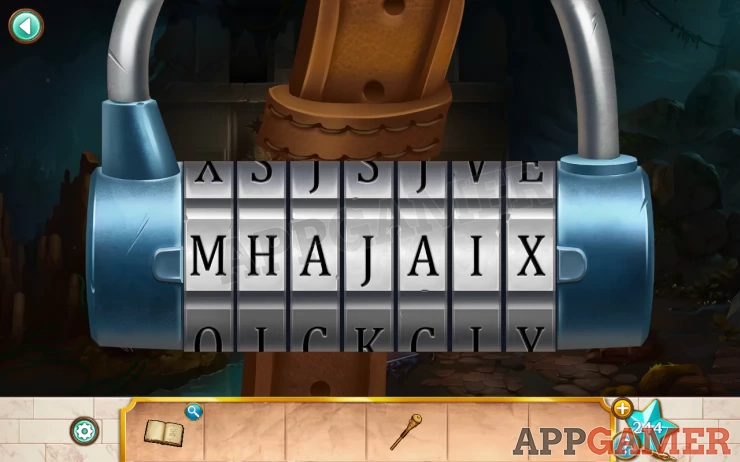
Hint: this belongs to Prof. Burns. Check the journal for a clue.
Solution: THERESAShow
You can now collect the med kit and a lighter from the ground
Use the med kit on Peter to heal his leg. He examines the drone but it needs oil.
Go back through the door way to the temple.
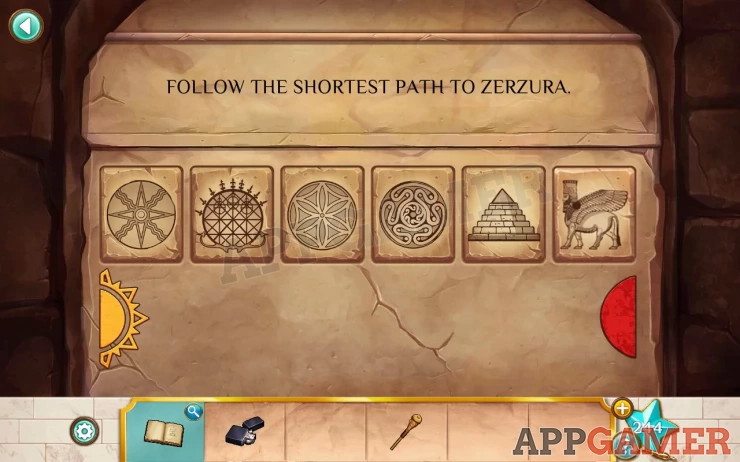
Tap the door on the right to see a lock and a clue.
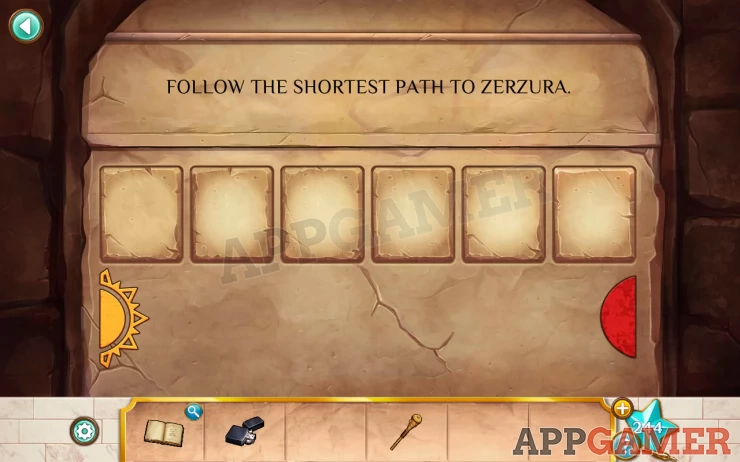
Then view the map on the plinth in the center or the room.
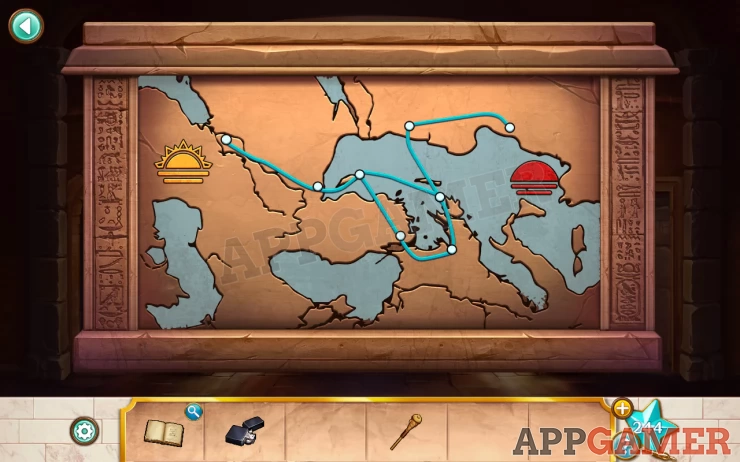
The shortest path from left to right is the top one.
Hint: now use the journal to solve this puzzle.
Solution: Check the map in the journal (note the one on the plinth is rotated). Match the locations for the short path to those on the map, then check the rest of the journal pages to find the appropriate symbols for them.Show
Code: Show
Go through to the treasury with lots of gold.
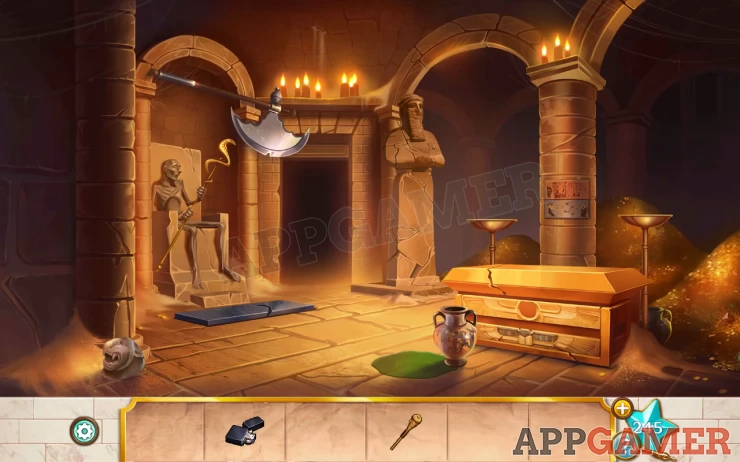
Star: on a candle top right
Collect a lions head from the bottom left and the Amphora (jug) of oil from the green puddle.
Next use the lighter on the 2 lamps behind the box. This will make the lid open, but there is another lid with a puzzle.
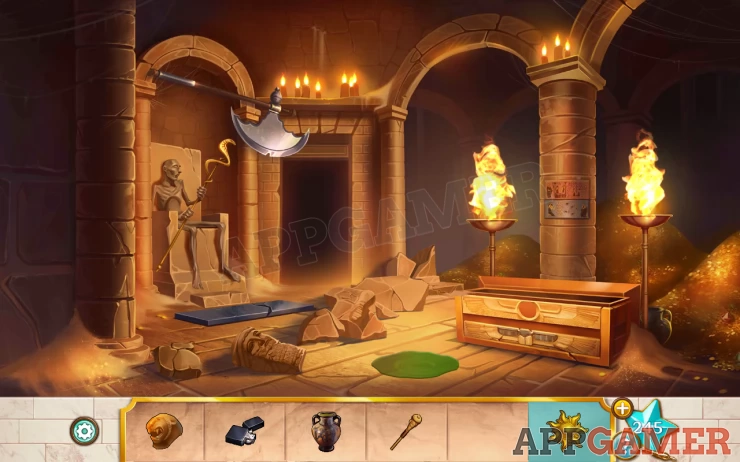
To solve this move the 3 colored blocks to the matching spots on the board. Use the arrow buttons.
Once done collect the 'Sun of Shamash'
Next tap on the tall statue in the center to crack it.. then a few more times until it breaks.
Collect the Heavy statue head from the floor. Then place it on the blue pressure plate in front of the throne on the left.
With the axe trap deactivated you can now collect the 'Vintner Staff' from the withered body holding it.
Finally tap to view a mural / picture on the pillar above the box for a clue.
Exit this room and go back to the first area where Peter is.
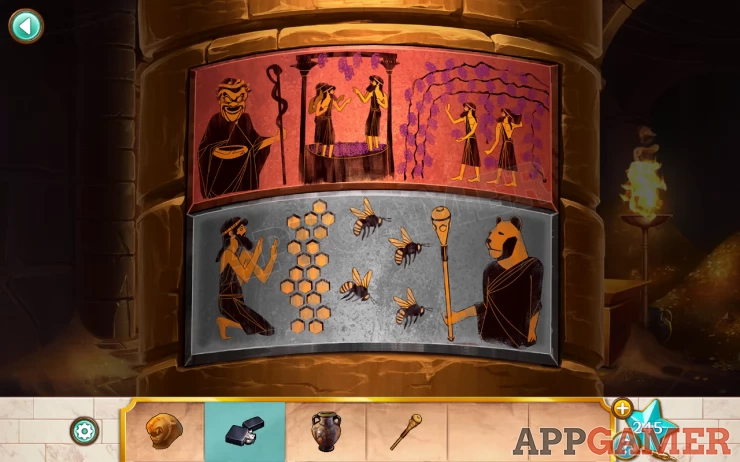
Add the Lion head to the broken status on the right, 2 panels open to reveal images
View them for more clues.
Next add the oil to the drone to fix it and you can collect it.
Go back into the temple room and use the drone to collect the 'Star of Ishtar' that is hanging from the ceiling.
Go back out to the first area.
Place the Sun of Shamash in the slot above the head of the statue to the right of the door.
It opens and you can collect a High Priest Staff.
Then place the Star of Ishtar in the slot above the left status. Collect the Scythe staff from inside.
Now go back into the room. You have 4 staffs, and 4 statues. Place the correct staff with each statue.
Hint: you have murals and images that depict the staffs and the persons holding them.
Solution: From left to right: Beekeeper, Vintner, Scythe, High PriestShow
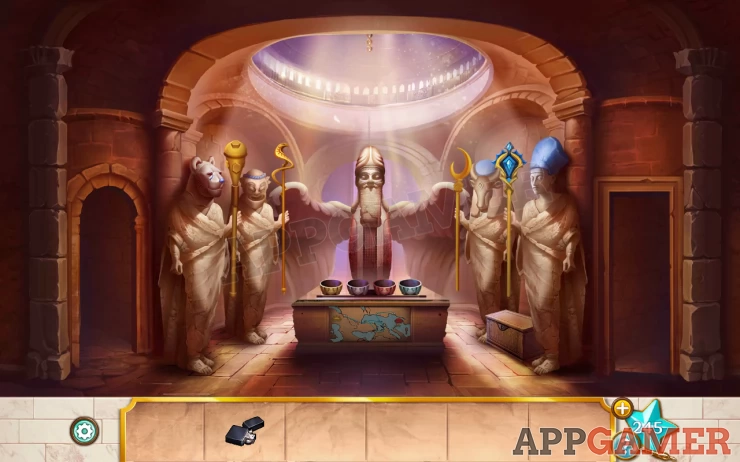
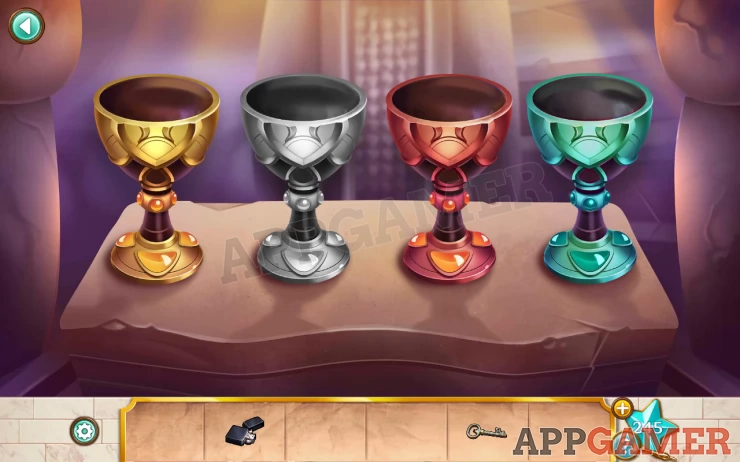
You will then see 4 goblets appear, note the colors. View these and collect a key.
Use the key to unlock the chest that is on the floor to the right.
There are 4 jars inside, you collect them to get a jar of wine (red), a jar of honey (yellow), and two empty jars.
You need to fill the other 2. Go through to the treasury and fill one of the empty jars with oil from the floor (green). Go to the first area and fill the other empty jar with water (blue).
Now return to the 4 goblets. These each have a color but you need to find the clues to know which liquid to pour in each.
Hint: check the murals again for the answers.
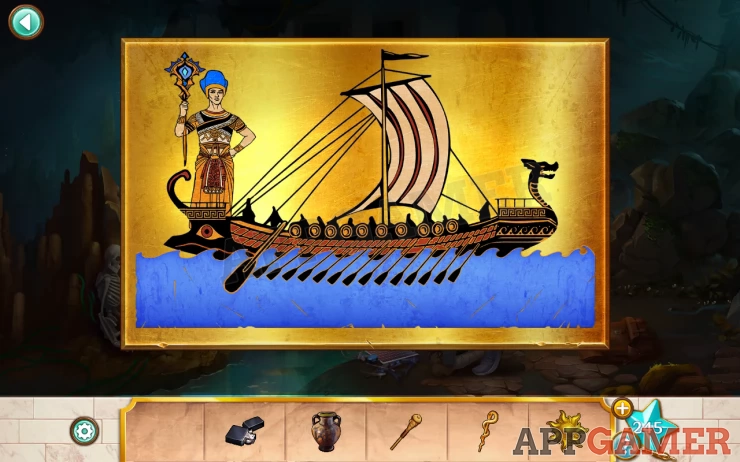
Solution: The first (gold) goblet matches the background of a gold mural in the first area, this shows a ship on the blue water. The second (silver) goblet is the same color as the image from the treasury with the beekeeper and honey. The third (red) goblet is the same color as the upper image in the treasury, this image has grapes and wine making. The fourth goblet matches the color of the mural in the first area with fire, for this use the oil and then light it with the lighter.Show
Pour Order: Left to right - Water, Honey, Wine, Oil (to make Fire)Show
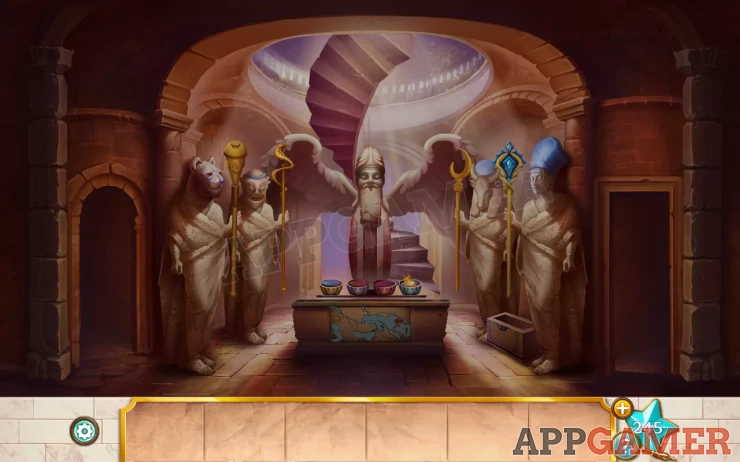
Stairs appear and you can make your way up.
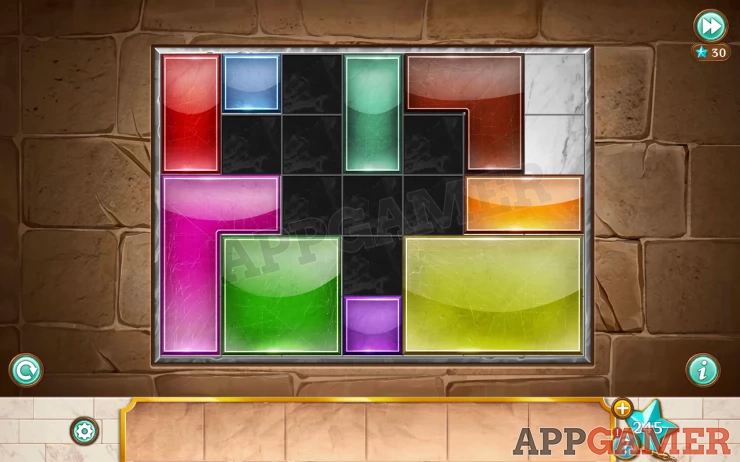
You now take over with the Prof. Burns again and you need to solve a block puzzle to discover the Heart of Zura.
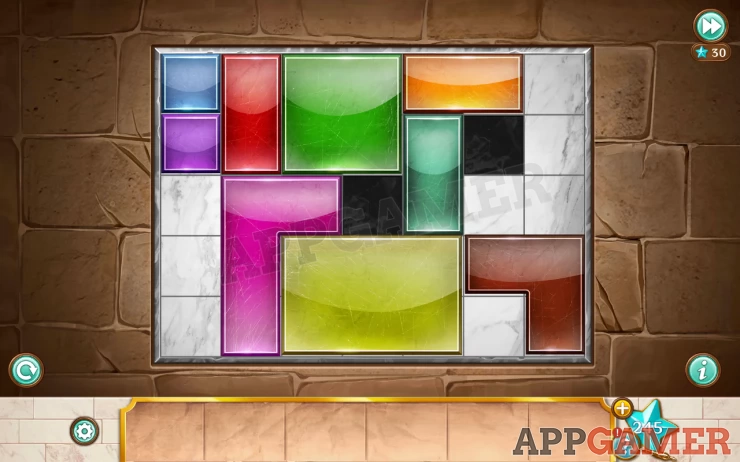
Move the blocks to uncover all the black tiles.
Solution: (move the top right block to the right to complete)Show
Once done watch through the scenes to see the Professor get possessed by the Heart.
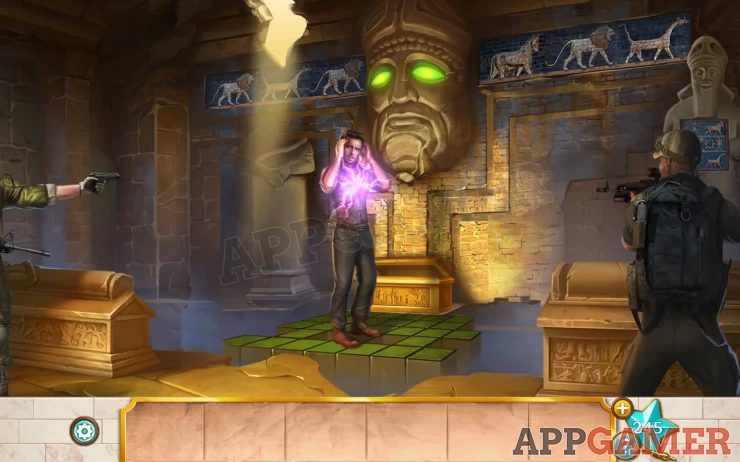
This completes chapter 2. Move on to Chapter 3.
We have questions and answers related to this topic which may also help you: Show all