Chapter 5 - Dec 22nd
More Adventure Escape: Xmas Killer
This is our full guide to chapter 5 of The Christmas Killer (Xmas Killer). Another great Adventure Escape Mystery game from Haiku.
It is now Dec 22nd
Back at the Police station, yo now have more evidence on the board. The old case file and the locket from Misty.
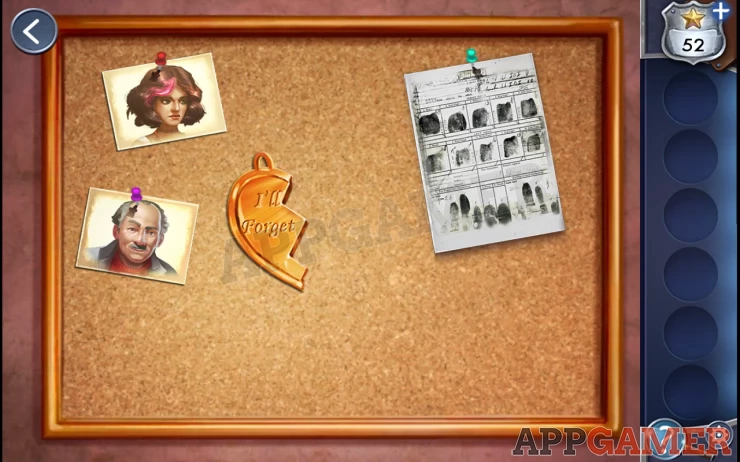
But now you have a package delivered to you from the Christmas Killer. And another snow globe
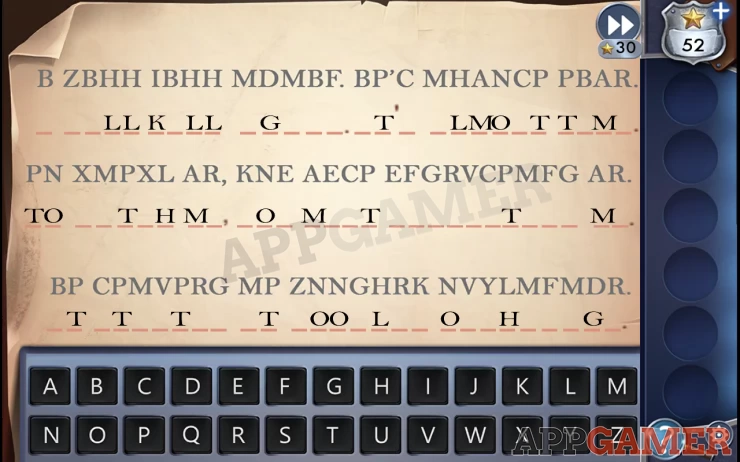
The letter is in code, but with many letters already filled in.
Select any empty spaces and try different letters to work out what it should say.
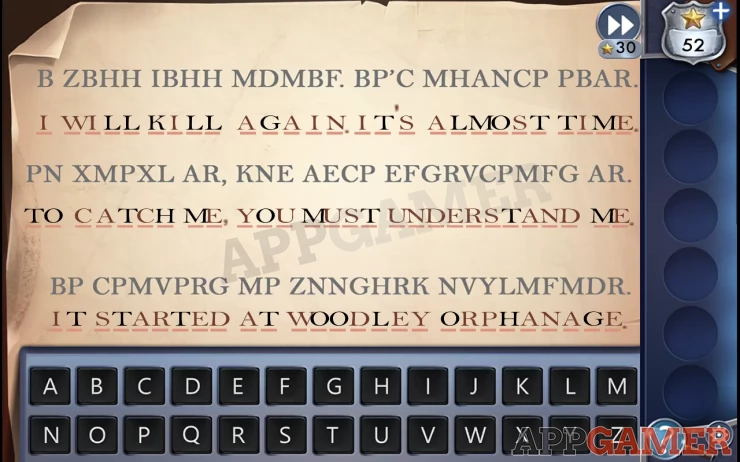
Solution: I WILL KILL AGAIN. IT’S ALMOST TIME. TO CATCH ME, YOU MUST UNDERSTAND ME. IT STARTED AT WOODLEY ORPHANAGE.Show
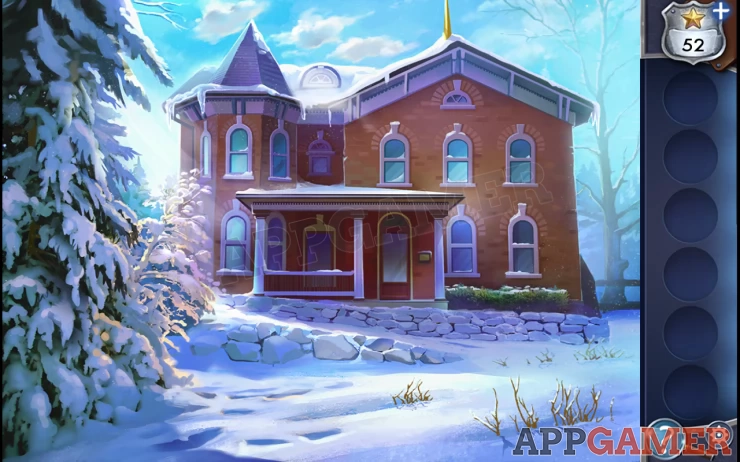
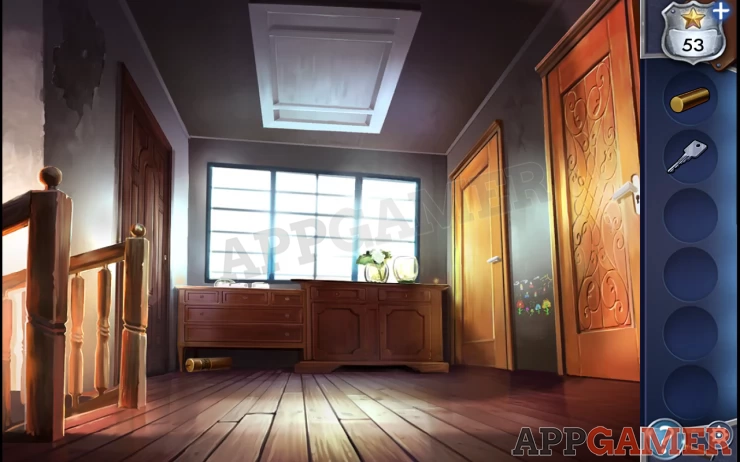
You now head over to the orphanage.
Go inside and talk to Mr. Orson.
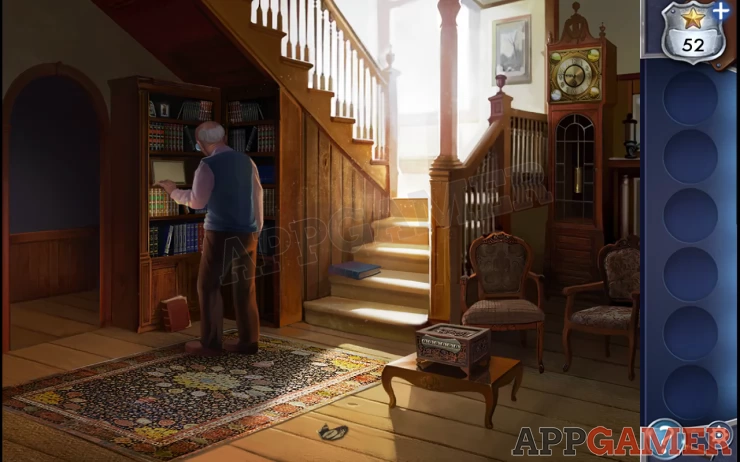
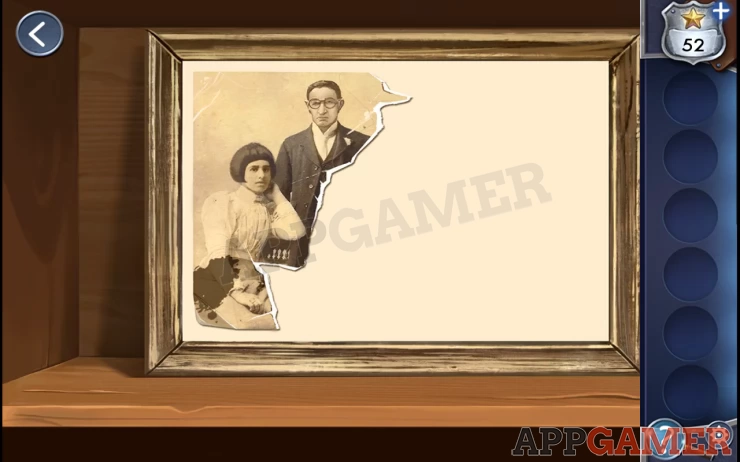
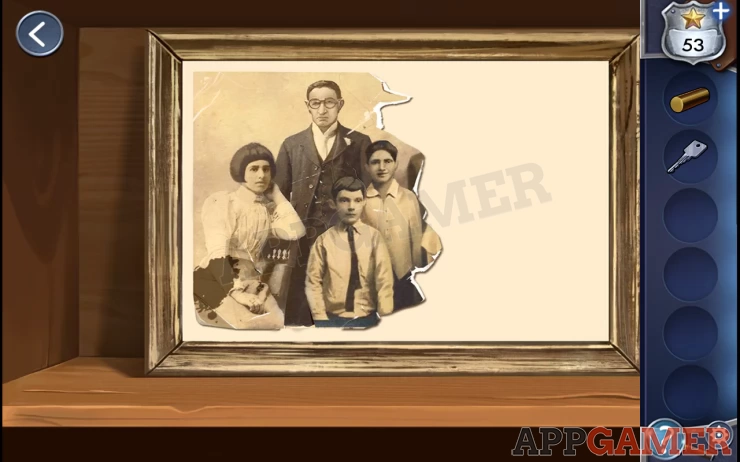
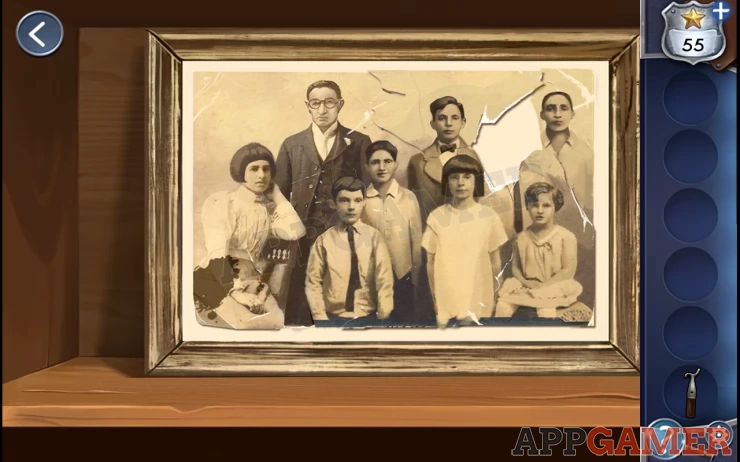
He tries to show you a photo but there are pieces missing.
Collect a piece from the floor, bottom center.
View the red book on the floor and the blue book on the stairs for clues.
Tap on the arch on the left to move through to a classroom.
Star: in the box bottom right.
Under the chair on the left is a clock weight, collect this.
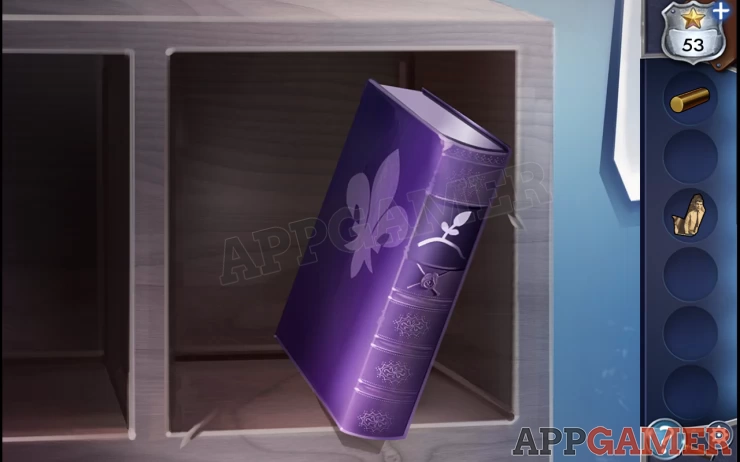
Then check the book on the shelves to the left for another clue.
Above the book case is a poster with 4 seasons represented, this is also a clue.
On the blackboard are the names of 6 cities. Some have numbers and some do not.
There is also a map with the same cities and direction arrows.
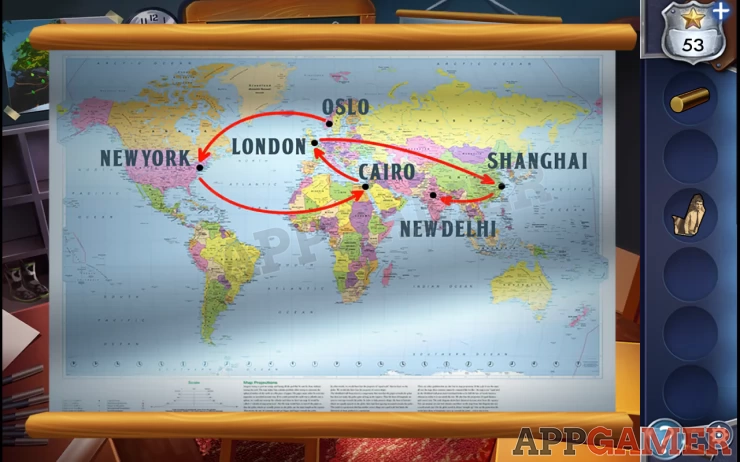
Back in the first room there is a locked box on the small table. View this.
Use the clues above to get the combination.
Solution: The names on the board have numbers for the number of letters in each. SHANGHAI 8 OSLO 4 LONDON 6 NEW YORK 7 CAIRO 5 NEW DELHI 8 The map tells you the orderShow
Code: 475688Show
Open the box and collect another photo scrap from inside.
View the photo frame again and add the two scraps to it. Mr. Orson gives you an old key for upstairs.
Go upstairs.
Star: on the dresser unit to the right of the vases.
Collect another clock weight from under the dresser on the left.
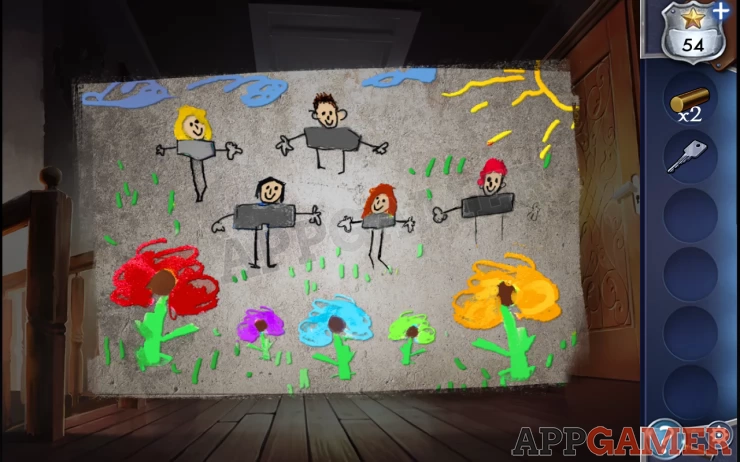
On the right wall between the 2 doors is a drawing. View it for a clue.
Next, use the old key to unlock the door to the far right. Enter a bedroom.
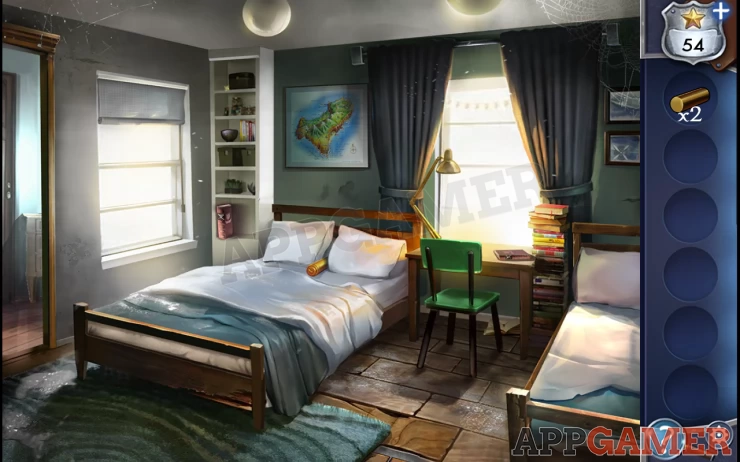
Star: On the top shelf on the left.
Collect a third clock weight from the left bed.
Tap the bed on the right of the room to move the mattress and find another photo scrap.
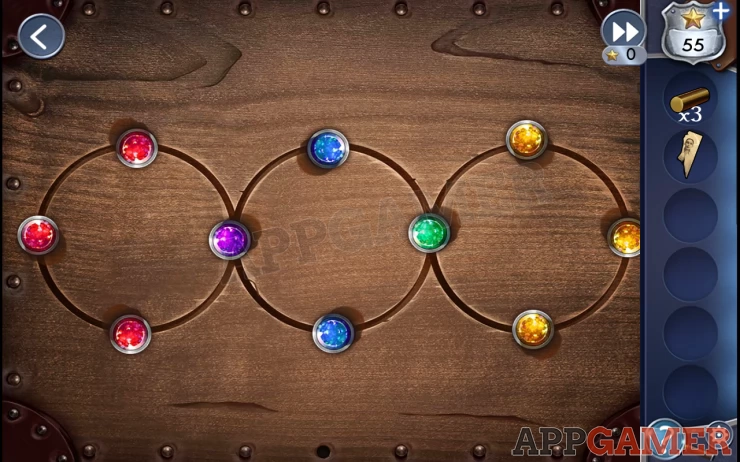
Then tap the left bed sheets to move them and find a box with a jewel puzzle.
Hint: the jewels are the same colors as the flowers in the drawing on the wall.
Solution: Note there are 3 reds, 1 purple, 2 blue, 1 green and 3 yellow. In the drawing check the order and size of the flowers of these colors. Rotate the circles to place them as follows.Show
Collect a photo piece.
There is another book to view for a clue on the bottom of the left shelves and one more on the small desk by the right window.
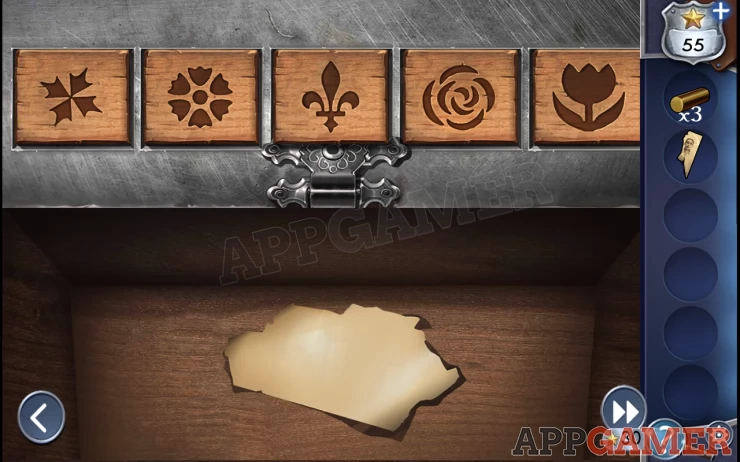
Tap to lift the corner of the rug at the bottom of the scene and find a locked box.
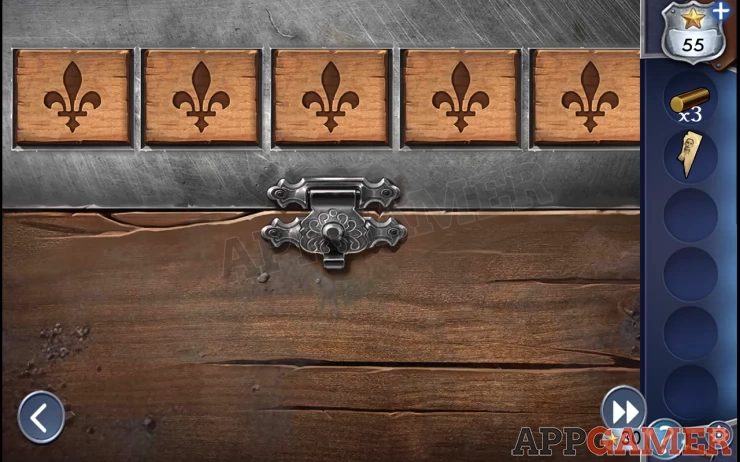
Hint: the symbols on the combination have been seen on the books.
Solution: Check the 5 books, each has a symbol on the spine relating to a tree. Order then from seed to full grown and then use the related symbols from each book on the lock.Show
Collect another photo piece.
Now go back downstairs and place the three clock weights on the clock.
View the clock face. This is a puzzle.
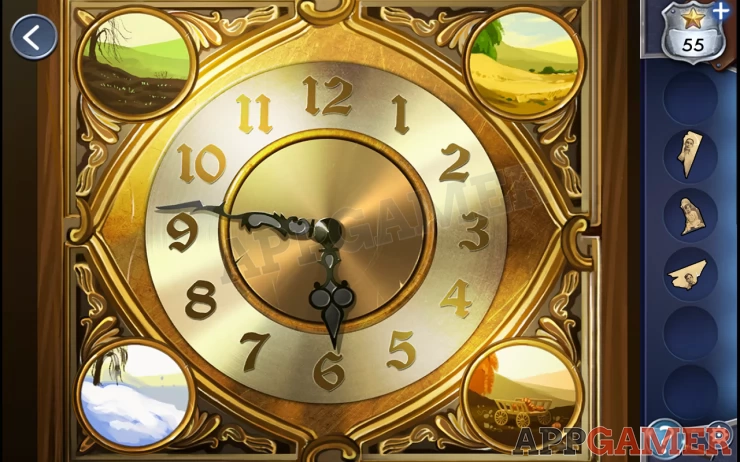
Hint: the 4 picture depict seasons.
Solution: Check the seasons picture in the classroom. Tap to swap pairs of the pictures to match .Show
Another photo scrap will fall out of the clock, collect this.
Now view the photo again and add the 4 new pieces you have.
Mr. Orson will give you a long hook.
Go back upstairs and use the long hook on the loft hatch above.
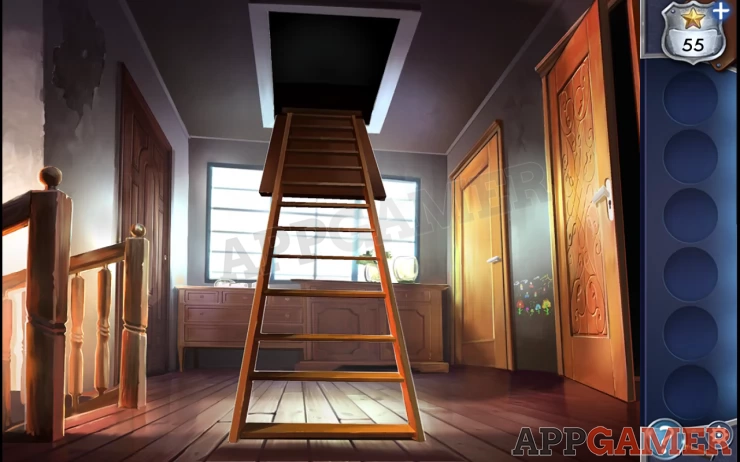
Enter the Attic.
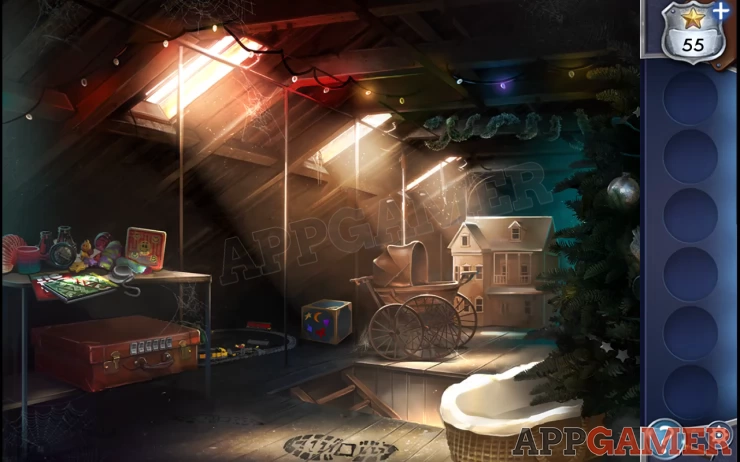
Note the footprint, someone was here recently.
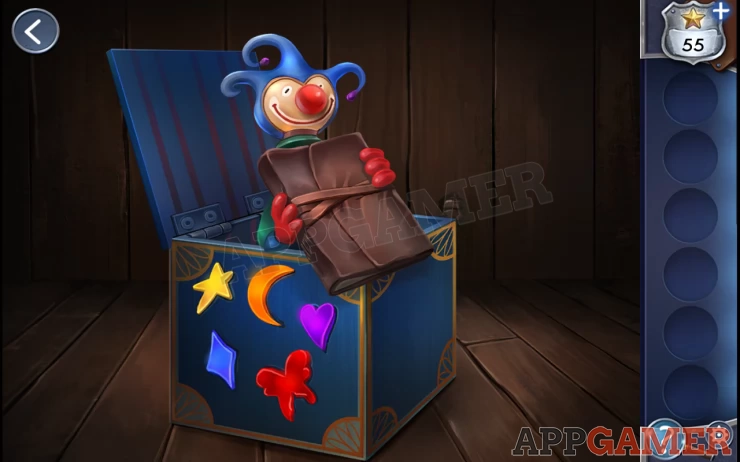
In the center at the back is a blue Jack-in-a-box. This has 5 buttons.
Hint: Pay attention to the Christmas lights on the ceiling.
Solution: Note the order of the flashes. Red, orange, blue, purple, yellow. Tap the buttons in that order.Show
Collect a journal, then read through it to find a clue at the end.
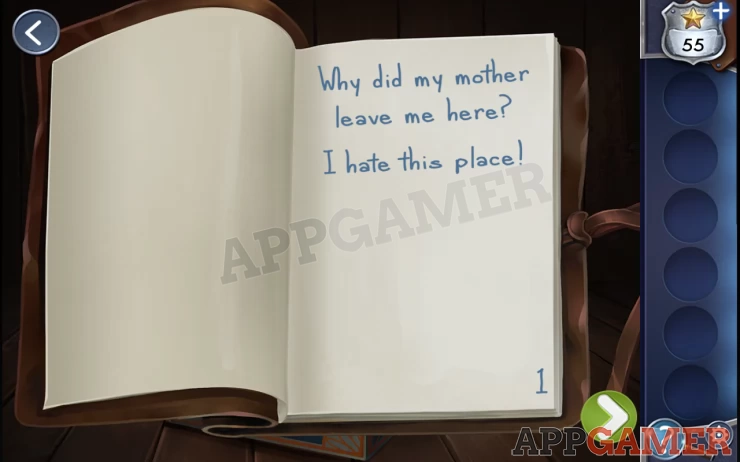
Show
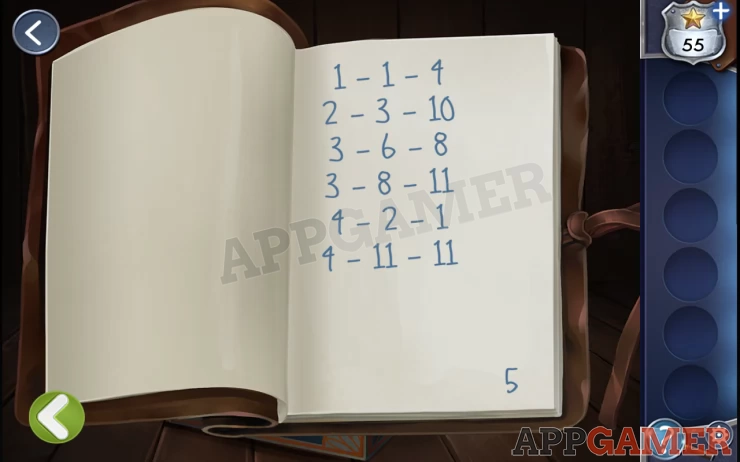
This is a clue to a code.
Solution: Each set of 3 numbers is a page line and letter number. Used these to find 6 letters in the journal.Show
Code: DUDUDUShow
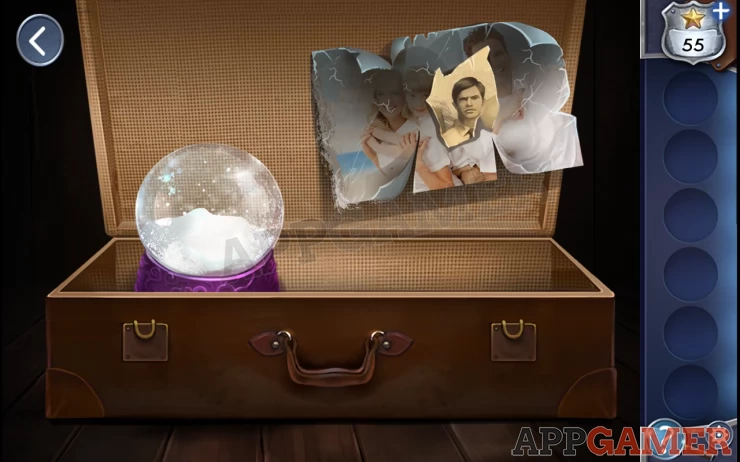
Now tap on the suitcase on the left of the room.
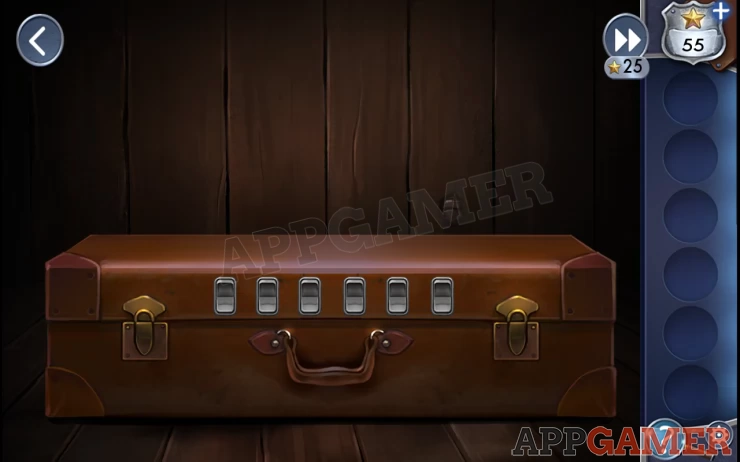
This has 6 toggle switches to open it.
Solution: DUDUDU represents Down, Up, Down, Up, Down, Up. Set the switches in this way Show
Now you can collect last photo scrap and another snow globe for your collection.
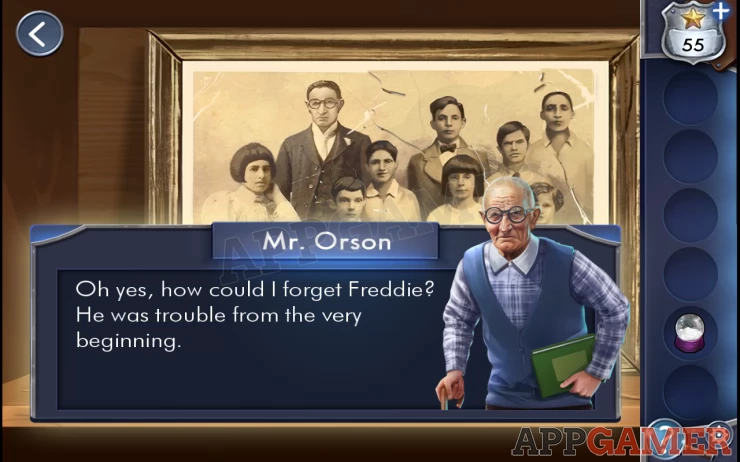
Go back down to Mr Olson and add the last scrap to the photo.
Learn about Freddie.
That completes chapter 5. move on to Chapter 6.