Chapter 7 - The Inner Sanctum
Adventure Escape: Hidden Ruins Guide
In Chapter 7 or Adventure Escape Hidden Ruins we have made in inside the inner sanctum, an area full of puzzles.
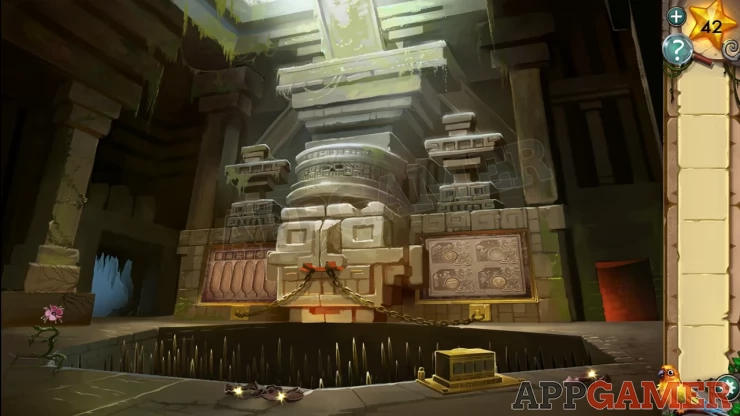
Stars: Tap and break the 3 stone pots on the ground to find 3 stars.
First tap the blue doorway to the left to find a circular maze puzzle.
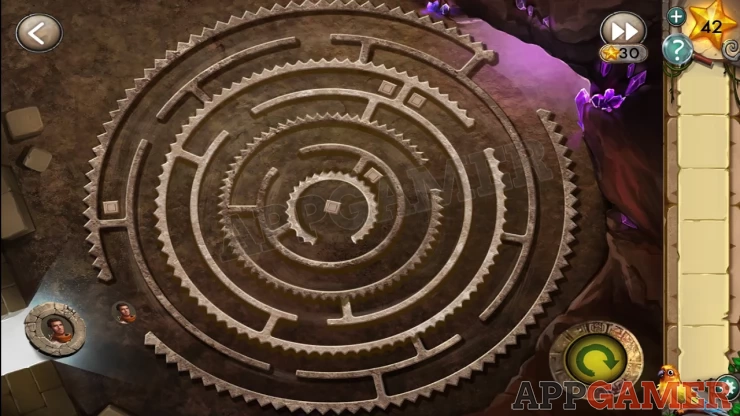
Tap and slide the small icon of yourself in the lower left around the maze. When you reach one of the small squares it will cause some rings of the maze to realign. You will need to work your way to the center and then realign the circles until you can exit back out to the right. You’re now in some crystal caverns.
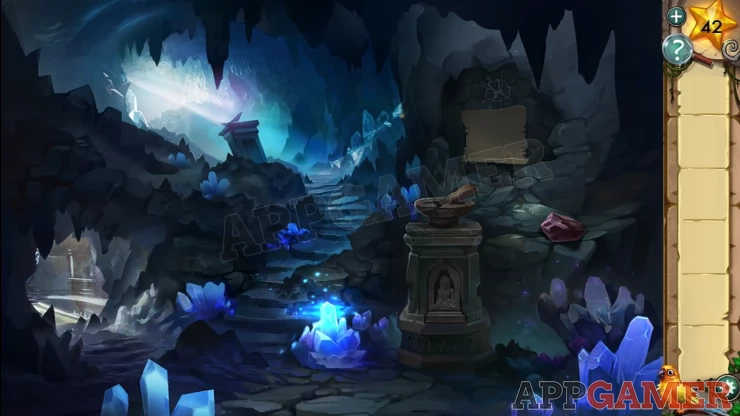
On the right side collect the chunk of obsidian, then tap the stone plinth with the mortar and pestle on it to dislodge and then collect some ore. Then tap to the left to return to the main room.
Next head through the right (red) doorway.
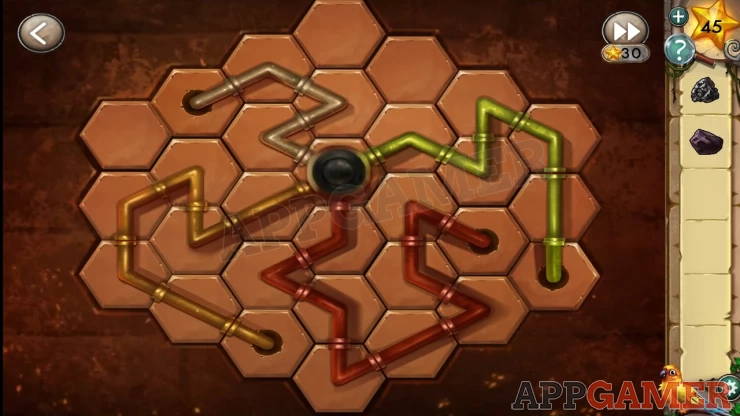
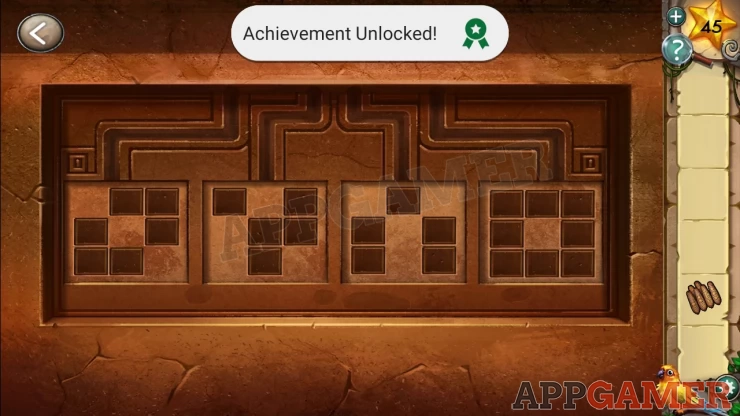
On the right wall is a puzzle.

To solve this puzzle tap pairs of blocks to swap them on the board. Swap the pieces until the pipes of each colour connect and form 4 continuous pipes from the center to an end piece that drops into the board.
Solution: Show
Once competed you can access the room. Use the obsidian on the grinding stone to sharpen it.
Tap the pattern on the left wall to view a picture of fish. This will be useful.
Return to the main room and use the sharpened obsidian to cut the flower on the left. Next tap on the gold box on the lower right, notice the fish on it and the coloured gems. .
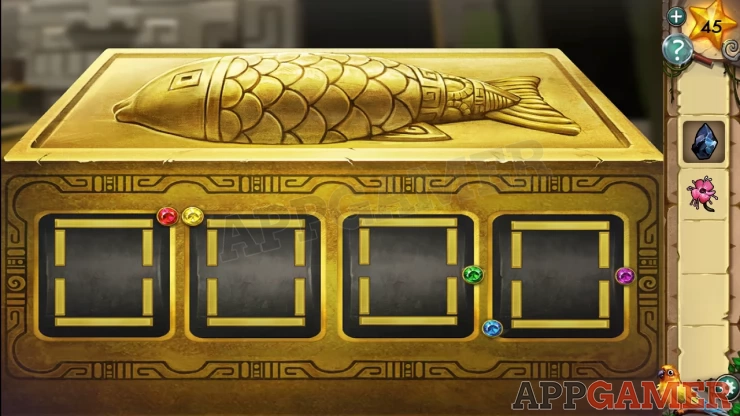
Hint: to get the combination find a pattern of the fish in the picture above of the same colour as the gems for each number.Show
Solution: The first number has a red gem in the upper right corner. Look at the red fish on the wall picture and draw a line based on the directions they’re facing, starting at the red gem. So with red, you get left, down, right, down, left. Using these lines you can draw a 5.
Do the same with yellow and you get 0. Green gets you 9. And last, blue together with purple gets you 8.
Code: 5098
Open tte box to collect some stone quills from inside.
Go back through the blue door to the crystal cave and use the sharpened obsidian on the glowing crystal in the center to get a crystal. Next, use the cut flower on the mortar and pestle to collect a liquid vial.
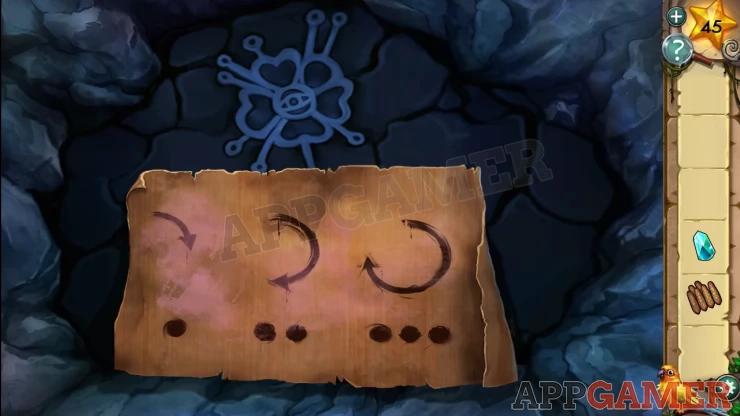
Above the mortal and pestle on the wall is a parchment. Tap this to view it and then add the liquid to the parchment to get a clue for the stone quill puzzle.
Show
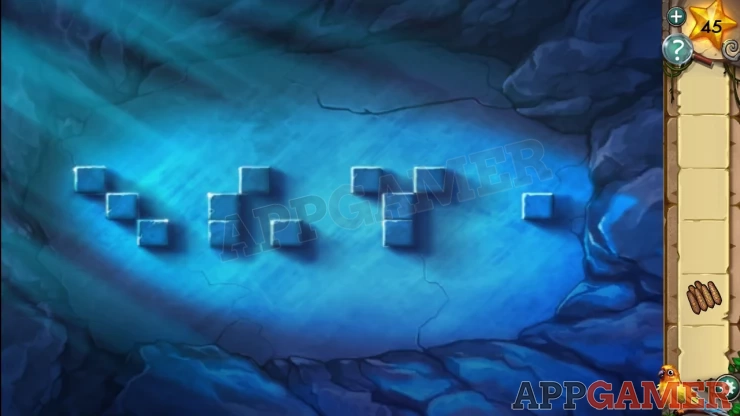
Before moving on, place the crystal on the pedestal at the top of the steps to view a clue for the puzzle in the smelting room.
Show
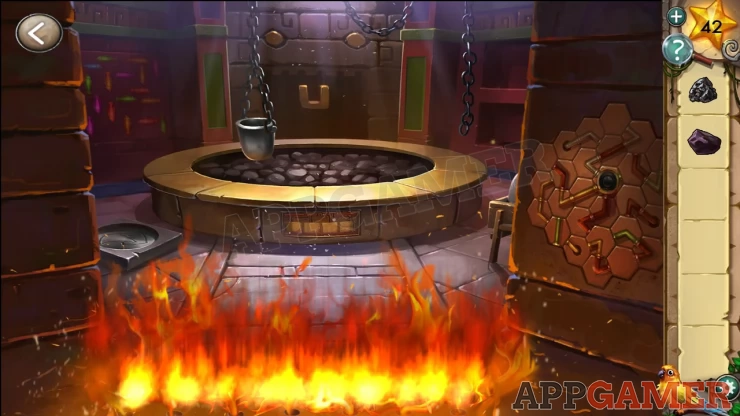
Go back to the smelting room (red door) and place the ore in the hanging crucible pot. The tap the puzzle on the bottom of the fire pit to view it. Use the clue found above to choose the correct symbol on each of the 4 blocks.
Hint: The clue shapes are reversed from the ones that you need to find.Show
Solution: Show
This will light the fire and melt the ore. Collect the melted ore and then use it on the mould on the floor. Collect the shield that this makes.
Now we can go back to the main room and open the puzzle on the left of the central door. In this one we can place the 6 stone quills.
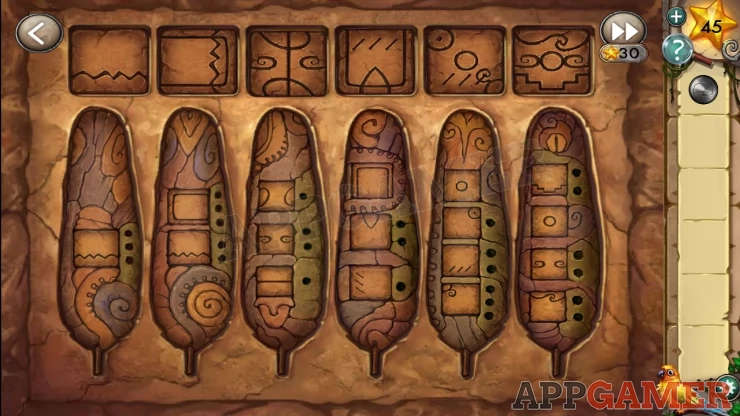
To solve this puzzle we tap the top squares to rotate the images. to know how many times to rotate them follow the code of dots using the clue found on the parchment in the blue crystal cave.
Hint: 1 dot = 1 turn clockwise, 2 dots = 2 turns clockwise and 3 dots is three turns clockwiseShow
Solution: Show

Now we can move on to the puzzle on the right. Place the forged shield with the other shields. Tap each of the 4 image to read text about it and determine which animal shield fits best. Then tap pairs of shield to swap their positions.
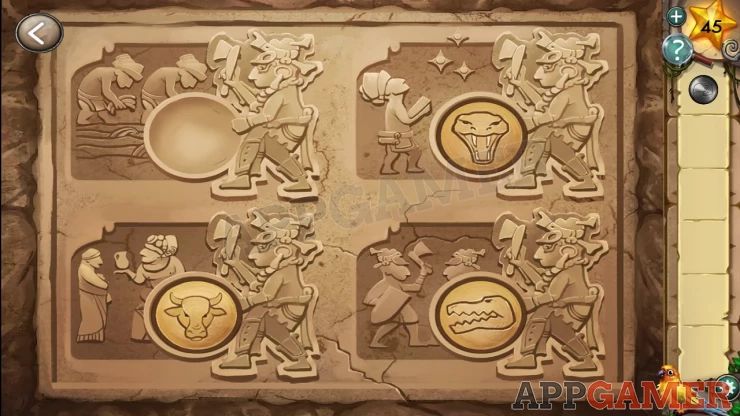
Solution: “The Kumari did backbreaking work in the fields.” - Ox shield. “The Kumari were known as sly and slippery traders.” - Snake shield. “They believed the cunning water beasts were descended from the gods.” - Crocodile shield. “The Kumari often fought from higher ground.” - Hawk shield.Show
With the puzzles solved the main door is now open and the bridge has extended. Go through the door to complete Chapter 7 and move on to chapter 8.

We have questions and answers related to this topic which may also help you: Show all