Level Guide 41 - 50
More 100 Doors: Escape from Work
100 Doors Escape from Work is another top escape room game from Peaksel Games. Makers of the similar 100 Doors Escape from Prison and Escape from school.
Having completed Levels 31 - 40 you can now find the walkthroughs of levels 41 - 50 here.
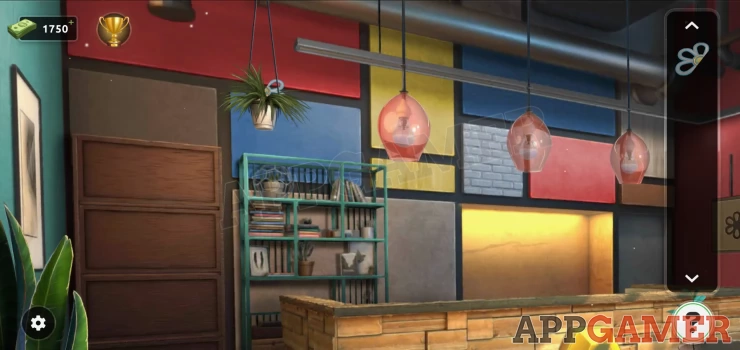
Level 41 Walkthrough
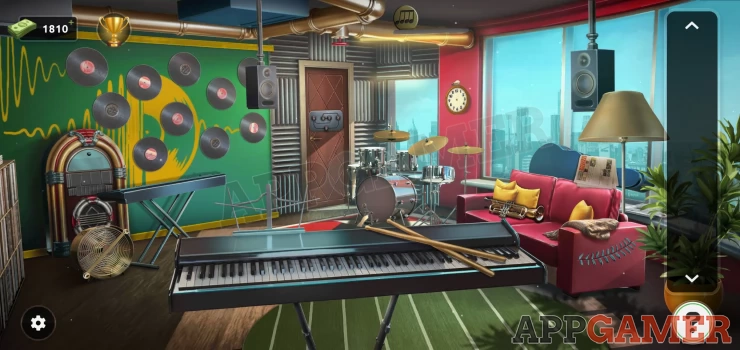
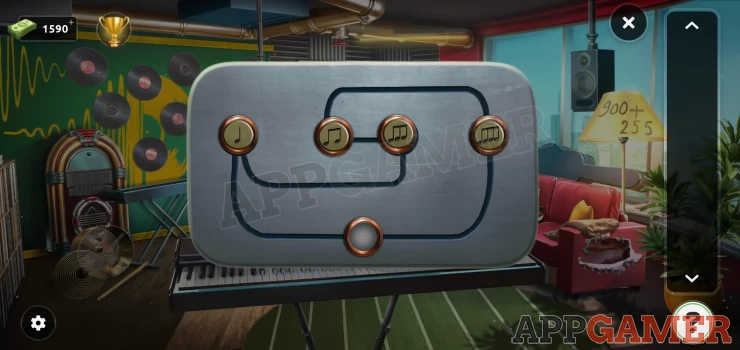
First collect the drum sticks from the keyboard. Then use them on the drum set at the back. This will make a circle with a musical note fall for you to collect.
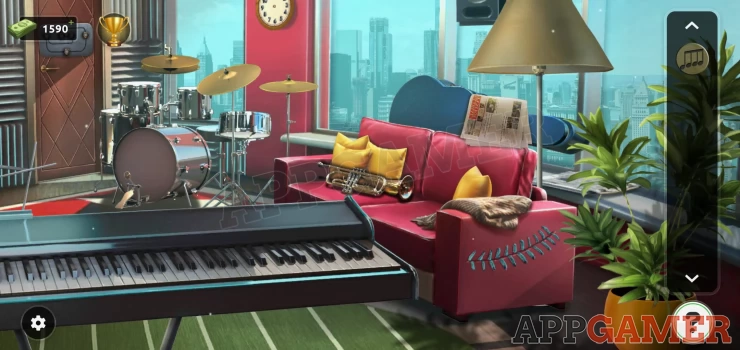
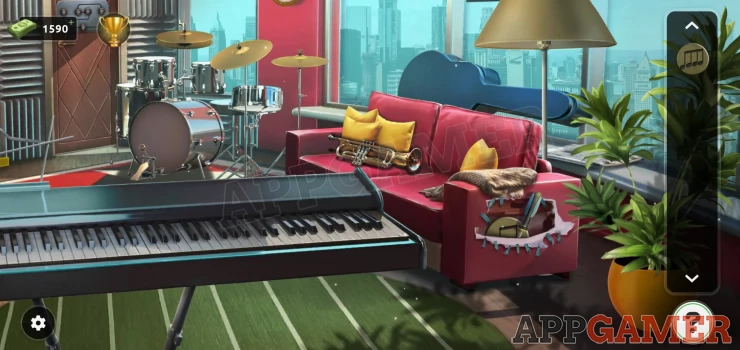
Next tap the newspaper on top of the sofa on the right to find some scissors, then use these to cut open the stitched fabric on the side of the sofa.
Collect a screwdriver and another circle with a musical note.
Next view the fan on the floor on the left by the jukebox.
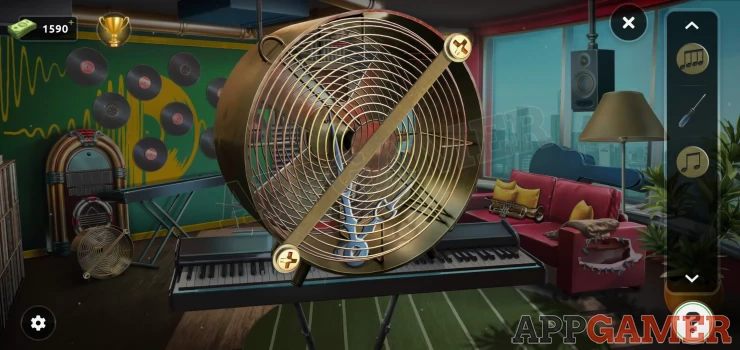
Use the screwdriver on this to open the cover and collect a pair of clock hands. Now view the clock on the wall on the right.
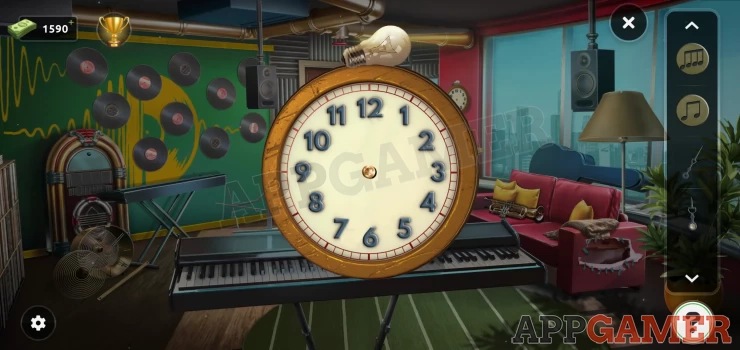
Add the hands to it and then collect the light bulb. Now add the light bulb to the lamp on the right by the sofa. This will reveal a clue.
Show
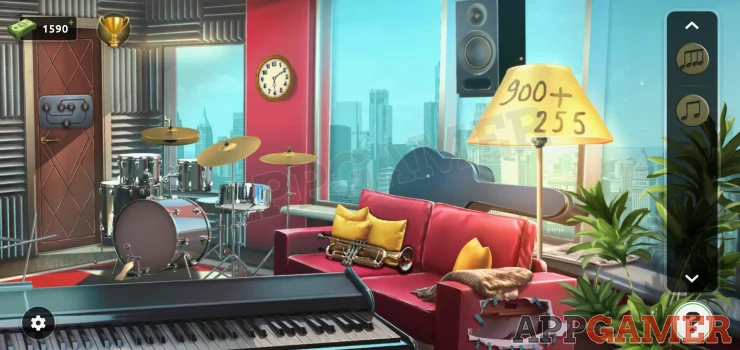
Now use the clue to set the time on the clock.
Solution: 900 + 255 = 11:55Show
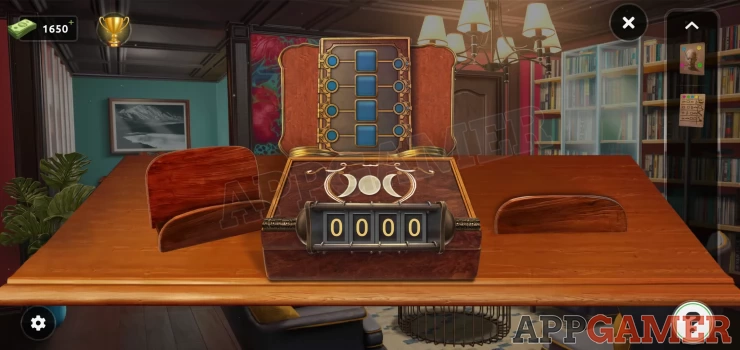
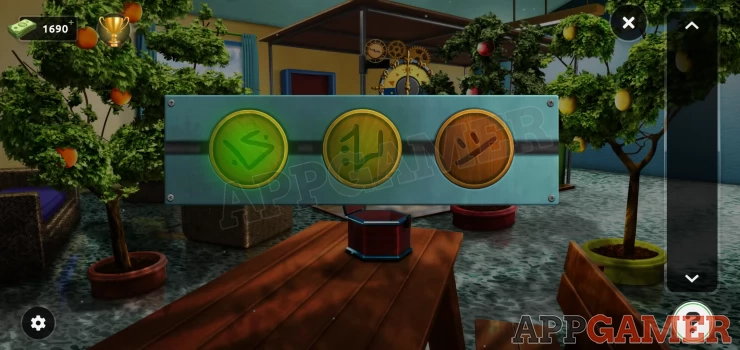
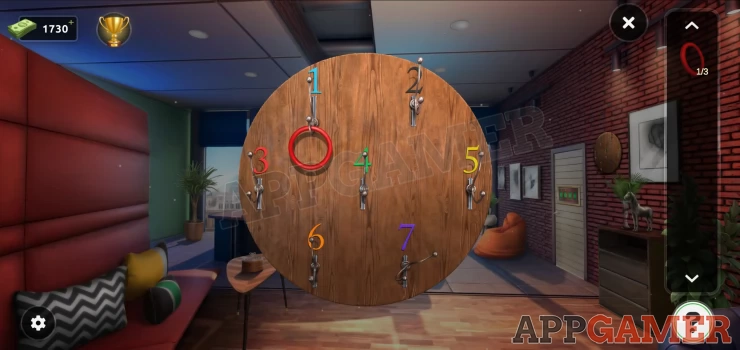
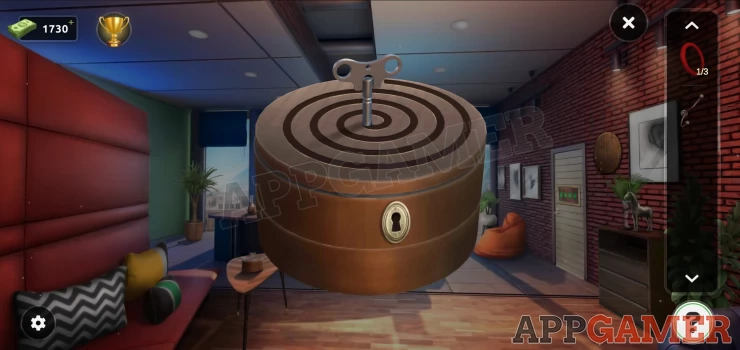
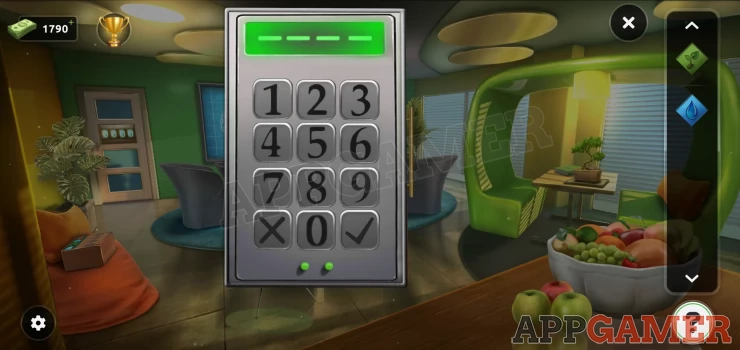
Collect another musical note. Now view the exit door to see the lock puzzle. Add the 3 circles to it then solve the puzzle.
Solution: Move the counters around the puzzle to line them up in order 1, 2, 3, 4Show
Escape the room.
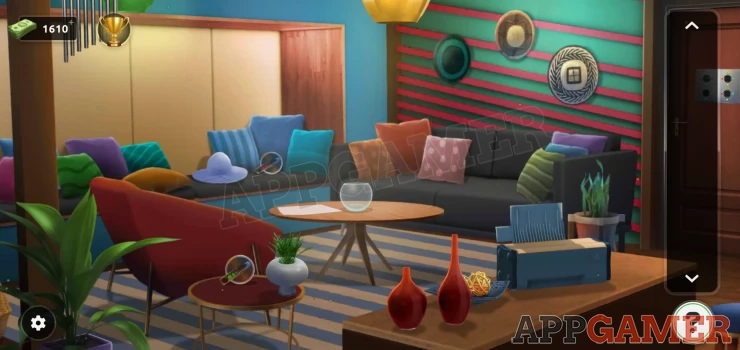
Level 42 Walkthrough
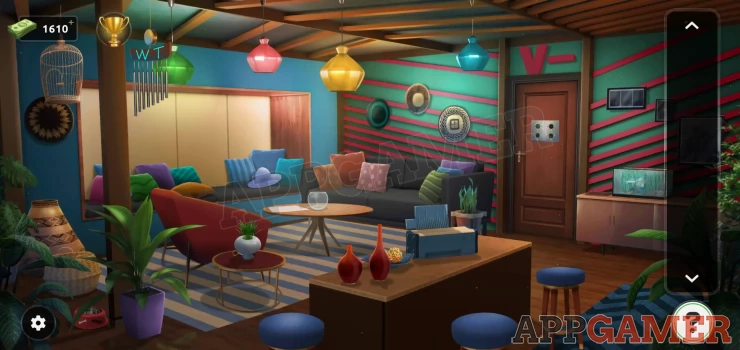
First move the white vase on the small table and the hat on the sofa to find 2 knobs to collect. Then also pick up the white paper on the larger table.
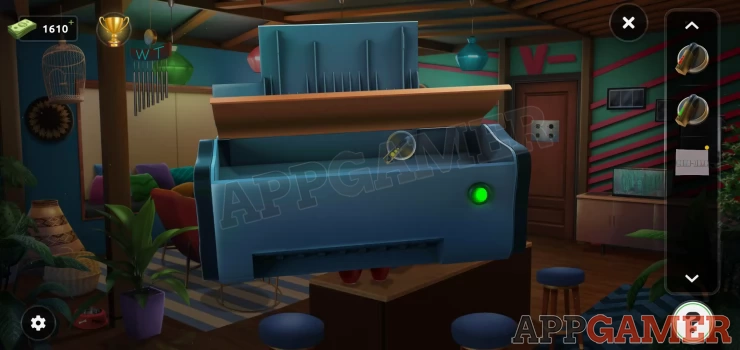
Now view the printer on the desk Add the white paper to it and press the red button to get a print out of a clue.

Collect the paper and then open the printer top to find another knob.
View the exit door to see the first puzzle.
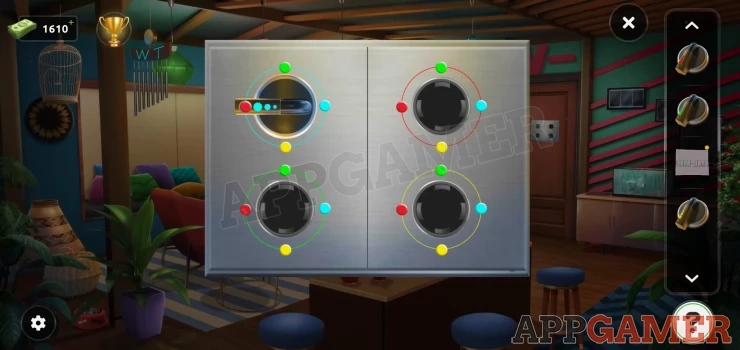
Add the 3 knobs to it and then set the correct positions.
Solution: Turn each knob so that the the colors on the know match the one on the outside ring.Show
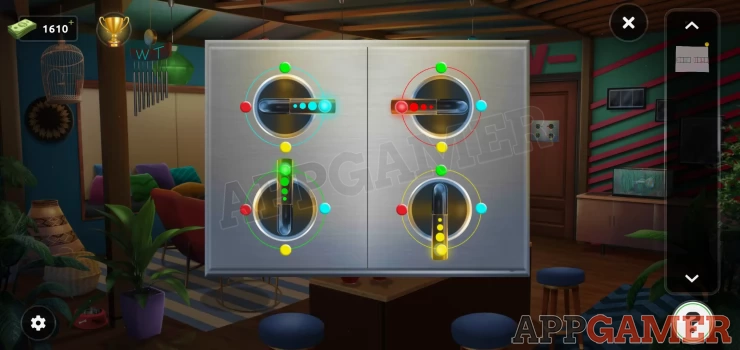
You now need a 4 letter code. The clues for this are on the paper and also on the wind chime hanging on the top left and another clue above the door.
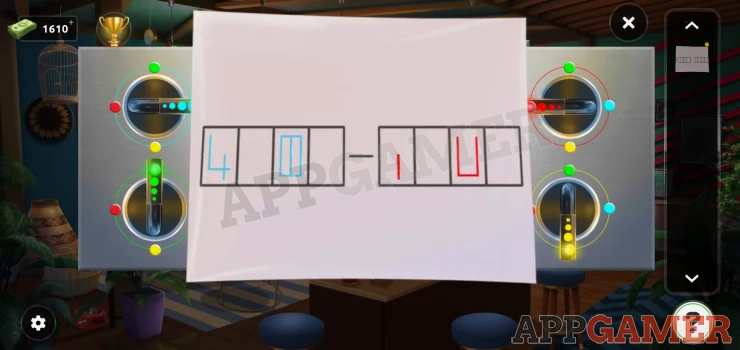
Solution: Look at the lines on the paper, start the the ones on the left (blue) and remove the lines on the right to get a letter shape for the 2 positions shown. Then repeat this process with the other clues. Take the 2 blue letters from the wind chime (WT) and remove the red lines from above the door (V-). Put these in the missing spaces on the paper.Show
Code: L V T IShow
Escape the room.
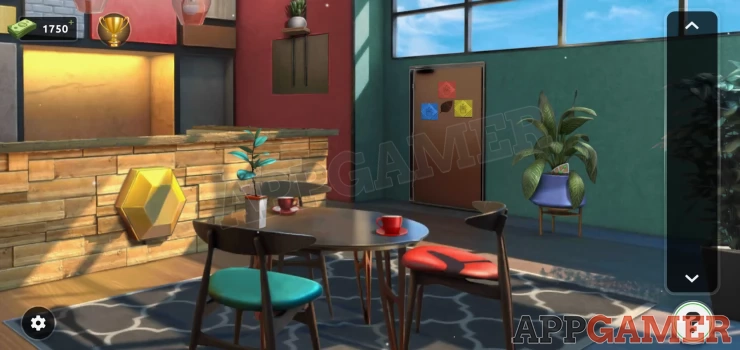
Level 43 Walkthrough
Tap the painting on the right on the wall to move it and see an envelope symbol. Then tap the blanket in the center of the sofa to move it and see a magnifying glass symbol. And finally tap the cushion on the foot stool on the lower right to see a pencil symbol.
Now view the box on the coffee table. Notice the line clues, now set the 4 symbols to the correct ones to open it.
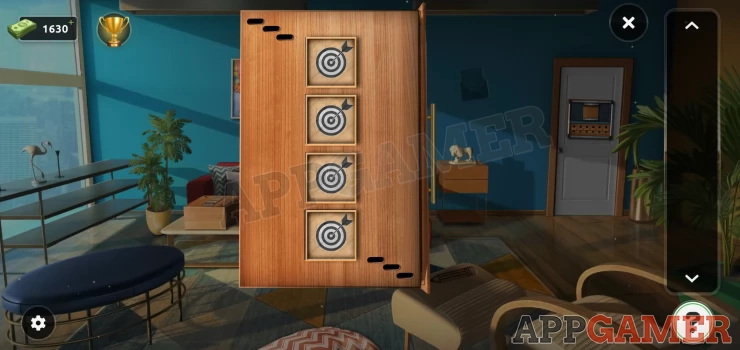
Solution: Top to bottom, clock, envelope, magnifying glass, pencil.Show
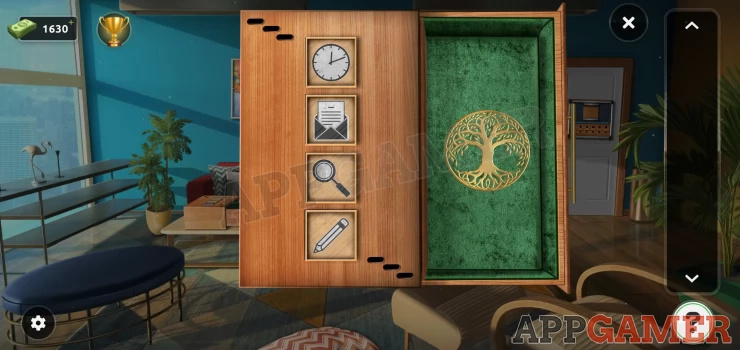
Collect the tree emblem from the opened box. Now tap on the door to see the puzzle lock.
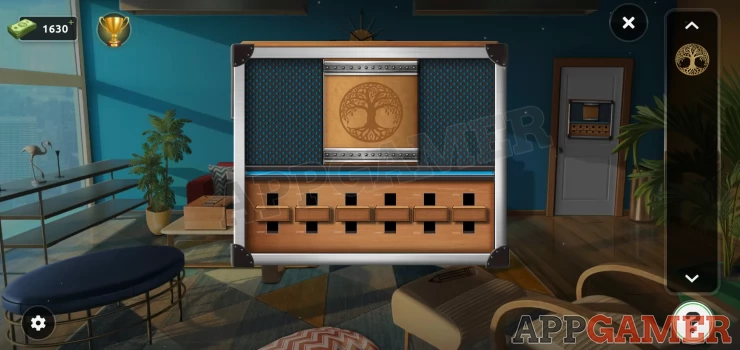
First you need to set the sliders at the bottom. Use the clue from the box for this.
Solution: Show
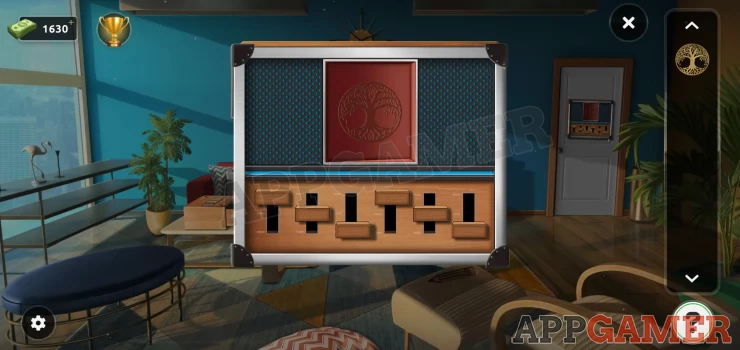
You can then add the tree emblem to the top and the door will open, exit the room.
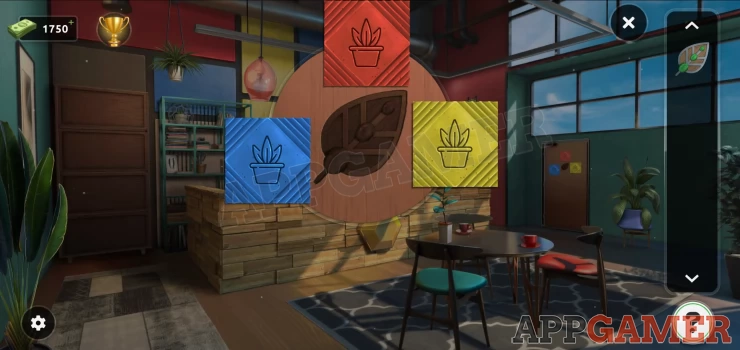
Level 44 Walkthrough

Move the white vase on the mantle to find a paper clue to collect, then also collect another one from the bookshelf on the right. Now tap the desk on the left of the room to view this puzzle.
Add the 2 clues to it, then tap the locked book in the center to begin.
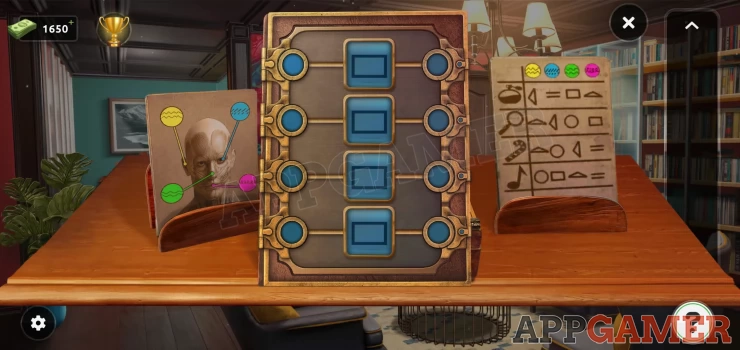
You now need to decipher the clues to get the correct 4 symbols to unlock the book.
Solution: On the right we have a table of symbols that relate to 4 senses and 4 colors. The top row is smell. The nose on the image on the left is green. So select the symbol for green for the top one. (the rectangle). Repeat this for the other 3 rows.Show
Code: Show

The book opens, look through the pages to find another clue.
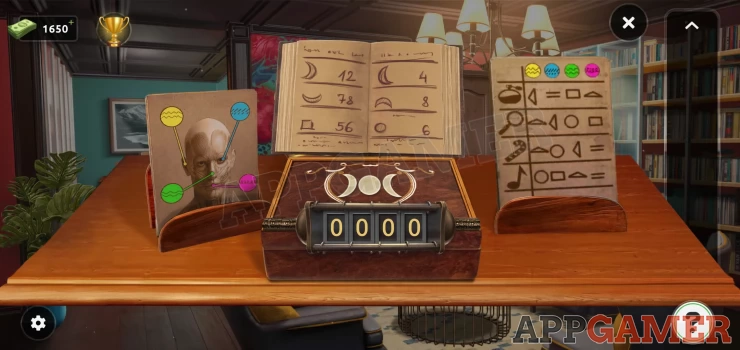
Use the clue and the symbols on the box below the book to get a code to open the box.
Code: 1264Show
Collect a key. Use the key to open the door and escape.
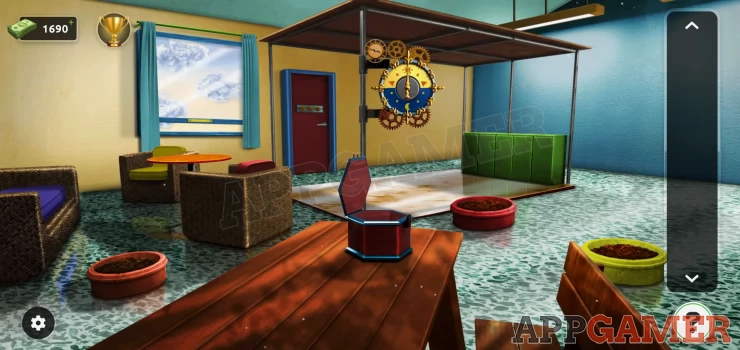
Level 45 Walkthrough
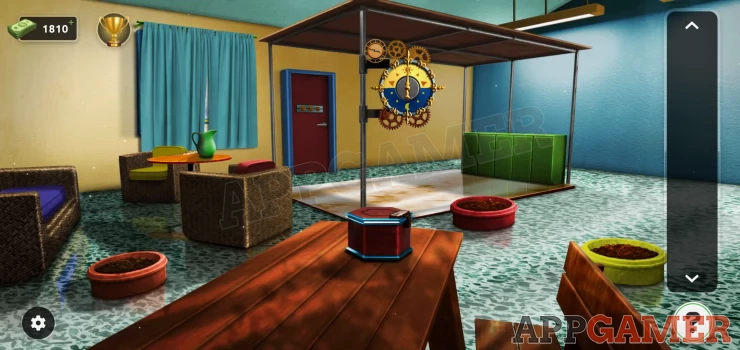
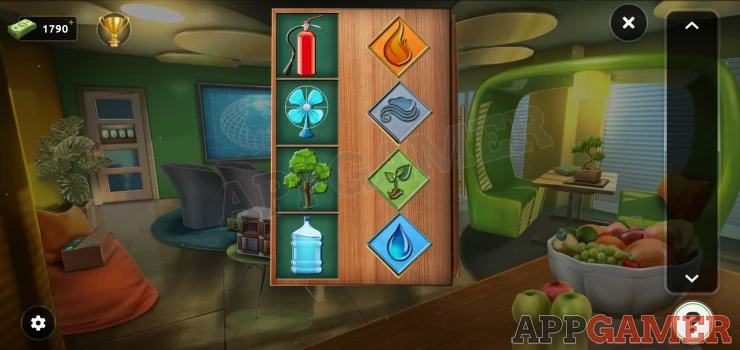
First collect the green water jug fro the table on the left and then tap the curtains on the window to open them.
You will see a view outside with 4 clouds.
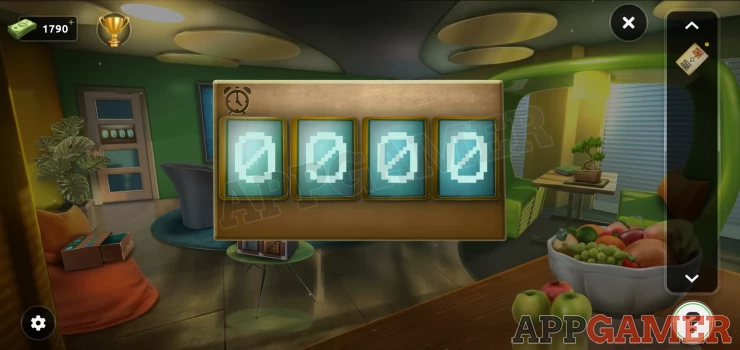
Now tap the time device on the pole in the center to speed up time. the clouds will change. Count them
Do this 2 more times to get 4 numbers.
Now view the box on the table. It has a cloud on it. Enter the code.
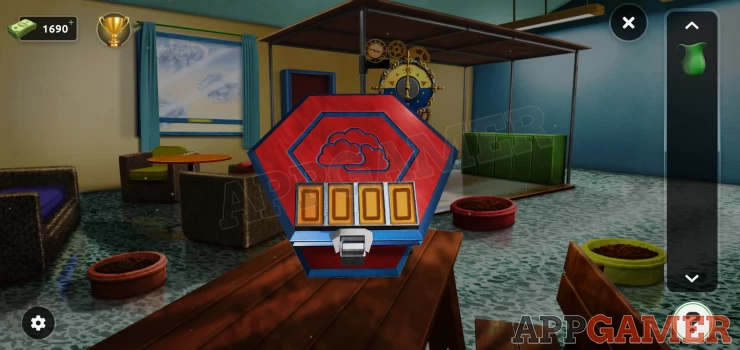
Code: 4312Show
Collect 3 seed bags. Now add the seed bags to the same colored planters, Orange on the left, then red and yellow on the right.
As before use the water jug on all 3 planters and then tap the time device again to speed up the growing.
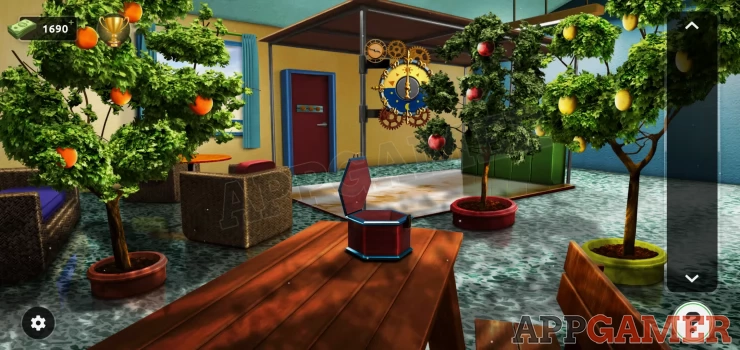
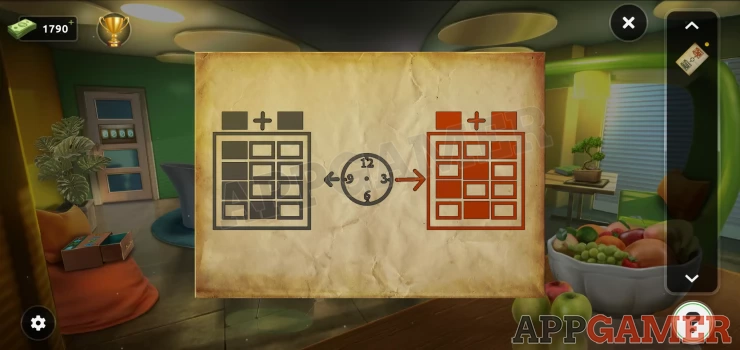
Now view the exit door puzzle lock. This requires 3 shapes.
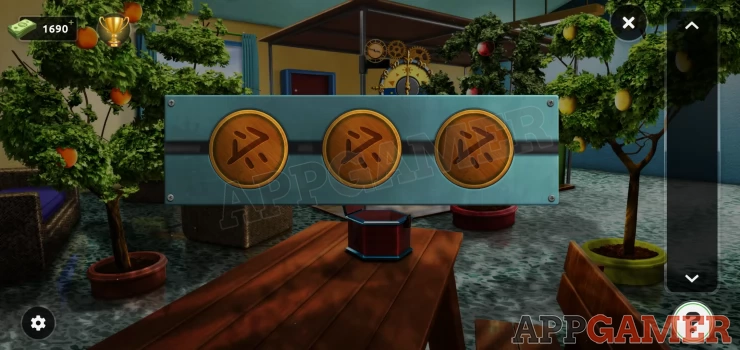
In this case you need to find 3 shapes that roughly represent the shapes of the trees (ignoring the fruit).
Solution: Show
Exit the room.
Level 46 Walkthrough
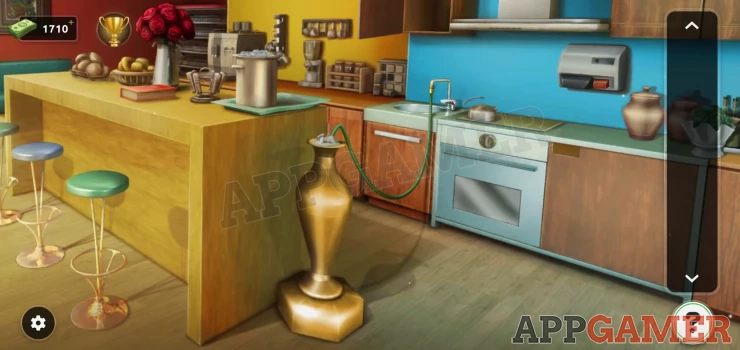
Collect the crowbar from the stool in the center and then use the crowbar on the single wall cabinet above the sink on the right. Collect a hose.
Next view the had dryer on the wall to the right of the oven, collect the roll of tape from the top.
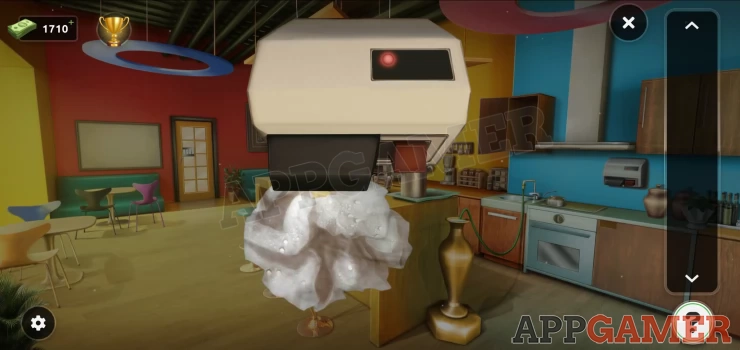
View the hose to see that it has a hole, then use the tape to repair it. Now add the hose to the sink on the right . This will fill the tall urn with water.
Collect a paper from the water and then view the hand dryer again. Tap the button to turn on the dryer and then add the paper to it to dry it out.
View the dried paper in your inventory and tap to open it to see a clue.
Show
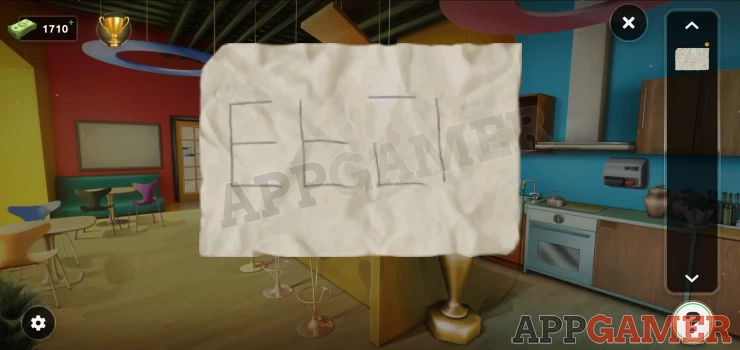
Now view the exit door lock. Use the paper clue to get the code.

Solution: The lines on the paper are the parts of a digits display to remove to get the numbers.Show
Code: 1743Show
Exit the room
Level 47 Walkthrough
Collect a red ring from the drawer unit on the far right of the room. Then view the round wall hook plate on the right wall just above it.
Collect the broken hook by the number 7. Now view a small round box on the small table by the sofa on the left.
Tap the key on top to open the top section. Collect a second red ring and a key. Now use the key in the lock to open the lower section. You need to use the hook to collect the 3rd red ring from the bottom.

Now tap on the desk to see an executive toy.
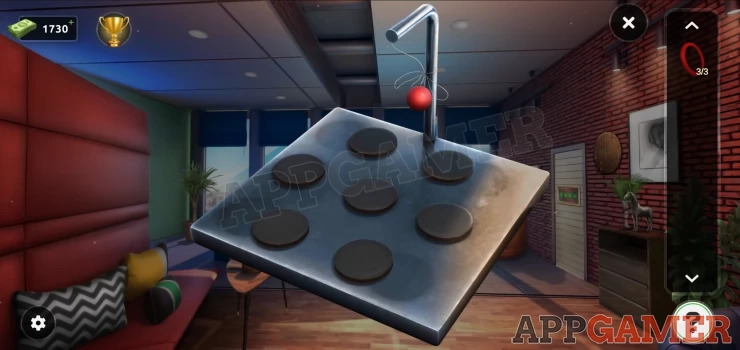
Tap the ball to loosen it and it will swing to one of the circles. Then tap it again to make it swing to a new one. Repeat this to find 4 positions.
View the round wall hook pate again. You now need to place the 3 rings on 3 more hooks.
Solution: follow the positions show by the desk toy, in the same order. 1 (already there), 4, 6, 5Show
Once done you will be shown a color clue.
You can now use this to get the code for the exit door.
Solution: Get the numbers matching the colors of the rings that appear above the hooks.Show
Code: 2154Show
Escape the room.
Level 48 Walkthrough
Tap the small plant on the table to move it and find a half a flower emblem. Then tap the hanging plant o the top left of the room to pull it down and find the other half.
Now view the similar flower emblem on a frame on the wall to the left of the door. Add the 2 pieces to it and the frame will open to reveal another pot plant. Tap the plant that appears to make it rise up.
Now tap the large pot plant on the right to remove some leaves and find a leaf emblem.
Then tap on the exit door to see that there is a leaf emblem slot revealed.
Add the emblem to it and he door will open. Escape the room.
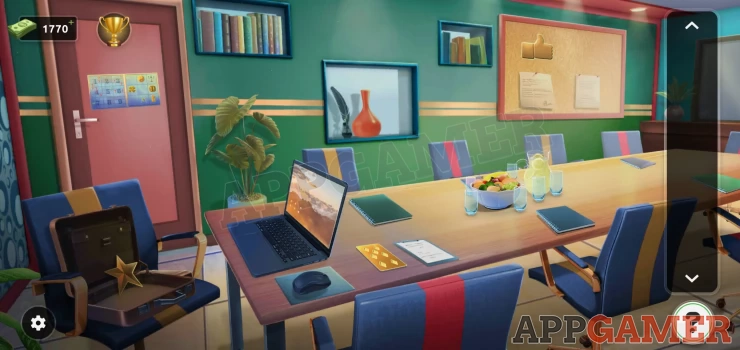
Level 49 Walkthrough
Open the briefcase on the chair on the left to find a gold star. Then move the green book on the table to see a gold playing card, and move a note on the pin board top right to find a gold thumb. Collect them all.
Now view the poster on the exit door.
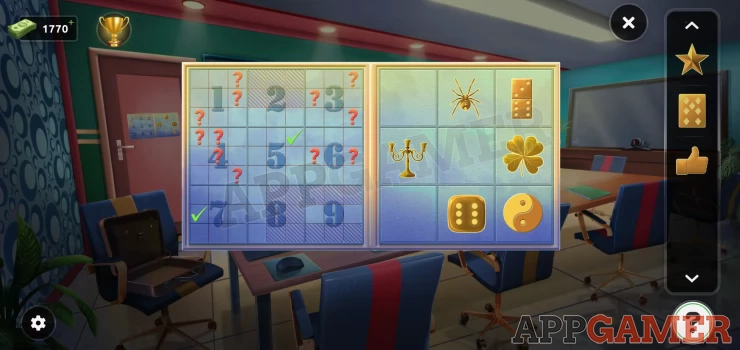
Add the 3 gold symbols to the right to begin. You need to arrange the symbols in the correct positions. Each of the symbols represent a number 1 to 9.
The left side is a clue.
Solution: This is like a Sudoku puzzle, green tick on 5 and 7 show the definite locations of those numbers (5 is the star, 7 is the playing card). red question marks show possible locations for that number, and the greyed out squares behind other numbers show locations where that number cannot go. Use these clue to get the correct layout.Show
Positions: Show
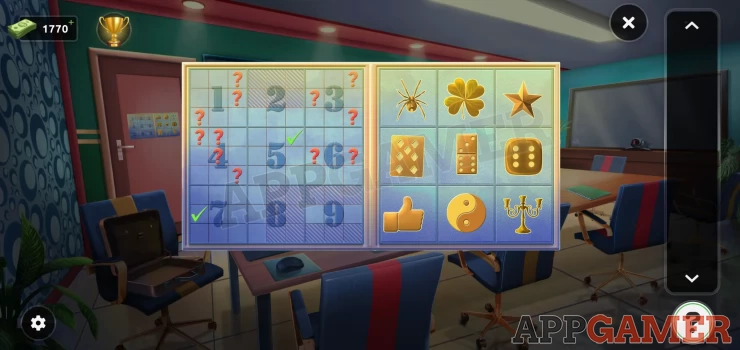
Once done you can escape the room.
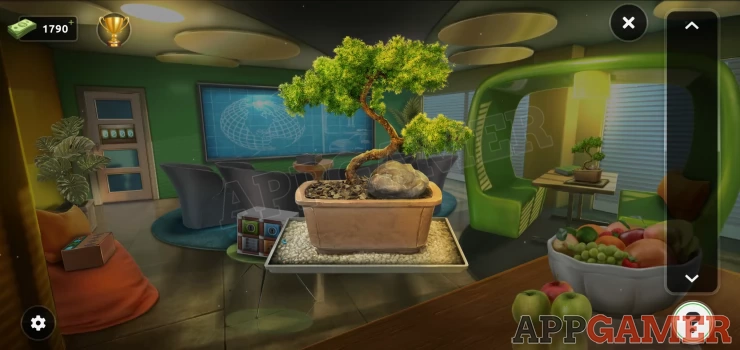
Level 50 Walkthrough
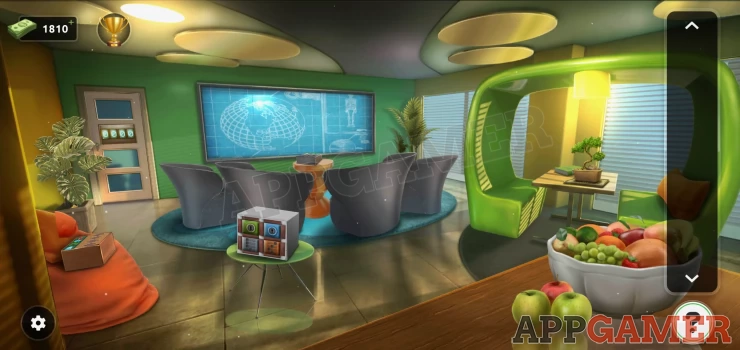
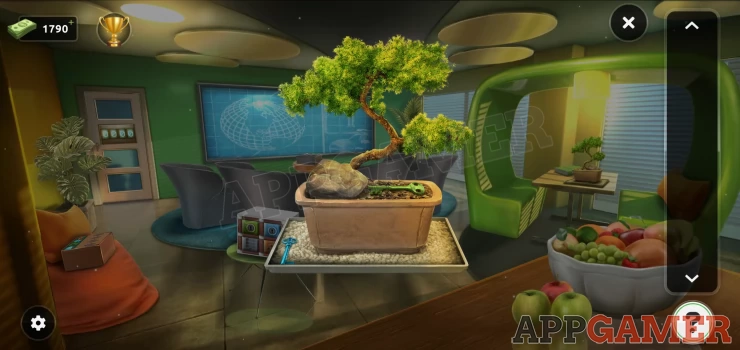
First view the bonsai tree on the table on the right.
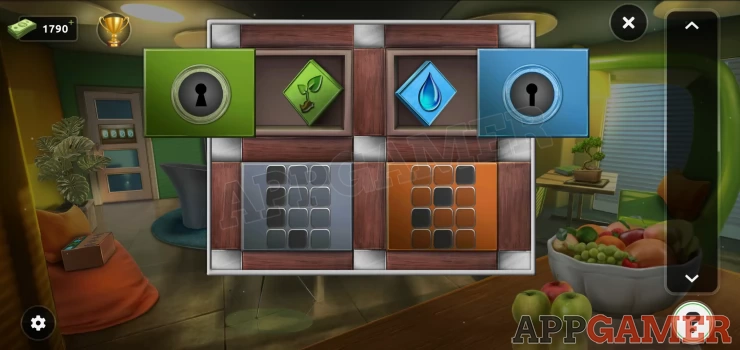
Move the rock on the soil to find a green key to collect and dig in the stone on the left to find a blue key.
Next view the box on the small green table.
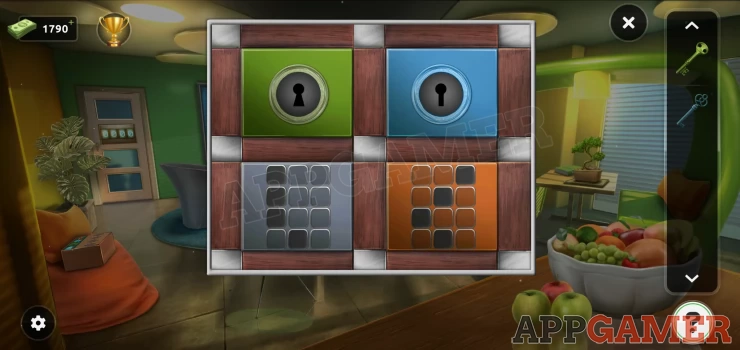
Use the 2 keys to open the top boxes and collect 2 colored tiles. Then take note of the clues below in the grids of squares. This is a clue.
Next view a locked box on the pedestal in front of the big blue screen. To open this you need to enter 2 codes.
Solution: The grids on the box above are the clue. tap the button on the number pad that are in the positions of the dark squares on the grids. Show
Codes: 1470, 3570Show
Once opened collect 2 more colored tiles. Now view another box on the orange chair on the left of the room.

Add the 4 tiles to the slots on the right to match the symbols on the left.
Show
You can then collect a paper clue. View this.
This clue relates to a time to be worked out from the same keypad grids. The clock shows that the hour is from the left grid and the minutes from the right grid.
Solution: add up the numbers from the left grid for the hour and the numbers from the right grid for the minutes.Show
Time: 12:15Show
Now view the exit door puzzle, you will see that you need a time. Enter the code from above.
Escape the room.
That completes levels 41-50. Move on now to Levels 51 - 60
We have questions and answers related to this topic which may also help you: Show all
 With 20 years of experience in creating video game content for the internet and over 30 years as a gamer, Mark is now a passionate mobile App Gamer. Loving a challenge, he is always ready to get stuck in to both survival builders and puzzle solving games. He has been providing content for AppGamer since 2014.