Scary Horror 2 - Chapter 3 - Liberation Walkthrough Part 3
More Scary Horror 2: Escape Games
This is Part 3 of our full walkthrough of Chapter 3 - Liberation of Scary Horror 2: Escape Games. A second Scary escape room game from developer Escape Adventure Games.
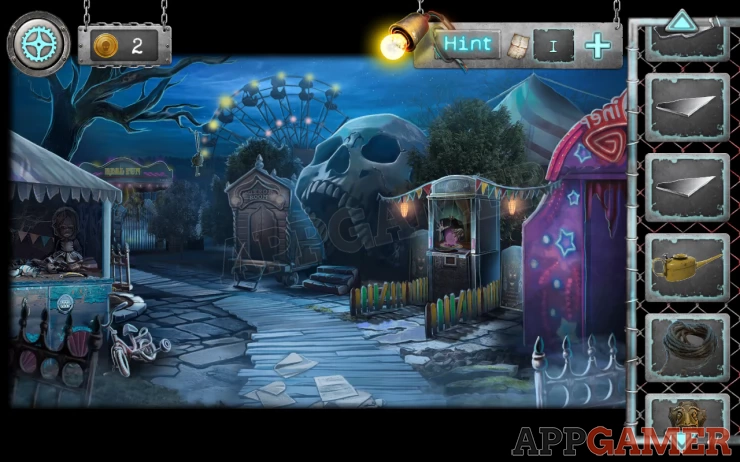
You have been exploring the Amusement Park and playing some of the old games to find items and reveal clues. Continue your progress through the areas of the Park to see if you can find a way out.
Chapter 3 - Liberation Walkthrough - Part 3
Return to the arcade room and use the Toy gun that you have just collected on the shooting game on the right side.
Shooting Game
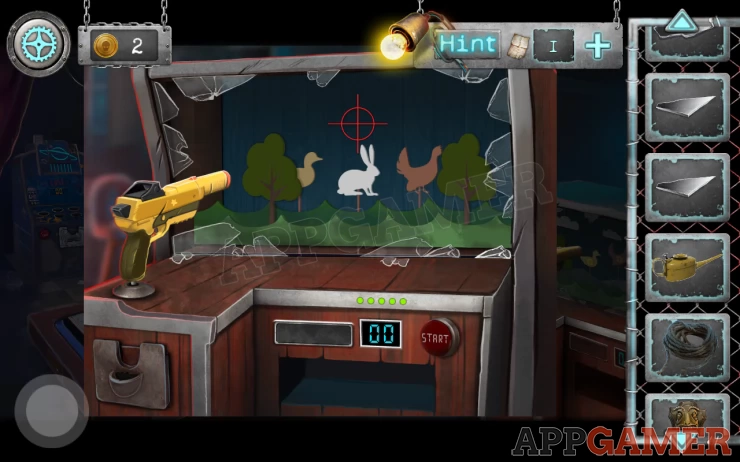
- Add a coin from the pouch of coins then press start to begin.
- Move the cross hairs around on the screen and the tap on the gun to fire
- You have 5 shots to hit the 3 moving targets.
- There is a delay so you need to anticipate the movement of the targets.
Once done you will be able to collect a Creepy Eye from the machine. You will also see 3 numbers on the targets as clues.
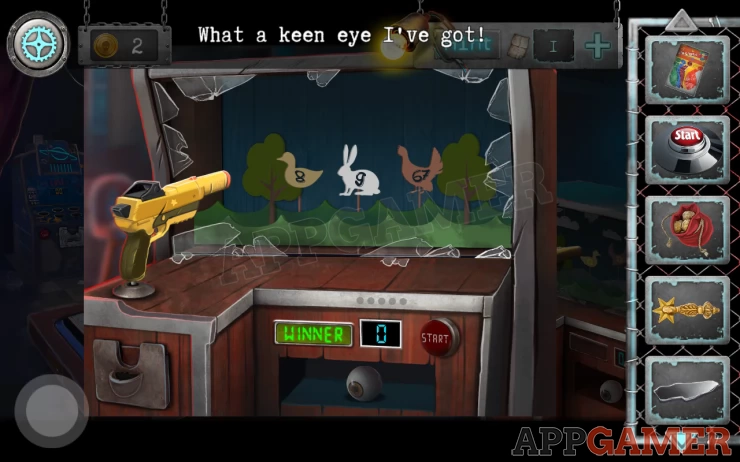
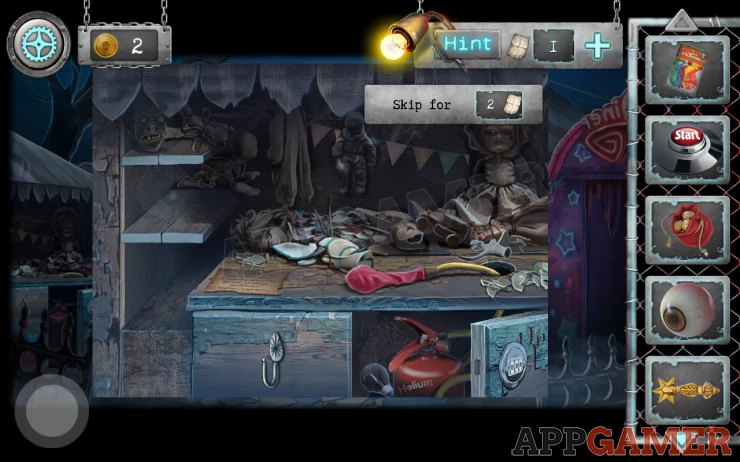
Back out and look again at the balloon stand on the left side. There is a 3 digit lock on the lower panel.
Solution: The paper clue tells you to multiply ducks by bunnies and add on capercaillies (chicken). The clues from the shooting game give you 8 x 9 + 67Show
Code: 139Show
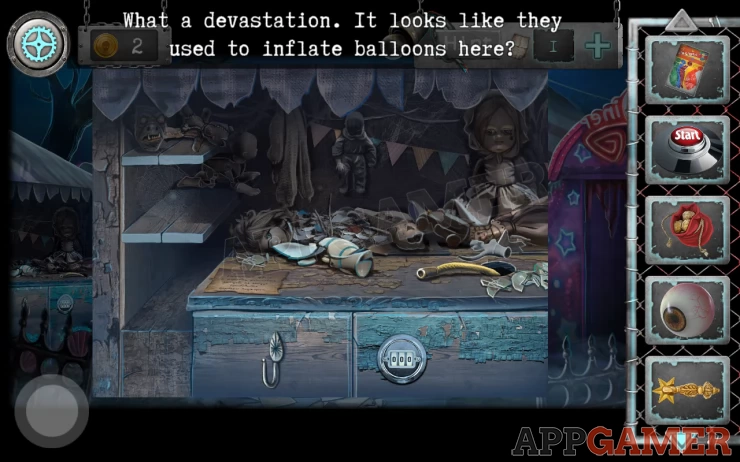
This opens a cupboard and there is a handle for the pump. Collect a light bulb fro inside the door and then use the balloons on the hose at the top and tap and hold on the red handle to inflate it. Be careful not to over inflate it.
Once it is ready use the rope on the balloon and it will be tied up for you. Then repeat this 2 more times until there are 3 balloons.
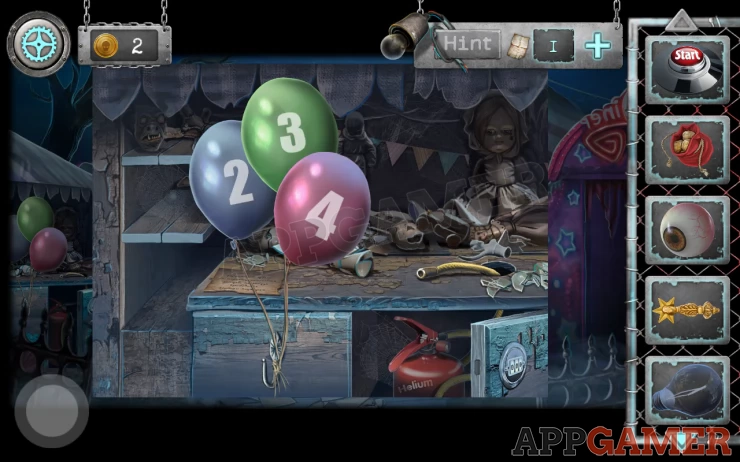
Back up from this view and then tap on the Balloons on the left side to release them. A mirror key will be dropped for you to collect.
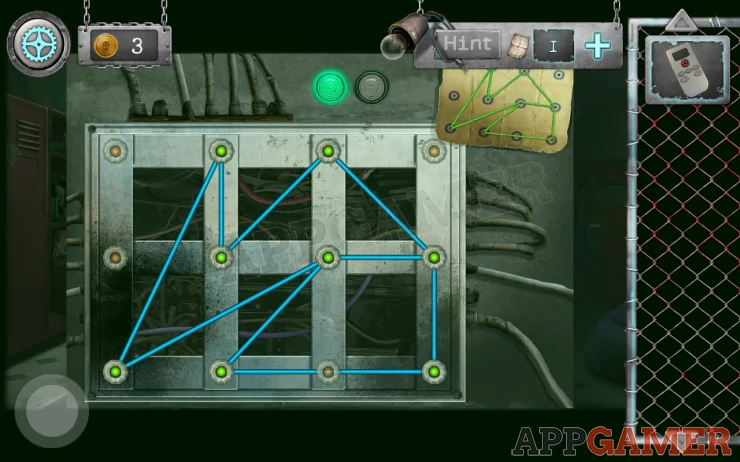
Now view the wooden door to the left of the Skull, this says Mirror room above it. You will see a key hole. Use the mirror key here to place it. This is a puzzle
Mirror Key Puzzle
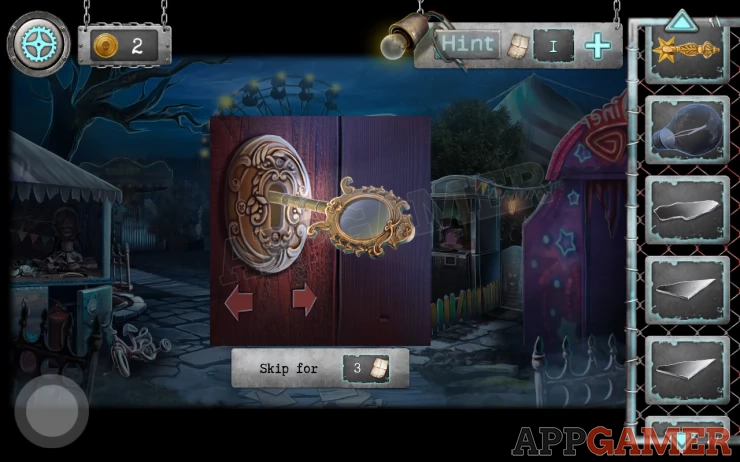
- To open the door you need to tap the arrows to move the key in the right directions.
- The clue for this is in the Arcade room on the Robot.
Solution: Watch the movements to the left or right of the key on the robots chest. Then copy thoseShow
Code: Left, Left, Left, Right, Right, LeftShow
Mirror Room
You can then enter the Mirror Room, it is dark.
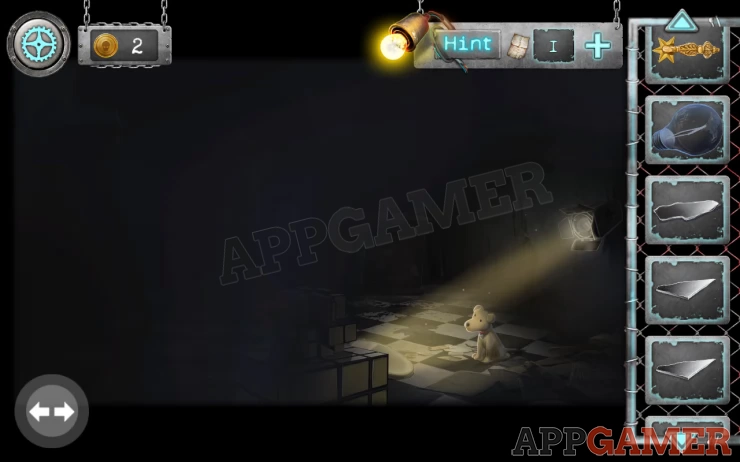
Collect the Cute Puppy toy from the floor and then tap the mirror on the floor that the light is pointing to to shine more light on the room. You can then tap on some shelves on the wall.
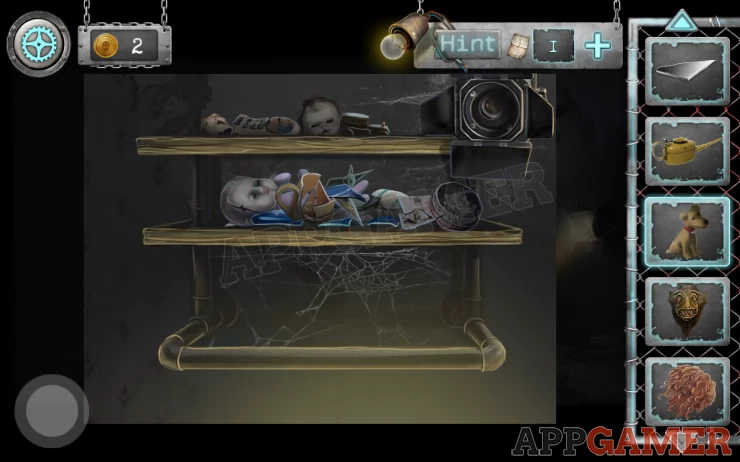
Move the items around until you collect a Cute Bunny Toy. Then add the light bulb that you have to the spot light on the upper right. In the room you can now see a large Chest on the left, view this.
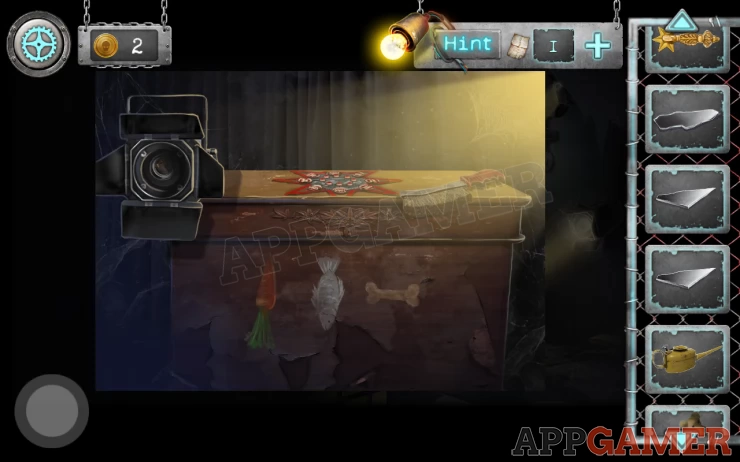
Collect the Metal Brush from it and notice the clue images on the front (Carrot Fish Bone).
Then tap on the top of the chest to see a puzzle.
Chest Puzzle
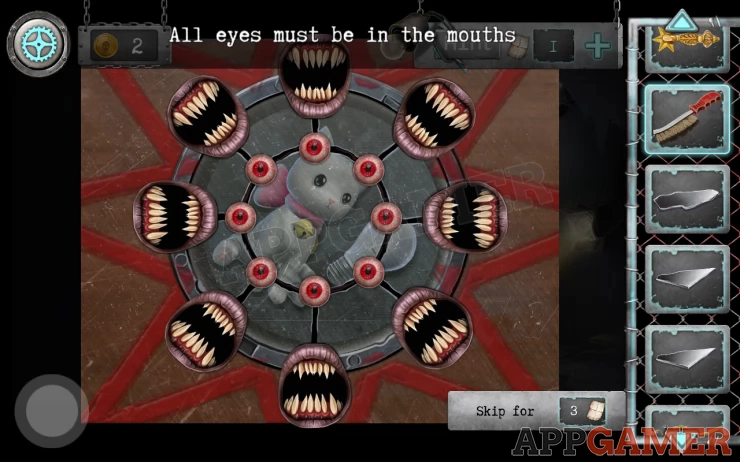
- You need to place all of the eyes into the mouths.
- Tap a mouth to move the eye next to it into the mouth.
- The eyes will move each time.
- You may need to re open mouths and take the eye out again to keep it moving until you are able to get them all in.
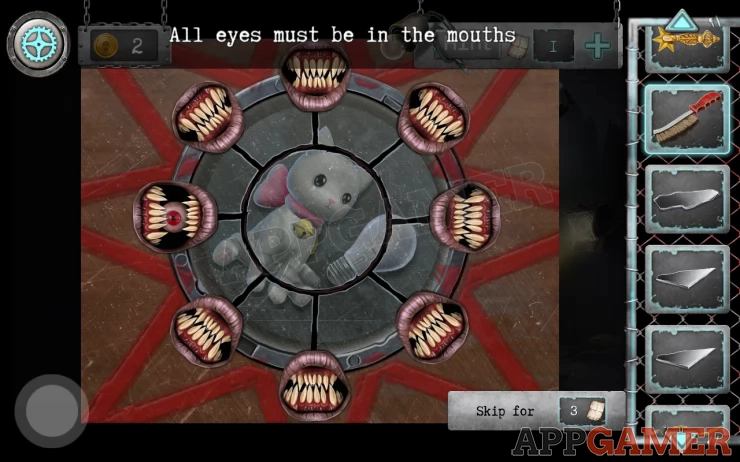
Once done you can collect another light bulb and a Little Kitten Toy. And a Token.
Place the light bulb in the spotlight by the Chest to light up more of the room.
You can now tap on the boxes in the center of the room to see a puzzle.
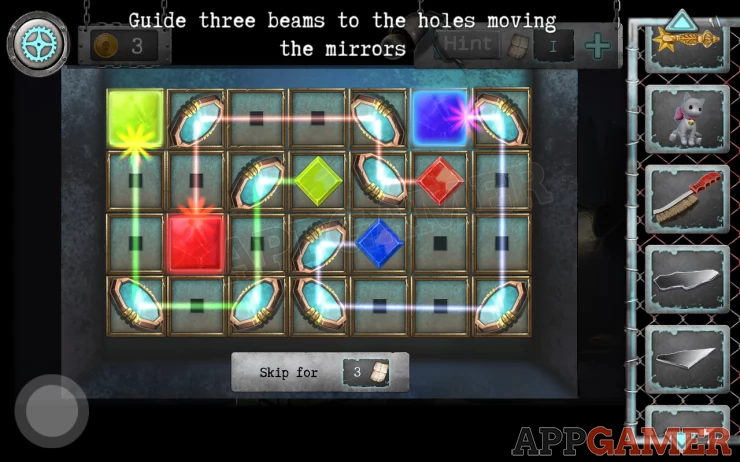
Mirror Puzzle
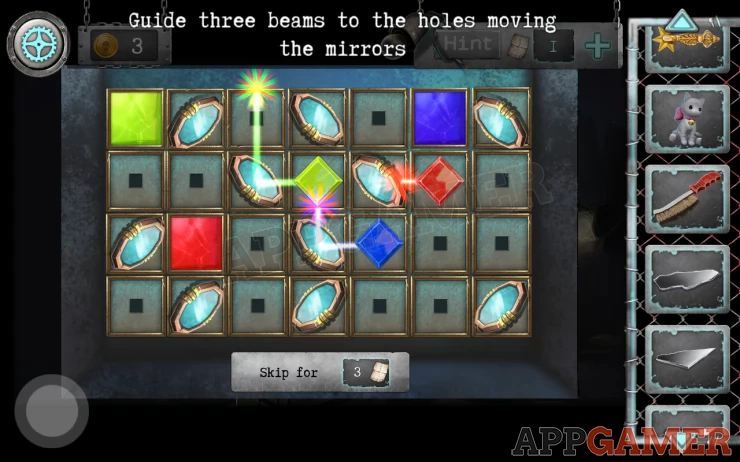
- Drag and place the mirrors in the grid.
- You need to direct the 3 colored lights from the source (colored diamond shapes) to the correct colored square.
- The light beams cannot cross
Solution: Show
You can now see the rest of the room. Tap on the left side to see 3 doors and 3 stools.
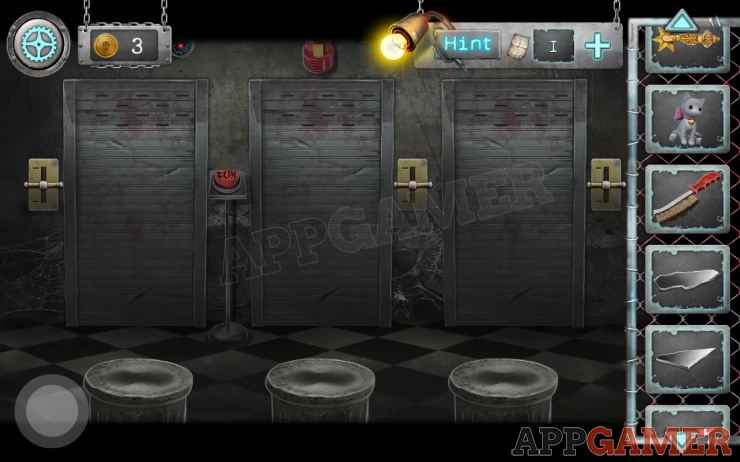
Place the 3 cute toys on the stools in the correct order. The clue for this is on the chest.
Then set the 3 handles, The clue for this is also on the chest.
Solution: Carrot, Fish, Bone = Rabbit, Kitten, Puppy Carrot points up, Fish points down, Bone is in the middle.Show
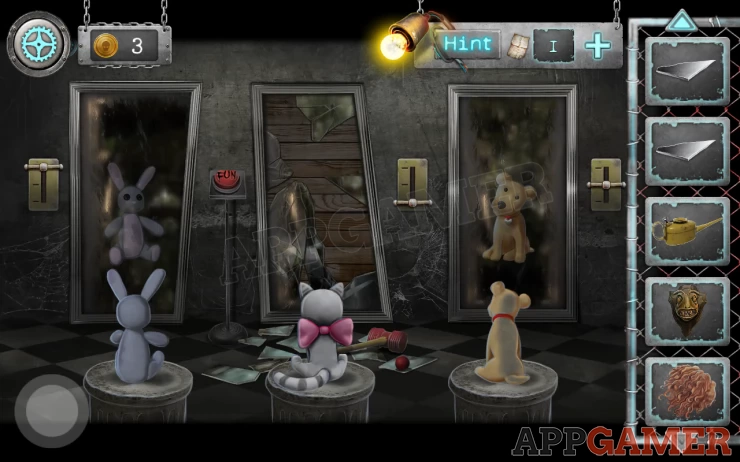
Then press the Fun button to open the doors and get a surprise. You can then collect a Clown nose and a red Hammer.
Back up and return to the Arcade room. On the back left is a blue machine to view. Add the Hammer to it and then use the pouch of coins to start the game.
Hammer Game
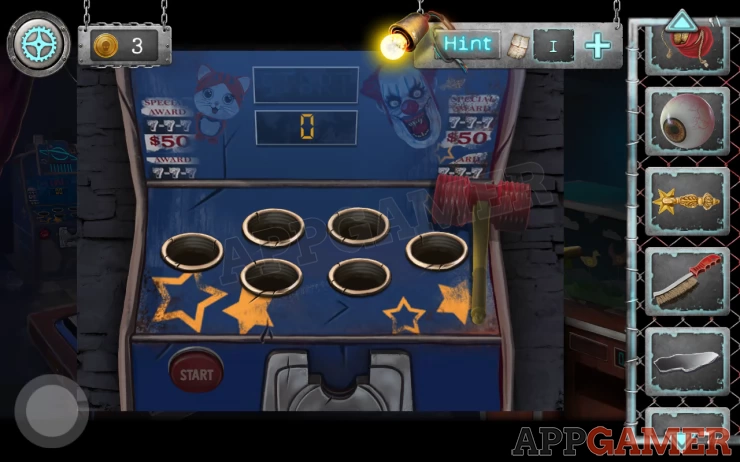
- Tap the clown heads to hit them with the hammer.
- Do not tap the kitten heads.
- Once your score reaches 20 you will end the game and then destroy it.
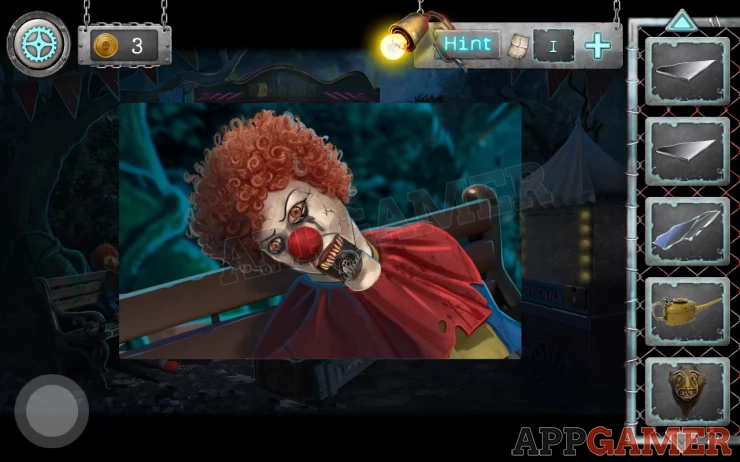
Remove the pieces of the wreckage until you can collect a second Creepy eye. And Another Mirror Shard. Now back out and return the tree on the left with the Clown mannequin on the bench. Add the ginger wig, the Clown nose and then the 2 creepy eyes to the mannequin head. You can then collect a Scary Key.
Now go back into the Mirror Room and view the broken mirror on the back wall.
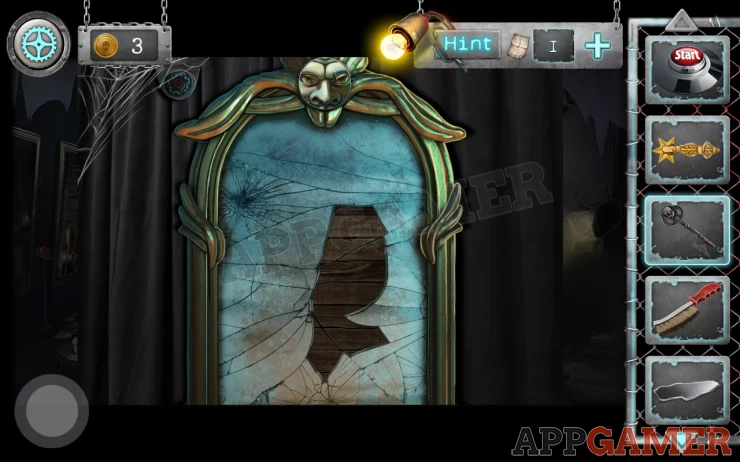
Add the 4 mirror shards that you have to complete it and you will get a scare. Then you will receive the Creepy Face part.
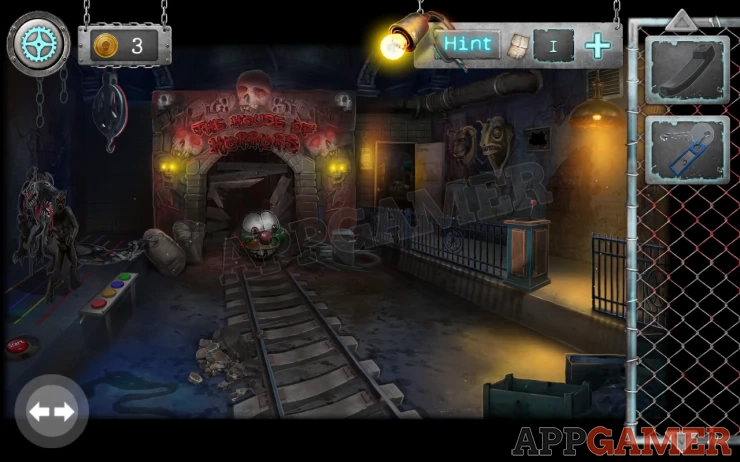
Exit the room again and tap on the Skull in the Park to see a door puzzle.
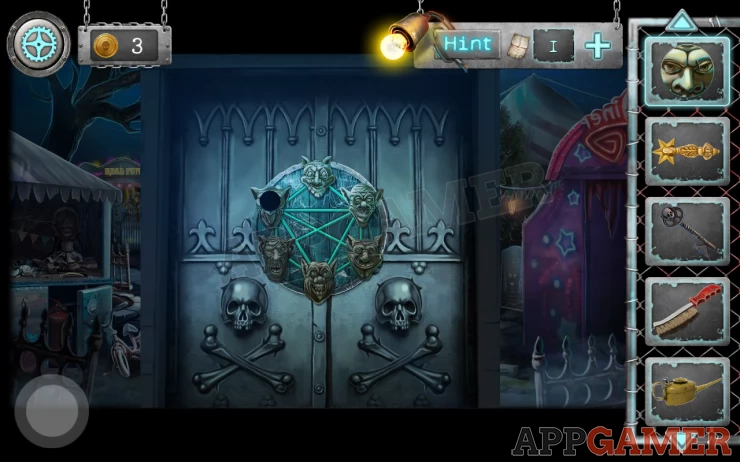
Creepy Face Puzzle
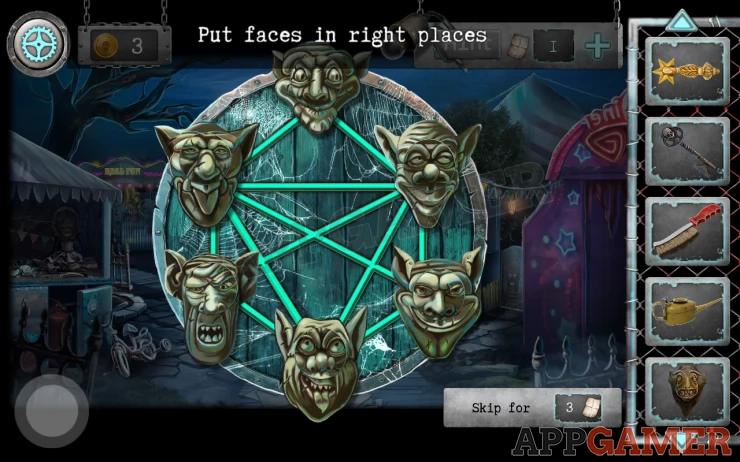
- Add the Creepy Face to it to begin
- Tap pairs of faces that are joined by lines to swap them.
- Move all faces to the correct locations to complete the puzzle.
Once done you can then access a key hole. Use the Scary Key here to open the door. Go through to find the start of a Ghost train ride.
Ghost Train
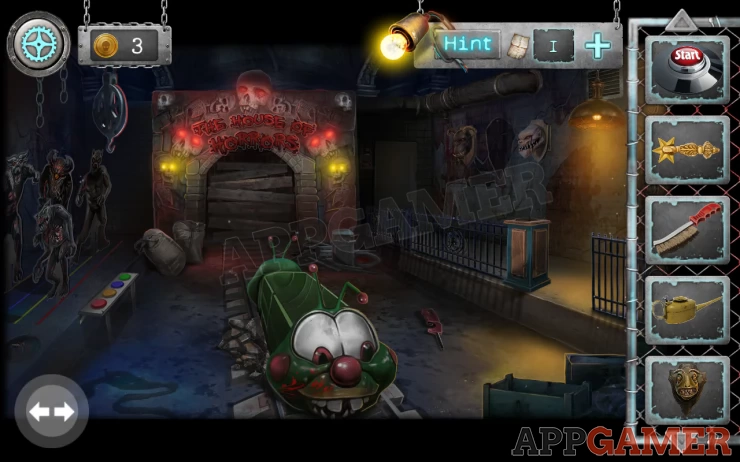
Collect the Gas Lighter from the ground on the right. Then tap to view a monster game on the left hand side wall.
Monster Game
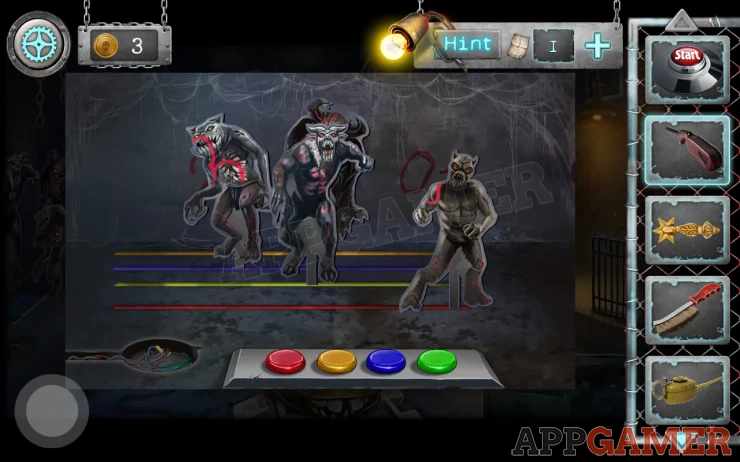
- Add the start button to begin.
- Then you can tap the colored buttons to stop each of the monsters moving.You can only stop them one at a time.
- You need to try to get the movements synchronized so that that all move to the middle at the same time.
- When you do this they will line up to reveal a number.
- If you struggle with this you can also just try to work out what number is written on the monsters, it is a single number in the middle of the others on the wall.
Solution: Show
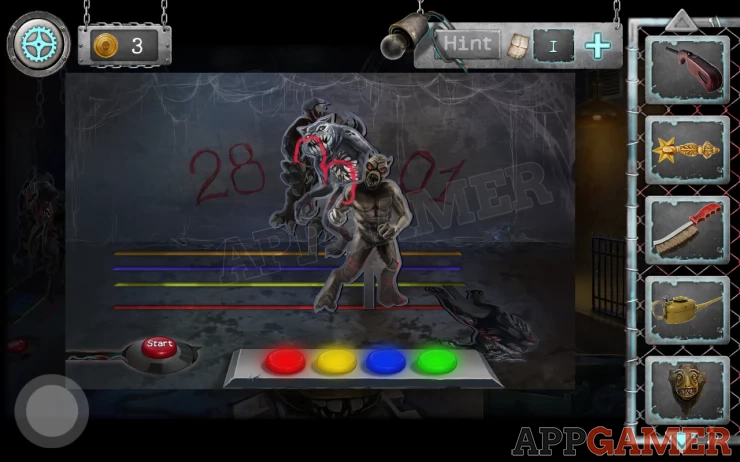
Next view a dark doorway on the back right of the room.
Use the Gas lighter on the hanging lantern to light it so that you can see. Then view the door handle panel, add the door handle that you have to it.
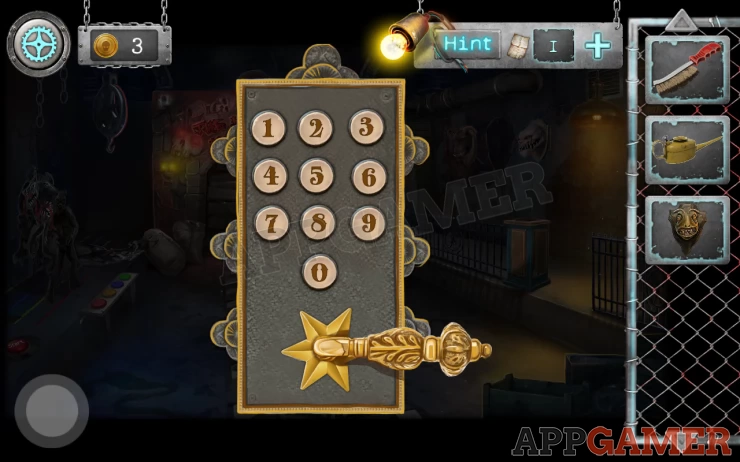
Now enter the code from the last game to open the door.
Code: 28301Show
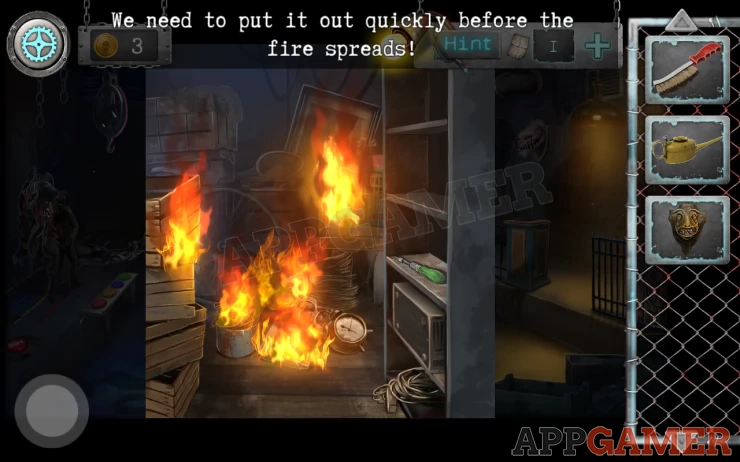
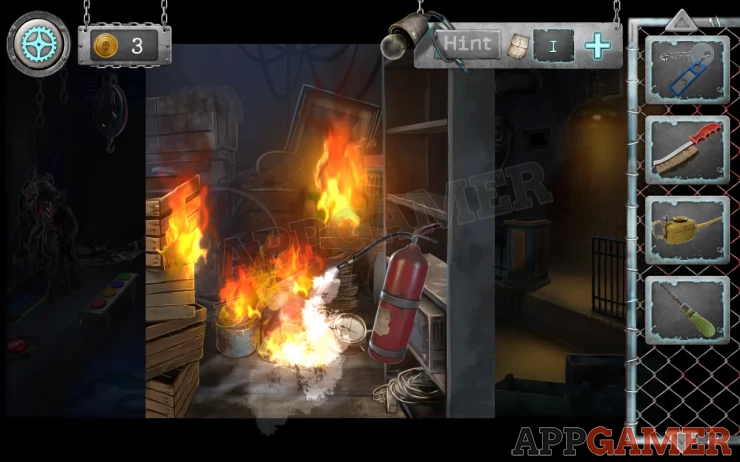
The room is on fire, look inside and collect the screwdriver from the right.
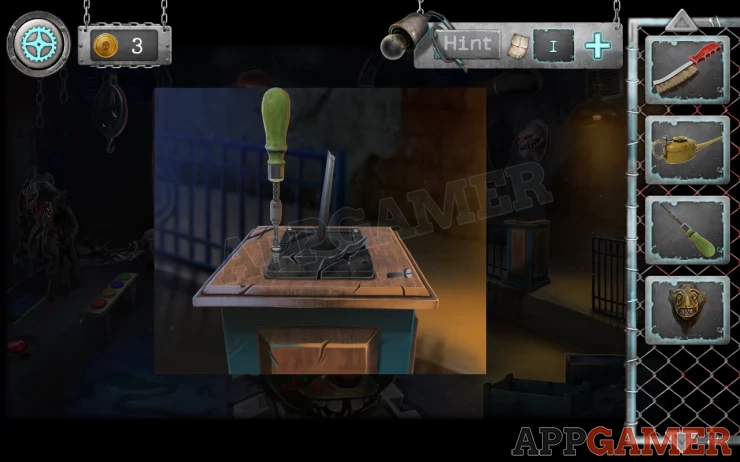
Back up and now view a broken handle on a stand on the right side of the train. Use the screwdriver to remove the broken handle
You will collect the 'Piece of Metal'. Then look at the 2 masks on the wall on the right. Then add the Monster Head Trophy to the empty space.
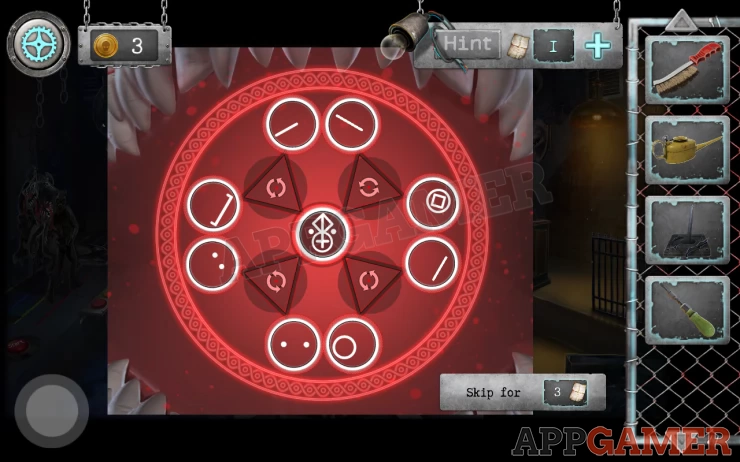
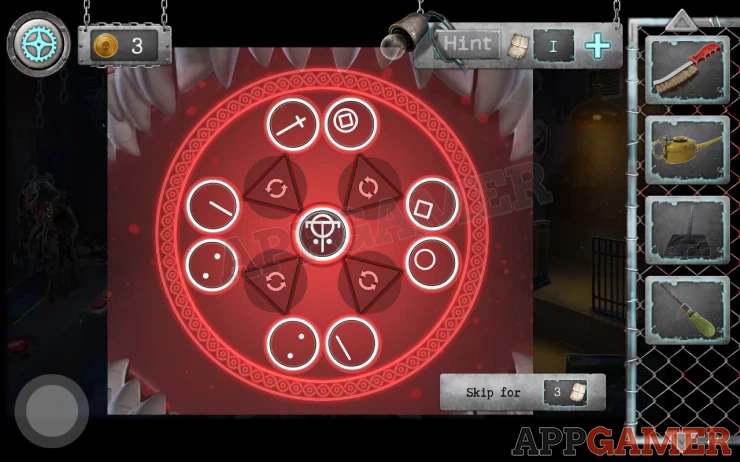
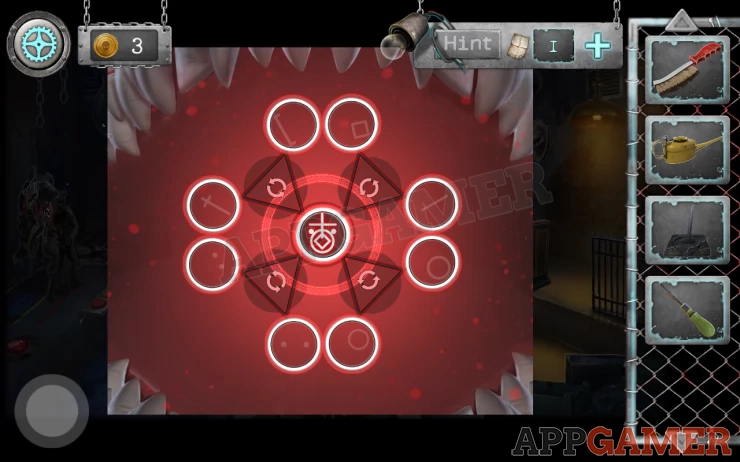
Monster Head Puzzle
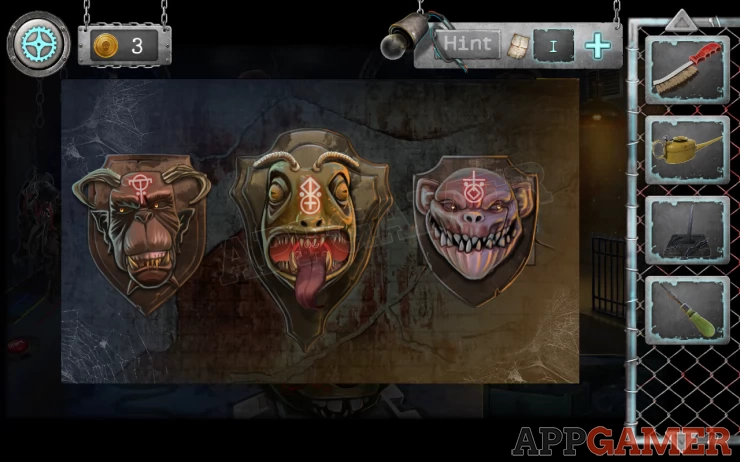
- Tap inside the mouth of the center head to see a symbol puzzle.
- There are 4 sections.
- Tap the center triangle of each section to rotate it and change the symbol parts.
- Match up the parts to create the 3 symbols shown on the monster heads.
Solutions: Show
Once done you will collect a Locker Room Key. And the head on the right will fall. Use the Metal Piece on the glass panel behind the head to break it and collect a Fire extinguisher.

Now go back to the room on fire and use the Extinguisher to put out the flames.
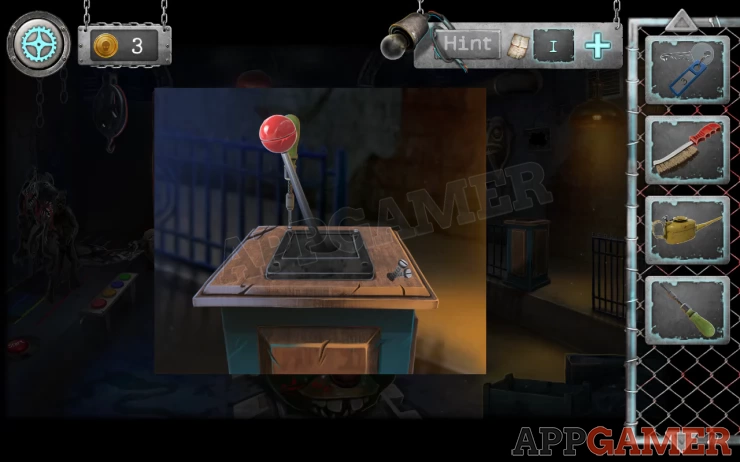
Remove the items on the floor, to find and collect a Lever. Then back up and add the new Lever to the Stand on the right, it will be attached with the screwdriver.
Next tap on the train, you will see the wheels are blocked.
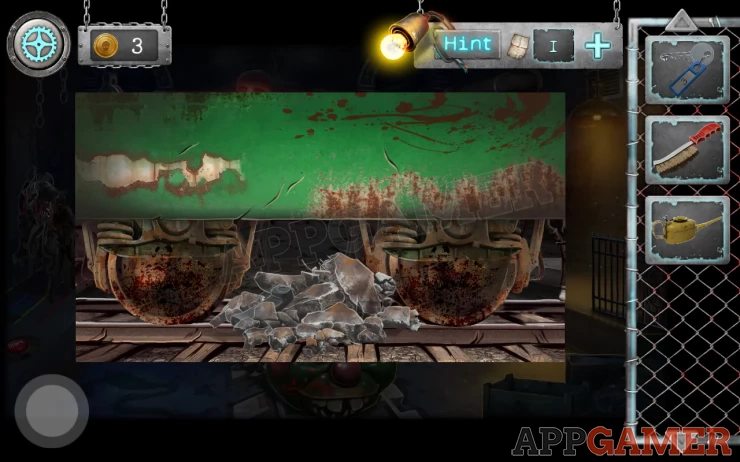
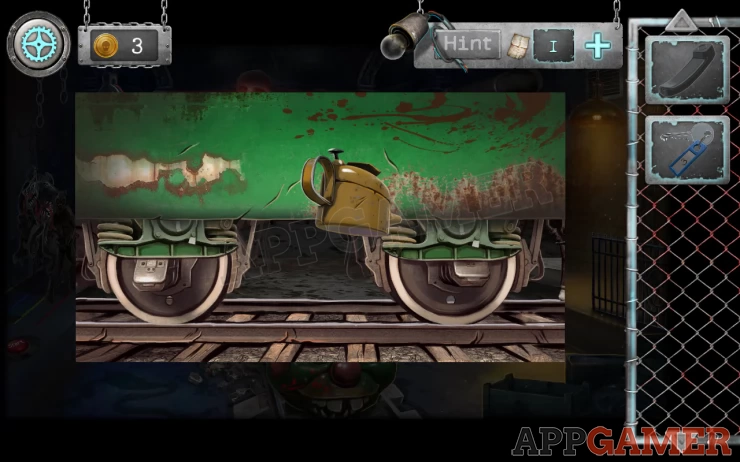
Remove all of the stones from the track, you will find a Radiotelephone Handset. Then use the metal brush on the wheels to clean them. Finally use the Oiler on the wheels as well to free them.
Now you can back up and tap on the Level to start the train moving, this will break through the barrier at the end.
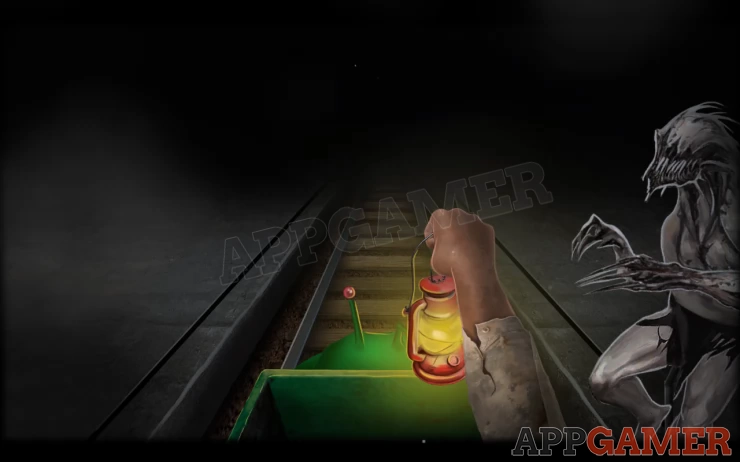
Collect the lantern from next to the door on the right and then tap on the train to ride it through the tunnel.
Train Game
- As you move forward monsters will appear on the left or right.
- Swipe to move the lantern towards them to scare them away.
You will then reach a station room
Station
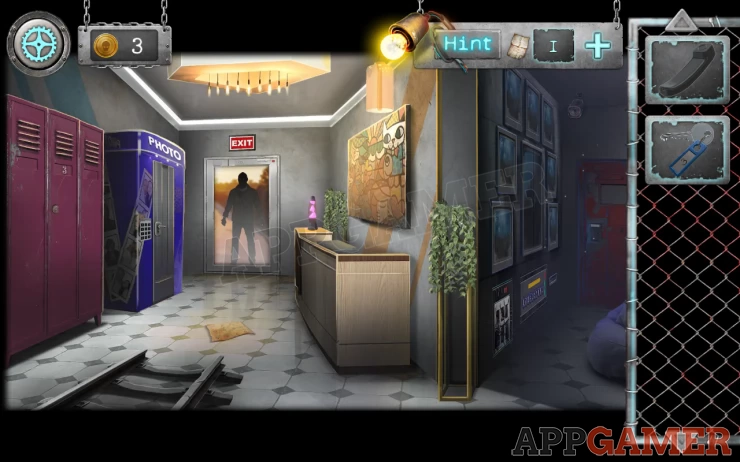
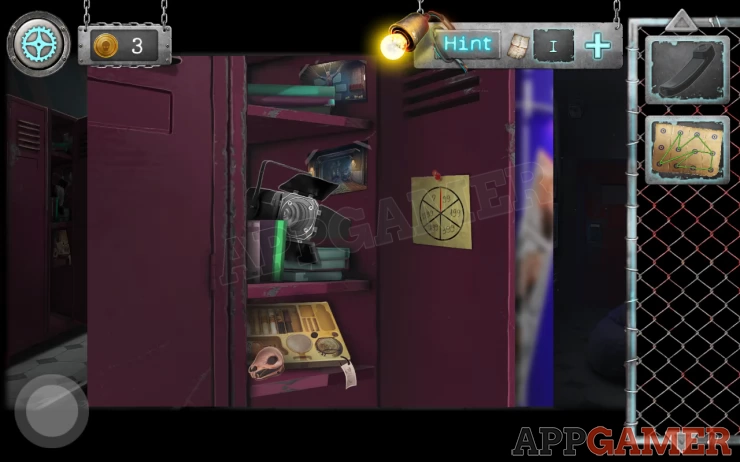
Collect a Crumpled Scheme paper from the floor and then view the Red lockers on the left. Use the locker key that you have to open the locker number 3. Inside the door is a Sheet with a code clue to collect.
Next tap on the desk opposite the lockers.
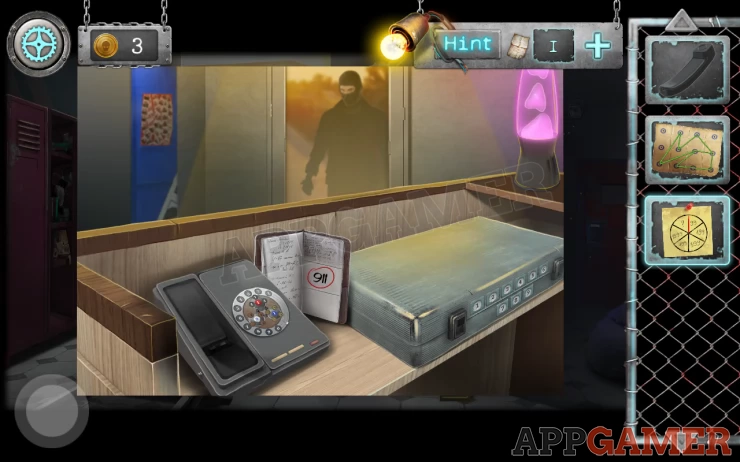
Place the handset on the phone on the left. then view the phone dial for a puzzle
Phone Dial Puzzle
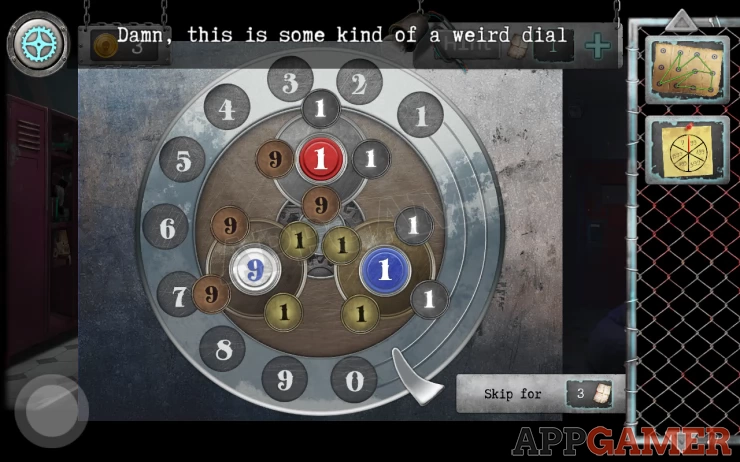
Rotate the 3 sections to move the numbers around the circles.
You need to move all of the '9's to the bottom left, the grey '1's to the top center and the gold '1's to the bottom right.
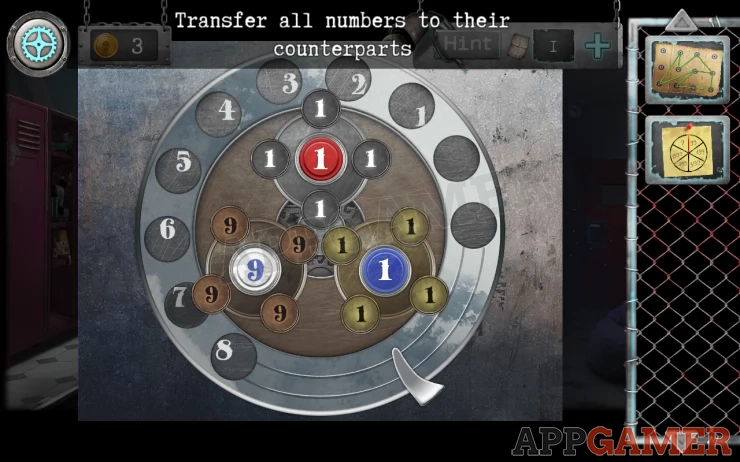
Once completed you will dial the police. But it does not work and you break the phone. Collect the Wires.
Now view the case to the right of the phone. The code sheet will be added. Follow the pattern of the numbers to find the code.
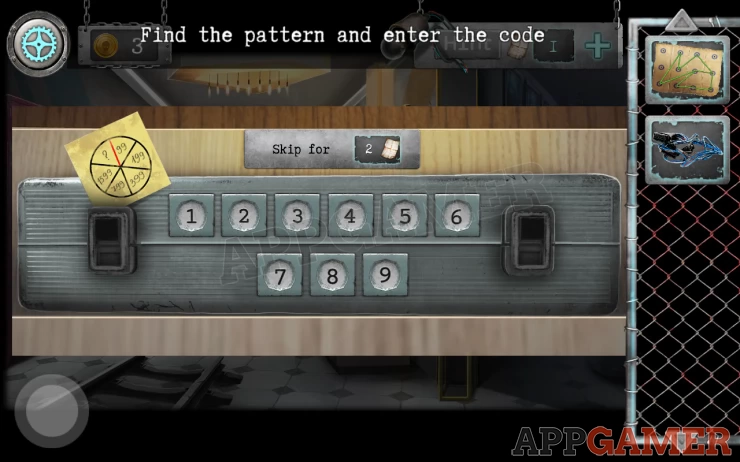
Solution:
99 + 100 = 199 199 + 200 = 399 399 + 400 = 799 799 + 800 = 1599 => 1599 + 1600 = 3199Show
Code: 3199Show
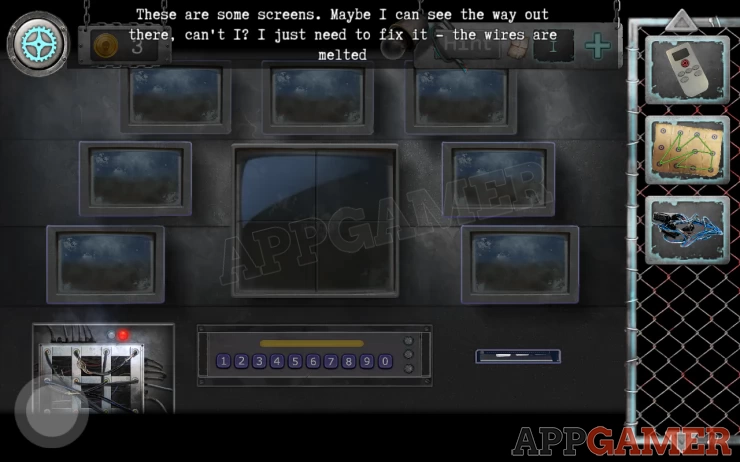
Collect the Remote Control from the case. Now look at the screens on the right side of the room.
Then view the broken wires on the bottom left. Add the Scheme paper to it and the wires you have collected.
Wiring Puzzle
- You need to drag and adjust the wires to match the pattern on the Scheme clue.
- I found that there are 2 ways to match the same wire layout, but only one of then was accepted, if you think you have it right and the light does not go green then try to find another way.
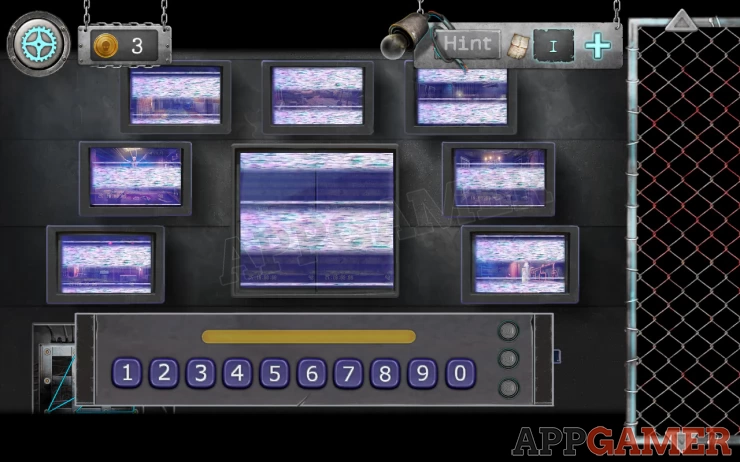
Next use the screens again and use the remote control to turn them on.
Screens puzzle
- You will see a sequence of number appear.
- Tap the numbers into the keypad. This will light up 1 green light.
- You need to do this 3 times.
- If you get one wrong you have to start again.
- The numbers change each time this plays.
You see various camera feeds from the previous areas of the game. As well as an image of the Photo Booth in the center. Then you will see numbers on the screens.
Collect a number Keyboard from the lower right. Then move back and tap on the Photo Booth on the other side.
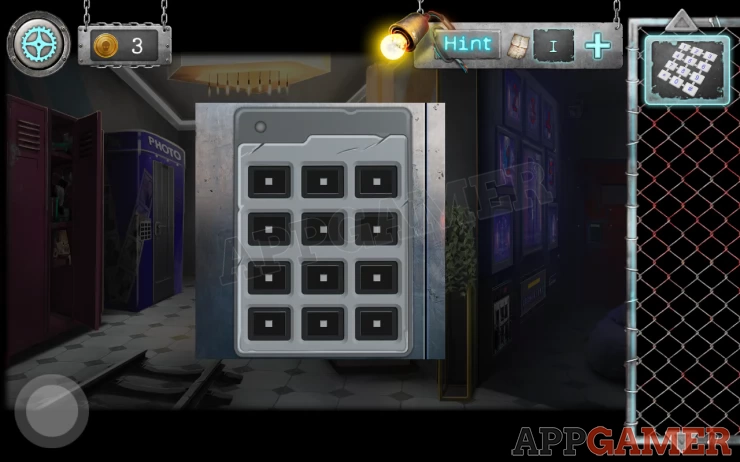
Add the keyboard to the panel and then tap in the numbers you saw (12345). The photo booth is open, look inside.
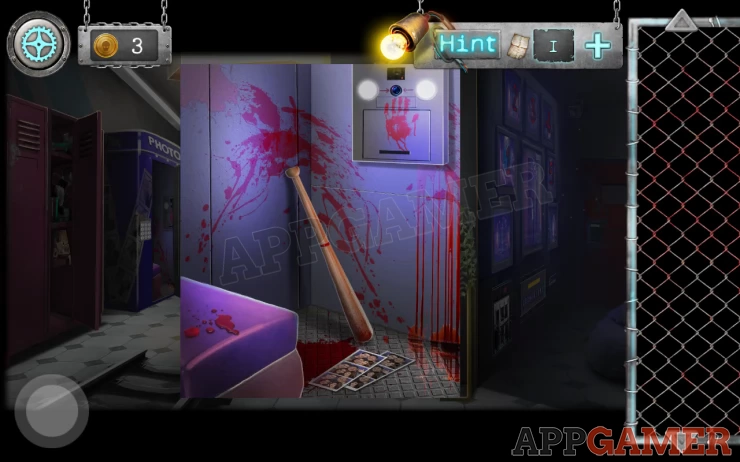
Collect the Baseball bat. And you will view some photos on the floor. Now use the baseball bat on the glass door with the Mysterious figure outside to break it.
You escape to find... It was all a birthday prank bro.

That completes Chapter 3 and the game. If you have any questions about the game please check the Answers Page to ask there.
We have questions and answers related to this topic which may also help you: Show all