Chapter 6
More Legend of the Time Stones
Welcome to our walkthrough for Chapter 6 of Legend of the Time Stones, a new Adventure Escape Mysteries game.
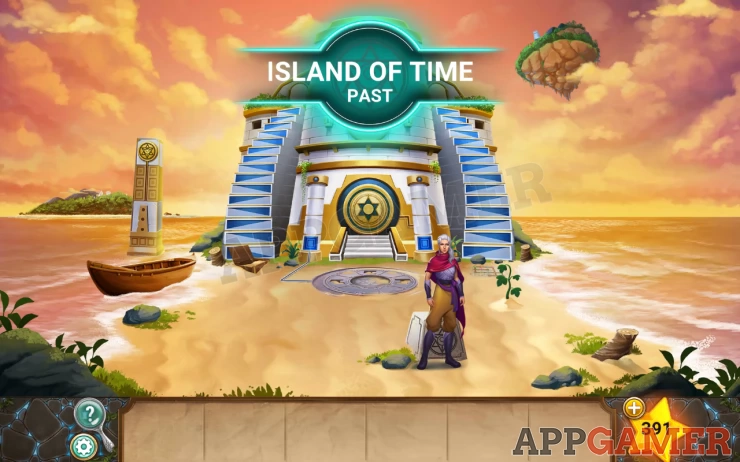
After battling the God of War in Chapter 5 you now have the Future Stone in your locket and have returned to the Island of Time. You need to speak to Luna in the Past.
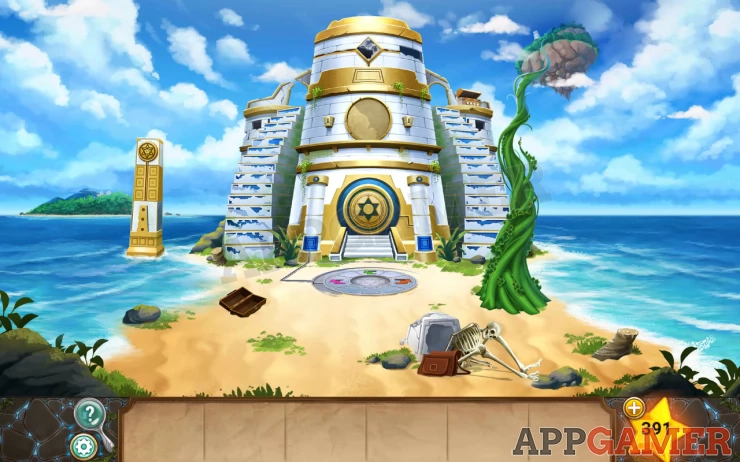
Tap the tower on the left to activate the locket and use the Pink stone to travel to the Past.
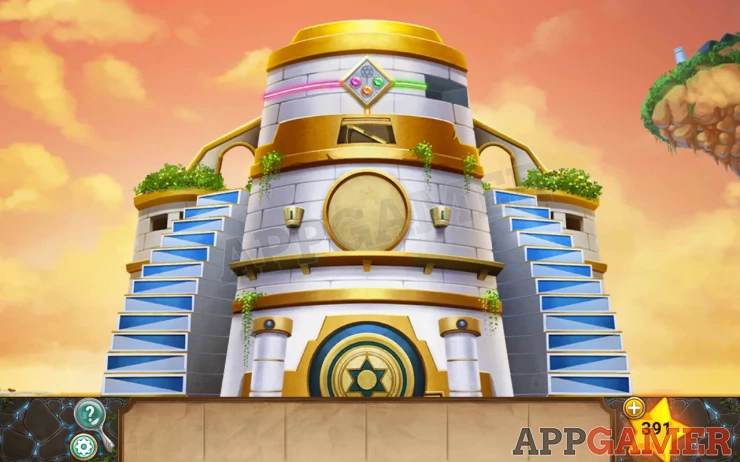
After talking to Luna but before traveling to the future, view the symbol at the top of the temple and use the new future stone on it. You can then collect a Golden Pickaxe.
Next use the locket on the tower to the left again and tap the Orange stone to travel to the future.
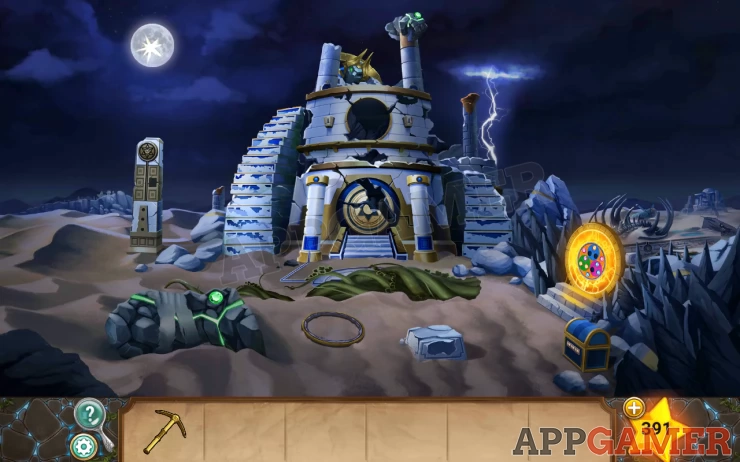
Star: On the moon.
First Use the golden pickaxe on the rocky leg on the left to collect the green gem (star shard)
Then tap the top of the temple to view the head.
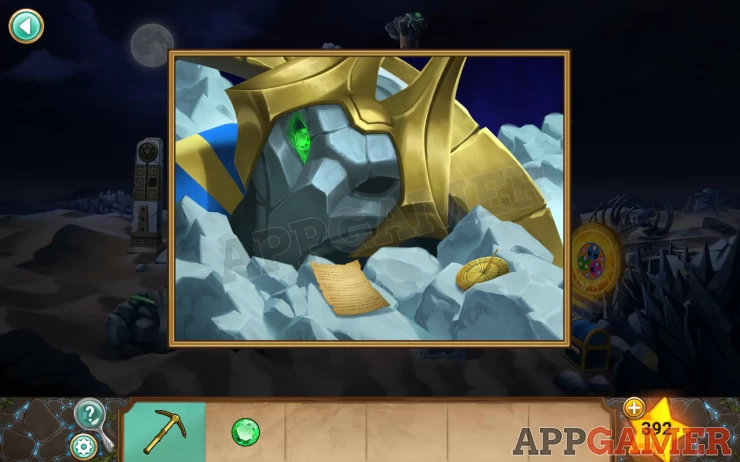
Collect the sundial. And read the note.
Then use the pickaxe to collect a second green star shard.
Now view the sundial in the inventory. This will give you a time.
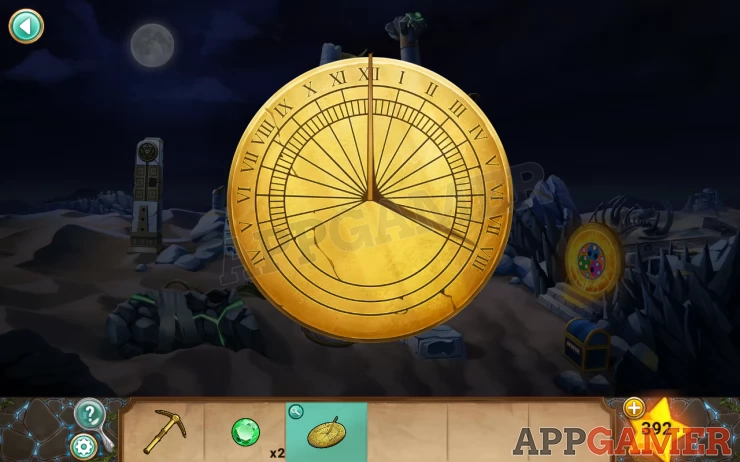
You can then use the tower on the left to travel to the past and the present. Check the sundial in each.
Now 'back to the future' and tap on the blue chest on the right to see the code entry.
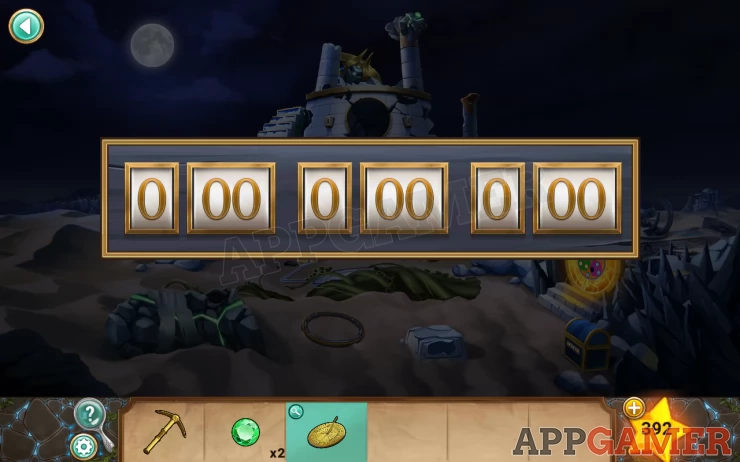
Solution: Use the 3 times from the sundial. Past = 6:15 Present = 1:30 Future = 7:45Show
Code: 6 15 1 30 7 45Show
Collect a Golden Saw
Next travel to the present (Green stone)
Use the saw on the bean stalk to cut it and it will fall on the temple.
Then travel back to the future.
You can now use the pickaxe at the very top of the temple to collect the third star shard.
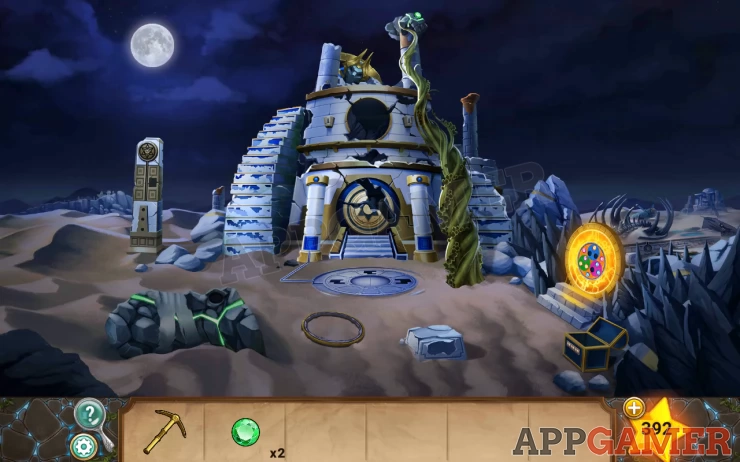
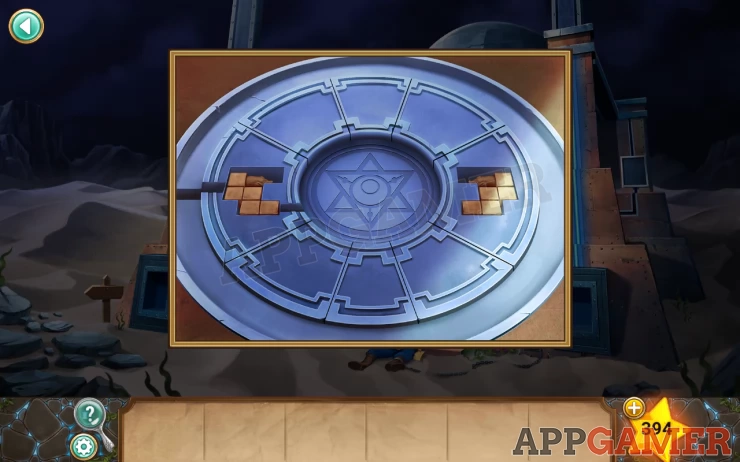
On the right is a golden wheel gate, view this for a puzzle.
Place the 3 star shards to start.
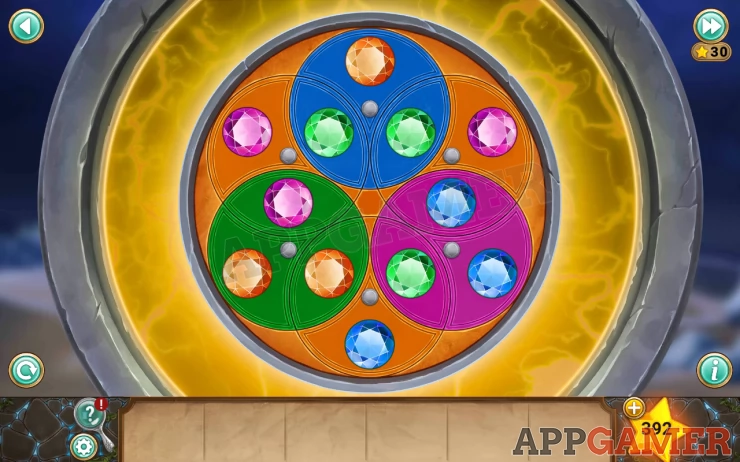
Follow the instructions to move the colored star shards to the correct locations.
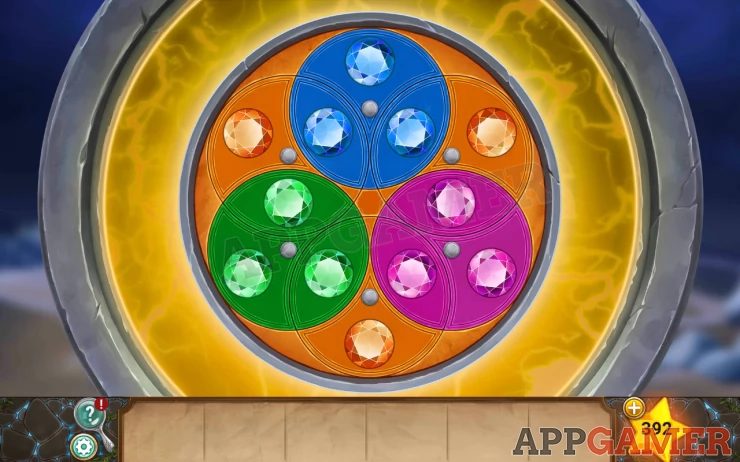
Once done the path is open and you can tap the open gate to move through to the next area.
You will have a conversation with Zuriel.
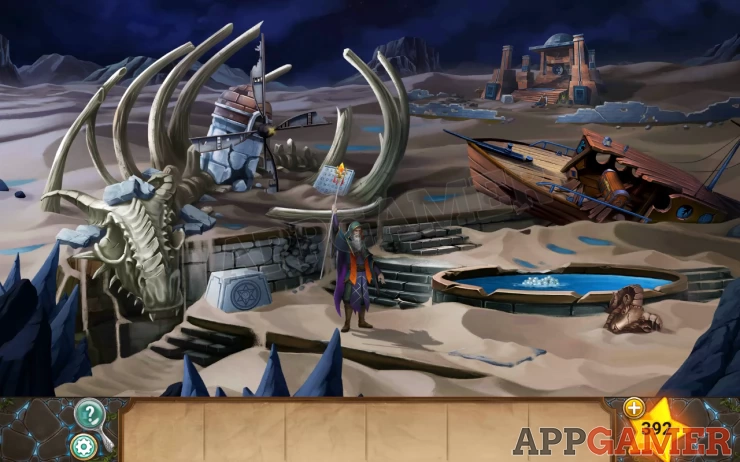
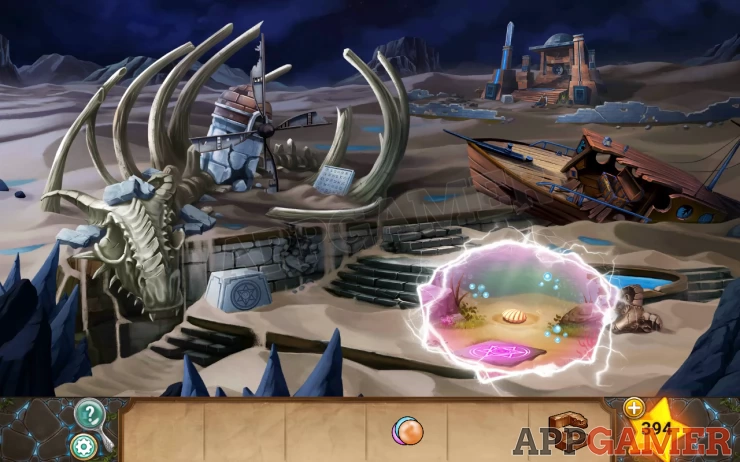
Star: on the broken windmill.
There is a star symbol block on the left. Tap this and use the green time stone to open a rift in the present.
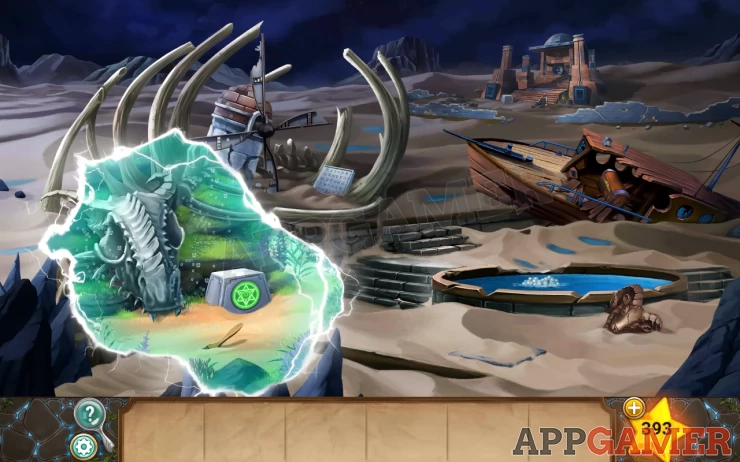
Collect a brush.
Close this rift and use the brush on the ground on the right to uncover another star symbol.
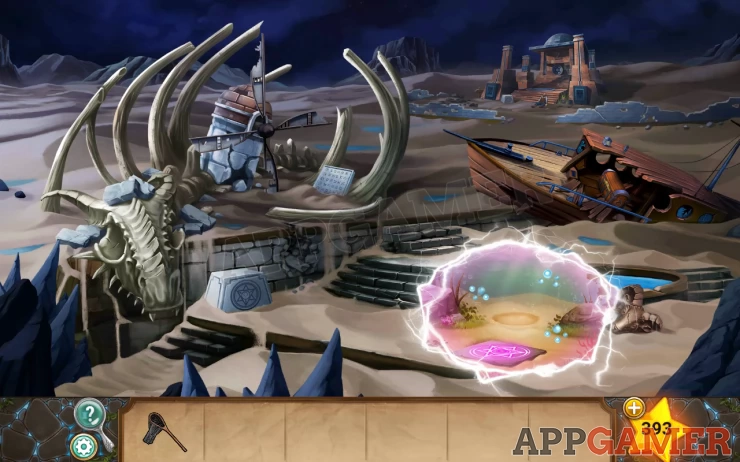
Use the locket here with the Past (pink) stone to open another rift. This time collect a Fish net.

Close the rift and then use the net on the pool of water to collect some fish eggs.
Now we use the star symbol on the right to open a rift in the past (pink) and place the eggs in the seabed.
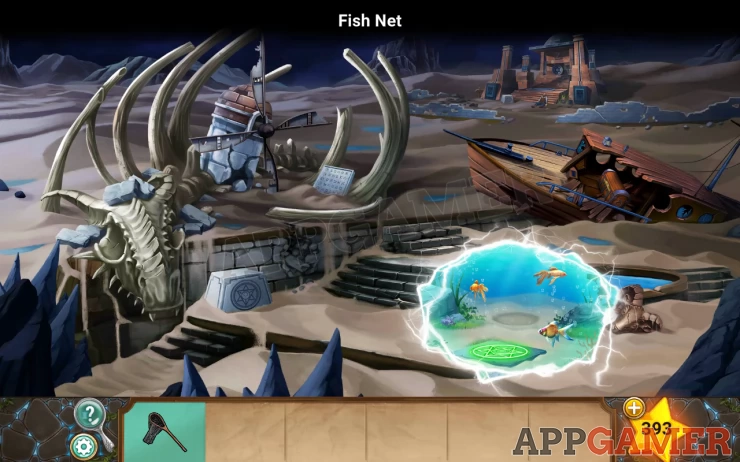
Then close this and open a rift to the present (green). You will see fish. Use the net to catch them.
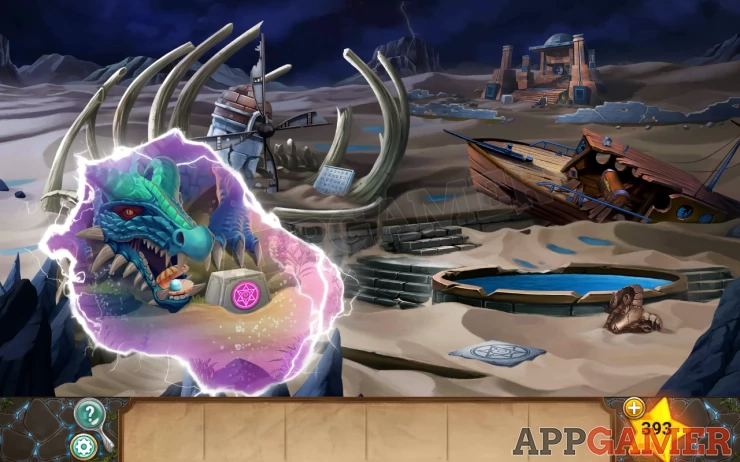
Next use the star symbol block on the left and open a Past rift.
Give the fish to the sleeping dragon. Then you can collect a pearl from the clam shell.
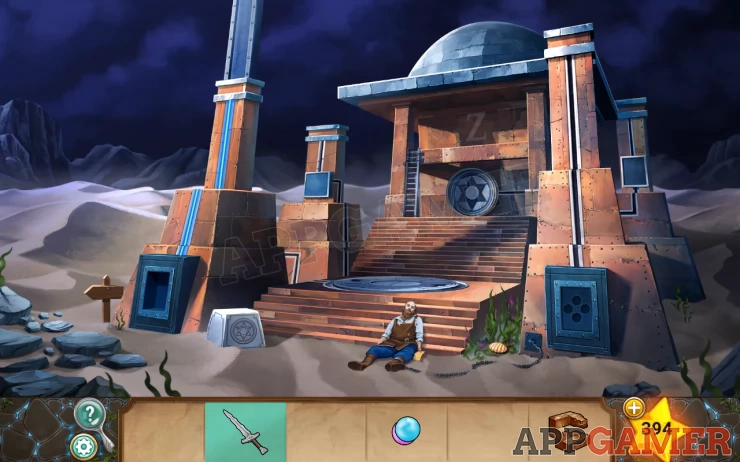
Now tap the temple in the distance to travel to it.
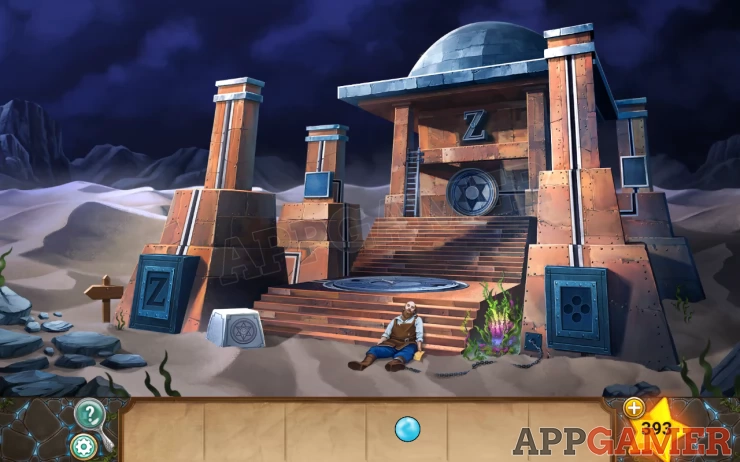
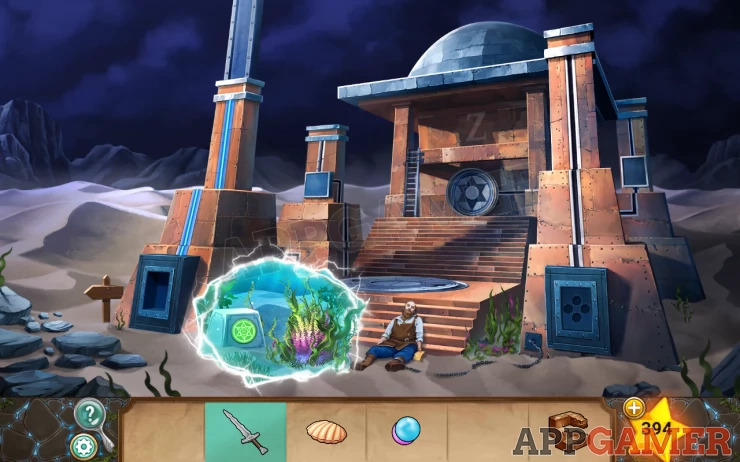
Star: on the roof of the temple
Tap on the dead man to see a clue that you can collect and read the note.

Tap on the circle area above the man to view it.
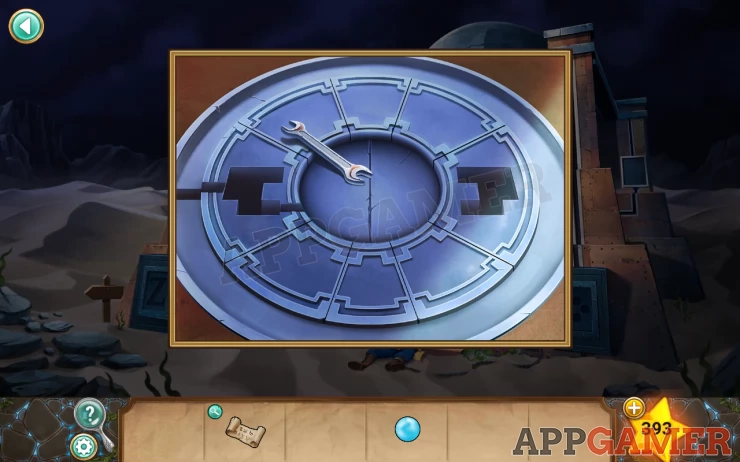
Collect the wrench.
Use the wrench on the Z emblem on the temple to collect it.
The place the Z on the left column at the front. A panel opens and you can collect a Metal Key.
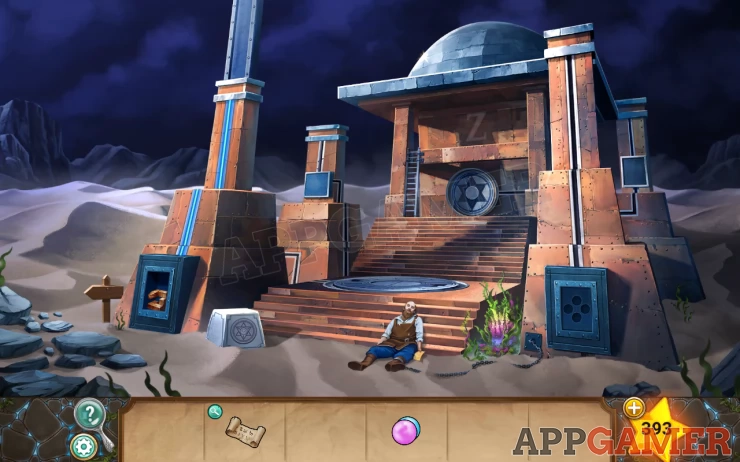
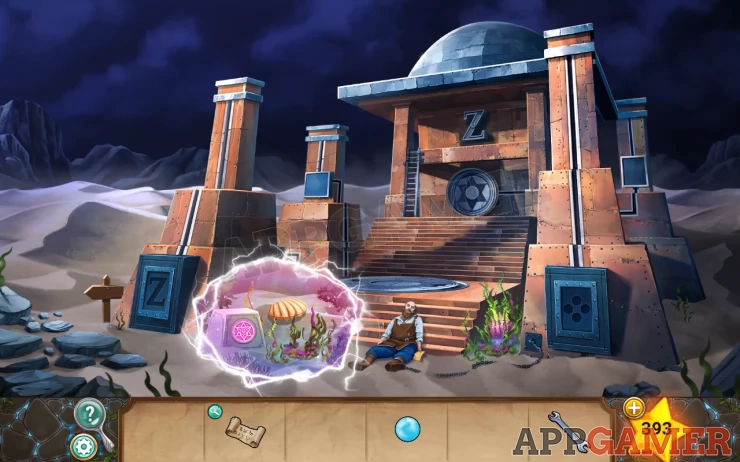
Now use the star symbol block on the left with the pink time stone to open a rift to the past.
Open the clam to collect another pearl
Now tap on the left to back up to the previous area.
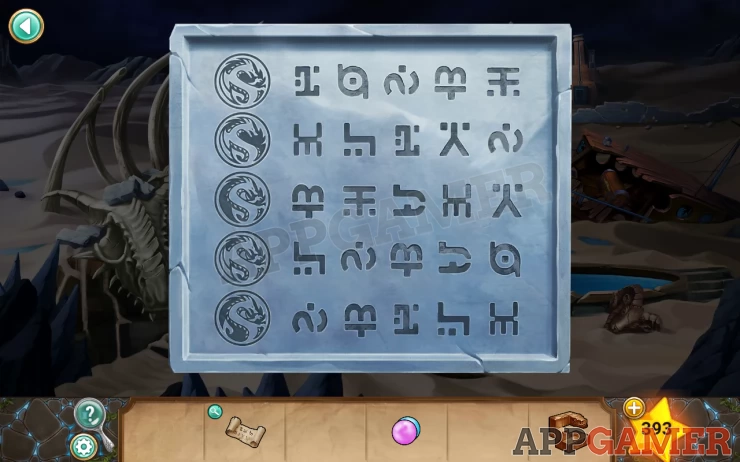
In the bones of the dragon carcass there is a stone tablet, view this.
Then also check the note you have.
Now tap inside the boat wreck on the right to find a chest with a combination lock.
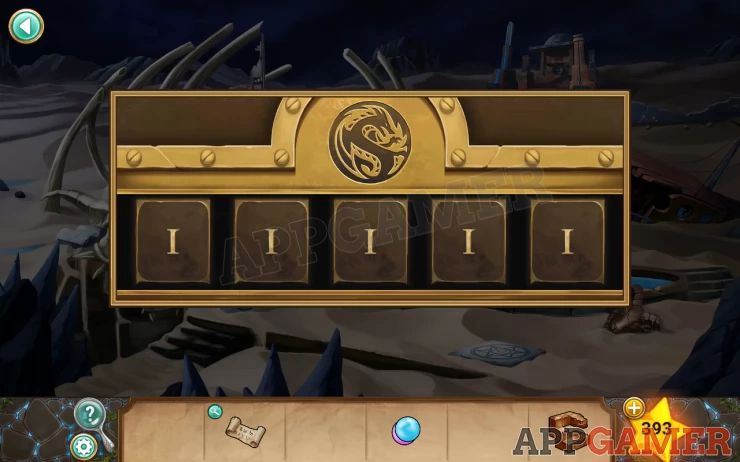
Hint: the dragon symbol matches on on the tablet.
Solution: find the matching line on the tablet and then use the note to translate the symbols to numbers.Show
Code: VIII VII IX IV VIShow
Collect the sword from the chest.
Go back to the temple scene and use the sword on the colorful seaweed growing on the right. You can then collect a baby clam.
Back up to the first scene and use the star symbol on the right to open a rift to the past (pink stone).
Place the baby clam on the sea bed.
Then open a rift to the present to see the clam shell is grown and you can collect a pearl.
Move back to the temple. Use the star symbol on the to open a rift to the Present (green stone).
There is more seaweed here. Use the sword to cut it, you can then open a clam shell and collect a fourth pearl.
You now have 4 pearls. Place them in the 4 holes on the right column.
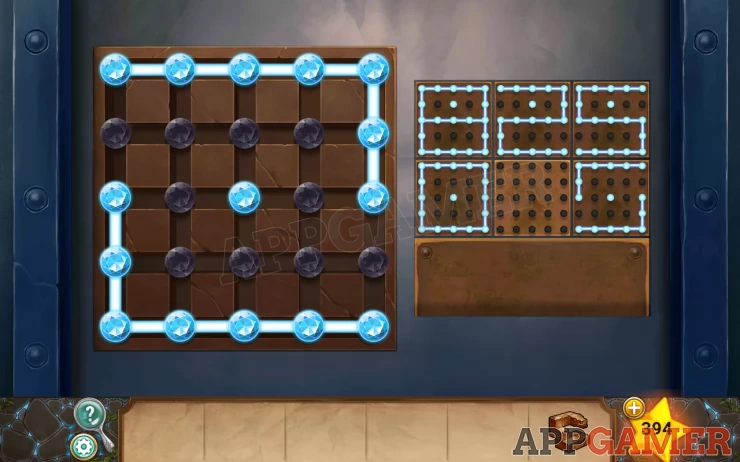
A panel opens, view the puzzle inside.
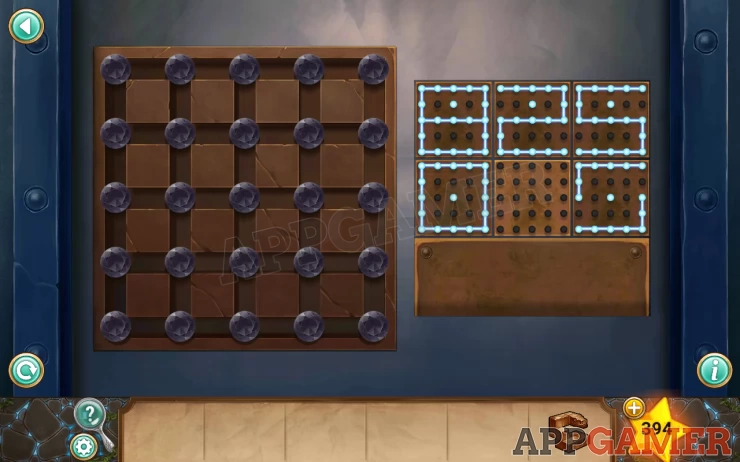
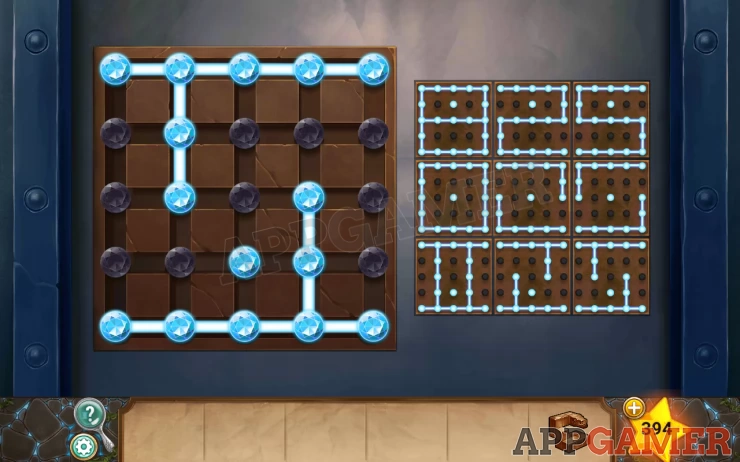
Hint: there are 3 pairs of patterns, a top and a bottom. Find the changes made between each visible pair and then make the same change to complete the missing pattern.
Solution: Show
You then need to repeat the same process to fill in the bottom missing pattern.
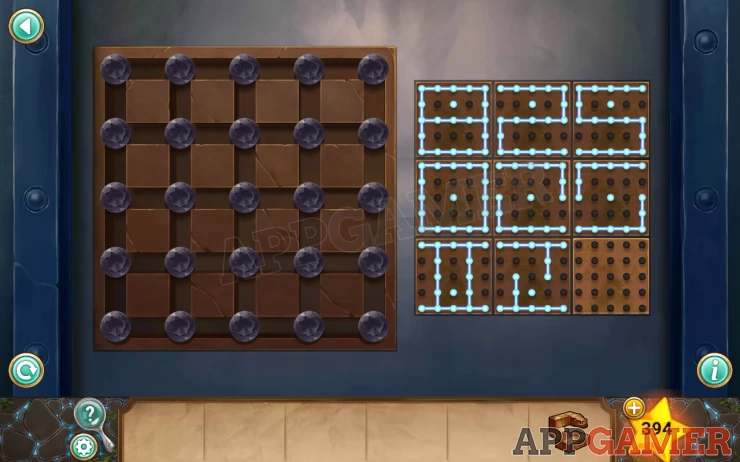
Solution: Show
Once done you can collect a second metal key.
View the circle area again and place the 2 metal keys.
Use the locket with the future stone to activate the center and reveal another puzzle.
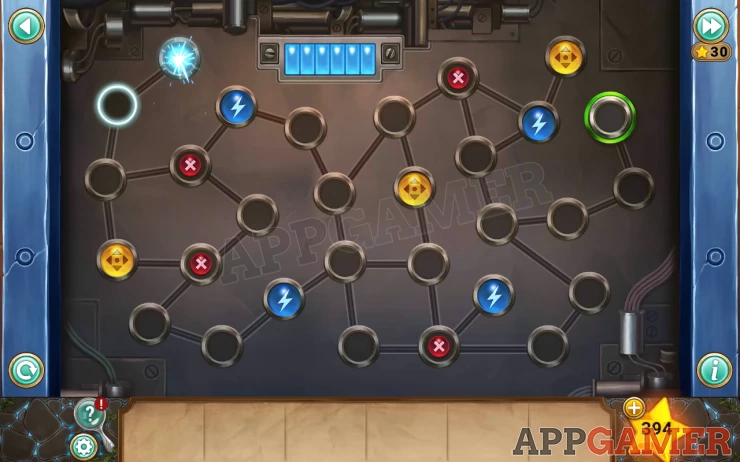
Complete this by moving the spark around the maze. Refill energy at the blue nodes, use the yellow ones to move the red nodes out of your way.
Once done there is a second puzzle of the same type to complete.
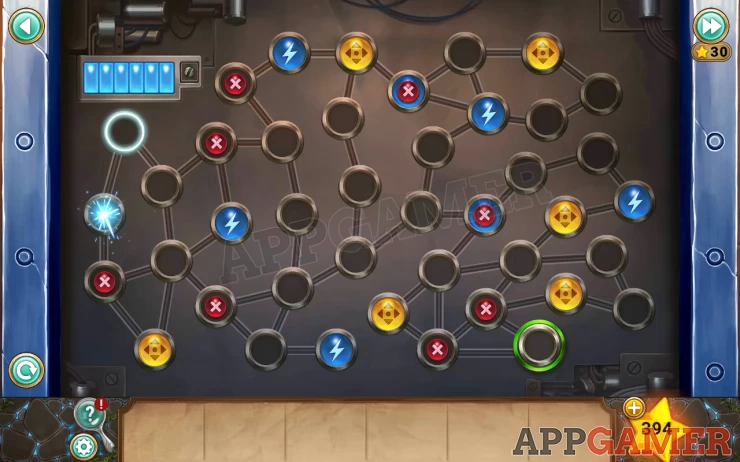
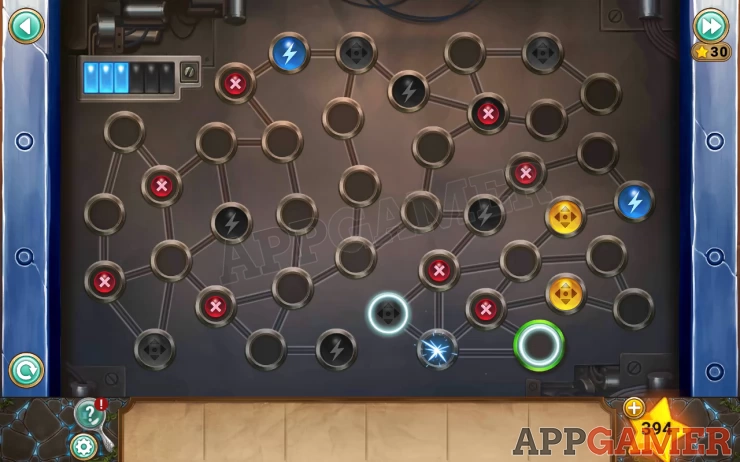
Completing this will open the door to the temple.
Go inside to complete chapter 6.
Move on now to chapter 7.
We have questions and answers related to this topic which may also help you: Show all
 With 20 years of experience in creating video game content for the internet and over 30 years as a gamer, Mark is now a passionate mobile App Gamer. Loving a challenge, he is always ready to get stuck in to both survival builders and puzzle solving games. He has been providing content for AppGamer since 2014.