Chapter 8 - Han Qiuyu - Part 2
More Hospital Escape - Room Escape Game
This is Part 2 of our guide to treating Patient 8 in Hospital Escape, Han Qiuyu.
You have managed to breach the gate and can now cross over the bridge and explore the city itself.
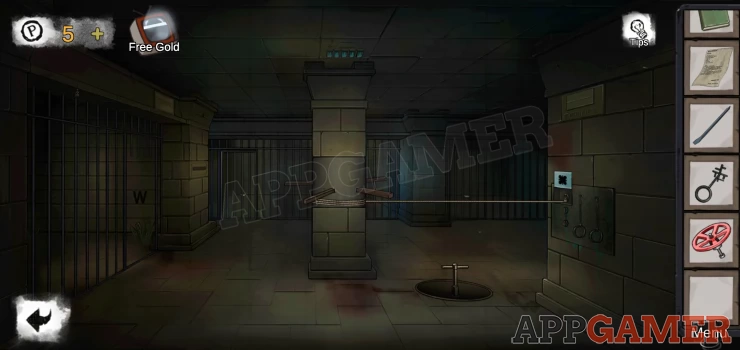
Courtyard
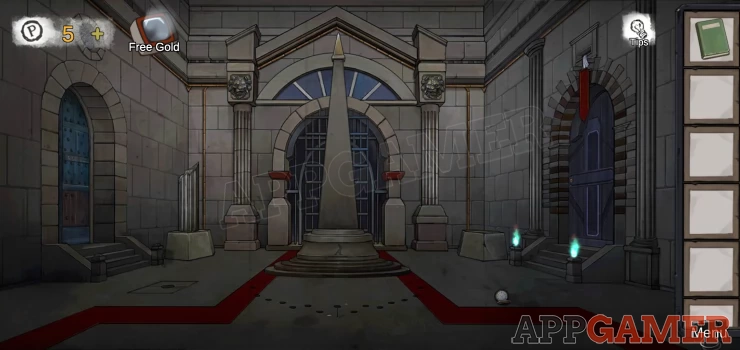
Object: on the ground bottom right.
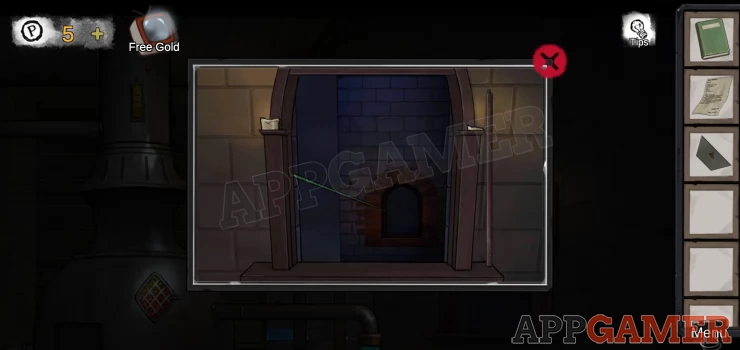
View the ground at the bottom center where there are many small holes.
Tap the red badge to set off the traps.
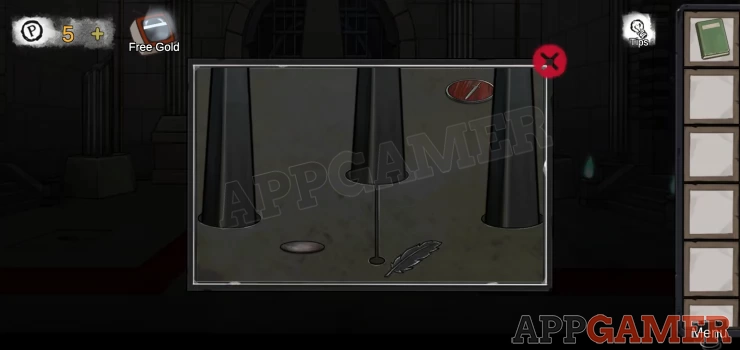
Collect the 'Stone tablets'
Next view the ground to the left to find a circle shape.
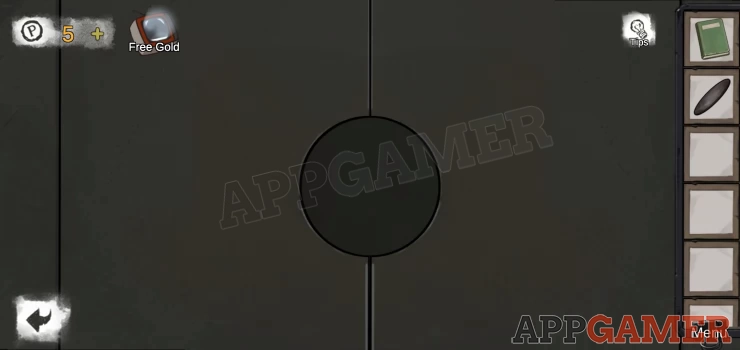
Add the stone tablet to it and you will reveal a puzzle.
Hint: this is a spot the difference puzzle. Tap the eye icon lower left to remove the other buttons.
level 1 5 differences
level 2 6 differences
level 3 7 differences
The differences vary with each play through. Some of them are very subtle.
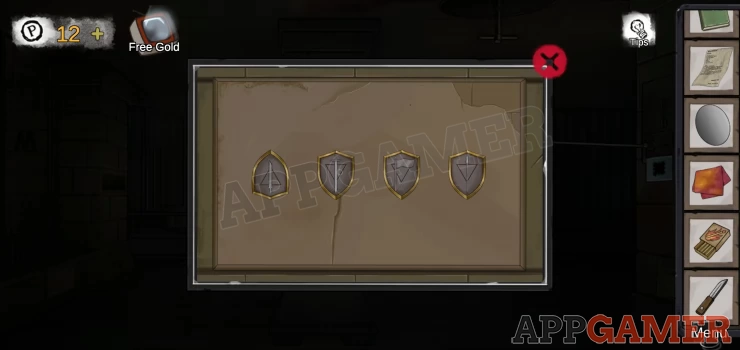
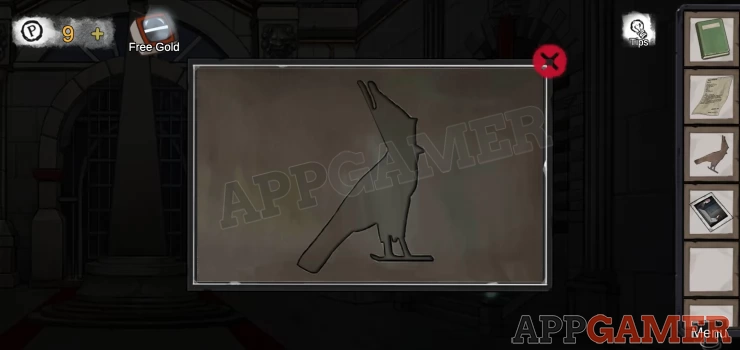
You will then see a clue with 4 shield shapes.
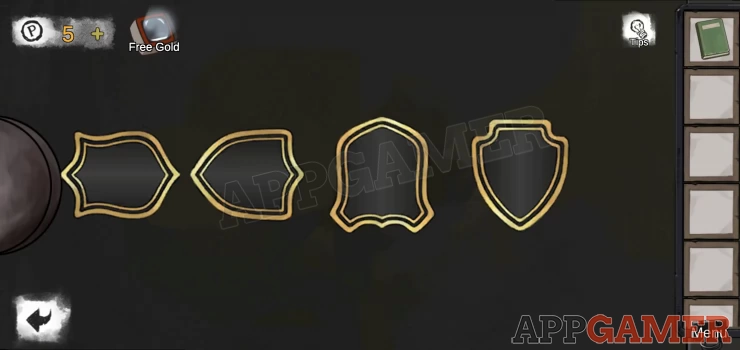
Tap to view the doorway on the far left. It has a lock with 4 shield shapes.
Hint: tap each to rotate them and match the pattern you find as above. It will vary with each game.
Enter the Assembly Hall
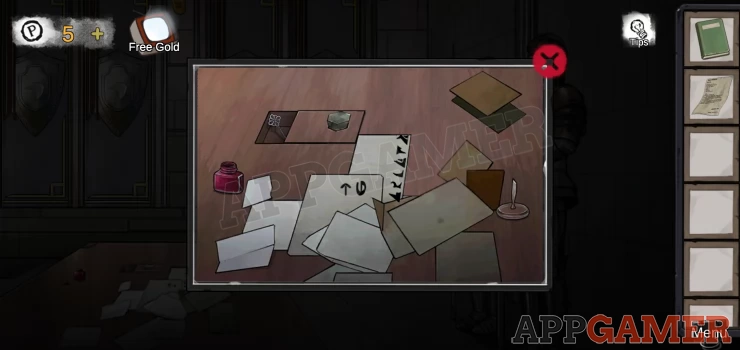
Tap to view the table in the center. There are many papers

Object: top center of the table. swan figurine
Collect a paper bottom right for a chapter clue - Admission notice.
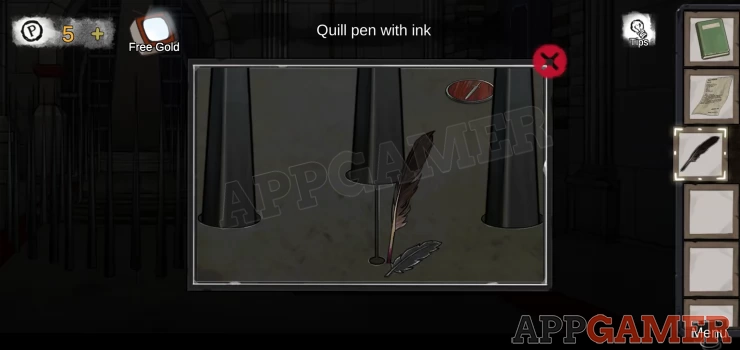
Collect the 'feather pen' from the right.
Use the pen on the ink bottle on the left to get a 'Quill pen with ink'
Note the symbols on the papers, these are a clue.
Go back to the courtyard
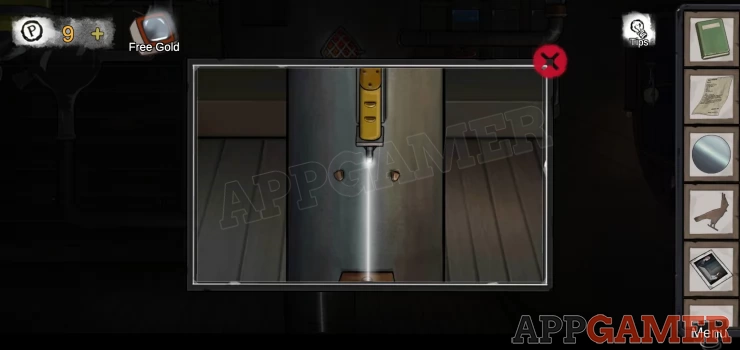
View the ground with the traps again and then use the quill pen on the small hole by the feather shape.
The traps will lower.
You can now collect the red 'Sword Badge'
Go back into the Assembly Hall and tap to view the suit of armor on the far right.
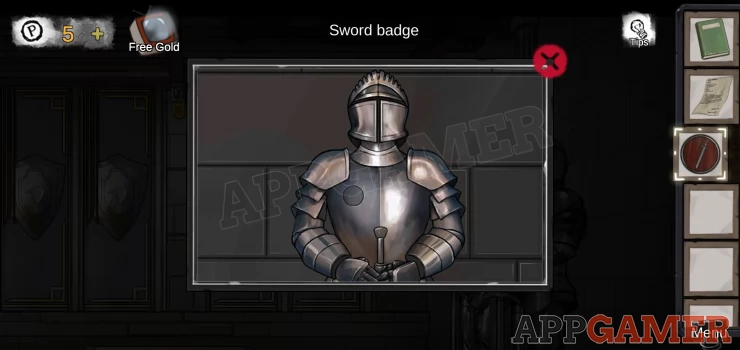
Add the Sword Badge to it.
Collect a Hexagonal Awl.
View the table again and place the awl into the hexagon hole on the top left.
Collect a 'Key'
Back out to the courtyard and view the door on the far right.
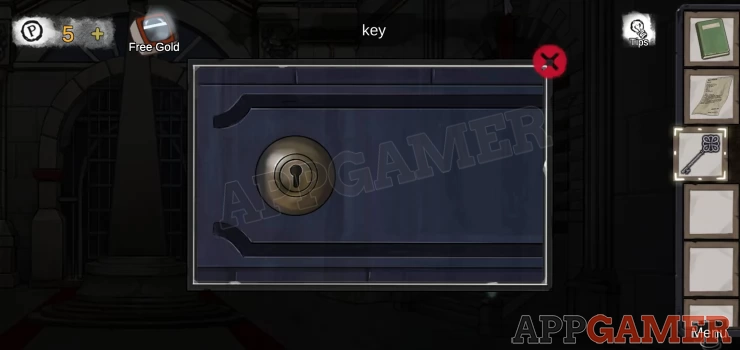
Use the key to open this.
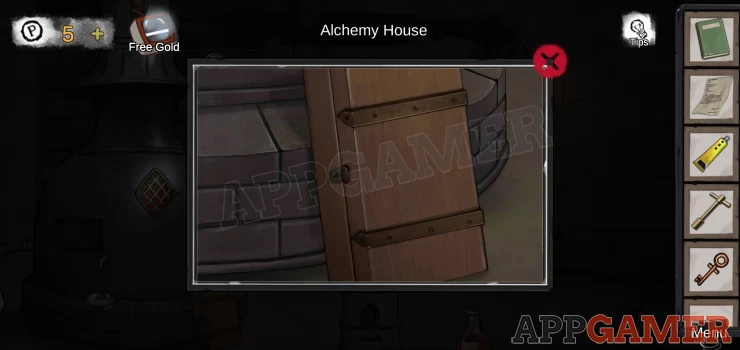
Enter the Alchemy House
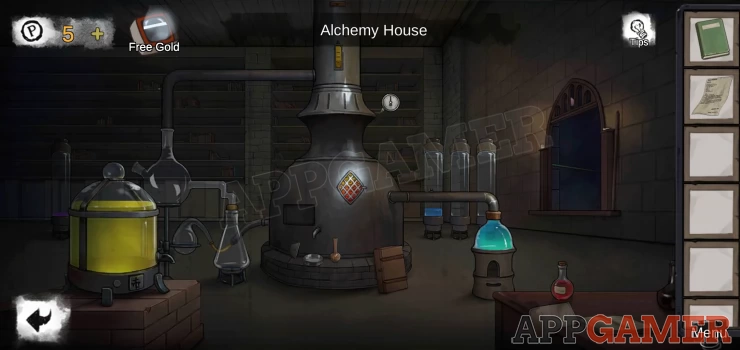
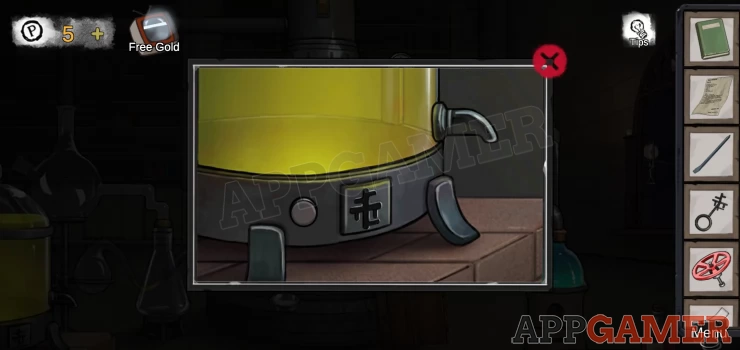
View the bottom of the large vat in the center.
Object: vase on the right.
Collect the stone.
Then view the archway on the far right of the room. Collect from the side a 'slender stick'.
Exit to the courtyard and use the stick on the small vent above the right door.
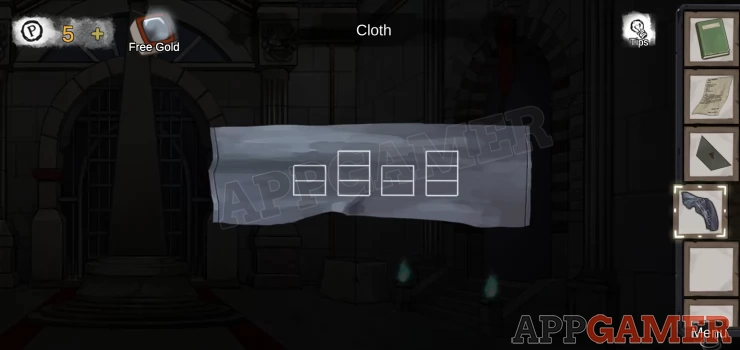
Collect a cloth. You can view this to see a clue.
Now tap on the stone on the back right of the courtyard.
Add the Stone you have to the puzzle to start.
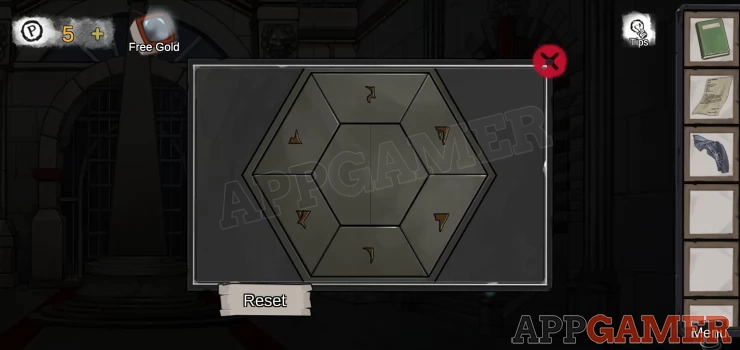
Hint: tap the 6 stone in the right order.
Solution: Follow the clue on the table in the Assembly room. Top to bottomShow
Collect the 'Axe Badge'
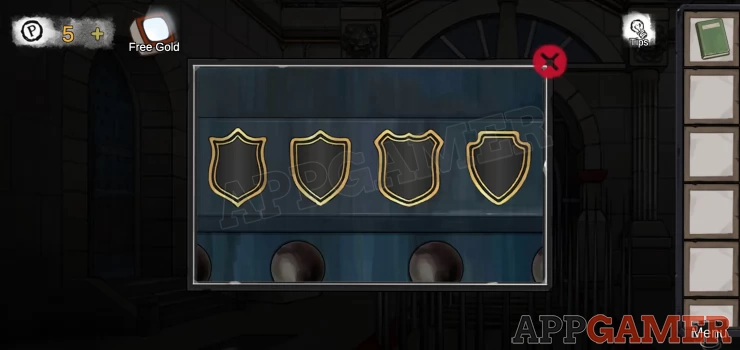
Enter the Assembly Hall and tap to view the back wall with the 4 shields.
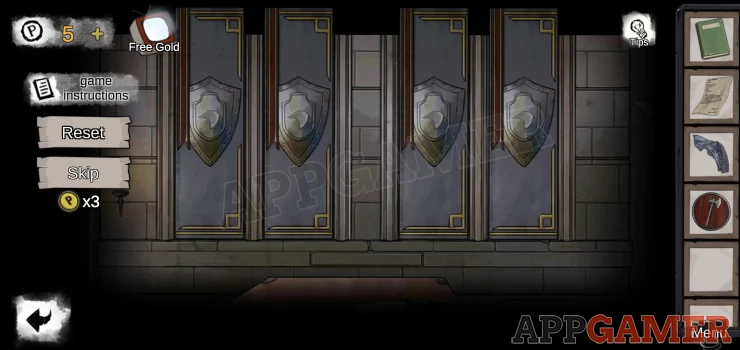
Tapping these will raise or lower them but also affect others.
Solution: The solution varies, you need to match the clue you find on the cloth. Not easy, but random tapping worked for me.
Once done collect 'Super Glue' and a 'T shaped valve wrench'.
Now tap to view the suit of armor second from the left. This armor has the Axe.
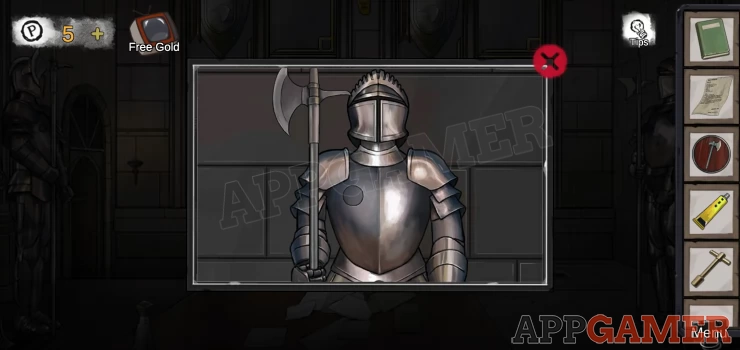
Add the Axe badge to it.
Collect another key.
Go back to the Alchemy house and tap to view a small brown case by the left of the central vat.
Use the key to open this.
Collect a 'crowbar' and a 'Cell key'
Go back to the Assembly Hall and view the door on the left of the room.
Use the cell key to open this.
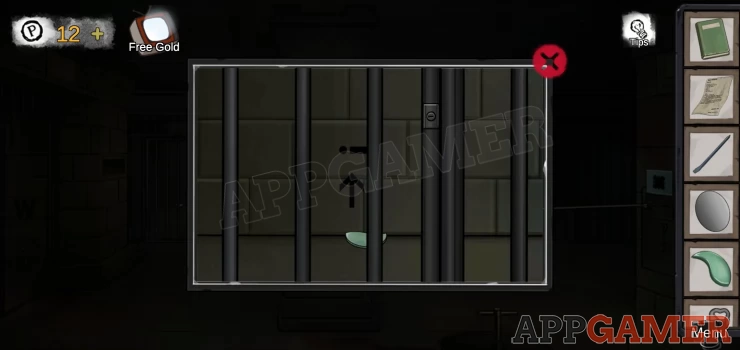
Enter the Cell
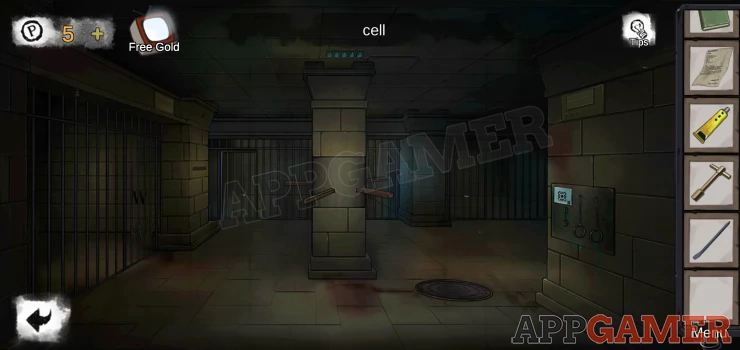
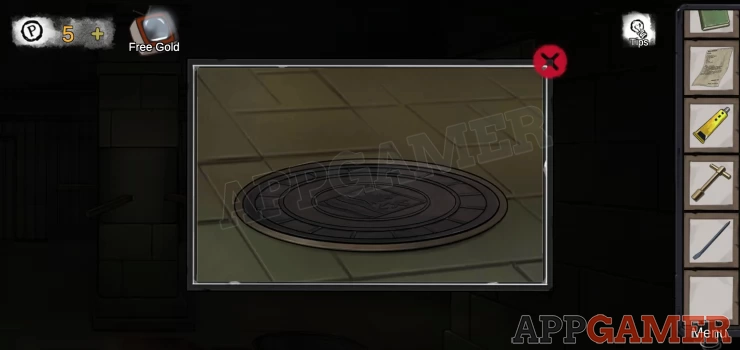
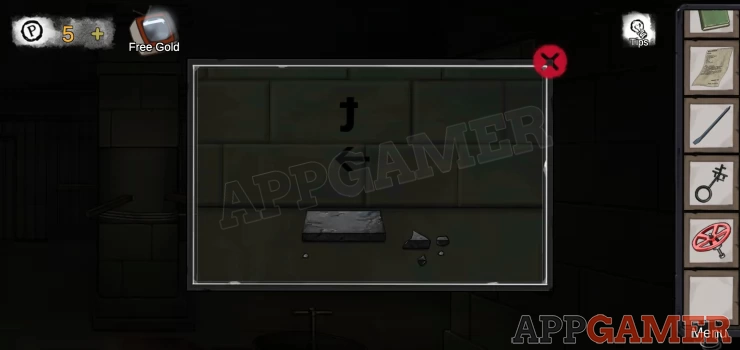
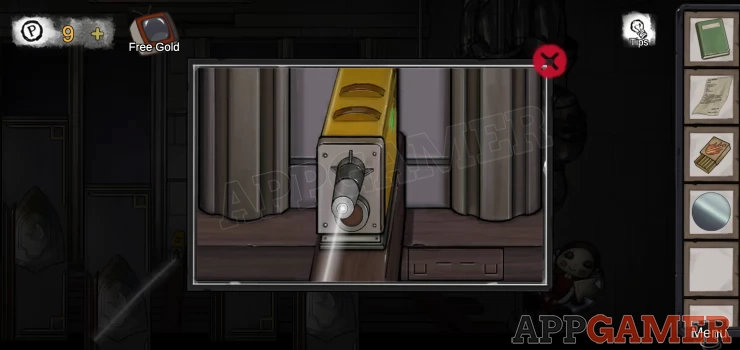
View the manhole cover on the ground on the right.
Use the crowbar to lift it and then use the T shaped wrench on the valve underneath.
A cell door opens.
Tap to view the cell on the left.
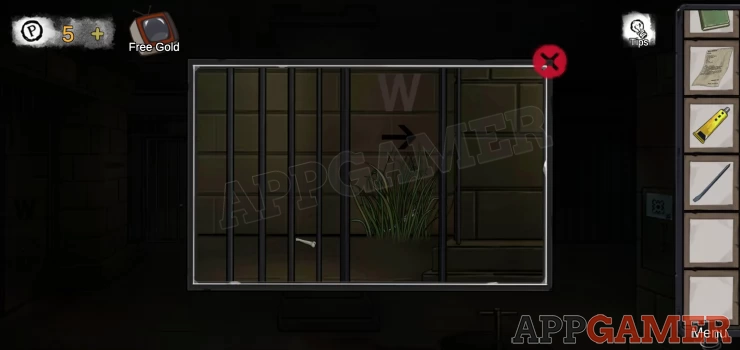
Object: bone on the floor to the left.
Tap the grass until you collect a 'Pulley'
Note the Clue (W)
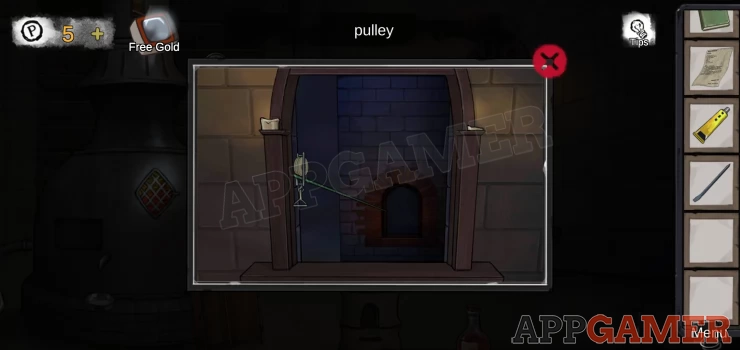
Back out and go to the Alchemy room. Tap the archway on the right again.
You can now use the Pulley on the rope on the right to travel to the next room.
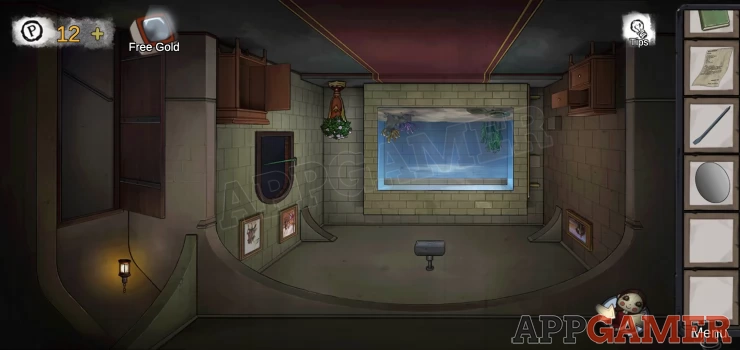
Enter the 'Room' There is a large fish tank.
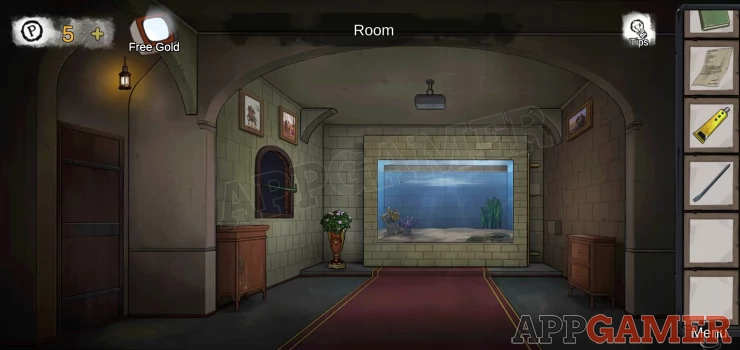
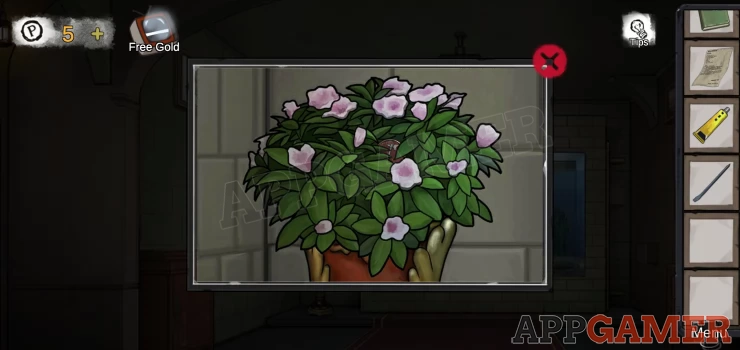
To the left of the fish tank is an urn of flowers. View this.
Collect the 'Halberd Badge'
View the Drawers on the right of the room and open the top drawer.
Collect a 'Special key' and a 'Handle'
Note the symbols on the bottom of the drawer.
Now view the small cabinet on the left of the room.
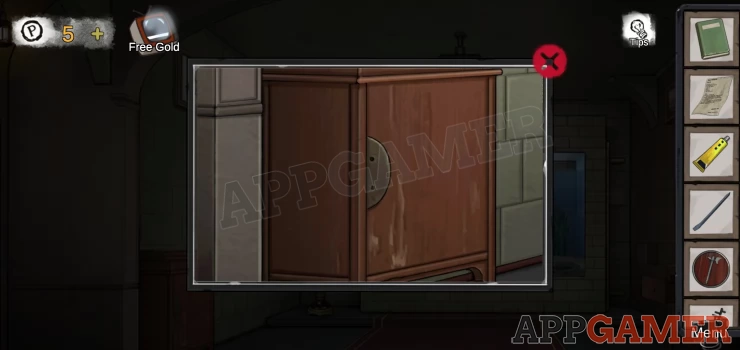
Use the super glue on the door and then add the handle. Open it to collect the 'Hammer Badge'.
Tap the window on the left and use the pulley to exit the room. Go back to the Assembly Hall.
View the suit of armor on the far left now and add to it the Hammer Badge.
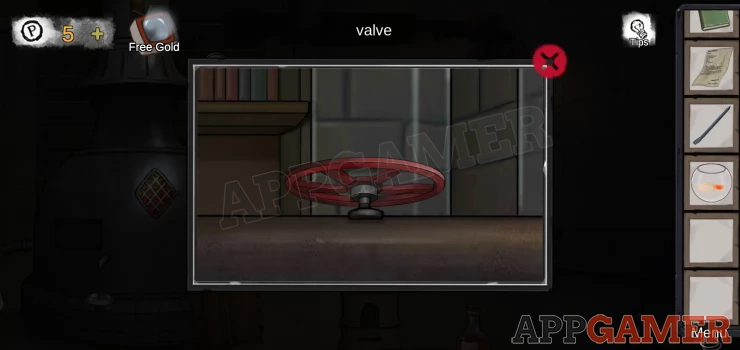
Collect a Valve.
Then view the suit of armor second on the right. Add the Halberd Badge.
Collect a 'hemp rope'
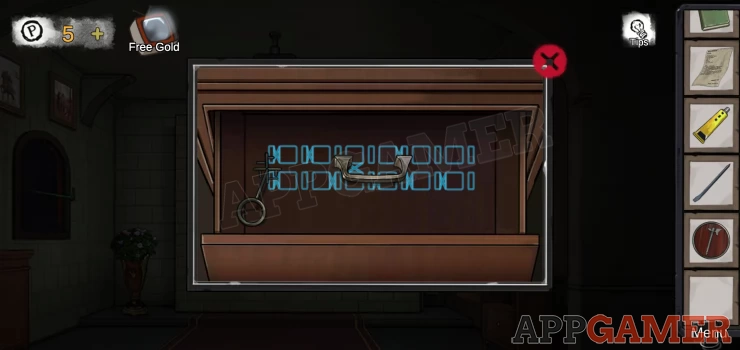
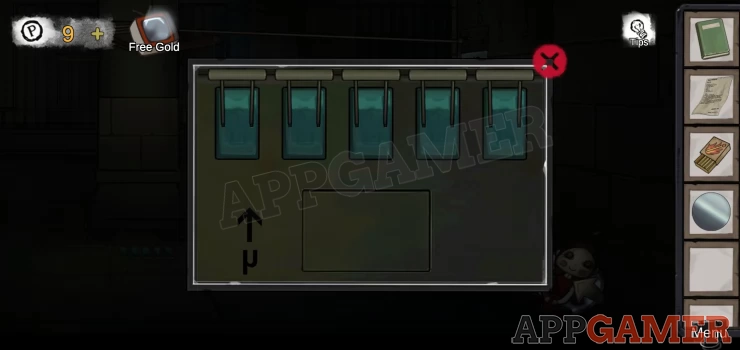
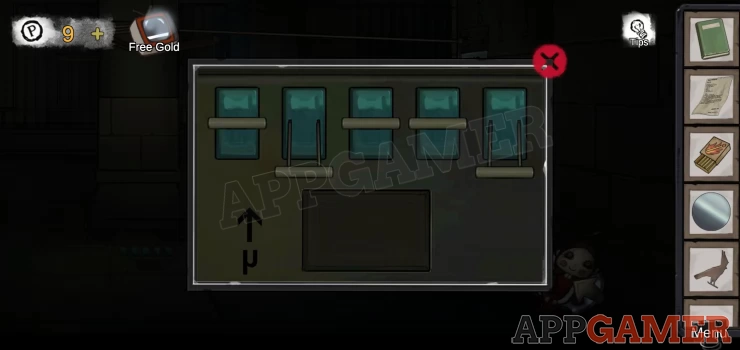
Enter the cell again and tap to view a panel on the far right.
This is a puzzle.
Hint: the moving symbol is the same as the one in the bottom right. Use the rotation button on the right to adjust it to match the template in the center.
You need to then press the play button on the left to stop the movement when the symbol overlays the template in the center.
Once done you will reveal a ring.
Add the hemp rope to it.
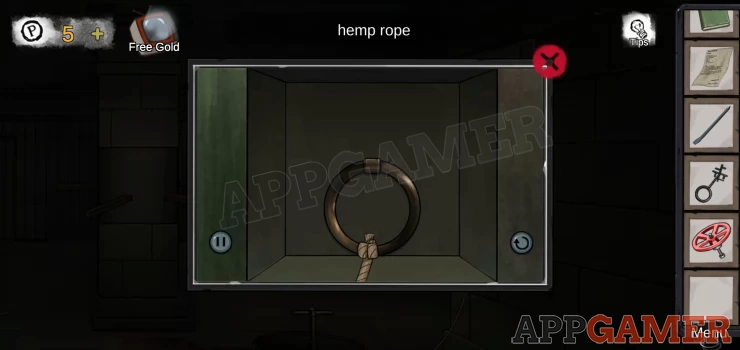
Then you need to tap the central column in the cell and add the other end of the rope to it.
Tap again to make the column rotate.
Another cell door opens.
View the cell on the right now.
Collect the 'Square brick', and note the second letter clue.
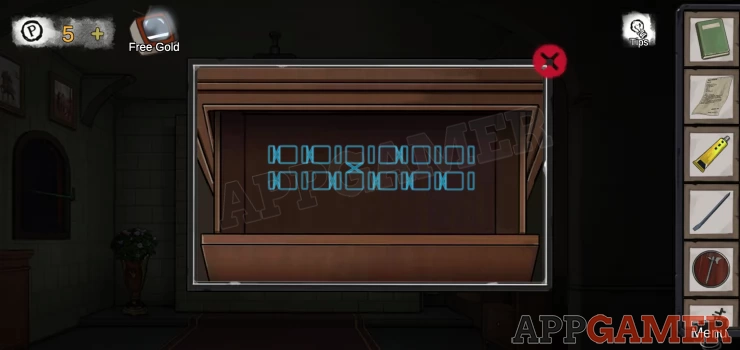
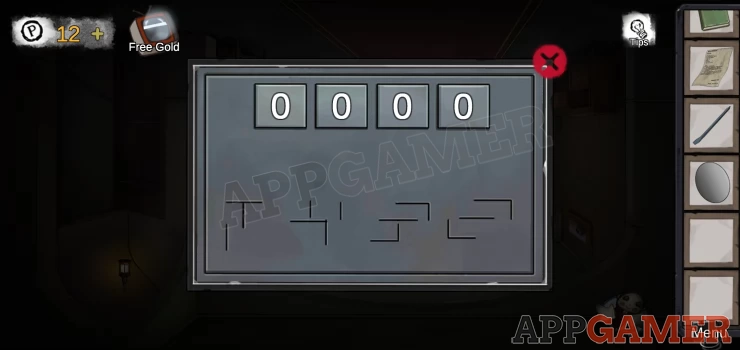
Now tap on a wall section on the left of the room next to the open cell on the left.
There is a 6 digit code entry.

Hint: The clue for this is in the fish tank room, the symbols in the drawer.
Solution: This is a tricky one but note that there are 6 pairs of squares (one above the other). Imagine the gaps around these as digital display segments, some of the segments are blocked though. make a number around each using the available segments spaces. My code was 320599Show
Collect a 'Container'.
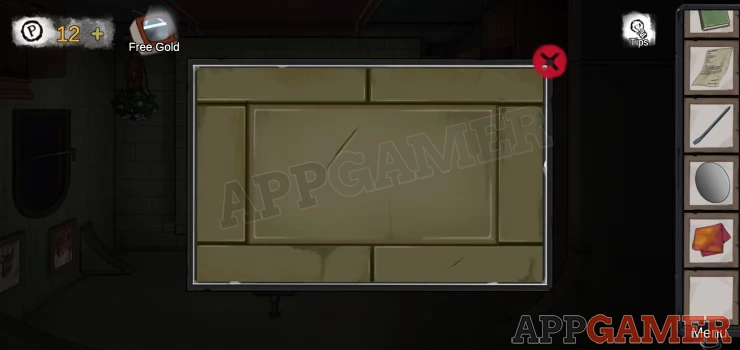
Back out to the Assembly room and view the square hatch on ground at the back right of the room.
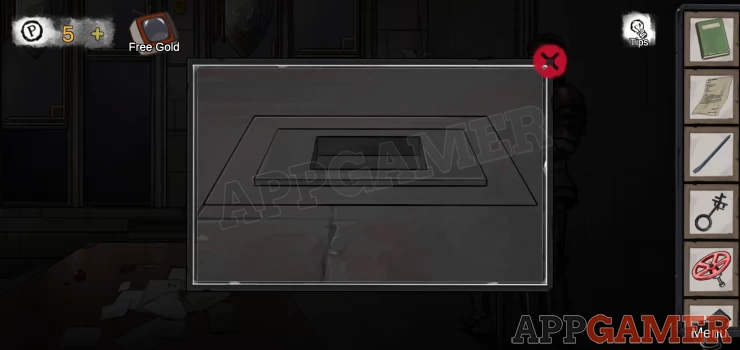
Add the square brick to it to open and collect a 'Goldfish'
Now head over to the Alchemy House.
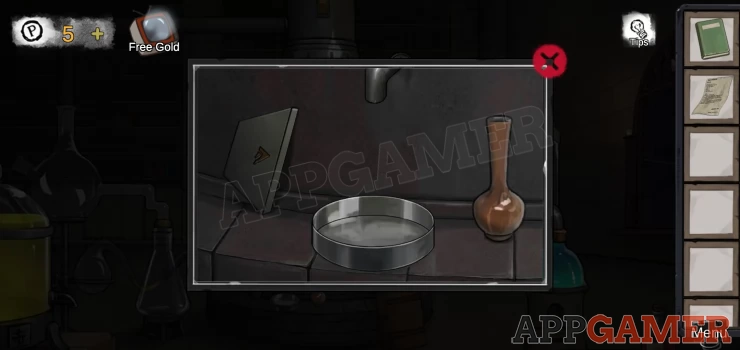
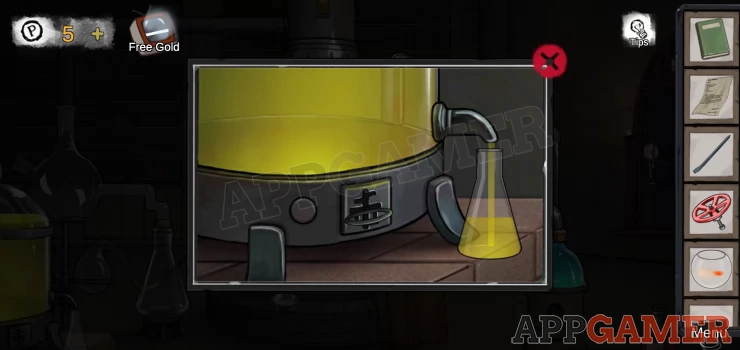
On the left tap to view the glass vat with the yellow liquid.
Use the special key on it to unlock it.
Place the container under the spout on the right and then press the button to fill it.
Collect the 'Yellow culture medium'
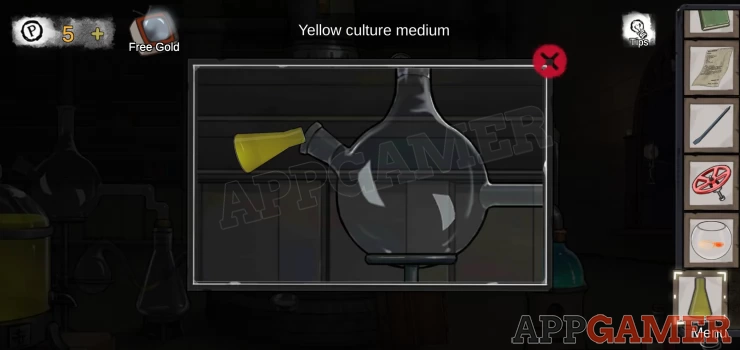
View the round flask just above the yellow liquid.
Add the Yellow culture medium to it.
Next tap on the pipe above this flask to find a place to add the valve wheel to.
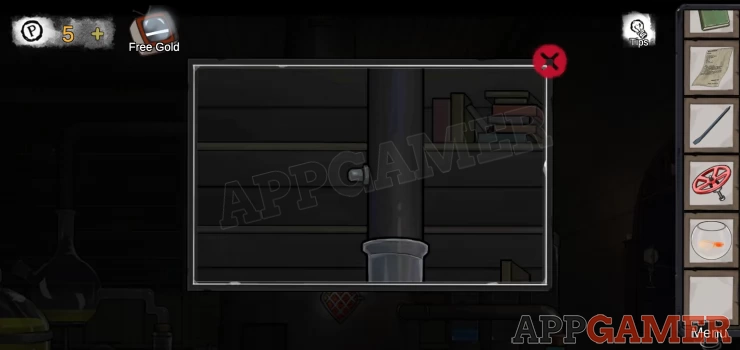
Turn the wheel and the yellow culture medium will be added to the central vat. Steam will appear.
Next collect the valve wheel again, then tap the pipe on the right to add the vale wheel to it.
Turn the wheel and the blue substance will be added from the right container.
You will then see a panel on the left of the central vat activate.
View this.
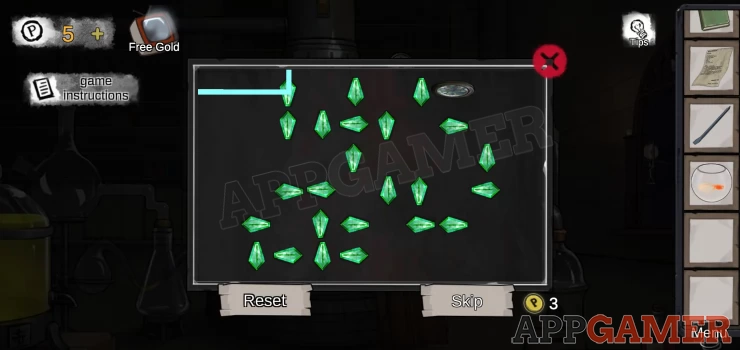
Hint: tap to rotate the green jewels, Make the laser pass through all of them and reach the circle 'exit'.
Solution: This will vary with each game play through.
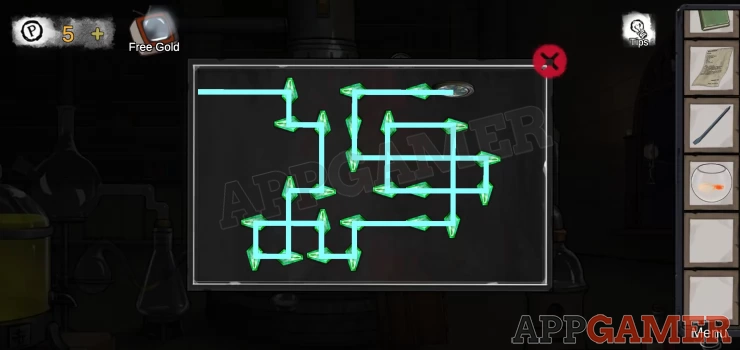
Once done a liquid will pour out into a small dish.
View the dish.

Add the goldfish to the liquid and then collect the dish to get 'Experimental Goldfish'
Go to the room with the fish tank. View the Tank. Add the experimental goldfish

Object: On the floor of the tank in front of the left hand rock. Very small. Move the fish to it to collect it.
Hint: move the fish around the tank, avoid fish with '!' as they will eat you. Avoid falling debris as it will stun you. Eat the other fish to grow bigger. Once you reach Level 10 and are big enough you can eat the large fish that appears along the bottom.
You receive a 'key'.
Tap to view the door on the far left of the room. Use the key to open the lock.
Go through and enter the Ground floor
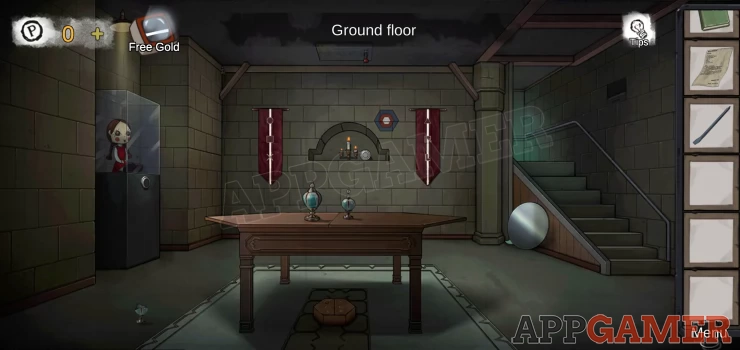
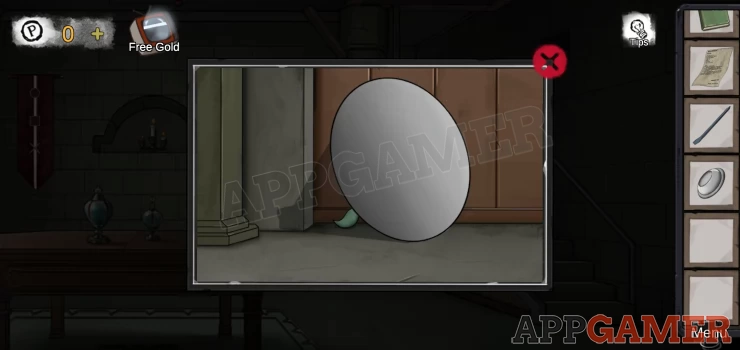
Object: on the floor on the bottom left.
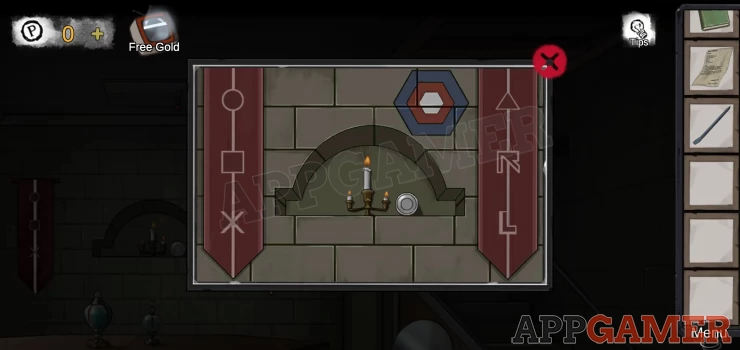
View the alcove at the back with the candles. Collect a round button.
Note the clues here.
Now tap on the round object on the right next to the stairs.
Collect the 'Frosted Mirror' and the 'Half Inlay'.
Then view the puzzle on the wall.

Add the round button to start.
Hint: Tap the buttons to change the numbers and colors of those around them.
Solution: follow the clue on the wall with the candles. Blue on the outside, red next and white in the center.
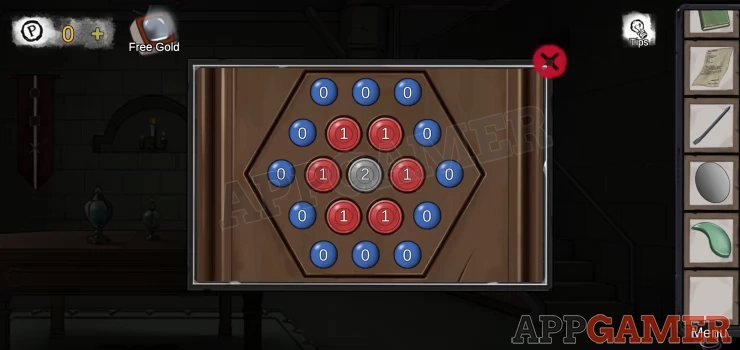
Collect a 'Circle'
Tap to view a box under the table in the room.
Add the circle to it to start the puzzle.
Hint: tap pairs of shapes to swap them. Follow a clue found above.
Solution: The pattern to follow is on the banners on the wall with the candles. It will vary for each gameShow
Collect 'Direction Button'
Now tap on the table top to find another puzzle.
Add the Direction buttons to start.
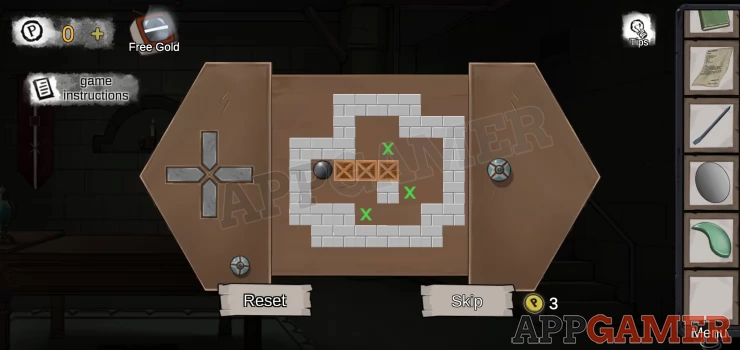
Hint: use the buttons to move the round ball. You can push the boxes
Solution: Move the 3 boxes to cover the spots with the X's
There are 3 levels that vary from game to game.
Collect a 'Cell door key'
Now back out and head to the Cells.
View the cell to the left of the central pillar and use the key to unlock the door.
Collect another 'Half inlay' and note the third letter clue.
Go all the way back to the 'Ground floor' room and view the case on the left with the doll in it.
Use the 2 halves of inlay on the circle
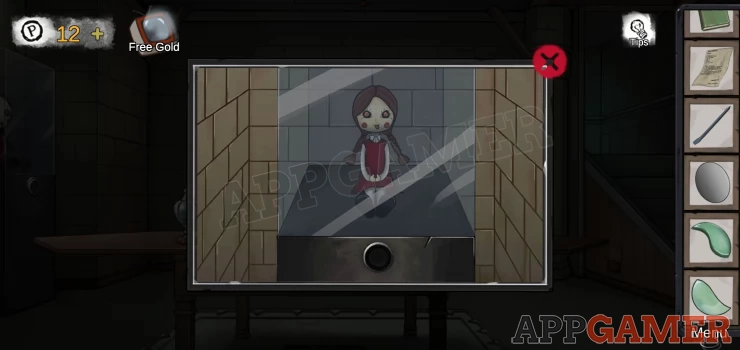
Collect the doll and you can now use the upside down power as before.
View the panel that is now on the floor.
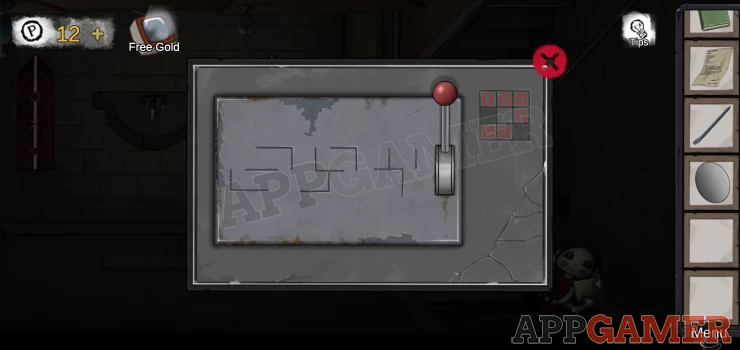
There is a clue in the squares on the top right.
Tap the lever to move the lines on the panel to form numbers. Tap it again to move the lines back. Note how they move and appear in both states. This is another clue.
Back out to the fish tank room and make it upside down.
View the box in the center of the room
This also has an arrangement of lines on it.
Hint: You cannot move these lines but they will operate the same way as the clues in the ground floor.
Solution: You need to mentally work out how the sections of each number will move and what number they will form when they do. Use this as the code for the combination.Show
Code : 7432Show
Collect 'Linoleum'
Now tap on the wall that is now below the fish tank, there is a lighter colored brick.
Use the crow bar on this to remove it and collect a 'Dagger props' and 'matches'
Now tap to view the 3 pictures that are on the walls (2 left, 1 right) for a clue. Take note of the items held and their directions.
Exit the room back up the pulley and go to the Cells. Make it upside down.
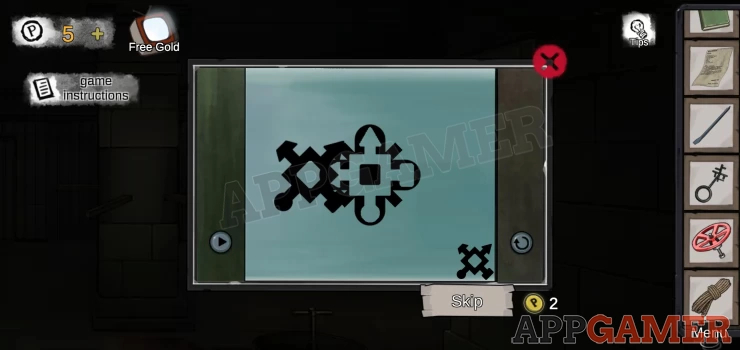
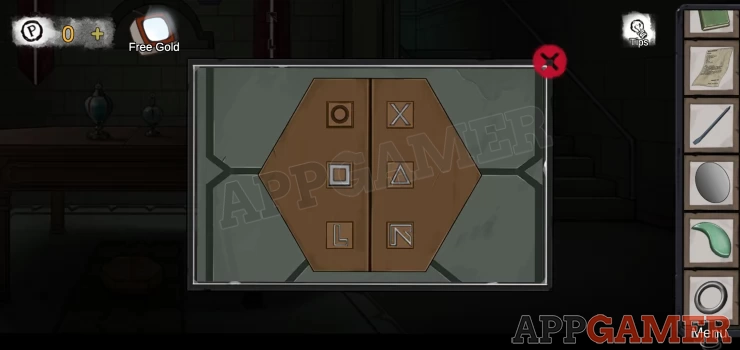
On the left below the cell doors is a lighter stone. View this

There is a puzzle with 4 shield shapes. Each with a weapon or item on it.
Rotate then to match a clue above.
Solution: Show
Collect a 'scrap of paper'.
Return to the ground floor. Upside down.
On the far right on the wall is a dark brick (or hole?) Tap on this.
This is a mini-game.
Add the dagger prop to start.

Hint: Balloons will drop down. move the dagger left and right to pop them. Bombs will also fall, you must avoid these. You need to pop the right number of red, blue and black balloons shown on the top left. The game gets faster as you proceed
It is very frustrating as the game tends to turn balloons into bombs at the last second. You must be very careful.
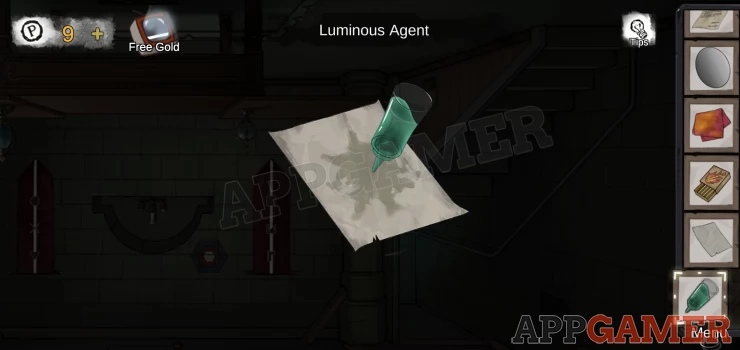
Once done you collect some 'Luminous Agent'
View the scrap of paper and add to it the luminous agent.
Then, in the room, tap to view the lamp that was above the doll case on the left (but is now on the ground).
Place the paper coated with luminous agent on this.
Collect it again, you now have Luminous paper.
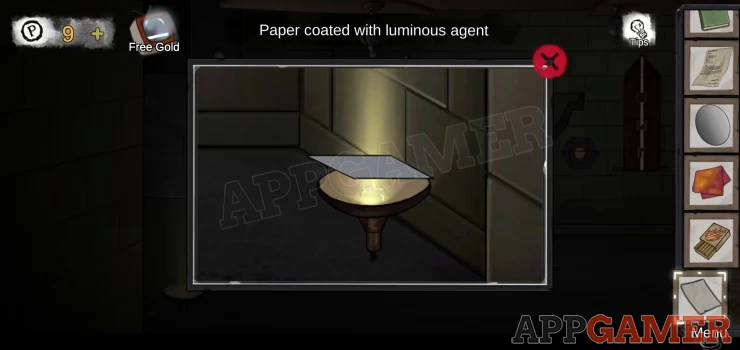
View it to see a clue.
Go back to the Assembly hall and make it upside down.
Now on the bottom left under the doorway is a panel to tap on.
This requires a 4 digit code.
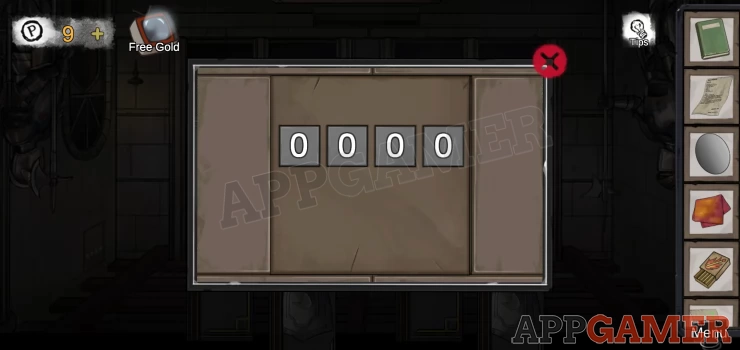
Hint: Check the luminous paper
Solution: The 4 numbers are on the paper but may be the wrong way up. It will vary for each game so check what yours says.
Collect 'Polishing Paste;
Combine the polishing paste with the frosted mirror to get a 'Mirror'
Now in the room there is a yellow object on the middle at the bottom. View this.
Tap it and it activates a beam.
To the right on the floor is a stain.
Use the Linoleum on this to wipe and reveal a clue.
Enter the cell room (upside down) and tap on the ground where you see some blue squares.
Note another letter clue bottom left.
We now need to set the switches on the top. These each have 3 positions, up, middle down.
Hint: The clue for this was next to the laser beam where we cleaned the floor.
Solution: Again a slightly odd one. There are 4 symbols on the clue. the first shows up, then the next 3 show middle. By trial we find that we can ignore the first switch and then set the other 4 according to this. This was my solution, but yours will vary.Show
Collect the 'Stone Fragments'
Next tap on the panel that is now low on the right of the room. You will see this arithmetic puzzle.
Add the matches to it.
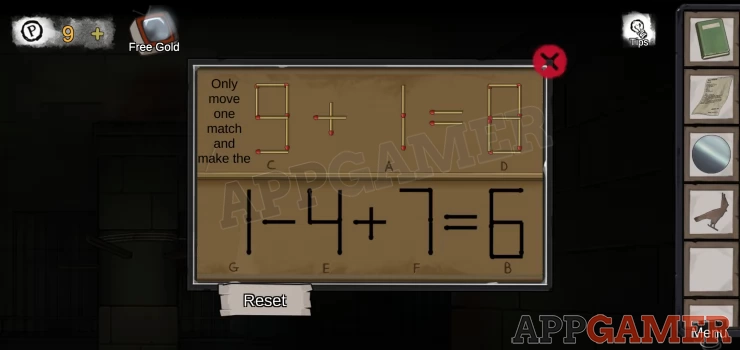
You then need to work out how to move 1 match from the top to make the sum correct.
Solution: Move a match from D over to C to turn it into 8+1 = 9Show
Next work out what move to make to make the second sum correct. You cannot move the pieces but work out what the numbers will be.
Solution: move the top bar from the 7 (F) and place it on the - sign between the 1 and the 4 to turn it into a +. Sum is then 1 + 4 + 1 = 6Show
This gives us then numbers for A, B, C, D, E and F which you need for the code entry.
As the placement of the letters can vary you will need to see which code you need.
Collect a Photo (chapter clue)
Return to the Alchemy House and make it upside down.
In the center you will see another yellow laser. Now pointing at the floor.
Tap to view it and then add the mirror to it to reflect the beam.
Go back to the courtyard. Tap on the base of the obelisk in the center to see a shape.
Add the stone fragment to it.
This opens the door in the center.
Go through to The Kings Throne
Make the room upside down.
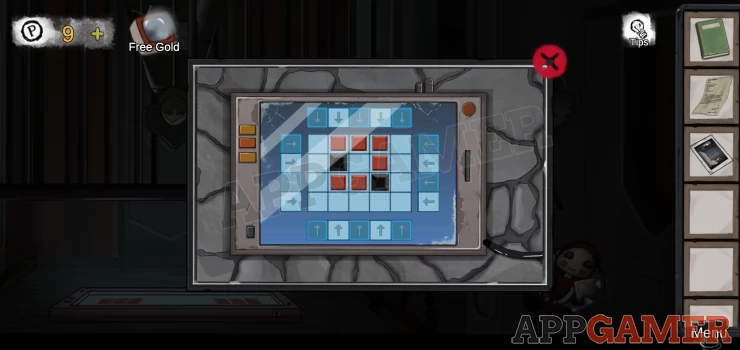
On the floor now is a blue panel. View this.
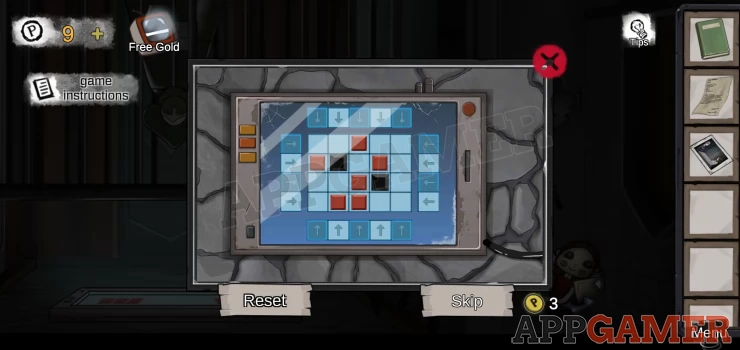
For this puzzle you need to move the blocks to form a pattern.
Hint: The black blocks are fixed, the arrows on the side will move all red blocks 1 square in that direction.
Solution: The pattern clue is in the Ground Floor roomShow
Once solved you will see 4 tiles with animal pictures.

These will be different each time.
Make the room the right way up.
Around the room are 4 animal heads.
Tap to view each one. They can all be moved in 4 directions.(up, down, left or right)
Solution: Move each into the positions shown on the tiles. This will vary for you. In my image I had to move. Deer: Up Bear: Right Lion: Down Bird: LeftShow
The bars lower.
Object: On the steps to the left.
Tap to view the front of the sarcophagus, there is a 5 letter code entry.
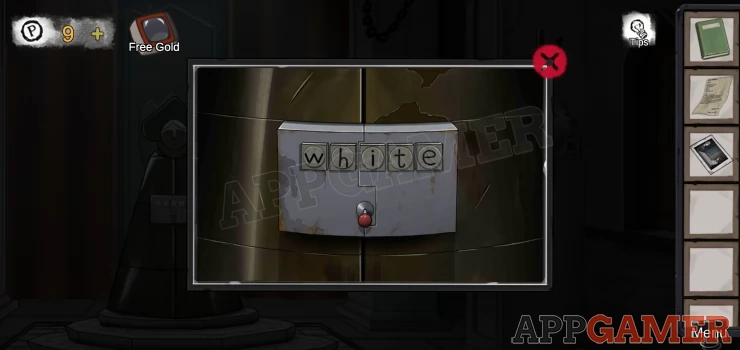
Hint: The red knob below can be moved in 4 directions. The 5 letters have been seen in clues.
Solution: Move the knob in the correct direction for W, then for h, then i etc.. The code will vary so you need to check the letter (in the cells and the assembly room) for yours. Remember to pay attention to the direction of the letters.Show
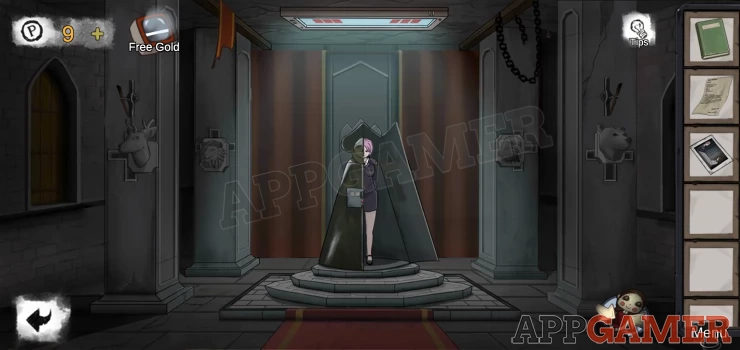
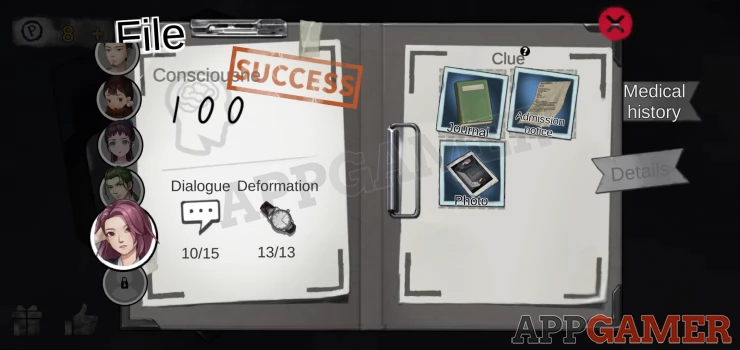
Inside is the patient. You can now talk to her an begin the dialogues.

To complete the chapter here are the best responses:
- Expose - Speculate - Reasoning - Grateful (Reasoning level 34) - Understand (Communication level 34)Show
This completes Patient 8 in Hospital Escape. There is 1 more to go. Proceed to Patient 9.
We have questions and answers related to this topic which may also help you: Show all