Chapter 7 - Mike - Part 2
More Hospital Escape - Room Escape Game
This is Part 2 of our guide to treating Patient 7 in Hospital Escape, Mike.
You have worked your way though most of the rooms of the big house and now found your way out into the garden.

Tap to view the garden table
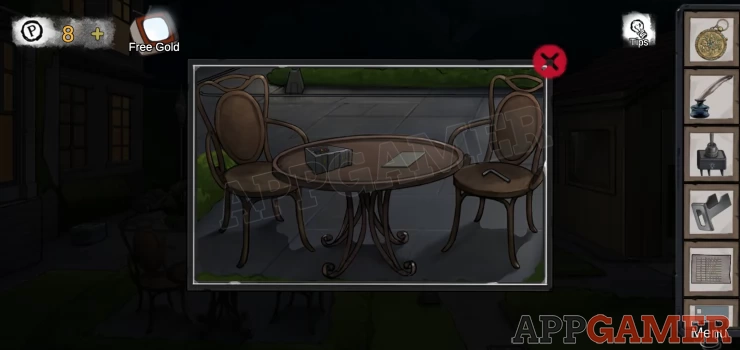
Collect a 'card filled with numbers' and a 'Shunt Box', then from the chair a 'hexagonal wrench'.
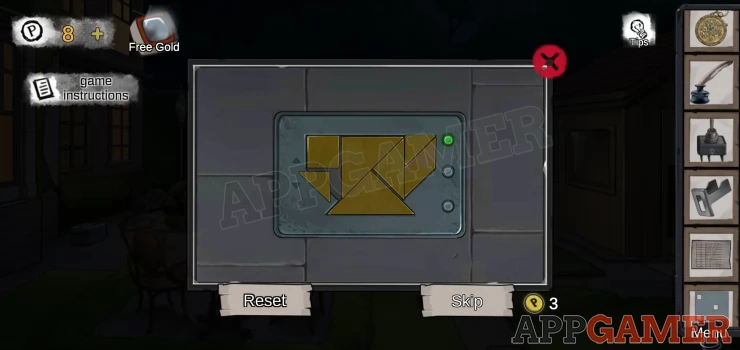
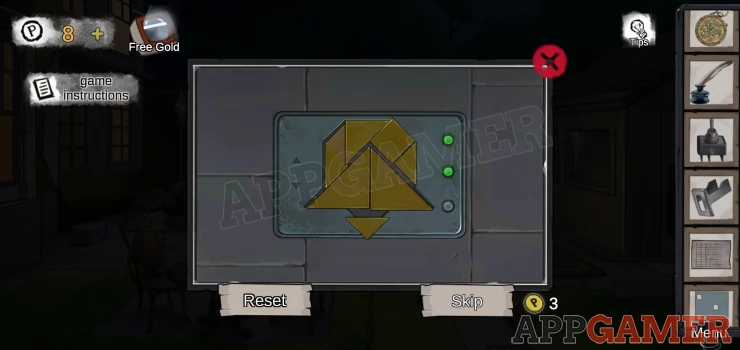
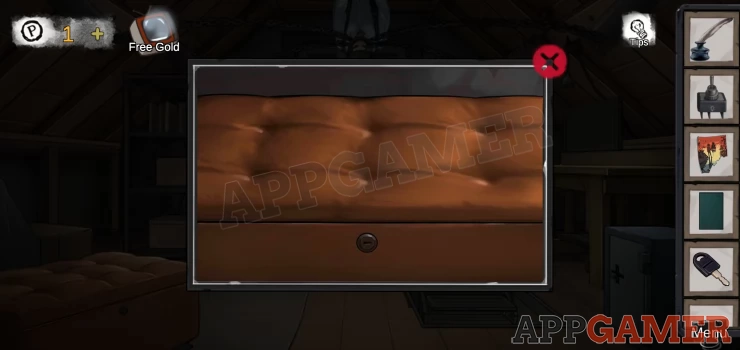
On the left near the window is a box on the ground. View this for another puzzle.
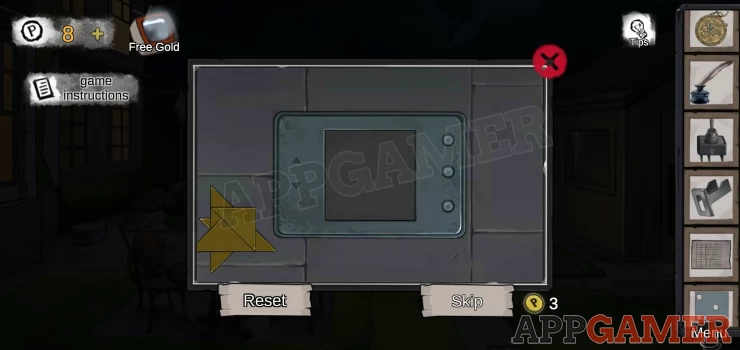
Place the shapes and arrange them to fit into the space on the box. There are 3 levels to complete.
1: Show

2: Show
3: Show
Collect a 'Red button'.
On the back right behind the Garage building is a flowerbed. View this
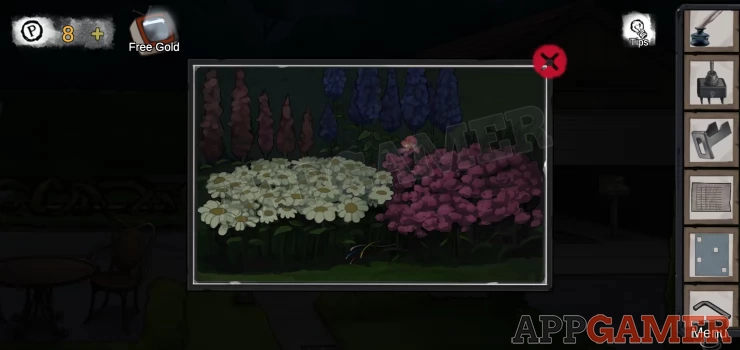
Object: Pink flower near the top.
Collect a cable from the below the flowers.
Now tap on the right to enter the Garage.
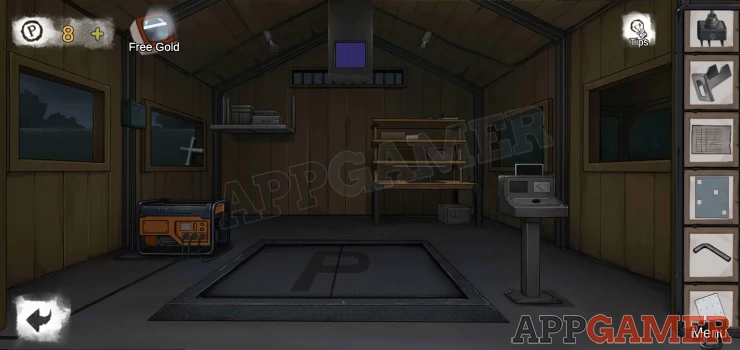
Object: on the window ledge on the left.
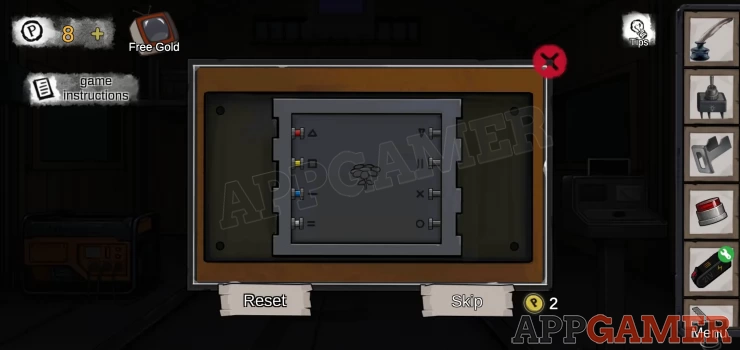
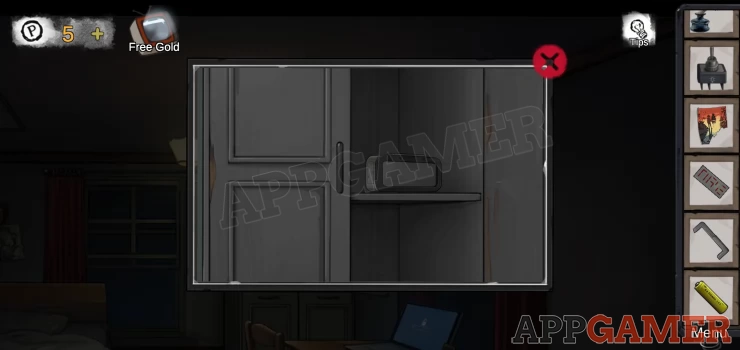
View the shelf on the back left to find a tool box with a combination lock.

Hint: You have a card of numbers and moreShow
Solution: View the 'card filled with numbers' and then add to it the Perforated plastic sheet to reveal 4.Show
Code: 9418Show
Collect a battery case.
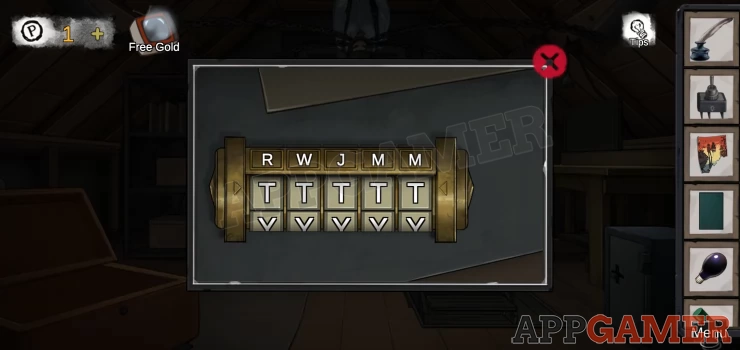
On the lower right under the shelves is another locked box. View this to see the keypad.
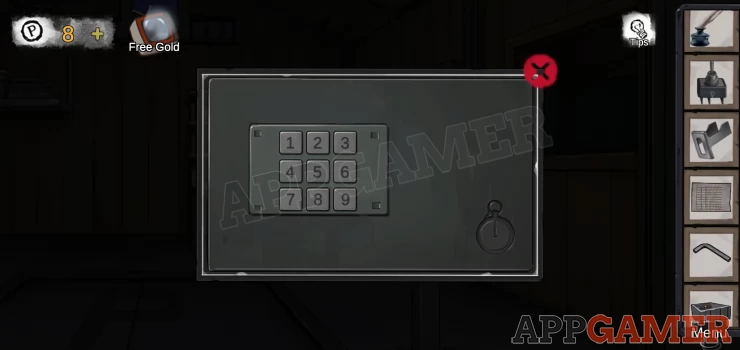
Hint: Note the pocket watch symbol on it.
Solution: - View the watch in your inventory and press the button on the side to open it. Then tap it again to begin a sequence. Each time you press you will get 5 different sequences. - Notice that the hand sweeps either short (dot) or long (dash). This gives you 5 codes. - Check your inventory for the 'Password Paper' This will let you translate the codes into numbers.Show
Code: 67373Show
Collect a Saw Blade
Now view the Yellow generator on the left of the garage.
Use the hex wrench to open the panel.
Add the 'Shunt box' to it, and then the 'Wires'.
You now need to connect the wires correctly.
Hint: There was a clue inside the living room.
Solution: The solution will vary for each game. Check the clue on the wall by the deer head to get you started. Then try the remaining combinations.Show
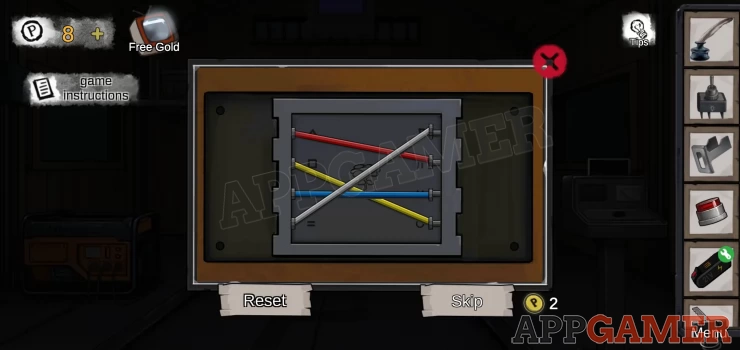
Once done there is power to the garage.
View the control panel on the right of the garage. Add the Red Button
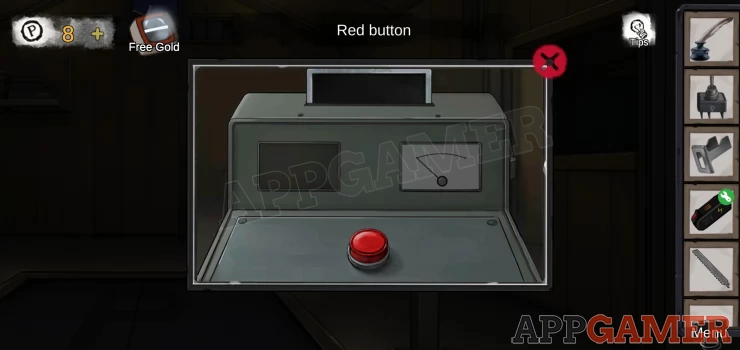
Collectfrom the top the 'Touchpad'
Press the red button. The Yellow Flash Beetle appears.
Tap to open the bonnet / hood of the car. Then view the engine.
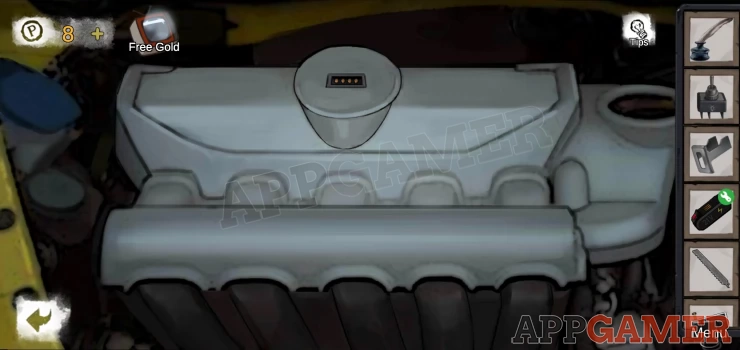
Connect the touchpad to the socket at the top for a puzzle.
Hint: tap the connected pairs of yellow nodes. to activate them all.
Solution: I think this one is always the same so hopefully the solution is: 1-4, 2-2, 3-1, 4-5, 5-3Show
Once done collect the Triangle block.
You now need to go back into the house (through the window) and down to the basement.
On a shelf on the bottom right is a yellow case.
View this and add the triangle block to the lid to open it.
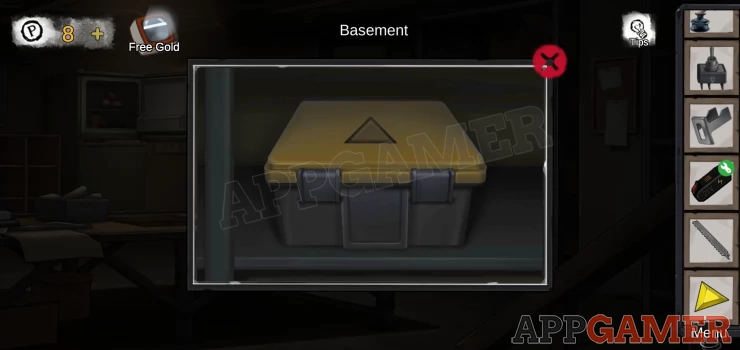
Collect a Hand Saw Motor.
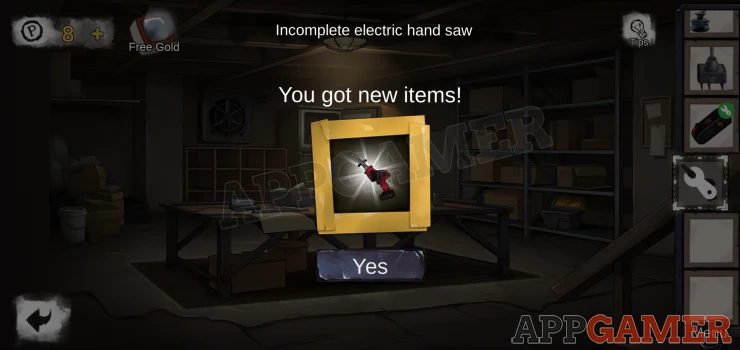
Combine the hand saw motor with the saw blade and the metal parts.
This gives you the 'Incomplete electric hand saw'
Now combine the battery case with the incomplete hand saw to make the 'Electric Hand Saw'
Go back out to the garden and into the Garage.
Tap on the top shelf on the back right to view a power outlet.
Add the hand saw to the charger cable to plug it in.
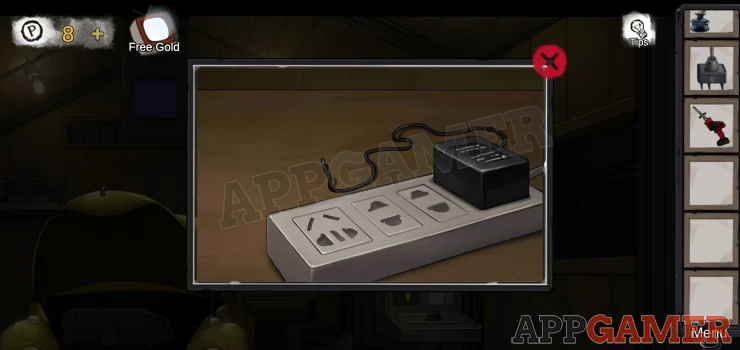
After a few seconds you can collect it again.
Go back to the garden and tap to view the twisted vines on the back left that are covering a ladder.
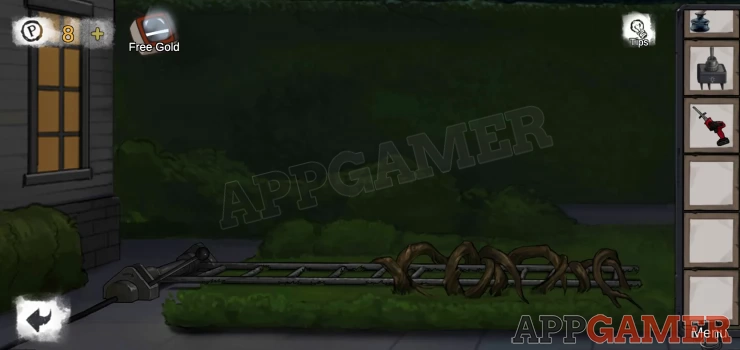
Use the hand saw on this to clear away the vines.
Tap the lever on the left to raise the ladder.
You can now access the Second bedroom.
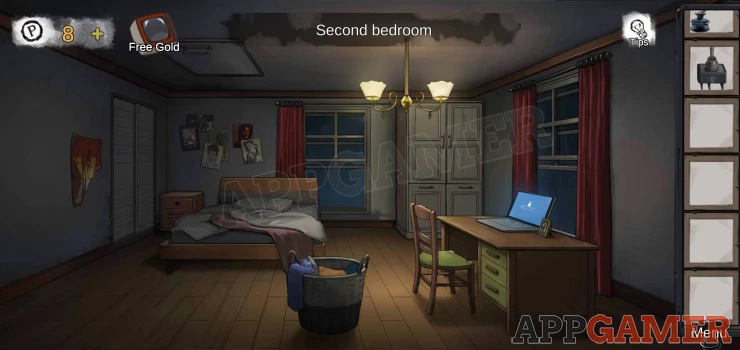
View the clothes basket in front and collect a 'round ball' and a 'long handle'.
There is a torn poster on the left wall, tap to collect this
View the large cupboard on the right of the room and open it to collect an 'alarm clock'.
Next view the small brown bedside unit on the back left.
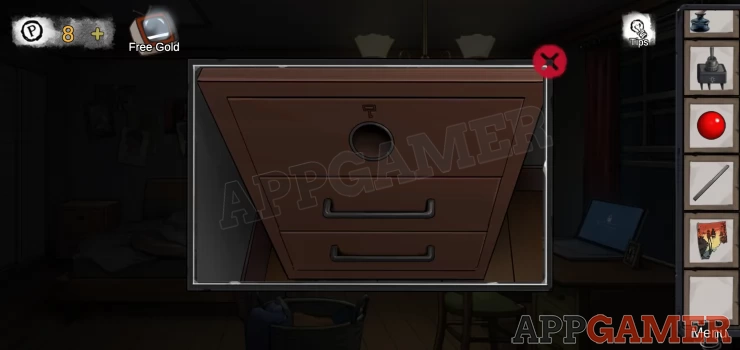
Add the ball to the hole at the top to open the top drawer.
Collect a screwdriver.
Object: Open the second drawers to find it.
Exit through the window to the garden and tap to view the drain on the lower right.
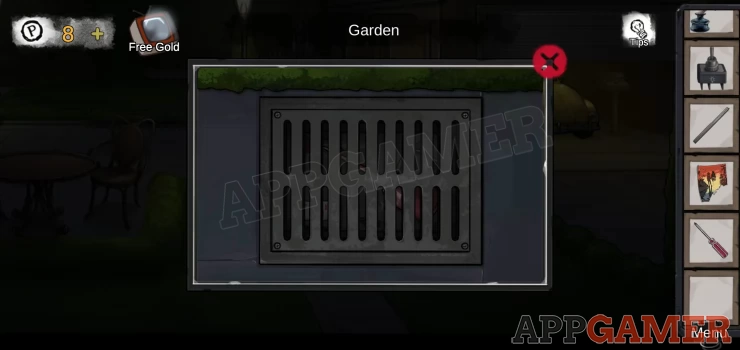
Use the screwdriver to open this and collect an 'Oil Can' and a 'Cue Board'
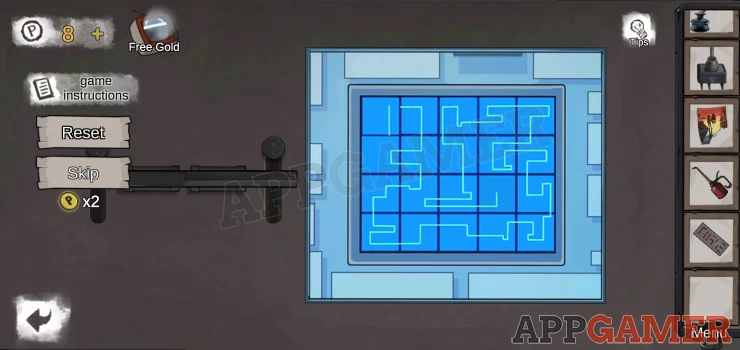
Enter the Garage again and view the workbench on the back right to find a puzzle with a blue screen.
Add the 'long handle' to the clips on the left to start.
Hint: rotate the squares to make the line connect fully.
Solution: Show
There is then a second puzzle.
Hint: slide the squares around again to make a fully connected line.
Solution: Show
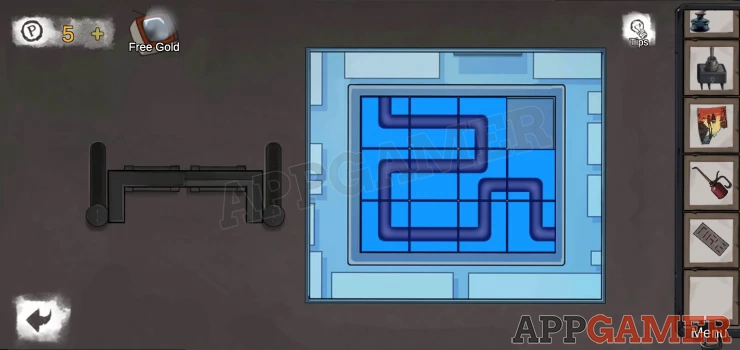
Once done you can collect the 'Twist Long Handle'.
Go back up to the second bedroom and view the cupboard on the left.
There is a clue written on the door. The door is stuck.
Use the oil can on the door and you can open it
Collect a 'Battery'.
Now view the alarm clock in your inventory and add the battery to the panel on the side.
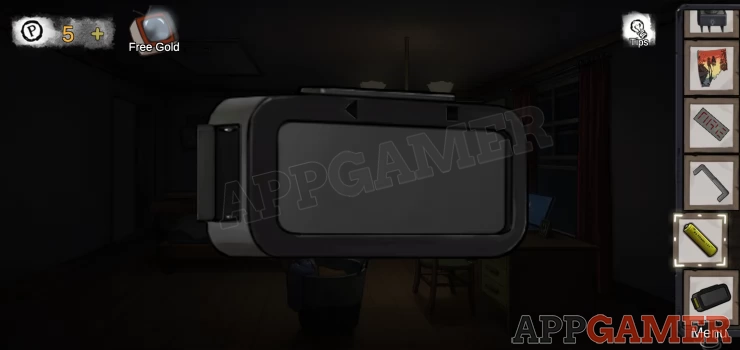
Then add the twist long handle to the top.
It will now display some segments.
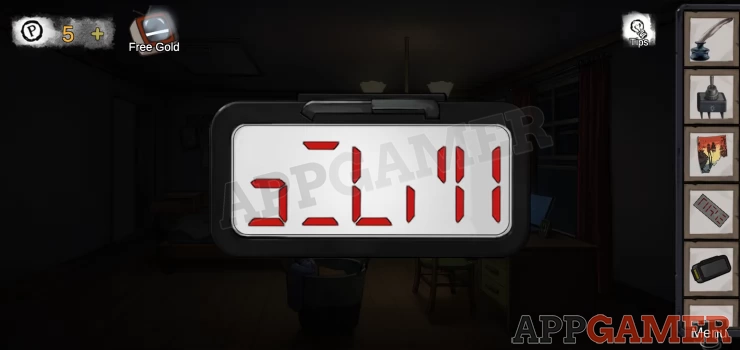
Add the cue board and position it to see a number code.
Show
View the laptop on the desk.
First tap on the photo for a clue.
Then unlock the laptop with the pass code
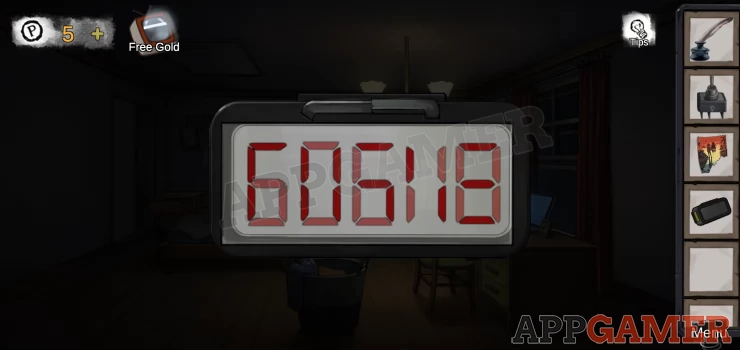
Solution: The code from the alarm clock.Show
Code: 606118Show
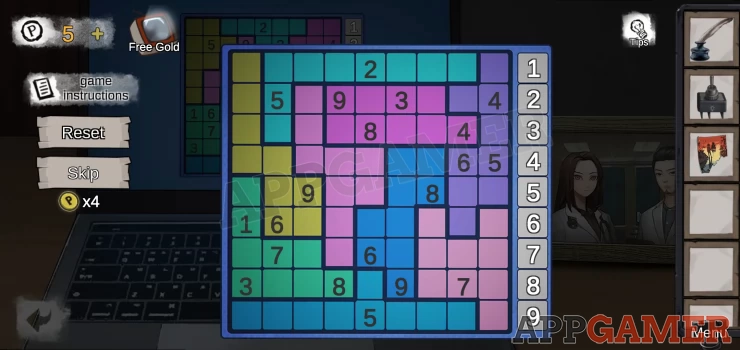
You now find a Sudoku style puzzle to complete.
This varies with each game so you will need to complete it yourself.
Once done you will see a line pattern on the screen. Remember this.
Show

Tap to view the drawers on the side of the desk and open the second one to find a diary. This is another Chapter clue.

Go back out and into the Living Room.
Tap to view the fire place.
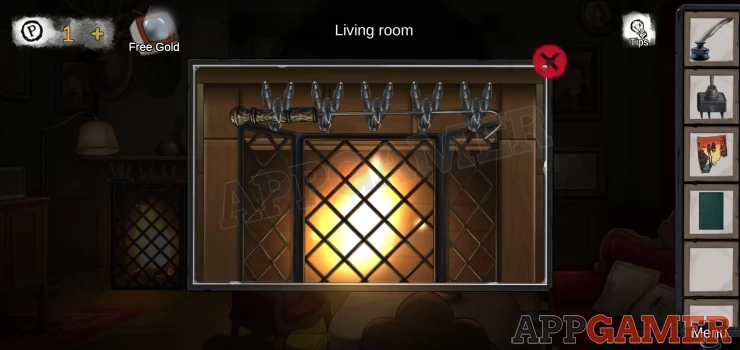
There is a hook above held on to by some strange claws.
Hint: Tap each claw to change how many fingers are holding on. Use a pattern found above as a clue.
Solution: Follow the pattern from the laptop screenShow
Collect the 'Long Handle Hook'
Back up to the second bedroom and use the hook on the loft hatch above the bed.
Go up into the Attic
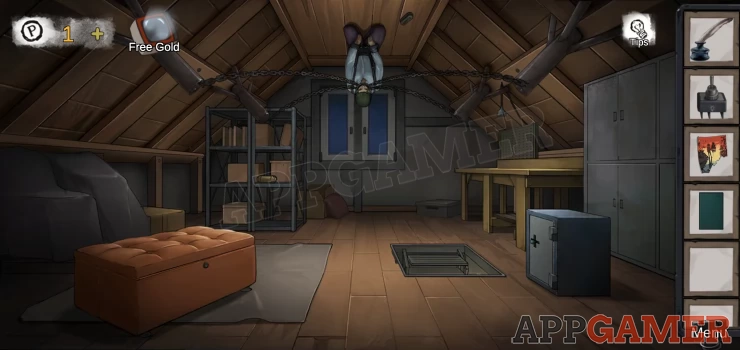
You find the Patient
Tap to view the table on the right.
Collect a crank

Go back down to the bedroom and tap the base of the bed to view it.
Use the crank on the protruding spindle. This raises the bed.
Collect a key.
Go back up to the attic and tap on the orange box on the left.
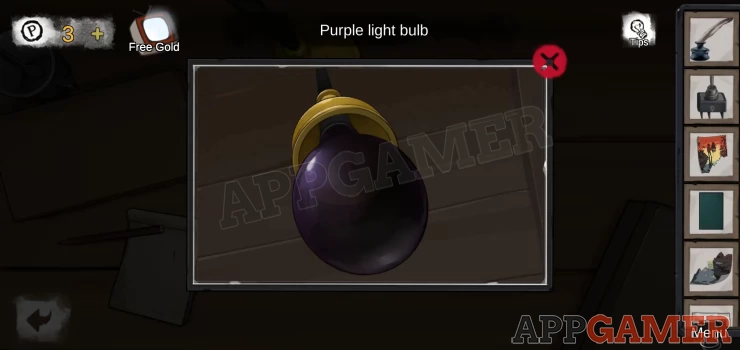
Use the key to open it and collect a 'Purple light bulb' and 'Adhesive remover'
Object: The item on the left.
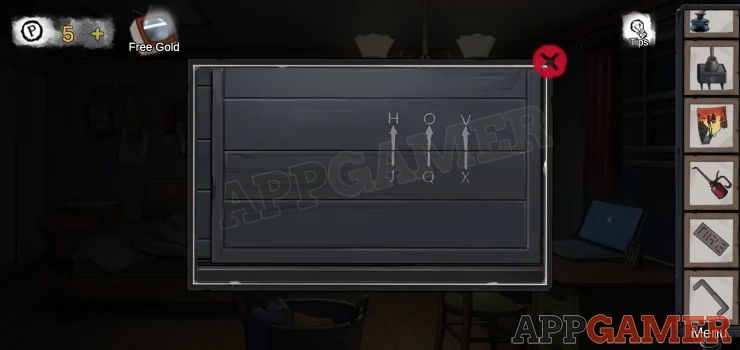
Next tap on the shelves on the left to find a puzzle cylinder.
Hint: translate the 5 letter on the top to new letters using the clue from the cupboard door below.
Solution: TYLOOShow
Collect the 'Five-pointed star fast'
You now need to go back down to the garden, into the house and then up the stairs to the second floor landing.
On the floor on the lower left is a puzzle box. View this
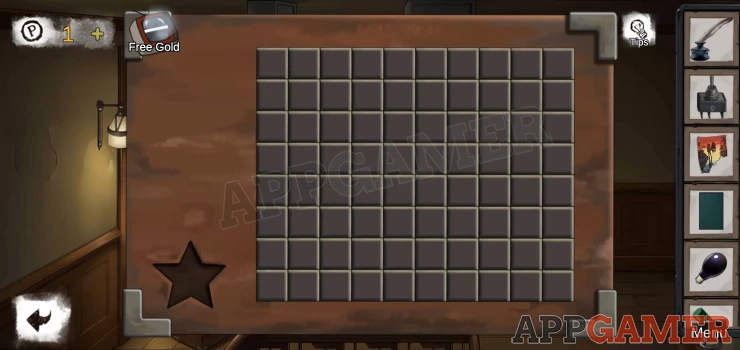
Add the star to it to start. Solve the puzzle.
Hint: You need to find numbers that give clues to the number and position of squares to light up in each row or column. The orientation of the number tells you if it specifies a horizontal row or vertical column. There also seems to need to be a symmetry to the solution
Solution: This pattern worked to solve the puzzle.Show
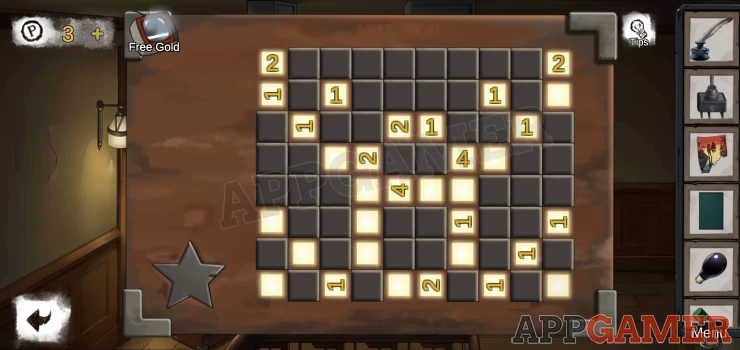
Collect the 'Poster Fragment'
Now go back down to the hall and exit to the front of the house.
View the front door again.
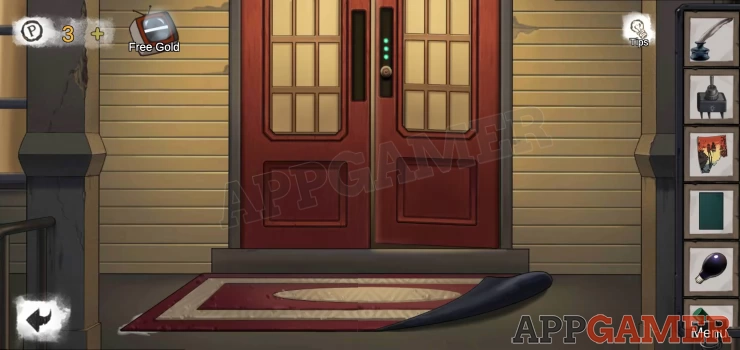
The left front of the door mat is stuck down. Use the Adhesive removed to un-stick this.
You can then lift it and collect a Report (chapter clue)
Go back through the house and up to the attic.
View the table on the right again.
Add the purple light bulb to the yellow lamp.
Place the 2 parts of the poster on the table where the mark is.
Add the metal switch to the lamp and turn it on.
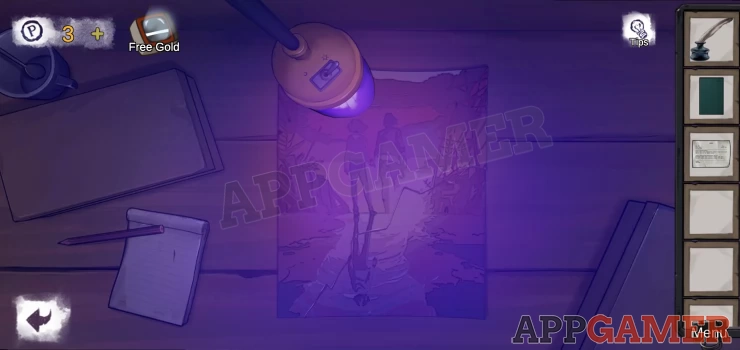
Then use the 'visible potion' on the poster to reveal some arrows.
Show
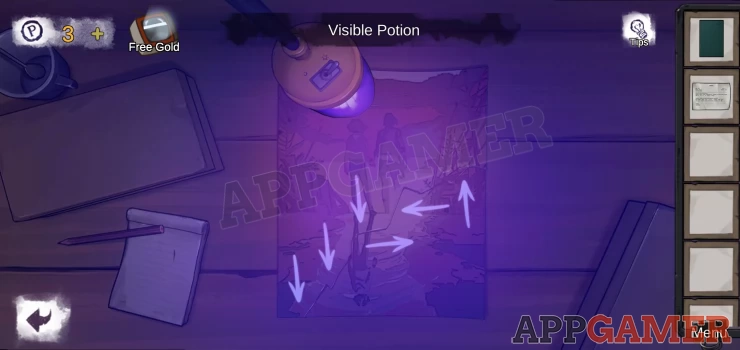
View the safe on the right of the attic. It has a joystick entry.
Hint: follow the arrows to move the joystick in the right sequence to open the safe.
Inside is a Doll. Collect it.
Then view the doll from your inventory.
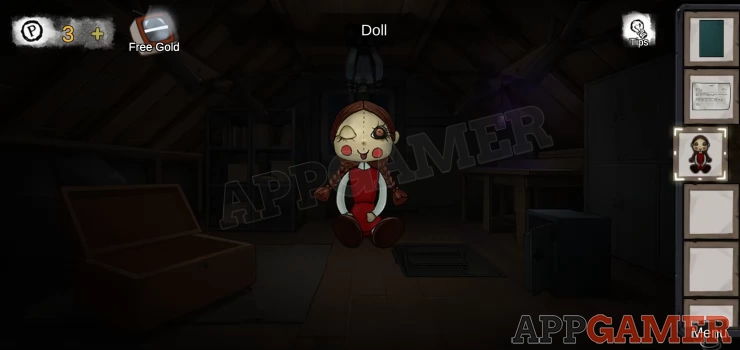
Hint: There is a dotted line down the middle. The left and right sides are not the same.
Solution: Toggle the Eye, hair, ear, arm, foot and cheek on the left to make them match.Show
Once done you collect the doll and can now use it to flip the rooms as in previous chapters.
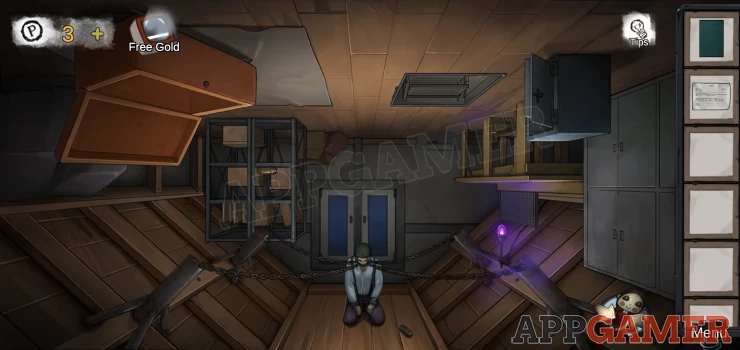
You can now access the patient, but not help them yet.
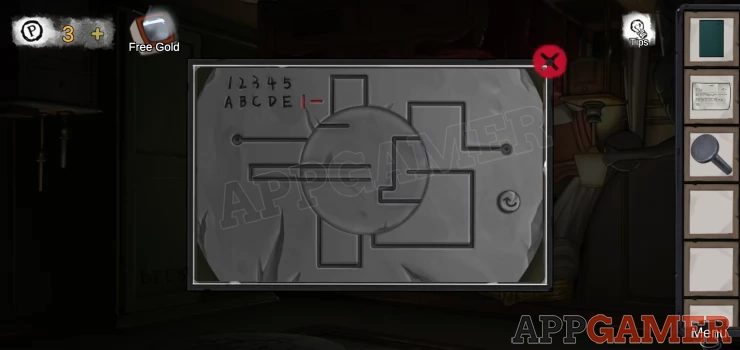
Tap the post holding the chain on the near left. There is a puzzle.
Hint: Connect the dots in one line without repeating any lines. You can reuse nodes.
Once done the box opens and you can see a clue.
Collect the 'Round Buttons'
Now make your way back to the master bedroom (Via the garden).
Make it upside down.
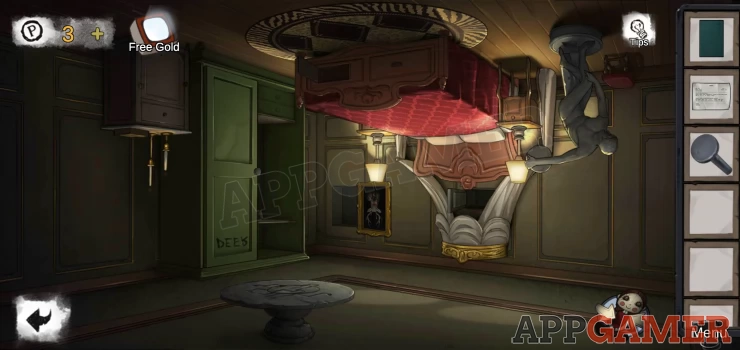
On the floor now is a round table, view this.
There is a clue in the top left.
Place the round button on the left of the puzzle to begin.
Hint: The center circle is rotated by the button on the right. You need to move the round button over to the exit on the right side of the table. Move it in and out of the circle to get it to the right place to exit.
You will need to use all of the internal and external tracks to make the transition.
Once done collect the 'small ball'.
Exit out to the Garage and make it upside down.
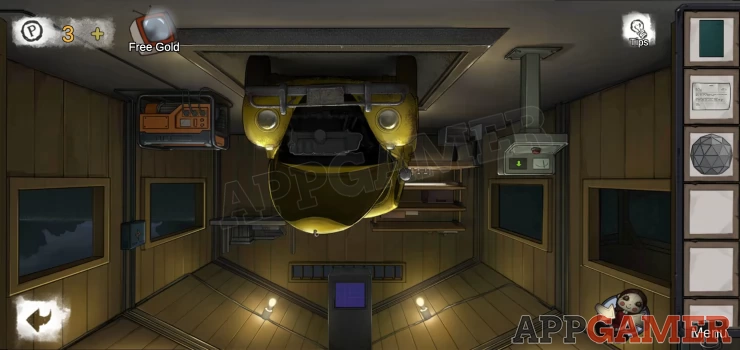
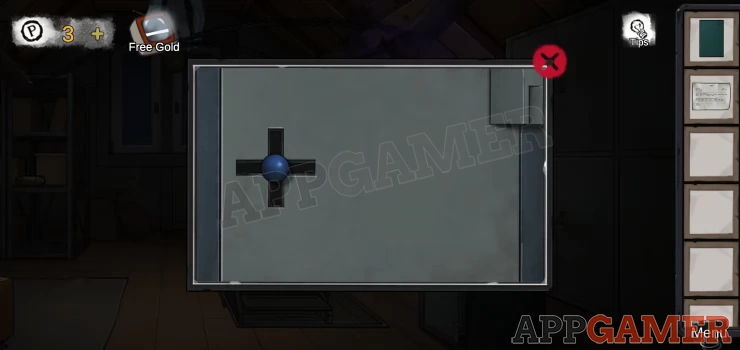
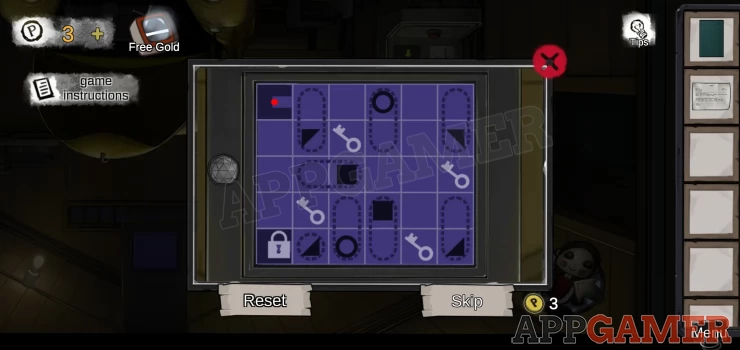
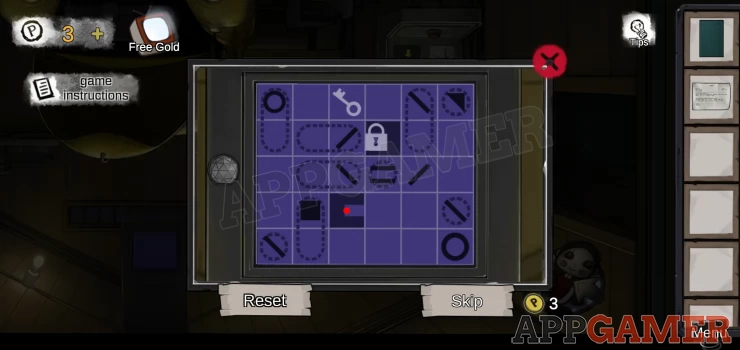
Tap the purple display on the ground now and then add the small ball to the socket on the left to start a puzzle game.
In this puzzle you need to move and arrange (rotate) the items on the board. When you tap the red dot it will launch from it starting point and it needs to be directed around the board, it must pass through all 'key' icons and end up in the other u shape ending point. Angle will reflect it. Circles will act as portals and the red dot will enter one and exit the other in the same direction.
There are 3 levels to complete.
Solutions: adjust the blocks as below
1: Show
2: Show
3: Show
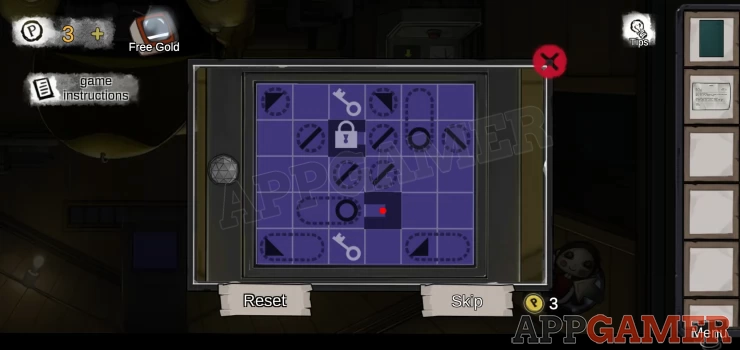
Once done you will collect a 'Stone Eyes'.
Go back to the second floor landing - make it upside down.
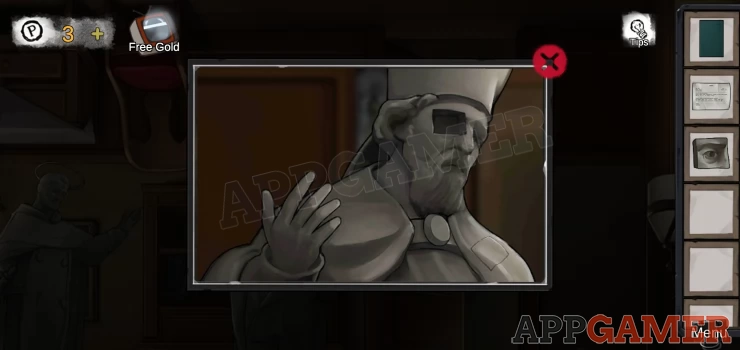
You can now tap on the plinths of the 2 statues to see clues. One has Letters and the other has numbers and letters. One of them will be different for you.
View the head of the statue on the right. Add the stone eye. You will get a button.
Now view the lower hand of the statue on the left.
Add the button, you will get the 'Reel' (scroll)
Now view the head of the one on the right again and place the 'reel' in the hand. A panel will open. Collect the Sun badge.
View the head on the left and add the sun badge to the forehead.
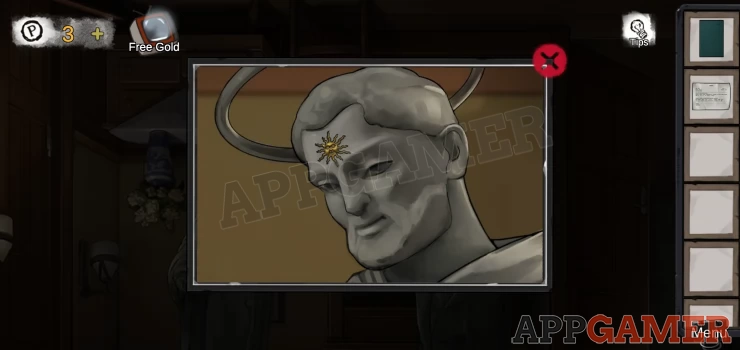
Return to the Attic - upside down.
The patient now has a symbol over his head.
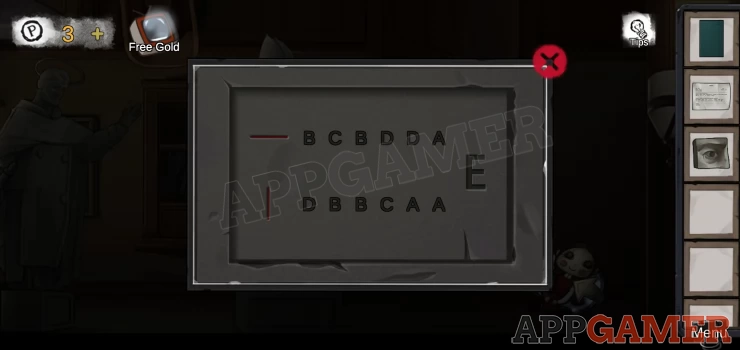
Tap the box on the ground in front of the patient to see a code entry.
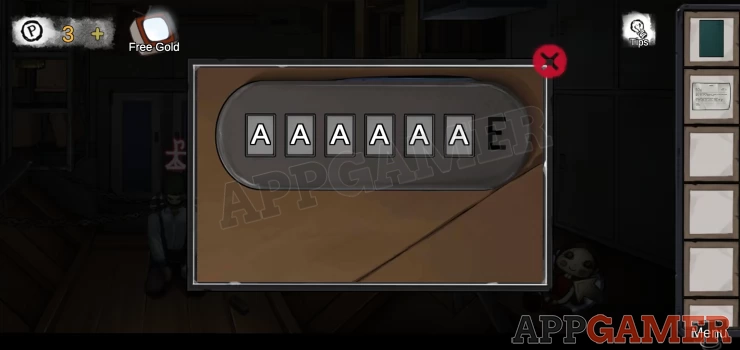
Hint: the code must be gained from the clues on the 2 plinths of the upside down statues.
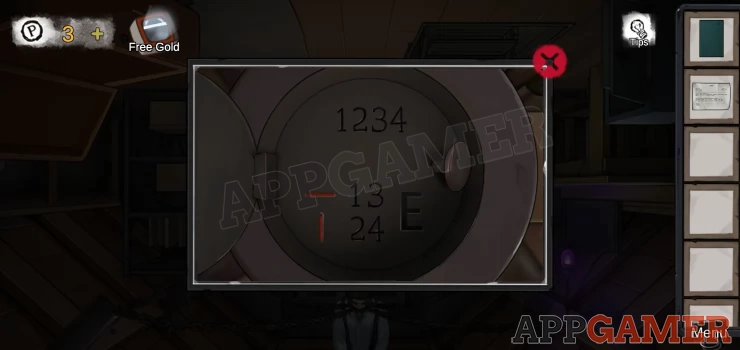
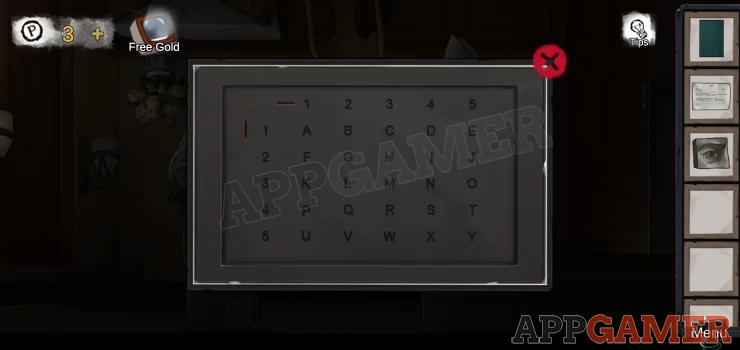
Solution: The code is different every time. To work it out first look at the right plinth that has pair of letters. (one above the other. A,B,C,D or E. These correspond to the numbers 1,2,3,4 or 5.
e.g. from my image the first pair, B D, would give you coordinates. 2, 4
Then look at the other plinth. The co-ordinates 2,4 will give you the letter Q
Get the 6 letters for your code and enter it in the box in the attic.
Collect the Photo (Chapter clue)
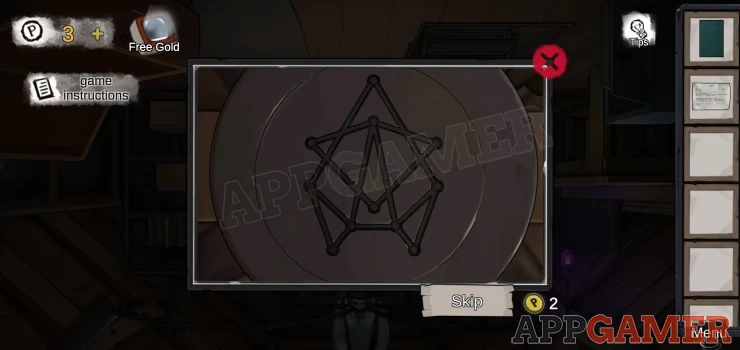
Now tap to view the patient.
There is a red symbol over his head and 6 others floating.
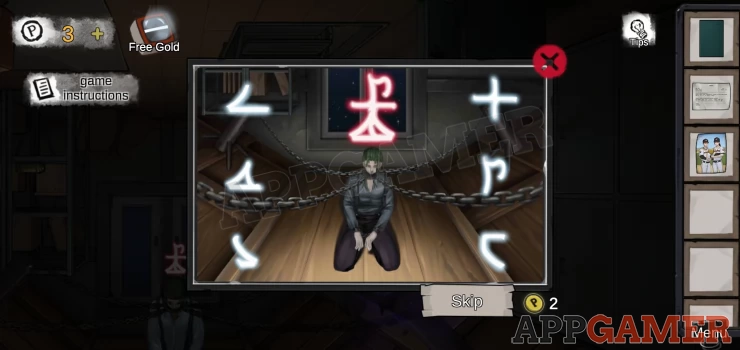
Solution: Drag the 6 floating symbols to the red one to overlay and match sections.Show
The chains will be released and you can now talk to the patient and begin the dialogues.
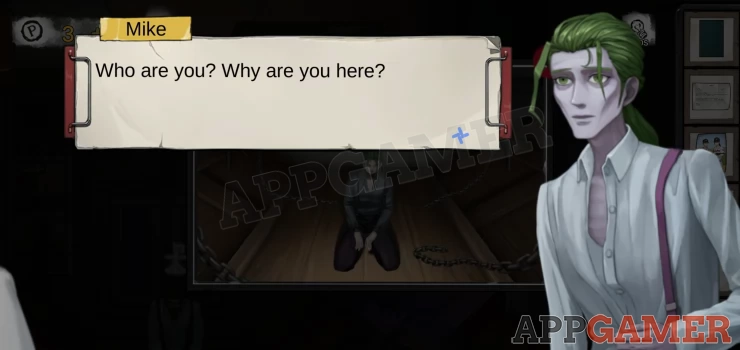
The suitable choices to make for success are:
- Inquiry (Reasoning Level 30) - Negative - Sympathy (Communication level 30) - Guilty will also bring success, but not score 100. - Questioning - Denial - Extrapolation (Reasoning Level 30) - Discipline (Observation level 26)Show
That completes the treatment of Patient 7, You can arrange your schedule and sleep until you encounter Patient 8
We have questions and answers related to this topic which may also help you: Show all