3D Escape Room Detective Story Chapter 5 Walkthrough
More 3D Escape Room Detective Story
This is a walkthrough guide for chapter 5 of 3D Escape Room Detective Story. In Chapter 4 we explored a train carriage and discovered many unusual puzzles in mind bending places. Now in the final chapter we have been summoned to a light house on Greenwich Pier to find the answer to the mystery.
3D Escape Room Detective Story Chapter 5 Walkthrough
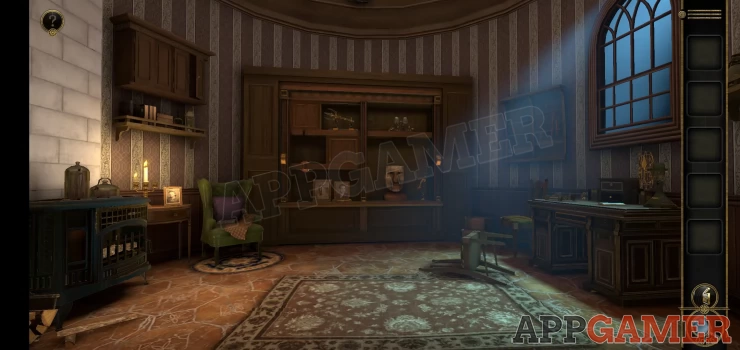
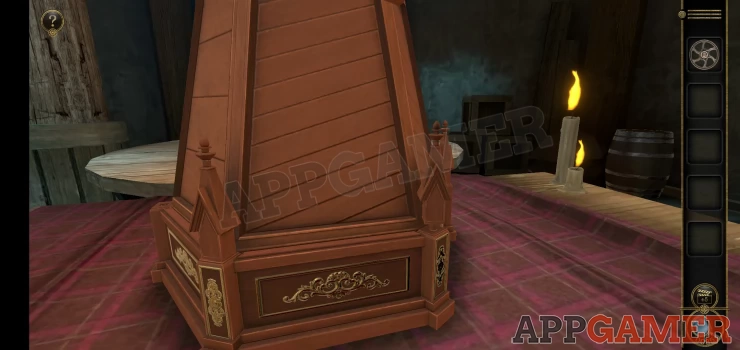
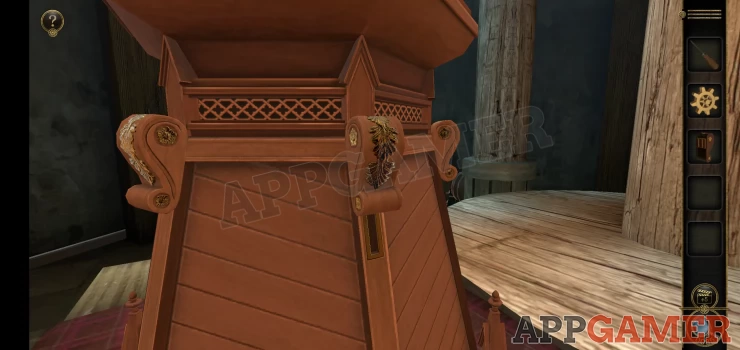
First view the shelves on the far side of the room.
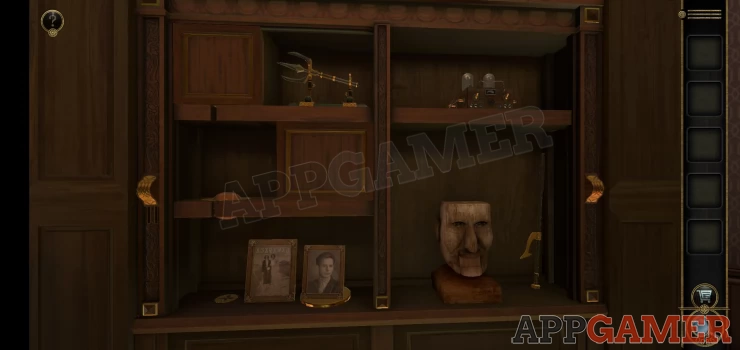
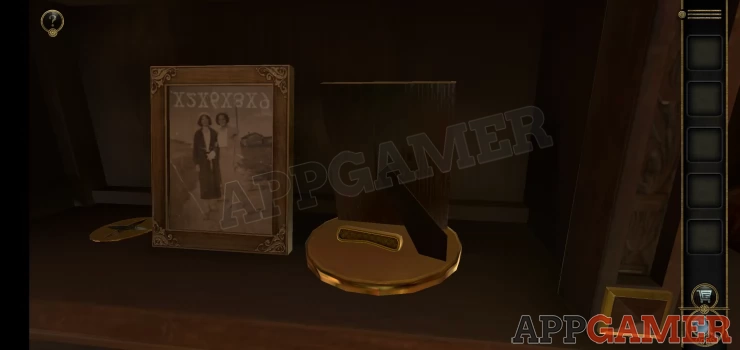
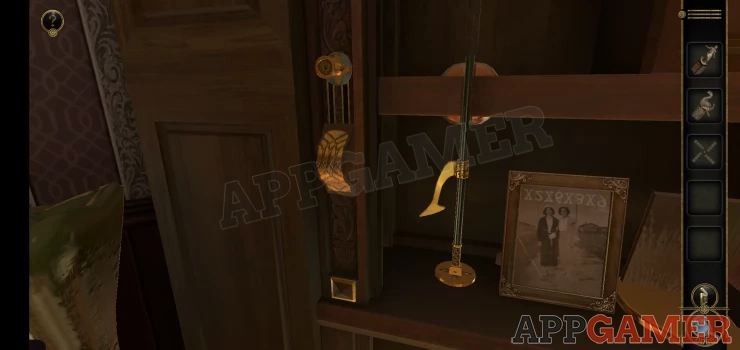
View the photos on the lower left, notice a clue written on the left one and then turn the right one around to collect a Drawer handle.
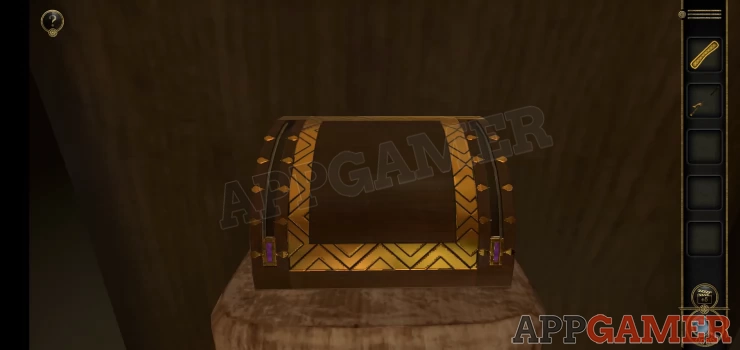
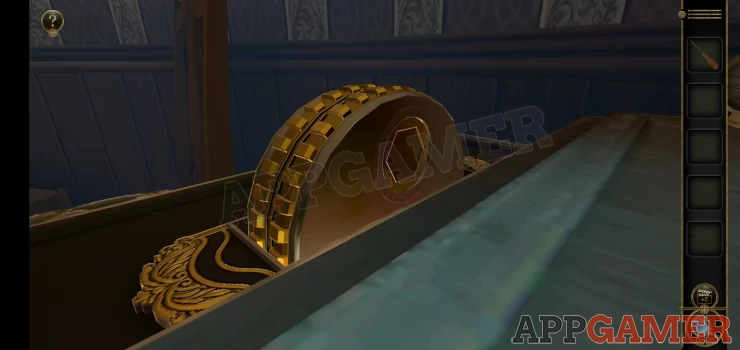
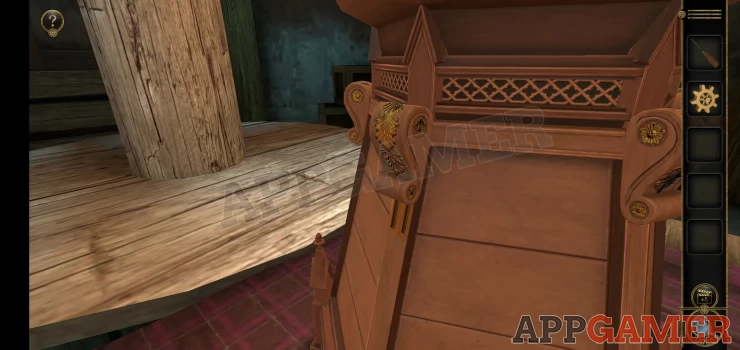
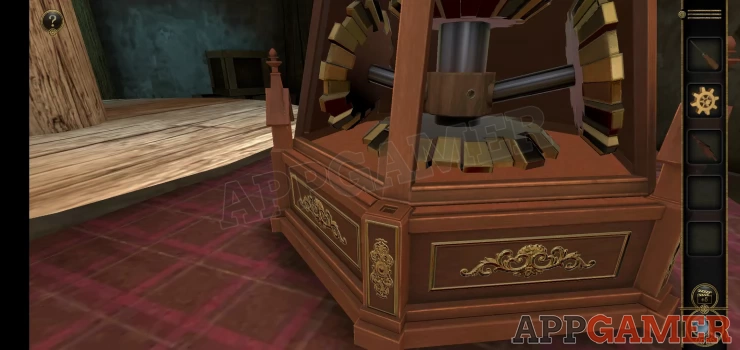
Next collect a 'Metal Rod from the lower right shelf and then view the Head that is there.
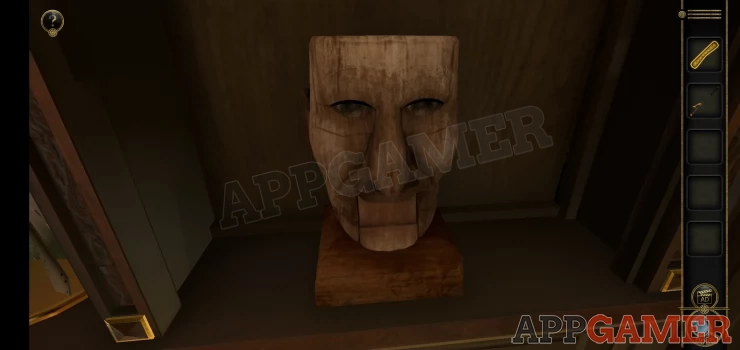
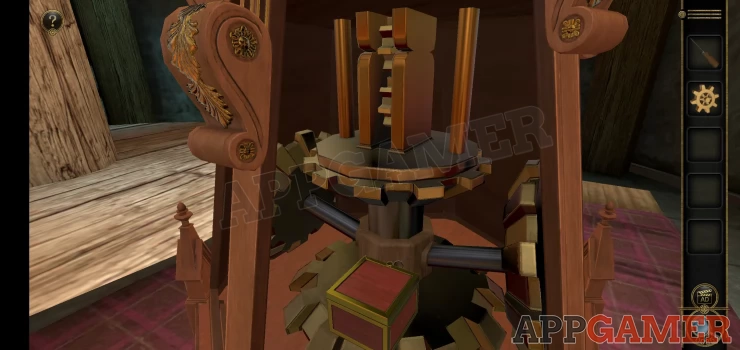
Head Puzzle
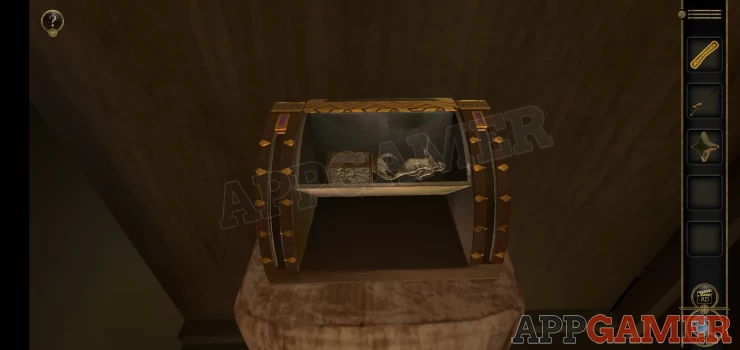
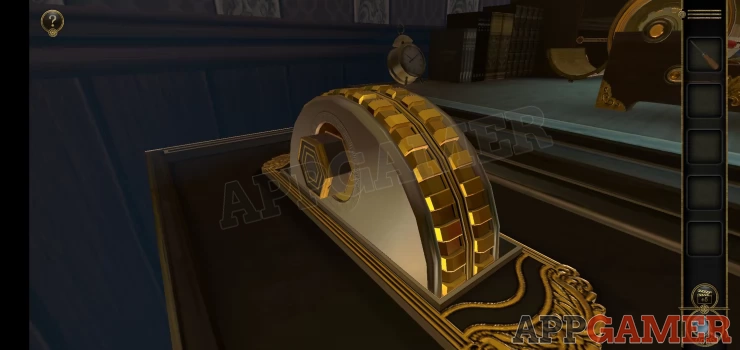
- Open the mouth and a puzzle box will appear on top.
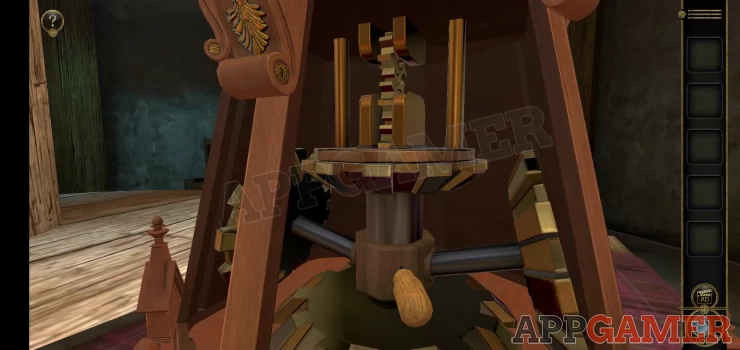
- To open this fist drag the right side slider to the bottom and then the left side slider, then drag down the left side again and then the right.
- Collect the Star shaped device from the bottom section.
- Next drag the right slider to the 2nd mark down and then the left slider to the bottom.
- This will open a top compartment.
- Collect a Mermaid Statue.
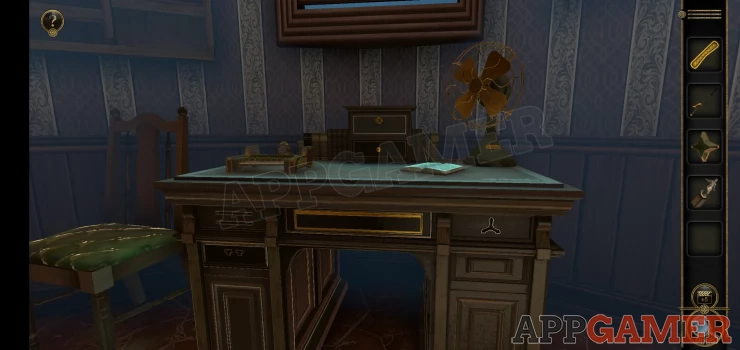
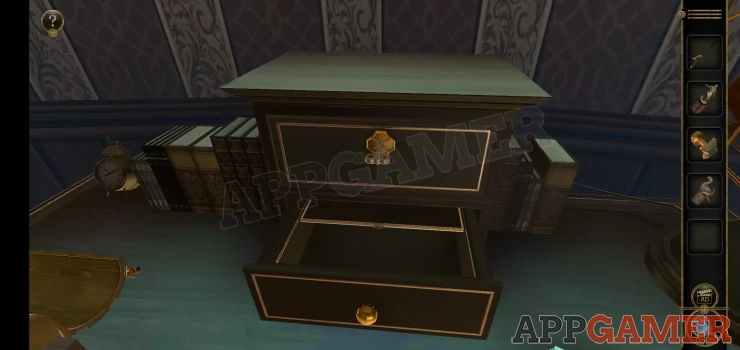
Now back up and view the desk on the right of the room.
Look at the lower drawer on the left and add the handle to it to open the drawer.
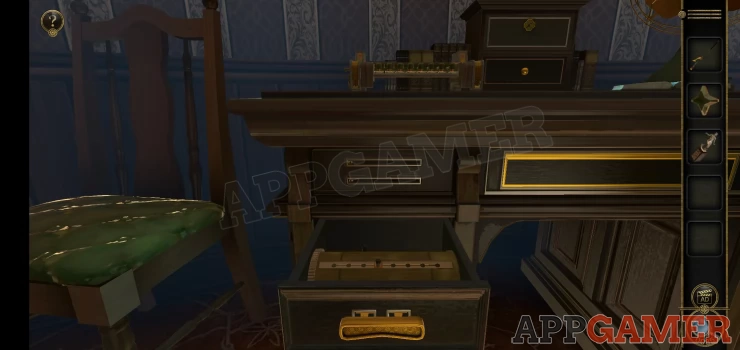
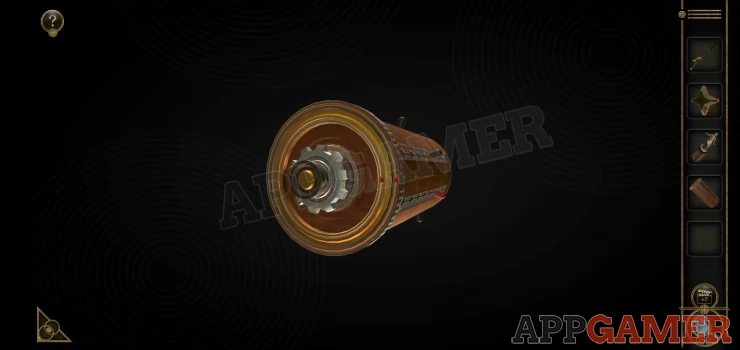
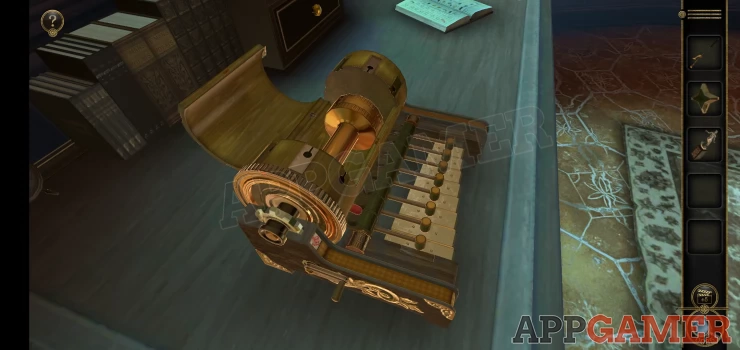
Collect the Music box cylinder from inside and then view this item in your inventory.
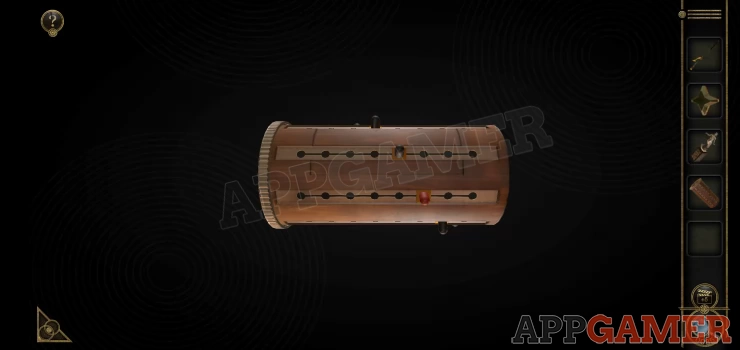
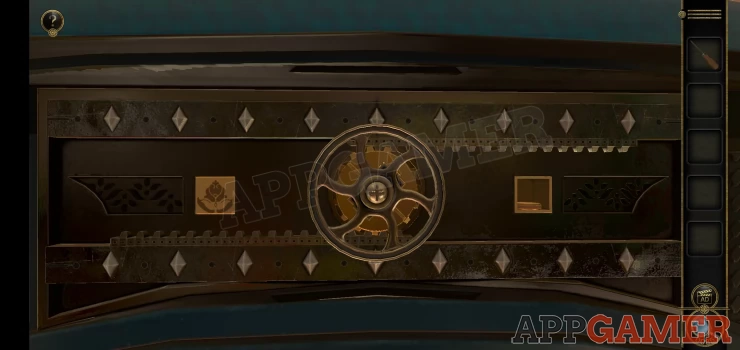
Look at the left end and then rotate the outer wheel to make the red dots line up. You will collect the item again.
Now look on top of the desk. First check an open book for a clue.
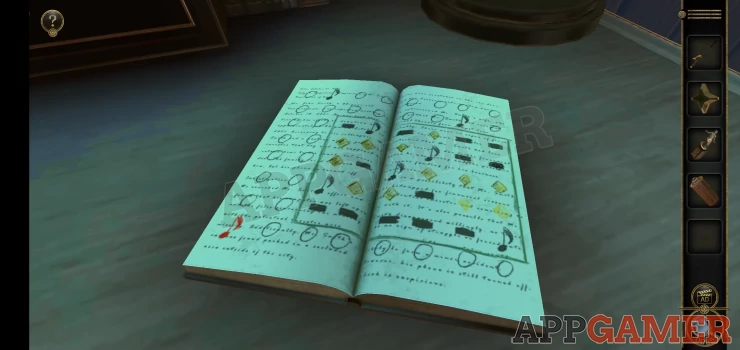
Next look at the musical device on the left and add the cylinder to it.
Music Puzzle
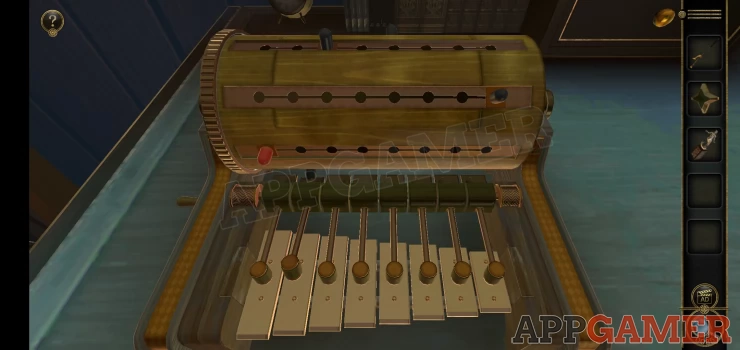
- Use the clue on the book to set the pins on the cylinder to the correct positions to play a tune.
- Place the pinks on the positions shown by the music notes. The red pin is the red note at the bottom of the clue.
- When you have the correct make sure to turn the cylinder for 1 full rotation to complete the tune and it will open.
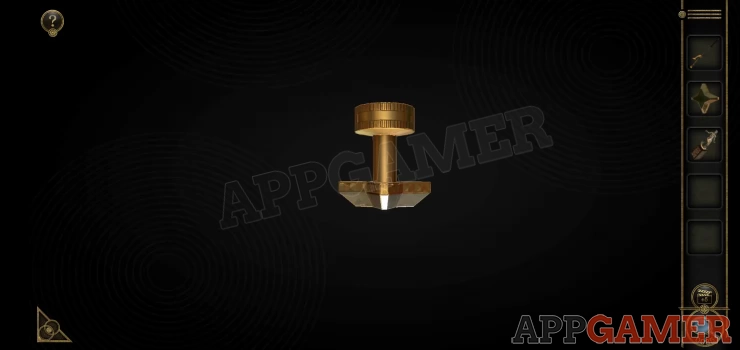
Collect the Small handle. You can now view the Star Shaped Device in your inventory and add the small handle to it to collect a star shaped handle.
Next look at the box drawers on top of the desk and open the lower one to collect a Knob.
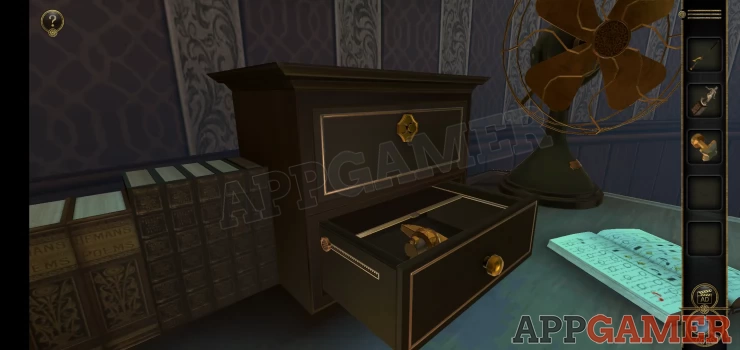
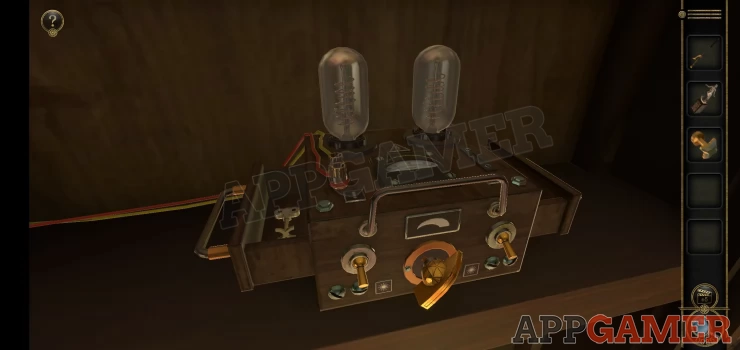
Go back to the shelves and view the top right to see a device. Place the knob on the front.
Turn the know and then lower the 2 switches to open drawers on both sides of the device. Look inside the drawers to collect a Key and a dinosaur statue.
Go back to the desk and use the key to open the top box drawer on top of the desk.
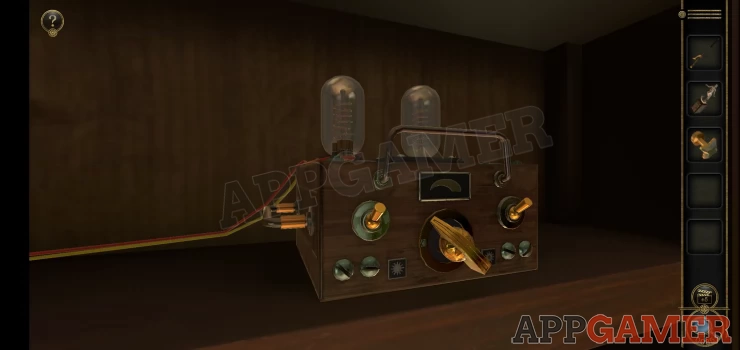
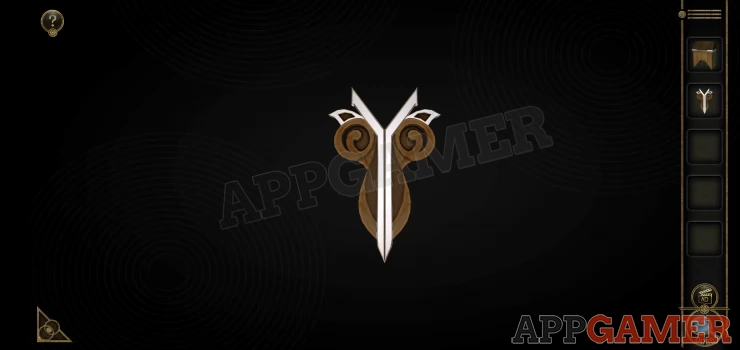
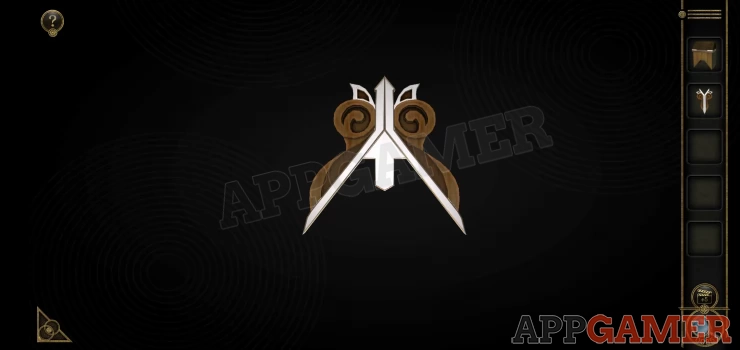
Collect a windmill blade and a Strange device. View the strange device in your inventory and lift the 4 wings to then collect it as a Transmission device.
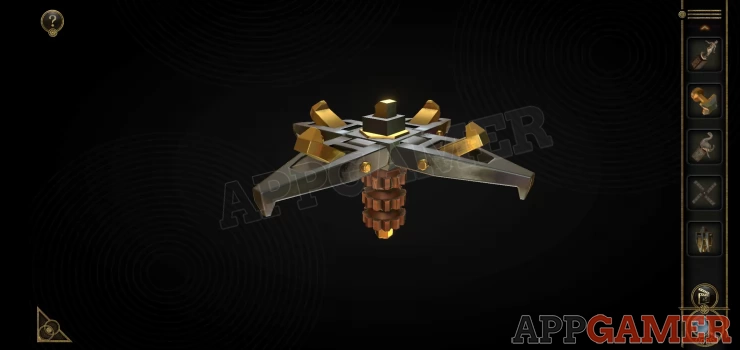
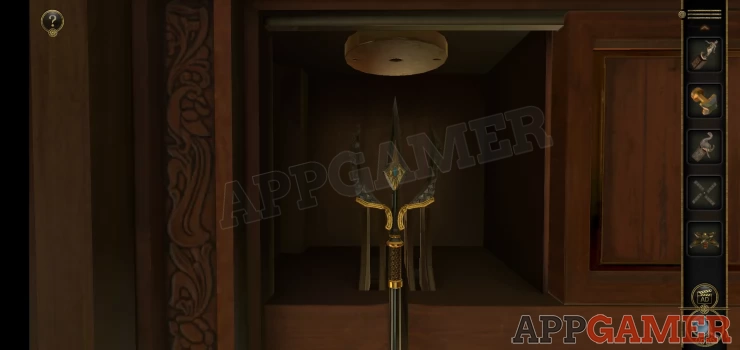
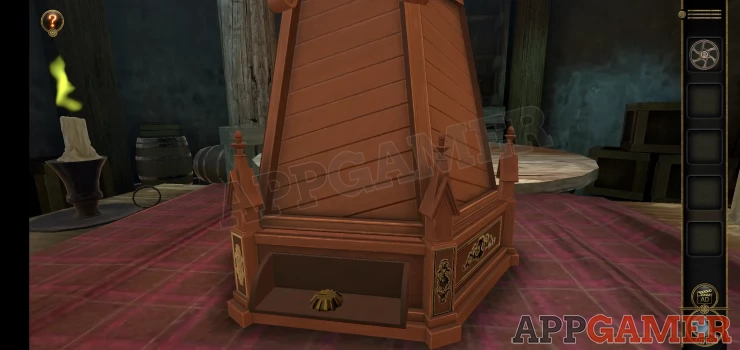
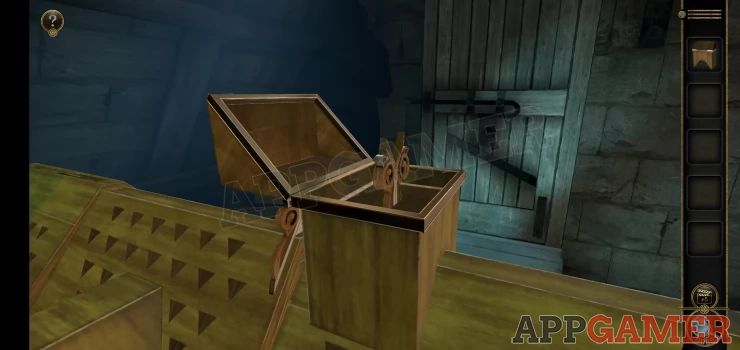
Return to the shelves and view the top left area. Collect the Trident.
Then turn the 2 stands that the trident was in to move the sliding panel to the right. You can then place the trident in to the 4 upright stands on the left.
This makes a switch drop on the left to reveal a star shape slot.
Add the star shaped handle to this and then turn it until a center section on the shelf to the right lines up.
Now view the socket on the bottom shelf below this. Next to the photos.
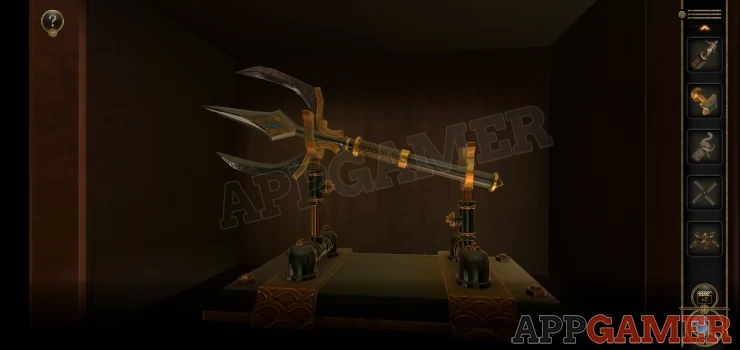
Add the Transmission device to the slot, then when it asks for another item add the Metal Rod in between the shelves to complete the trident and activate a mechanism.
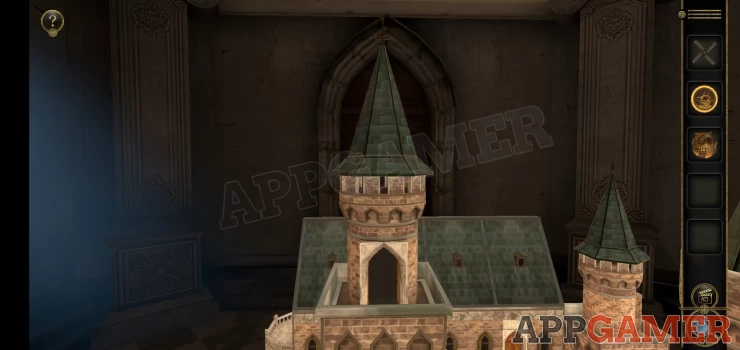
This will reveal a model on the middle shelf. View this.
Collect the Strange Key from the shelf and then back up to the desk again.
Use the key on the right hand draw of the desk and turn it to unlock a panel in the center. This now required an 8 digit code.
Desk Code
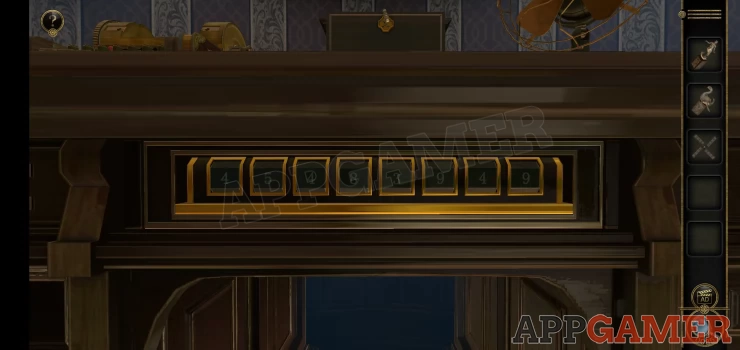
- There are 2 clues for this, the first you have seen on a photo.
- The second is written on top of the desk on the right.
- Combine the 2 sets of numbers to complete the code.
Code: 4 2 7 6 3 8 5 9Show
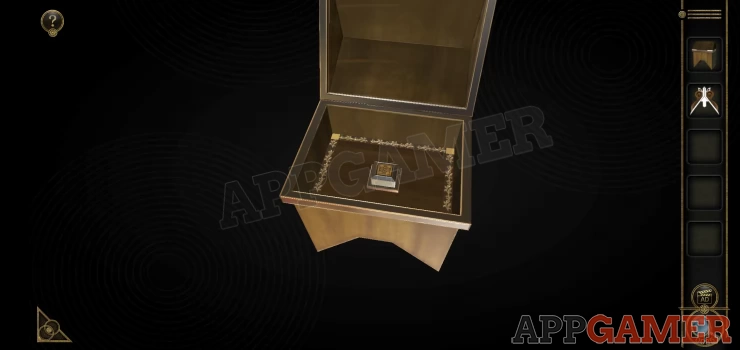
The drawer opens to reveal a puzzle board.
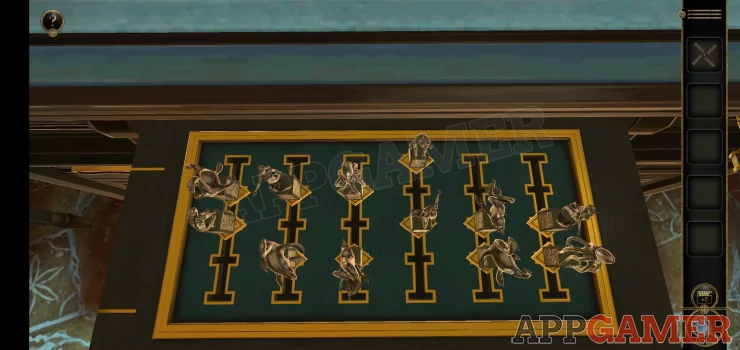
Desk Statue Puzzle
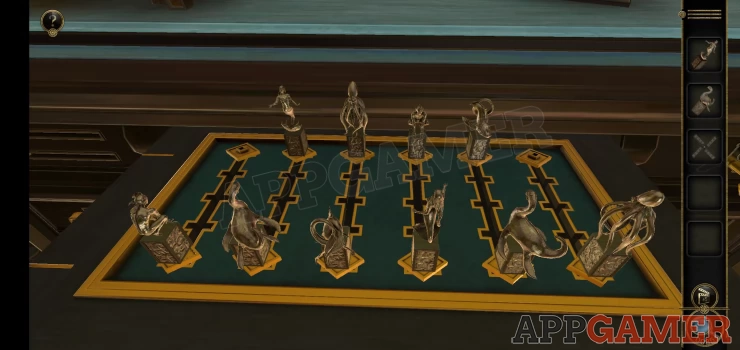
- Add the 2 statues to it that you have collected to start the puzzle.
- You can now move the statues towards each other on the tracks.
- Moving 1 will also move others.
- You need to find the correct positions for each to solve the puzzle.
- Check the solution below to see what you need to achieve.
Solution: Show
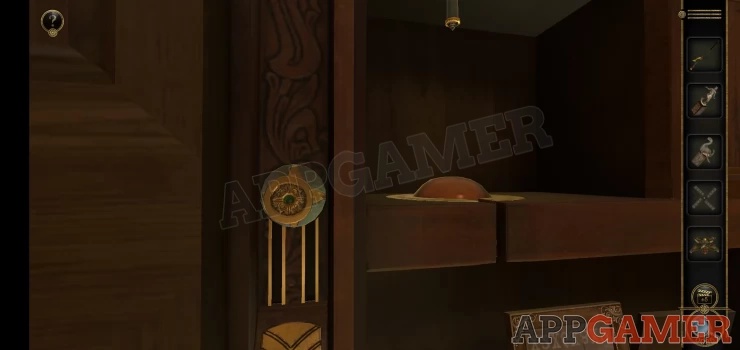
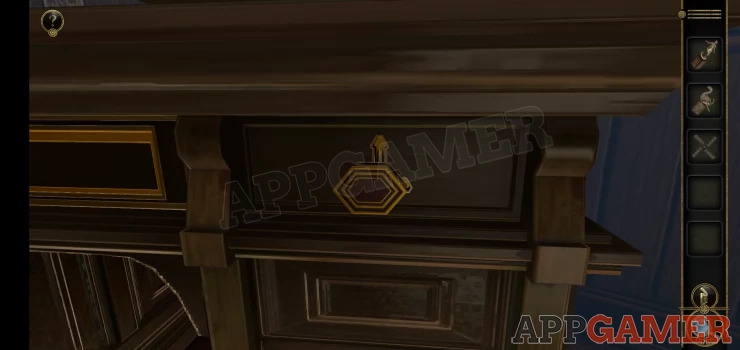
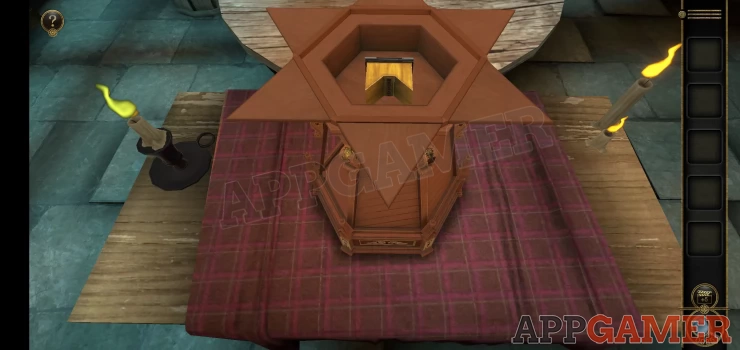
Collect the Clock Dial from the panel that opens. Next turn to the left of the room and view view the fire place. You can zoom in on the grate at the front. Slide down the switch on the left side and you can then collect Metal Badge A.
Now go back to the shelves and view the model. Add the clock dial to the front.
This starts a puzzle to arrange the decorative scroll on the 2 columns.
Decorative Columns Puzzle
- There are 3 sections on each column that you can turn.
- Each one will also make others turn.
- You need to get the completed design on the front of each column.
- Watch the video below for help.

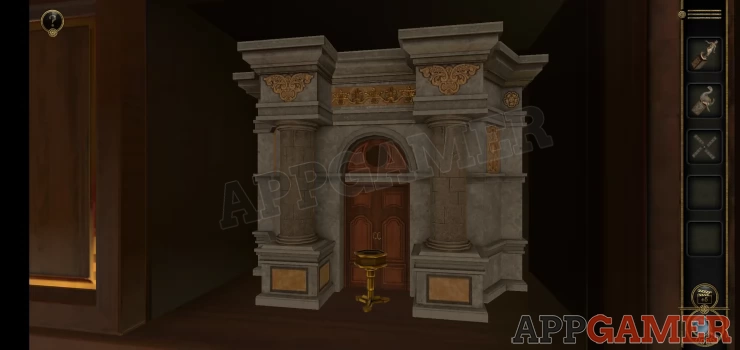
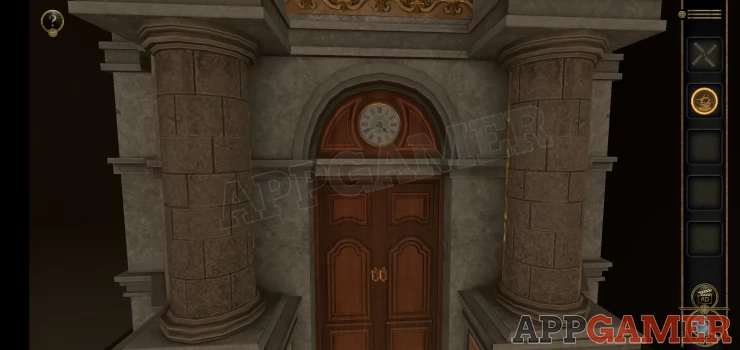
When the door opens tap it to go through.
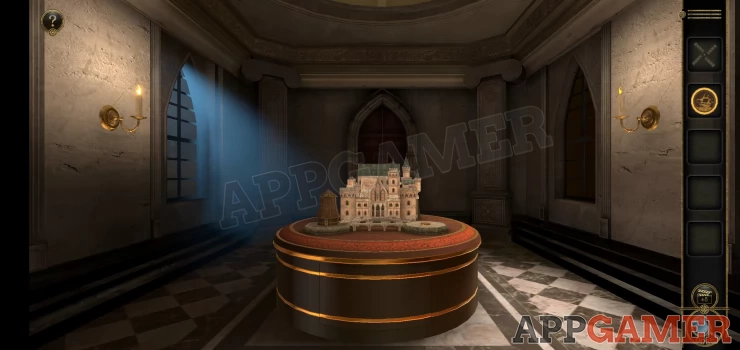
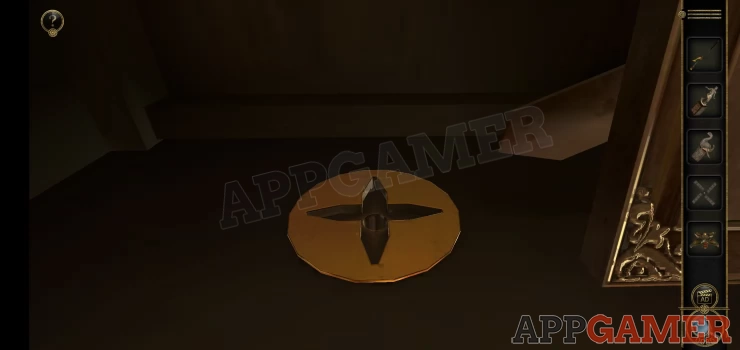
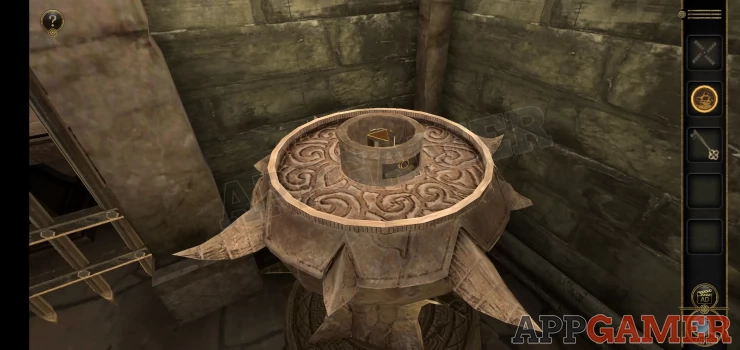
First look on the front right platform of the model and collect the Large Metal disc.
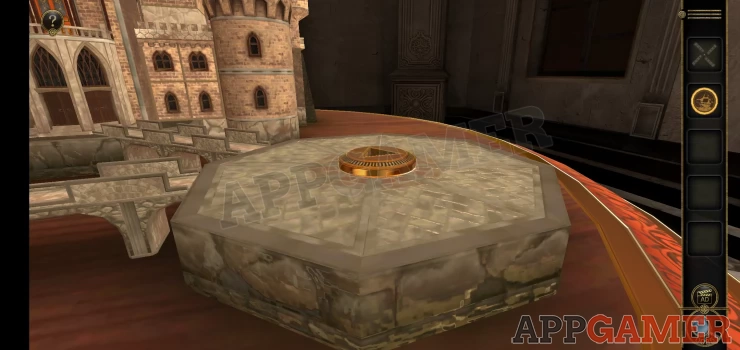
Then view the front of the base that the model is on. There is a large panel that you can slide open.
Add the metal disk to the triangular slot at the bottom and then turn it to activate the model.

You will move to the back of the castle model, you will see a slider in the window to pull down which opens the doors.
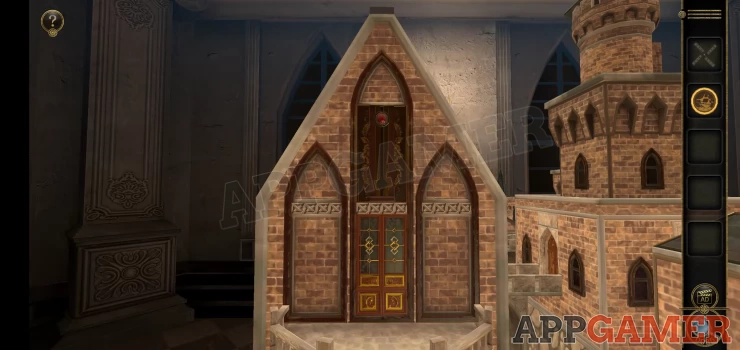
Then tap to enter this next building.
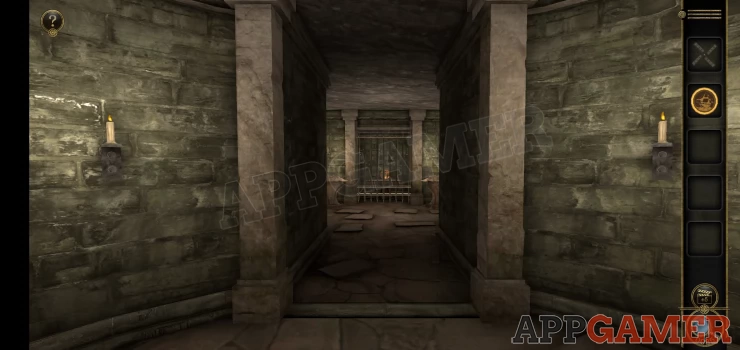
Move forward to see 2 round stone pedestals.
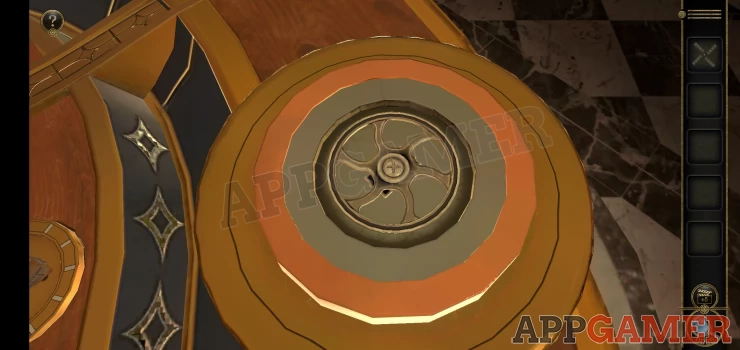
View the one on the left. Turn the top clockwise to lift the center.

You can then collect a key from the center. Next view the pedestal on the right, turn the top clockwise again, Collect a metal button.
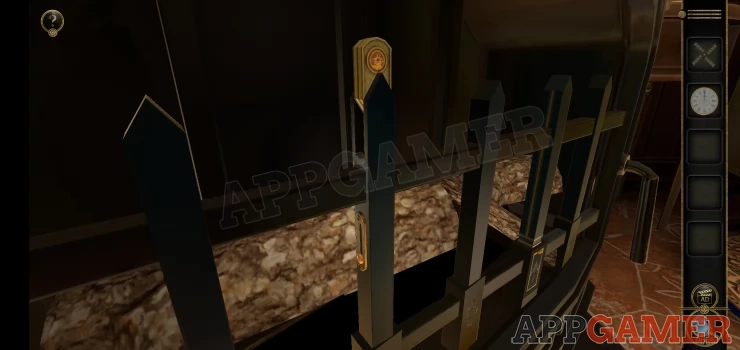
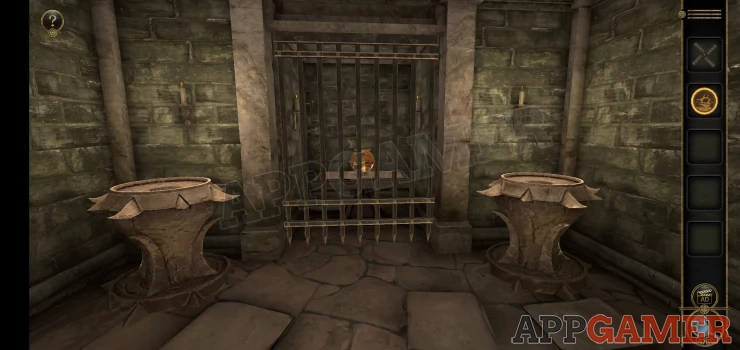
Now back up and turn to the left to see a corridor with a statue at the end and some half tubes. This is a puzzle.
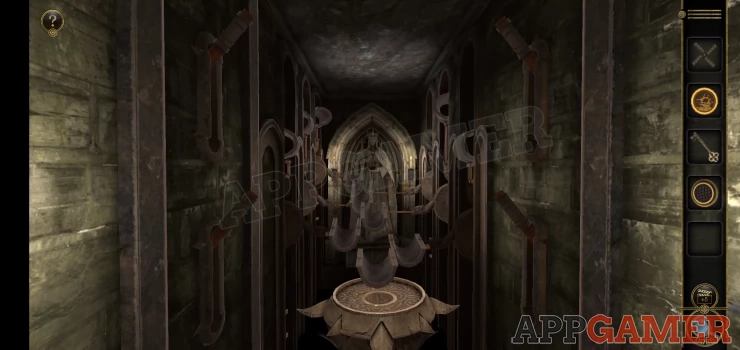
Chute Puzzle
- Tap the 4 levers on the left and right to change the layout of the tubes to make a singe path in the center.
- Check the video below for help.

Collect the Heavy Metal Ball A.
Now back up and turn to the other side to see a locked door.
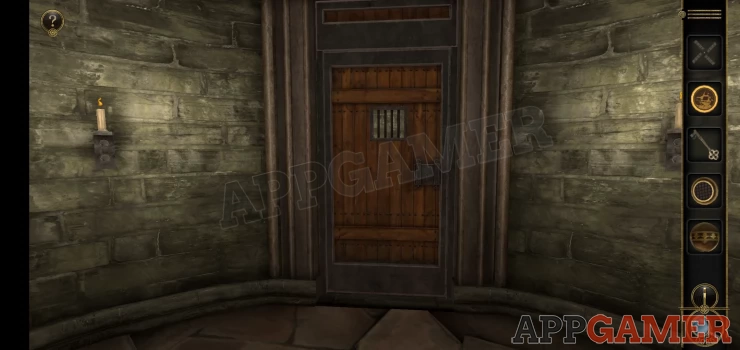
Use the key to open this and go though to find a wooden box. Open the box.
Chess Piece Puzzle
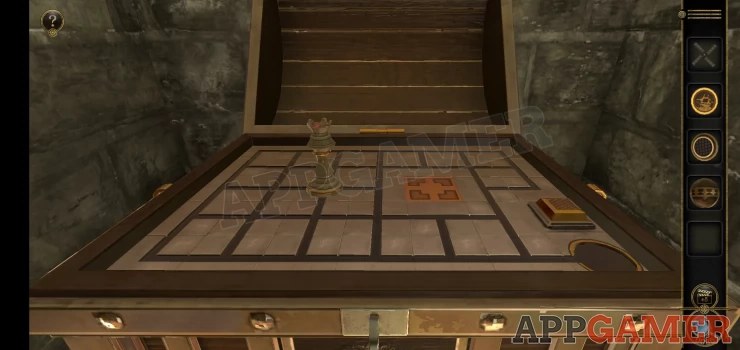
- View the top for a puzzle
- To solve this you need to move the chess piece around the grid.
- As you go the previous paths you cross will be blocked.
- You need to cover the entire board without blocking yourself and reach the end point on the lower right.
- Check the video below for help.

Collect the second heavy metal ball. Now return to the room with the 2 pedestals
Place the heavy metal balls on the the pedestals, you can check the bottom of the balls to see a shaped slot to know which one to place on each pedestal.

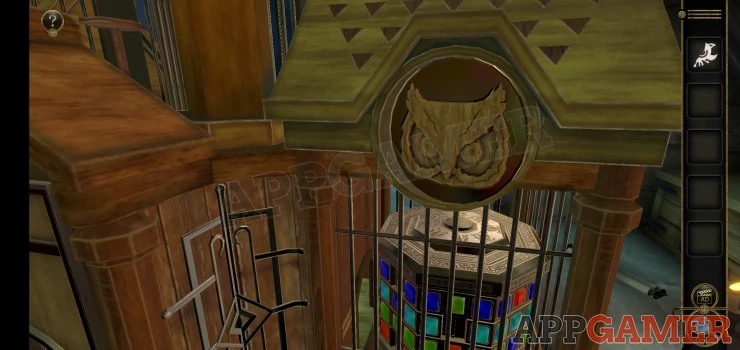
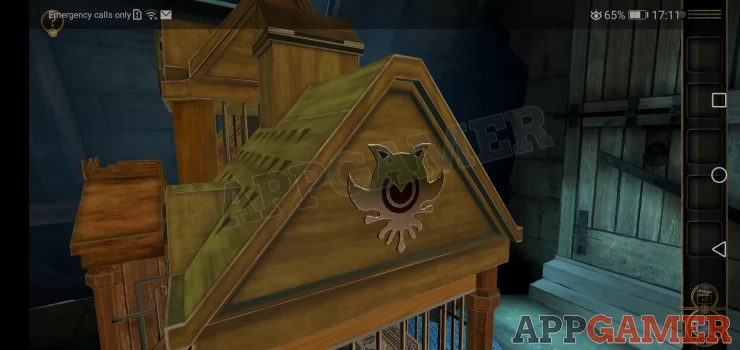
Now view the golden Owl.
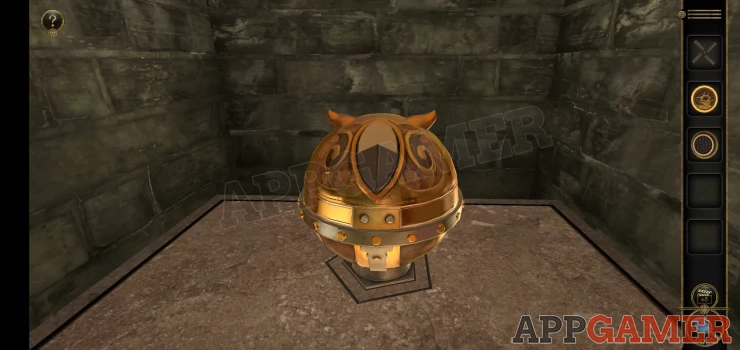
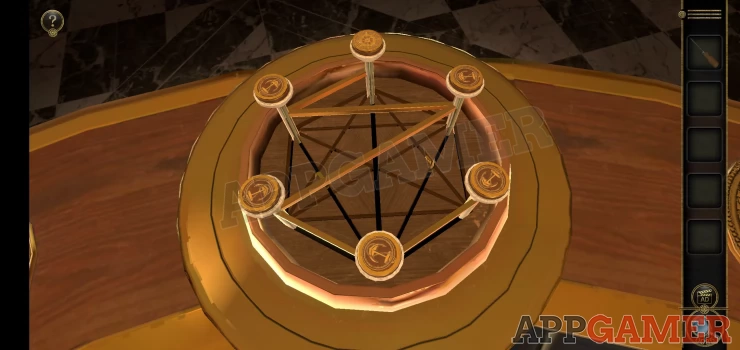
Tap the own to turn it around, the back will open to see a puzzle.
Owl Puzzle

- Place the metal button in the center to start.
- There are 4 gears rotating, and 4 holes on the cylinder next to them.
- You can select a gear by moving the slider at the bottom left and right.
- Use the button to hold a selected gear for a second to change its alignment with the others.
- You need to line up the 4 holes to complete the puzzle.
- Check the video below for help.

Collect the Owl (Extremely Heavy Mechanical Ball)
You will then pass out of that room and move to view one of the towers of the model.
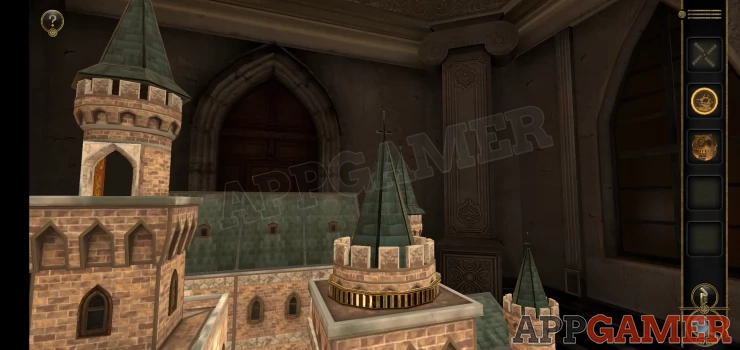
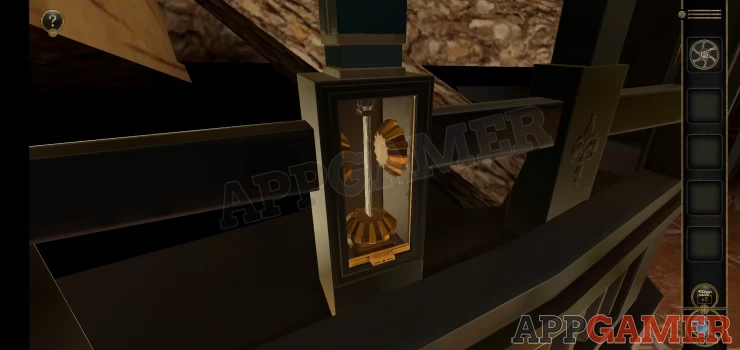
Turn the gear at the bottom to extend the tower and open a door, go through.
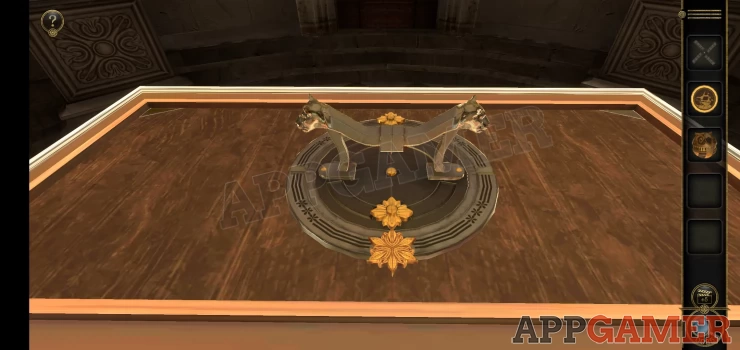
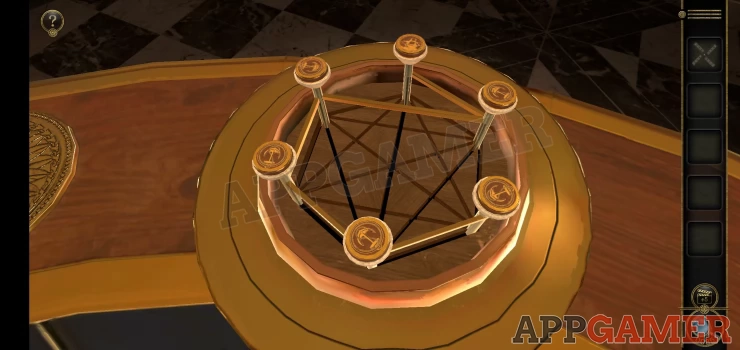
View the box in the center. You can look around this and see double handles, 4 on each side. This is a puzzle.
Handle Box Puzzle

- You can slide each handle up, when you do a timer starts.
- When the time runs out the handle will drop again. Some handles will drop faster than others.
- You need to lift all 8 handles at the same time.
- Hint: on the side with no figure in the center, the second handle from the left drops very quickly. The other 3 take longest.
Solution: Start on the side with no figure and lift handles 1, 3 and 4, turn the box and lift all 4 on the other side, then turn back and lift handle 2.Show

Collect the Wooden Statue that appears, you can then place this on the side of the box with no figure.
You will then see the handle on top. Turn the handle around and the box lid will open.
We cannot do anything further here at the moment so back out to the view of the castle towers and now view the tallest tower on the left.
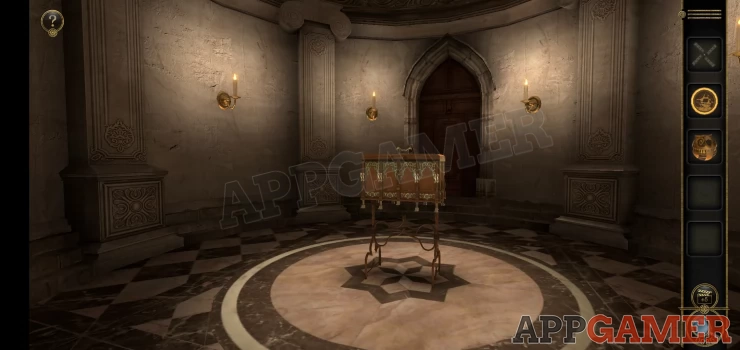
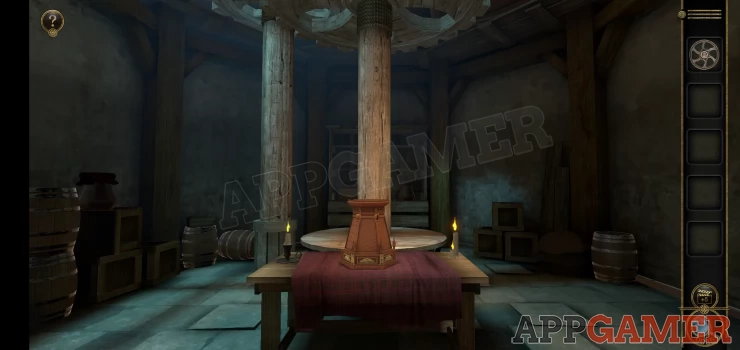
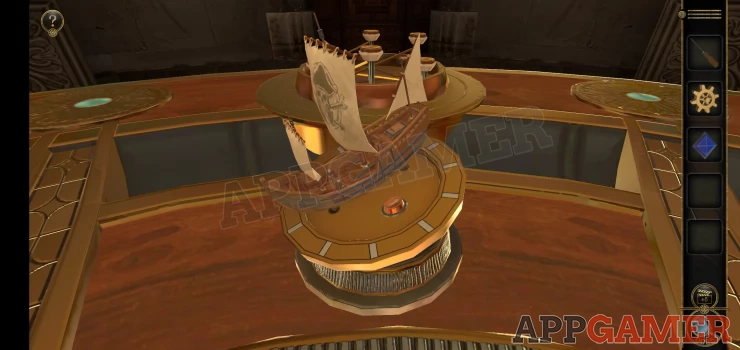
Go through the open door to another room with a round table.
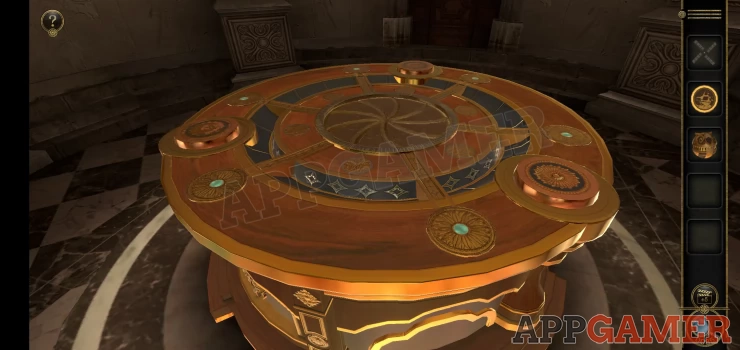
Rotate the center of the table until a blue hole opens up you can then place the mechanical own ball into the center.
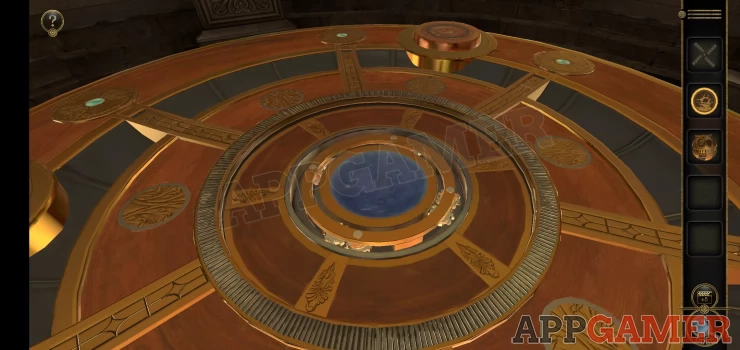
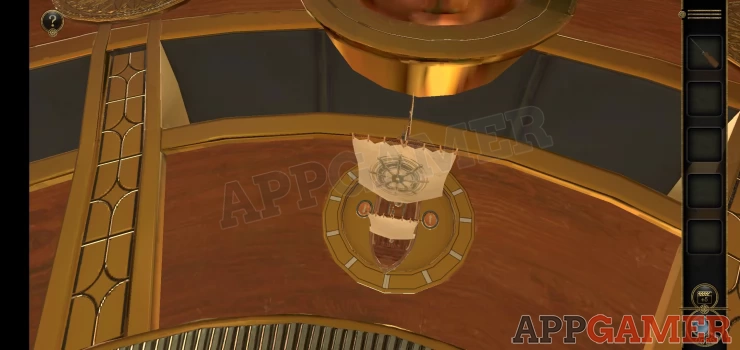
This activates the puzzle table and 6 boats will appear. Along with a section on one side with 6 emblems on top.
Add the Metal Badge A to the missing slot and this will set the emblems to show directions. Notice that 1 emblem is a Ship while the others as Anchors. This is the puzzle clue.
Look at the ships on the table. They have different emblems on the sails (or none).
Find the one with the boat and turn it to point in the same direction as the emblem on the puzzle clue. (to the center).
Then look at the other emblems on the clue and set the ships on the table to point in the same directions.
Once done the first clue will disappear and a second clue platform will appear. But first look back at the first area and collect a Rotary Handle.
Back up out of the tower and view the model castle again.
On the lower left is a windmill. Add the windmill blade to this and the front door will open
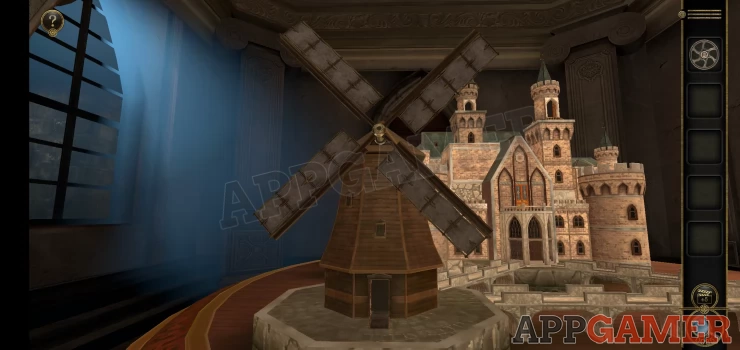
Enter the windmill.
View the object on the table and notice the small spire on the right of center is lifted.
Twist the spire to lower it and a panel opens, collect the Strange Gear.
Now back out all the way to the initial room. Where we can again view the fire place on the left.
First examine the bottom right of the grate. Lower the sliding door and add the strange gear.
You can then collect a Screwdriver. Next look at the top of the fireplace and open the 2 doors.
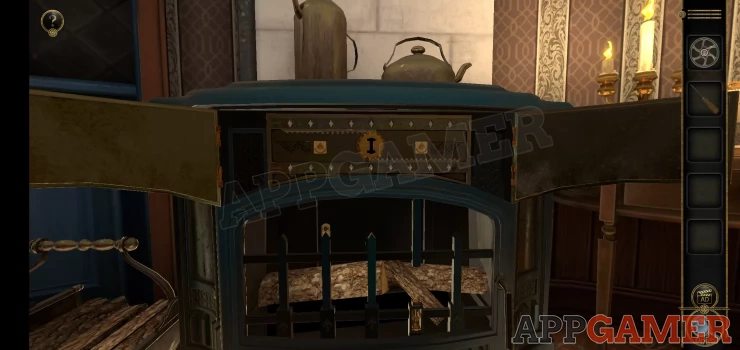
Add the rotary handle to the center and turn it. Collect Metal Badge B from the right.
Head back through the model on the shelf and then through the door on the tallest tower on the castle to the room with the round table. View the new puzzle clue platform with a missing slot for the badge.
We now repeat the process from above, the main badge has a wheel emblem, so start with the ship on the table with the wheel on the sails and turn it to face the center. Then turn the other ships to face the directions indicated by the anchors on the clue platform.
Once done the clue platform will turn over and reveal a handle to collect and a new clue platform will appear. Collect the handle.
Again back all the way out to the starting room and view the desk on the right of the room.
View the top left drawer and add the the handle to the front.
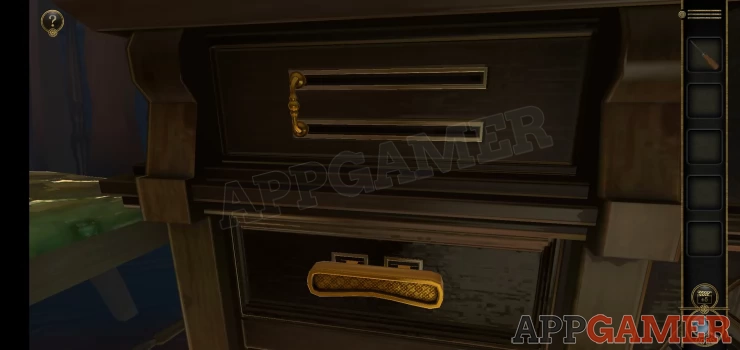
Slide the handle and the top of the desk will move to reveal 3 wheels on the left.
- On each side of the 2 wheels you can see shapes, there are 3.
- Turn the wheels to line them up so that the same shapes appear on the left and right.
- When you do this a box will appear.
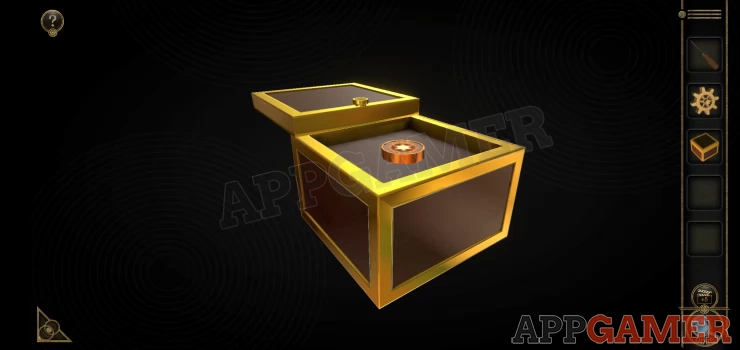
- Repeat this for all 3 shapes so that you have collected 3 boxes.
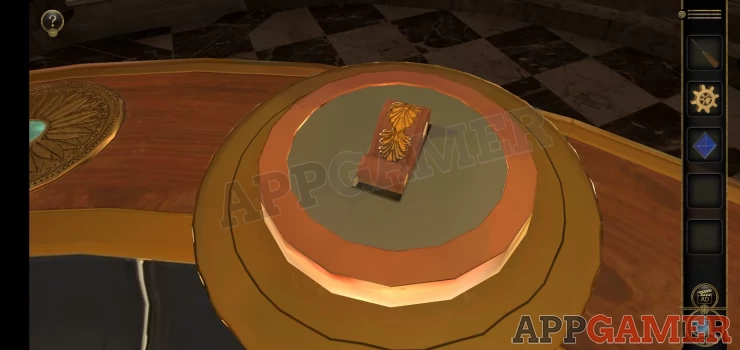
Now open the boxes in your inventory. You will collect Metal badge C from small box A
A small gear from the small box shaped like +; and a Sapphire from small box C
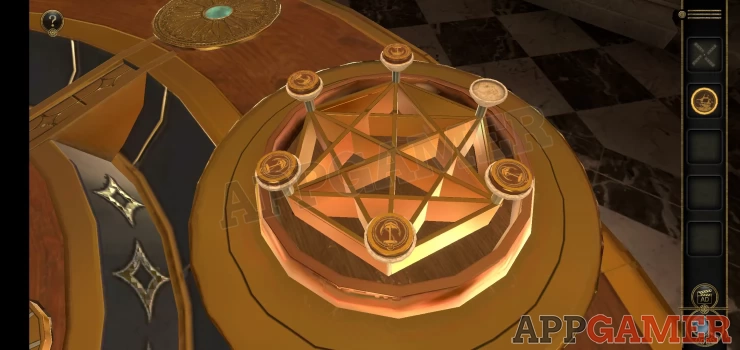
Go back again inside the models to the tallest tower room with the round table. View the third clue platform. Add the metal badge to it and you will now have a third ship puzzle.
- In this one the ships are also elevated and can now be angled to look upwards or downwards.
- View the clue platform to see how they relate.
- The main ship is the one with the pirate face.
- In this case the wooden stick from it is pointing downward to the ship on the left.
- Turn the main ship to the left and angle it downwards using the buttons on the side of the ship.
Repeat the same process with the other ships and make sure to angle them up or down depending on the angle of the wooden stick it is facing.
Once done you can then collect Slider A.
Back up out of this room and re-enter the other tower on the castle to the right. View the urn on top of the box in the room. There is a slot for a sapphire.
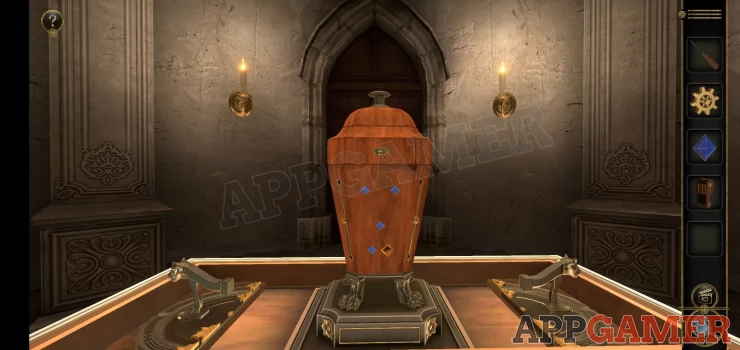
Add the Sapphire to it to start the puzzle.
Sapphire Puzzle
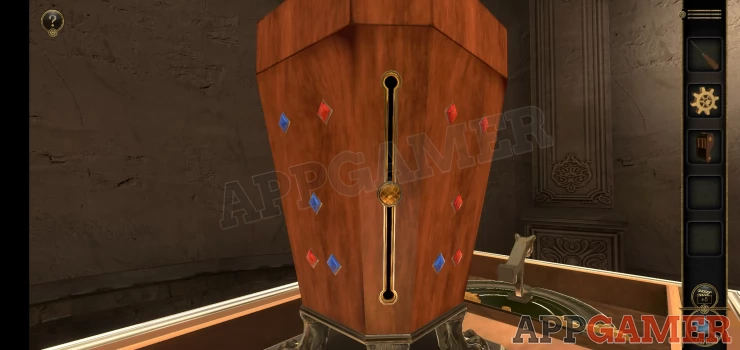
- Look around the urn to see that some sides have red gems as well as blue ones.
- Use the slides on the corners to change the displayed gems.
- You need to set all of them to blue to compete the puzzle.
- Check the video below for help.

This opens the top and reveals a new puzzle.
- On the front in the enter is a round symbols that you can see through a hole.
- If you look around the puzzle you will see that there are several sections to the center column and each one has a round symbol on it.
- You need to turn each section so that all of the symbols line up.
- You also need to move the grey blocks up and down to allow you to turn each section.
- Watch the video for help.

Collect Slider B.
Back out of the tower room and go back inside the Windmill on the model. First look on the left side of the object on the table and add Slider A to the slot.
Pull it down and the side of the object will open. Look inside and collect the small box.
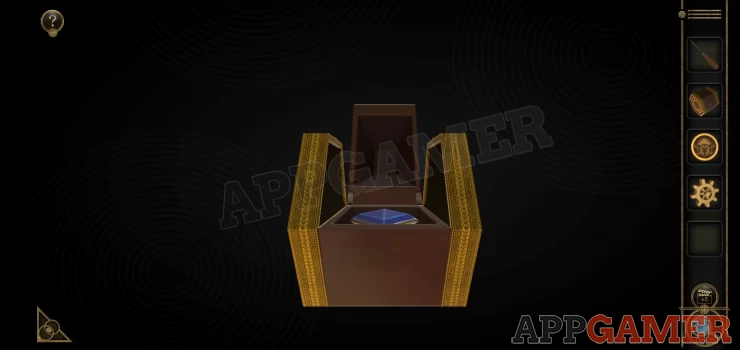
View the box in your inventory and open it to collect an 'Inconspicuous small iron piece'
Next look on the right side of the object on the table and add the slider B to the slot on the side.
This opens a drawer below.
Slot Puzzle

- Add the small iron piece to the slot on the left.
- You now need to slide this to the right side to complete the puzzle.
- Each of the 4 plates on the puzzle can be flipped over to change the track.
- Watch the video below for help.

Collect the 'Roof Component'. Go back to the left side of the object and add the roof component to the empty space.
The mechanism inside will move and you will have a space at the top. Add the small gear to the gap. Then add the screwdriver to the small hole at the bottom of the mechanism.
Turn the screwdriver to start the machine and the top of the object will open. Collect a 'Birdcage Decoration'.
This completes the Windmill section and you will now see a new tower appear from the model on the right.
Enter the room at the top of the tower. There is a birdcage in the center of the room.
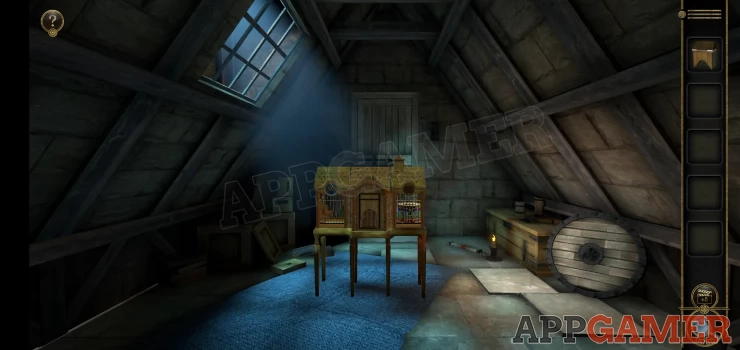
First view the chimney section on the top right and open the top.
Collect the Decoration from inside and then view it in your inventory.
Lift the 2 side arms to open it up and collect it again.
Then view the Birdcage Decoration that you have in your inventory. Open the top and look inside.
Tap the button and you will then collect it again. Now view the left side of the roof.
Add the small white decoration on the right side and the center section of the roof will lift. Then add the chimney decoration to the lower left side of the roof.
Slide it to the right. A roof panel will open.
Collect the Owl disk and then view the top center section of the roof. Add the Owl disc to it.
Turn the disc and the bars below will open so that you can collect An Owl Board and Broken Decoration A
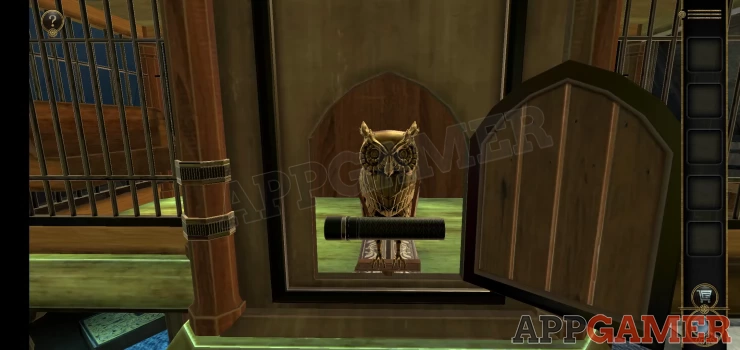
Next view the right side of the birdcage and add the owl board to the owl slot that is there.
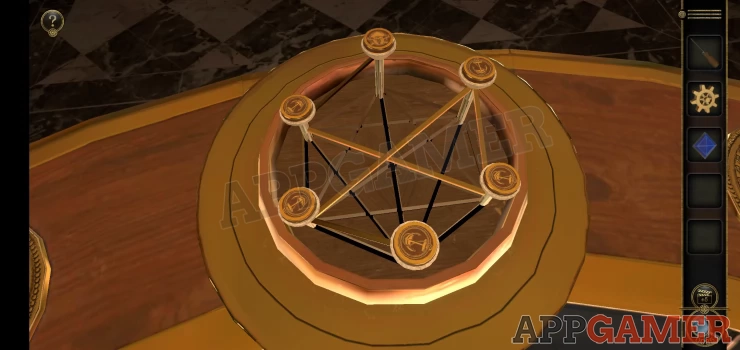
You will now see a puzzle with colored stars, on the right side of the cage is a constellation star map That is a clue.
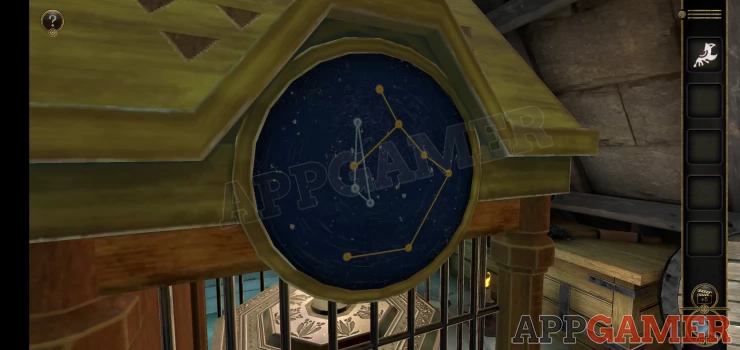
Star Map Puzzle
- On the left you have a board with colored stars and filters that you can move over the top.
- The 4 sections of the filter can be rotated to cover some stars and show others.
- Moving them will also change the color of some stars.
- Arrange the 4 filter pieces to show the constellations shown on the right side.
- Watch the video for help

Collect the Broken Decoration B, then view it in your inventory. Add the other part of the broken decoration to it and then collect it.
Now rotate the birdcage view to see the right side of the roof and add the decoration to it. The bars below open and you can collect the Colorful Metal Box.
View this in your inventory to see the puzzle.
Colorful Box Puzzle
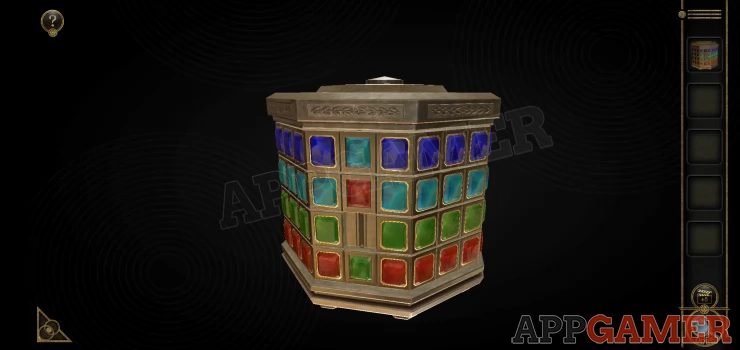
To solve this you need to rotate the rows and move the colored pieces so that they are all in the correct rows.
Dark Blue
Light Blue
Green
Red
Once done the top will open and you can collect a Door Panel.
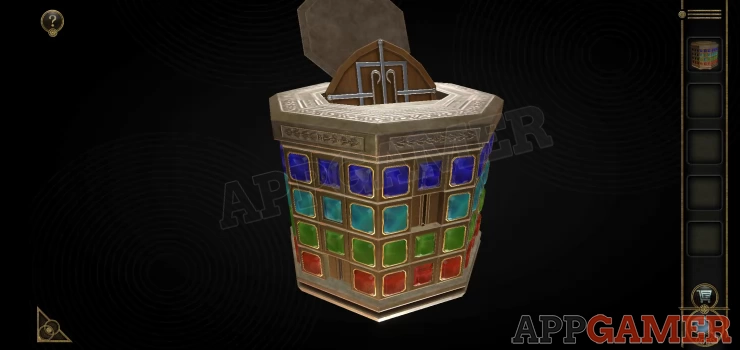
View this in your inventory and turn it to see the back. Collect the small disc and make a note of the position of the 3 slots that remain.
Now view the front door of the cage. Add the metal disk to the middle slot.
Bird Cage Door Puzzle

You can now use the rings on the left and right columns next to the door to control the position of the 3 shapes.
You need to position and align then to match the shapes on the back of the door panel so that the door panel can fit on it.
The left controls will move the left and middle shapes and the right controls will move the right and middle shapes.
Check the solution below.
Solution: Show
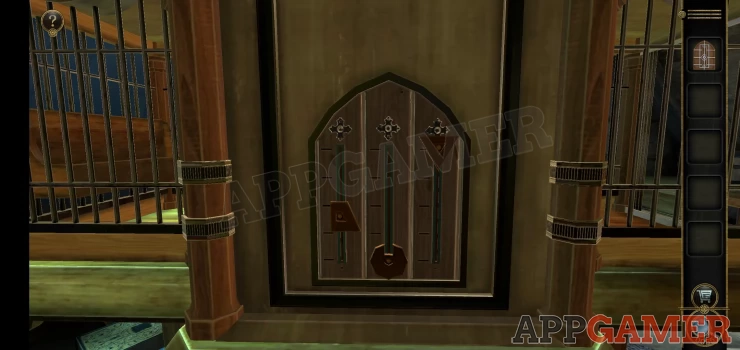
Add the door panel to the door and it will open.
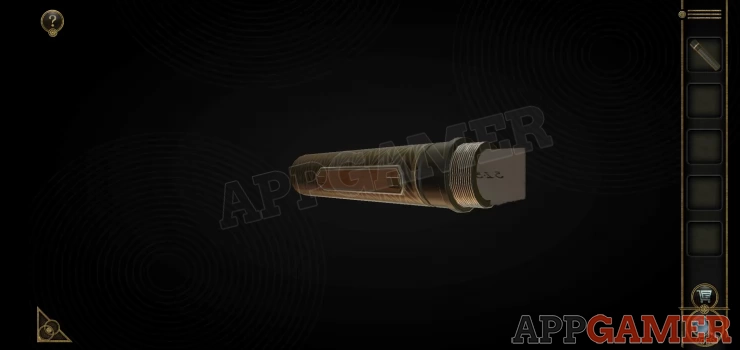
Collect the metal cylinder from the owl and then view it in your inventory, unscrew the end and you will be able to collect a paper from inside.
You now have some coordinates.
This completes Chapter 5, and the game. Watch the final scene.
We hope this walkthrough was helpful, if you have any questions about the game please head to the Answer page to ask there.
We have questions and answers related to this topic which may also help you: Show all
 With 20 years of experience in creating video game content for the internet and over 30 years as a gamer, Mark is now a passionate mobile App Gamer. Loving a challenge, he is always ready to get stuck in to both survival builders and puzzle solving games. He has been providing content for AppGamer since 2014.