3D Escape Room Detective Story Chapter 4 Walkthrough
More 3D Escape Room Detective Story
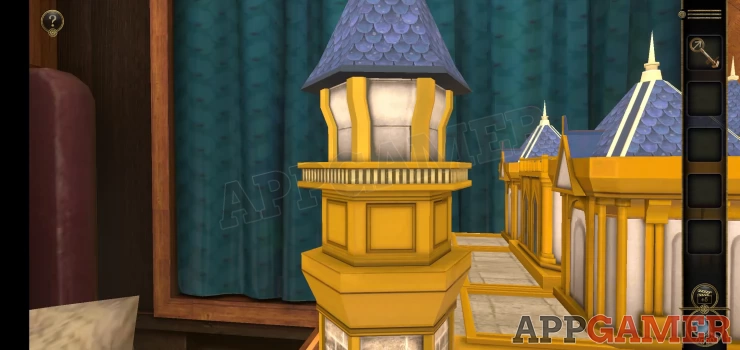
This is a walkthrough guide for chapter 4 of 3D Escape Room Detective Story. In Chapter 3 we explored a ship at the dock to solve more puzzles and discover another strange note. Now in Chapter 4 we first receive a strange phone call from our mystery suspect and then a call asking us to investigate another crime scene on a train.
3D Escape Room Detective Story Chapter 4 Walkthrough
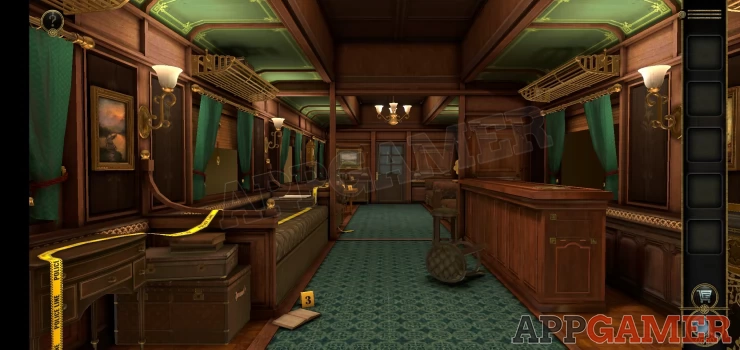
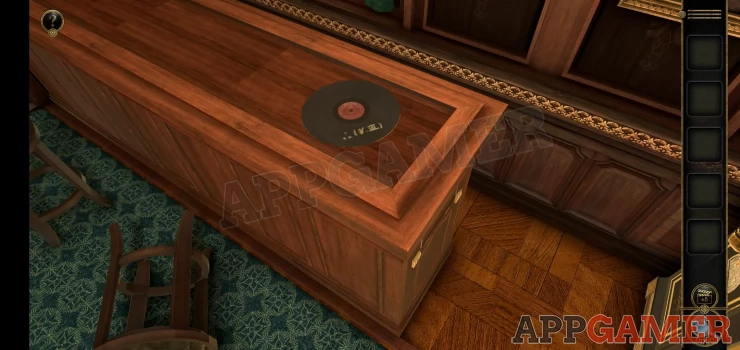
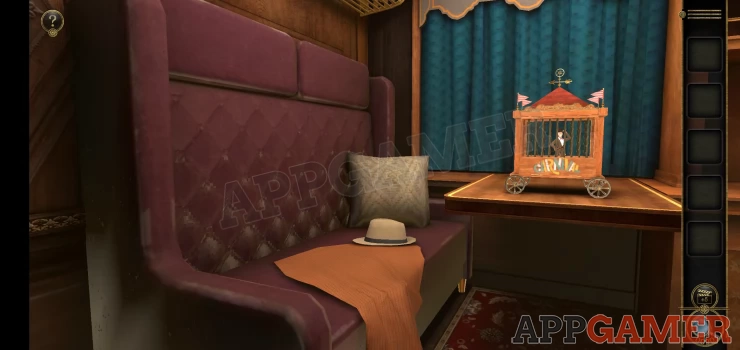
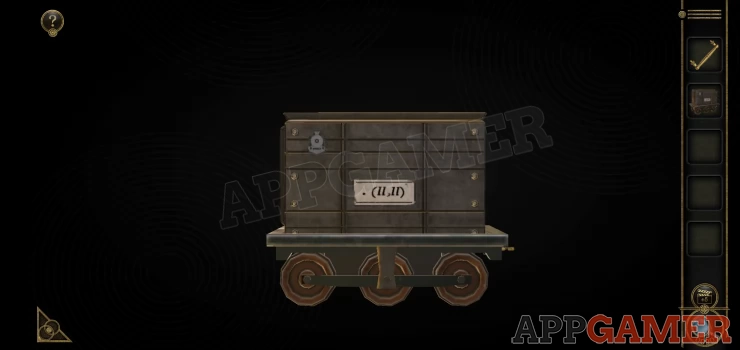
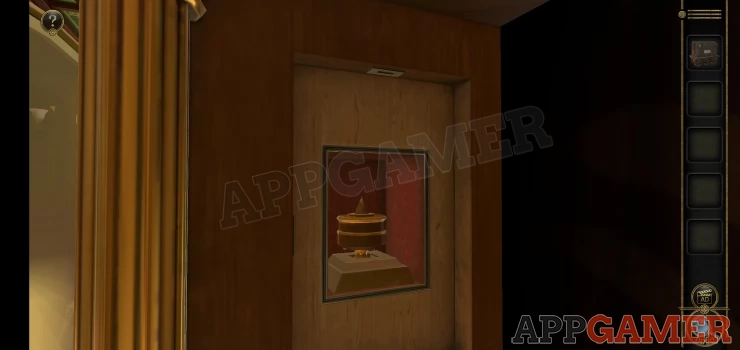
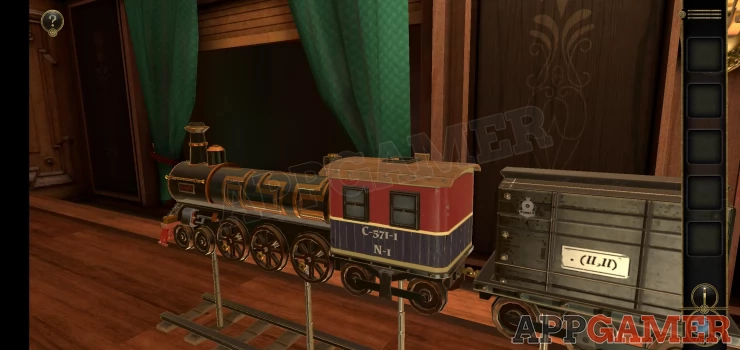
On the right side of the carriage is a bar, look on top of this to see a music record. Make a note of the writing on it as a clue for later and then collect the record.
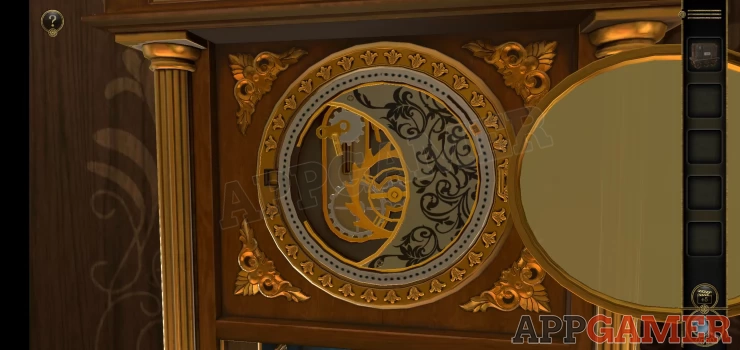
Now move forward though the carriage to find a gramophone on the right side. View this
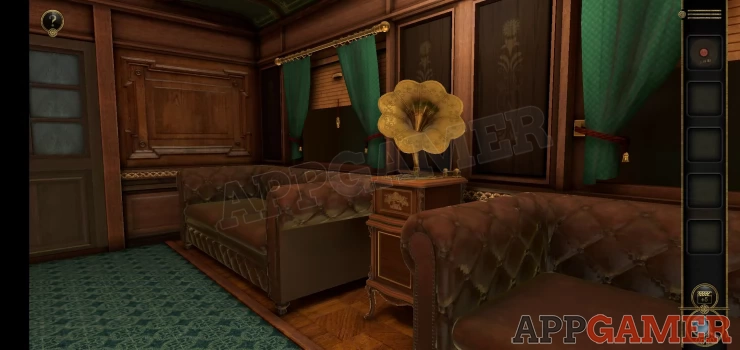
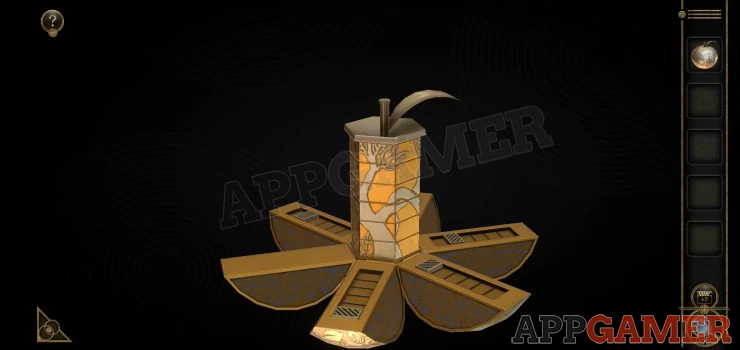
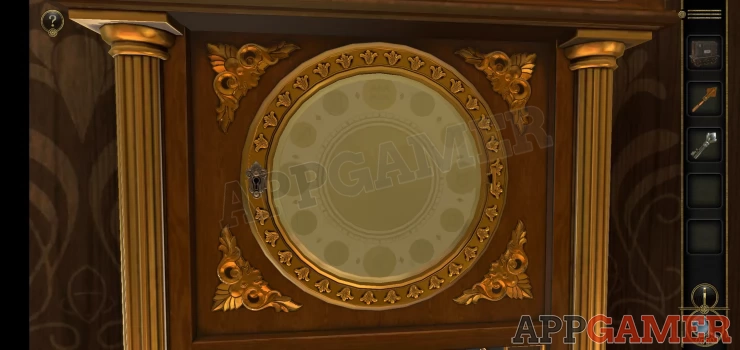
Add the record to the top and you will see a panel open on the front. This has a puzzle.

Gramophone puzzle
You need to move the blocks and pieces on the puzzle to re arrange them so that the bottom piece can slide to the right to fit over the black shape. Check the video for help.

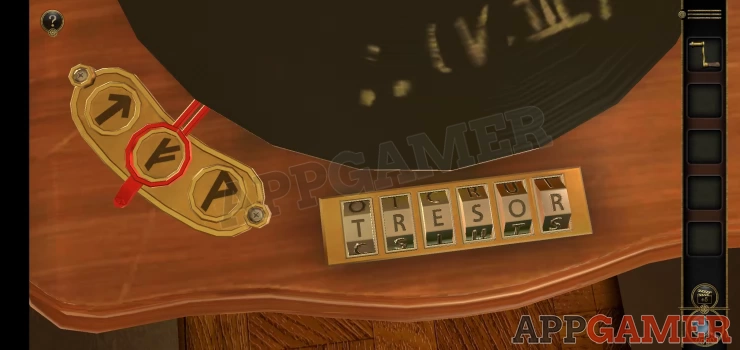
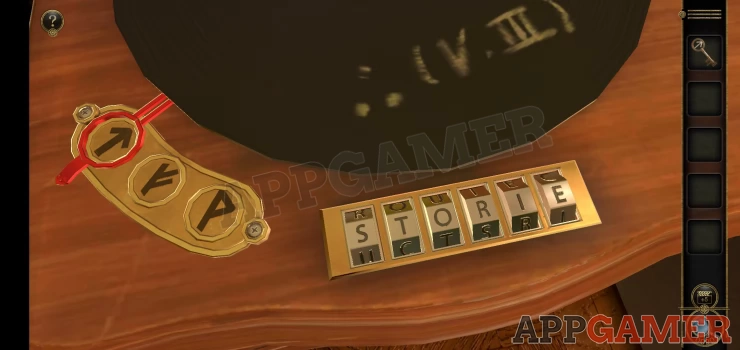
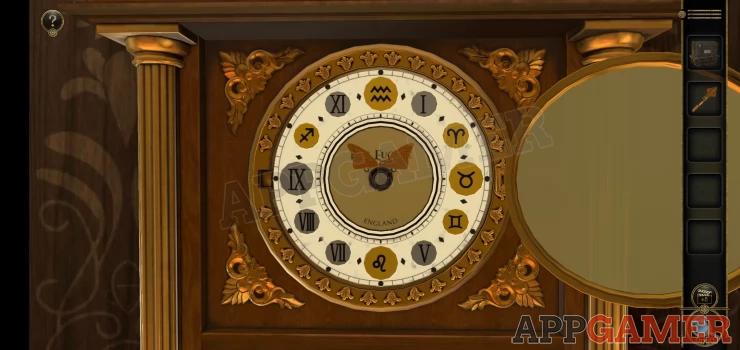
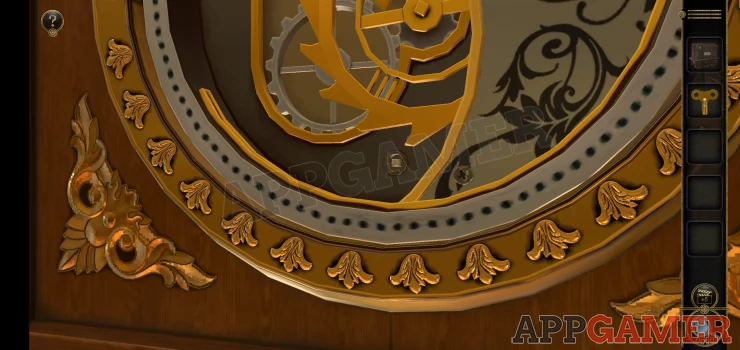
Once done you will see a clue on the lower left, a symbol and a word. View the top of the gramophone again and you will see a symbol selector and a code entry. Use the clue to set this.
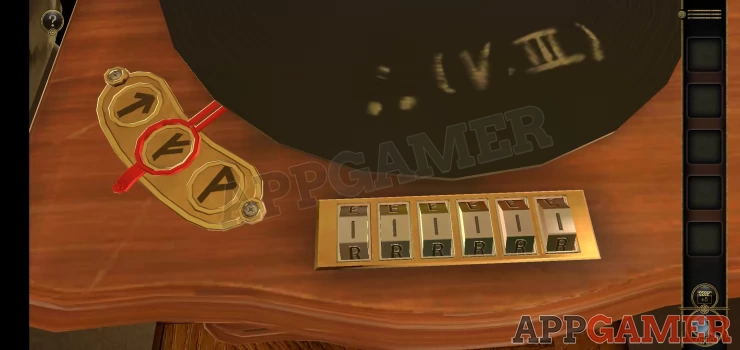
Solution: Show

The record plays and a panel opens on the front. There is a small door.
Tap the open door to go through into a miniature world.
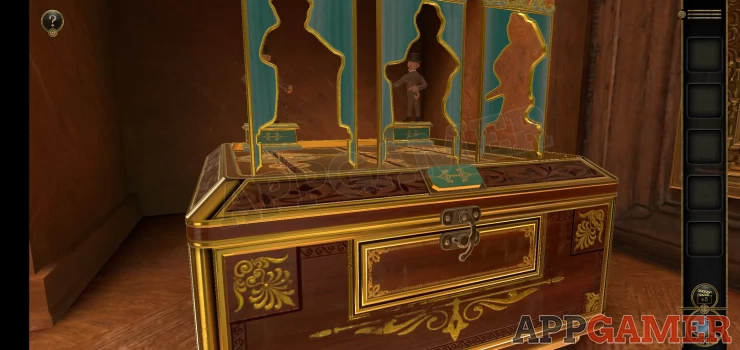
Look to the right and view a box with 3 shapes on top.
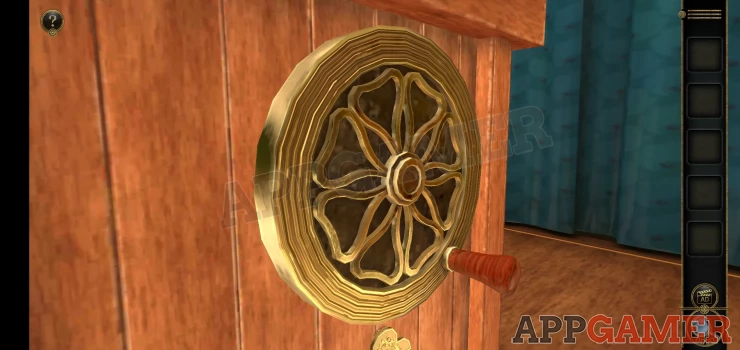
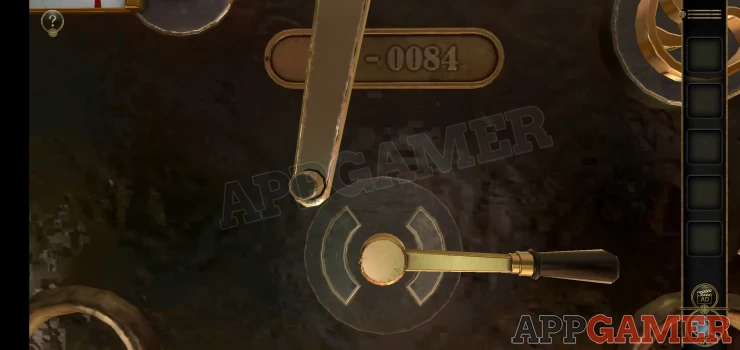
Lift the catch on the front and open the small drawer, you can then collect a Wheel from inside. Back up and view the model Carnival carriage on the table. On the right side of it is a small slot. Add the wheel to the slot and turn it.
You will see the arrow on top and the flags change direction.
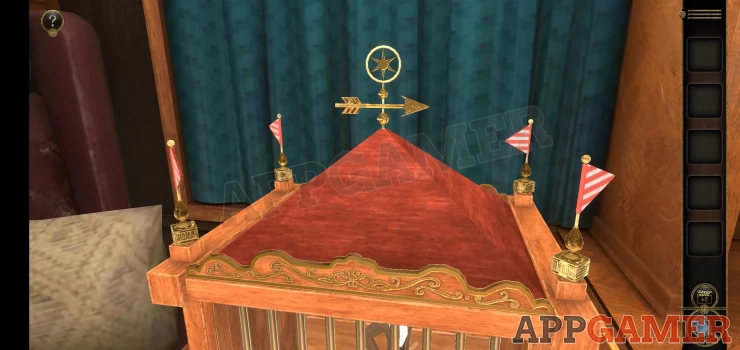
Turn each of the 4 flags to point in the same direction as the arrow. You can now collect a handle.
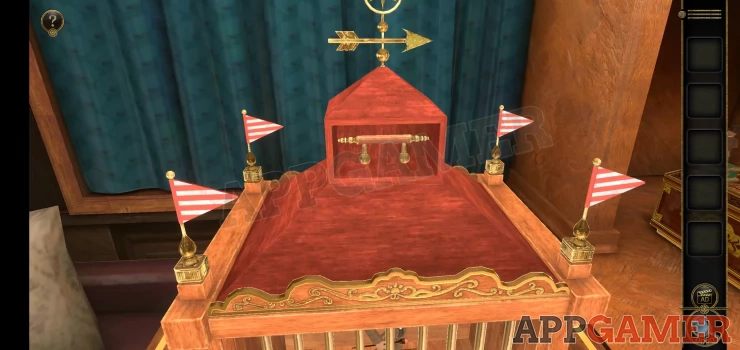
Look again on the right side of the carriage to see 2 holes below the wheel. Add the handle here.

Lift the handle and the front will open. You can then collect the Monkey Figurine from inside.
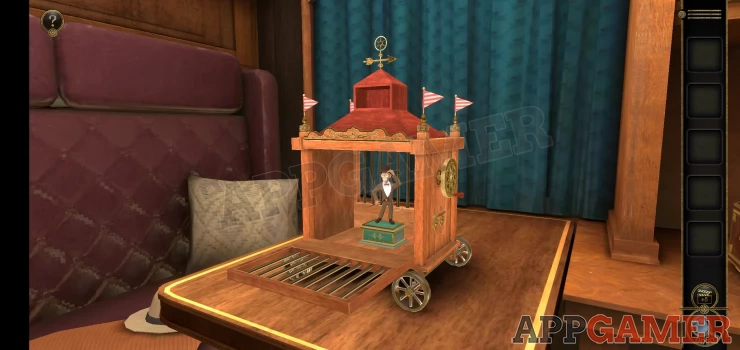
Go back to the box on the right side with the shapes and place the monkey figurine on top with the other 2. A button appears.
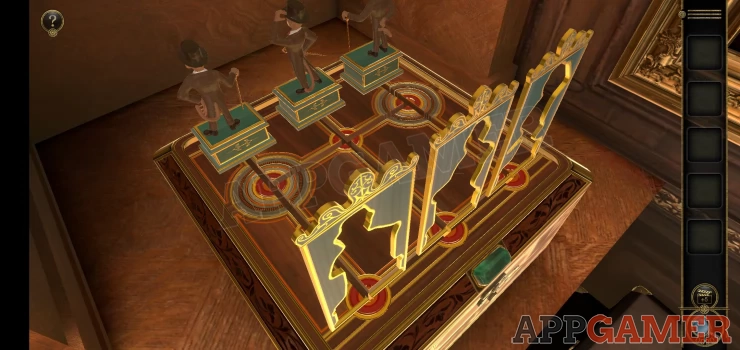
Monkey Puzzle
- Pressing the button will try to pass the 3 figurines through the cut out shapes.
- You need to adjust the positions so that this can happen.
- Each move you make will also change the position of the monkeys and the tracks on the box that allow you to move.
- Watch the video below for help.

Once done a panel opens and you can collect a Square Carving. You will then be back in the main train carriage.
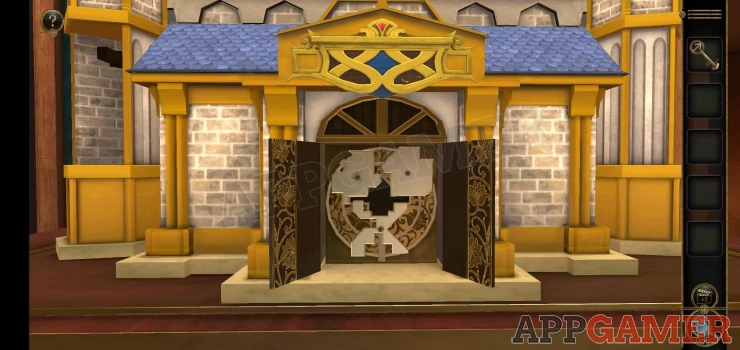
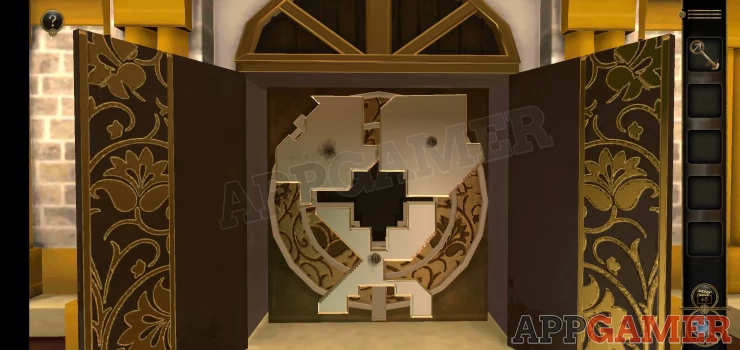
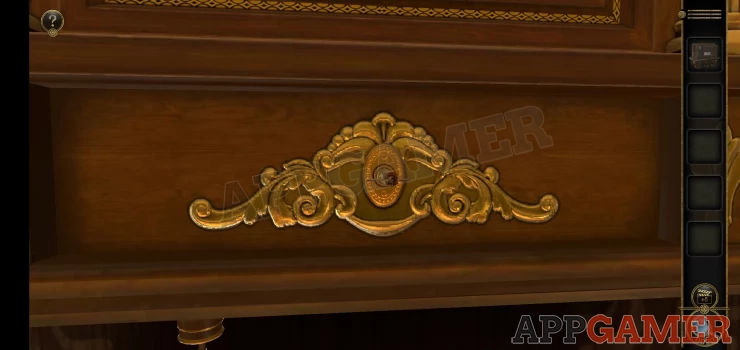
Back up to the first area of the train and view the side panel on the bar on the right.
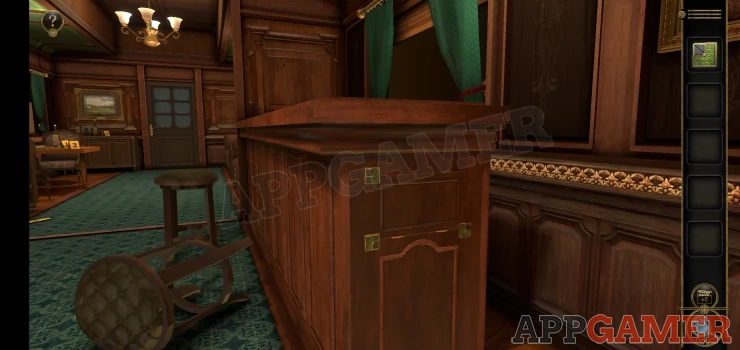
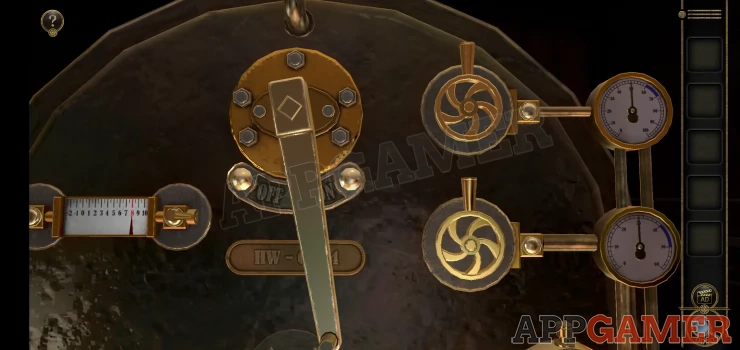
Zoom in and place the square carving on the top right to match the others. This is now a puzzle to open the panel
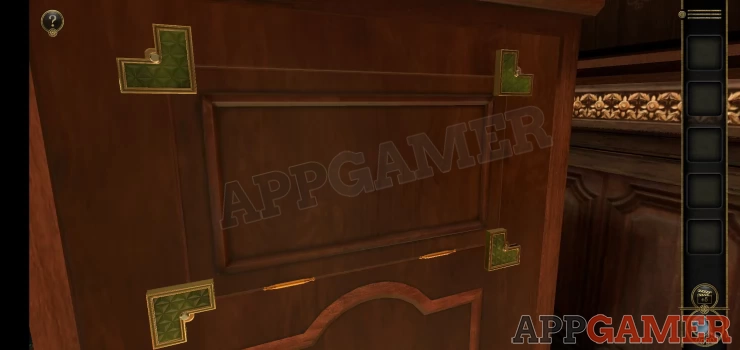
Rotate the 4 pieces to allow the panel to open. Moving one will also move others. Once it opens look inside. Lift the handle on the right and then slide it down. This will reveal another puzzle and let you collect the handle.
Handle Puzzle
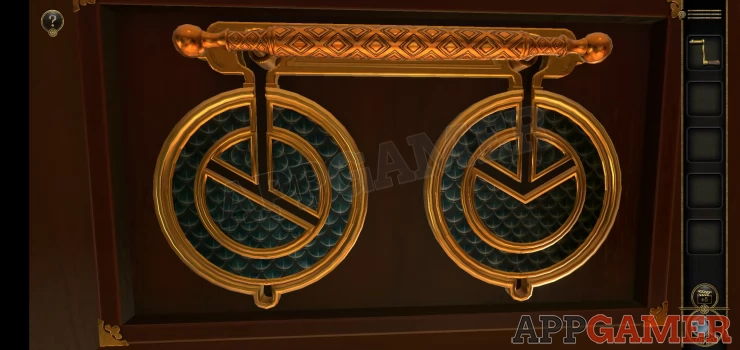
- To solve this you need to pull the handle to the bottom.
- It needs to pass through the circles that have 2 sections that can be rotated to move the tracks.
- Follow the video below for help.

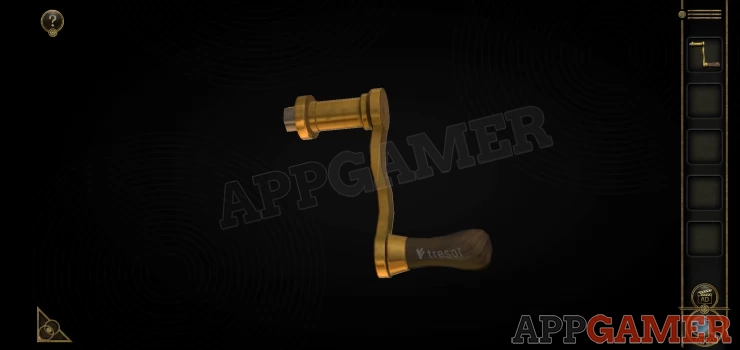
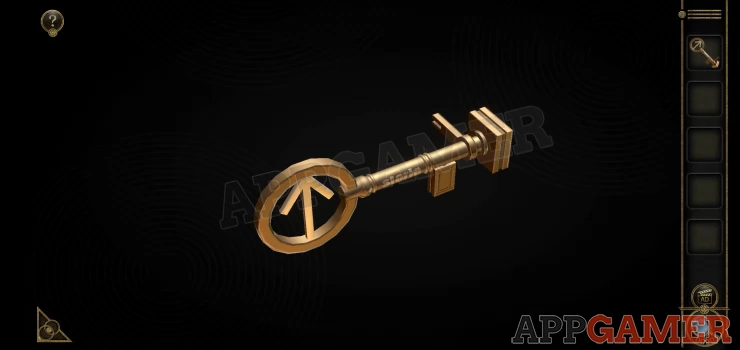
With this done you can now examine the Crank handle in your inventory.
Notice on the handle another symbol and a word. Return to the gramophone player and use this clue to set the code on top.
Show
The small door opens again and you can pass through to the miniature world.
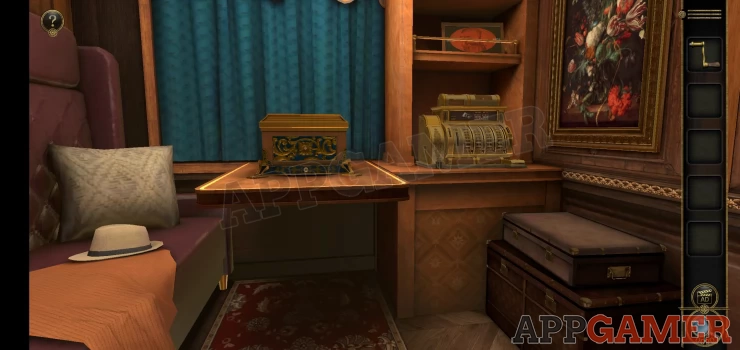
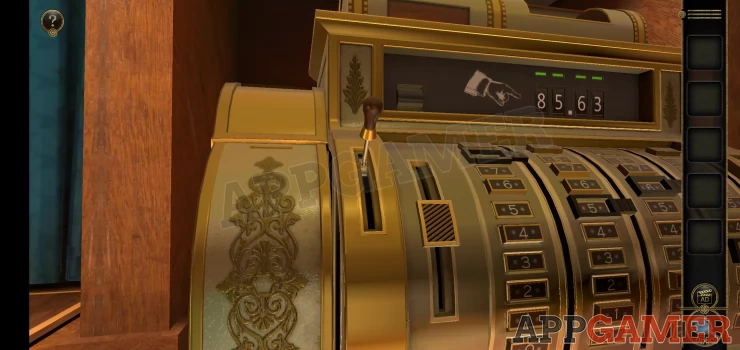
First look on the right side to view the Cash Register. Look on the right side of it and add the crank handle to the slot. Turn the handle.
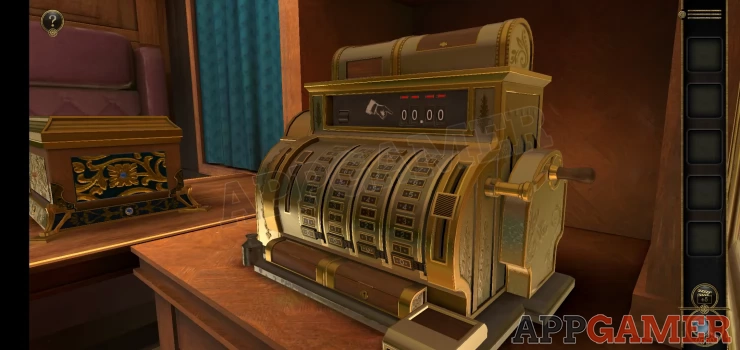
You will see a receipt appear, note the total. 85.63
Cash Register puzzle
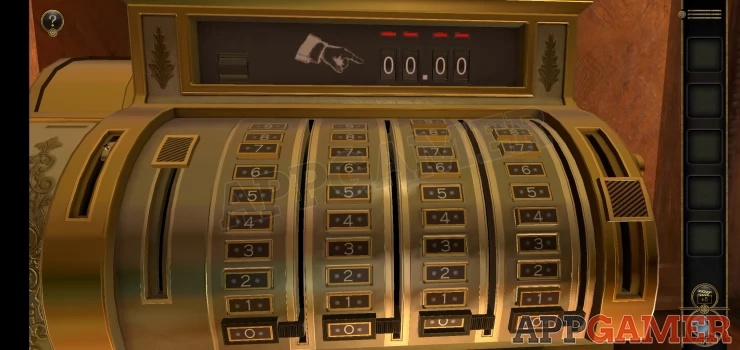
- Use the controls on the left and right to set the total on the register to 85.63.
- The slider on the right will move the black selectors up or down by 1 each time.
- The slider on the right can raise or lower the number blocks which can stop the selectors from moving or let them move.
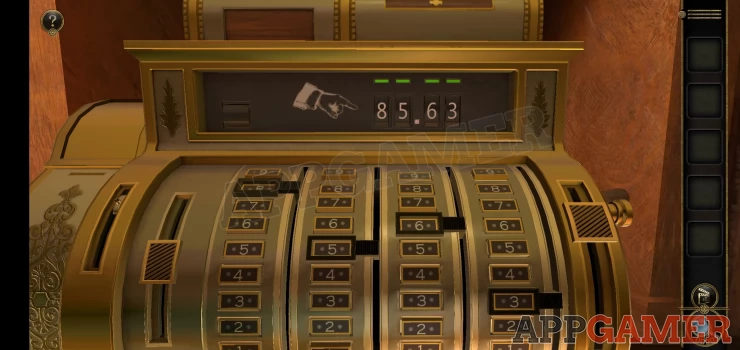
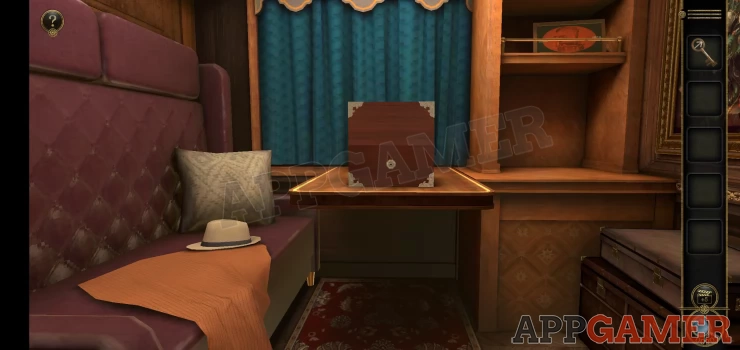
Once done you will be able to collect a key from the top. Now view the front of the box on the table in the center.
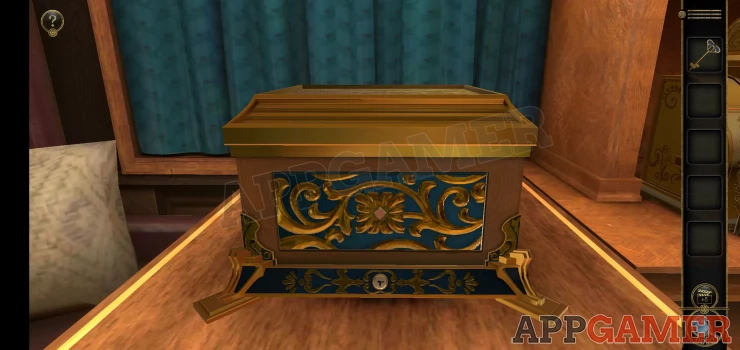
There is a key hole at the bottom. View this and use the key on it.
You need to turn the key to find a position so that the key can be inserted further. You need to do this 3 times to keep turning the key and letting it move in further until it unlocks.
Collect a Pull handle. Return to the register and place the pull handle in a slot on the left.
Pull it down to open another compartment and collect the 'Double handle locking pliers'. Go back to the box on the table and place this item in the center of the front panel.
Turn it and the top of the box will open to find another puzzle.
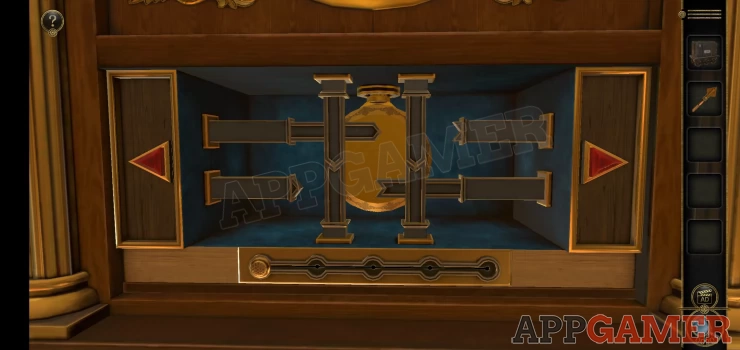
Maze Puzzle
- You need to move the red counter from the right side to the center of the circle.
- The lower left control can e used to turn the rings of the tracks to new positions.
- The button on the top left is used to flip over the tracks to give more path options.

Once done you can collect a key.
Return to the Register and use the key to open a compartment on the lower right.
Collect a Slider.
Now view the top left side of the register and add the slider to a switch here.
Then pull it down to open another panel to find another puzzle.
Slider Puzzle
- This has a rotating cylinder with colored sliders on it.
- Each slider needs to be moved to a specific colored position to complete the puzzle.
- The movement is quite tricky.
- Check the video below for help.

Collect the Round carving that appears, This completes the second miniature section.
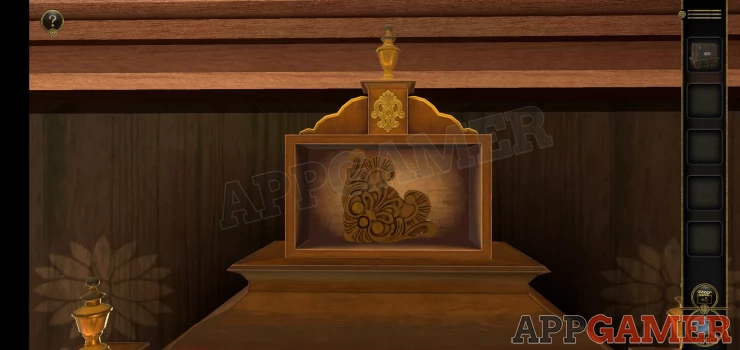
Back in the main train carriage move back to the starting area and look at the ornate box on the right.
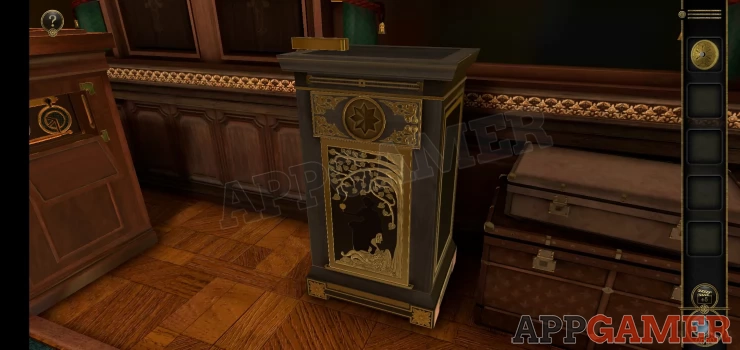
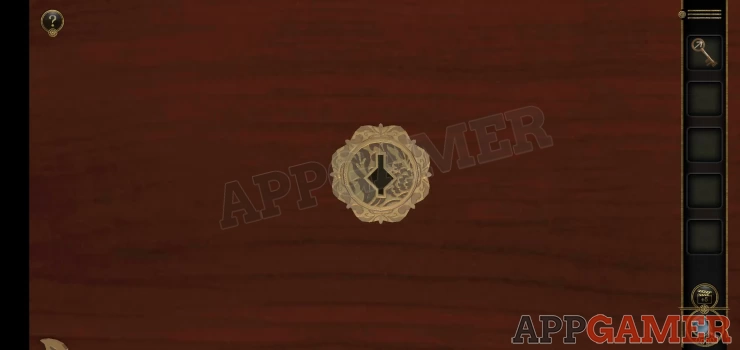
First view the round carving in your inventory and turn it around to see the star shape on the back. Then add the carving to the star shaped slot at the top.
Next look in the opened hole on the side of the box to collect a 'Tetrahedron'.
Then turn the handle clockwise to move it out of the way and allow the top of the box to open.
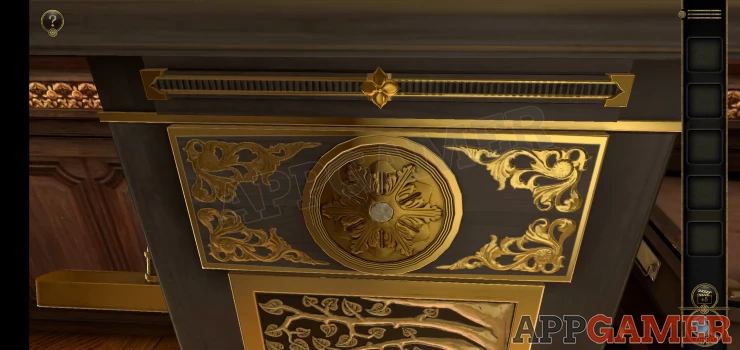
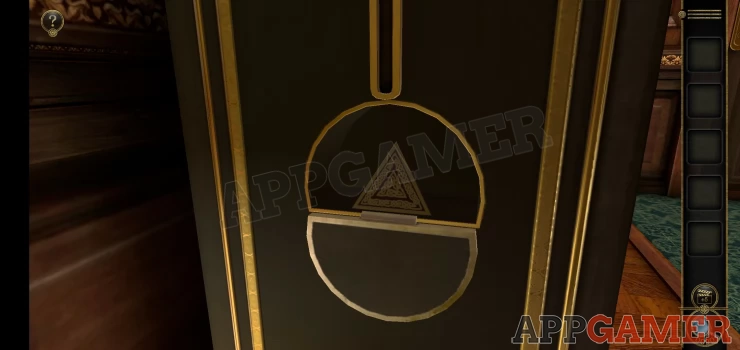
View the board that appears at the top. Add the Tetrahedron to it to start a puzzle.
Tetrahedron Puzzle
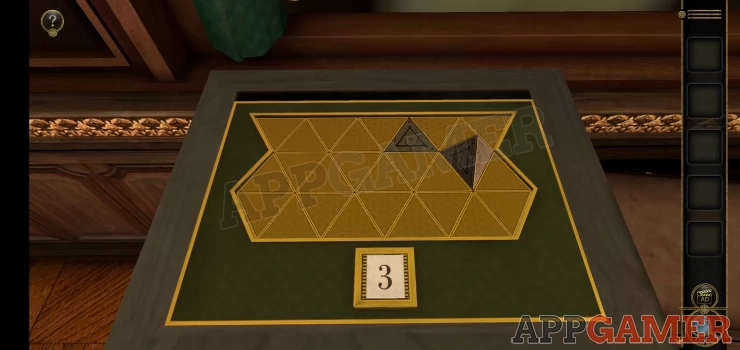
- Move the tetrahedron on the board to the indicated space
- You need to do it in the marked number of moves. The first level is 3 moves.
- There are then 2 more levels to complete.
- Check the video below for help.

Collect the Metal Carving.
View the front of the box again and add the metal carving to the small square slot at the top.
Now slide in the end pieces from the left and right to meet in the middle, this will open a drawer at the top for you to collect a 'Bas-relief of beauty'.
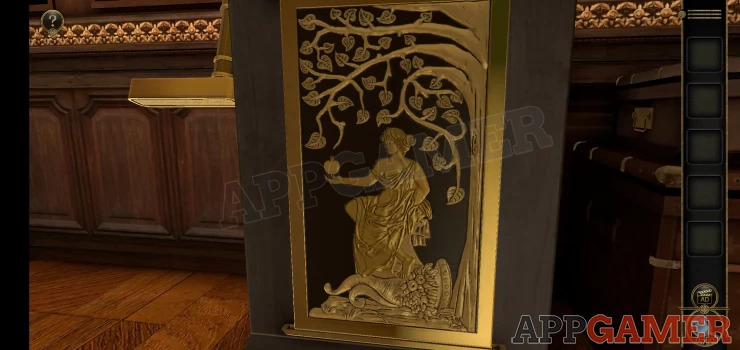
View the decoration on the front and add the relief to it. You will then reveal another puzzle.
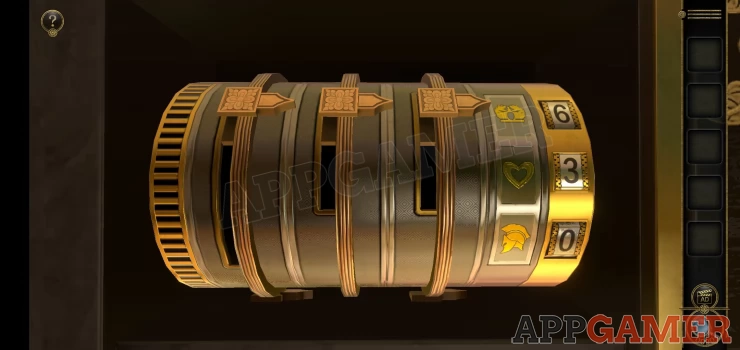
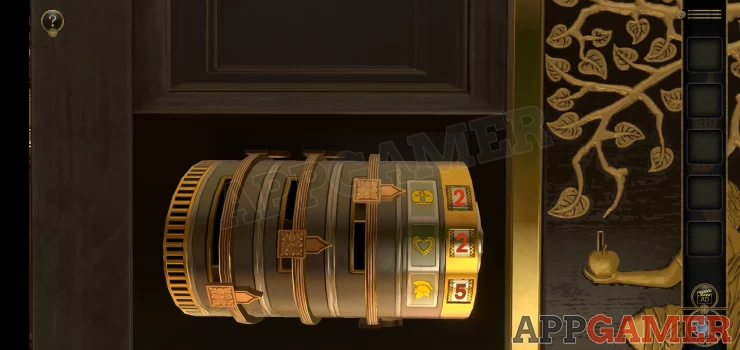
Move the pointer on the cylinder to change the numbers on the right.
Set them so that the red numbers appear 2 2 5
Solution: Show
Once done collect the Metal apple from the opened drawer. View the Metal apple in your inventory and then tap on the leaf at the top top open the puzzle.
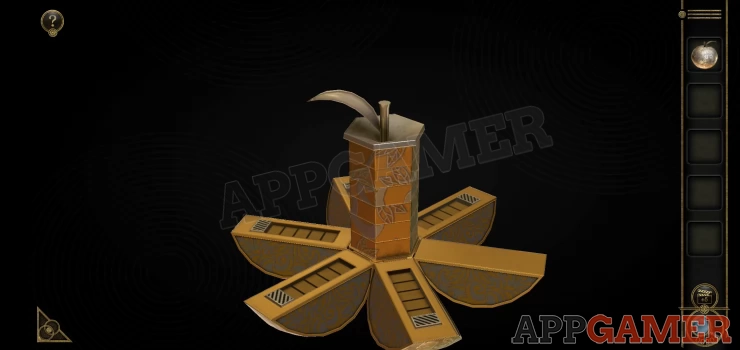
The center core has 6 sections, 5 of these can be turned by moving the sliders on the side segments.
Set them to complete the drawing on the core.
Solution: Show
Once done you will collect a Key.
You can now view a locked drawer at the bottom of the same box and use the key to open it.
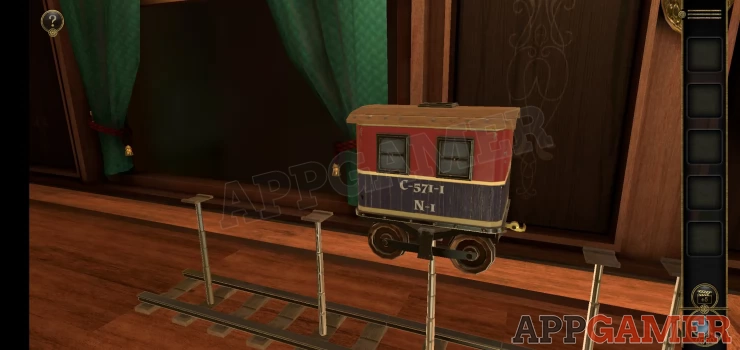
Collect the Train Part A. View the top of the bar again and place the train part on top of the raised platforms over the track pieces.
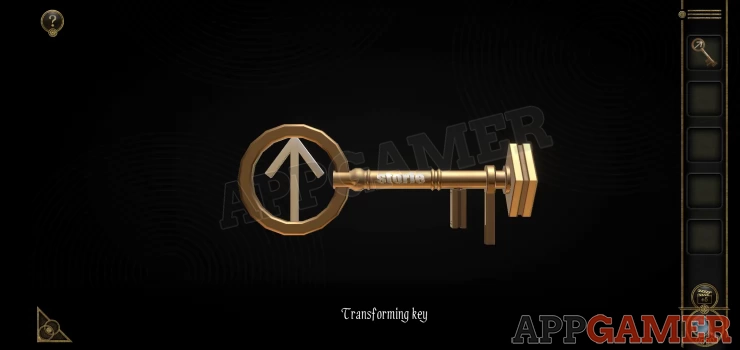
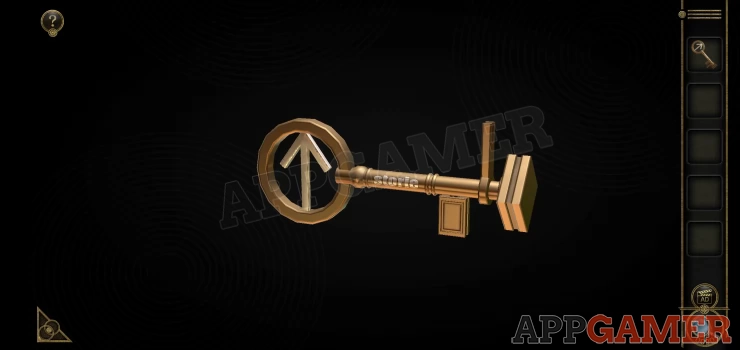
You will then be able to collect a 'Transforming Key'.
View the key in your inventory to see another symbol and word clue.
Return to the gramophone player and use this symbol and word to set the controls again.
Show
You can now enter the miniature carriage again.
View the box on the table in the center and note the appearance of the key hole.
Now view the transforming key in your inventory, you can turn parts of it to adjust how it appears. Change it until it matches the lock shape, it will be automatically collected when you get it correct.
Solution: Show
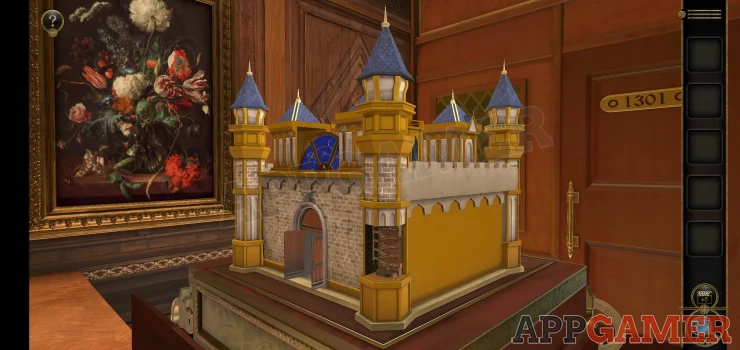
Use the key on the lock and tun it to open the box. The key will be collected again. Now view the model castle that appears from the box. Look at the front left tower.
Turn the base of the tower to open a panel below. You can then collect a Plaque. Now place the plaque above the front door to the castle. The doors will open.
View the key hole inside the doors. First turn the pieces around the hole to clear the way and make the square opening.
Now view the transforming key again and adjust the parts so that it will fit in the key hole.
Solution: Show
Use the key and the top section of the castle will open. Turn to the back of the castle roof to see a dial with star constellation maps. To the left and right are sliders that you can pull down to change the sections of map that appear.
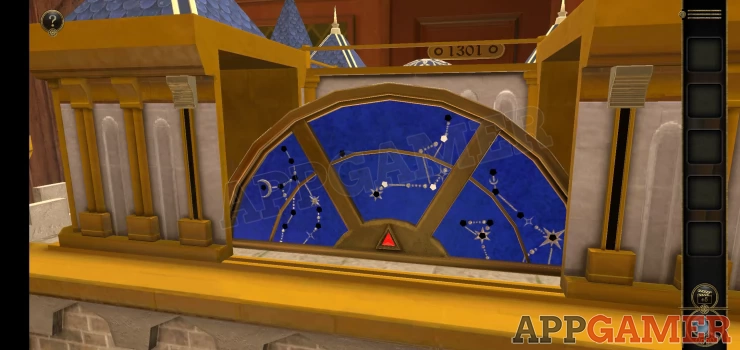
You need to adjust the map until you find a set where all of the stars are lit.
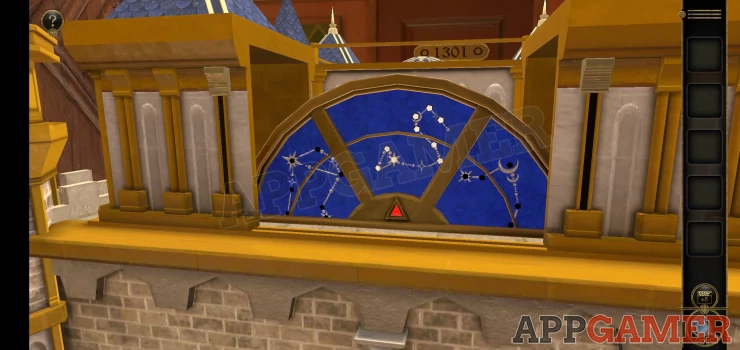
Once done the lower doors open and you can collect a 'Tower Top Model'. Add the top to the back left tower and another panel will open to reveal a puzzle.
Turnstile puzzle
- Turn the dial at the bottom to change the arms of the turnstile.
- Use the slider on the right to lift it.
- Once you can raise it up to the top the puzzle is complete.

Collect the Shield that appears. Turn back to the front of the model and add the shield to the top.
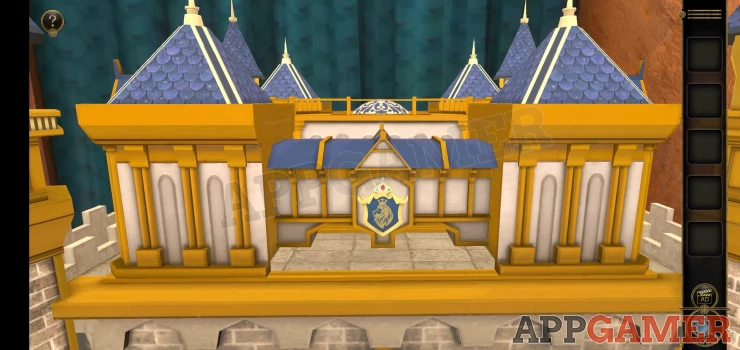
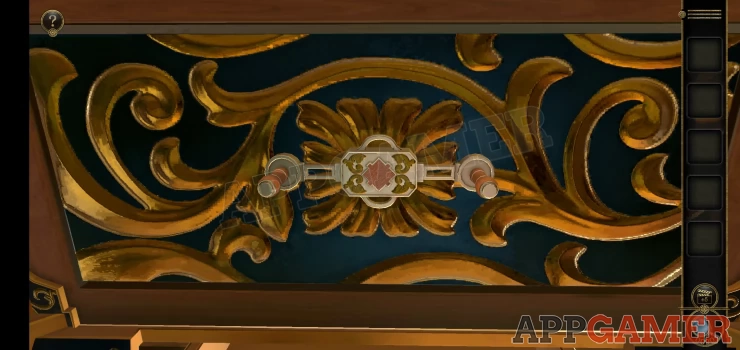
View the top of the center tower that appears and then rotate the blue dome until you see this symbol
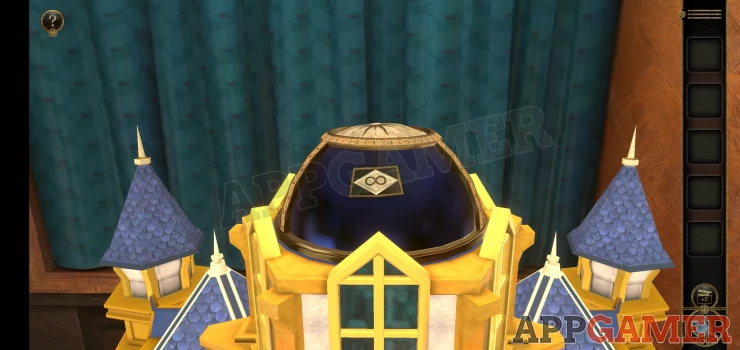
Now you have a puzzle on the top to arrange the pieces.
Turn the 2 dials at the base of the top piece to turn the shapes inside.
Align them to form an outline of the symbol that appears below.
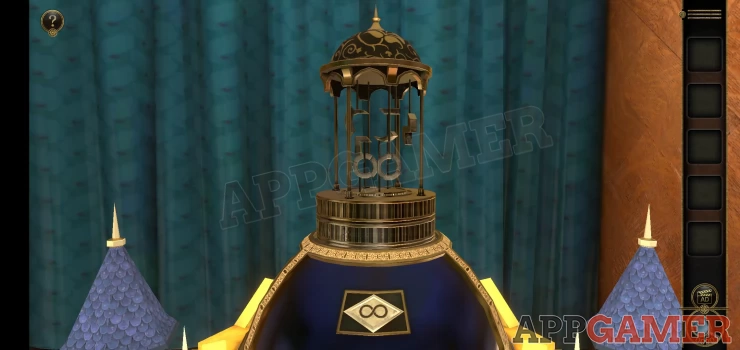
Once you complete one, there will be a second symbol to replicate.
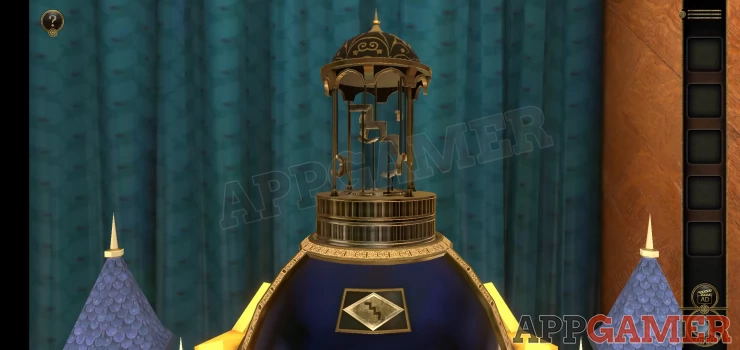
Then a third.
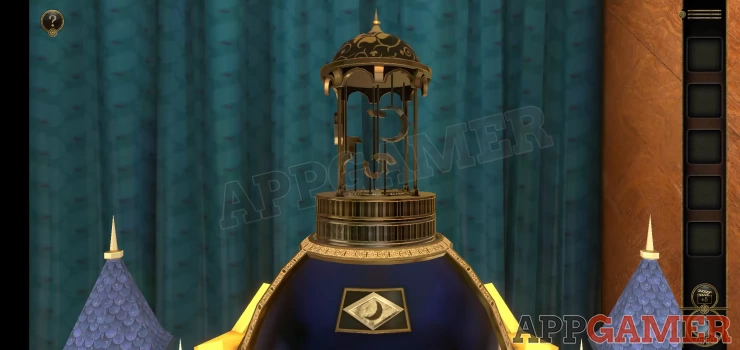
Once complete you can collect a handle and this completes the third miniature section.
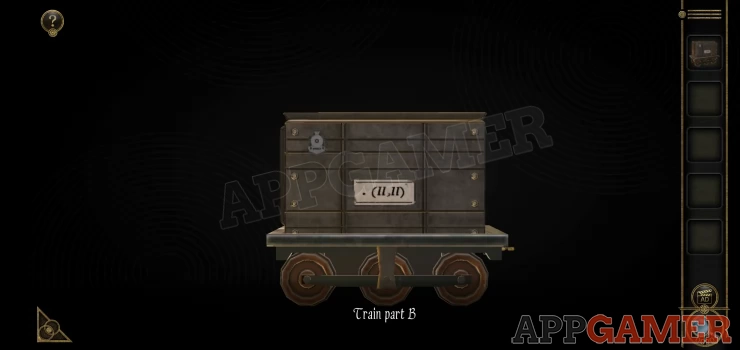
Back in the main carriage you can now also collect Train Part B. Note the clue on the side of it.
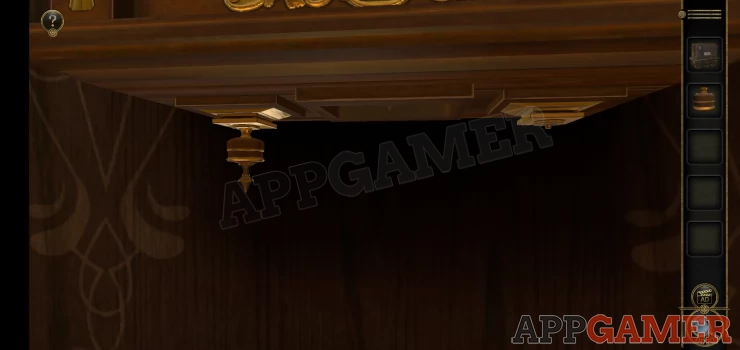
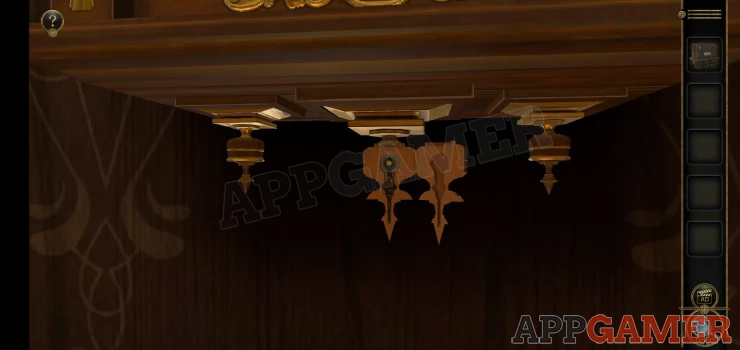
Now turn to the other side of the carriage to see a clock on the wall, view the left side of this.
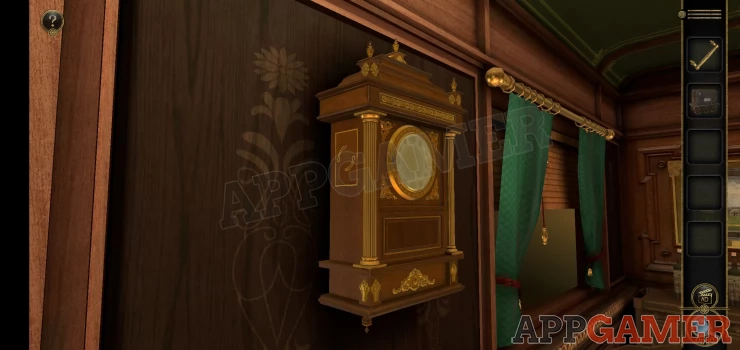
Add the handle to it and then turn to open the panel .
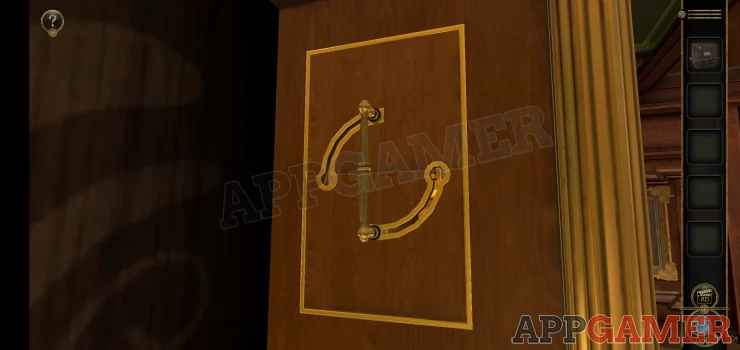
Turn the gears inside and you can collect a 'Strange Key'
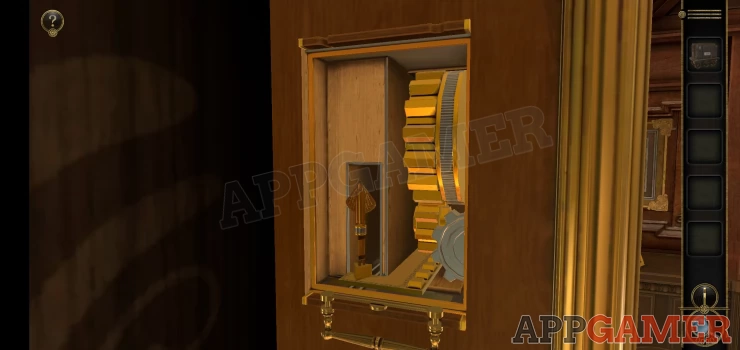
Now view the front of the clock and a key hole at the bottom.
Use the strange key here to open it. You will collect the key again.
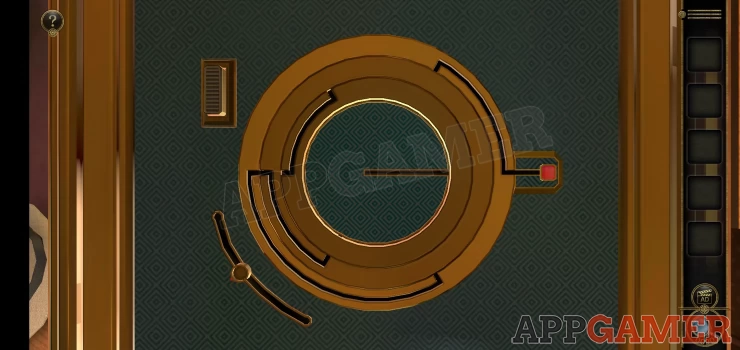
You now need to solve this puzzle by moving the bars.
- Use the arrows to move the slider at the bottom left and right.
- this will cause some bars to move in our out
- Continue until all of the bars are retraced and you can access the round box behind.

Once done you can turn the dial on the gold box to match up the red arrows and it will open. Collect the pocket watch. Then view it in your inventory and open it.
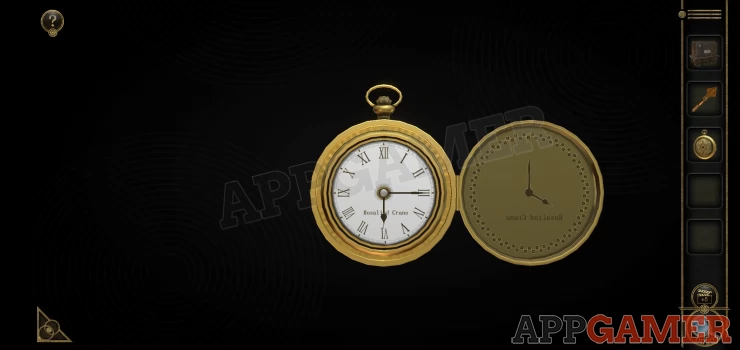
Notice the hands on the cover on the right. Set the time to match this (notice that the writing is reversed)
Solution: Set the time to 8 o'clock.Show
You can then collect another key (Small key).
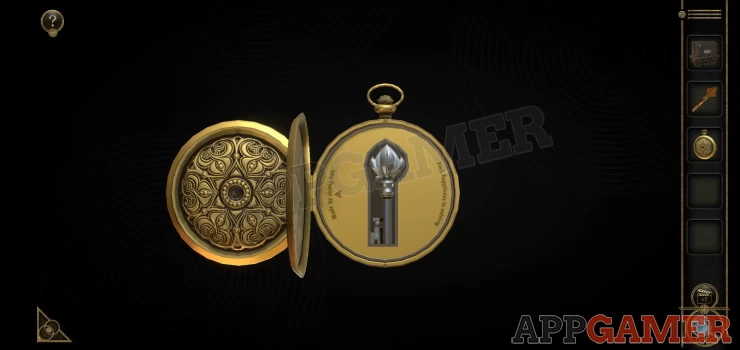
View the clock face next and use the small key on the lock on the left to open the cover.
Collect the Metal Butterfly Wings from the center of the clock face. Now view the Strange key in your inventory and add to it the butterfly wings.
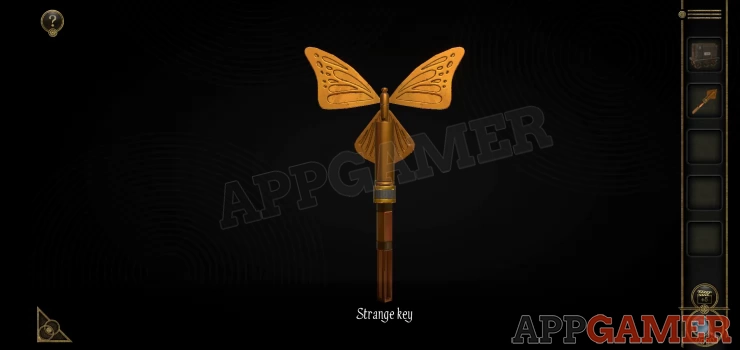
Next turn the wings on top until the key alters and you will collect it again. Now look at the right hand side of the clock to see another panel. Open the round cover at the top.
Use the strange key here to open the panel . Collect from inside a Decorative Wooden Block.
Now have a look at the inside of the panel that opened to see a clue. Notice the 2 symbols.

Now we need to look at the bottom of the clock.
Add the wooden clock to the right side and a third block will appear in the center. Open it to find a pointer to collect.
Return to the clock face and add the pointer to the center.
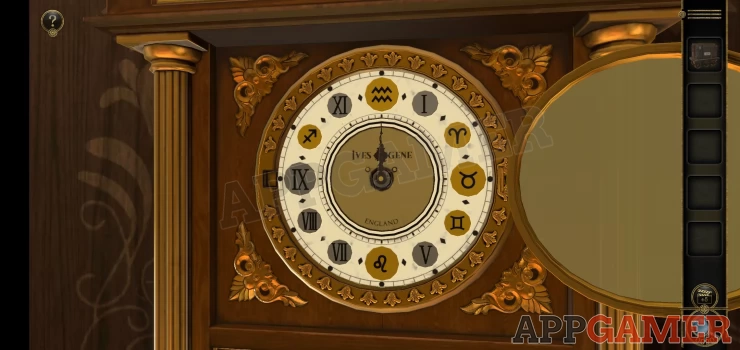
You can now drag the pointer around the clock face. As you pass each number it will change from number to symbol and back again. To solve this you need to set all of the clock numbers to show only symbols as below.

The clock hands will then appear.
Use a clue from above to set the hands to the correct position.
Solution: use the symbols in the panel on the right of the clock, the time set needs to be 8:20.Show
The clock will turn and you can collect a 'Spring' (wind up key) from behind.
Slide the small gear on the top left down. Then use a slider on the top right to turn the half moon cover a little and look closer for a small key hole.
Use the key (spring) here to start the clock and it will turn back. You can then collect a Carving from the top of the clock.
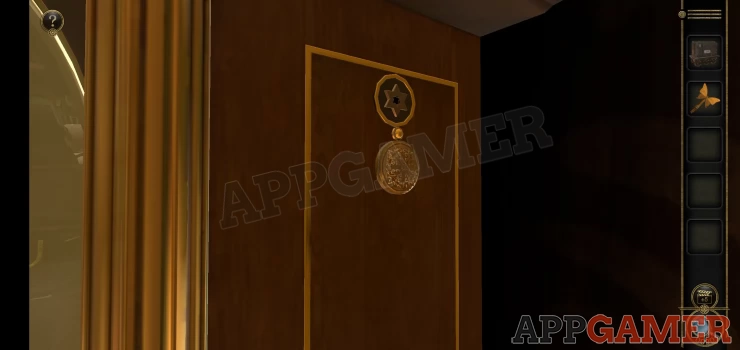
Now view the painting on the wall to the right of the clock, you can add the carving to the lower left corner.
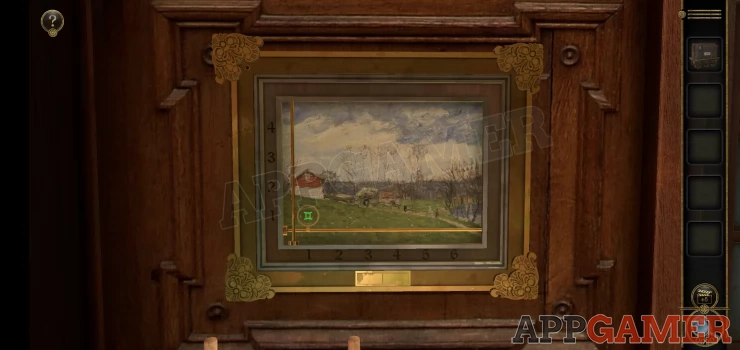
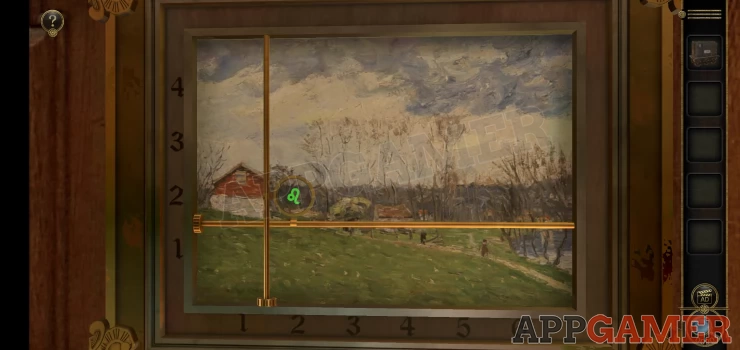
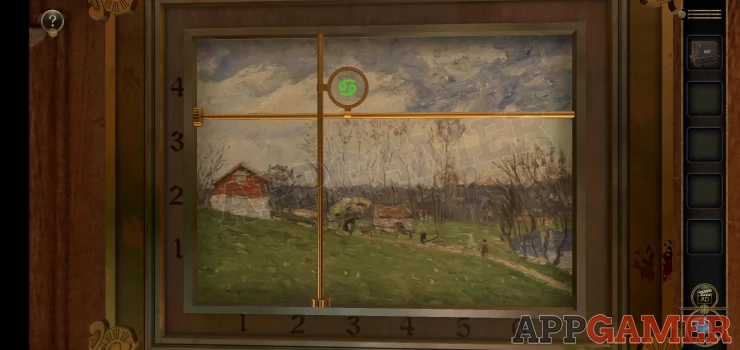
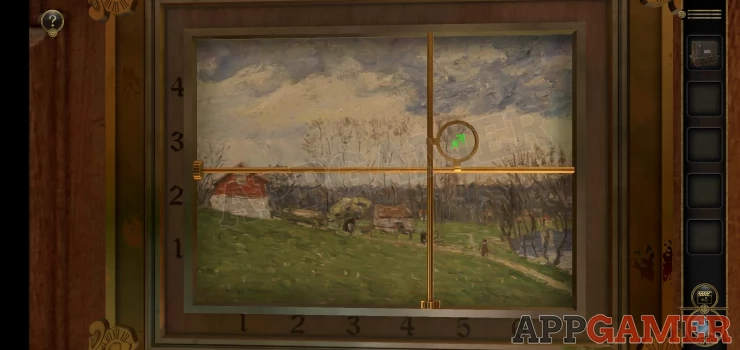
Now you need to move the corner carving until they are all close into the painting. Once done it will reveal a 7 number code entry at the bottom of the frame.
Painting Code Puzzle
There are several steps to getting the code. Some of the clues we have seen already.
Step 1: There are 3 clues hidden around the carriage, these have a number of dots followed by coordinates.
Show
Step 2: Move the glass on the painting to the positions of the 3 coordinates to get 3 symbols.
Show
Step 4: Finally look on the clock face to find the symbols and determine the numbers that they represent.
Code: 6 5 10Show
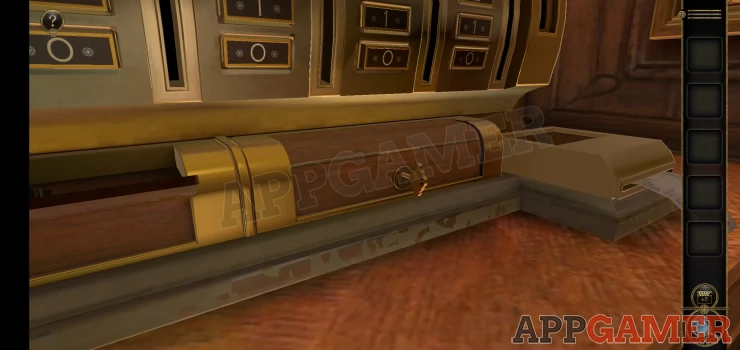
You can now collect Train part C. Return to the starting area on the train and view the bar on the right. Add the 2 train parts to the model.
A hatch will open on the top of the middle part. Tap on this to look inside. There are a range of train controls
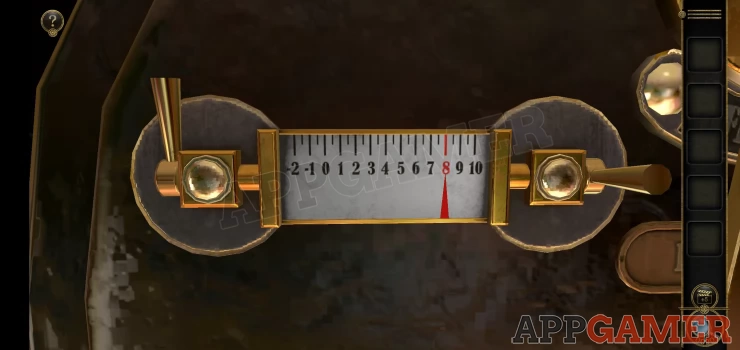
Model Train Controls Puzzle
First view the gauge on the left. Use the handles to set the gauge reading to the red 8.
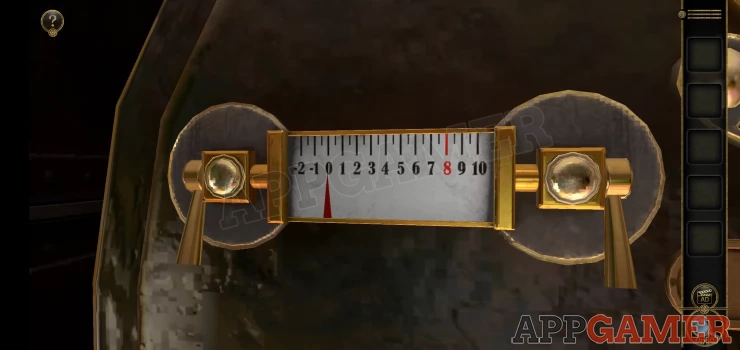
Solution: Show
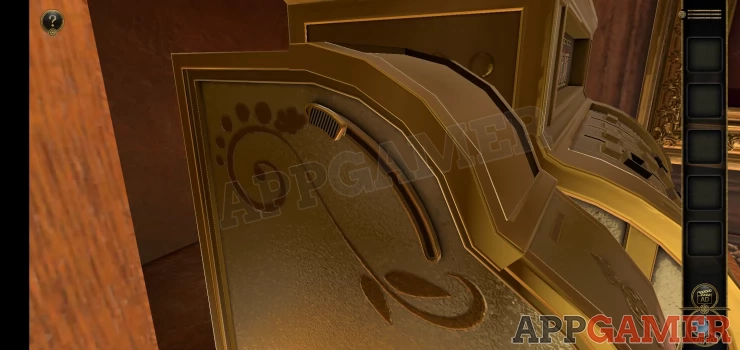
You then view the lever in the lower center. Pull this to the right.
View the lever above this and pull it to the On position on the right.
Next you view the gauges on the right side. You need to set both of these to the blue sections.
Hint: turn the top wheel to the right until the top gauge reads 100 and then turn the bottom wheel, keep adjusting until they are both in the blue.
Next you will see another switch below which you can turn to On.
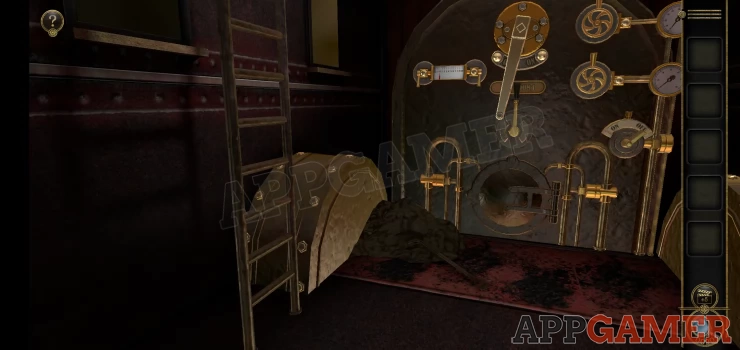
Now you can collect a Linkage shaft from the boiler door that opens. Now look at the body of the engine at the front of the train model. This is another puzzle.
Train Engine Puzzle
- To solve this you need to turn the body of the engine and move the cylinder from the back to the front.
- Watch the video for help.

Collect the Handle from the front of the train. Now view the side of the train and add the linkage shaft to the wheels. Then also add the handle.
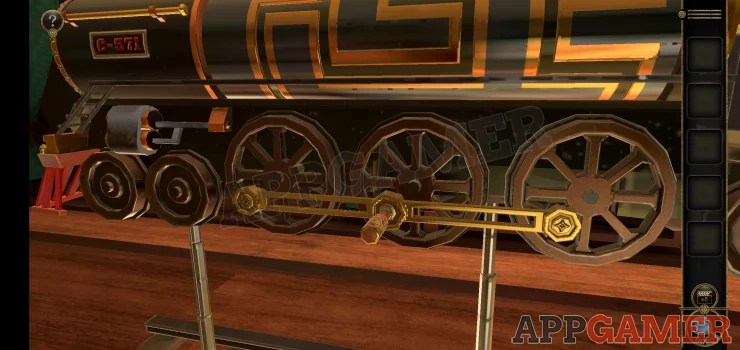
Turn the Handle to move the wheels and the train will activate. It will move down the bar top to a sign.
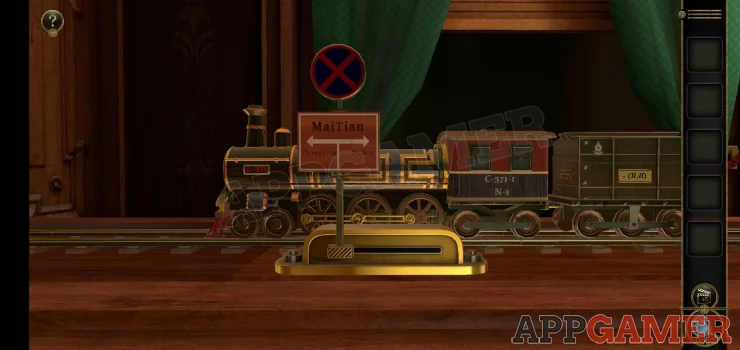
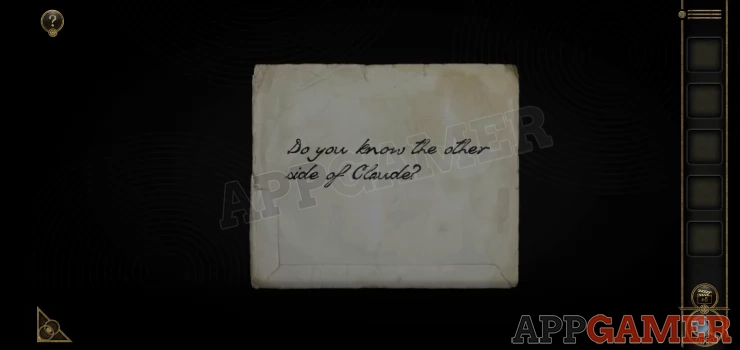
Slide the sign to the right and it will turn and reveal another note.
"Do you know the other side of Claude?"
This completes Chapter 4. Move on to Chapter 5.
We have questions and answers related to this topic which may also help you: Show all
| 3D Escape Room Detective Story Chapter 3 Walkthrough | Back to Top | 3D Escape Room Detective Story Chapter 5 Walkthrough |
 With 20 years of experience in creating video game content for the internet and over 30 years as a gamer, Mark is now a passionate mobile App Gamer. Loving a challenge, he is always ready to get stuck in to both survival builders and puzzle solving games. He has been providing content for AppGamer since 2014.