Chapter 3 - First Brotherhood Walkthrough - Part 3
More Lost Lands 9
Welcome to our Lost Lands 9 Walkthrough, another in the popular line of Mystery escape room and puzzle games from Five-BN games. This is part 2 of out guide to Chapter 2.
Following Chapter 3 Part 2, the wizard Maaron and Folnur have discovered the rune to take them to the Kingdom of Gort to investigate the source of the mysterious entity.
Chapter 3 - First Brotherhood Walkthrough - Part 3
After the cut scene you start at the top of a cliff above the dungeon that you need to reach.
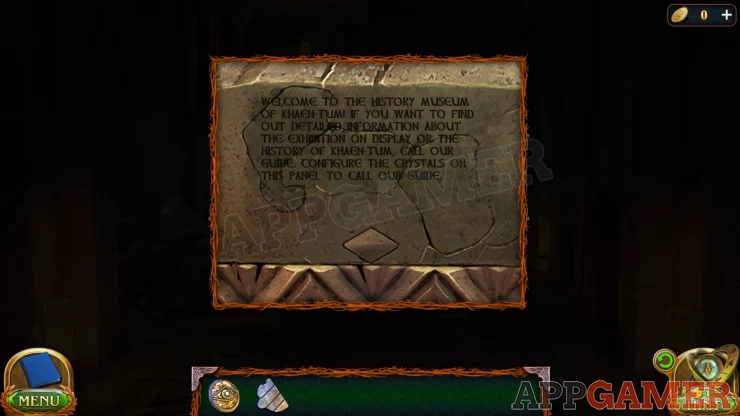
New Task: What happened in Khaen-Tum?
Collection Item: Armor piece on the right just below the bird nest.
Morphing Object: Small tower in the distance on the far left.
Tap the red flowers just to the left to collect a Well Tile from them.
View the Nest on the right and tap on the Vulture. You need something to lure the bird away.
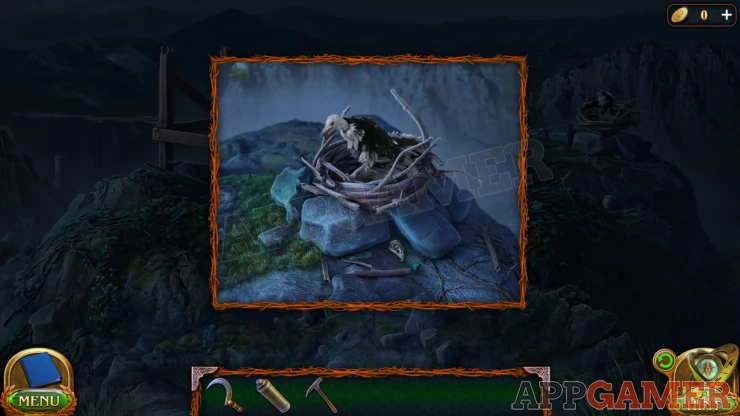
Travel to the top of the tower in the Bryn Pass and you can collect from the ground on the right a Dead Crow.

Then go back to the nest and use the dead crow on the vulture, it will be thrown and the vulture will fly away.
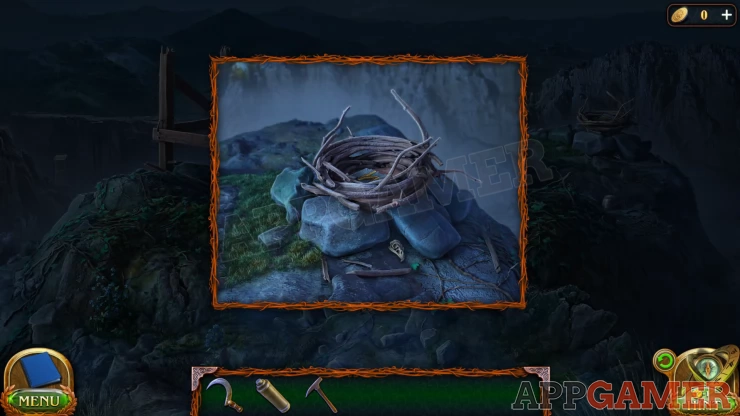
Search the nest to collect another Well Tile.
View the round Well in the center of the hill.
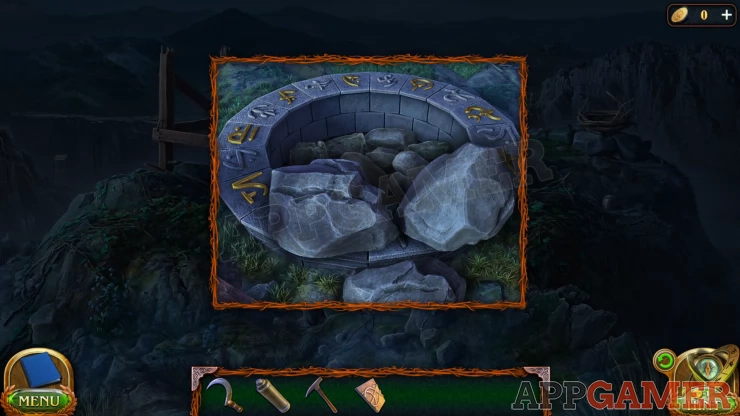
Clear away the rocks and then you can add the 2 tiles to it.
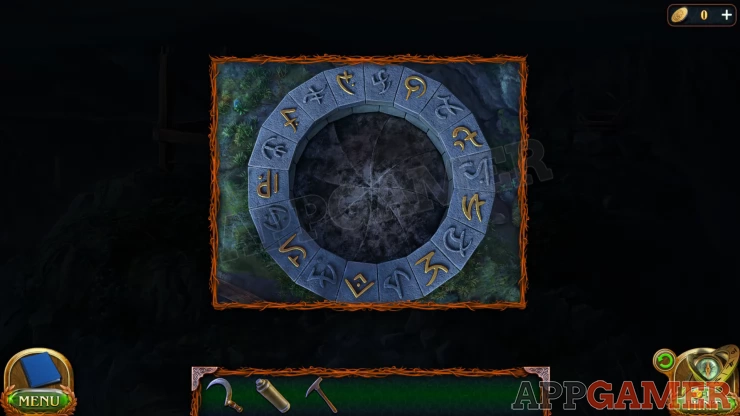
Next use the spyglass on the buildings in the distance to look out across the cliffs. Look around the area to find 3 symbols.
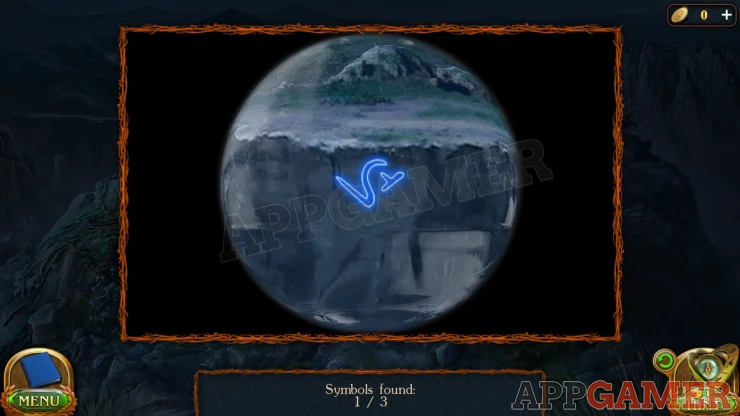
Then view the well top again and tap the 3 matching symbols
Solution: Show
The well opens and you can go down into the city.

Collection Item: Armor Piece on the steps on the left by a large chain.
Morphing Object: Ladder section on the building on the right.
First tap the side of the building on the right to see some steps that are missing.
Next view the large hanging net on the left.. You need to find a way to cut it down.
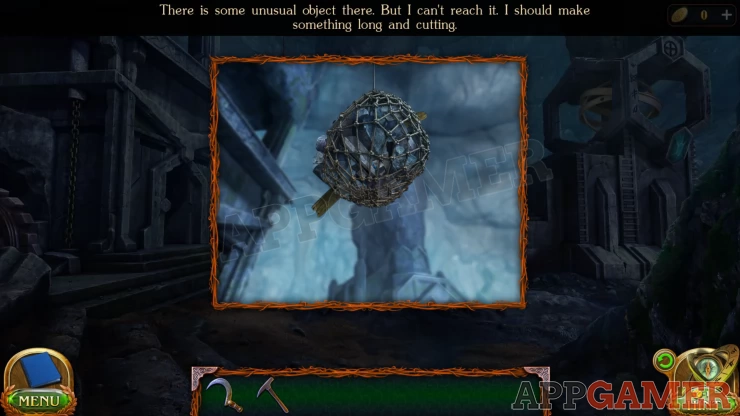
Go back up to the top of the well entrance and view the wooden structure on the left
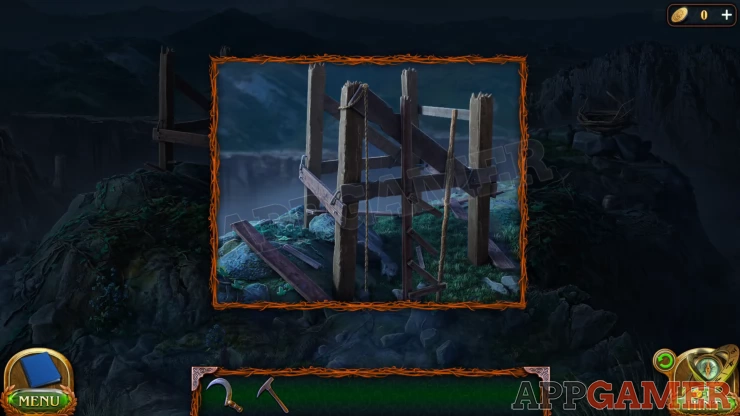
Collect a Long Pole and then use the sickly on the rope to cut and collect a Piece of Rope. Now view the long pole in your inventory and add to it the sickle and the Rope.
You will get an Elongated Sickle.

Go back down and use this on the hanging net to cut it down. You can then view the rubble on the ground.
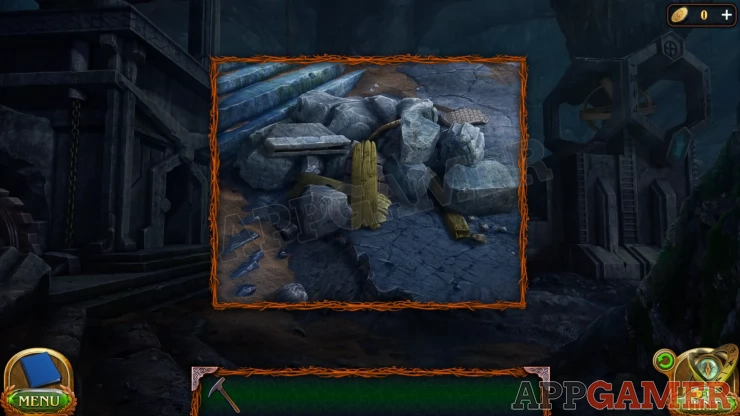
Tap to move the items around until you find and collect a Pattern Block.
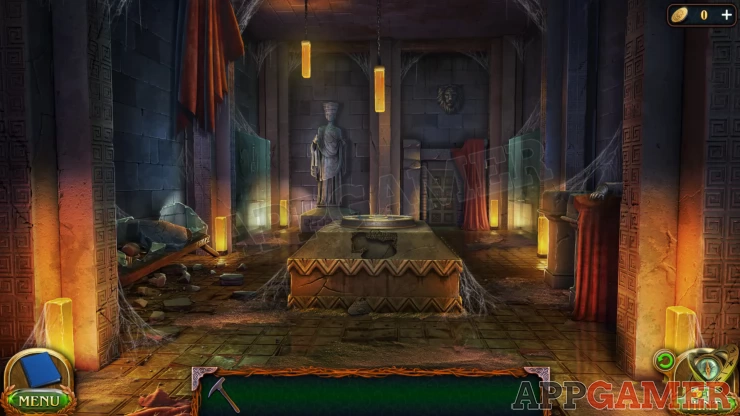
Now tap the doorway on the left building to enter the temple.
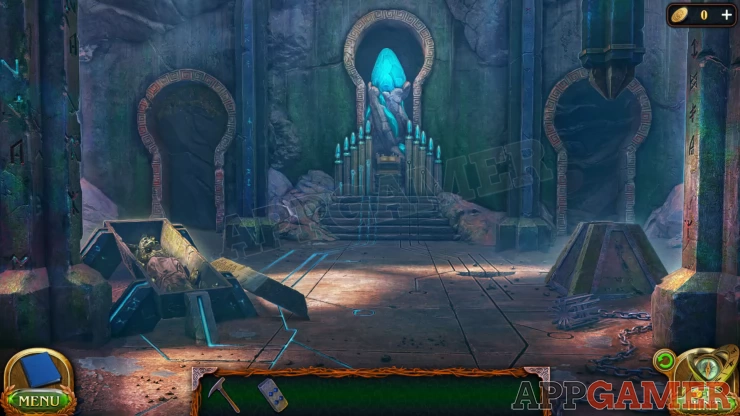
Collection Item: Armor Piece o the left of the steps in the center.
Morphing Object: Vines hanging in the top of the archway on the left.
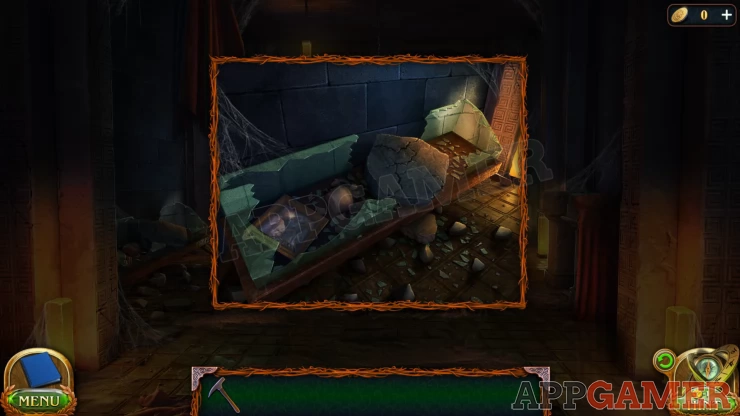
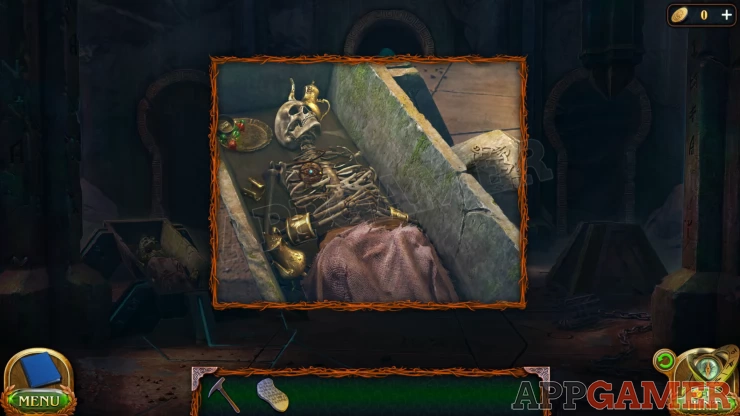
Look inside the sarcophagus and collect another Pattern block.
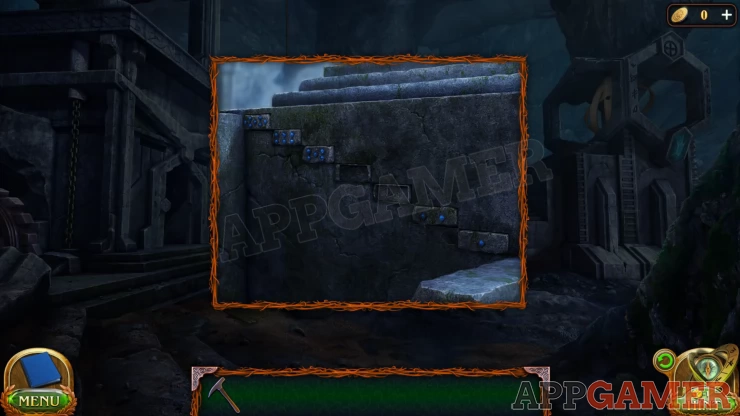
Now back out and view the missing steps on the side of the building on the right again. Add the 2 pattern blocks her and you will start a puzzle.
Steps Puzzle
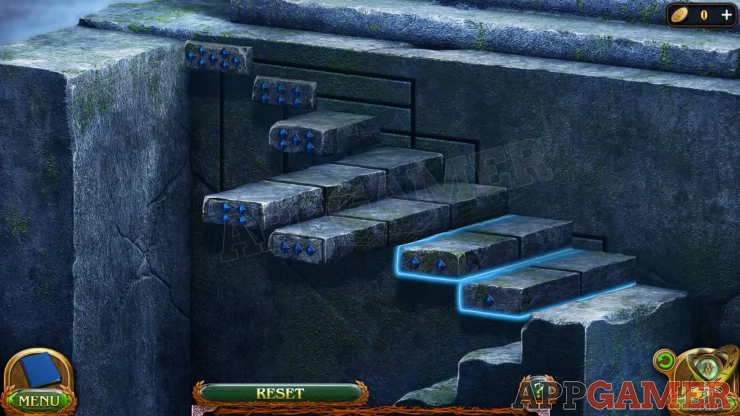
- Each step can be in 4 positions. Closed, 1 out, 2 out and 3 sections out.
- Tap a step to push it into the wall. Each step you move in will also move another one out.
- You need to get all 7 steps to be 2 sections out of the wall.

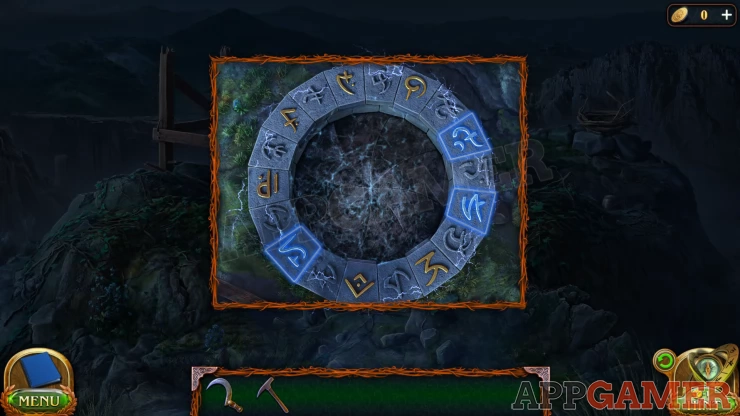
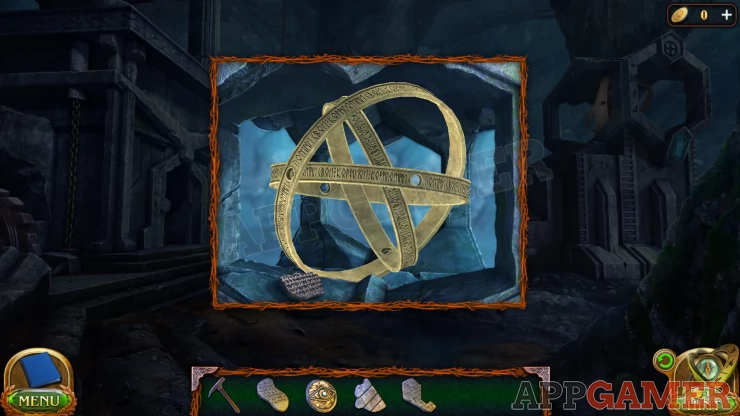
Once done you can view the moving rings at the top of the tower.
Manuscript: below the rings to the right.
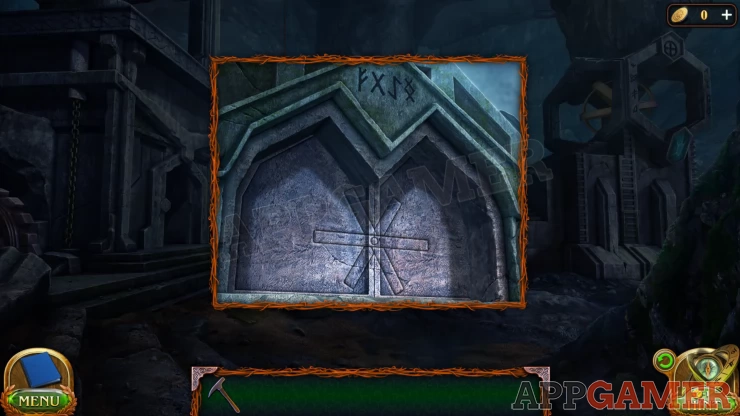
Now view the doorway to the building in the distance. It has a symbol that resembles the rings.
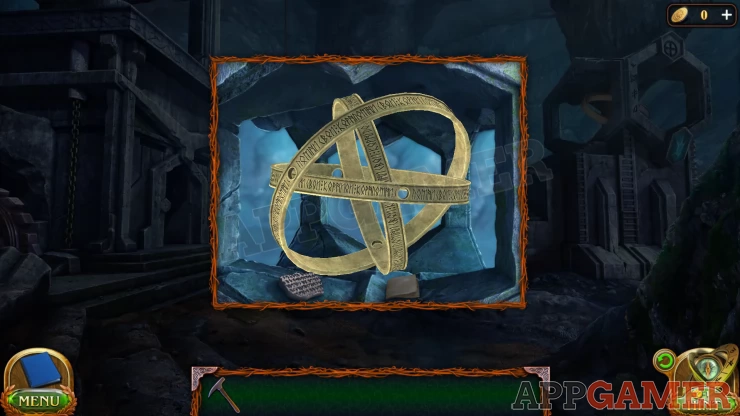
After this view the moving rings again and you will be told that you need to stop them from spinning. Close the view and Folnur will stop the rings from spinning, you can then view them again for a small puzzle.
Rings Puzzle
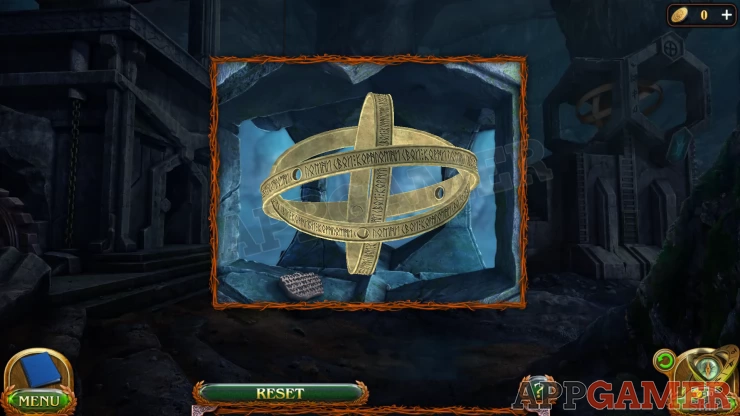
- Drag each ring to rotate it and align them.
- Arrange the rings so that they match the design on the door with the holes lined up in the center.
Solution: Show

The doors open. Go into the Museum
Collection Item:Armor piece on the red plinth on the right side.
Morphing Object: Round shield / lion head on the far wall on the right
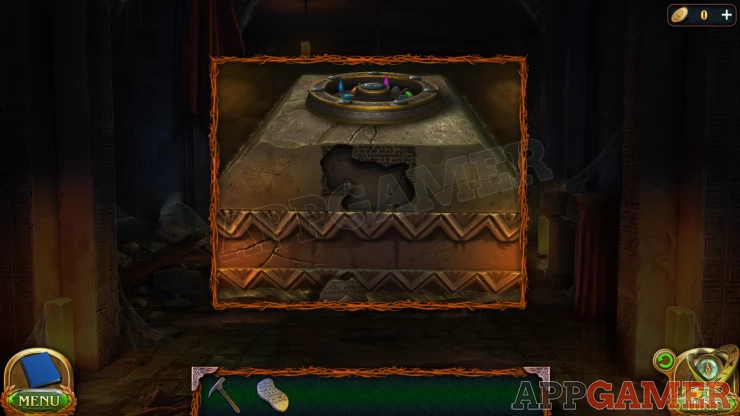
First view the platform in the center there is a broken plaque there.
Then view a broken display case on the left wall.
Move the large stone to find a book and read it for a clue about Oigela. Then you can collect a Shard of Text from under the book.
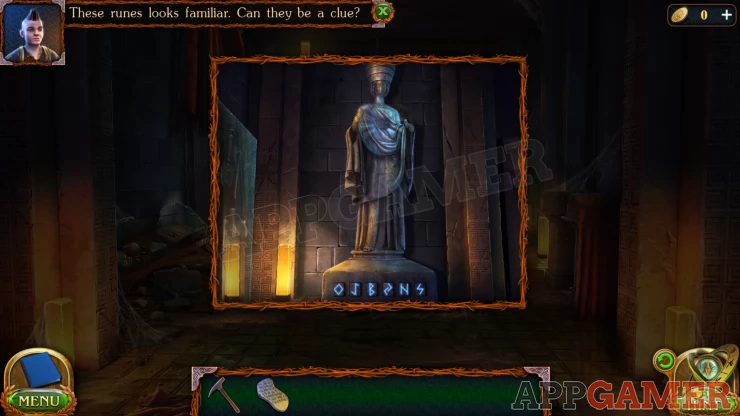
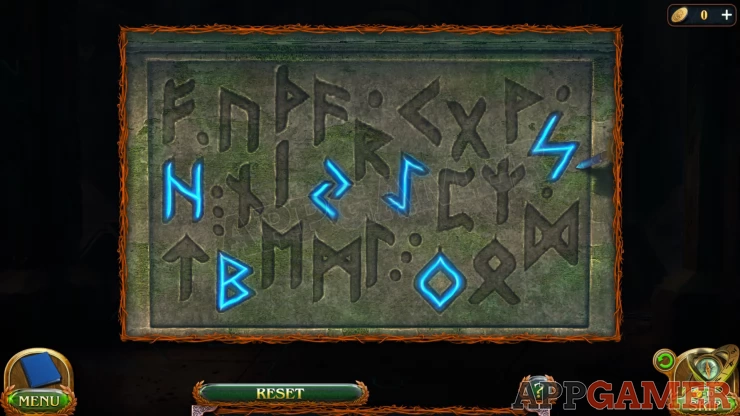
Next view the statue on the back left and tap the 6 runes at the bottom to light them up. This is a clue.
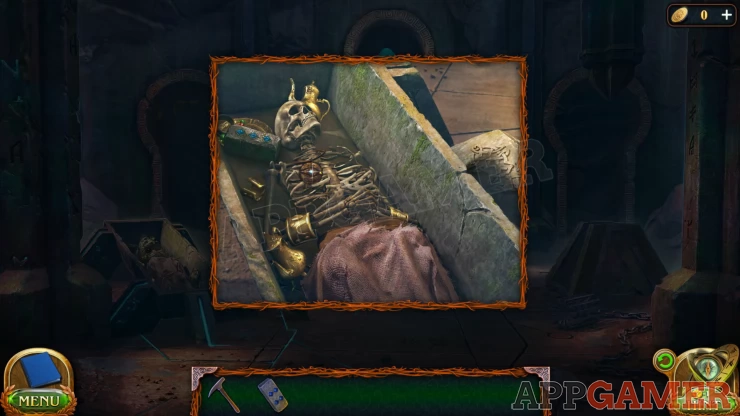
Back up and enter the Temple building on the left again. Look inside the sarcophagus again and you can collect Oigela's Medallion.
Then view the altar in the center of the room. Select the Quill from the recess and then you can use it on the tablet below to mark some runes.
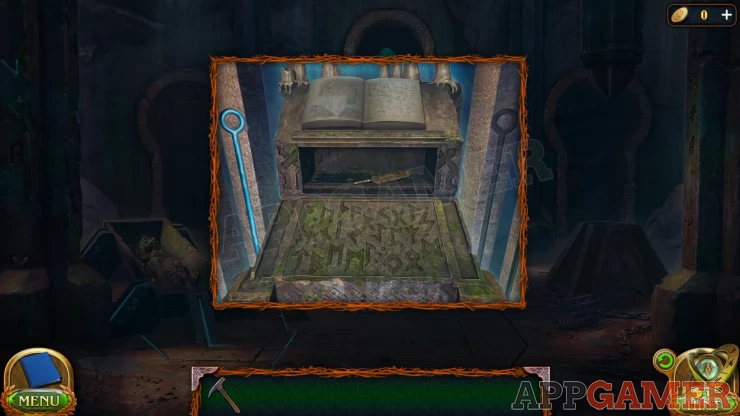
The clue for this is the 6 runes in the museum
Solution: Show
Lights on the right are activated but there is a hole in the floor. View this,

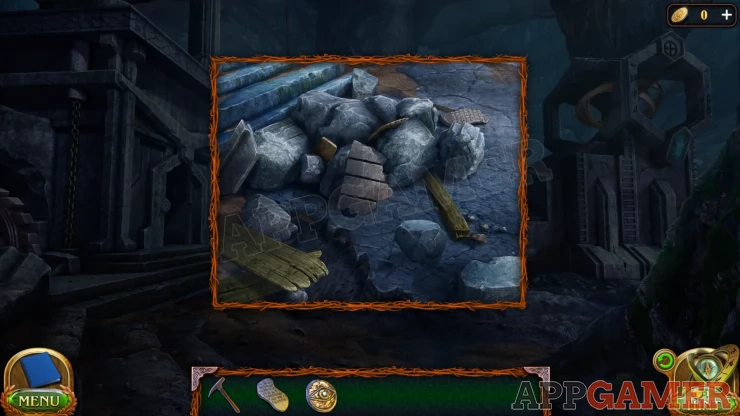
Now back out and view the pile of rubble on the floor from the net. Collect a Part of the stone Floor and also another Shard of Text.
View the spinning rings on the tower on the right again and collect 1 more Shard of Text.
Go back up to the top of the well entrance and view a small mound on the left below the wooden structure, there is a crack in the rock.
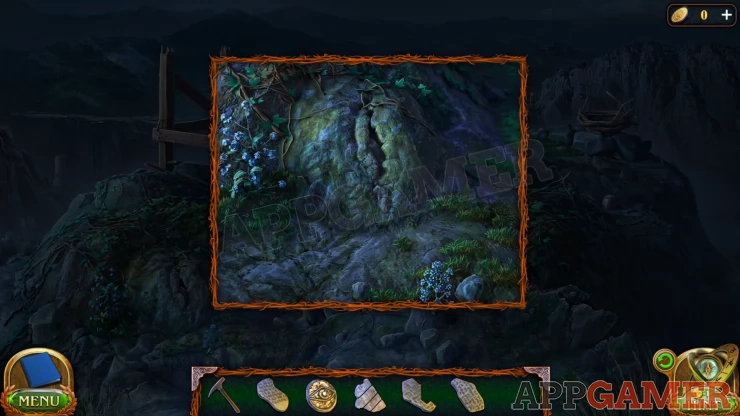
Use the pickaxe here to chip away the rocks and collect the Projection Crystal.
Now go back down to the Museum.
View the broken section of the center platform again, select the fourth shard of broken text that is below the broken area and place it inside. Then add the other 3 shards of text to it.
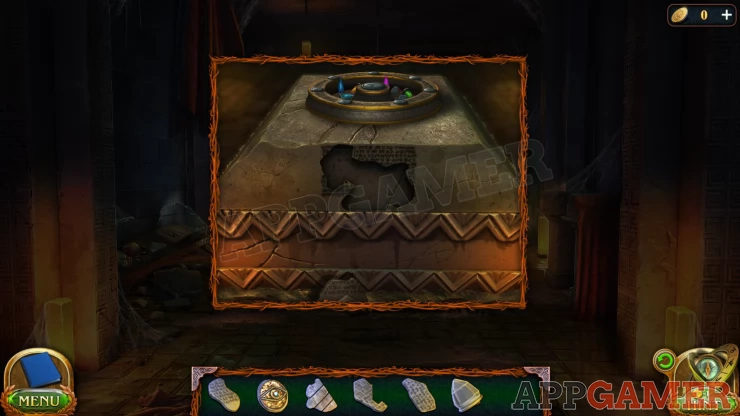
Next view the top of the platform and place the Projection Crystal in the center.
View the area with the text again and press the small button just below the engraving, this will energize the crystal above.
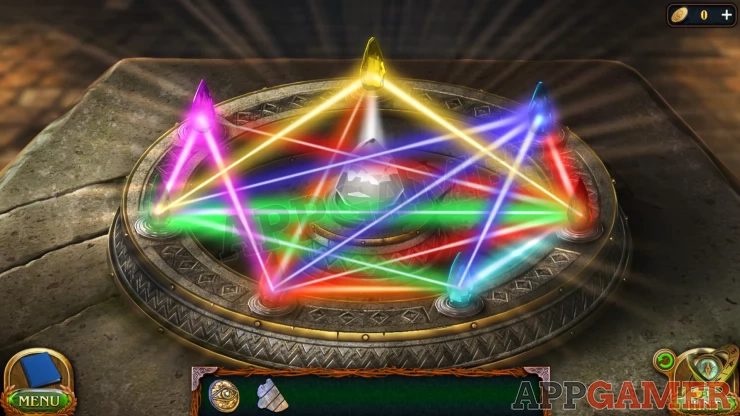
View the crystals at the top again and now you have a puzzle.
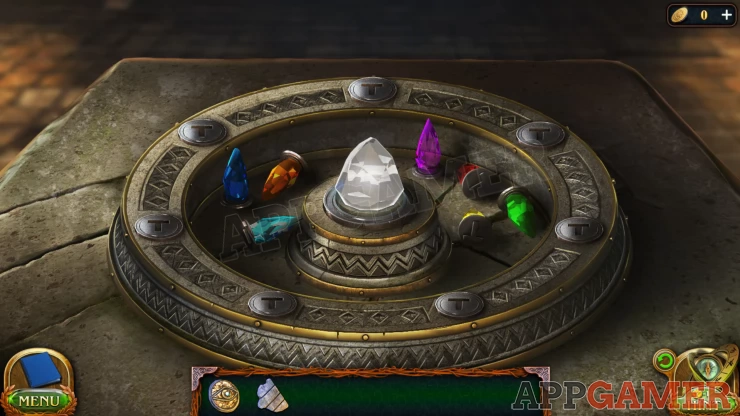
Crystal Puzzle
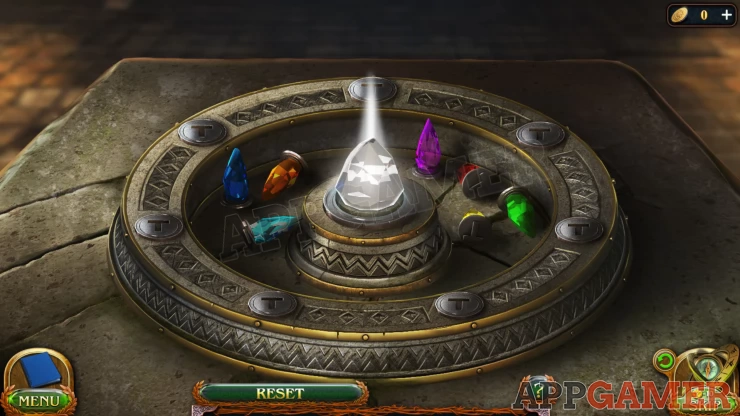
- There are 7 colored crystals and 7 slots around the circle.
- Place the crystals in the correct slots to make a complete pattern of light beams that pass only between the crystals.
Solution: Show
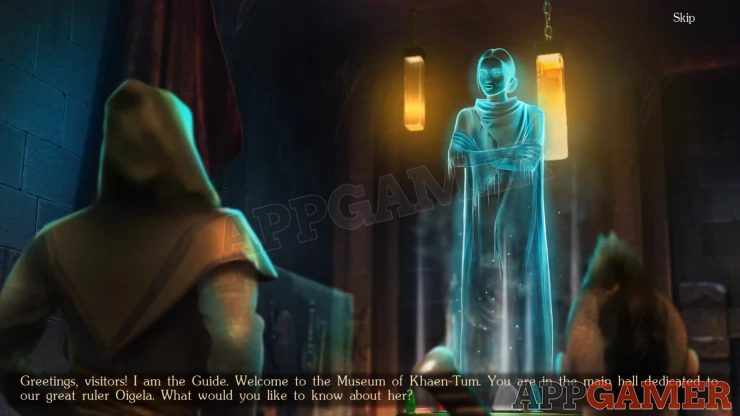
Once complete you will talk with the guide, to learn about the Soul Catcher device. Maaron leaves.
New Task: Soul Catcher
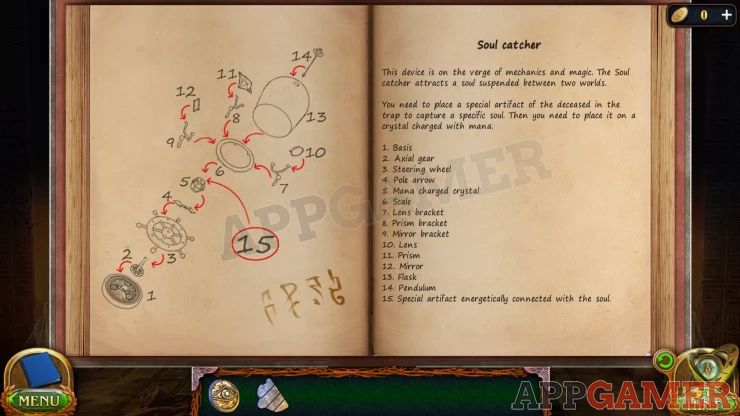
View the broken display case on the left again and tap the book to turn the pages and then read the information on the Soul Catcher. Collect the Book.
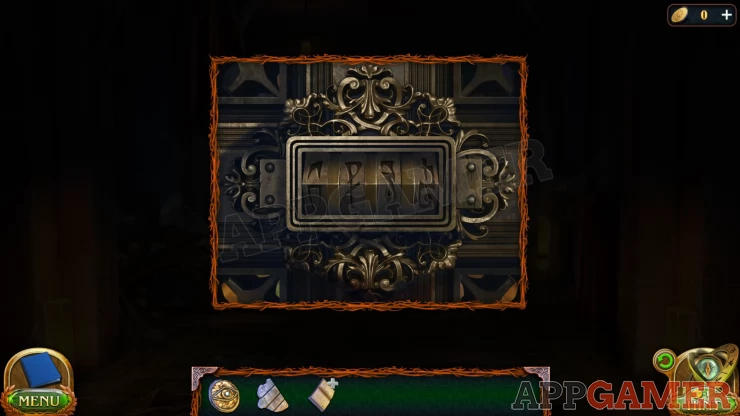
View the door on the right to see a code lock. The code can be found in the book.
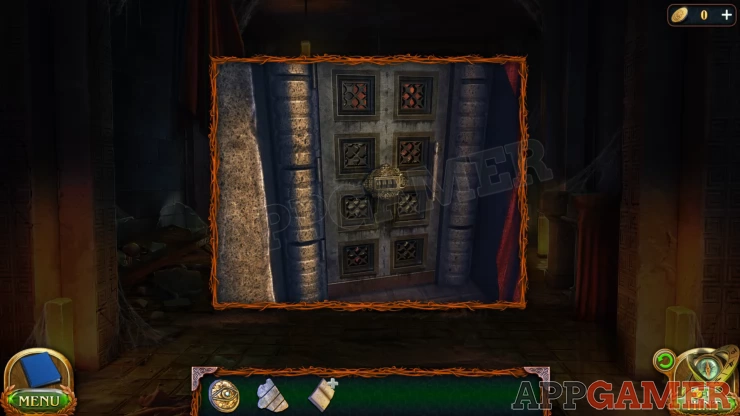
Solution: Show
Enter the Back room This is now a hidden object puzzle.
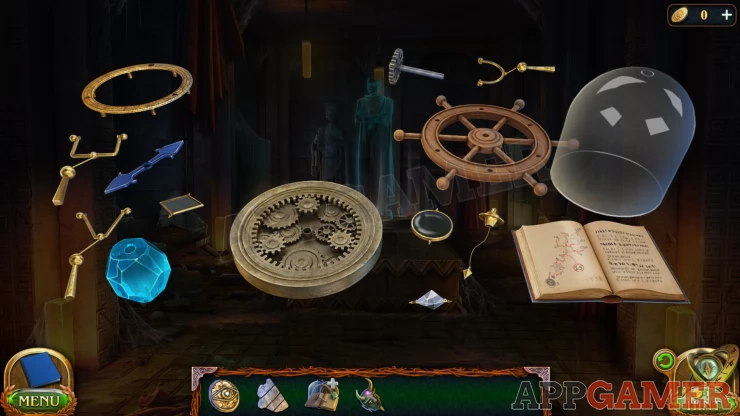
Soul Catcher Hidden objects
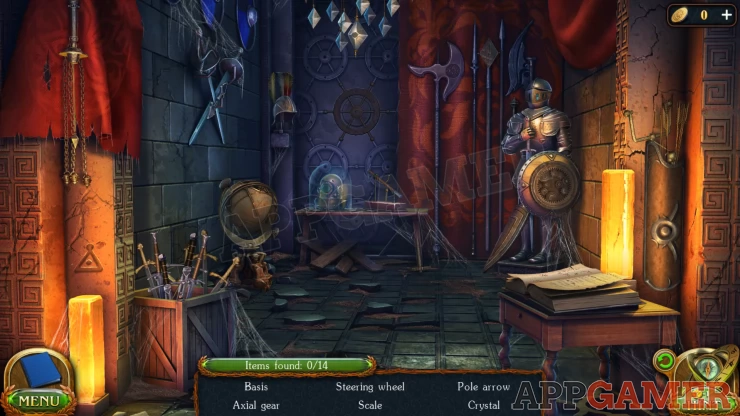
There are 14 items to find, the names will be listed at the bottom 6 at a time.
The book is placed on the right and you can check the images and names of the items there.
- Basis - on the shield of the Armor on the right.
- Pole Arrow - On the swords hanging on the left wall
- Steering Wheel - in the center oft he wheels on the back wall.
- Mirror Bracket - move the arrows in a quiver on the right side of the room to find it.
- Prism - Tap the back wall again to lower the chandelier and collect a prism from it.
- Axial Gear - on the floor by the right table leg.
- Mirror - at the top of a spear behind the armor.
- Prism bracket - move the swords in the box on the left to find it.
- Pendulum - hanging in some chains on the far left
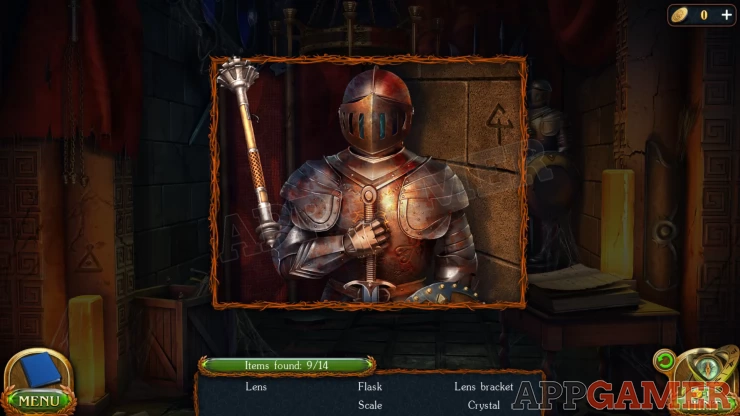
- Crystal - View the top of the armor and then select the mace on the left and use it on the helmet to open it.
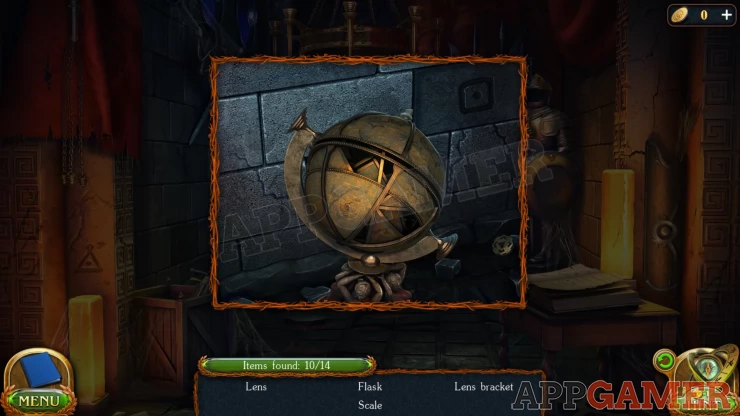
- Scale - View the globe on the left. Tap it to rotate it and then use the small round detail on the floor on it to open it and find the Scale.
- Flask - view the table at the back and collect the large glass dome.
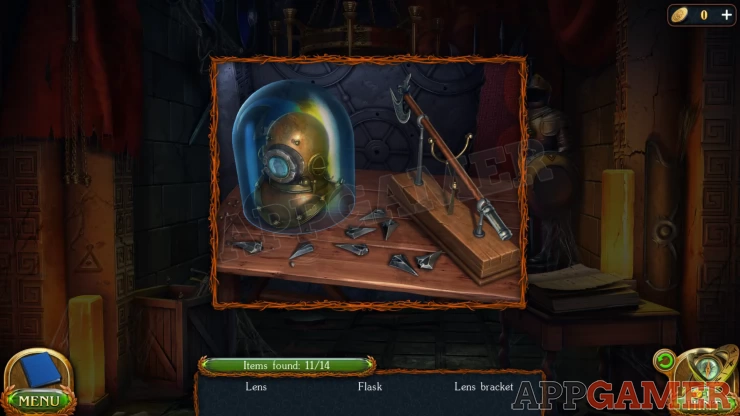
- Lens bracket - still on the table tap the shards on the table and then remove the weapon on the right from the holder and collect the middle arm holding it.
- Lens - Also on the table the lens is on the front of the helmet. You need to tap 3 of the 6 bolts to remove it. You can find these on the walls around the room.
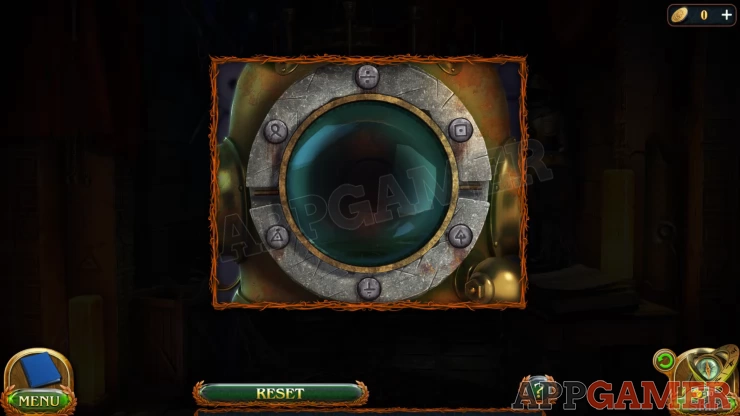
Solution:
Show
Tap the bolts at 2 o'clock, 4 o'clock and 8 o'clock
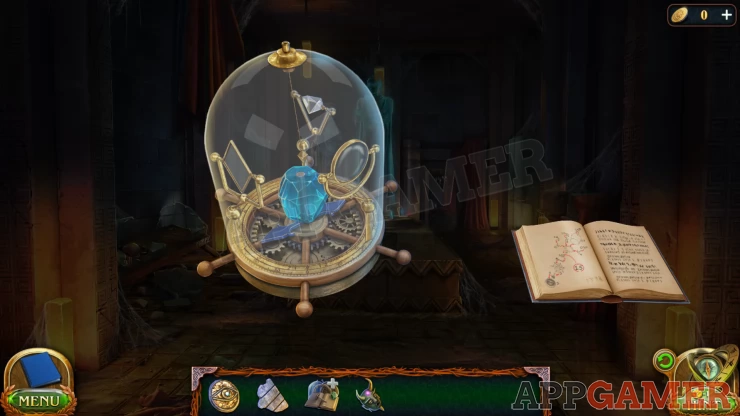
You now have the Parts kit for the Soul Catcher
Maaron returns.
You will receive a Talking Mask.
View the parts kit in your inventory, then assemble the parts according to the diagram in the book.
Collect the Uncharged Soul Catcher.
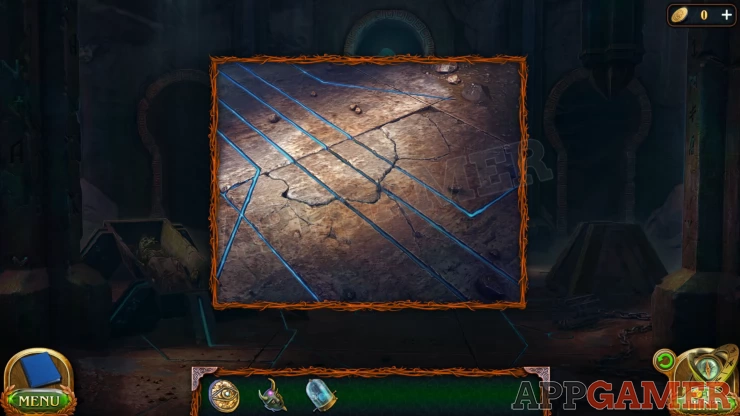
Go back to the temple room. You can place the Part of the stone floor into the hole and complete the power connection to the Mana Generator on the right.
View the generator and add the Soul Catcher to the ground.
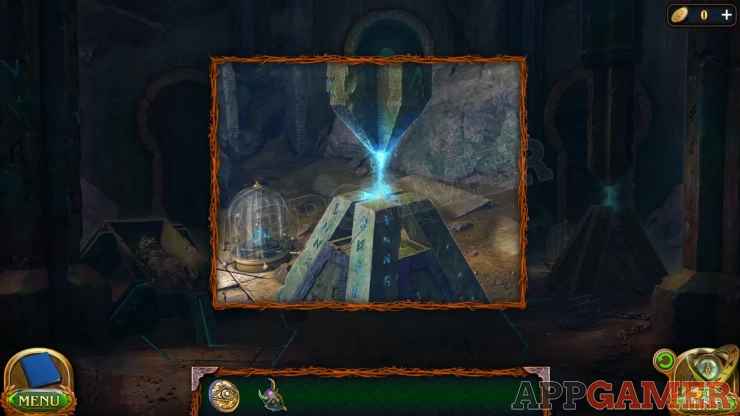
Then open the soul catcher and place the crystal in the beam of the generator. When it is charged it will be placed back in the device and you can collect it again.
Now you need to go to the Sacred Peak this is the top of the Hill in Bryn Pass

View the center of the stone circle and place the soul catcher.
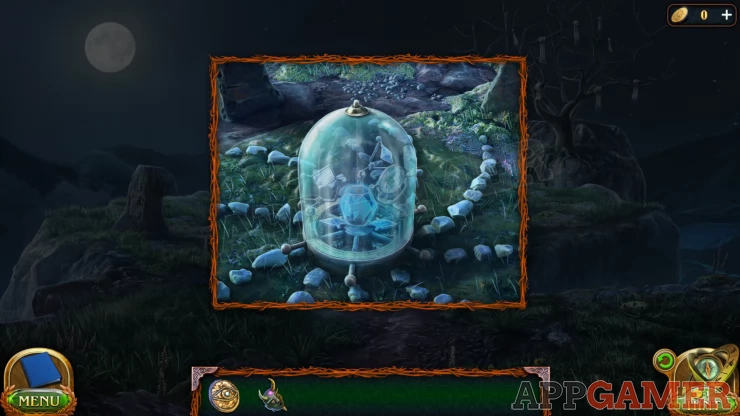
Open it and add the medallion to the top of the crystal. Then align the various components until the light shines and the hands spin. Replace the cover and the Spirit of Oigela will be trapped.
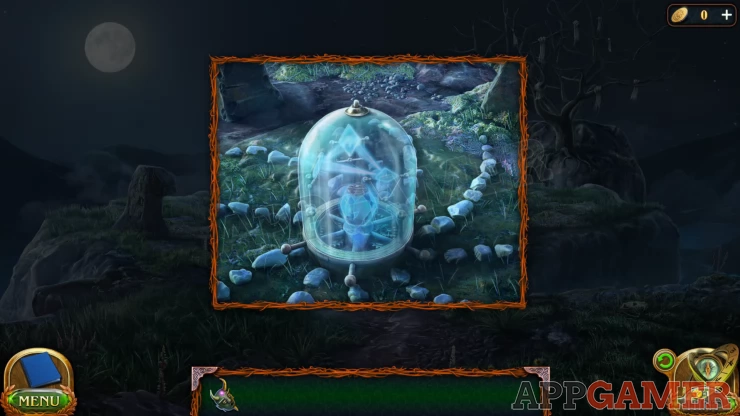
Place the Talking mask onto the black smoke to start a conversation. You find out how to get rid of the entity.

New Task: Ritual of Liberation
You need to find 4 animal skulls to match the 4 stone statues. These are found in the areas you have visited.
Solution:
Show
Return to the Peak and place the 4 skulls on to the matching stones.
You will then get a puzzle to complete.
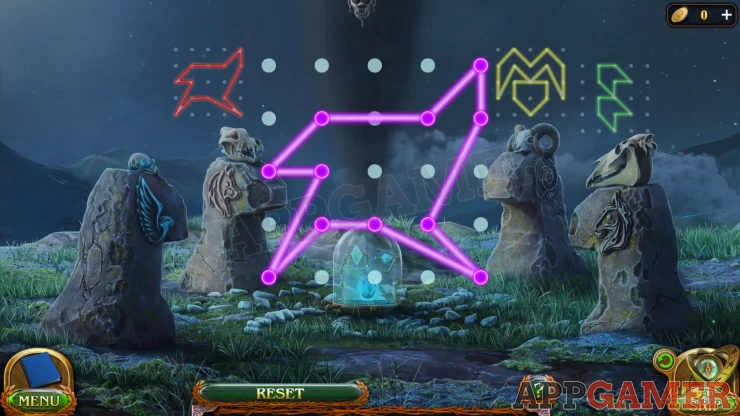
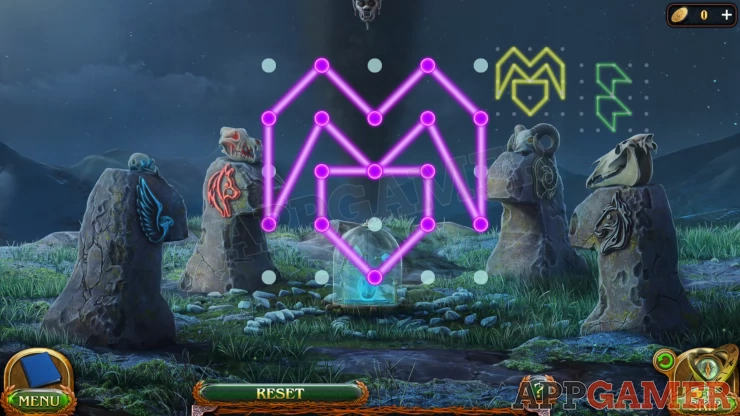
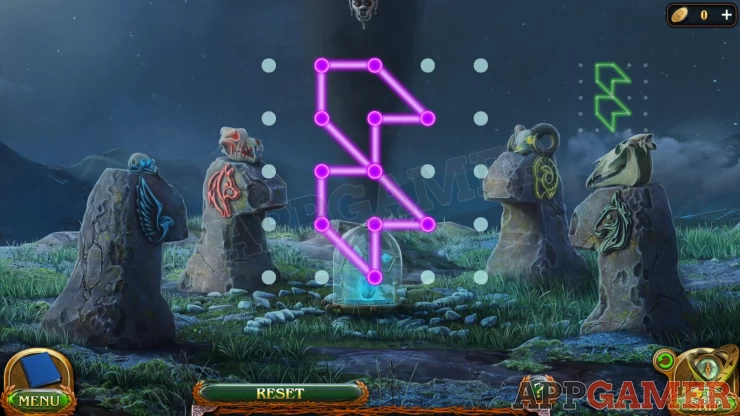
Ritual Puzzle
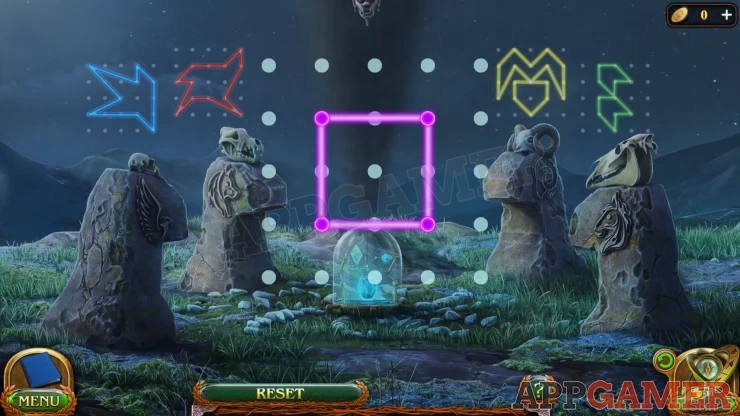
- There are 4 colored patterns shown on the left and right.
- Drag the lines in the center pattern to copy one pattern at a time.
- Copy each of the 4 patterns to complete the puzzle.
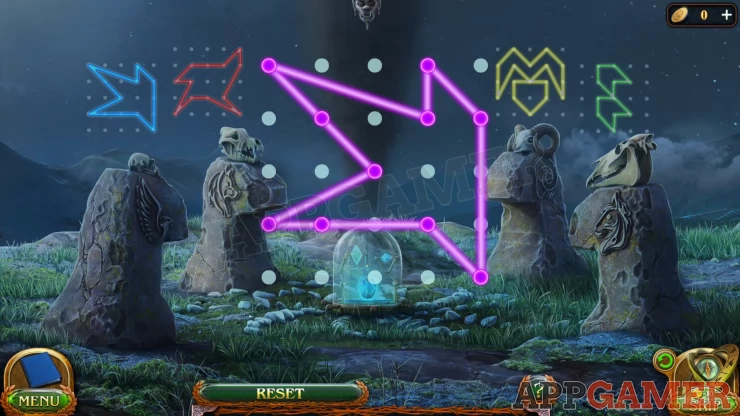
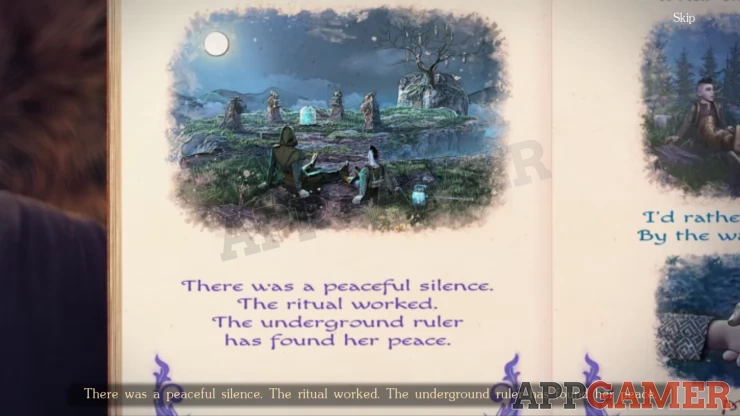
Once done you will complete the task and the Ritual. The entity is gone and Oigela rests
Congrtulations you have compeleted the game.
If you have any questions about Lost Lands 9 please check out the Answers Page to ask there.
 With 20 years of experience in creating video game content for the internet and over 30 years as a gamer, Mark is now a passionate mobile App Gamer. Loving a challenge, he is always ready to get stuck in to both survival builders and puzzle solving games. He has been providing content for AppGamer since 2014.