Chapter 3
More Adventure Escape: Framed
This is our full walkthrough for Chapter 3 of Adventure Escape: Framed for Murder, another great escape room game from Haiku.
Following chapter 2 where we found Prof. Lansky and his drugs we now head to the police station to follow up some leads.
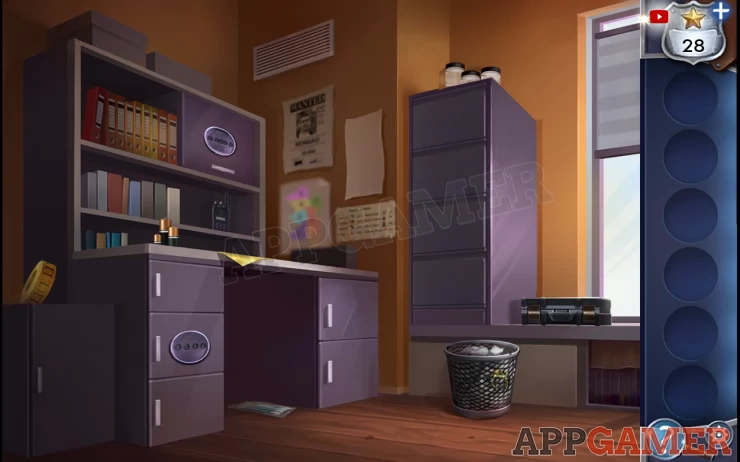
From the desk collect the crime scene tape (left), batteries and a yellow paper. Then under the desk collect the cotton swabs. From the bin collect a tape measure.
From the top of the drawers on the right collect evidence containers.
Add the batteries to the radio on the desk shelf It will repeat a message of numbers.
Tap to view the safe above this for a 5 digit entry code.
Hint: the radio.
Code : 35818Show
Collect a badge.
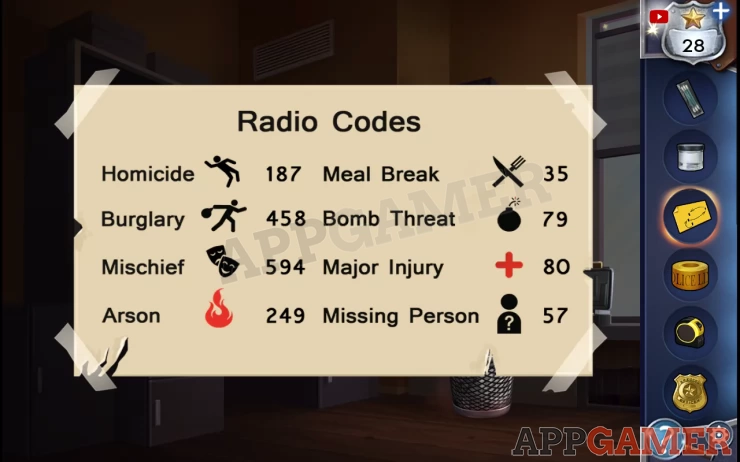
There are 2 posters you can view on the wall.
Check the one with the Radio codes.
Now you can tap on the desk drawer on the left with a code lock.
Code: 9578Show
Collect an Ammo Clip.
Open the desk cabinet on the right to find a gun. Use the ammo clip on it and then collect the Pistol.
Tap on the case by the window to open it and view the police kit.
Add all the items that you have collected so far to the pile on the right.
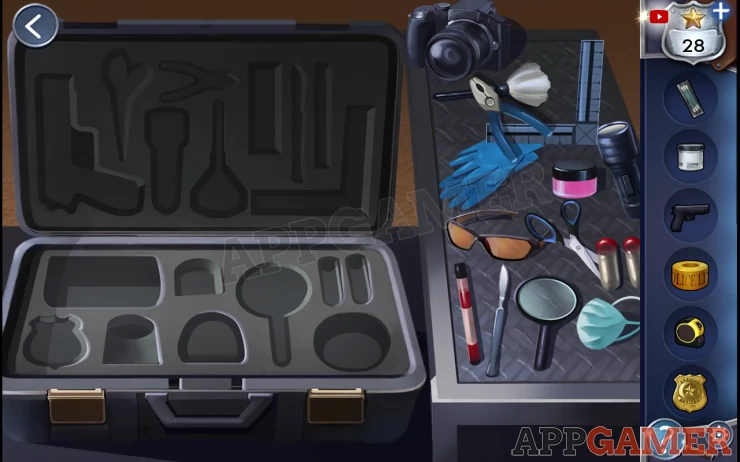
Drag and place them into matching slots in the case on the left.
(3 items will remain)
Once the kit case is filled you can access the drawer to find the file in the cabinet.
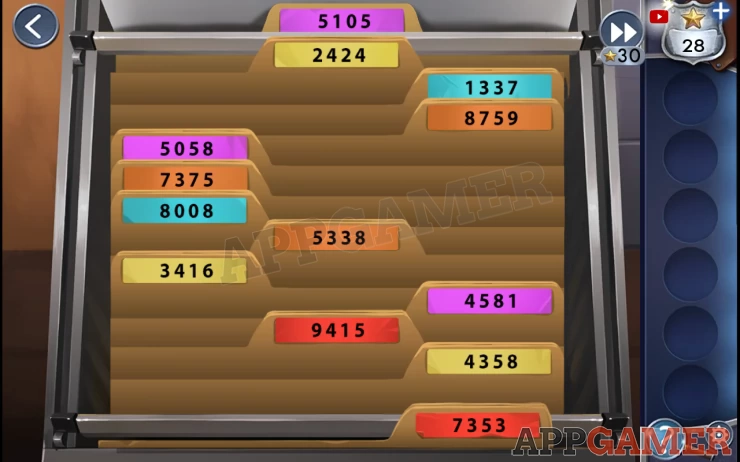
You need to arrange the files in the right order.
Hint: view the other poster on the wall with colored sections.
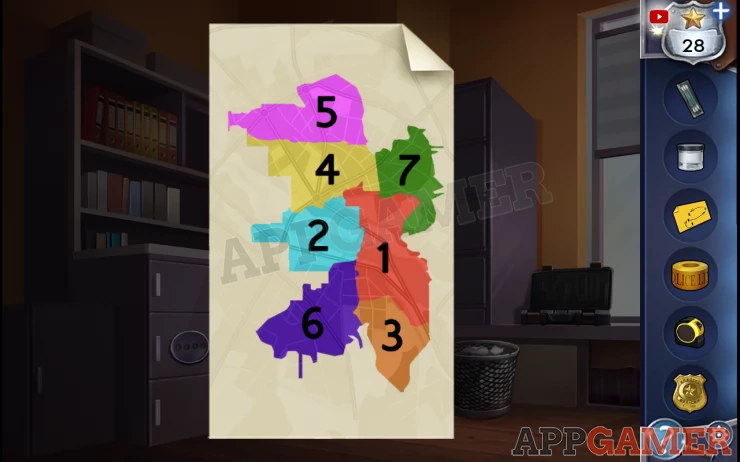
Solution: The poster numbers tell you the order the colors should go in. Red, light blue, orange, yellow, pink. Start with Red at the bottom. Numbers within colors should go in ascending order. Eg: Red 7353 - Red 9515 - Light Blue 1137 - Light Blue 8008 - etcShow
You now need to sneak into the holding cells and this means another puzzle.
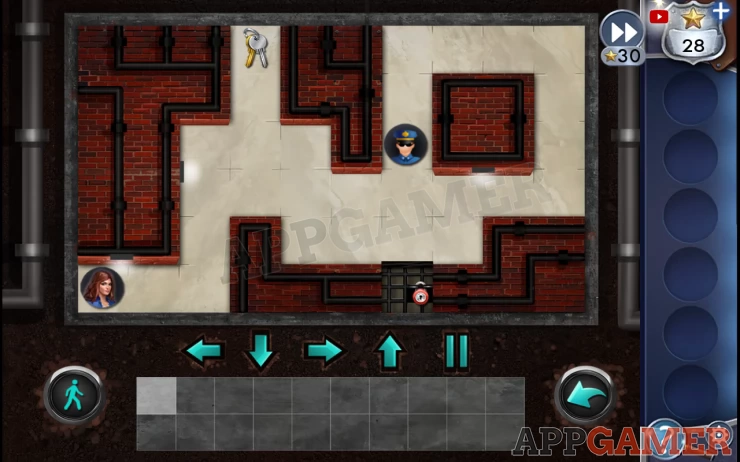
Hint: Set up a movement pattern with the controls at the bottom. Then execute it by pressing the walk button.
For each move you make the patrolling guard will also move. If the guard can spot you by direct line of sight at any time you will be spotted and need to try again. Try a few times to get used to the guards movements.
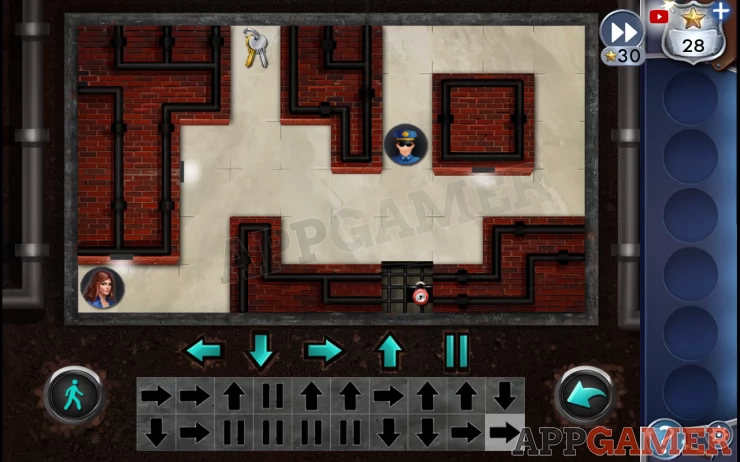
If you have trouble follow the solution below.
Solution: Show
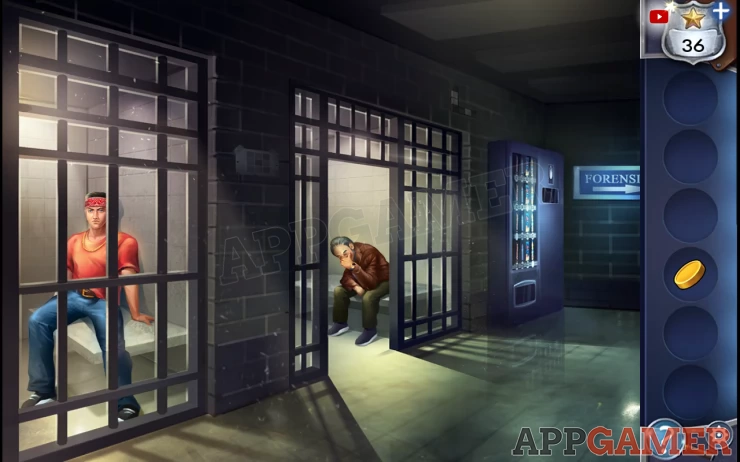
You are now at the cells.
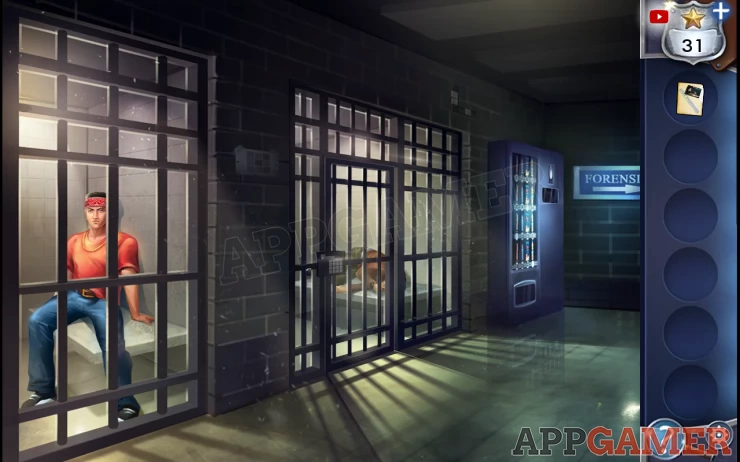
Star: Bottom right.
Tap to talk to Romeo, Caesar’s brother. You will get a choice of questions.
You will need to place the case file on the third question, “Why was Caesar murdered?”

You cannot yet answer the other 2 questions
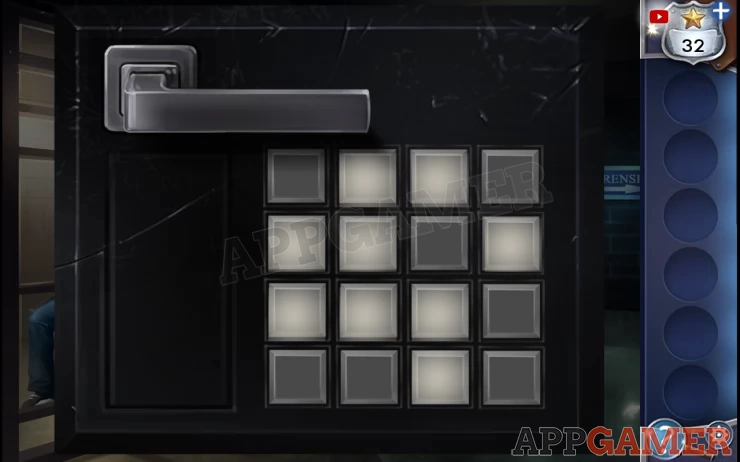
Back up and look around the cells areas for clues.
Hint: paper on the wall and a pattern of blocks
Show
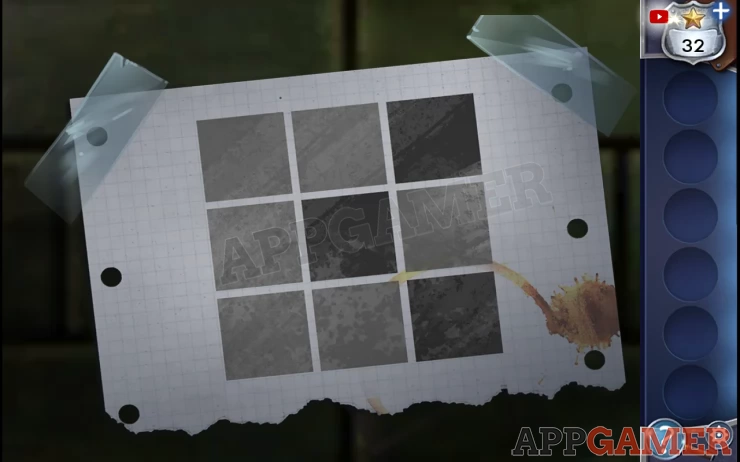

Solution: Put the clues together to give you a code to the lock on the cell next to Romeo’s.Show
Code: Show
Now you need to go to the Forensics lab. Tap the sign on the right for this.
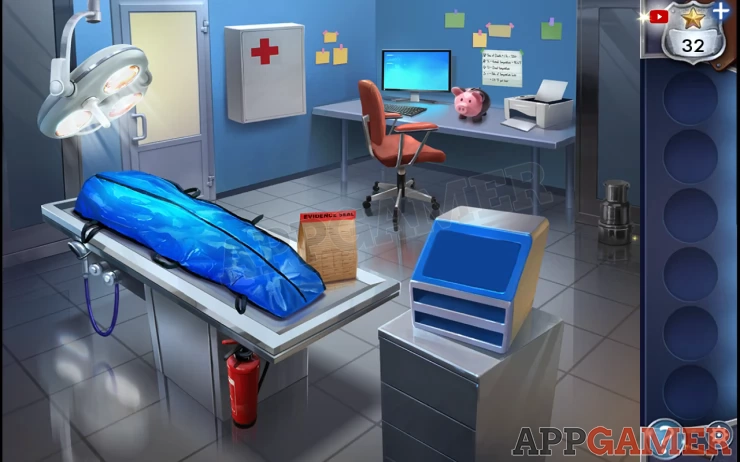
Star: on the center right.
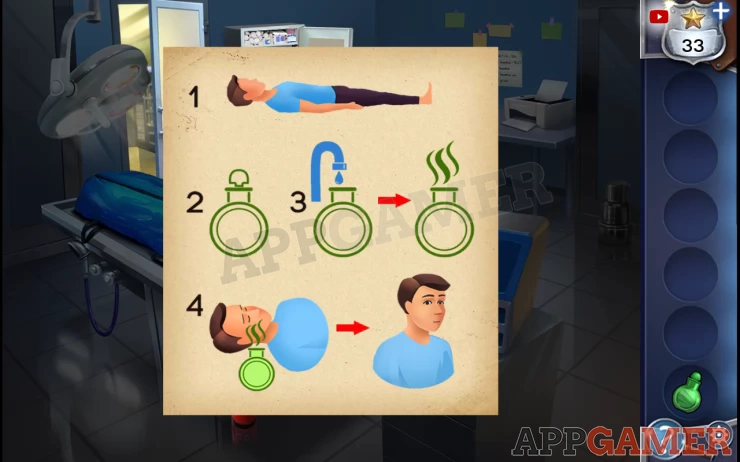
Open the medicine cabinet, collect the smelling salts. Then also view the poster on the door for the method to revive someone.
Collect the fire extinguisher, and open the evidence bag next to the body to collect the 'Bloody letter opener'.
There is a cupboard door under the autopsy table. open this to collect a thermometer.
Then open the top drawer next to the Autopsy table to get a Cotton swab.
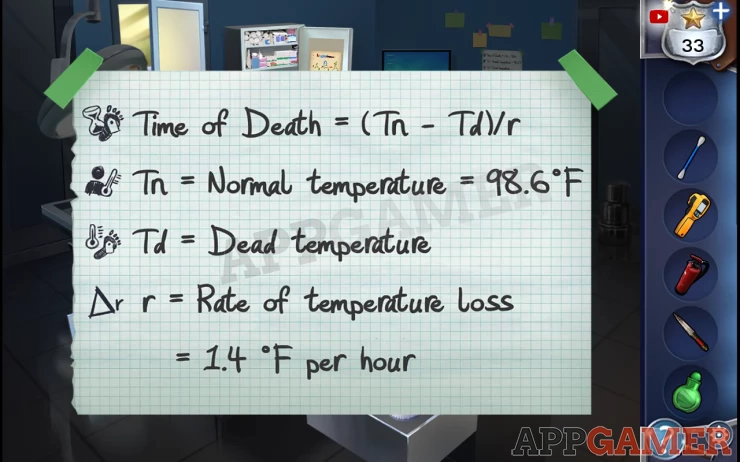
Above the piggy bank on the right is a poster to view. This tells you about body temp loss.
Open the body bag and then use the cotton swab get some of Caesar’s blood.
Then place the cotton swab and the bloody letter opener in the blue machine on the drawers. This is a DNA analyzer.
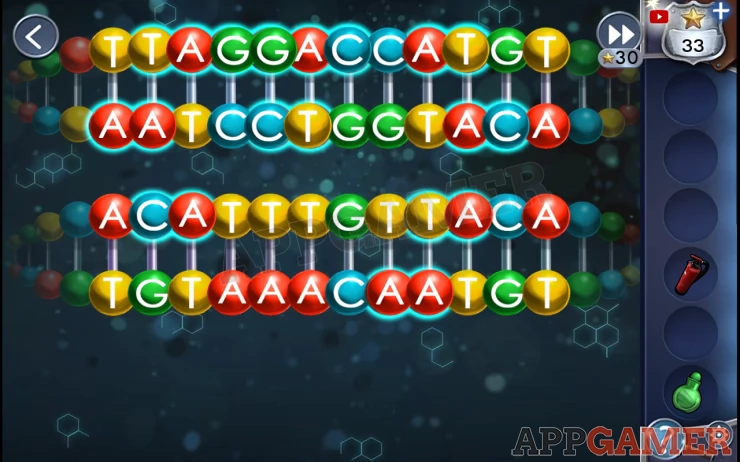
We have a DNA puzzle, you need to fit the pairs at the bottom to the chain at the top.

Hint: for DNA, C must always match with G and A must always match with T
Solution: Show
The blood is a match.
Now tap on the PC to access it. You need to guess the passcode.
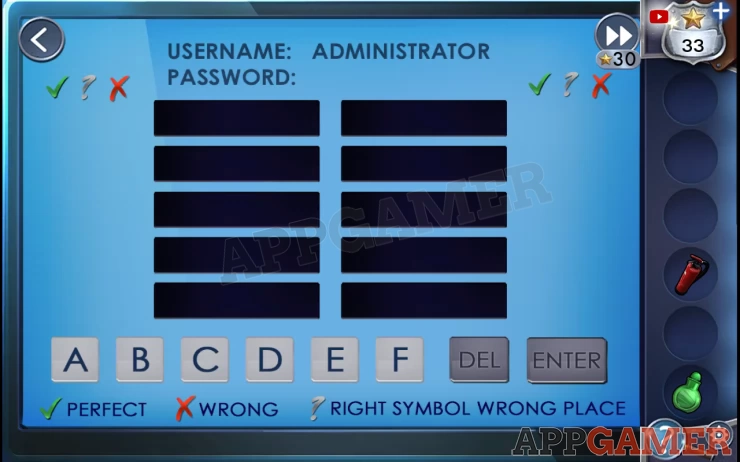
Hint : this is a Mastermind style game game. You need to guess four letters and it tells you how many are perfect (right letter in the right place, wrong, or correct but in the wrong place. You have ten tries to get to the right password.
Solution: the code will differ with each attempt.
Now use the thermometer on the body to read the temperature.
The thermometer will read 79°F.
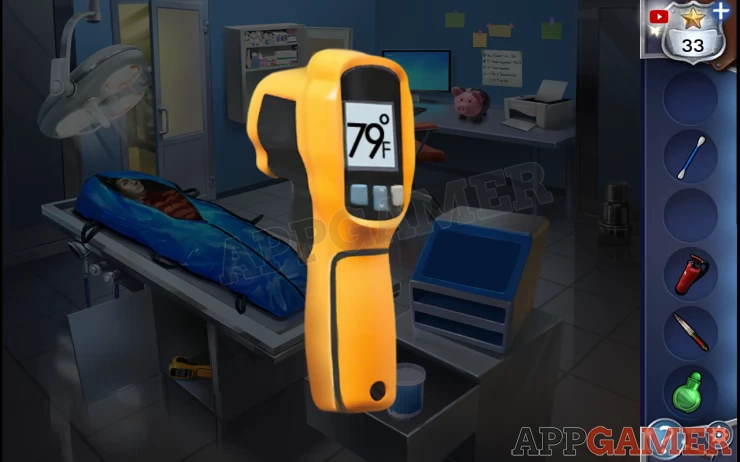
Go onto the PC and enter 79 for the dead temperature and 1.4 for the rate of temperature loss.

The computer will tell you he died 14 hours ago, or 9 PM yesterday.
Tap the printer to collect a Time of Death Report and also a Murder weapon report.
Before you leave you need to use the smelling salts on the water hose to the left of the autopsy table to activate them.
Then finally use the fire extinguisher on the piggy bank to break it open and collect a coin.
Tap the door to exit and go back to the cells.
Talk to Romeo again. You can now add the Time of Death Report and the Murder Weapon Report to answer the 2 questions.
He will give you some information.
Now give the activated smelling salts to the passed out prisoner.
He asks for chocolate, so tap on the vending machine and insert the coin.
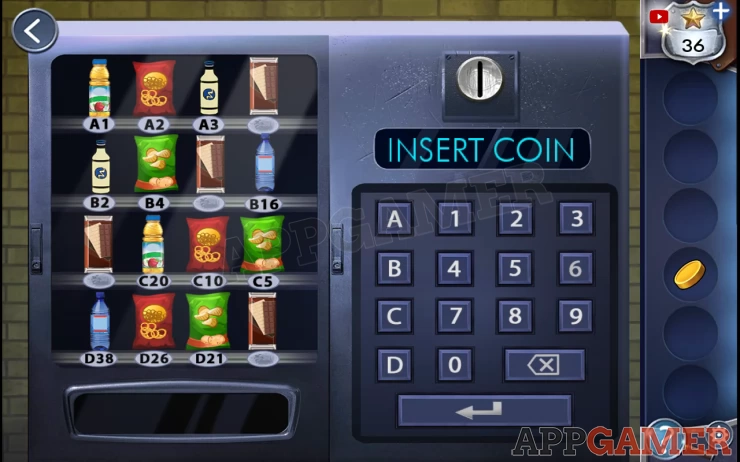
There are 4 chocolate items in the machine but they are not marked. Work out what number to request for a chocolate bar. You only need one to begin with.
Solution 1: Top row is easy A1, A2 and A3. => A4
Get the chocolate and give it to the prisoner. He wants more though. You will need to do this 4 times
Solution 2: B2, B4, B?, B16 - each one doubles = B8Show
Show
Solution 3: C?, C20, C10, C5 - working backwards 5+5 =10 | 10+10=20 | 20+15 =24 = C35Show
Solution 4: D38, D26, D21, D? - each value is the sum of the values above it. (eg, 1 + 2 + 35 = 38) = D25 (4 + 16 + 5)Show
Now that the Prof is fully awake you can have a conversation and get some more information. And it's time to go for a jog.

This completes Chapter 3, continue to Chapter 4
We have questions and answers related to this topic which may also help you: Show all