Chapter 4
More Adventure Escape: Framed
This is our full walkthrough for Chapter 4 of Adventure Escape: Framed for Murder, another great escape room game from Haiku.
After speaking to Caesars brother and Prof. Lansky in chapter 3 we now head back to the security office on campus to examine the vandalized painting
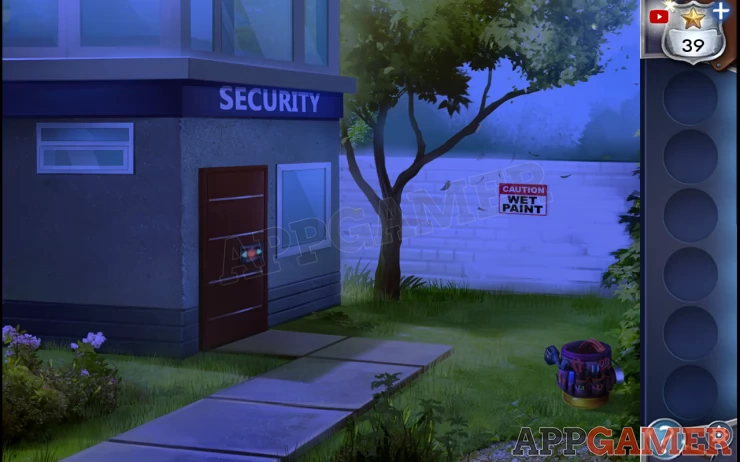
Star: in the tree top right.
Tap on the door to view the lock puzzle.
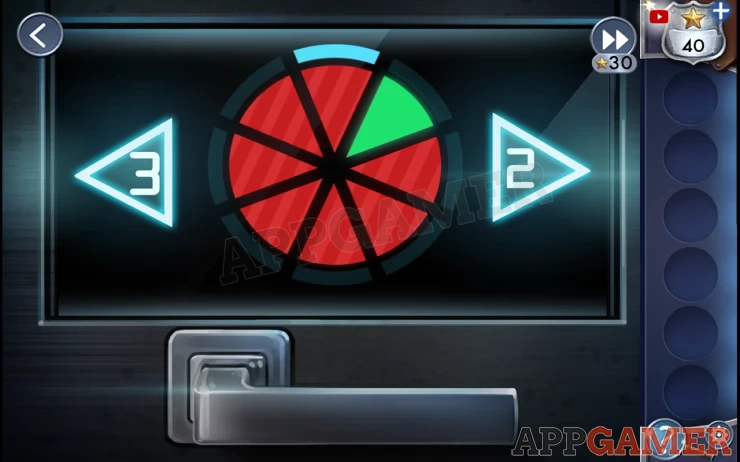
Hint: You need to turn all the pieces green. The right arrow move 2 away segments clockwise and changes it. The left arrow moves 3 pieces counter-clockwise and changes it.
Solution: If you are at the start then this combination should work. Press Left, Right, Left, Right, Left, Left, Right.Show
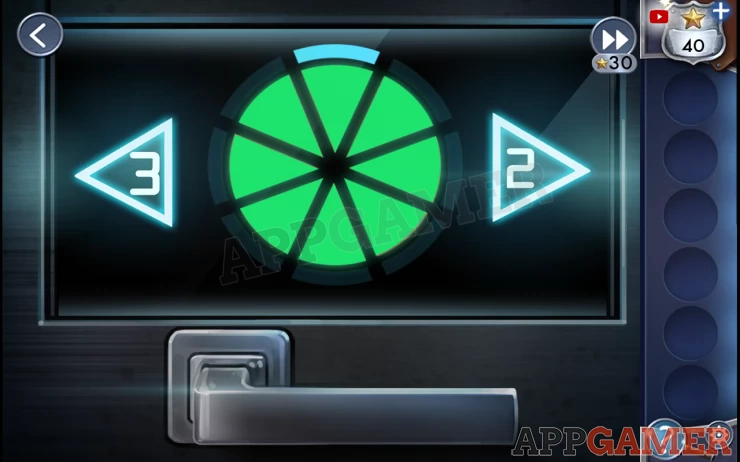
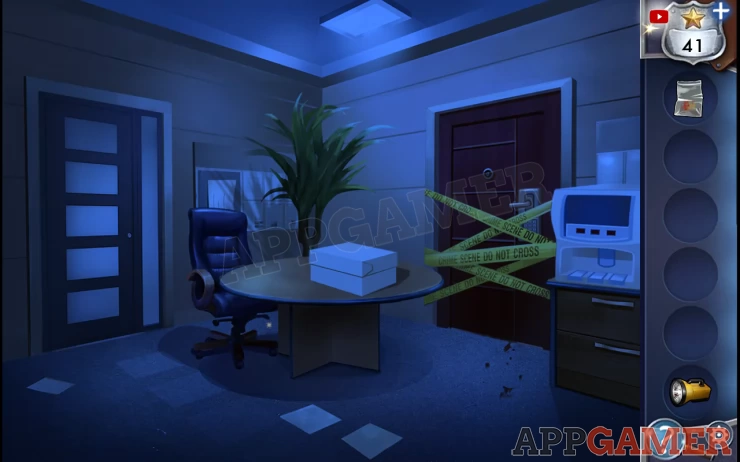
Go inside the office.

Star: on the ceiling top right.
Open the drawers on the desk. Collect a utility knife blade and a clear plastic bag.
Next use the blade on the utility knife on the desk, then take the knife.
Then use the knife on the painting in the left corner and then use the plastic bag to collect the piece from the ground.
We return to the corridor outside Sylvia’s office.
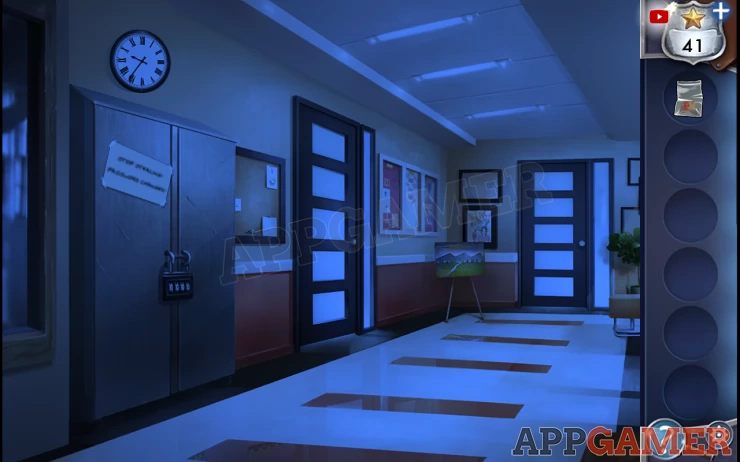
The password for the cupboard padlock has been changed. We can check the time on the clock again for a hint.
Solution: The clock shows 9:36, but as it is night time now we need to make sure it reflects 9 pm.Show
Code: 2136Show
Collect the flashlight. Then tap on the left door to enter the office.
Star: Under the chair and table.
Open the lower drawer on the right and collect the evidence container.
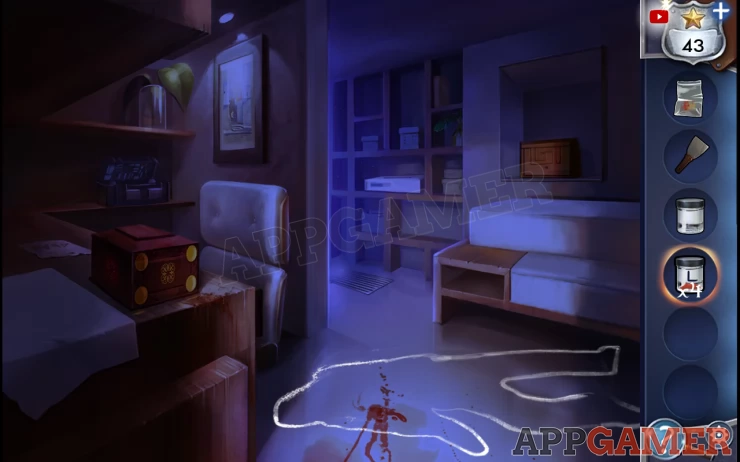
Then go through the sealed off door.
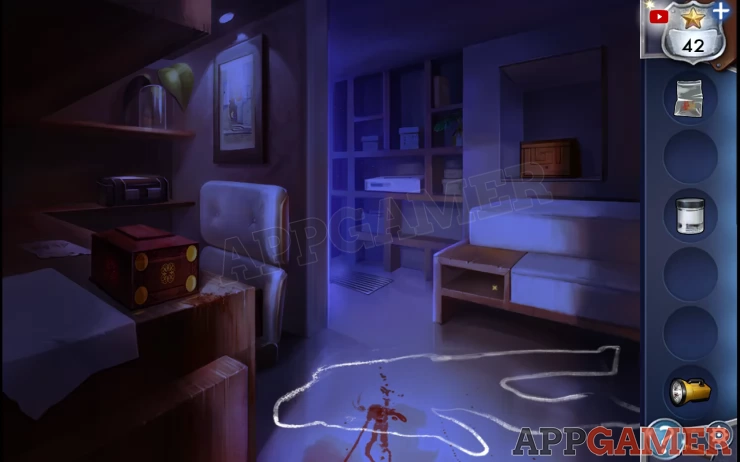
Star: in the sofa pocket, above the body outline.
On the shelf on the far left is a kit bag, open this and collect another evidence container.
Go back to the hallway.
Then open the door at the end of the hall and go into the art room.
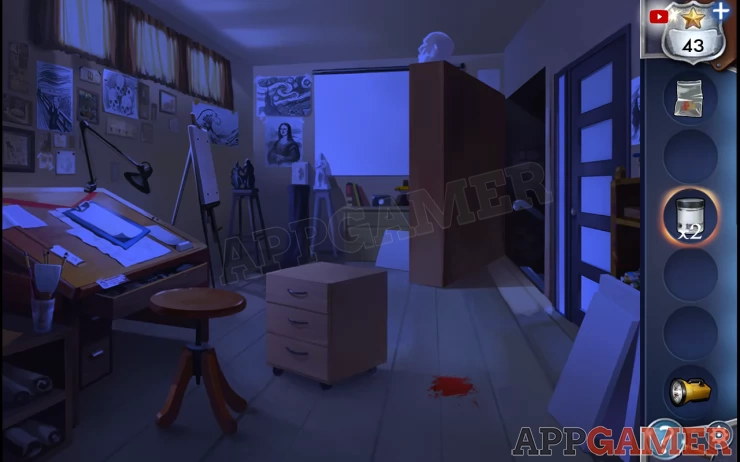
From the pot of brushes on the far left collect a paint scraper.
Use the scraper on the dried blood on the floor. Then use an evidence container on this to collect it.
Use the flashlight on the secret passage to let you go downstairs.
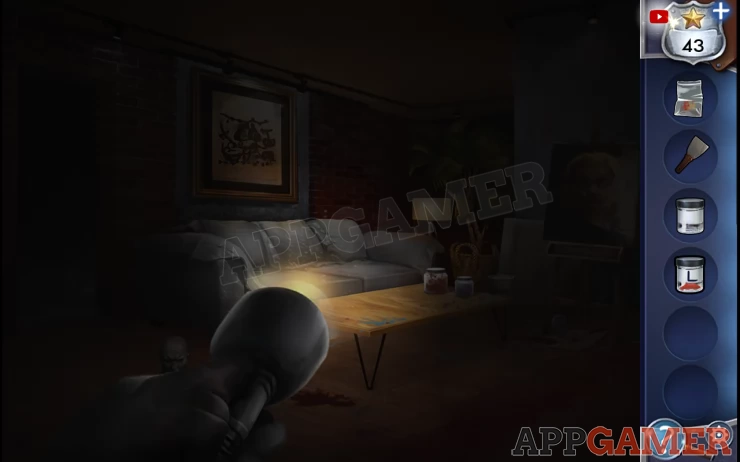
Use the light to search the room and find 3 more blood samples. Collect then in the same way as before using the 'L' evidence container.
Go back out to the corridor and then into the office to view the crime scene.
Use the scraper and second evidence container to collect the blood sample from the floor.
Back out to the outer office.
Add both evidence containers and the painting sample to the machine on the right. This lets us start a new puzzle.
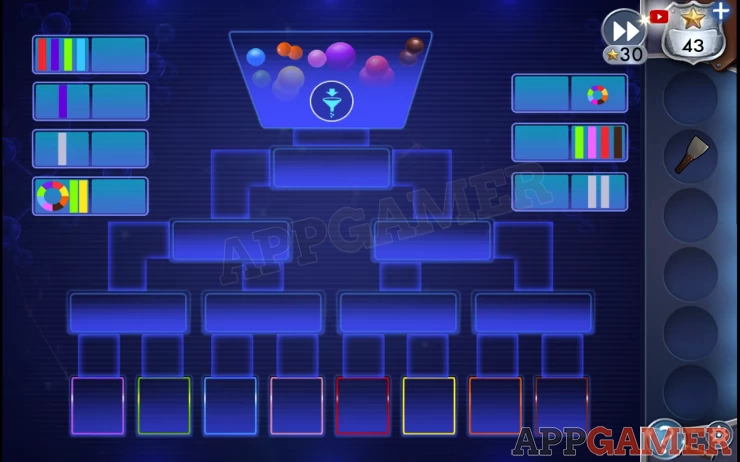
Hint: You need to place the filters into the slots on the puzzle so that when the processing start the molecules will end up on the correct colored boxes at the bottom. There are color filters and the ones with the white bars will filter based on the number of atoms in the molecule.
Drag a filter to put it in place. Tap a filter to remove it.
Solution: Show
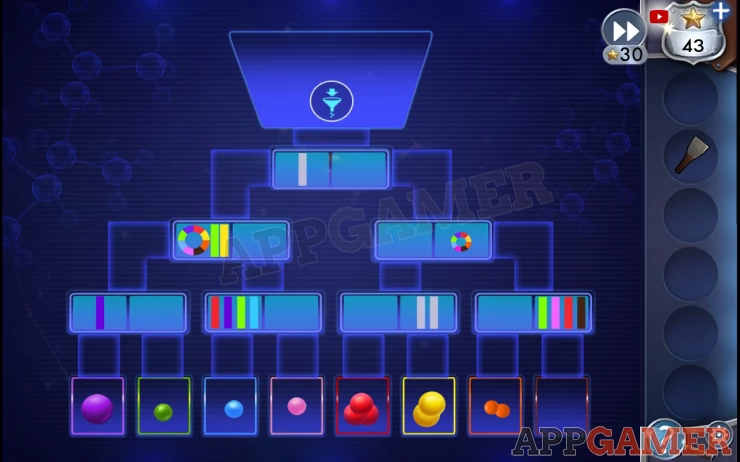
The samples match so now we must return to the Dorm for more clues.

Use the elevator. We want to check out Caesar's room but first we need to head to the basement so press B.
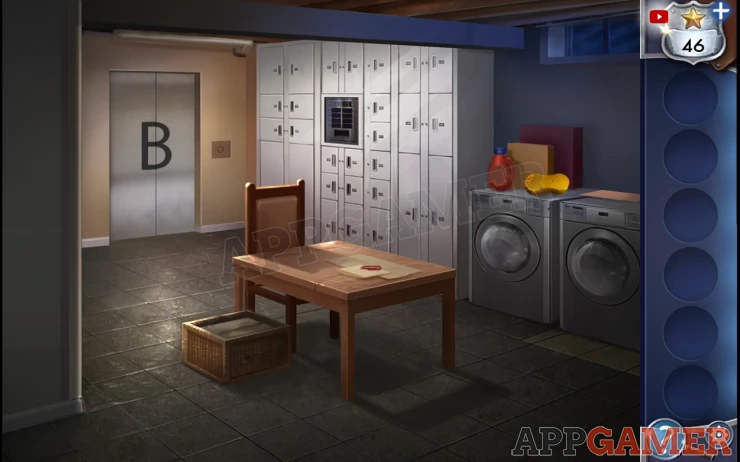
Collect the sponge from the washer and the paperclip from the table.
Now head up to the third floor and to room 15 as we did before.
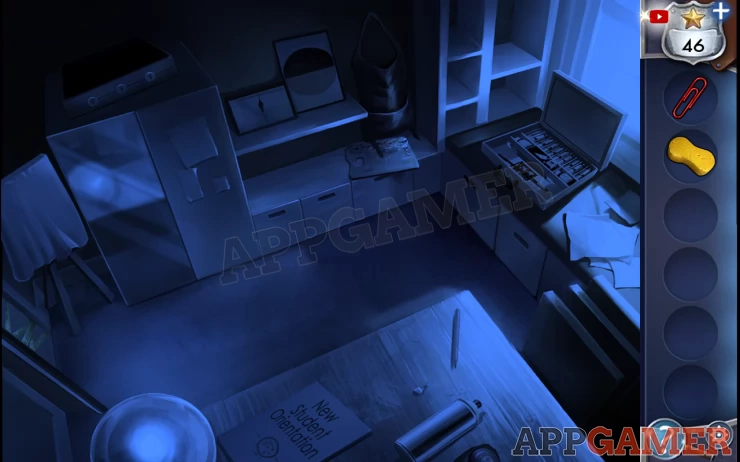
On the table tap to view the 'New student orientation'. This gives us Caesar's locker number.

Also on the is a spray can. The nozzle is blocked.
Use the paperclip on the can to unblock it and then you can collect the 'Paint Thinner'
Tap on the covered easel on the left to remove the sheet, then view it.

Use the paint thinner on it and then the sponge to reveal a number 5773Show
Now we can go back to the basement.
Tap to view the Lockers access panel.
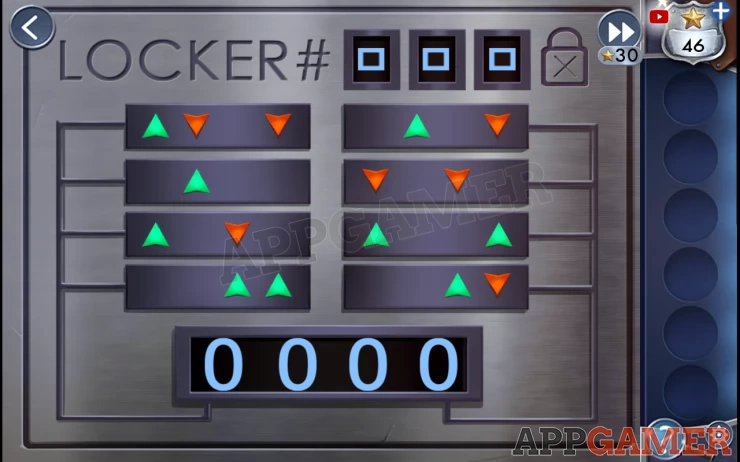
Hint: Enter the locker number at the top, 827. Then use the 8 wide buttons to set the code. Each button will make several of the digits change. This is indicated by the arrows.
Solution: Set the code to 5773. This can be achieved from 0000 by tapping top left 5 times, second left 3 times, bottom left 7 times and then top right 9 times.Show
You now collect a map. And a set of instructions.
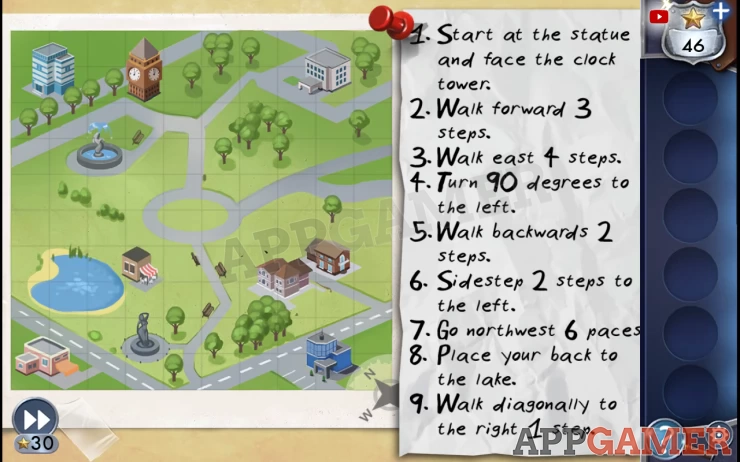
Follow the directions listed to navigate the map. then tap on the map to search the spot to find Caesar’s stash. Hint: Note the compass at the bottom for the directions. North is not up on the map.
Solution: Show

This completes Chapter 4. You can move on to Chapter 5
We have questions and answers related to this topic which may also help you: Show all