3D Escape Room Detective Story Walkthrough
3D Escape Room Detective Story Guide
3D Escape Room Detective Story is a new adventure puzzle game from HKAppBond. Set in London in 1930, you play as a a renowned detective as you encounter a series of bizarre cases, set over 5 chapters. You can find our 3D Escape Room Detective Story walkthrough to Chapter 1 below.
To investigate them and uncover the mysteries that lurk in the shadows of London you will need to solve layers of puzzles and break through baffling mechanisms. If you find yourself stuck at any point in the game we have a walkthrough to help you completed every area of the game. We start below with Chapter 1.
3D Escape Room Detective Story Walkthrough - Chapter 1
Chapter 1 stars with a call from Sheriff Claude to ask for your help with a tricky case at the Tulip Inn on Sun Dew Avenue. When you arrive you find the outline of a body and a room to investigate.
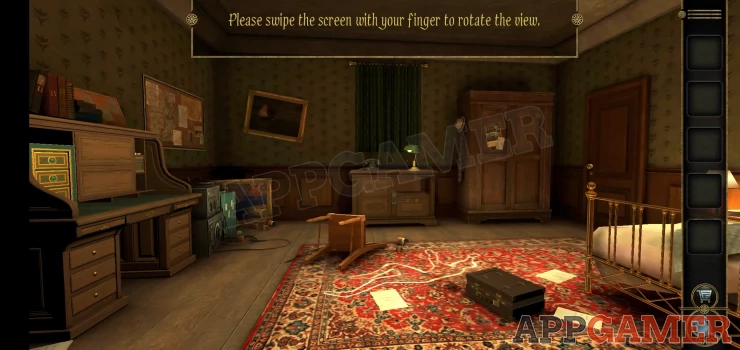
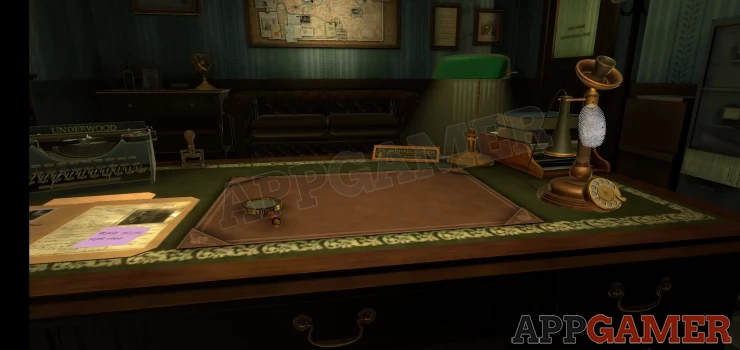
There is an initial tutorial section to help you understand how to navigate around the room and interact with items. Follow this to view the desk and collect the handle. Then view it.
Follow the hints to view the Desk lamp and add the handle to it. Rotate it and collect the Variable Resistor item.
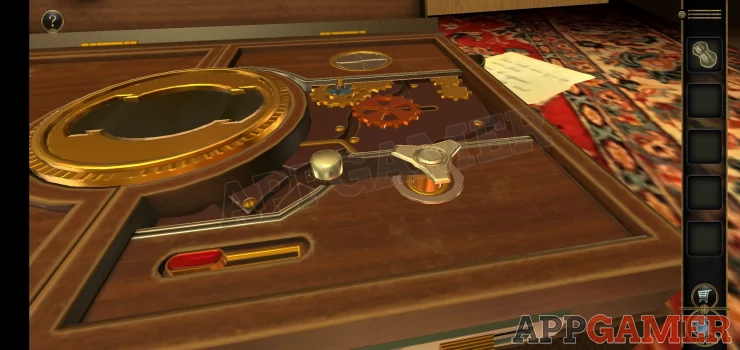
First lets view the case that is on the floor by the outline.
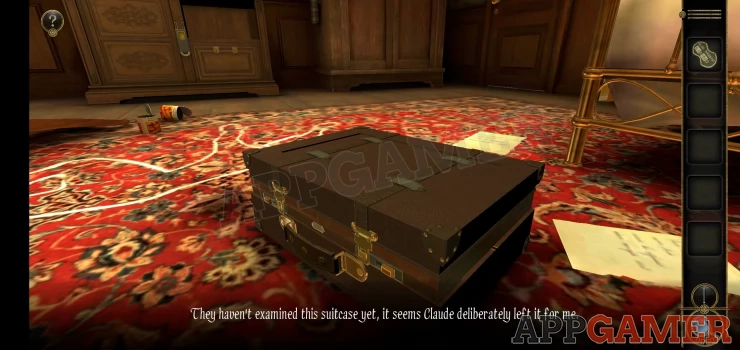
View the 2 catches on the front and rotate the button on the lock and then slide the catch to open it. Do this on both sides to open the case.
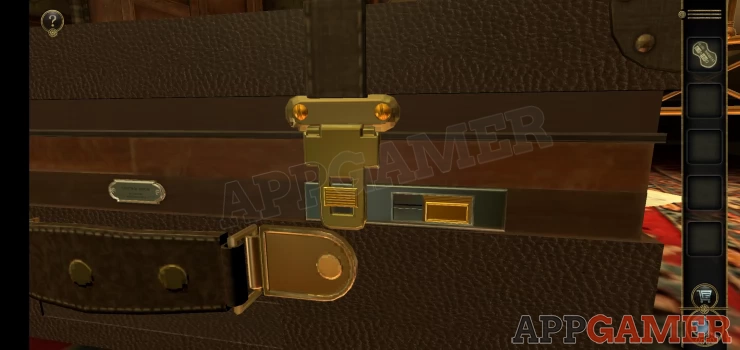
With the case open view the catch in the center of the top section. You can rote the dial in the center to slide the metal piece left and right. Move it all the way to the left and then the right to release the catches.
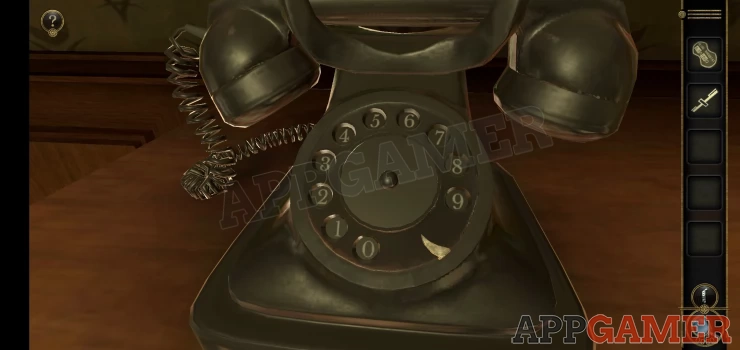
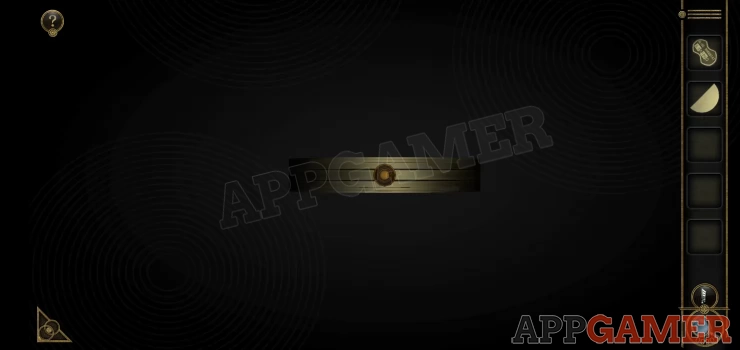
You will then collect the metal strip and open the top section of the case. There is a puzzle inside but we cannot complete it yet, first make a note of the Tel number on the right. 9527
Now back up and head to the desk to view the phone on it. View the Dial and use this to enter the number. (for a rotary dial you tap and drag the number clockwise to the stop on the lower right).
A draw opens and you will see another puzzle.
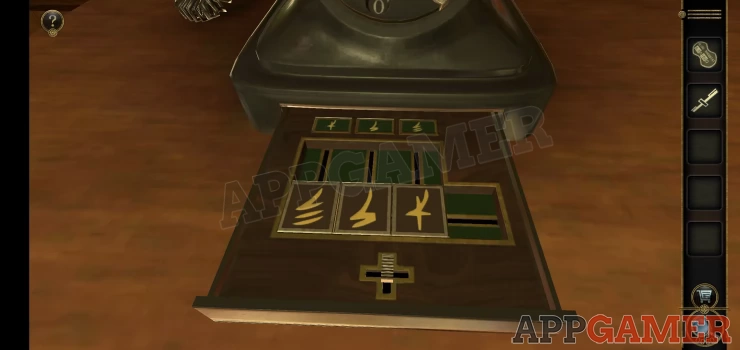
Phone Drawer Puzzle
- To solve this you need to slide the 3 pieces around to rearrange them to match the order of symbols shown above.
- Drag the 4 way control at the bottom to move all of the pieces in any direction.
- Check the video below for help.

You will now see a switch on the side of the phone, tap this to open a up the phone and you can collect a round 'Metal Tray'. Now you can return to the case on the floor. Add the metal tray to the center of the bottom section and you will see a small handle rise up.
Turn the handle and a compartment will open for you to collect a 'Half star shaped metal'
Now look on the left side of the case to see a star shape with a piece missing. Add the piece you have to this and another small panel will open.
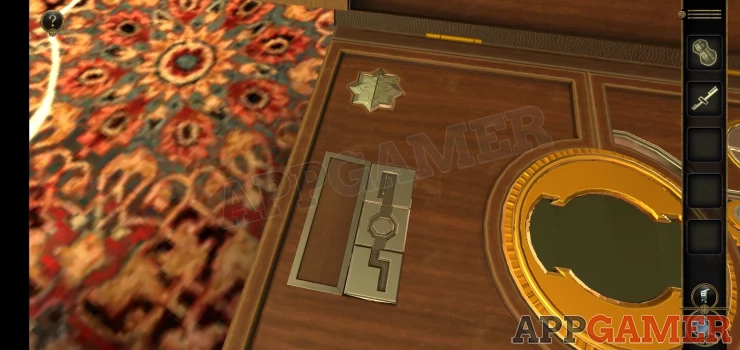
- This has 3 sections and you can tap each one to change it.
- You need to be able to place the meta strip into the groove.
- Swipe to change the 3 sections until they match the shape of the metal strip so that you can place it there.
Solution: Show
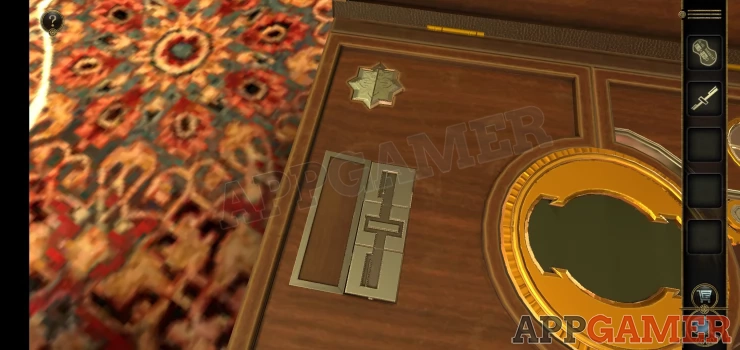
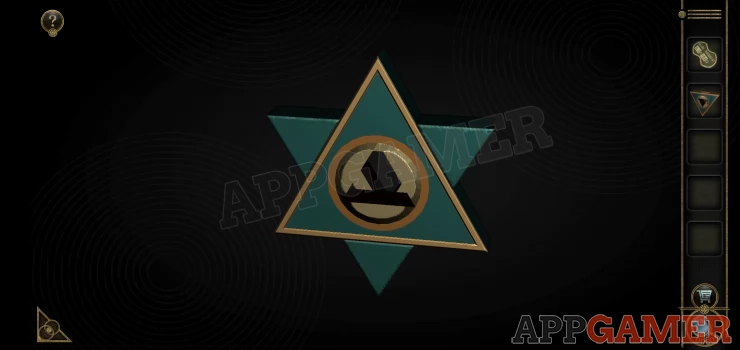
Place the strip and you will collect a 'Triangle Metal Block'. View this in your inventory. Twist the front section of the block to rotate it until it locks into place to form a star shape. Collect this 'Irregular gear'
Back up a little and view a small threaded bolt on the right side of the case. Place the Irregular gear (star shape) on to the bolt, then back up and view the handle on the case again.
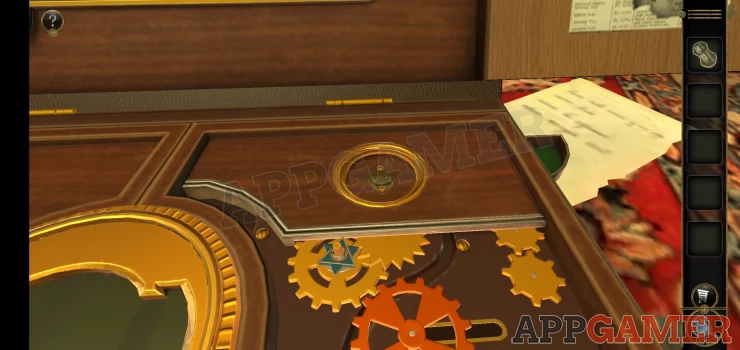
Slide the red switch on the lower left to the left to move the gears. Then turn the handle again.
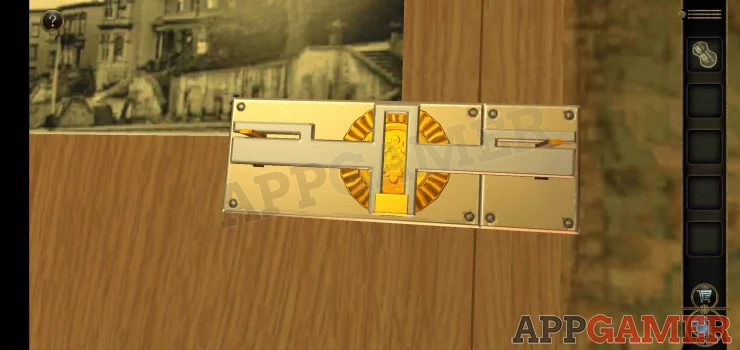
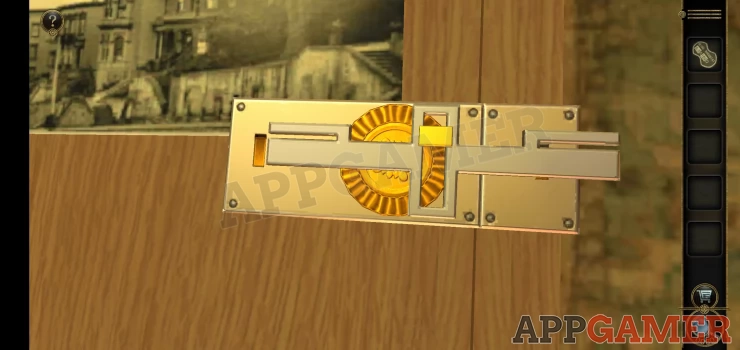
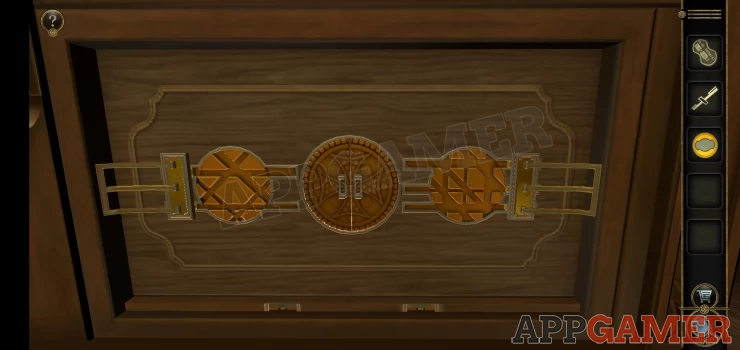
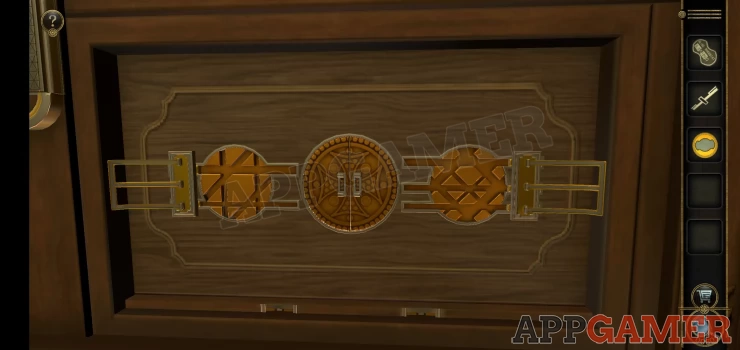
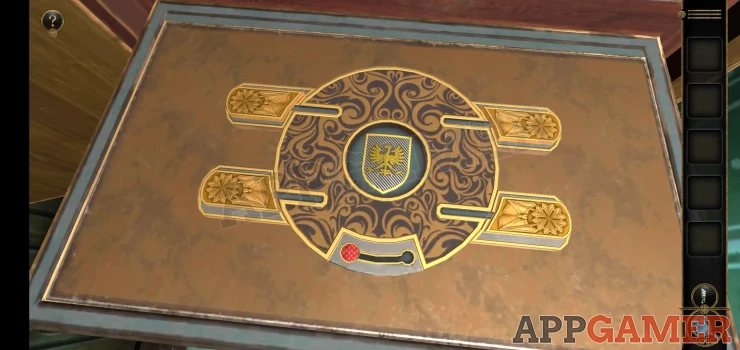
This will open another compartment. Collect the 'Electronic Prop'. Now we look again at the puzzle on the top section of the case.
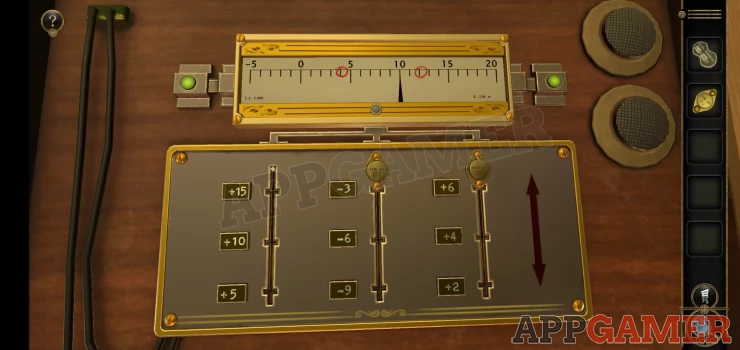
- Add the Electronic prop to the left slider to start the puzzle.
- You need to set the sliders to the correct positions to set the reading at the top to the 2 red circled numbers.
- You can view the 2 solutions below.
Solutions:
Show
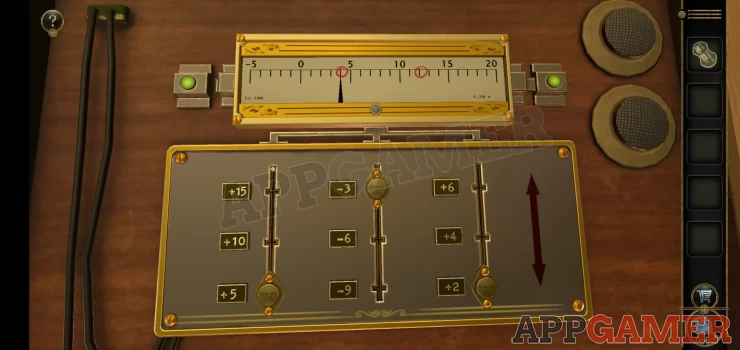
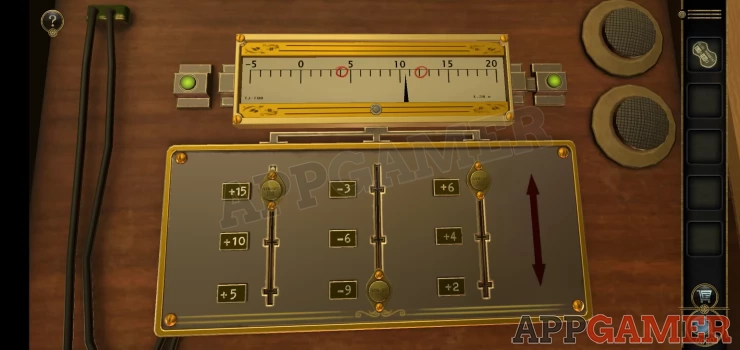
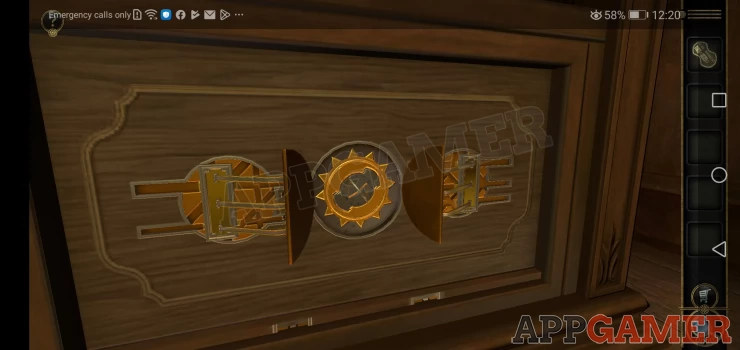
Collect the Semi-Circular Metal Piece that is revealed.
Now view this piece in your inventory. There is a button on the front that you can rotate to open the piece up.
- To do this you need to tap on the button and drag your finger downwards.
- Keep repeating this movement until the piece full opens.
- Then continue until the arrow hands also turn and point to the red and blue markers top and bottom.
- 2 wing sections will appear top and bottom.

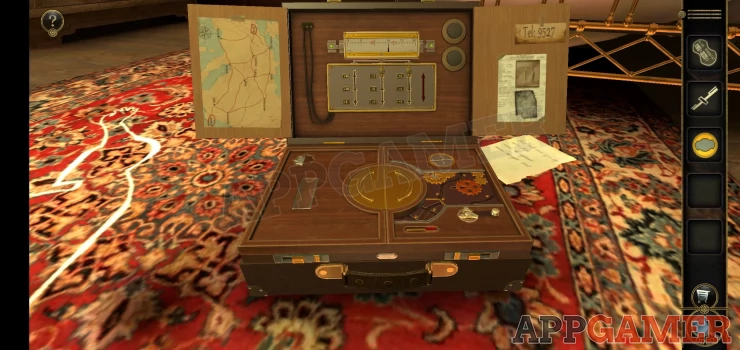
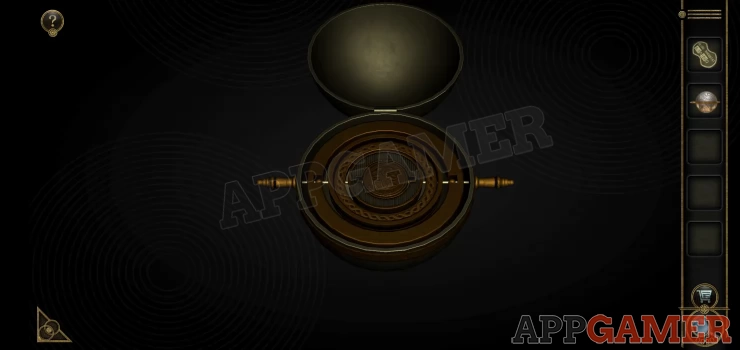
Collect this 'Sundial Compass'. Now view the bottom section of the case again and place the sundial compass into the center.
The case opens up further, then tap to collect the Sundial compass again. It now includes the Metal tray.
A block appears in the center of the case. We cannot do anything with this yet.
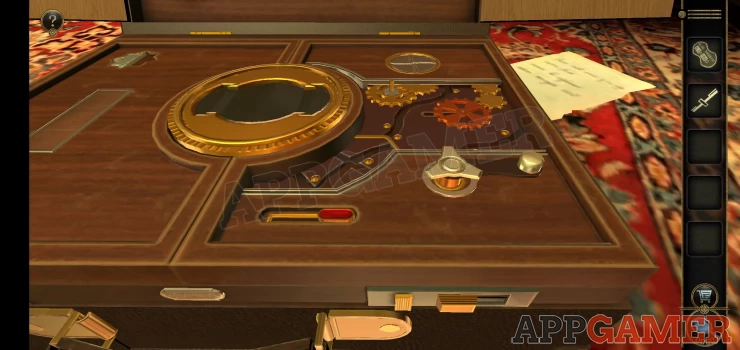
Now back up and zoom in to view the the bottom right panel on the Table that the phone is on.
Slide down the 2 catches on the top of the panel to open it and find another puzzle lock.
To open this you need to rotate the 2 round dials on either side so that the catches can be moved to the center.
Solution: Rotate the 2 circles to match this image.Show
Slide the catches to the center to open a round panel. You can then place the Sundial compass into the center slot.
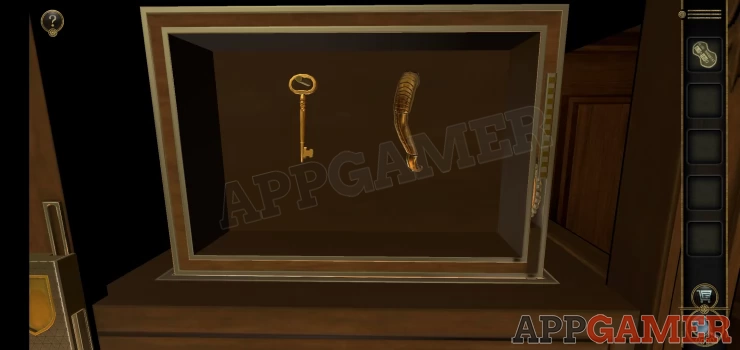
When a box appears above collect from it a Key and a Trunk.
Now look on the right of the room to see a door.
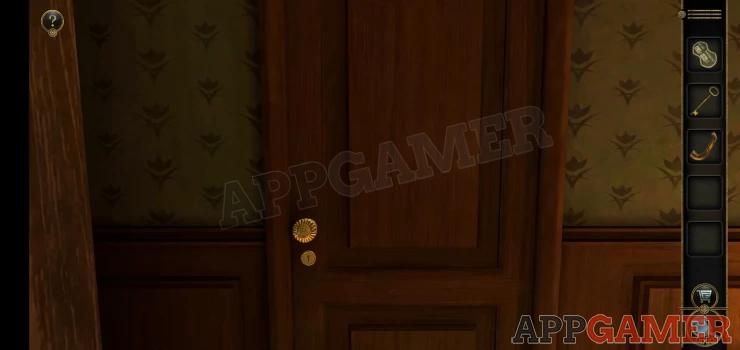
Zoom in to view the lock and add the key to it, then rotate the key to open the door to see a washroom. Zoom in on the sink to view it.
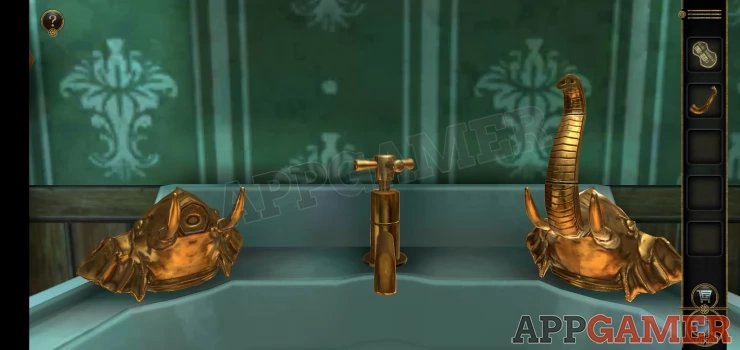
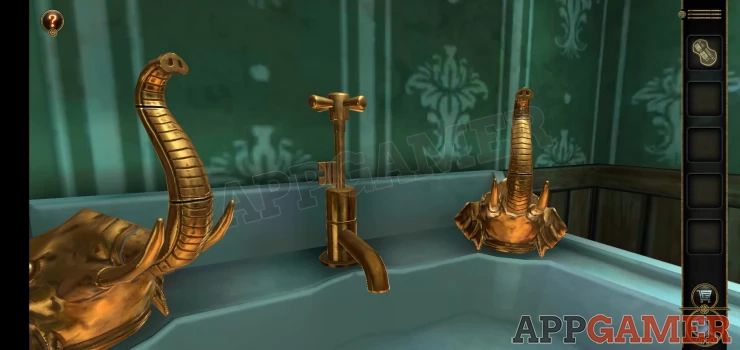
Place the trunk on the left side, you then need to adjust it to match the one on the right.
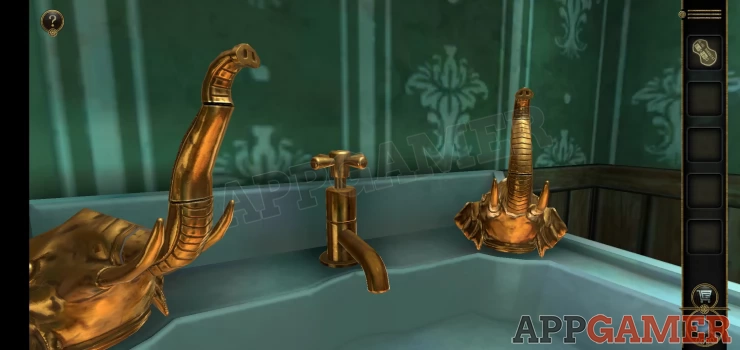
Rotate the 2 sections as shown. You can then collect a hidden key from the faucet.
Now view the wall cabinet above the sink. You can use the key on this to open it.
First here you can zoom in on the top right section to see a panel that you can open. Slide it down and then collect from inside a Metal Ball.
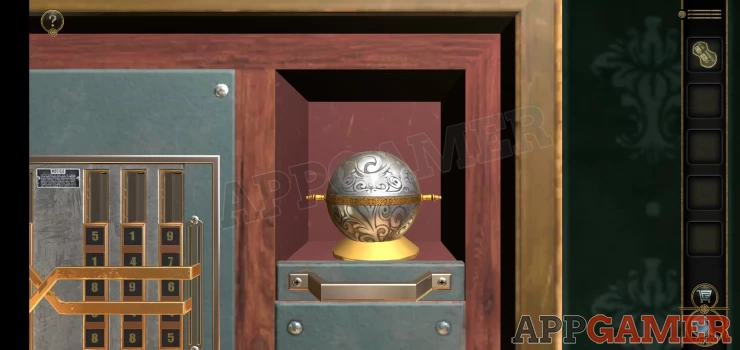
View the ball in your inventory and then open the top lid and then a smaller lid inside to find and collect a coin.
Now back up out of the bathroom and return to the desk view on the left of the main room.
View the green and gold safe on the left of the desk and look at the top of it to see a slot for a coin.
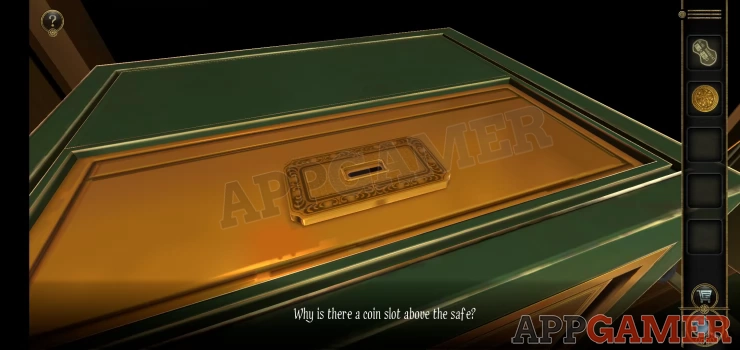
Add the coin to it and a front panel will open with a puzzle.
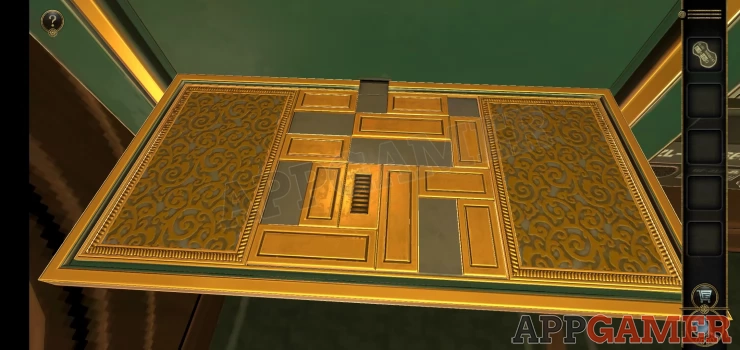
Safe Block Puzzle
To solve this you need to arrange the blocks so that you can slide the one with the lines on it up to the top.
Watch the video below for help.

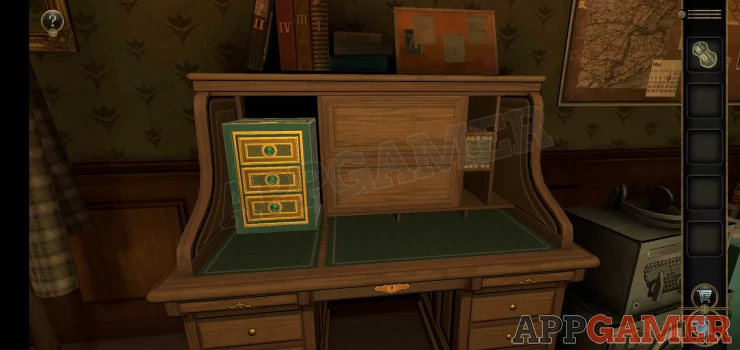
This will open the safe and you can collect an Eyepiece. Go back to the Case on the floor and you can add the eye piece to the block in the center of the bottom section.
When a drawer opens collect the Cassette (Magnetic) Tape and the Resistor.
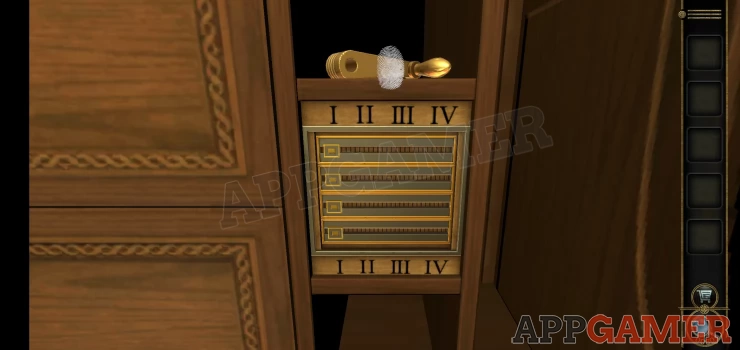
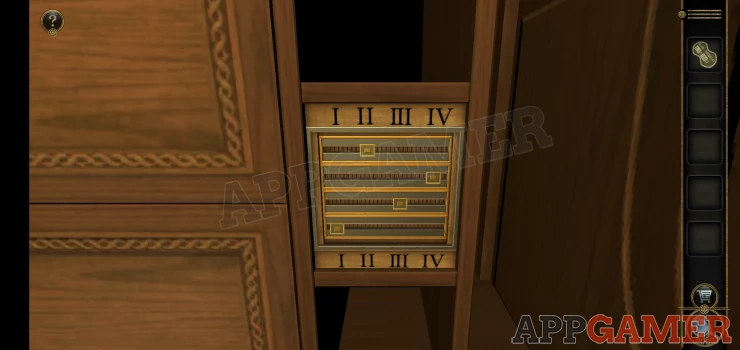
Return to the desk view and notice the 4 books on the top left, there are Roman numerals on then. Then view the sliders on the right side for the desk where you found the handle.
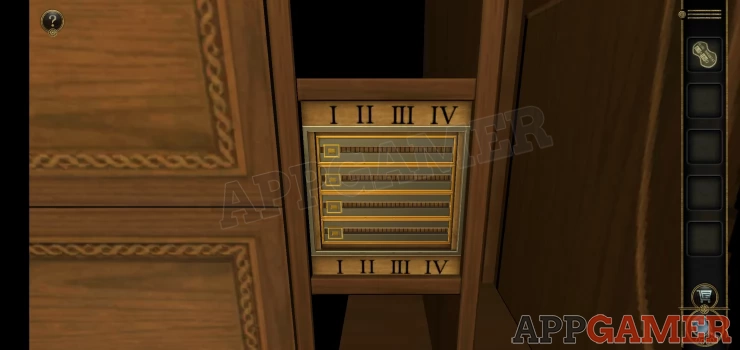
Use the books clue to set these.
Solution: Set the first (top) slider to number 2 (II), then the rest to IV, III IShow
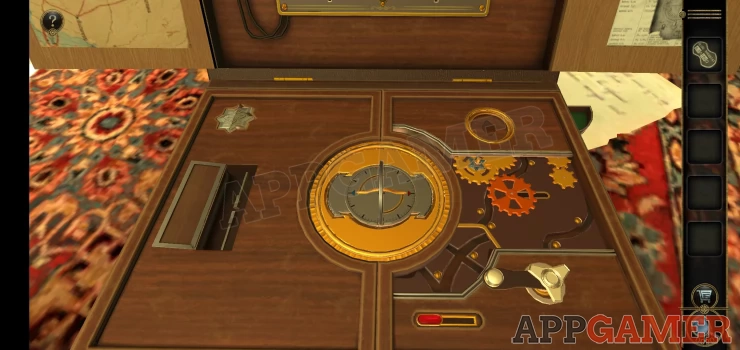
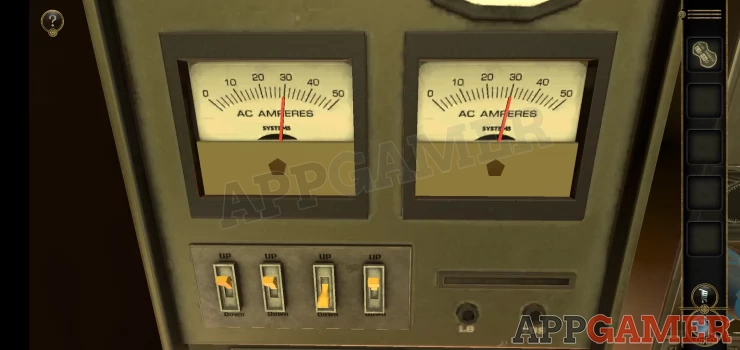
The desk opens and you find some equipment. Tap on the left side to view the panel. There are 2 gauges. The left one is controlled by the 4 switches, the right one reads 30.
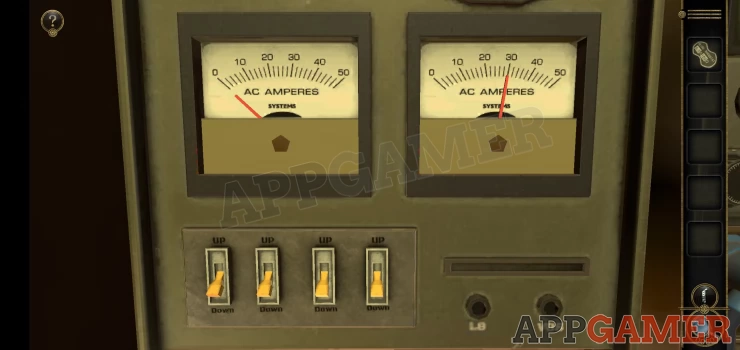
To solve this you need to turn on the correct switches to make the left gauge also read 30.
Solution: The solution for this seems to vary so you may need to try different combinations. My solution is below but yours may be different.Show
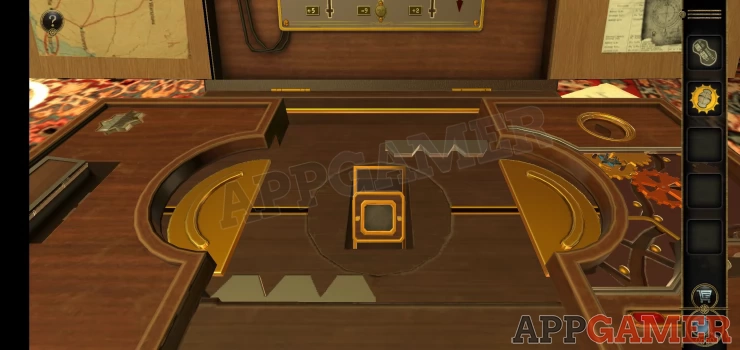
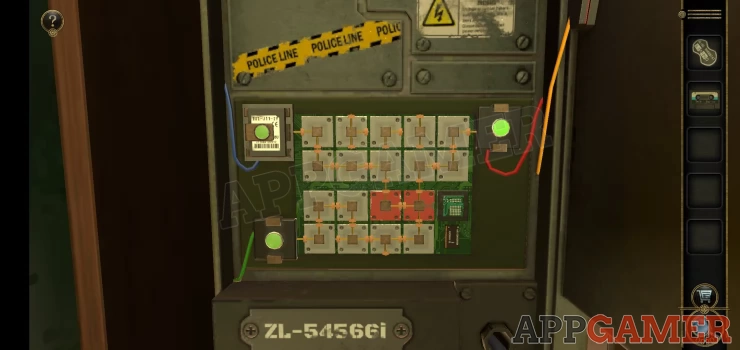
Once done the front opens and you will see a circuit puzzle.
Circuit Puzzle
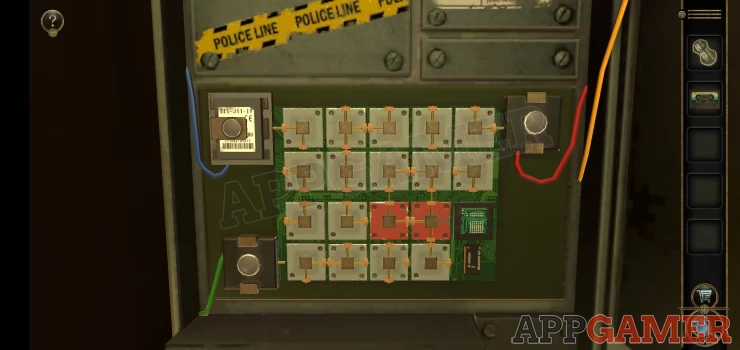
- Add the resistor to the top left (blue wire) it to start.
- Tap to rotate the grey clocks to make connections.
- The red blocks cannot be moved.
- You need to make a circuit between the 3 wires to complete this.
Solution: Show
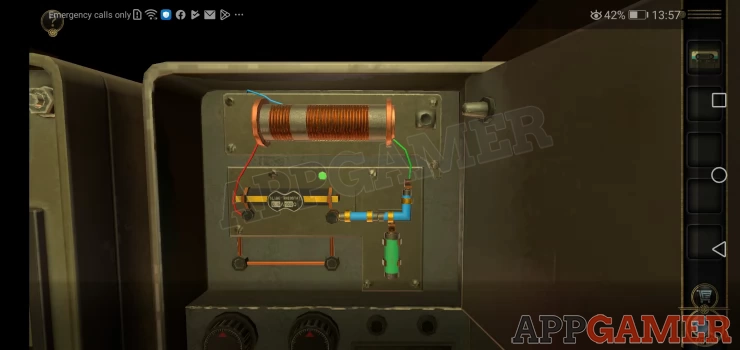
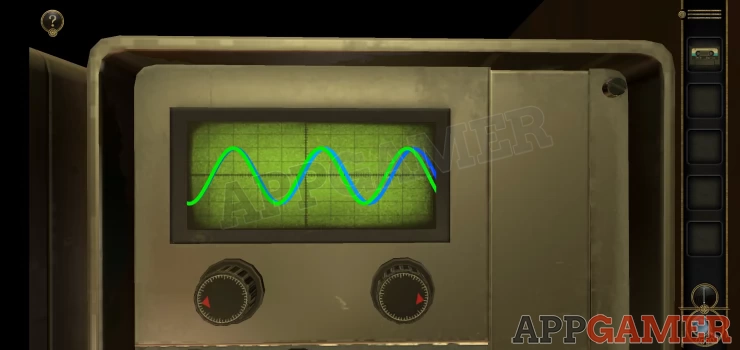
This will open a panel to the right. Place the variable resistor on to the yellow bar to activate an oscilloscope.
Oscilloscope puzzle
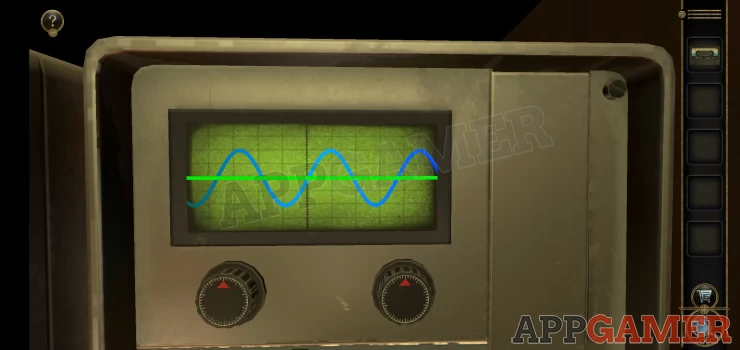
Use the 2 knob to control the green waveform
Adjust it to match the blue waveform.
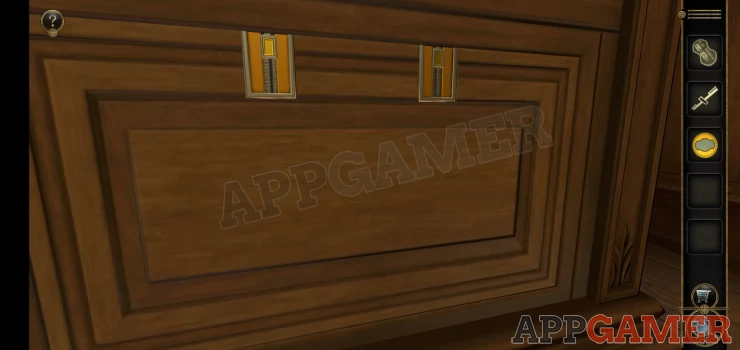
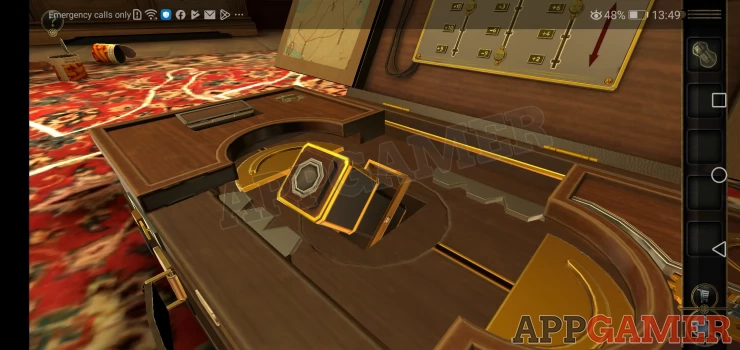
Once done you can collect another Key. View the drawer below the desk and use the key here to open it. Inside is more equipment. First view the radio tuner on the right.
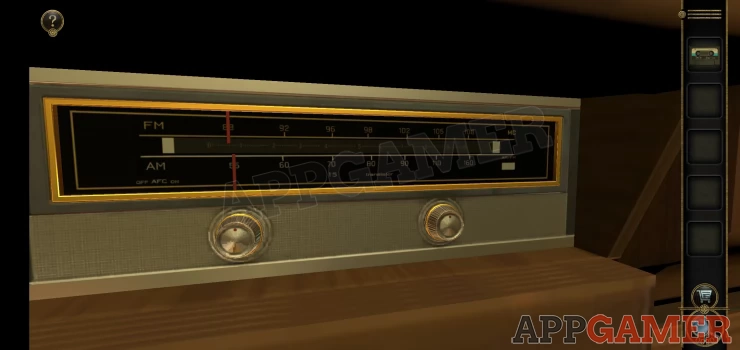
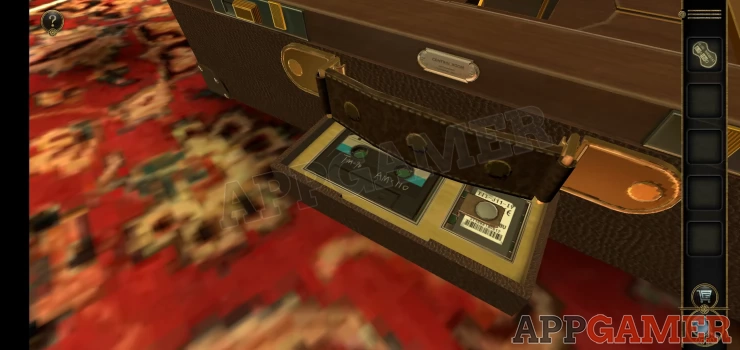
Look at the cassette tape in your inventory for a clue.
Turn the 2 receivers to FM: 98 | AM : 110
A cassette deck on the left will open. Place the cassette tape into it.

This will open another panel above and you can collect a Decorative Slider. Now lets return to the bathroom and the cabinet on the wall. View the panel at the bottom to see 3 dials and a switch.
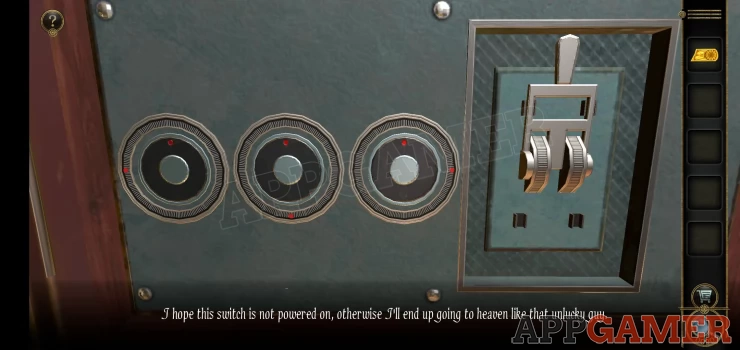
- Pull the switch down to activate the dials, you then need to complete this puzzle.
- Turn the 3 dials to the red markers.
- Turning each dial will also move one or both of the others as well.
Solution: Turn the right dial anticlockwise 1 quarter. Turn the left dial clockwise 1 quarter. Turn the center dial clockwise half way round.Show
Video:

This will open a drawer with a new puzzle on top. View this.
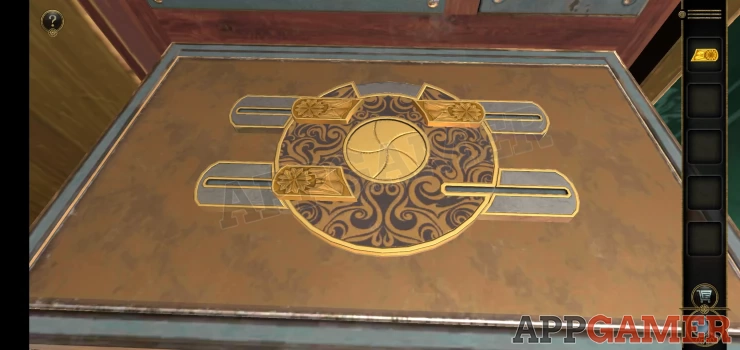
- Add the decorative slider to it to begin.
- To solve this puzzle you just need to pull out the 4 sliders in the correct order.
- If you make a mistake with the order they will reset an you start again.
Solution: The order seems to change for different game, my order was, bottom right, top left, bottom left, top right. .But yours may vary.Show
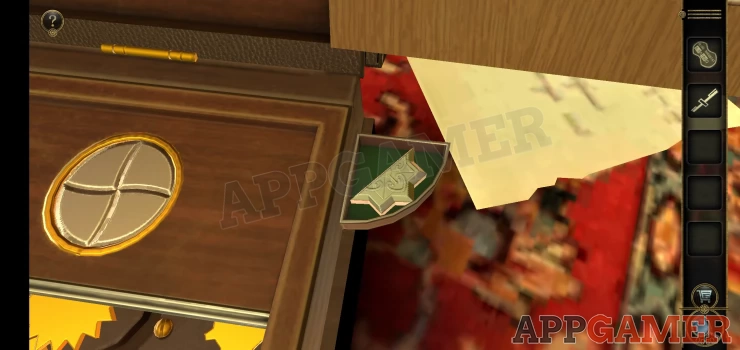
Once done you can rotate the center to find a red slider. Move it across to open a center panel and collect the Shield.
Return to the table with the phone on it in the main room and look on the front to see a lock with a shield shaped slot.
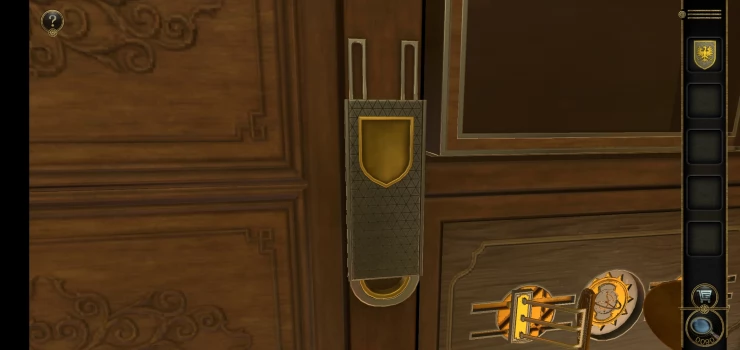
Add the shield to it and then slide up the cover to find a Cross Wrench to collect.
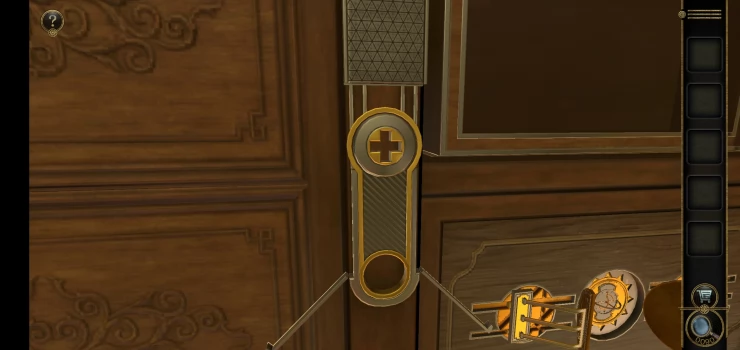
Next look on the left side of the table to see a switch on the side panel.
Zoom in on this and move the switch to open the side of the table. Use the cross wrench on the plate with the cross on it and turn it.

This will open a large panel on the front.
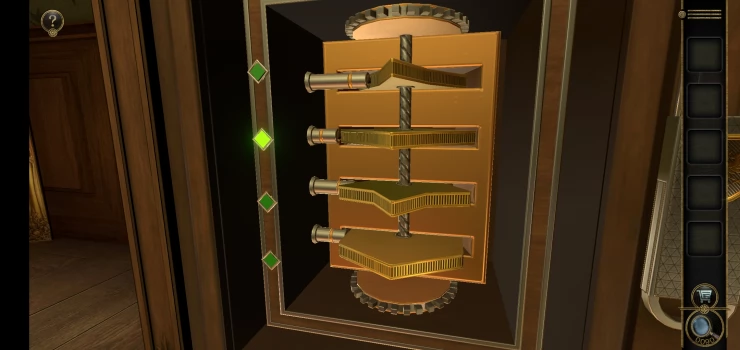
- There are 4 shapes that you can rotate here to more pistons on the left.
- Rotate them until you light up all of the green lights.
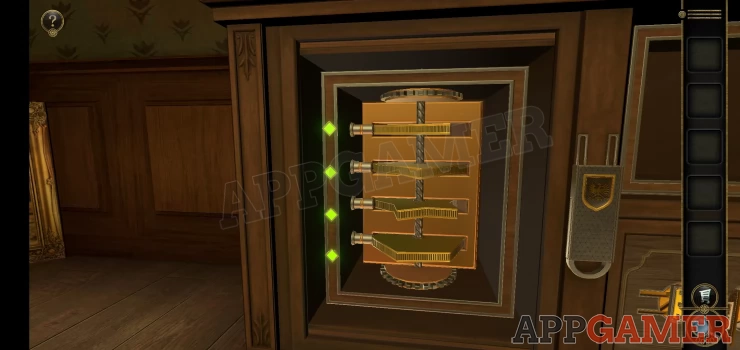
You can now collect a number Cube from the back.
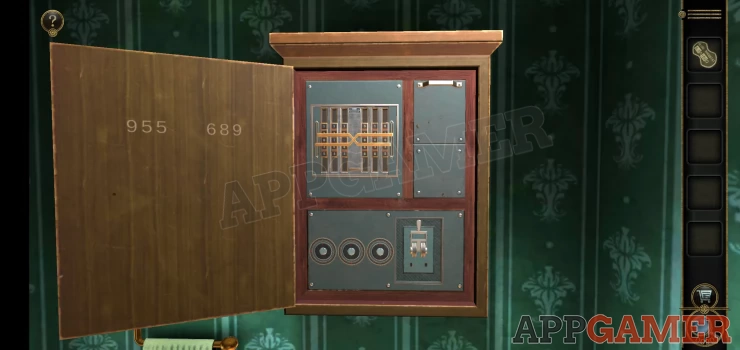
Again return to the wash room and the wall cabinet. This time note the numbers written on the door. 955 689. Then view the panel on the top left with the numbers.
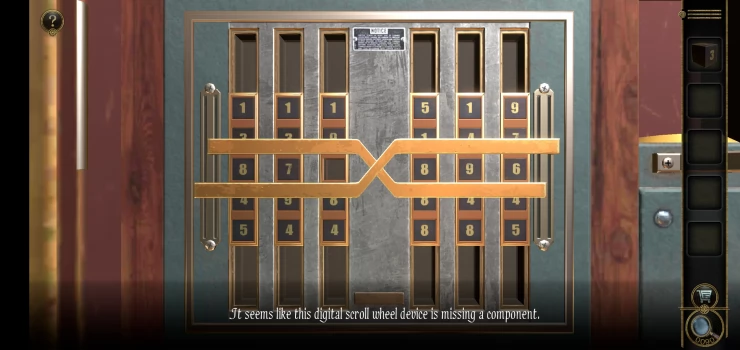
- Add the cube to the missing slot on the left.
- You can now slide each of the 6 racks up and down to adjust the visible numbers
- The numbers will alter with each move but if you keep moving each one up and down you can align the correct sequence to match the number on the door.
Solution: Show
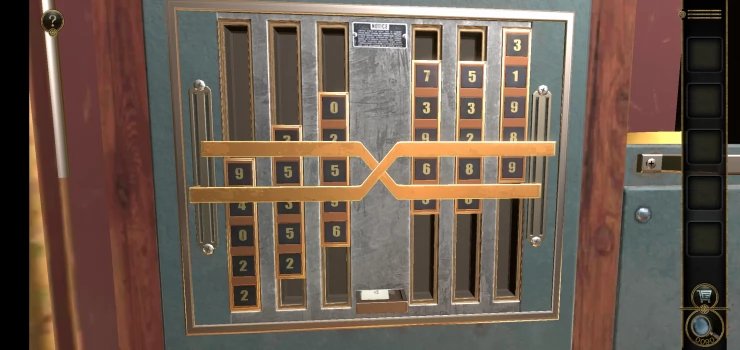
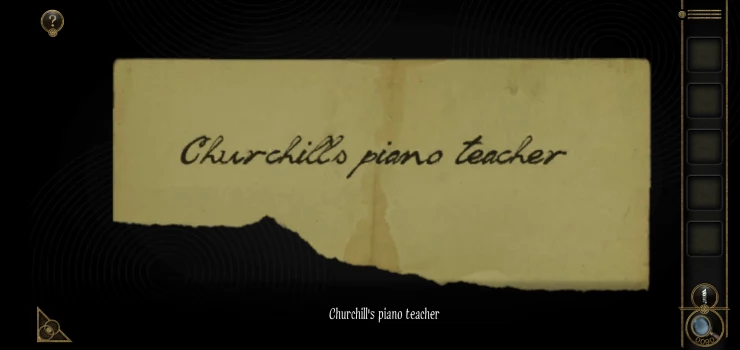
Collect the paper that appears at the bottom with the clue.
"Churchill's Piano Teacher"
This clue completes Chapter 1. You can move on to Chapter 2.
We have questions and answers related to this topic which may also help you: Show all